


To create a file in Windows, right-click on your desktop or in File Explorer and click on New. Is this post going to be the shortest post ever? Nope. Because using the GUI sometimes won’t work, you can use the command prompt to create a file. In this tutorial, you will learn just about every way possible to use PowerShell and Windows command prompt to create file on the command line.
Let’s get started!
Prerequisites
If you’d like to follow along with the steps in this tutorial, be sure you have the following ahead of time:
- A Windows PC – All demos in this tutorial will use Windows 10, but Windows 7+ will work also.
- PowerShell 3.0+ – All demos in this tutorial will use PowerShell v7.1.3.
Using Windows Command Prompt to Create File
You have two command-line options in Windows; the command prompt (cmd.exe) or PowerShell. Let’s first cover how to use the Windows command prompt to create a file that is blank.
To get started, open the Windows command prompt by clicking on the Start button, typing cmd.exe, and hitting Enter. The Windows command prompt should come up, and you’re ready to go.
Using the ECHO Command
Let’s start this tutorial by first covering the echo command. The echo command is a command-line utility that allows you to display messages in a command prompt. In Windows, if you can send something to the command console, you can also redirect that output to a file!
In the Windows Command Prompt window:
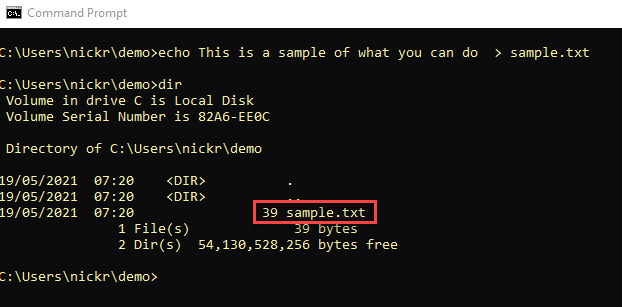
1. Run the echo command as shown below. This command echoes the text provided (This is a sample text file) to the command console. But, since the command is using the redirection operator (>), this operator tells Windows to instead create a file with the text (sample.txt).
When you’ve created the file, run the dir command to list all files in the current working directory
echo This is a sample text file > sample.txt
 dir
You can see below that Windows creates the sample.txt file in the current working directory.
2. To confirm the file contains the expected “This is a sample text file” text, execute the type command followed by the file name. The type command reads the file and returns the text inside.
You can see below that sample.txt does, indeed, contain the expected text.
type sample.txt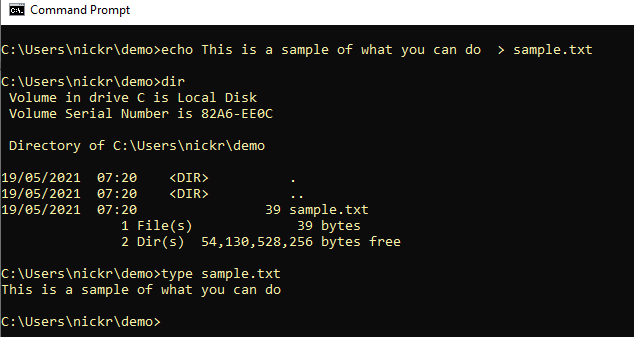
Using the COPY CON Command
If the echo command doesn’t fit your taste, you can always use the copy command using the con argument. Instead of copying files, the con argument tells the copy command to copy output to the console.
The
conargument is actually a device, not a command.
To create a file using copy con:
1. Run copy con followed by a file name. This command won’t immediately create the file. You’ll be presented with a flashing cursor.
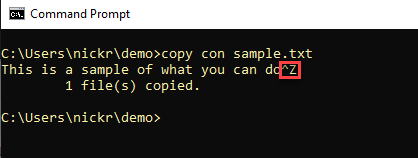
copy con sample.txt2. Once you see that flashing cursor type in some text you’d like to include in the file and press Enter.
This is a sample of what you can doWhen you’re done, press Ctrl-Z and press Enter to exit the interactive prompt. Pressing Ctrl-Z will also add an end-of-file marker to tell Windows to close the open file handle.
You can see below pressing Ctrl-Z will display ^Z, and Windows will tell you it’s “copied” one file. This file will be the file you specified and will contain the text you just typed.
Using the FSUTIL Command
You can also use Windows command prompt to create file by introducing fsutil! Fsutil is a file system management tool built into Windows.
To use fsutil on the command prompt to create a new file:
1. Close the command prompt if you still have it open and open it up again, but this time as an administrator. Unfortunately, the fsutil utility requires it.

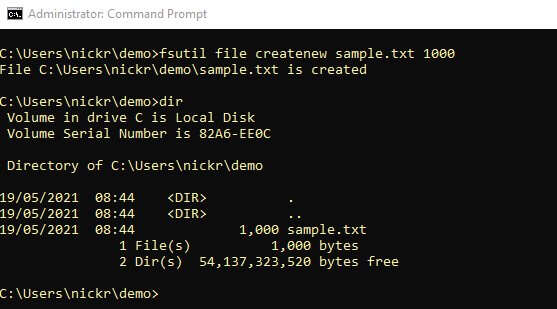
2. Now, invoke the file function of fsutil to create a new file using the createnew argument followed by the file name to create (sample.txt) and the size in bytes you’d like the file to be (1000).
The below command will create a file called sample.txt in the current working directory that’s 1KB in size.
fsutil file createnew sample.txt 10003. Type dir again to list all files in the current working directory and you should see a 1,000-byte file now exists.
Since the fsutil utility can create blank files of a certain size, the utility is great for creating dummy files for network performance testing!
Creating a File with PowerShell
It’s now time to use a more modern approach of using a Windows command prompt to create file; with PowerShell! PowerShell has a few different ways to create a file so let’s cover them all.
So, open your Windows PowerShell or PowerShell console and let’s get started!
Using the New-Item Cmdlet
One of the easiest ways to create a file in Windows with PowerShell is to use the New-Item cmdlet This cmdlet creates new items (a file in this case).
The
New-Itemcmdlet can also create Windows registry keys or folders.
1. Run the New-Item cmdlet specifying the directory to create the file in (Path), the Name of the file, the type of item (ItemType), and finally, the text to include in the file (Value).
The below command will create a file called sample.txt in the current working directory (.) with the text This is a text string inside the file.
New-Item -Path . -Name "sample.txt" -ItemType "file" -Value "This is a text string"
You can also use
New-Itemto create a directory by using theDirectoryargument for theItemTypeparameter.
2. Now, take a look at the file just created using the Get-Content cmdlet to tell PowerShell to read the file and display its contents.

Using the Set-Content and Add-Content Cmdlets
Next, let’s check out the Set-Content and Add-Content PowerShell cmdlets. These two cmdlets can create files in a similar fashion but Set-Content creates and overwrites a file while Add-Content will create and append to an existing file.
With PowerShell still open, run the Set-Content cmdlet providing it the Path and name of the file to create with the text you’d like the file to contain (Value) as shown below.
The command below will create a file called sample.txt in the current working directory with the text This is a text string inside the file.
Set-Content -Path .\sample.txt -Value "This is a text string"To create the same file, simply replace
Set-ContentwithAdd-Content. TheAdd-Contentwill create files and will also append text to existing files.
Using the Out-File Cmdlet
To round out how to create a file on the command prompt with PowerShell, let’s end this tutorial with the Out-File cmdlet.
The Out-File cmdlet is a handy command similar to the redirection operator (>) previously covered in the Windows Command Prompt section. The Out-File cmdlet accepts input from the PowerShell console and writes that output to a file of your choosing.
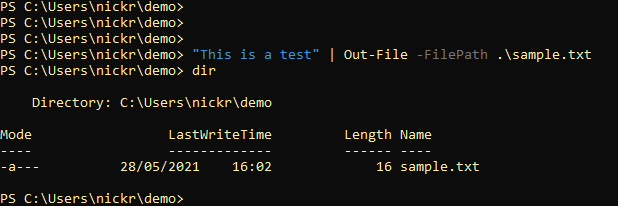
With PowerShell still open, type some text ("This is a test") and pipe that text to the Out-File cmdlet providing the path to the file to create (FilePath).
The below command will create a file called sample.txt in the current working directory with the text This is a test inside.
"This is a test" | Out-File -FilePath .\sample.txt You can see below that PowerShell created a 16-byte file called sample.txt.
Conclusion
In this tutorial you learned different ways to use PowerShell and Windows command prompt to create file. By now, you should know just about all the ways to create text files on the command line.
Which method do you prefer?


