


Yearning for a smoother ride in crafting Open Container Initiative (OCI) images? The magic word to untangle your container conundrum is ‘buildah’, your container-building sidekick.
Imagine a world where crafting containers becomes second nature. In this tutorial, you’ll unravel the mysteries of creating OCI images with buildah. Be it from scratch, tweaking existing ones, or even dancing through the world of Dockerfiles.
Get ready to build and export your creations for collaborations!
Prerequisites
Set the stage for your exploration into building OCI images with buildah by ensuring you have the essentials in place. Below is a checklist to guarantee you’re ready for the ride:
- A Linux machine – This tutorial uses a Debian 12 server.
- A non-root user with sudo privileges.
- A Podman or Docker Engine installed on your Linux machine.
Installing buildah on Linux
When building container images, whether from scratch, using existing images, or from the working container, buildah is one you can count on to streamline the process. This tool allows you to create images with OCI or traditional Docker formats.
You can use ample package managers to install buildah in most Linux distributions. But in this tutorial, you’ll install buildah via APT.
To install buildah on your Linux machine, complete the steps below:
1. Open a terminal session, and run the apt update command below to update your system’s repository package index.
💡 Ensure you employ a non-root account with sudo privileges and prefix commands with
sudo. This tutorial exclusively uses a root account to sidestep compatibility problems when executing commands, which is not recommended.
apt update
2. Once updated, execute the following command to install buildah while accepting all prompts automatically (-y).
apt install buildah -y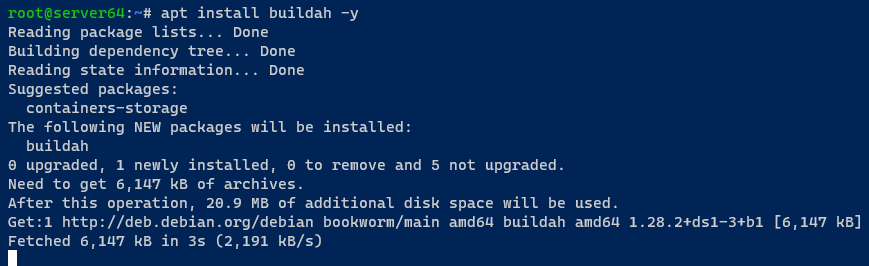
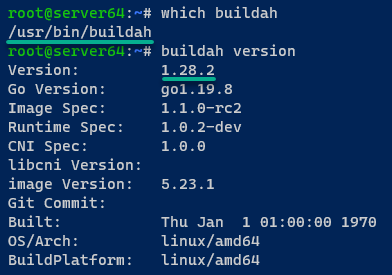
3. Lastly, run each command below to locate the buildah binary file and verify the buildah --version installed.
# Locate binary path buildah
which buildah

# Checking buildah version
buildah version
Below is the path to buildah (/usr/bin/buildah) with version 1.28.2 installed.
Building OCI Images from Existing Images
After successfully installing buildah, you’re about to craft your OCI images for your applications, leveraging existing images. The nuances of building OCI images from existing ones are vital to containerization.
You’ll seamlessly integrate and customize existing images, molding them into the perfect fit for your containerized applications.
To build an OCI image from an existing one, follow these steps:
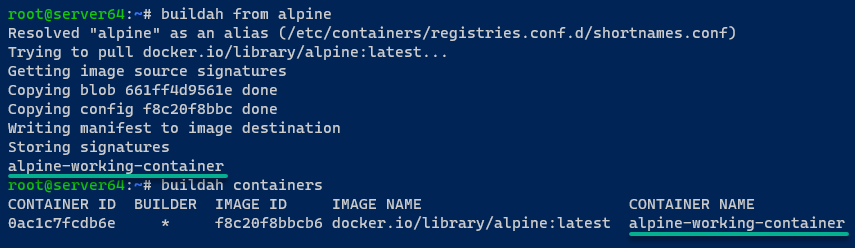
1. Execute the commands below to create a new working container environment from the base image alpine and verify your system’s running containers.
💡 Opt-in for minimal base images, such as Alpine, whenever possible. Doing so helps reduce the overall image size, enhancing efficiency and speeding up deployment times.
This step lets you create a new container called alpine-working-container as a working environment for building OCI images.
# Create a working container from an Alpine image
buildah from alpine

## Checking the list of working container
buildah containers
As shown below, the alpine-working-container is created based on the Docker image alpine and used as a builder.
2. Next, run the following buildah run command to install the nginx package (for demonstration purposes) to the alpine-working-container.
buildah run alpine-working-container apk add --no-cache nginx
3. Once NGINX is installed, run the commands below, which have no output but create a new directory ~/conf directory and a custom index.html file.
# Create ~/conf directory
mkdir -p conf

# Create index.html file
echo "Hello Buildah - adamtheautomator.com" > conf/index.html
4. Now, open the ~/conf/default.conf file in your preferred editor, and add the custom server block configuration below.
This configuration optimizes the NGINX server for efficient content delivery, sets up logging for monitoring, and implements browser-level caching for specified file types.
server {
     # nginx port #
     listen 80;

     # document root #
     root        /var/www/localhost/htdocs;

     # log files
     access_log  /var/log/nginx/access.log;
     error_log   /var/log/nginx/error.log;

     # cache files on browser level #
     # Directives to send expired headers and turn off 404 error logging. #
     location ~* ^.+\\.(ogg|ogv|svg|svgz|eot|otf|woff|mp4|ttf|rss|atom|jpg|jpeg|gif|png|ico|zip|tgz|gz|rar|bz2|doc|xls|exe|ppt|tar|mid|midi|wav|bmp|rtf)$ {
        access_log off; log_not_found off; expires max;
     }
}
5. With configurations all set, run the buildah copy command below to copy the index.html and default.conf files to the alpine-working-container.
These commands provide the alpine-working-container with the required files and configurations to successfully run an NGINX web server.
# Copy index.html file to alpine-working-container
buildah copy alpine-working-container conf/index.html /var/www/localhost/htdocs/index.html

# Copy default.conf file to alpine-working-container
buildah copy alpine-working-container conf/default.conf /etc/nginx/http.d/default.conf
6. Subsequently, execute the following buildah config commands to configure the default --workingdir and --entrypoint to the alpine-working-container.
The specified working directory and entry point contribute to the seamless execution of NGINX within the container. These commands ensure NGINX starts correctly and operates within the desired context.
# Setting up default WORKDIR to /var/www/localhost/htdocs
buildah config --workingdir /var/www/localhost/htdocs alpine-working-container

# Setting up ENTRYPOINT start command to "/usr/sbin/nginx -g 'daemon off;'"
buildah config --entrypoint "/usr/sbin/nginx -g 'daemon off;'" alpine-working-container
7. Next, run the buildah commit command below to build an OCI image called nginx-alpine based on your alpine-working-container and verify the list of images.
# Build an image called nginx-alpine
buildah commit alpine-working-container nginx-alpine

# Checking the list of images
buildah images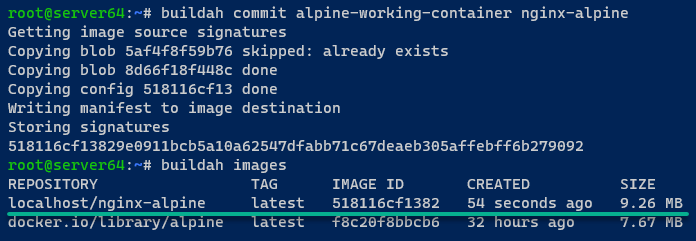
8. Once you have an OCI image, execute each podman command below to run a new container (nginx) based on nginx-alpine and verify (ps) the list of images.
This step is crucial for testing and validating the functionality of your NGINX containerized application.
# Run the container called nginx based on nginx-alpine
podman run -it -d -p 8080:80 --name nginx localhost/nginx-alpine

# Checking the list of containers
podman ps
You can see below the nginx container with the status Up and exposed port 8080 on the host machine.

9. Lastly, run the curl command below to access the nginx container.
Testing your images locally helps identify and address any issues and prevents potential problems when deploying images in production environments.
curl http://localhost:80808/Assuming everything works, you’ll get the output below from the nginx container that says Hello Buildah – adamtheautomator.com.
This output proves that your OCI image (nginx-alpine) was successfully built and deployed as a running container.

Building OCI Images via Dockerfiles
Besides using existing images, buildah is a flexible image-building tool that allows you to build images in multiple ways and environments. One example is using Dockerfiles within a Docker environment that lets you articulate every step of the image creation process.
Dockerfiles provide a standardized, version-controlled, and shareable way to describe the environment and dependencies required for your application.
To build an OCI image via a Dockerfile, carry out the following:
1. Move to the ~/conf directory on your terminal, create a new Dockerfile, and populate the following configuration. Like building OCI images using existing images, this Dockerfile configuration sets up an Alpine Linux-based container with NGINX installed.
# Use the latest Alpine Linux as the base image
FROM alpine:latest

# Set the maintainer information for this Dockerfile
LABEL maintainer="Arvid <[email protected]>"

# Install NGINX and update packages, then clean up to reduce image size
RUN echo "Installing Nginx" \
    && apk add --no-cache nginx \
    && rm -rf /var/cache/apk/*

# Set the working directory inside the container
WORKDIR /var/www/localhost/htdocs

# Copy the custom index.html to the container's web directory
COPY index.html /var/www/localhost/htdocs/index.html

# Copy the custom NGINX configuration file to the appropriate directory
COPY default.conf /etc/nginx/http.d/default.conf

# Expose port 80 to allow external access to the NGINX web server
EXPOSE 80

# Run NGINX in the foreground when the container starts
CMD ["/usr/sbin/nginx", "-g", "daemon off;"]2. Next, run the buildah build command below to create a new OCI image called nginx-alpine2 based on your Dockerfile.
buildah build -f Dockerfile -t nginx-alpine2 .
3. Once the process is finished, run the following command to verify your system’s list of OCI images.
buildah imagesIf the OCI image creation is successful, you’ll see the nginx-alpine2 image, as shown below.

4. Afterward, execute each command below to run a new container (nginx2) with the base image nginx-alpine2m and check the list of containers (ps).
# Run a new container nginx2 based on nginx-alpine2 image
podman run -it -d -p 8082:80 --name nginx2 nginx-alpine2

# Checking the list of containers
podman ps
You can see below that the nginx2 container is up and with exposed port 8082 on the host machine.

5. Lastly, run the following command to check the nginx2 container.
curl http://localhost:8082An output that says Hello Buildah – adamtheautomator.com displays, like in the screenshot below.
This output confirms that building OCI images via Dockerfile is also viable.

Building OCI Images from Scratch
Dockerfiles provide a structured and reproducible way to define images, which works great. But did you know you can also tailor every aspect of your container environment to meet your unique requirements?
Building OCI images from scratch offers the ultimate flexibility. For instance, you can reduce the size of the final image by installing only packages needed for your application.
To build an OCI image from scratch, proceed with the following:
1. Run the command below to install debootstrap on your system. debootstrap is your go-to companion for crafting minimal Debian environments from the ground up.
This tool meticulously assembles the essentials by fetching and unpacking Debian archives into a designated subdirectory. The result? A minimal Debian environment that forms the foundation for your custom configurations and applications.
apt install debootstrap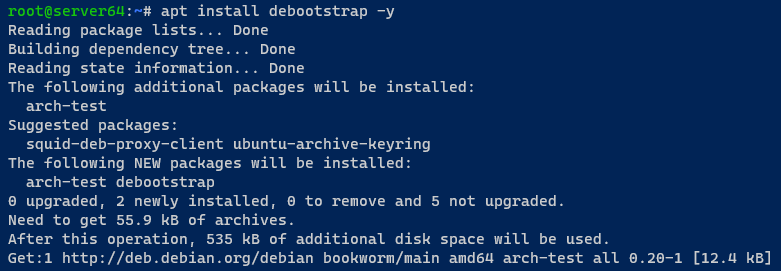
2. With debootstrap installed, execute the following commands to create a container ($newcontainer) with the most minimal base image available (scratch).
# Create a minimal working container using the 'scratch' base image
newcontainer=$(buildah from scratch)

# Verify the creation of the new working container
buildah containers
As seen in the following, a new container called working-container is created.

3. Next, run the below commands to achieve the following:
- Retrieve and store the
mountpoint of theworking-containerfilesystem in the environment variablescratchmnt. - Print (
echo) the obtained mount point ($scratchmnt).
scratchmnt=$(buildah mount $newcontainer)
echo $scratchmnt
The information below can be crucial when working with the contents of the container, allowing you to manipulate files and directories from the host system.

4. Now, execute the debootstrap command below to install the Debian bookworm base system to the $scratchmnt directory where working-container is mounted.
debootstrap bookworm $scratchmnt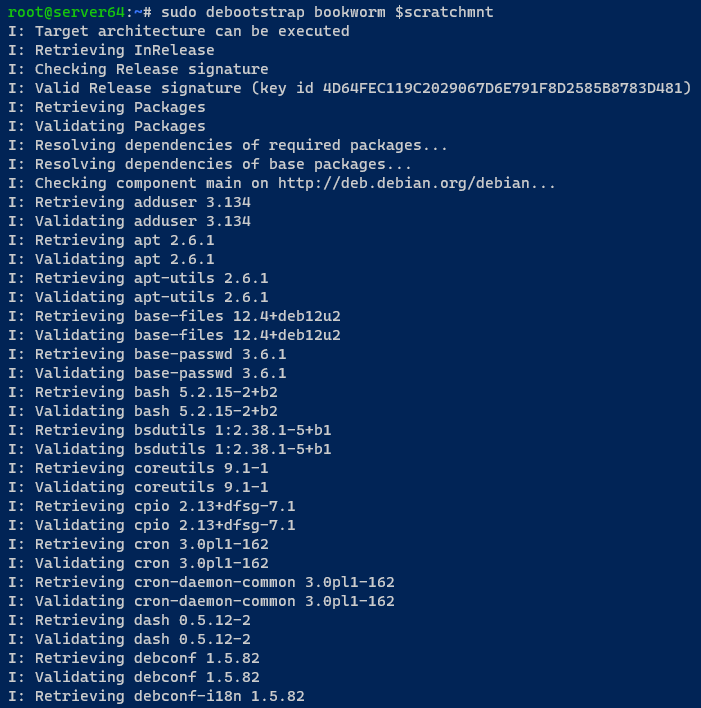
5. Once installed, run the following commands to execute the bash shell inside the container specified by the variable $newcontainer and exit the container.
# Execute the bash shell
buildah run $newcontainer bash
# Or press Ctrl+D to exit the container
exit
6. Create a new sample application called hello.sh in your preferred editor and insert the following code, which prints a message 10 times.
#!/usr/bin/env bash
for i in {1..10}; do
   echo "Hello Buildah - adamtheautomator.com"
done
7. Execute the following chmod command, which has no output if successful, to make the *hello.sh* file executable.
chmod +x hello.sh8. Now, run the command below to copy the hello.sh file to the working-container directory (/usr/bin). Doing so ensures the script is executable and accessible within the container.
buildah copy $newcontainer ./hello.sh /usr/bin
9. Once copied, run the buildah config command below to set the default command (--cmd) to be executed when the container starts.
The default command in this case is /usr/bin/hello.sh, which runs your hello.sh script.
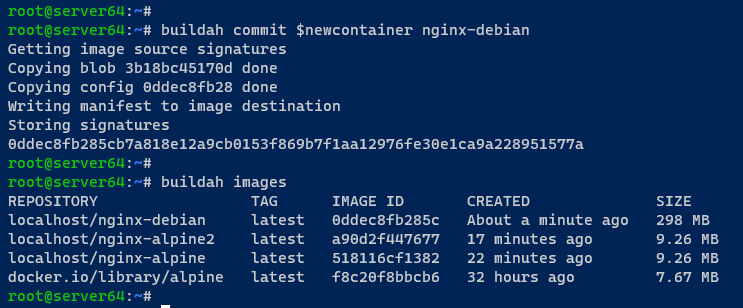
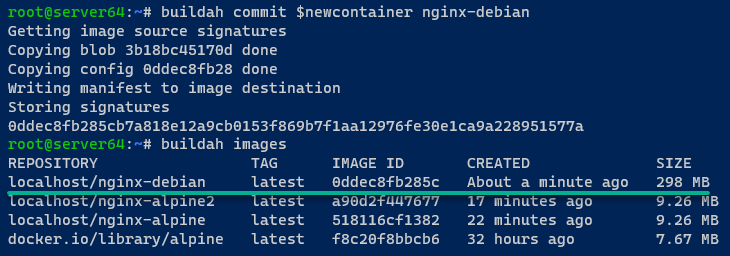
buildah config --cmd /usr/bin/hello.sh $newcontainer10. Further, execute the following commands to create a new OCI image (commit) called nginx-debian based on the container working-container and verify the list of images.
# Commit the changes to create a new image named 'nginx-debian'
buildah commit $newcontainer nginx-debian

# List available container images, including 'nginx-debian'
buildah images
In the output below, the nginx-debian image is available among other images.
11. Now, run the following commands to unmount and delete (rm) working-container.
These commands have no output, but this process ensures resources associated with the working-container are properly released and cleaned up.
buildah unmount working-container
buildah rm working-container
12. Finally, run the command below to perform the following:
- Create a new container based on the
nginx-debianimage andrunthat container. - Removes (
--rm) the container automatically once execution is complete.
This approach is a common practice for short-lived containers where the goal is to execute a task and discard the container afterward. The last thing you’d want is these containers sticking around and cluttering your system—driving you nuts.
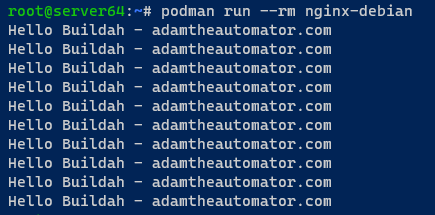
podman run --rm nginx-debianAs shown below, the container executes the start command (/usr/bin/hello.sh) and prints Hello Buildah – adamtheautomator.com 10 times.
This output demonstrates the successful creation and functionality of your nginx-debian container image.
Exporting and Uploading OCI Images to Image Registries
After meticulously crafting containers tailored to your applications, you must ensure they are securely stored and readily accessible for deployment. How? You’ll export and upload these masterpieces to an Image Registry.
buildah allows you to upload OCI images virtually anywhere, offering the flexibility to:
- Export images to a designated directory or as an archive file.
- Upload images to public and private image registries, such as Docker Registry.”
To export and upload OCI images with buildah, execute the following steps:
mkdir -p ~/exported/{docker,oci}2. Next, execute the buildah push command below to export the nginx-alpine image with Docker format to the ~/exported/Docker directory.
Exporting images makes them transportable and shareable with others who may want to use the same image.
buildah push nginx-alpine dir:./exported/docker/
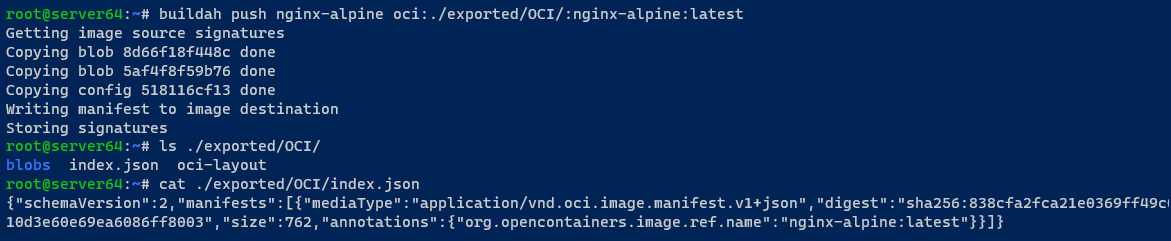
3. Subsequently, run the following command to export (push) the nginx-alpine image with the oci format to the ~/exported/OCI directory and verify the OCI image.
# Export the nginx-alpine image with the OCI format to the ~/exported/OCI directory
buildah push nginx-alpine oci:./exported/OCI/:nginx-alpine:latest
# List the contents (ls) of the ~/exported/OCI/* directory
ls ./exported/OCI/
# Display the contents (cat) of the index.json file within the exported OCI image
cat ./exported/OCI/index.json
The output below shows three items in the ~/exported/OCI/ directory, including the index.json file. This metadata file contains essential information about the exported image, such as its layers, configuration, and other relevant details.
4. Now, run each command below to export the nginx-alpine image as an archive in Docker (docker-archive) and OCI format (oci-archive).
# Export as an archive with Docker format
buildah push nginx-alpine docker-archive:./exported/nginx-alpine.gzip:nginx-alpine:latest
# Export as an archive with OCI format
buildah push nginx-alpine oci-archive:./exported/nginx-alpine.zstd:nginx-alpine:latest
# List the contents of the ~/export directory
ls ~/exported/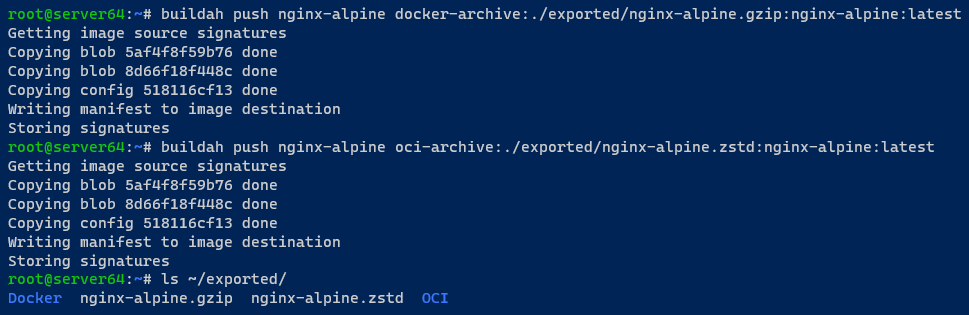
5. Ultimately, execute the below command to upload the image to the Docker Registry.
Ensure you change the username and password placeholders with your Docker credentials.
buildah push --creds=username:password nginx-alpine docker://username/nginx-alpine:latest
💡 Optionally, run the below commands to upload the
nginx-alpineimages to a private and local image registry.Uploading image to private Docker Registry
buildah push nginx-alpine docker://registry.example.com/nginx-alpine:latestUploading an image to local image registry
buildah push --tls-verify=false nginx-alpine localhost:5000/nginx-alpine
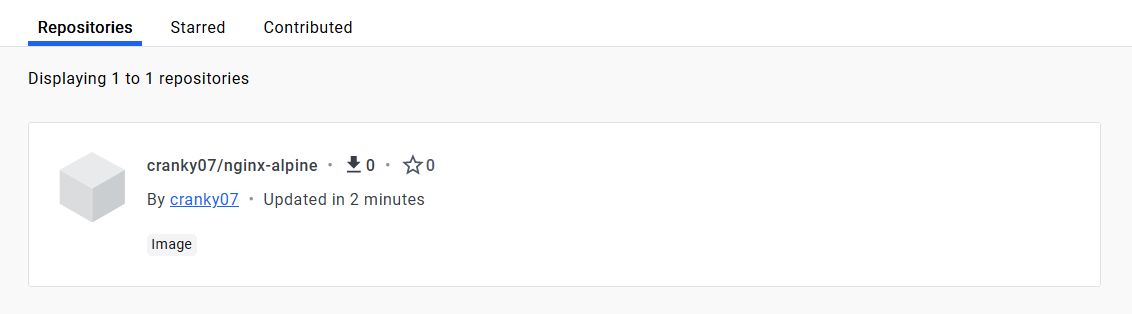
Once uploaded, check the image on the Repositories tab on the Docker Registry.
In this example, the nginx-alpine image is uploaded successfully, as shown below.
Conclusion
Throughout this tutorial, you’ve navigated the intricate landscape of building OCI images with buildah. You’ve explored crafting containers from existing images, via Dockerfiles, and even from scratch. Bravely, you ventured into the wild realm of exporting and uploading your creations to Image Registries.
At this point, your containers are like rockstars, ready to hit the stage in any environment you throw at them. Armed with the knowledge of constructing, customizing, and distributing OCI images, the possibilities are expansive.
Why not consider integrating these skills into your everyday workflows? Would you be interested in a project like Skopeo for managing OCI images? Experiment with tweaking existing images, fine-tune your Dockerfiles for precision, and dare to create from scratch!


