


Converting your raw data into organized and actionable information may sound complex. Well, not when you have a fast and efficient solution. Worry not! This beginner-friendly AWS Glue tutorial has got your back.
In this tutorial, you will learn the crucial steps of configuring and executing data transformations with AWS Glue.
Explore and streamline data preparation for cloud-based analytics!
Prerequisites
Before working with AWS Glue, ensure you have an active Amazon Web Services (AWS) account with billing enabled. A free tier account will suffice for this tutorial.
Creating an IAM Role for AWS Glue
Before executing a transformation job, you must create an Identity and Access Management (IAM) role that grants permission to the AWS Glue service. This role defines what type of resources AWS Glue is allowed to access in your AWS account.
To create the IAM role, follow the steps below:
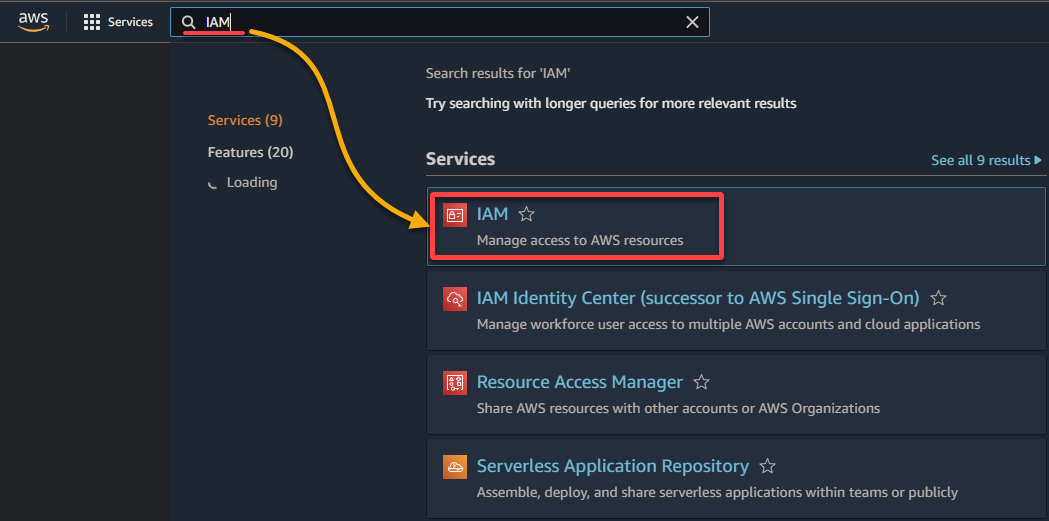
1. Open your preferred web browser, and log in to the AWS Management Console.
2. Search for and select IAM in the result list to access the IAM console.
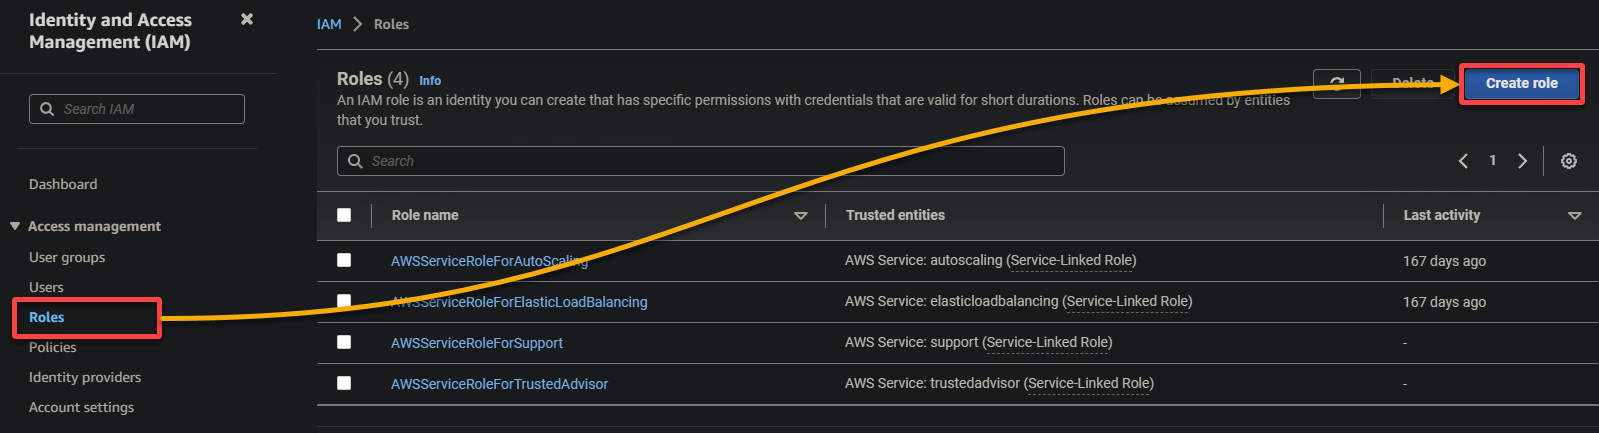
3. In the IAM console, navigate to Roles (left pane) and click Create role (top-right), redirecting your browser to a new page dedicated to configuring the role.
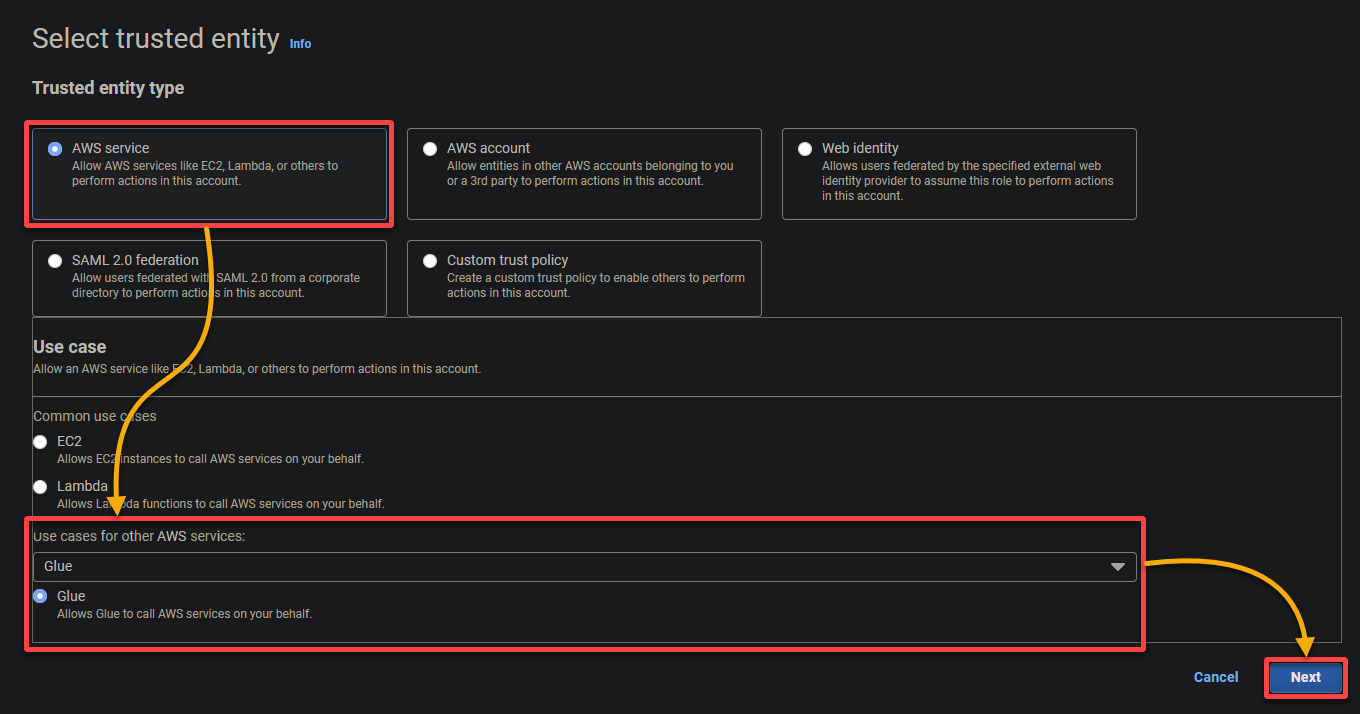
4. Now, configure the following settings for the role:
- Trusted entity type – Select AWS service so an AWS service will trust the role. Doing so allows that service to assume the role and act on your behalf.
- Use case – Choose Glue under the Use cases for other AWS services section since you will create the IAM role specifically for AWS Glue, and click Next.
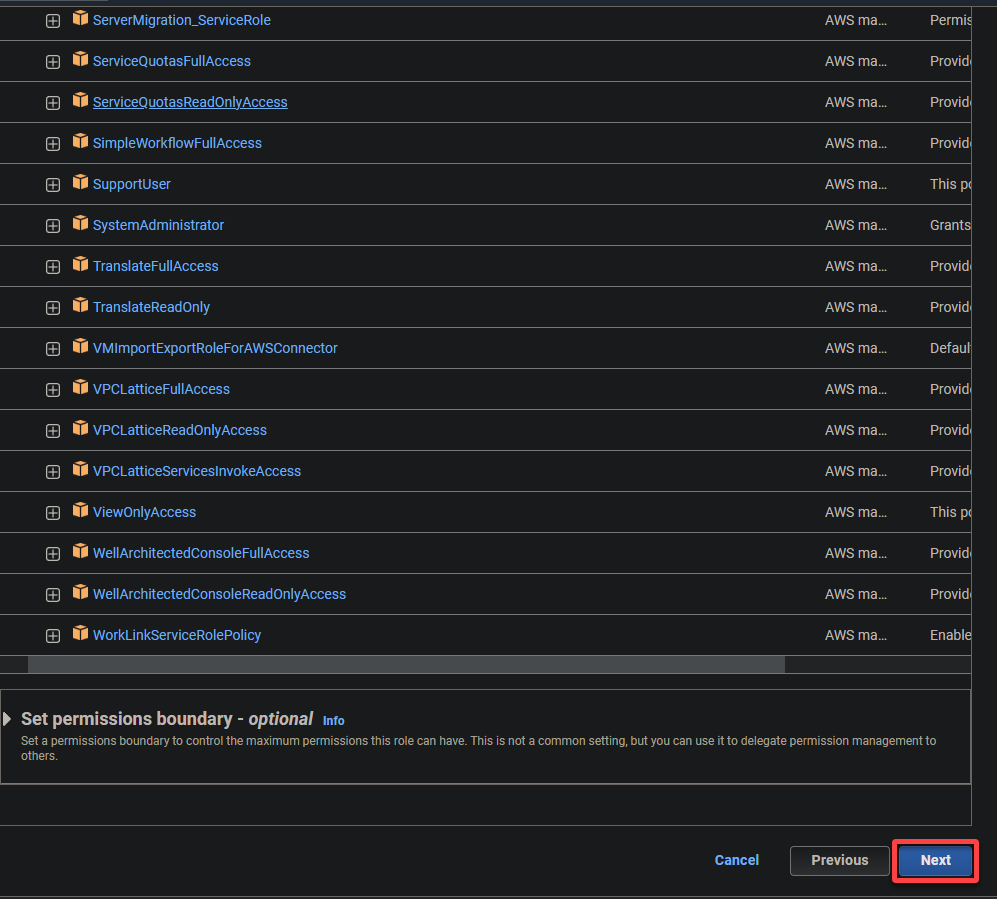
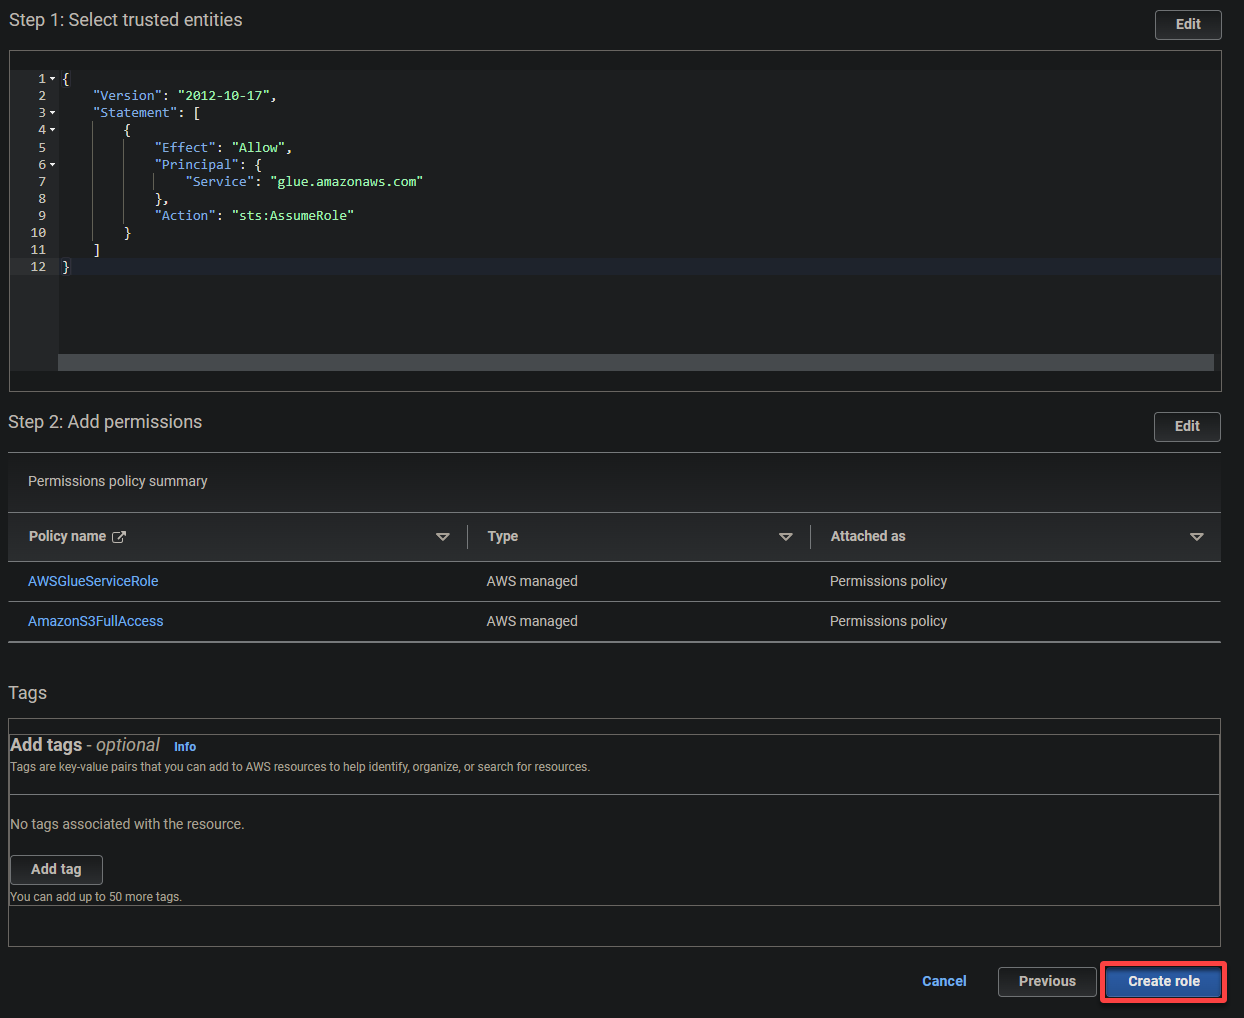
5. Search and select the following policies, and click Next.
- AWSGlueServiceRole – Grants the AWS Glue service the necessary permissions to perform its operations.
- S3FullAccess – Grants full access to the S3 resources, allowing AWS Glue to read from and write to S3 buckets.
AWS Glue needs extensive permissions to read from and write to S3 buckets to perform its data extraction, transformation, and loading (ETL) tasks effectively.
💡 Avoid granting unnecessary excessive permissions, as they can pose security risks.
6. Provide a descriptive name for the role (i.e., glue_role) and a description.
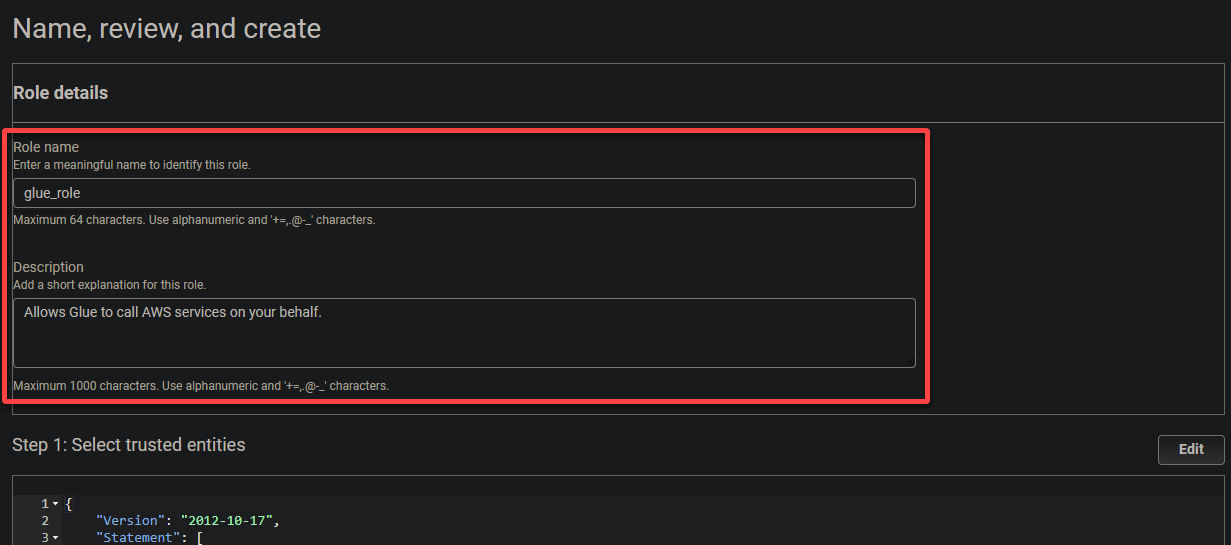
7. Finally, scroll down, review your settings, and click Create role (bottom-right) to finalize creating the role.
Creating an S3 Bucket and Uploading a Sample File
Now that you have an IAM role for AWS Glue, you need a place to store your data, specifically, an S3 bucket. An S3 bucket provides a centralized location for storing the data that AWS Glue will process.
In this example, AWS Glue will use AWS S3 as a data store for various operations, such as data extraction, transformation, and loading (ETL) tasks.
To create an S3 bucket and upload a sample file, follow these steps:
1. Download a sample data file (example Every Politician data set) to your local machine. This file contains an unstructured collection of records to serve as the input for the AWS Glue transformation job.
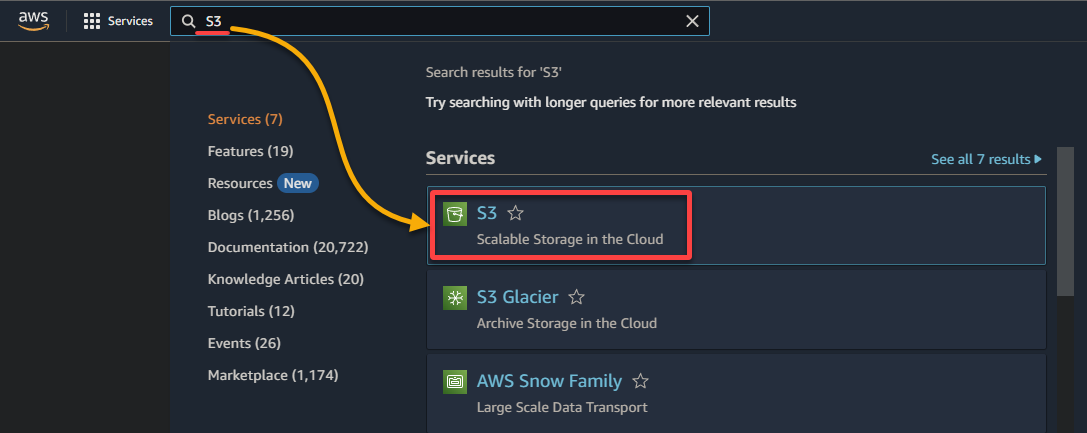
2. Search for and select the S3 service to access the S3 console.
3. Click Create a bucket to initiate creating a new S3 bucket.

4. Now, provide a unique name for your bucket (i.e., sampledata54675) and select the region where the bucket should be located.
A unique name lets you avoid conflicts with existing bucket names is crucial, while the region selection determines the physical location of your bucket’s data.
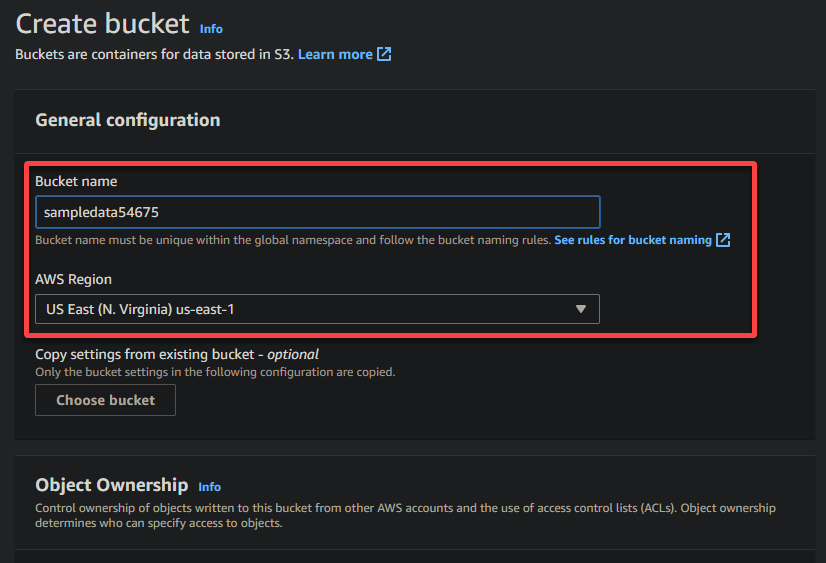
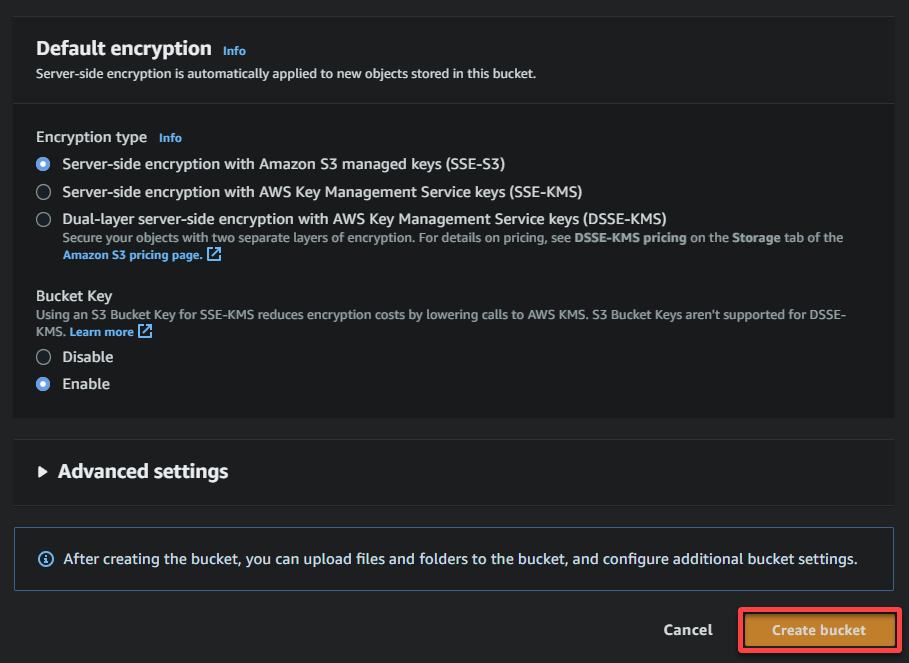
5. Scroll down, keep other options as is, and click Create bucket to create the bucket.
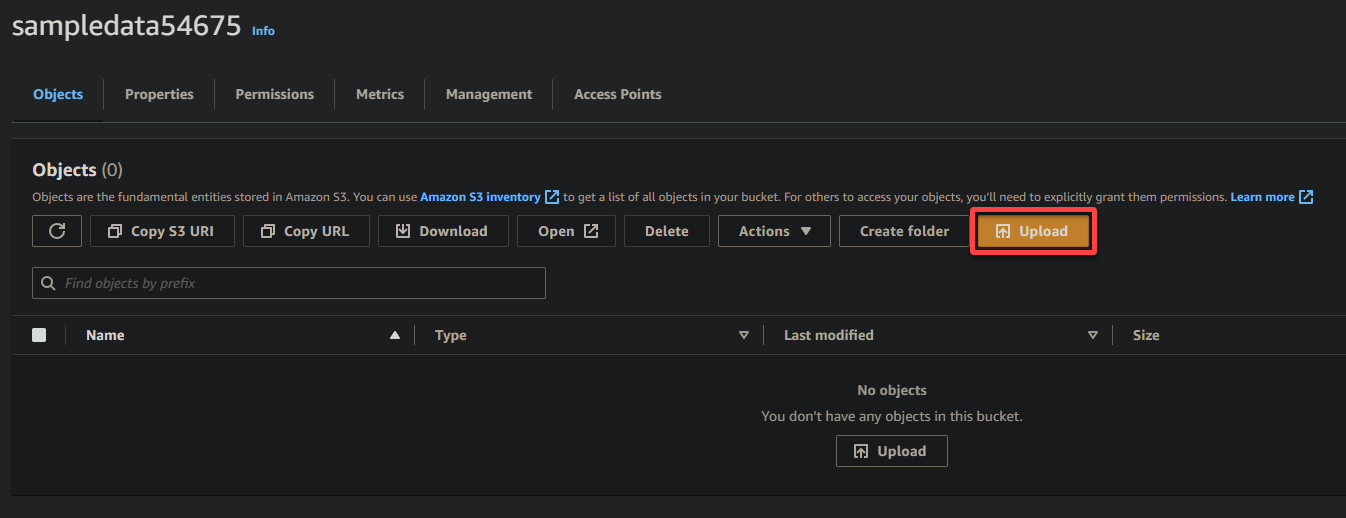
6. Once created, click the hyperlink for the newly created S3 bucket to navigate to the bucket.

7. Click Upload and locate the sample file you wish to upload.
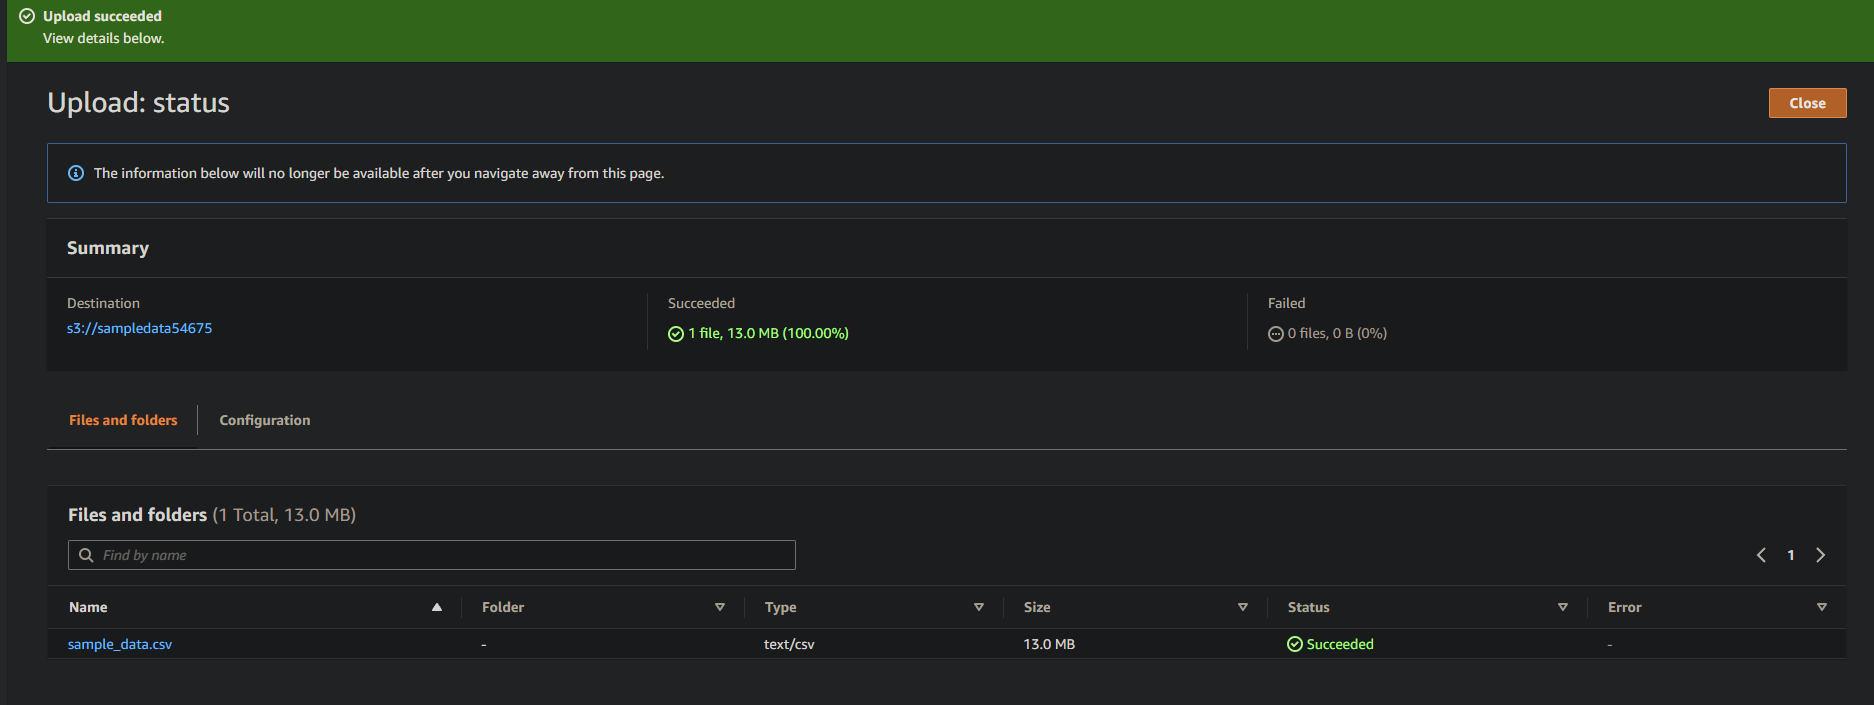
8. Lastly, keep other settings as is, and click Upload to upload the sample file to the newly created bucket.

If successful, you will see your newly-uploaded file in your bucket, as shown below.
Creating a Glue Crawler to Scan and Catalog Data
You have just uploaded sample data to your S3 bucket, but since it is currently unstructured, you need a way to read the data and build a metadata catalog. How? By creating a glue crawler that automatically scans and catalogs the data.
To create a glue crawler, follow the steps below:
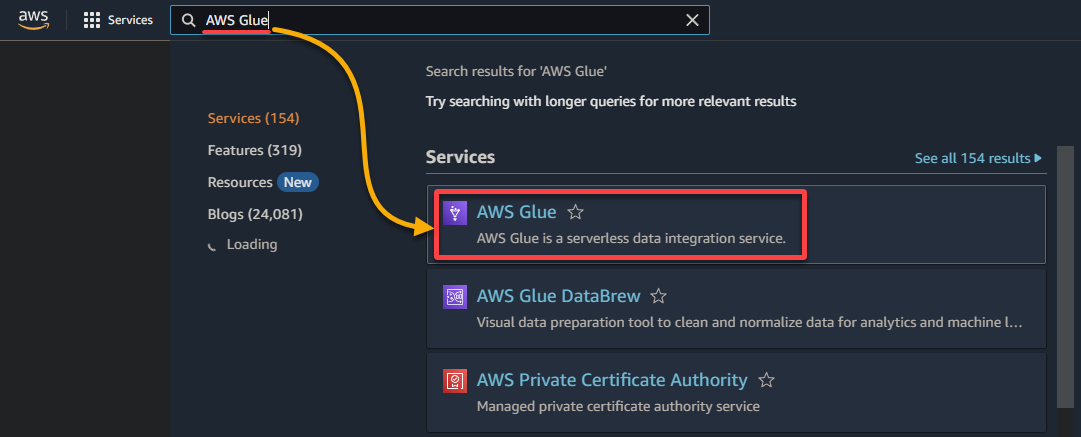
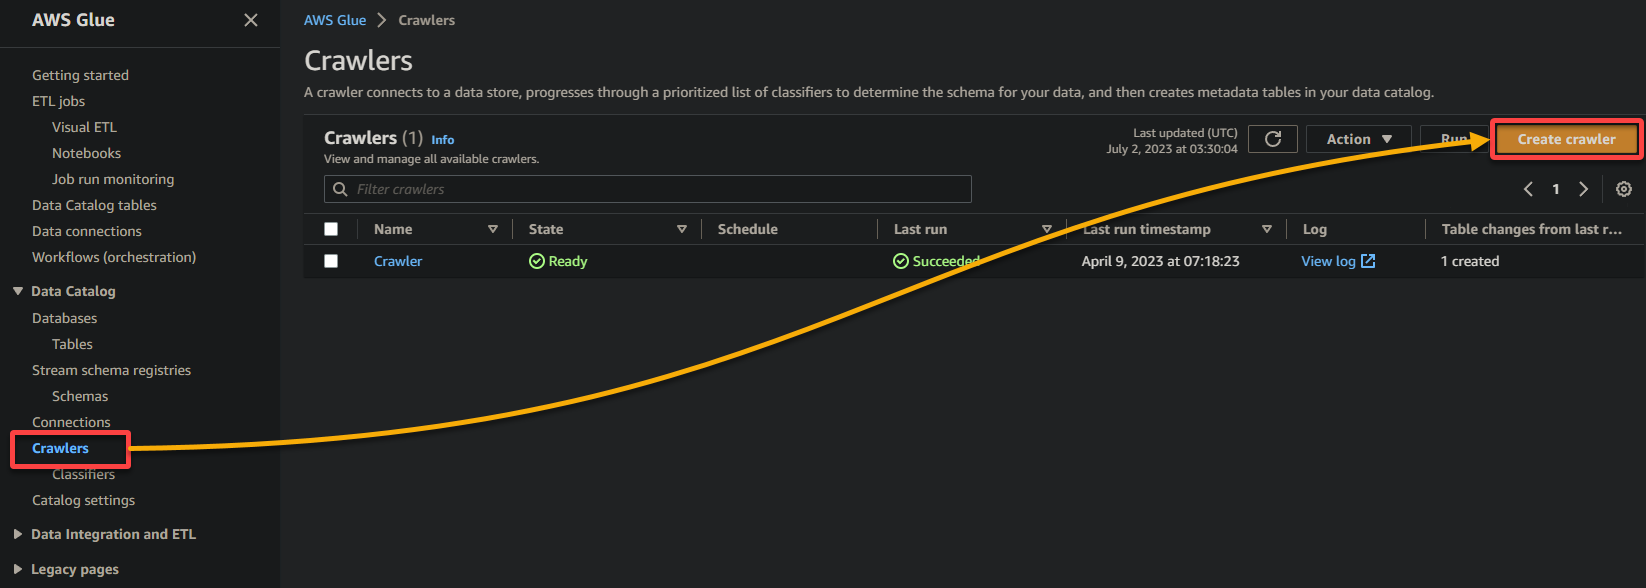
1. Navigate to the AWS Glue console via the AWS Management Console, as shown below.
2. Next, navigate to Crawler (left pane) and click Add crawler (upper-right) to initiate creating a new glue crawler.
3. Provide a descriptive name (i.e., glue_crawler) and a description for the crawler, keep other settings as is, and click Next.

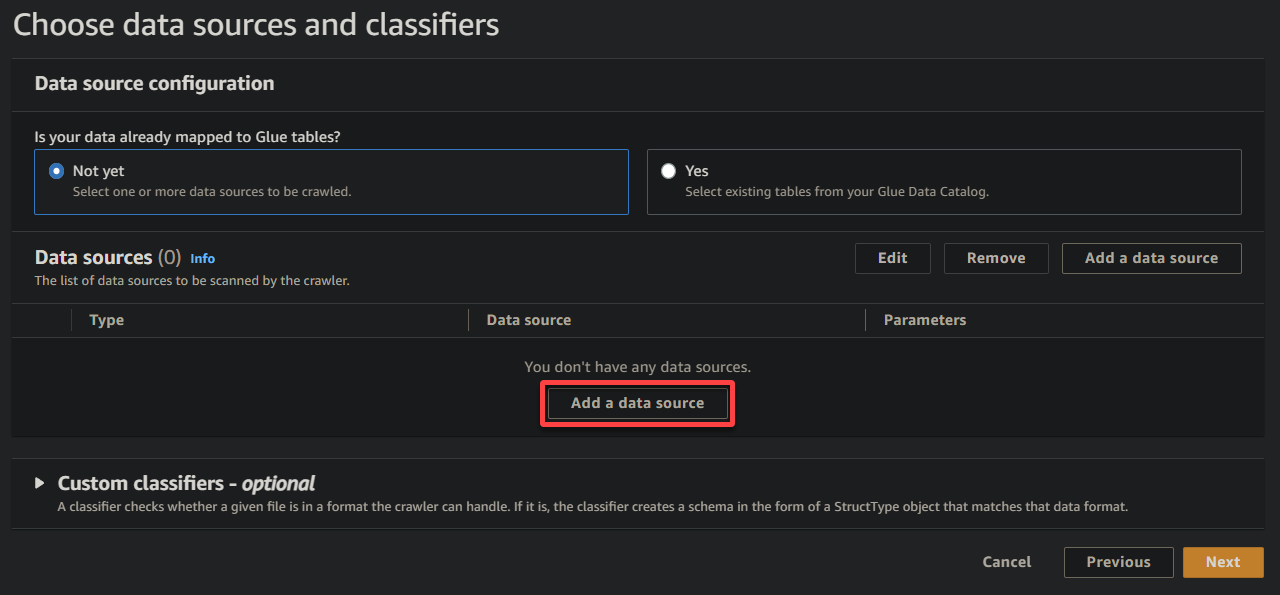
4. Now, click Add a data source under Data sources to initiate adding a new data source to the crawler.
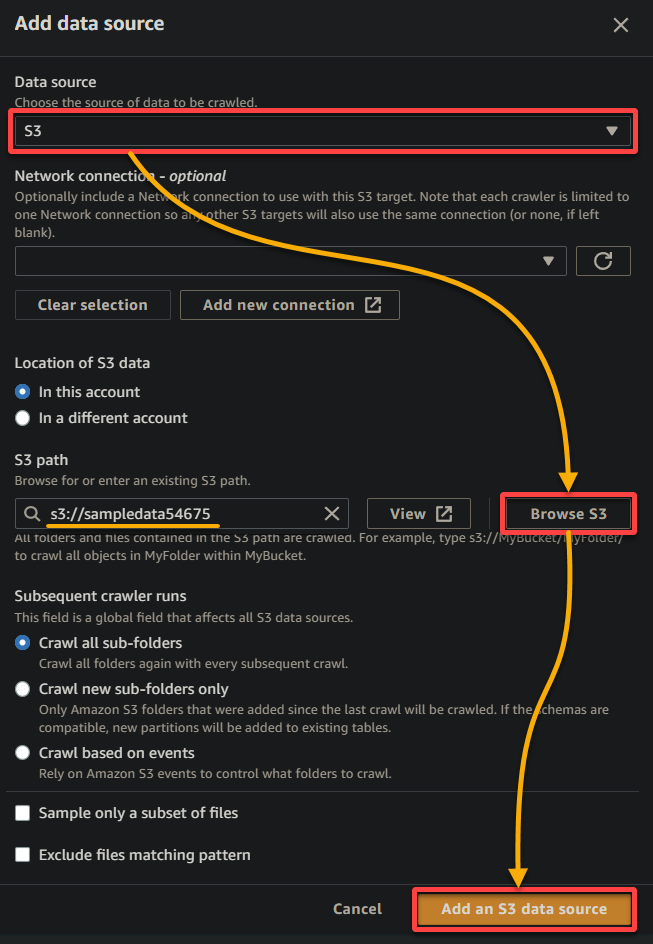
5. On the popup window, configure the data source as follows:
- Data source – Select S3 since your data is in your S3 bucket.
- S3 path – Click Browse S3, and choose the bucket that contains your uploaded sample data (sampledata54675).
- Keep other settings as is, and click Add an S3 data source to add the sample data to the crawler.
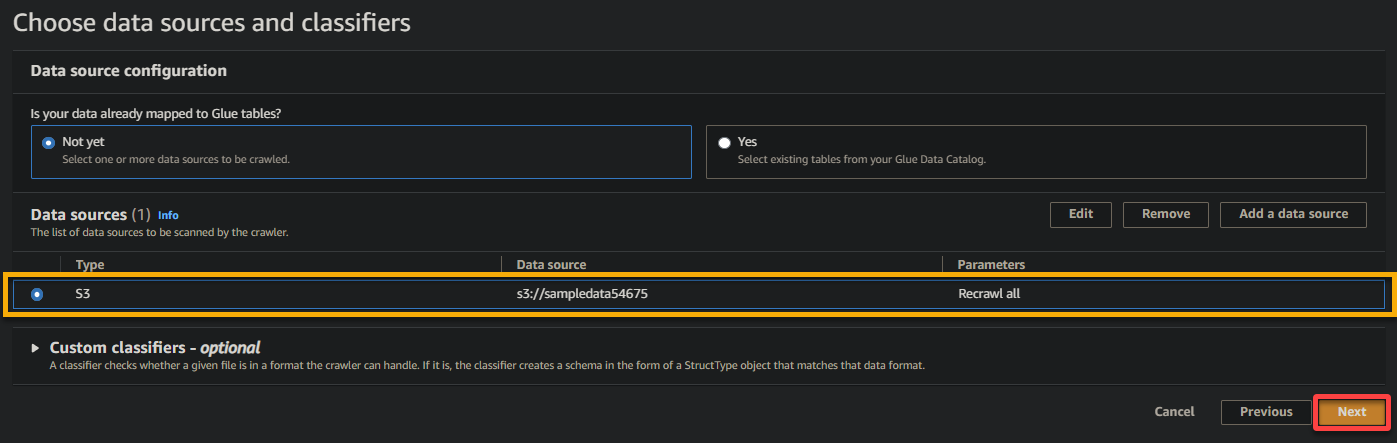
6. Once configured, verify the data source, as shown below, and click Next to continue.
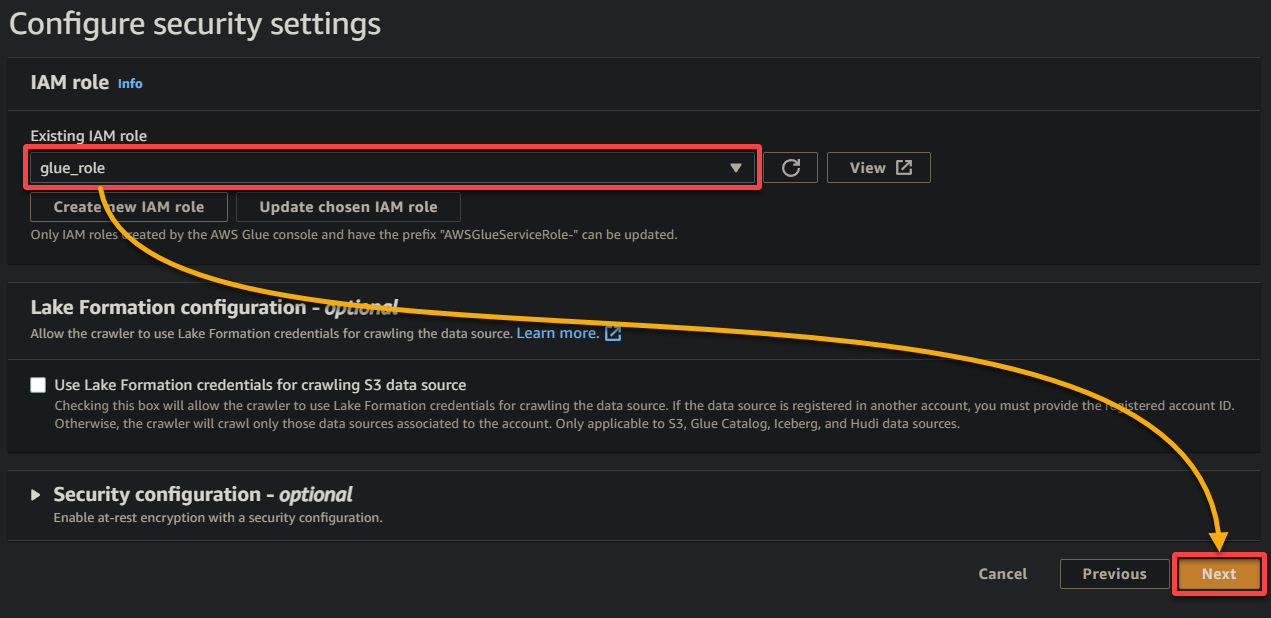
7. On the next screen, select the IAM role you created earlier (glue_role), keep other settings as is, and click Next.
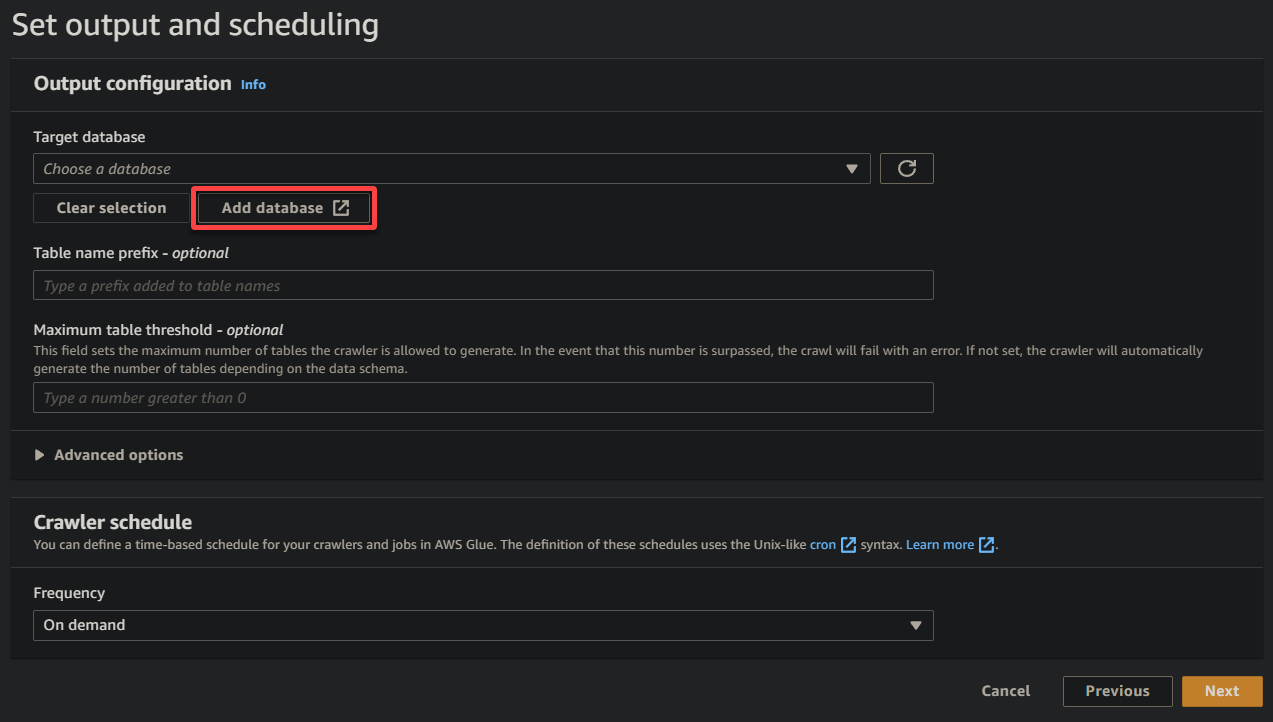
8. Under output and scheduling, click Add database to initiate adding a new database to store the processed data and metadata generated by your glue crawler. This action opens a new browser tab, where you will configure your database details (step eight).
This database provides a structured representation of the data for querying and analysis.
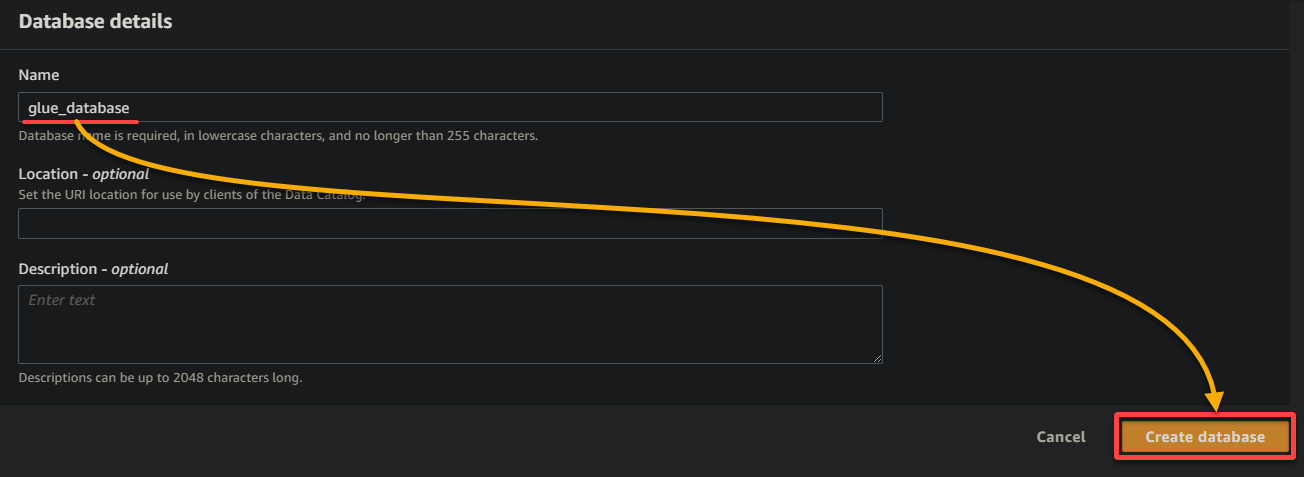
9. On the new browser tab, provide a descriptive database name (i.e., glue_database), and click Create database to create the database.
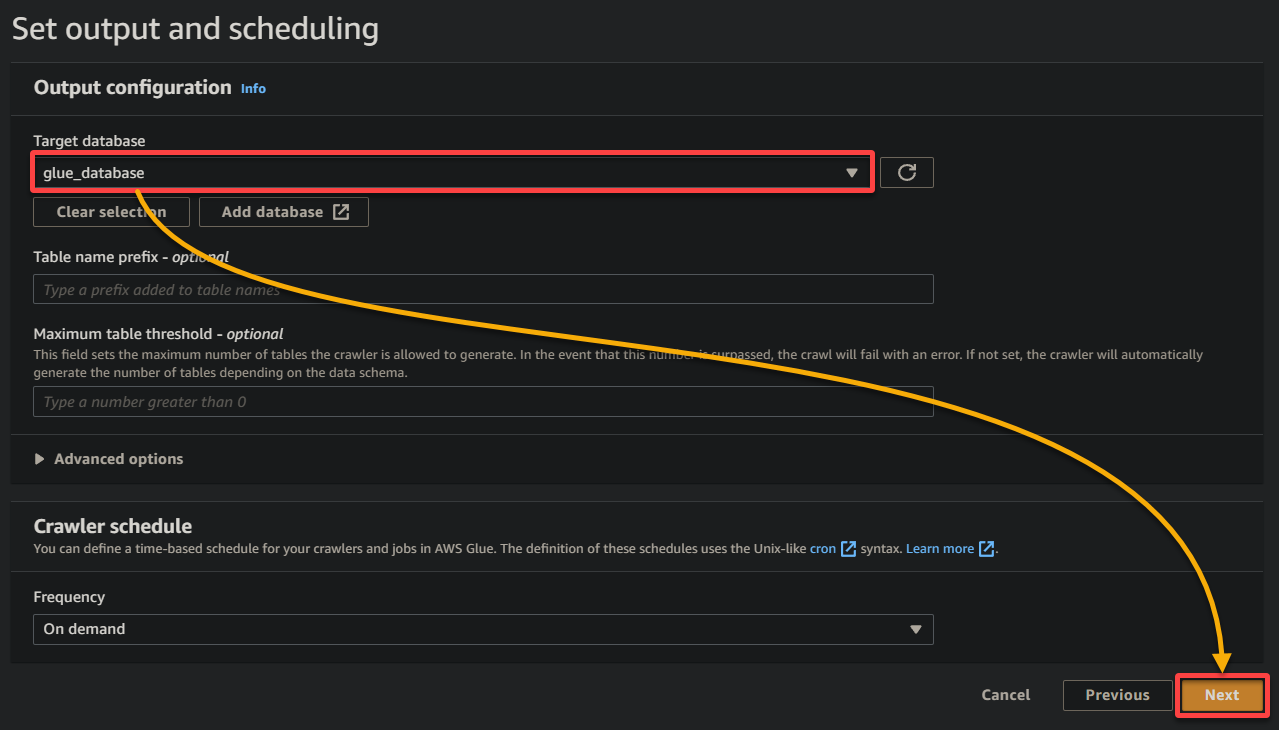
10. Switch to the previous browser tab, select the newly-created database (glue_database) from the drop-down, keep other settings as is, and click Next.
11. Ultimately, review your settings on the final screen to ensure they are accurate, and click Create crawler (bottom-right) to create the new crawler.
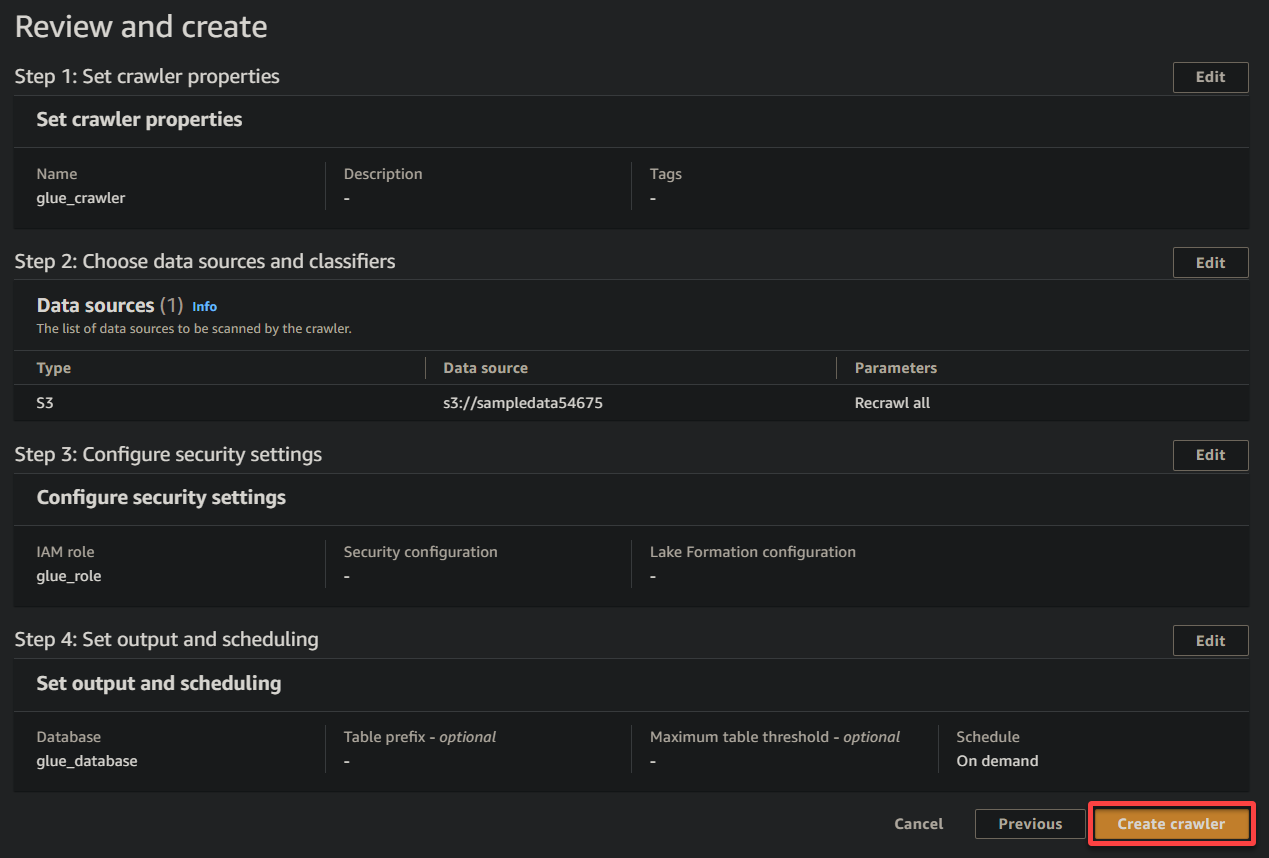
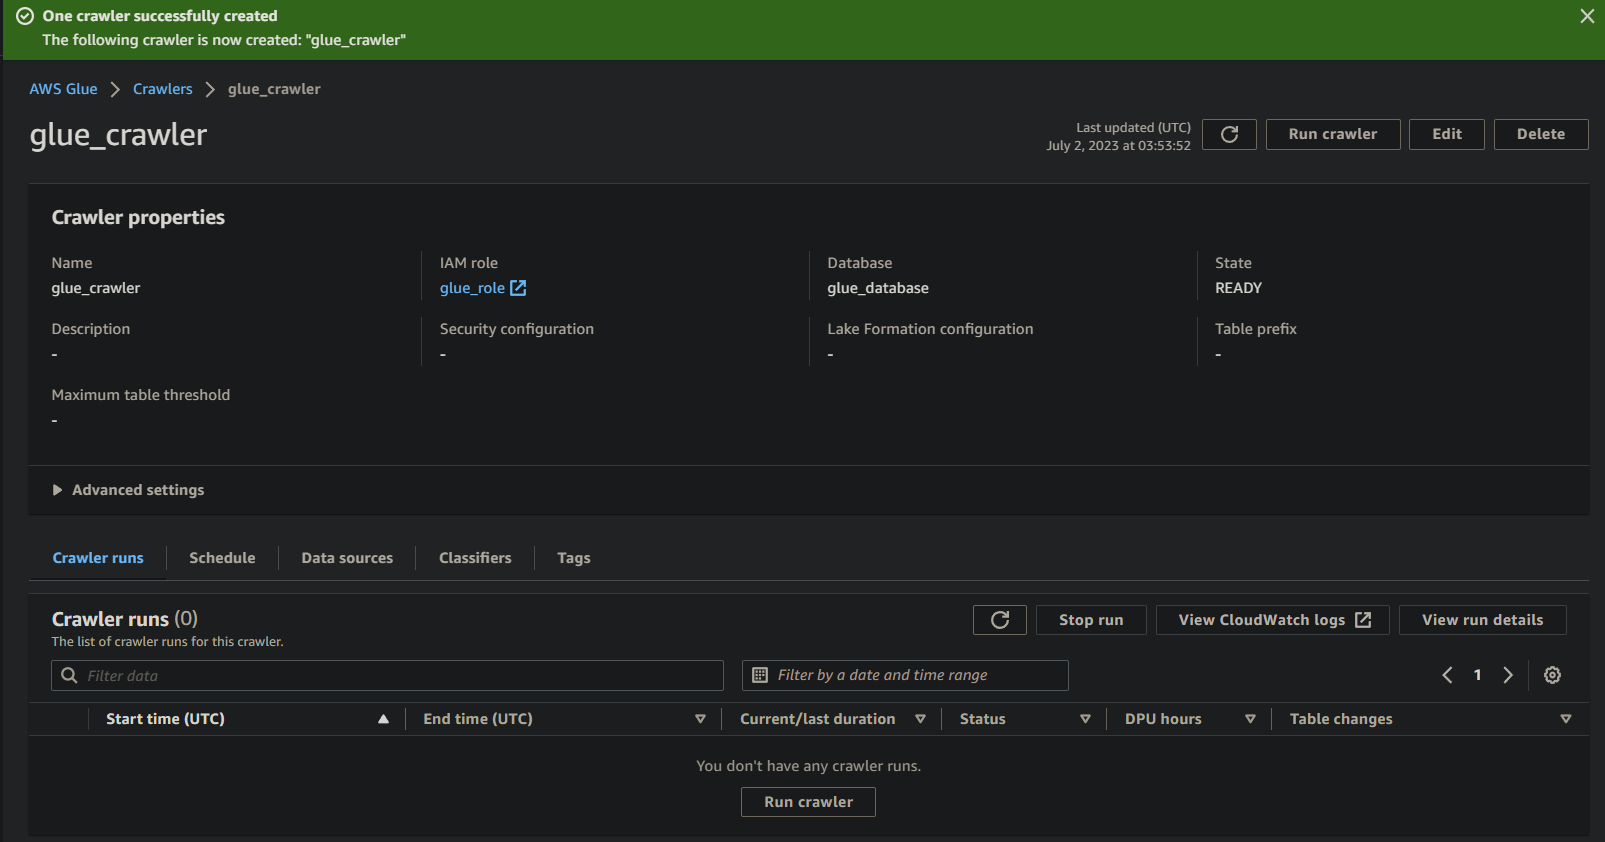
If everything goes well, you will see a screen confirming the successful creation of the crawler. Do not close this screen yet; you will run this crawler in the following section.
Running the Glue Crawler to Build a Metadata Catalog
With a new crawler at your disposal, running the crawler is essential to start the scanning and cataloging process. Your glue crawler will build a metadata catalog that provides a structured representation of your data for querying and analysis purposes.
To run your newly-created glue crawler:
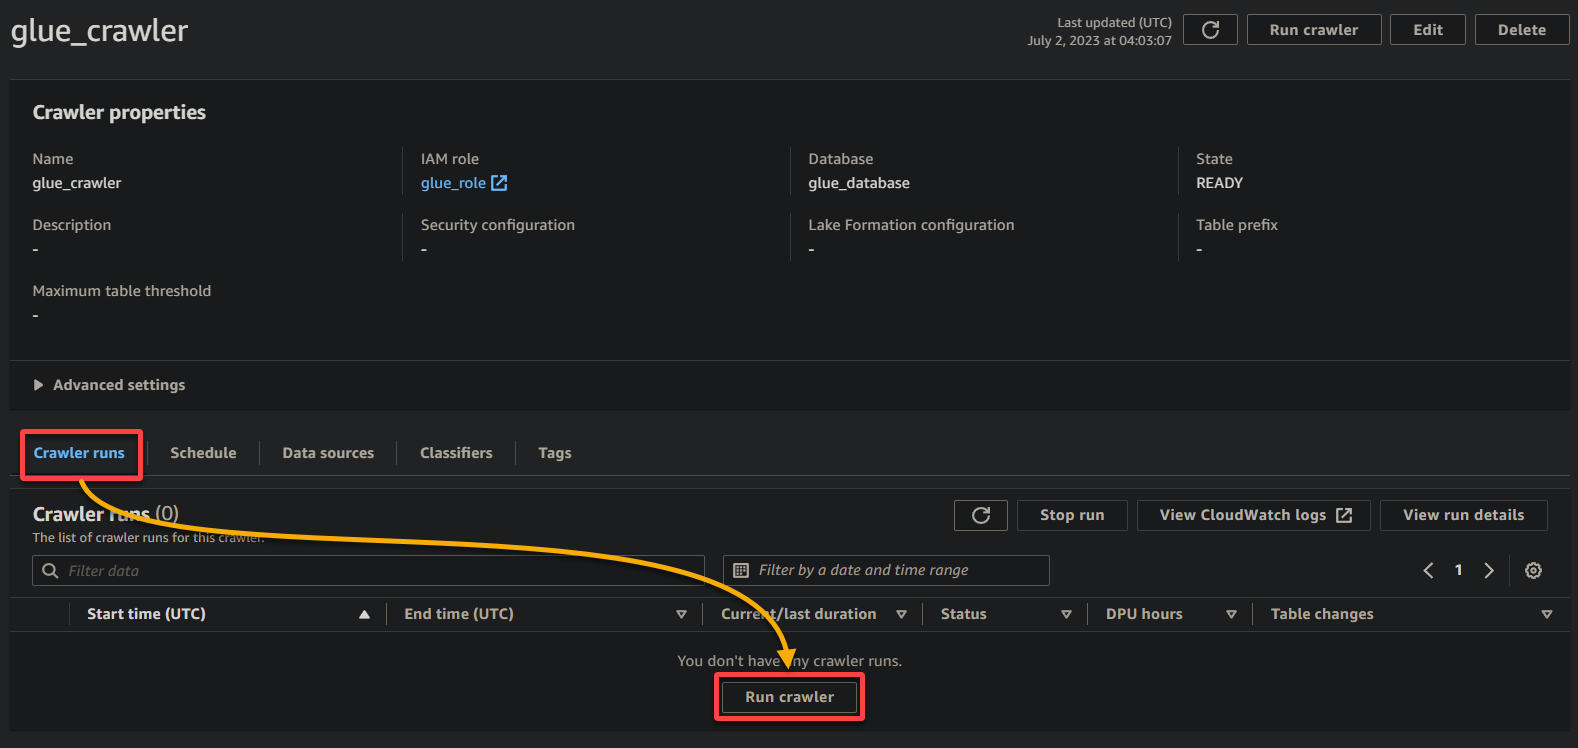
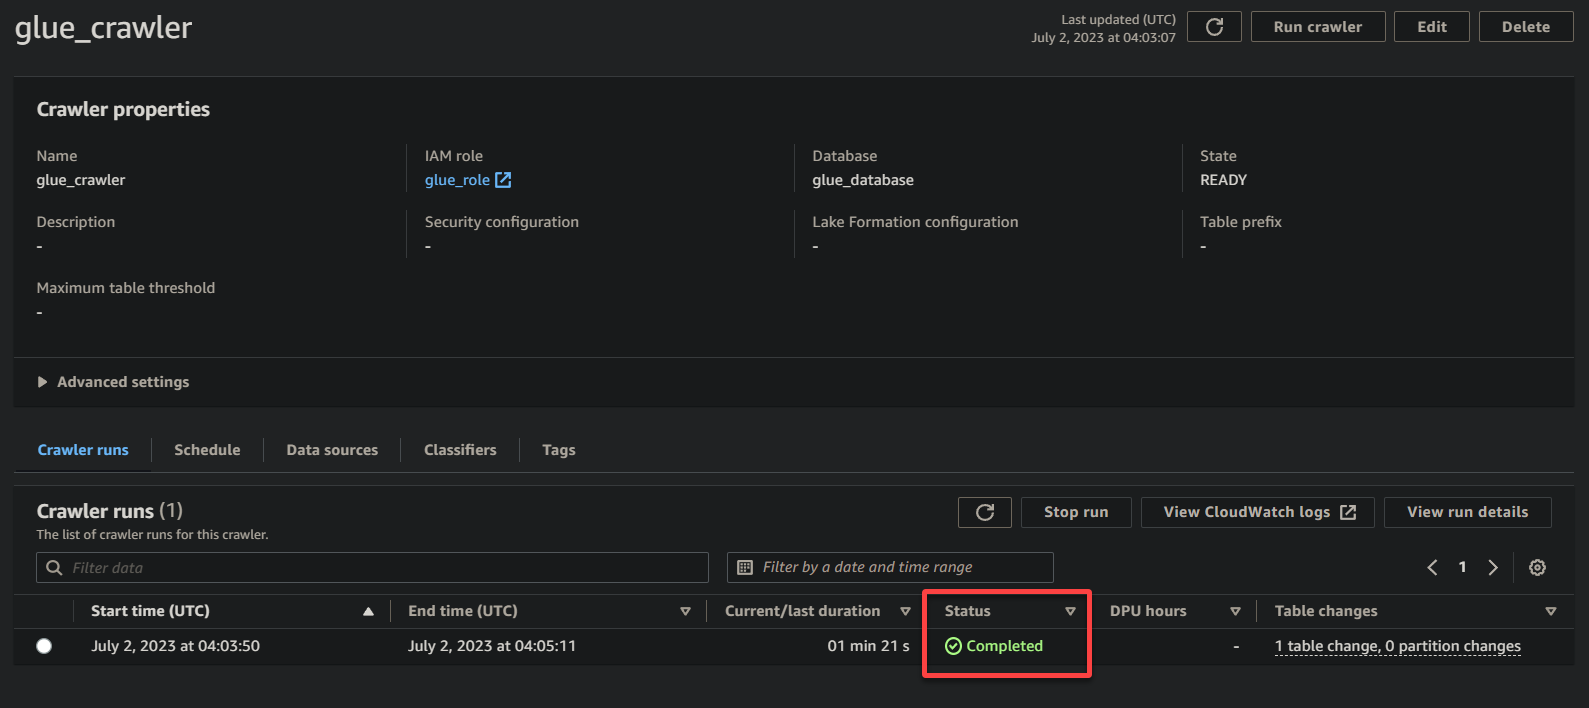
1. On the crawler details page, click Run crawler under the Crawler runs tab to initiate the execution of the crawler.
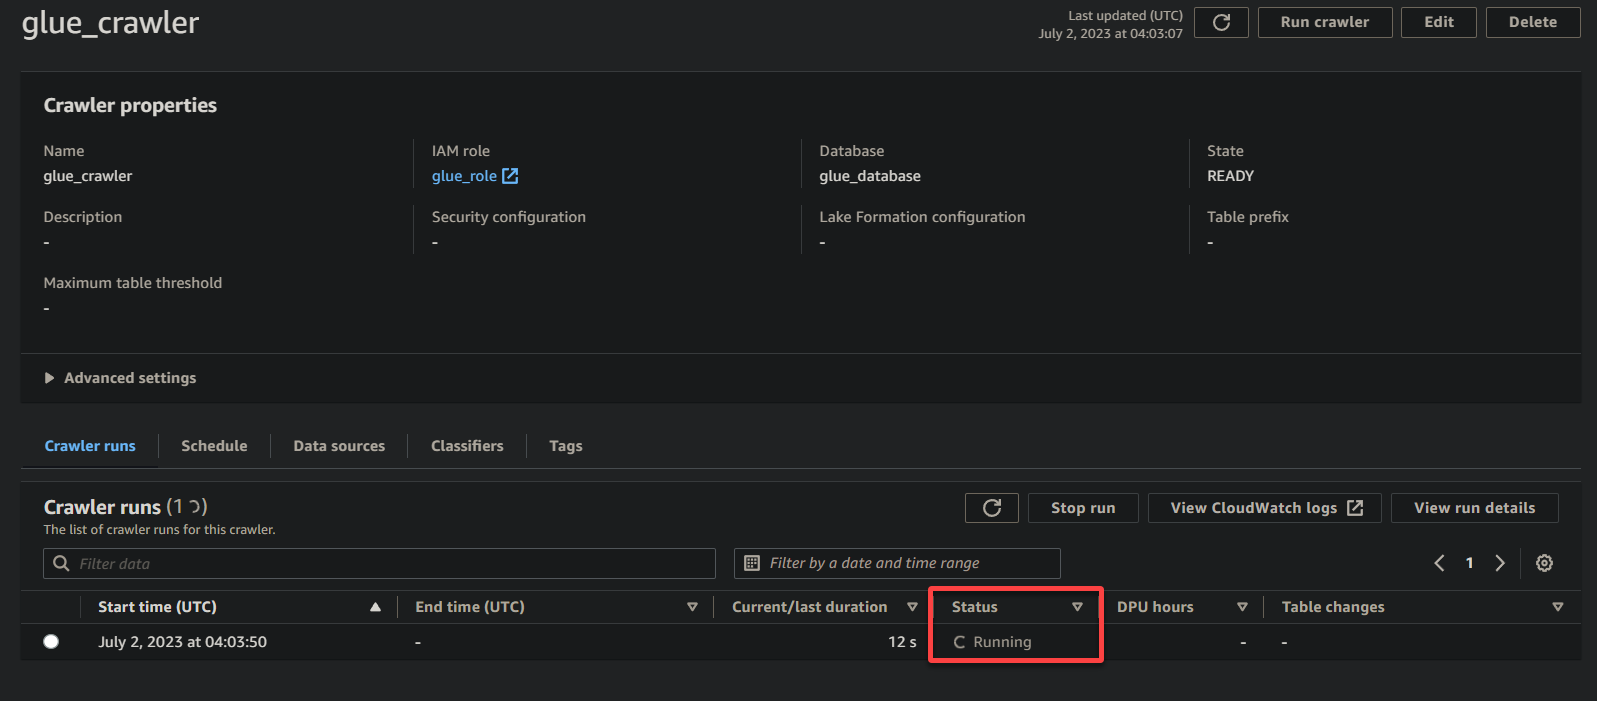
Once the crawler starts running, you will see its status and progress on the crawler details page.
Depending on the size and complexity of your data, the crawler may take some time to complete its execution. You can periodically refresh the page to see the updated status of the crawler.
Once the crawler has completed its execution, the status changes to Completed, as shown below. At this point, you can proceed with querying your data.
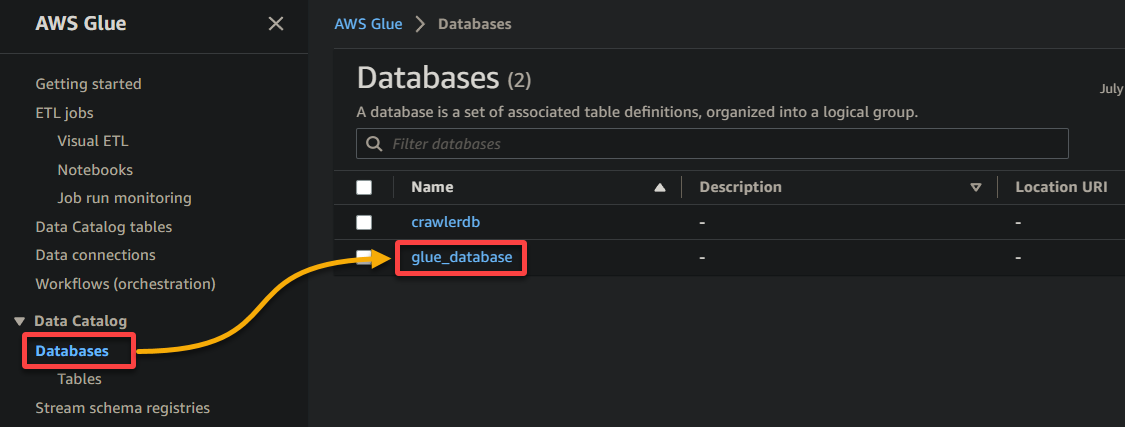
2. Next, navigate to Database (left pane), and click your database to access its properties and tables.
3. Finally, click on your bucket’s name (sampledata54675), now a table, to view its stored data.
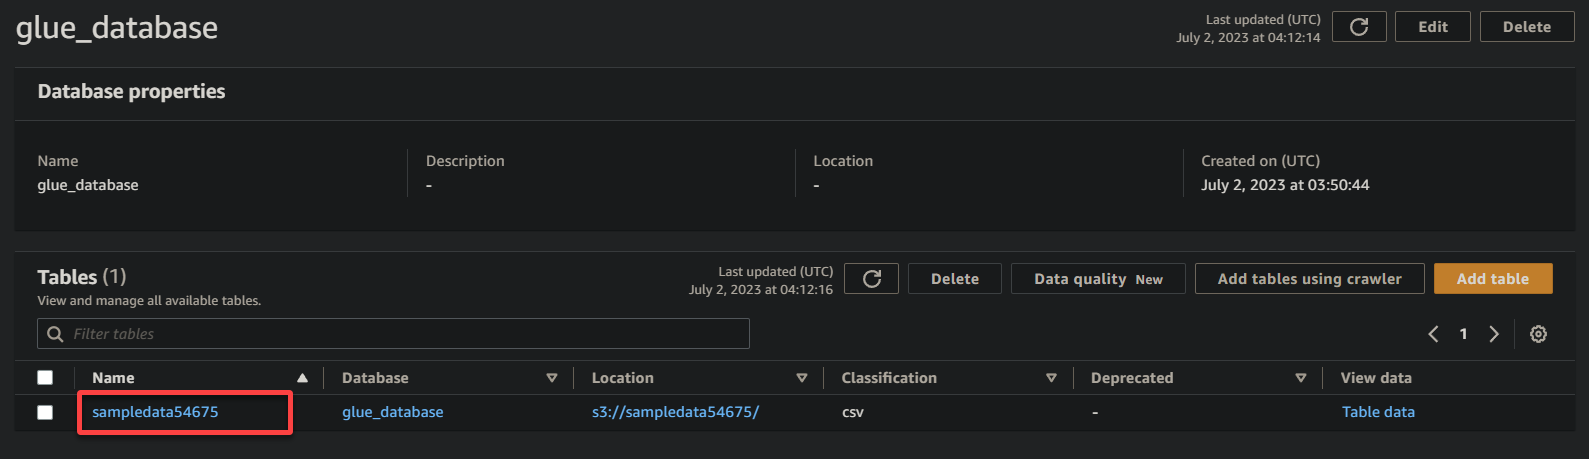
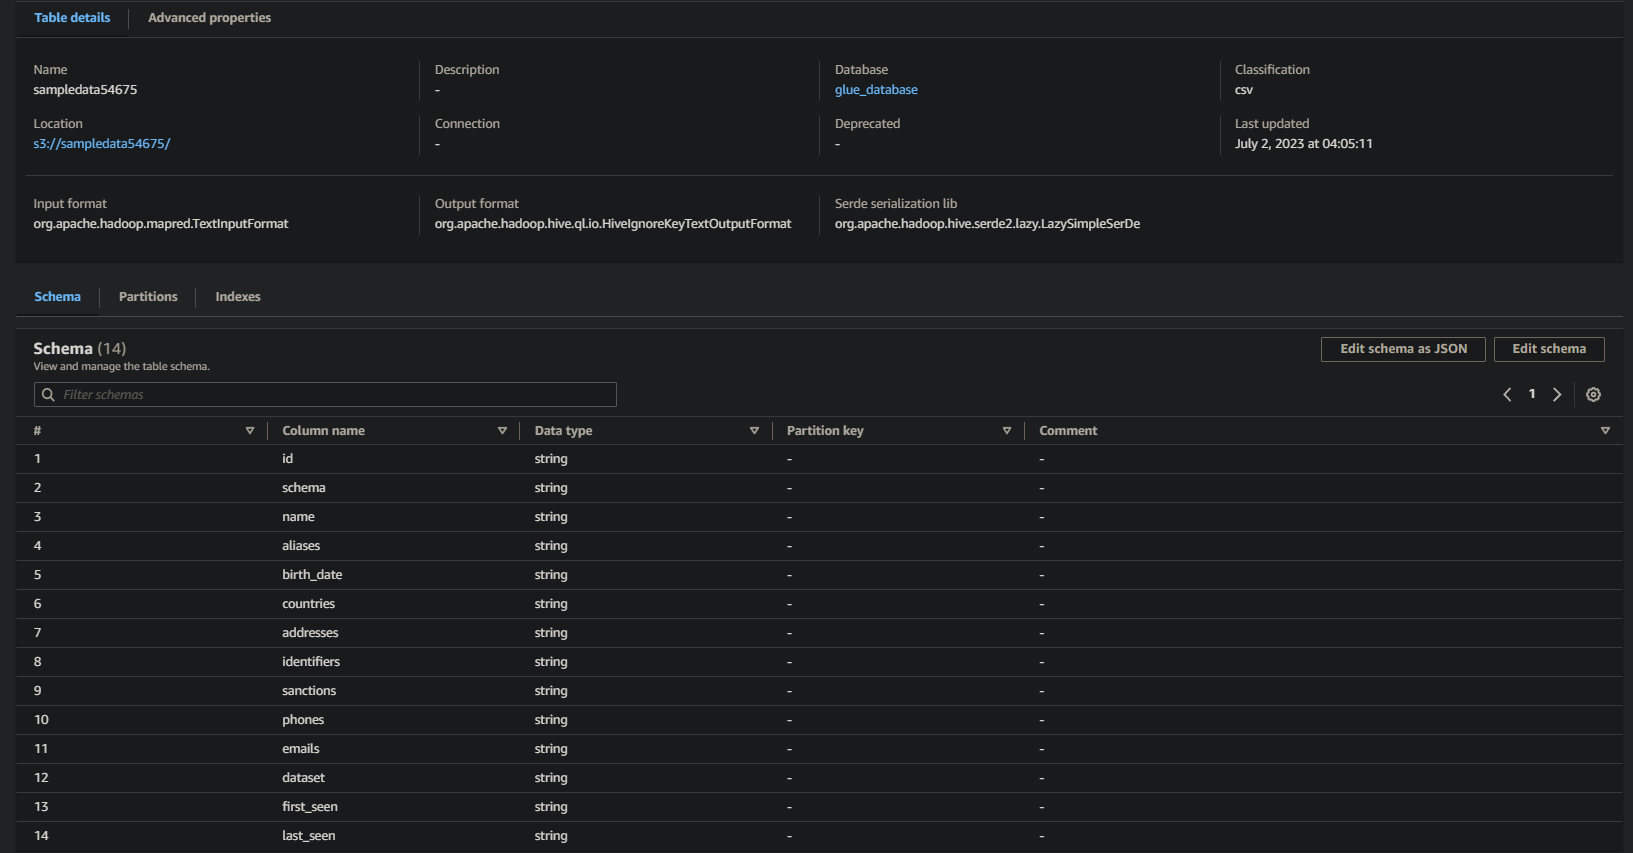
If successful, you will see information similar below. This information confirms that the data was successfully transformed into the database table, providing valuable details.
Querying Cataloged Data via AWS Athena
Now that your data is available in AWS Glue Data Catalog, you can use various tools to query and analyze your data. One such tool is AWS Athena, an interactive query service that enables you to analyze data in the cloud using standard SQL.
To query the data using AWS Athena, follow the steps below:
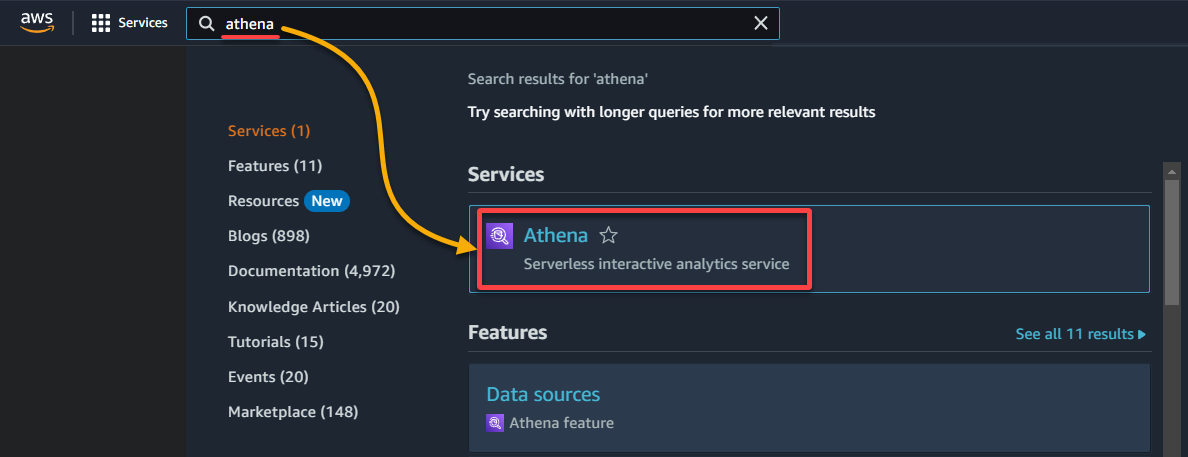
1. Search for and access the Athena console.
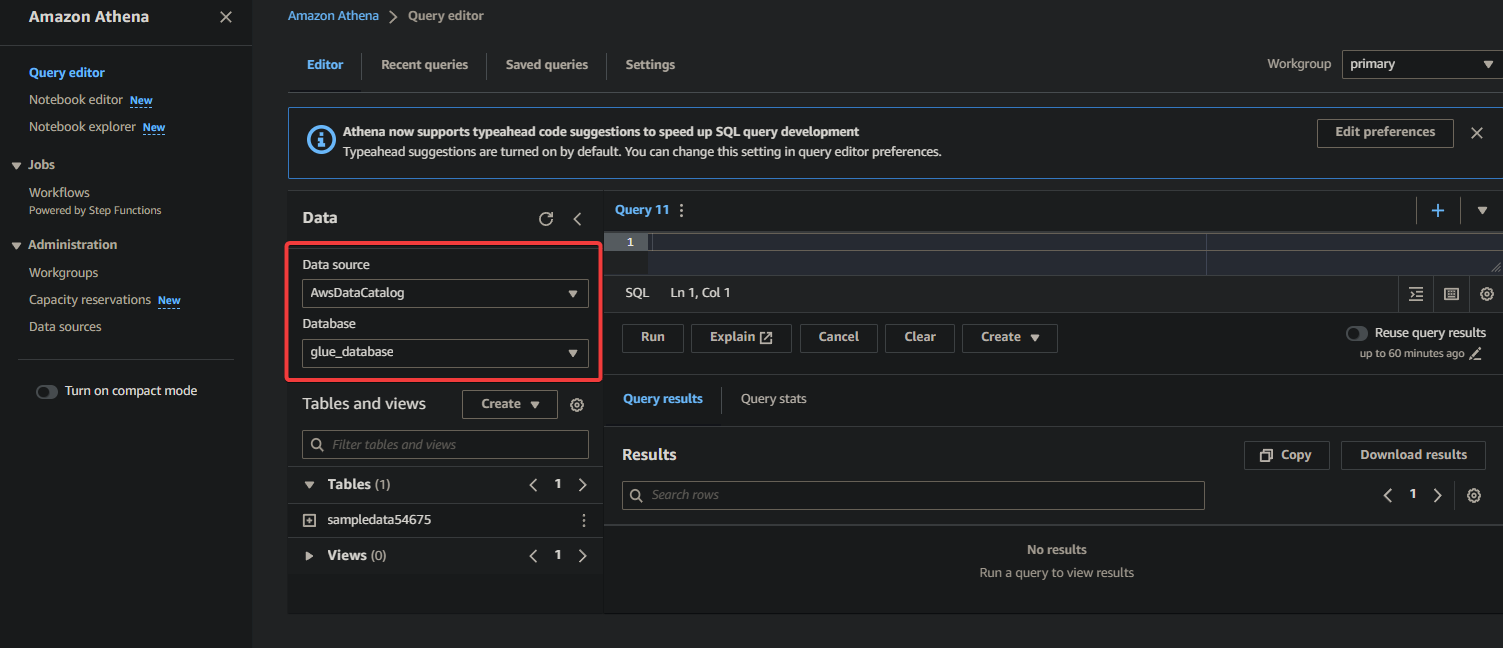
2. Select the database where your data is cataloged under the Data section as follows:
- Data source – Select AwsDataCatalog to indicate that you want to query the data cataloged in AWS Glue.
- Database – Select the appropriate database from the drop-down field (i.e., glue_database).
💡 If you do not see your desired database in the drop-down, ensure the crawler has completed its execution and cataloged the data.
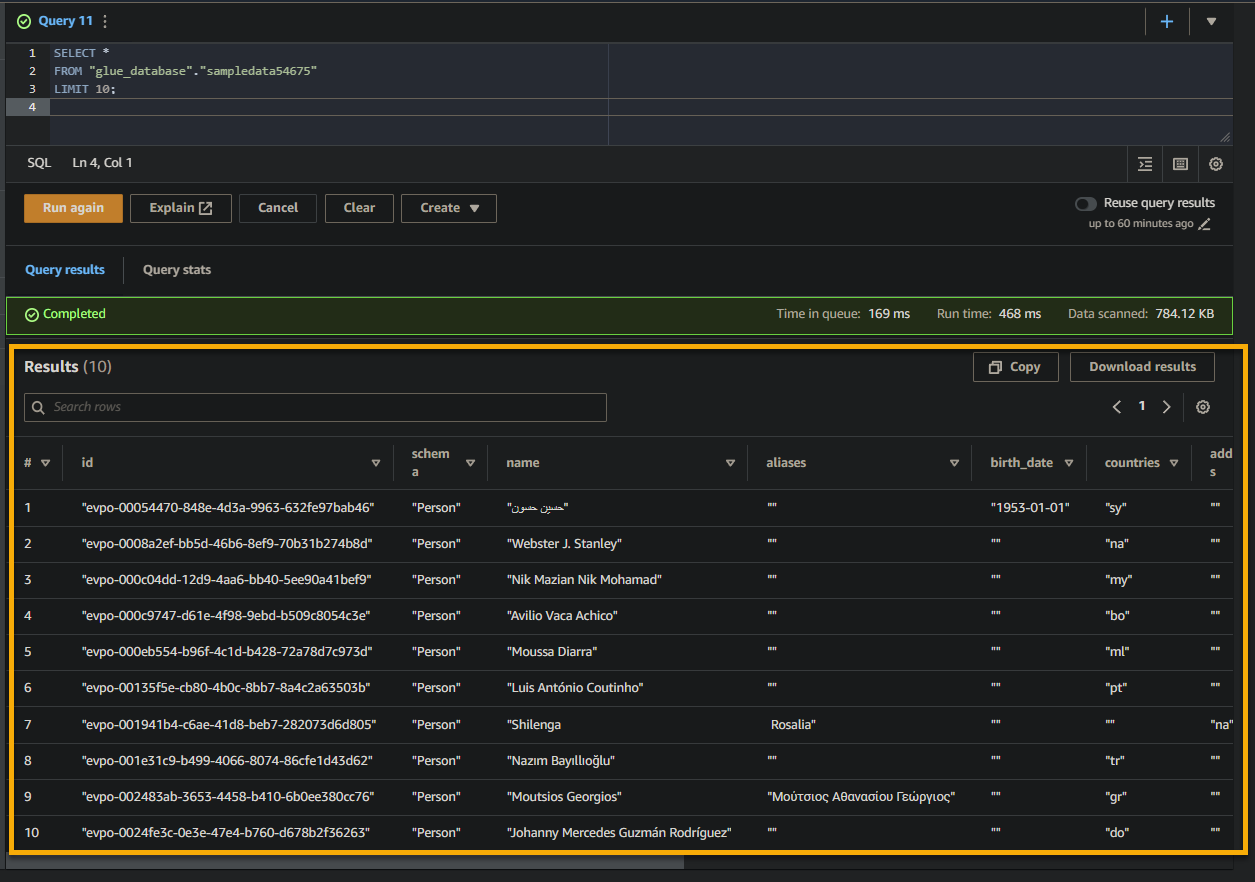
3. Finally, populate and run the following query in the query editor on the right.
This query returns the first 10 rows from the sampledata54675 table in the glue_database database. Feel free to modify the query to suit your specific requirements.
SELECT *
FROM "glue_database"."sampledata54675"
LIMIT 10;
If the query is successful, you will see the results in the Result pane, as shown below. The results contain information about the records stored in the table based on your SQL query.
Take note of the column names, data types, and values returned in the result set. This information helps you understand the structure and content of the queried data.
Conclusion
In this tutorial, you have learned the basics of using AWS Glue to create a Glue Crawler, catalog your data, and query data using AWS Athena. Data preparation and analysis are essential for any data-driven application. And tools like AWS Glue provide a quick way to extract, transform, and load (ETL) data from various sources into a database table.
With AWS Glue, you can now quickly manage and organize data, allowing you to focus more on analyzing and deriving insights from your data. But what you have seen is just the tip of the iceberg. Explore the wide range of capabilities and functionalities AWS Glue can offer!
Why not leverage AWS Glue connections to seamlessly integrate with other AWS services, such as Amazon RDS or Amazon Redshift? This integration enables you to build complex ETL pipelines and achieve even greater data analysis capabilities.


