

As the world moves more and more toward cloud-based solutions, knowing how to utilize cloud database also become more crucial. But don’t worry. Amazon Relational Database Service (Amazon RDS) is just what you need.
With Amazon RDS, you get to focus on your applications so you can give them the fast performance, high availability, security, and compatibility they need. And in this tutorial, you’ll learn how to get started with Amazon RDS, a cloud database service provided by Amazon Web Services.
Ready? Read on to get started!
Prerequisites
This tutorial will be a hands-on demonstration. If you’d like to follow along, be sure you have:
- An AWS account – You can create one for free if you don’t have one yet.
- AWS CLI installed and configured on your machine. This tutorial uses AWS CLI on Ubuntu 20.04 Linux environment.
What is Amazon RDS?
Amazon RDS is a web service that eases setting up, operating, and scaling relational databases in the cloud. Amazon RDS provides cost-efficient and resizable capacity. All these while automating time-consuming administration tasks, such as hardware provisioning, database setup, patching, and backups.
Why use Amazon RDS? Suppose you’re running a web application that needs a database backend. But typically, you don’t want to deal with the hassle of setting up and maintaining your own database server.
Or maybe you’re already using Amazon EC2 for your web application and want to offload the database workload. Whatever your reasons, Amazon RDS comes in handy to set up and operate your relational database in the cloud.
Creating a Dedicated IAM User for Amazon RDS
Assuming you already have an AWS account, you’re now ready to create a database instance using the AWS console. But first, you’ll have to create an AWS Identity and Access Management (IAM) user with proper permissions to work with Amazon RDS.
IAM is a feature of your AWS account that provides security credentials to services and users you register with IAM. With IAM, you can securely control access to your AWS resources.
Instead of a root account, you need an IAM user when you want to use the Amazon RDS API or the AWS Command Line Interface (AWS CLI) to work with Amazon RDS.
If you use the root account credentials to access AWS resources, you have to share the same credentials with everyone who needs access to those resources. This setup can lead to security issues if the credentials are compromised.
To create an IAM user via the AWS console:
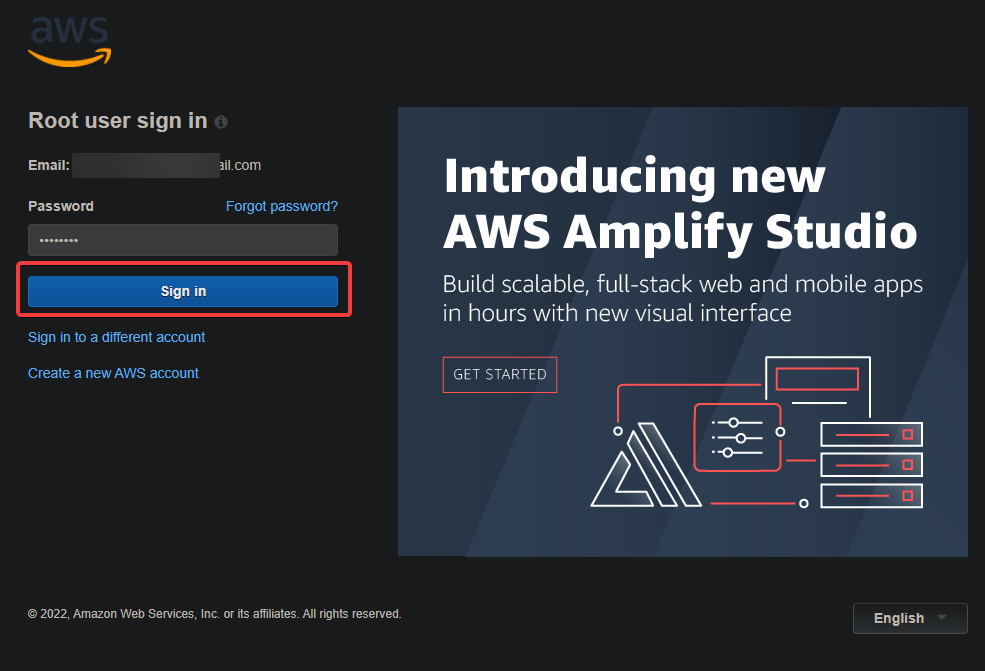
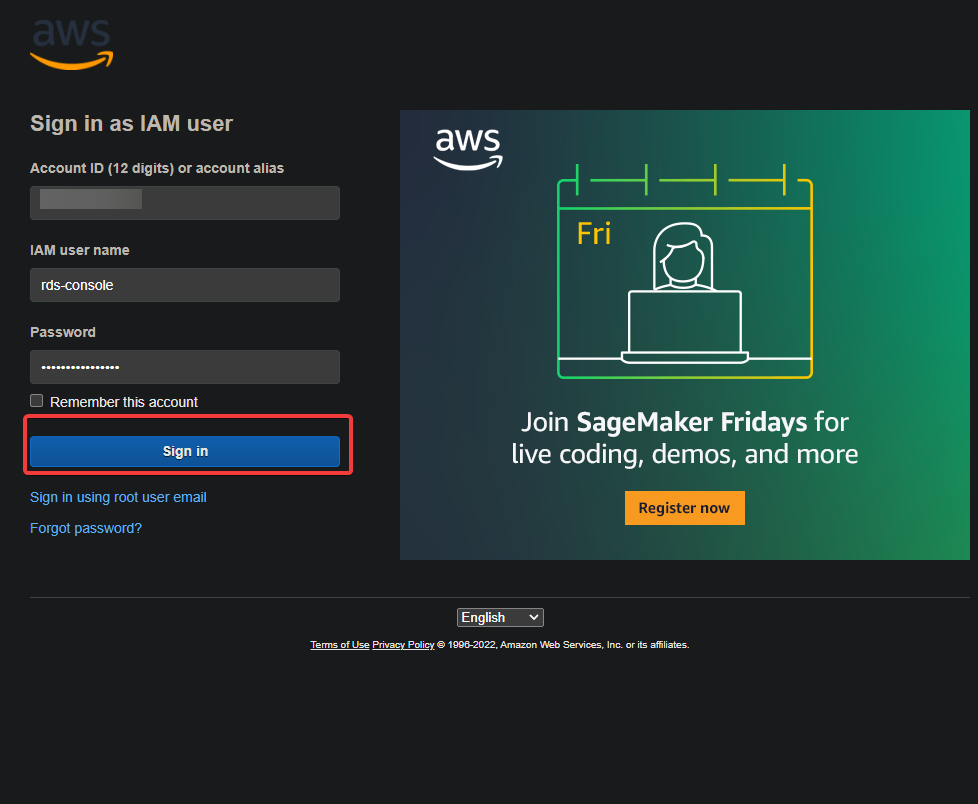
1. Sign in to the AWS Management Console using your root account credentials, and click on Sign in.
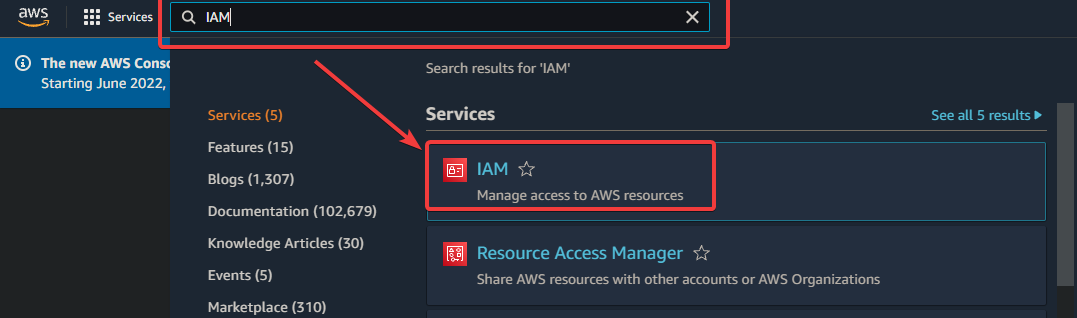
2. Next, search for IAM in the search box at the top, and click on IAM on the list of results, as shown below, to access the IAM console.
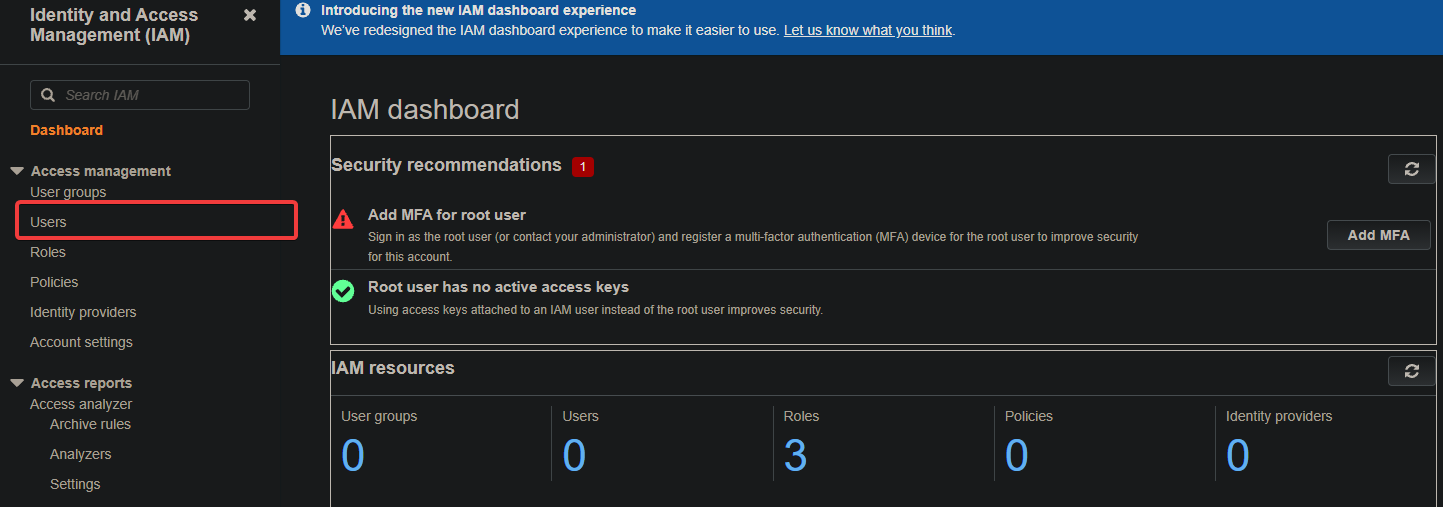
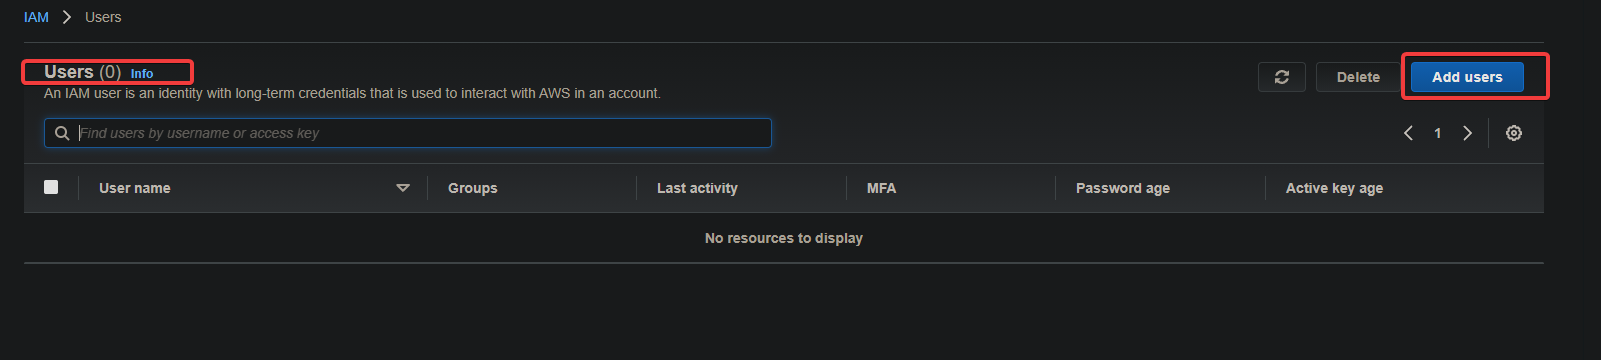
3. On the IAM dashboard, click on Users in the left panel shown below to see the Users page (step four), where you can manage IAM users under your root account.
4. Now, click on Add users (top-right) to initialize adding a new IAM user.
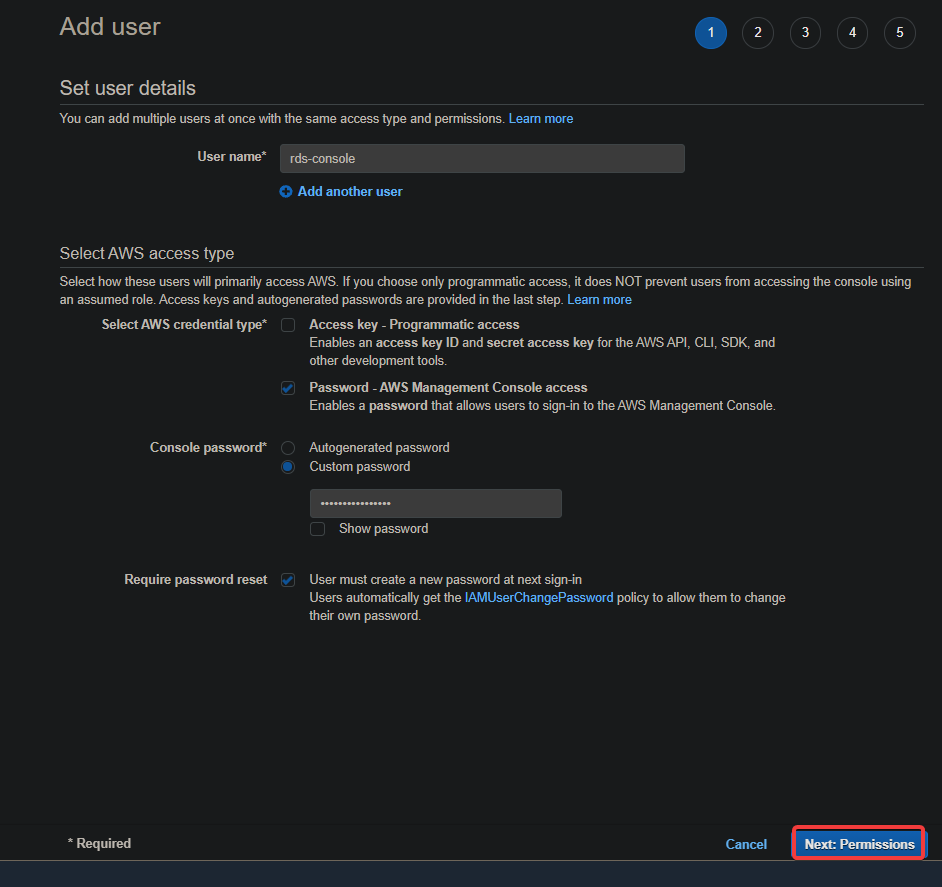
5. Configure the user details with the following:
- Provide a unique User name for the user, but this tutorial’s choice is rds-console.
- Tick the Password – AWS Management Console access check box to enable password access for the user.
- Select the Custom password option, and set a strong password for the user.
- Tick the Require password reset box to require a password change when the user logs in for the first time.
- Click on Next: Permissions to start adding permissions to the new user (step six).
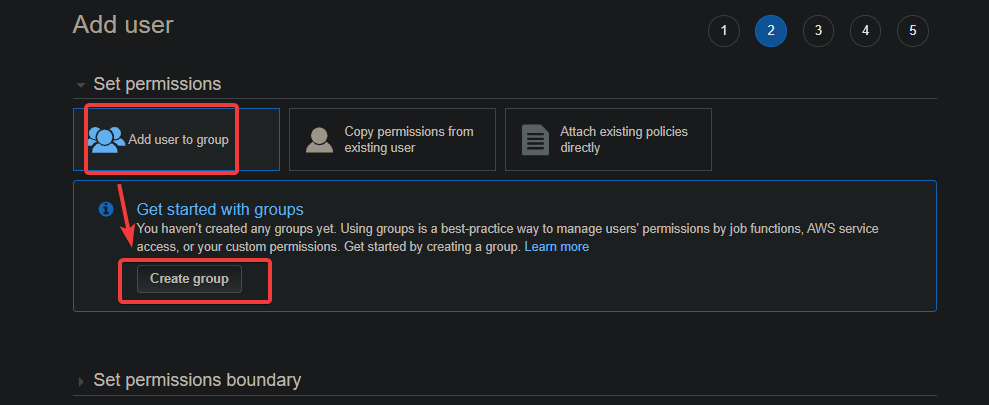
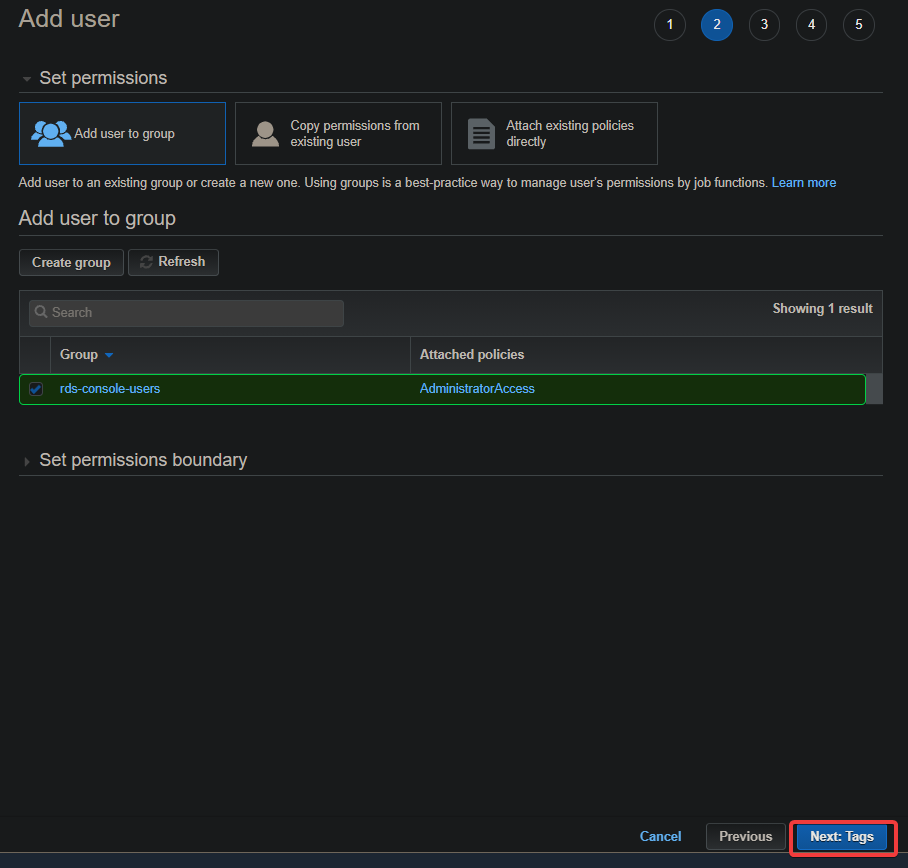
6. On the Add user page, click on Add user to group —> Create group to initialize creating a new IAM user group. An IAM group is a collection of IAM users with specific permissions.
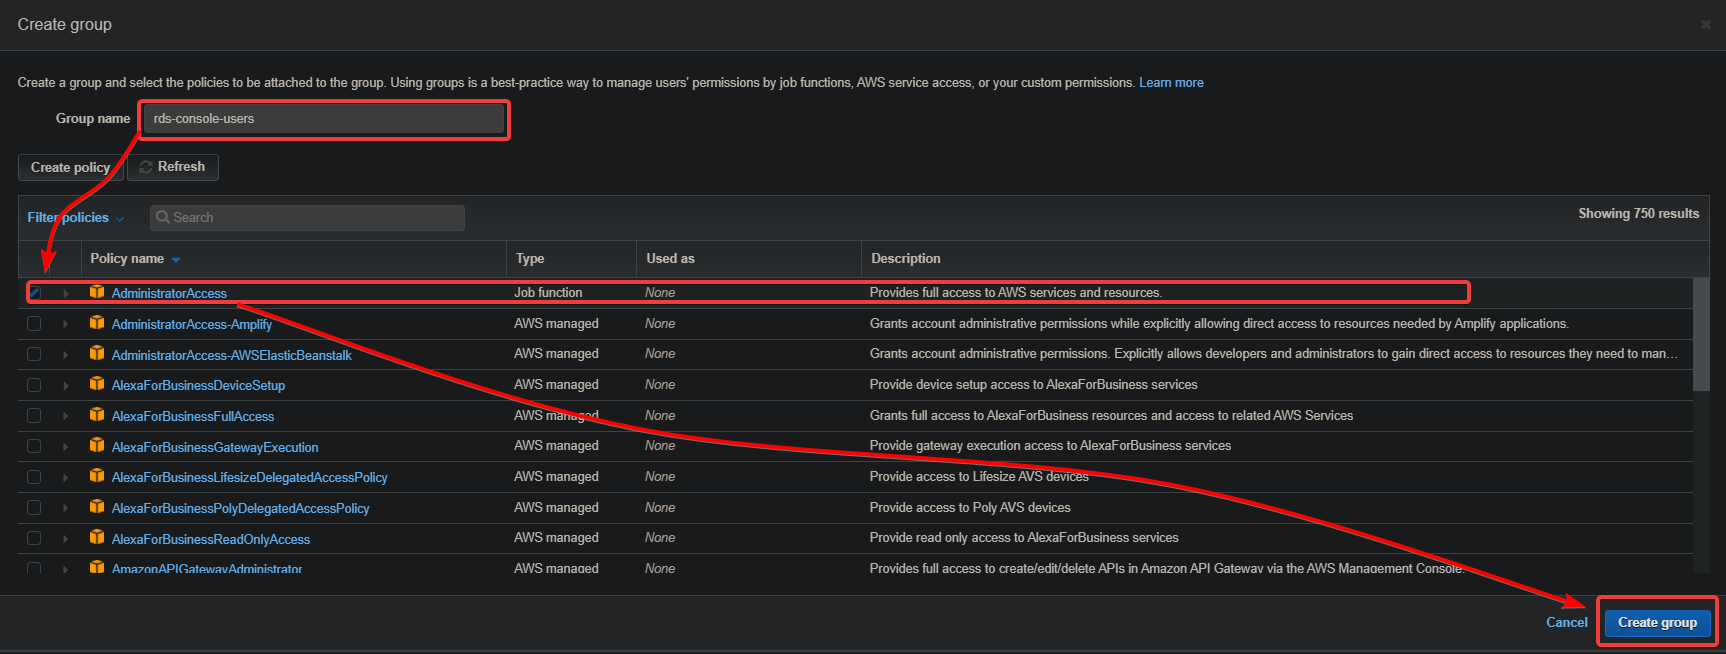
7. Now, configure the new IAM user group with the following:
- Provide a unique Group name, but this tutorial’s choice is rds-console-users.
- Tick the box beside the AdministratorAccess option to select it, which serves as an IAM role. An IAM role lets you delegate access to users, and you can see that this role provides full access to all Amazon RDS resources.
- Click on Create group (bottom-right) to create your first group and redirect the browser back to the Add user page.
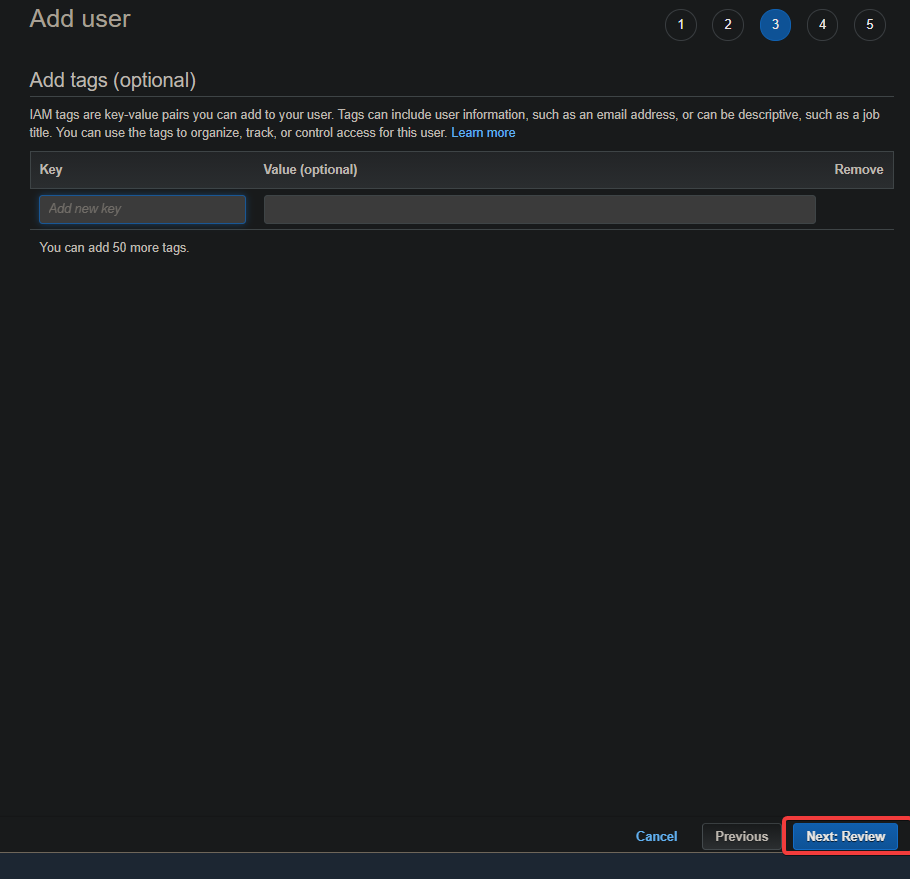
8. Back to the Add user page, click on Next: Tags to continue configuring the new user details.
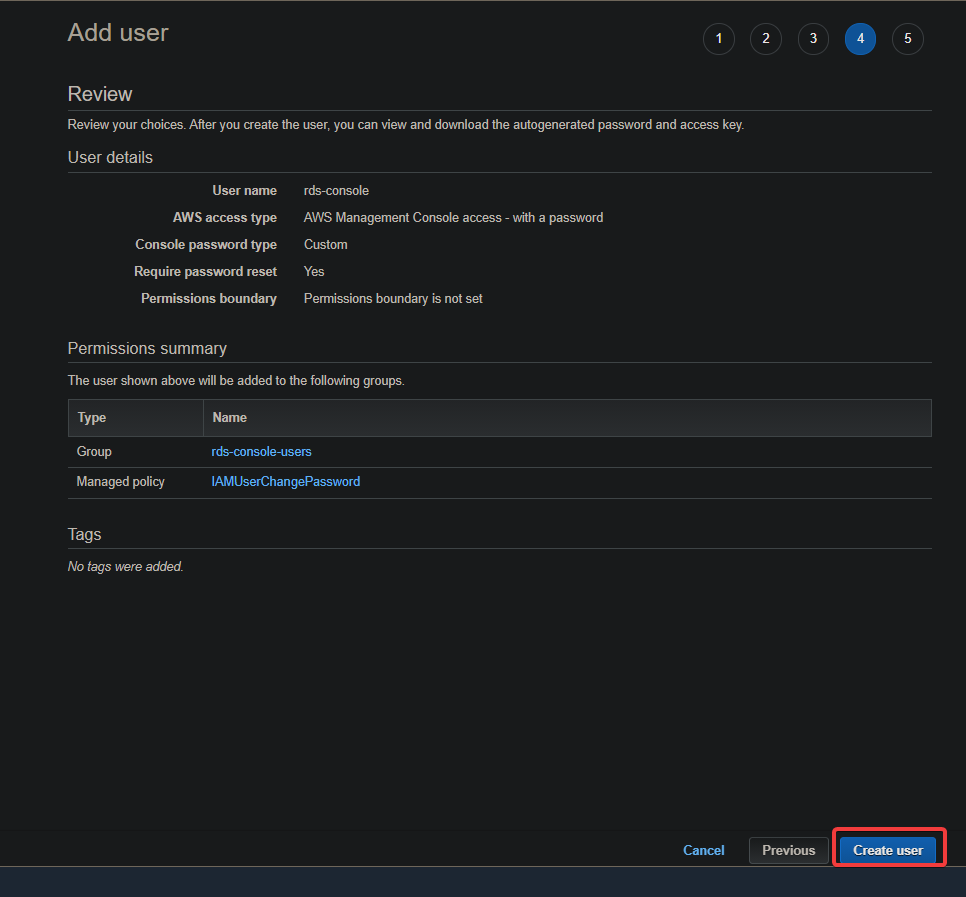
9. Skip adding tags, and click on Next: Review to view the summary of the new user details.
10. Next, review the new user details, and click on Create user at the bottom to create your first IAM user.
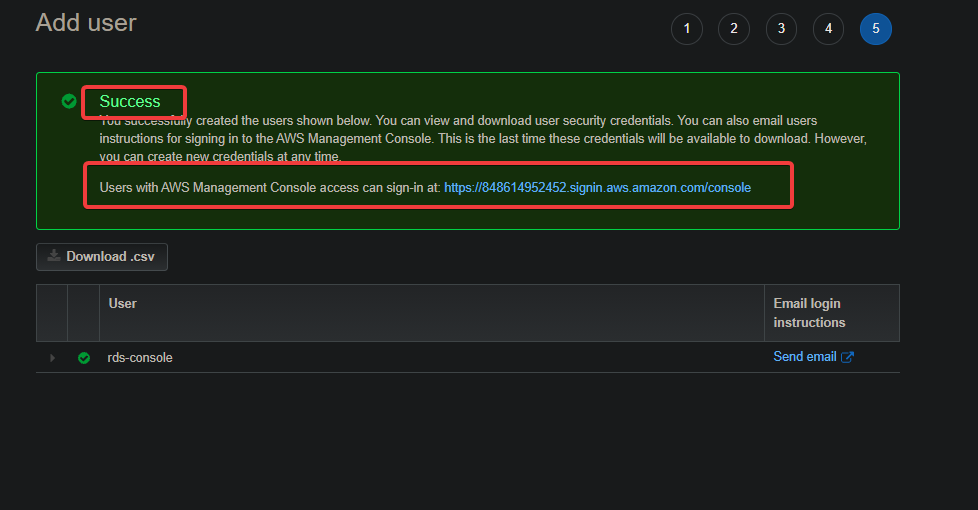
You’ll see a Success message after creating the new IAM user, as shown below.
Note down the AWS Management Console access URL. You’ll need this access URL to log into the AWS Management Console as your new IAM user.
11. Finally, navigate to your Users page to see your new IAM user on the list, as shown below.

Creating an RDS Database Instance via the AWS Console
Now that you have an IAM user with the necessary permissions, it’s time to create an Amazon RDS database instance. There are two methods to create an Amazon RDS, via the AWS Console and AWS CLI, but you’ll use the former method for a start.
To create an RDS database instance via the AWS Console:
1. Logout from your root account and navigate to the AWS Management Console access URL you noted in step 10 of the “Creating a Dedicated IAM User for Amazon RDS” section.
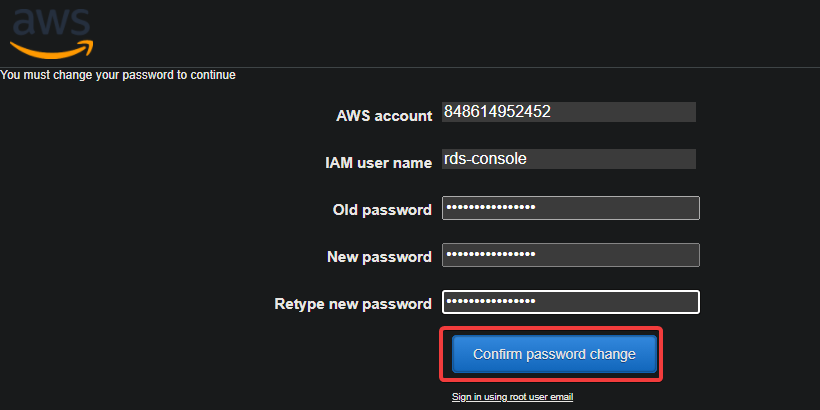
On the IAM user login page, enter your IAM user’s credentials, and click on Sign in. Since this is the first time you’re logging in as the IAM user, you’ll be asked to set up a new password (step two).
2. Next, provide and confirm a new password, and click on Confirm password change to secure your account. Once changed, your browser redirects to the AWS Management Console.
3. Search for RDS in the search box at the top, and choose RDS to access the RDS Management Console.

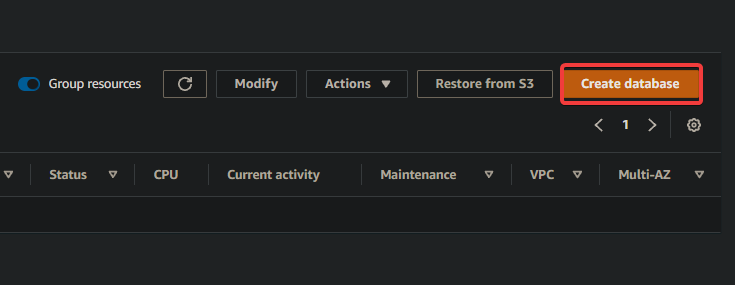
4. Click on Databases in the left panel while in the Amazon RDS Management Console to see the list of available databases, which is empty, as shown below.

5. Now, click on the Create database button (top-right) to initialize creating a new SQL database instance.
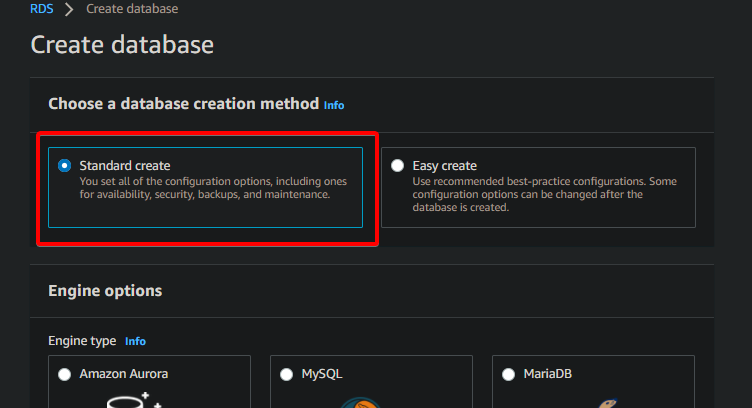
6. Choose a database creation method you prefer. But for this tutorial, the choice is the Standard create method since it lets you specify all the configuration options for your database instance.
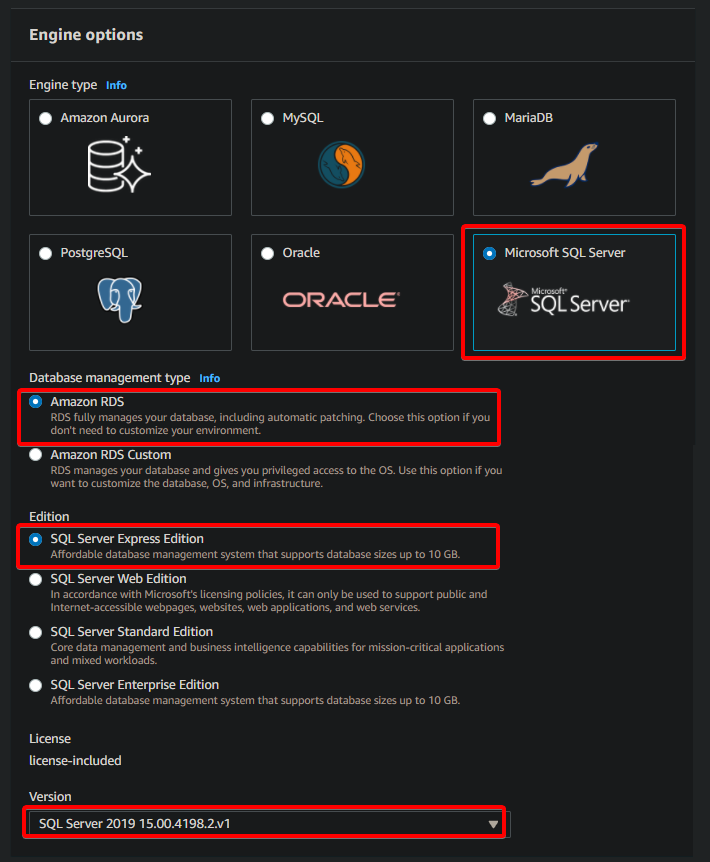
7. Configure your Engine options with the following:
- Select an Engine type you prefer since Amazon RDS supports multiple database engines. But in this example, you’ll use the Microsoft SQL Server.
- Select Amazon RDS as your Database management type.
- Select SQL Server Express Edition since it is a free edition of SQL Server.
- Select your preferred version of SQL Server. But for this tutorial, you’ll use SQL Server 2019 Express Edition, the latest version at the time of writing.
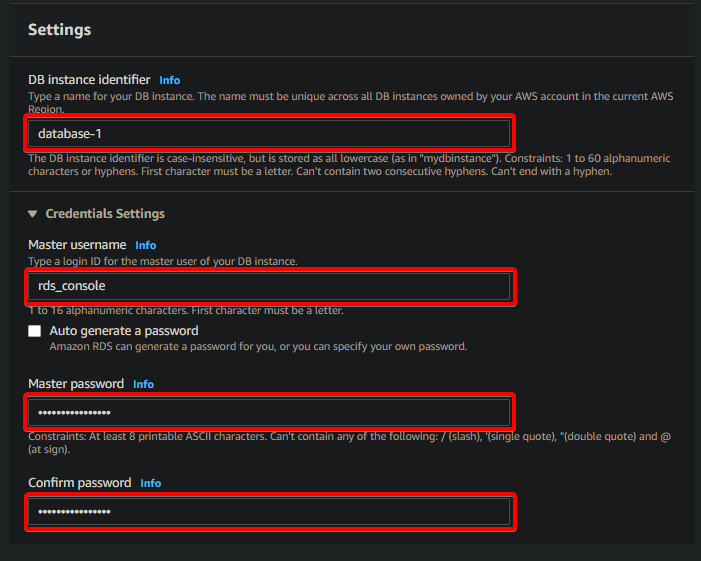
8. Scroll down to the Settings section and configure your database name and credentials as follows:
- Provide a descriptive name for your database instance (database-1) under DB instance identifier.
- Provide a username (rds_console) and password for the master user for logging into your database instance.
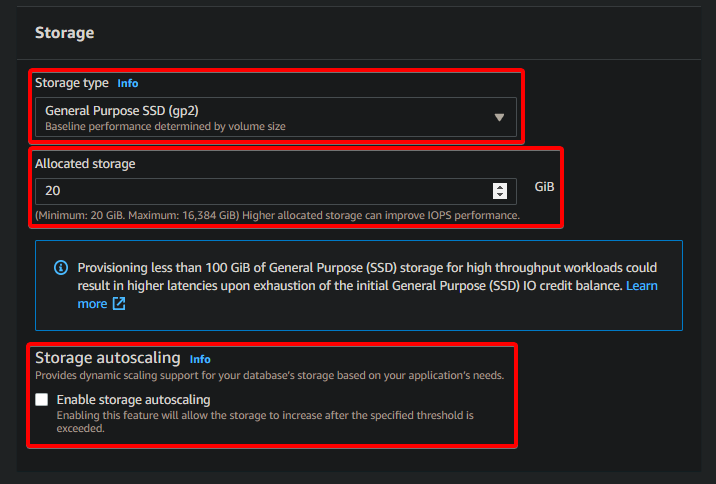
9. Under the Storage section, configure your database’s storage with the following:
- Keep the default Storage type value (General purpose (SSD)) since it’s a fast storage type suitable for most workloads.
- Set Allocated storage (in GB) to provision for your database instance (minimum storage size is 20 GB). The more storage you allocate, the more I/O operations your database instance can process. But remember, more storage also costs more.
- Untick the Storage autoscaling option since you don’t want Amazon RDS to auto-scale the storage for your database instance. You instead want to control the storage size manually.
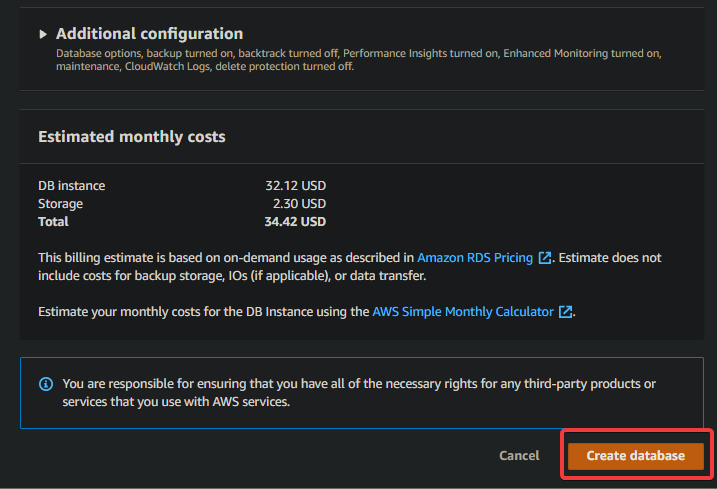
10. Keep other settings at default since you won’t need to change them for this tutorial, and click on Create database to create your MySQL database instance.
11. Finally, navigate to your Databases page again, and you’ll see your newly-created database instance with Creating status.
Click the Refresh button to refresh the list and see the latest status.

After creating the database, the status changes Available, indicating your database instance is ready to use, as shown below.

Creating an IAM User with Programmatic Access
Creating an RDS Database Instance Using the AWS Console undoubtedly works. But perhaps you’re looking for a way to make the database creation repeatable and automated. In that case, the AWS console is not your best choice since it requires user intervention to perform various tasks manually.
Luckily, AWS lets you create and manage AWS resources using code via the AWS CLI. With the AWS CLI, you can integrate your database provisioning process with your IaC or CI/CD pipeline.
Before creating an RDS database instance via the AWS CLI, you’ll first have to create a dedicated IAM user programmatic access to the IAM user. Doing so permits the IAM user to access the AWS CLI.
1. Log out from your IAM user (rds-console), and log in to your root AWS account.
2. Initialize creating an IAM user as you did in steps three to four of the “Creating A Dedicated IAM User for Amazon RDS” section.

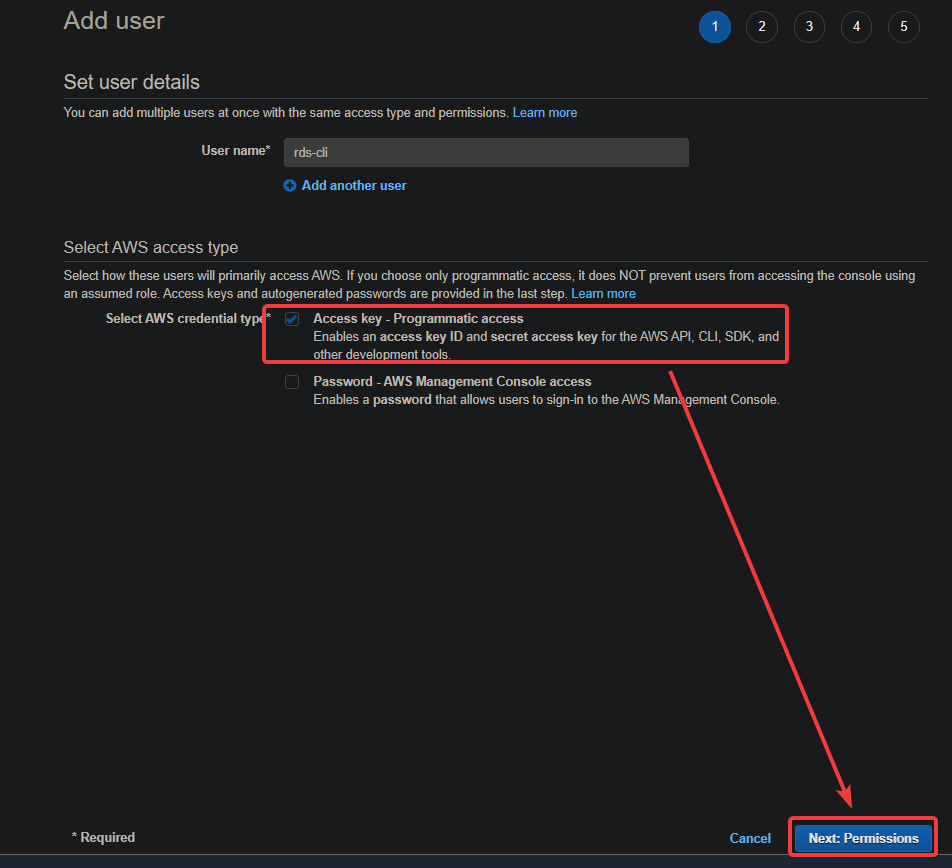
3. Configure the user details and AWS access type with the following:
- Provide a unique name for your IAM user (rds-cli).
- Tick the Access key – Programmatic access option. This option allows the IAM user to access AWS resources via the AWS CLI authenticated by the access key ID and secret access key.
- Click the Next: Permissions button to continue.
4. Now, select Add user to group —> Create group to create a new group.
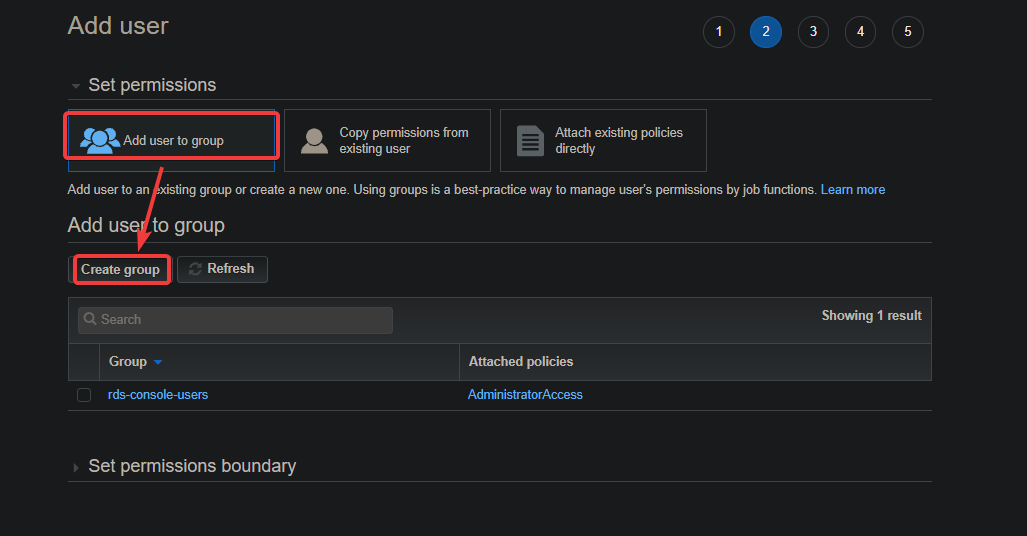
5. Configure the new group details as follows:
- Provide a unique name for your group (rds-cli).
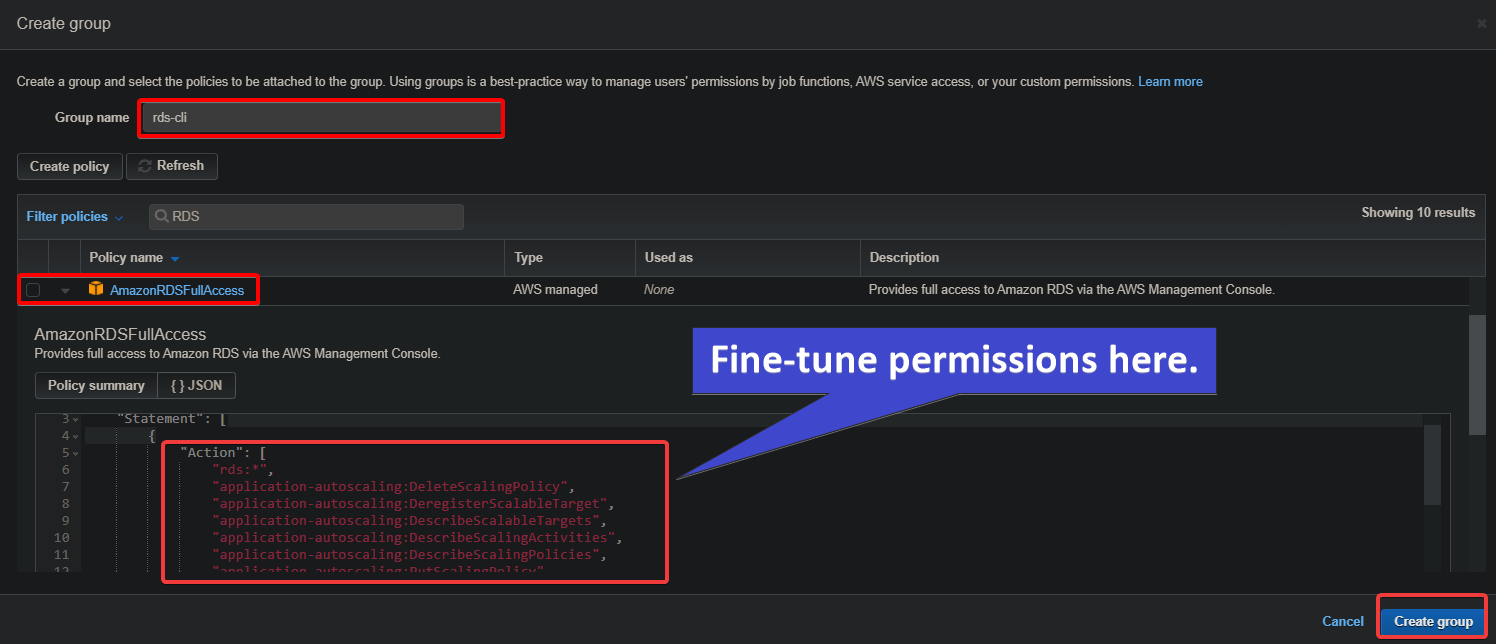
- Tick the AmazonRDSFullAccess role from the list to allow this group to manage all Amazon RDS resources. You can also fine-tune the permissions by selecting specific Amazon RDS actions that this group is allowed to perform by editing the JSON policy document.
- Click on Create group button to create the group.
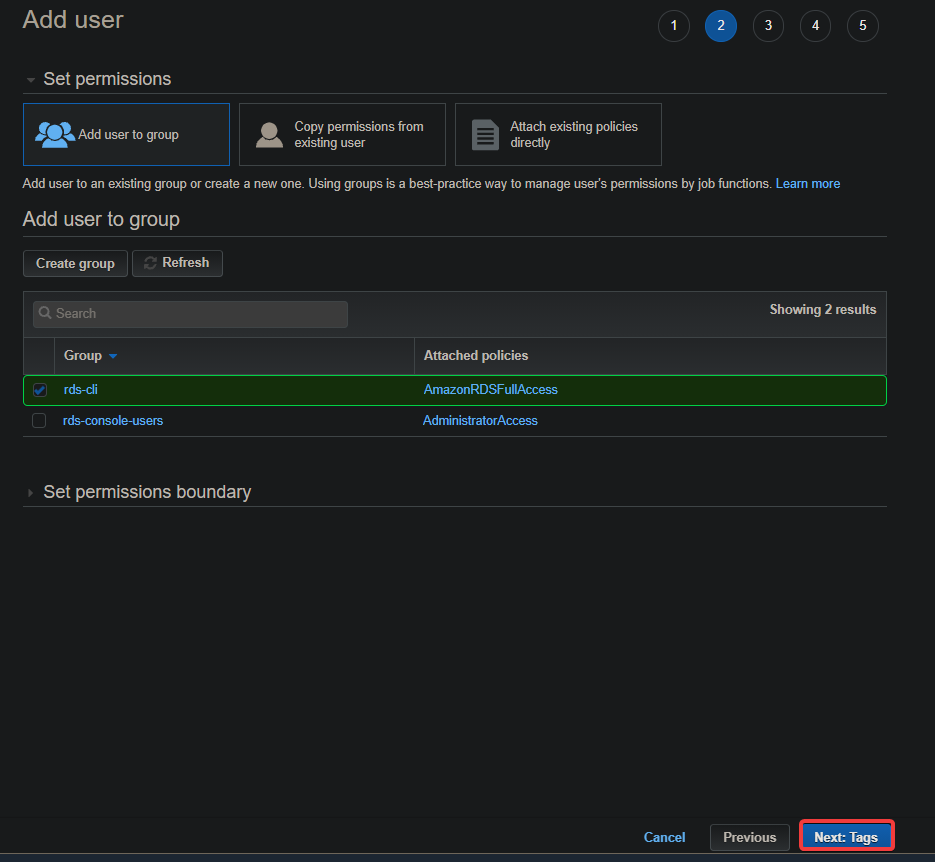
6. Back to the Add user page, tick the box beside the new group (rds-cli), and click on the Next: Tags button to continue.
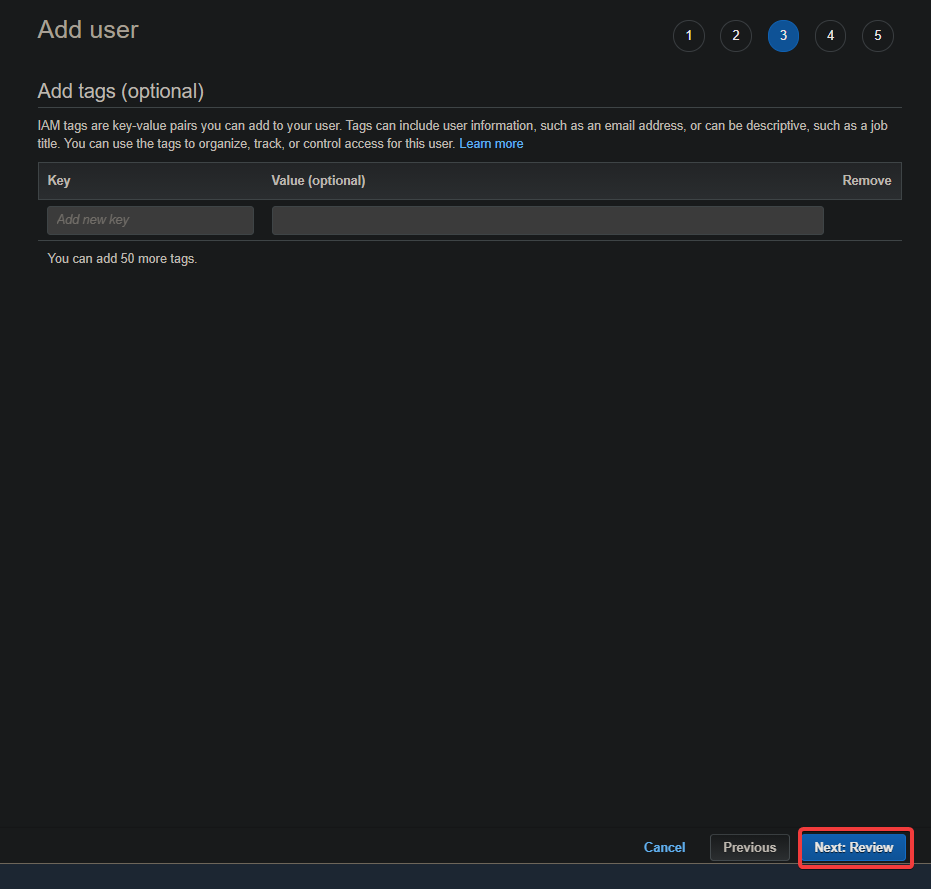
7. Skip adding tags and click on Next: Review, so you can review the settings you configured for the new IAM user.
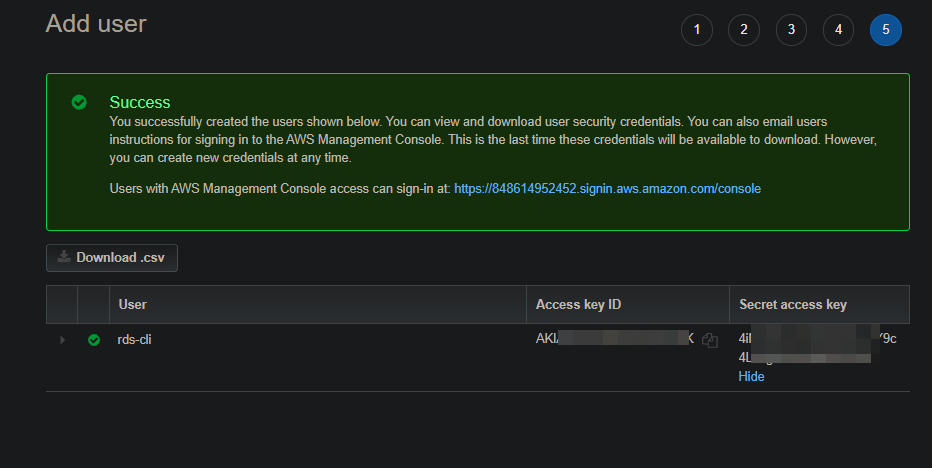
8. Review the new user settings summary, and click on Create user to create the IAM user. Your browser redirects to the IAM user detail page (step nine).

9. Lastly, click on Download .csv to download the CSV file or copy the Access key ID and Secret access key and store them safely. You will not see these keys again after you leave this page.
Creating an RDS Database Instance via the AWS CLI
After creating a dedicated IAM user with the necessary permissions for your CLI environment, you’re now ready to create your RDS database instance via the AWS CLI. But first, ready the keys you noted in the last step of the “Creating an IAM User with Programmatic Access” section.
1. Open your terminal and run the following configure command to configure your IAM user credentials.
This command creates a new file called credentials in the ~/.aws directory. This credentials file stores your IAM user credentials, so you don’t have to provide them every time you run an AWS CLI command.
aws configureProvide the following when prompted:
- AWS Access Key ID – The Access key ID of your IAM user.
- AWS Secret Access Key – The Secret access key of your IAM user.
- Default region name – The AWS Region you prefer to use, but the choice for this tutorial is us-east-1.
- Default output format – Enter json since the json output is human readable.

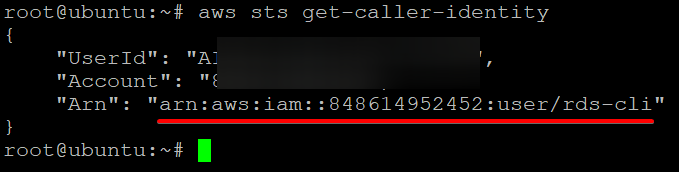
2. Next, run the below sts get-caller-identity command to verify the AWS CLI can assume the IAM role you created in the previous section.
aws sts get-caller-identityEnsure you note down the ARN value. You’ll later compare that ARN with the one in your IAM console.
If you see the error message saying “An error occurred (AccessDenied),” make sure you correctly configured your IAM user credentials. At the same time, verify the proper permissions have been attached to the IAM user and/or group.

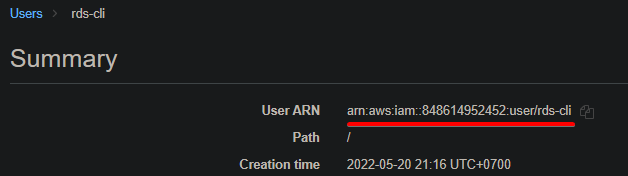
3. Navigate to your IAM user detail page on your IAM console, and compare the ARN with the one you noted in step one.
If the ARNs match, you can settle down that your IAM user can assume the IAM role you created.
4. Now, run the rds describe-db-instances command below (without parameters) to get a list of all the DB instances in your AWS account.
aws rds describe-db-instancesYour output should be blank, like the one below, since you haven’t created any DB instances yet.

5. Run the rds create-db-instance command below to create a new Amazon RDS MySQL database instance by passing the following parameters:
--db-instance-identifier– This parameter specifies a unique name for your new DB instance. In this tutorial, the identifier isrds-mysql-instance.
--db-instance-class– This parameter specifies the DB instance’s compute and memory capacity (db.t3.micro).
--engine– This parameter specifies the database engine (mysql) for this instance.
--master-username– This parameter specifies the username for the master user. In this tutorial, the username isrds_cli.
--master-user-password– This parameter specifies the password for the master user. You can set your own, but in this example, the password is$trongpa$$word.
- –allocated-storage – This parameter specifies the storage size for the DB instance in gibibytes (GiB), which is 5GiB (minimum), in this tutorial.
aws rds create-db-instance --db-instance-identifier rds-mysql-instance --db-instance-class db.t3.micro --engine mysql --master-username rds_cli --master-user-password $trongpa$$word --allocated-storage 5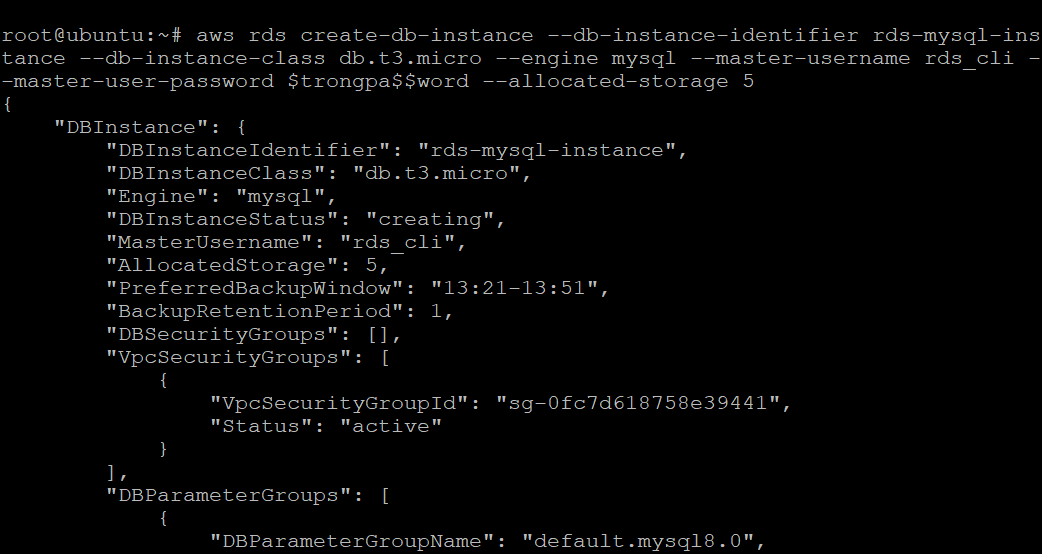
6. Lastly, rerun the following rds describe-db-instances command to check the detailed information of the newly-created DB instance (rds-mysql-instance).
aws rds describe-db-instances --db-instance-identifier rds-mysql-instance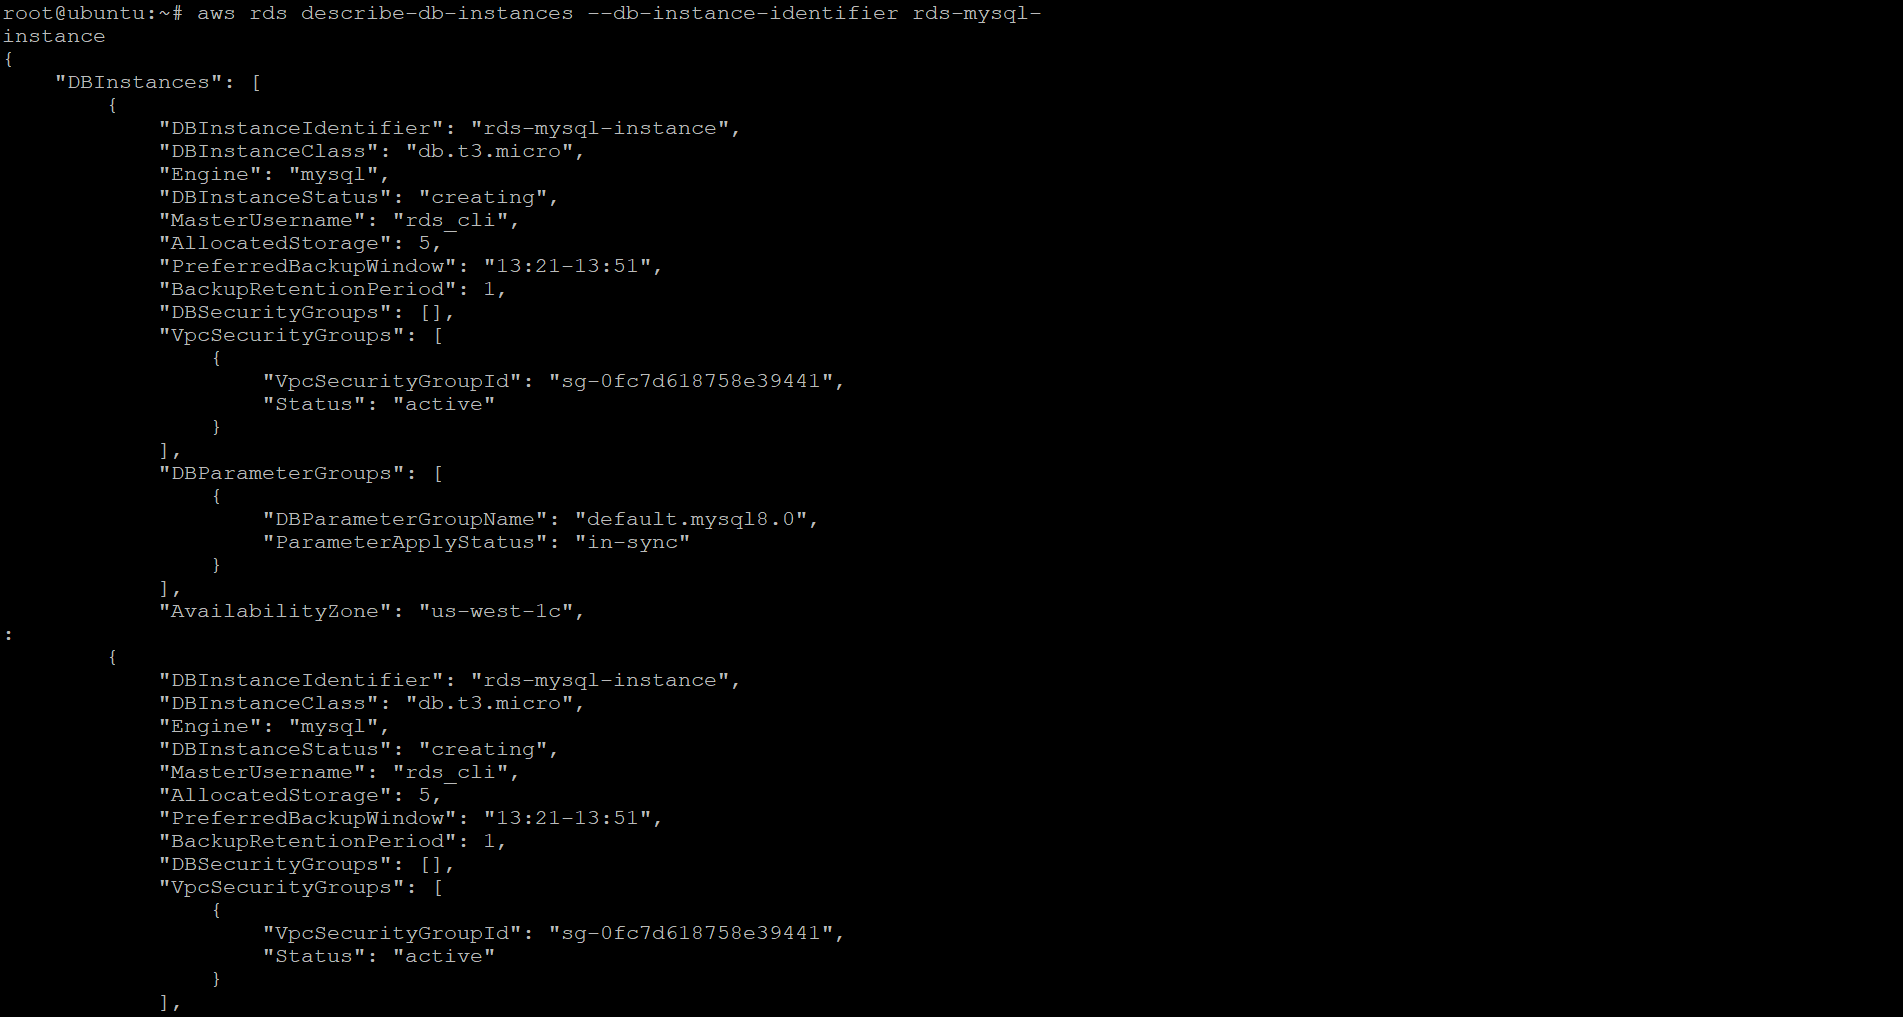
Removing DB Instances via the AWS CLI
You’ve successfully created DB instances, but you wouldn’t want to keep one too many, right? AWS charges you hourly for a DB instance while it exists; even if not used, the cost adds up quickly. But with AWS CLI, you can remove DB instances that don’t serve a purpose anymore.
Run the command below to remove the newly-created DB instance with the --skip-final-snapshot parameter. This parameter prevents Amazon RDS from taking a final DB snapshot before deleting the instance.
aws rds delete-db-instance --db-instance-identifier rds-mysql-instance --skip-final-snapshot

Now, run the rds describe-db-instances command below to check if the DB instance (rds-mysql-instance) has been deleted.
aws rds describe-db-instances --db-instance-identifier rds-mysql-instance
If you see an error message like the one below, you’ve successfully deleted your target DB instance (rds-mysql-instance)

Conclusion
In this article, you’ve learned to create IAM users and roles and Amazon RDS MySQL database instances. With all these awesomeness Amazon RDS showed you, avoid hugely unnecessary charges by deleting your DB instances when you’re done with them.
At this point, you can confidently explore more about Amazon RDS and create and delete DB instances. You already have a running MySQL DB instance on Amazon RDS, so why not try to import your local MySQL DB to the cloud?
With your data in the cloud, you can then take advantage of all the benefits that come with it, such as scalability and high availability.


