

If you are looking to create or manage CloudFormation stacks on AWS Cloud, then automating with the Ansible CloudFormation module is one you must try! Deploying with the Ansible CloudFormation module only requires running a single Ansible command.
AWS CloudFormation is an AWS service that helps you set up your AWS resources to spend less time managing those resources and more time focusing on your applications that run in AWS.
In this tutorial, you’ll learn how to manage IaC with Ansible CloudFormation using different templates in the AWS Cloud.
Read on and get started!
Prerequisites
This tutorial comprises step-by-step instructions. If you’d like to follow along, be sure you have the following in place:
- An Ansible controller host – This tutorial uses Ansible v2.11.7 on an Ubuntu 20.04.3 LTS machine.
- A remote Linux computer to test out the Ansible CloudFormation module (amazon.aws.cloudformation) – This tutorial uses Ubuntu 20.04.3 LTS as the remote node called.
- An AWS account with an AWS S3 bucket.
- An AWS IAM user, an access key ID, and a secret key set up on your local machine with access to create and manage Cloudformation stacks on AWS Cloud.
- An inventory file and one or more hosts are configured to run Ansible commands and playbooks. The remote Linux computer is called myserver, and this tutorial uses an inventory group called web.
- Python v3.6 or later installed on your Ansible controller host and the remote node machine – This tutorial uses Python v3.9 on an Ubuntu machine.
- Python modules boto3 greater than 1.15.0 and botocore greater than 1.18.0 installed on the Ansible controller host and the remote node machine.
Creating JSON to Create a CloudFormation stack in AWS
If you need to create multiple CloudFormation stacks, manually doing so on the AWS console will consume lots of effort and time. Instead, using the Ansible playbook will be a good alternate.
Ansible Playbooks offer repeatable, re-usable configuration management and multi-machine deployment system with which you can launch as many Cloudformation stacks with a single command.
Kick off this tutorial by creating a CloudFormation stack with JSON template using the ansible-playbook command.
1. First, log in to your Ansible controller host using your favorite SSH client.
2. Next, run the following commands to create a directory called ~/ansible_cloudformation_stacks_demo. This directory will contain the playbook. and all the required configuration files that you’ll use to invoke the Ansible CloudFormation module.
# Creating the directory and switching to it.
mkdir ~/ansible_cloudformation_stacks_demo
cd ~/ansible_cloudformation_stacks_demo
3. Switch to your remote node, and create a JSON file called cloudformation-example.json in the tmp directory with your preferred text editor. Populate the file with the following JSON template.
Apart from JSON templates, you can now create a CloudFormation stack with Jinjatemplates, apart from JSON templates. Jinja templates are template files that store variables used at runtime. When Playbooks are executed, these variables get replaced by actual values defined in Ansible playbooks.
The JSON template below creates the AWS EC2 instance named (MyEC2Instance) with the Image id (ami-0fb653ca2d3203ac1), key (ps), and an Instancetype of t2.micro. An Amazon Machine Image (AMI) provides the information required to launch an instance to find the correct ami click here.
This JSON file will be rendered with Ansible Playbook when you execute the Ansible task with template parameter and create the Cloudformation stack. A CloudFormation Stack is a JSON or YAML formatted text file, or you can save these provide extension, such as .json, .yaml, .template, or .txt.
Comments are provided in this JSON file, but JSON does not support comments therefore remove them before utilizing the file.
{
    "AWSTemplateFormatVersion" : "2010-09-09",
# Declaring the Resources that needs to be created in AWS cloud
    "Resources" : {
# Creating AWS EC2 instance in AWS cloud
      "MyEC2Instance" : {
        "Type" : "AWS::EC2::Instance",
# Setting the ami, key and Instance type of AWS EC2 instance
        "Properties" : {
# Declaring the Amazon Machine Image
          "ImageId" : "ami-0fb653ca2d3203ac1",
# Declaring the Instance type of AWS EC2 and key that will be assigned to the instance
          "InstanceType" : "t2.micro",
          "KeyName" : "ps"
            }
         }
     }
}
Building Ansible Playbook to deploy with the template parameter
Now that you have a JSON file created in your local machine, which is great, Next, you will need to create Ansible Playbooks that will execute the task containing the template parameter.
Ansible runs the JSON file templates using the template module.
Let’s get into building the Ansible Playbook to deploy with the template parameter.
Assuming you are still logged into the Ansible controller host:
Instead of a template parameter, you can also use template_path, template_fullpath, template_destpath to define the path of the file accordingly.
1. Create a file called main.yml in the ~/ansible_cloudformation_stacks_demo directory into your Ansible controller host and copy/paste the following YAML playbook contents.
The playbook below creates the CloudFormation stack, ansible-cloudformation-ata to launch one instance with instance type t2.micro in the us-east-2 region. This playbook uses the template that you created in the previous section.
The tutorial creates a cloudformation stack in the us-east-2 region. But a list of regions that AWS support is also available.
---
- name: Ansible Cloudformation module example using a template parameter
# Defining the remote server where the Cloudformation module will run
  hosts: web
# Defining the remote user (ubuntu) where the Cloudformation module will run
  remote_user: ubuntu
  tasks:
    - name: create a cloudformation stack
      amazon.aws.cloudformation:
        stack_name: "ansible-cloudformation-shanky"
# Ansible removes the CloudFormation from the AWS Cloud if you set the state value as absent.
# Ansible creates the CloudFormation in the AWS Cloud if you set the state value as present.
        state: "present"
        region: "us-east-2"
# create a cloudformation stack Using template parameter
        template: "files/cloudformation-example.json"
# If you need to create a cloudformation stack Using Jinja template
# uncomment the template_body parameter using lookup of Jinja2 template and comment template parameter
# template_body: "{{ lookup('template', 'cloudformation.j2') }}"
# Declaring the tags to the CLoudformation stack
        tags:
          Stack: "ansible-cloudformation"
2. Now, run the command below to invoke the playbook (main.yml) that executes the tasks to create the CloudFormation stack on the AWS cloud.
# Executing the Ansible Playbook to create the CloudFormation stack on the AWS cloud
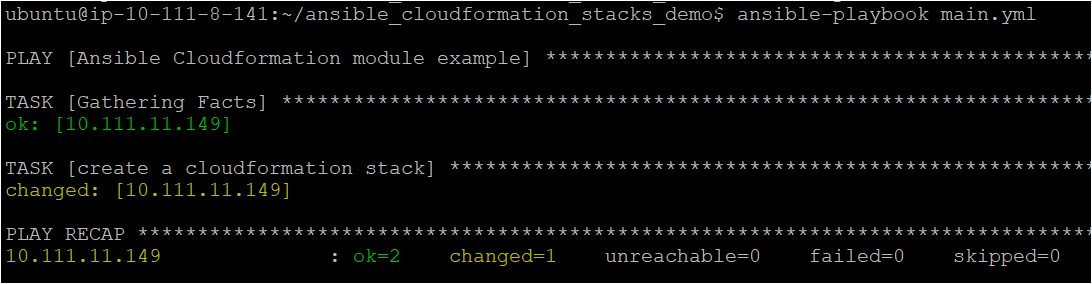
ansible-playbook main.ymlBelow, you can see that TASK [Gathering Facts] shows an OK status, which indicates all the configuration files and parameters look good to Ansible.
The TASK [create a cloudformation stack] shows a changed status that tells you Ansible completed the task you specified in the Ansible playbook.
Verifying the CloudFormation stack in AWS Cloud
At this point, you should have a CloudFormation stack built-in AWS Cloud but let’s verify to make sure in the AWS Management Console.
1. Open your favorite web browser, navigate to the AWS Management Console and log in.
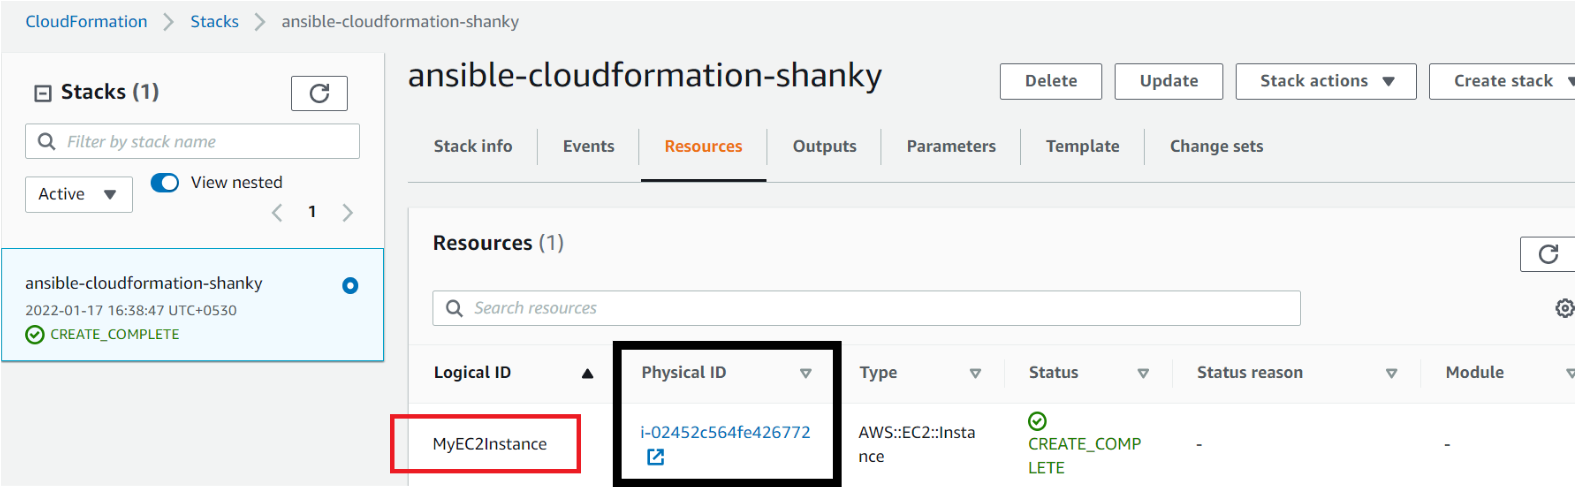
2. Open your favorite web browser, and log in to the AWS Management Console. Search for Cloudformation in the search box at the top of the console, and click on the Stacks menu item.
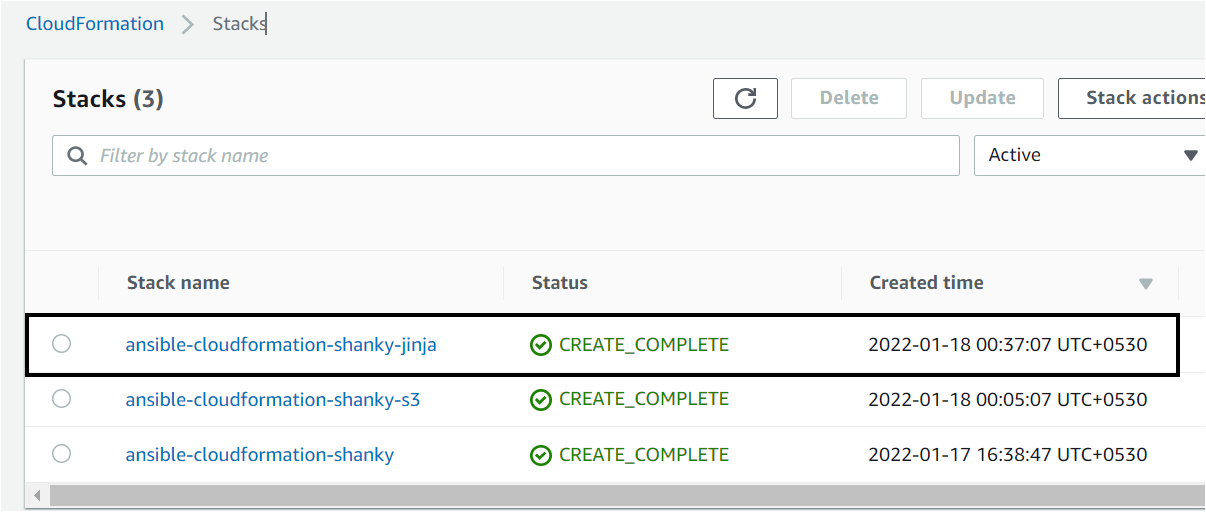
Below, you can see the Logical and Physical ID of the stack (ansible-cloudformation-shanky) you created previously with the Ansible Playbook.
If you no longer require the web application or AWS instance, you can delete the stack, deleting all related resources.
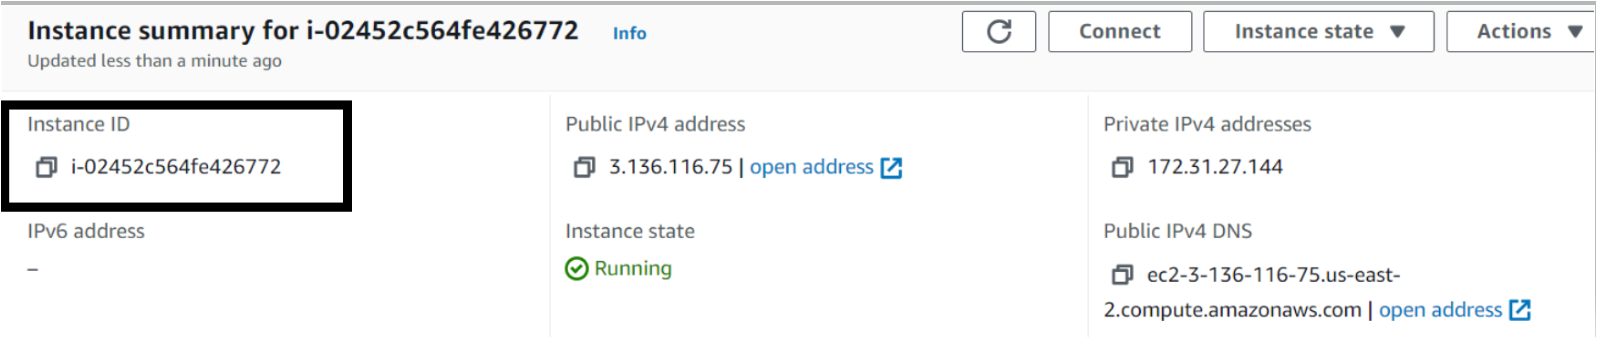
3. Finally, navigate the AWS EC2 page to verify the AWS EC2 instance.
AWS CloudFormation rolls the stack back and automatically deletes any created resources if a resource can’t be created. And if a resource can’t be deleted, any remaining resources are retained until the stack can be successfully deleted.
Like the one below, you’ll see your newly created instance with the same ID from the CloudFormation stack (step two).
Again while verifying, you’ll see another CloudFormation stack if you would have created using Jinta templating(ansible-cloudformation-shanky-jinja) created in the AWS Cloud.
Creating a CloudFormation stack with JSON templates or with templates_paramaters stored on your local machine could be risky as they can get lost or corrupted. It is recommended to store your template in cloud-based storage such as AWS S3 bucket and call it from the Ansible module using the template_url parameter.
Conclusion
In this tutorial, you’ve taken advantage of the Ansible AWS CloudFormation module to manage AWS CloudFormation stacks with a single command. You also realized that there are many ways to create CloudFormation stacks, such as using JSON and Jinja templates.
Why not deploy AWS services using the Ansible CloudFormation module in your upcoming projects with this newfound knowledge?


