


Are you having difficulties querying data, especially without a managed infrastructure? Why not consider AWS Athena? AWS Athena is an interactive query service that lets you run SQL queries against a massive amount of data.
In this tutorial, you’ll learn to take advantage of Athena’s features and integration with AWS Glue to analyze data in Amazon S3.
Sit back, relax, and master the effortless Serverless SQL with AWS Athena!
Prerequisites
- An AWS account (Free-tier account with charges applicable on queries).
- Python version 3.6 or later – This tutorial uses Python version 3.10.4.
- A Windows or Linux computer – This tutorial uses Windows 10 PC.
- A code editor – This tutorial uses Visual Studio Code (VS Code).
- An S3 bucket containing a JSON or CSV formatted file to analyze structured data – This tutorial uses an S3 bucket called athena-112.
Creating an Identity and Access Management (IAM) Role for Athena
Before you can manage access to AWS services, you’ll attach some Athena-managed policies to your IAM user for access to Athena.
Athena enables cross-account access to S3 buckets owned by other users. In addition, Athena can process unstructured, semi-structured, and structured data
There are two managed policies for Athena, AmazonAthenaFullAccess, and AmazonS3FullAccess. These policies grant Athena permission to query Amazon S3 and store the results of queries in a bucket.
To create an IAM role for Athena:
1. Open your favorite web browser, and sign in to the AWS Management Console in your browser.
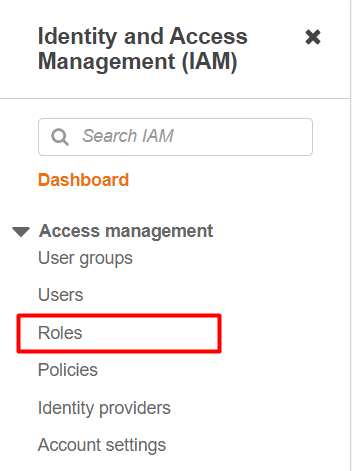
2. Navigate to the IAM identity permissions console, and click on the Roles option from the side menu to initiate creating a role.
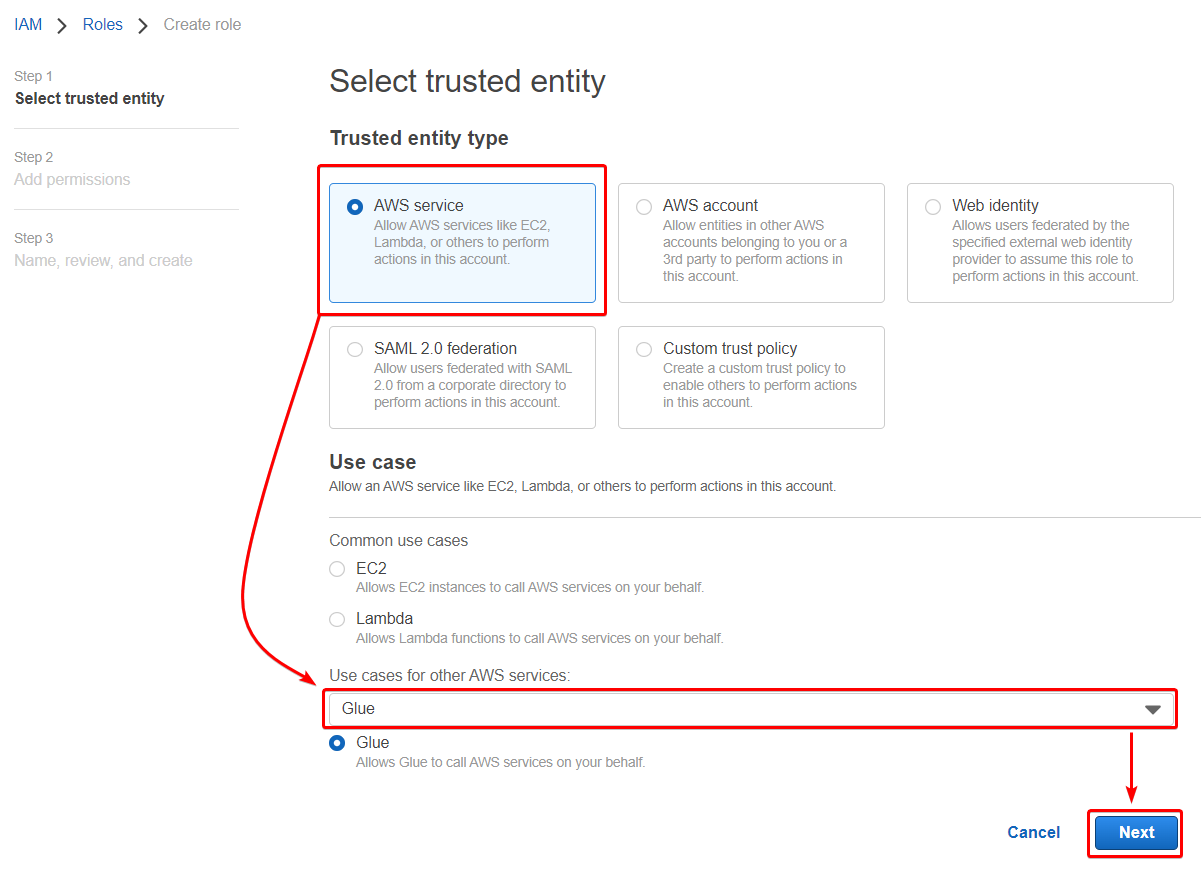
3. Leave Trusted entity type as AWS service, select Glue from the dropdown field under Use case, and click Next.
AWS Glue powers data integration so you can analyze your data and put it to use in minutes instead of months.
4. Now search for the policy name AmazonS3FullAccess in the search box and tick the box.
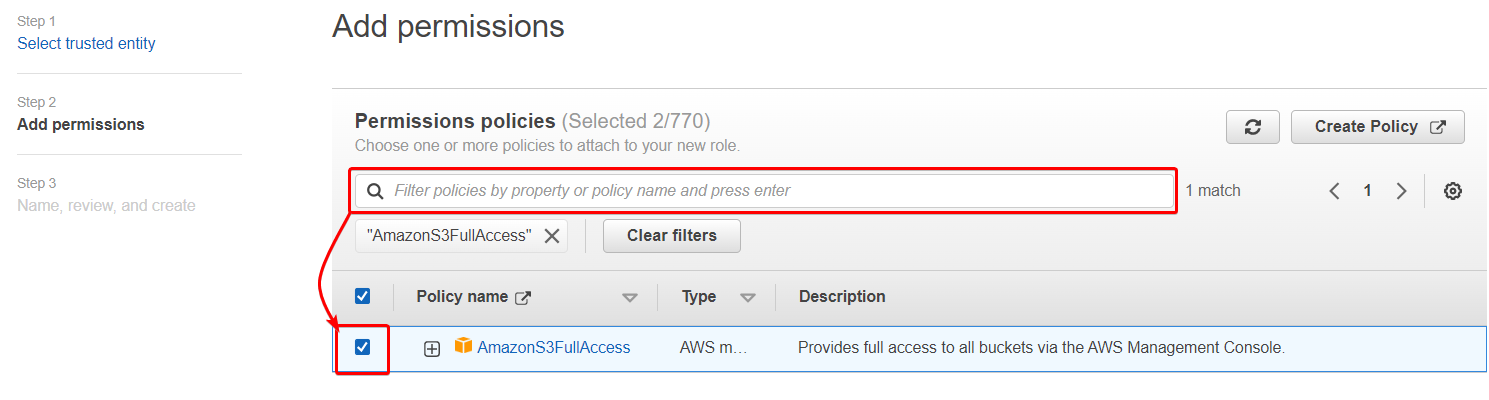
5. Repeat the same process as you did in step three. But this time, add AmazonAthenaFullAccess from the list and click Next.
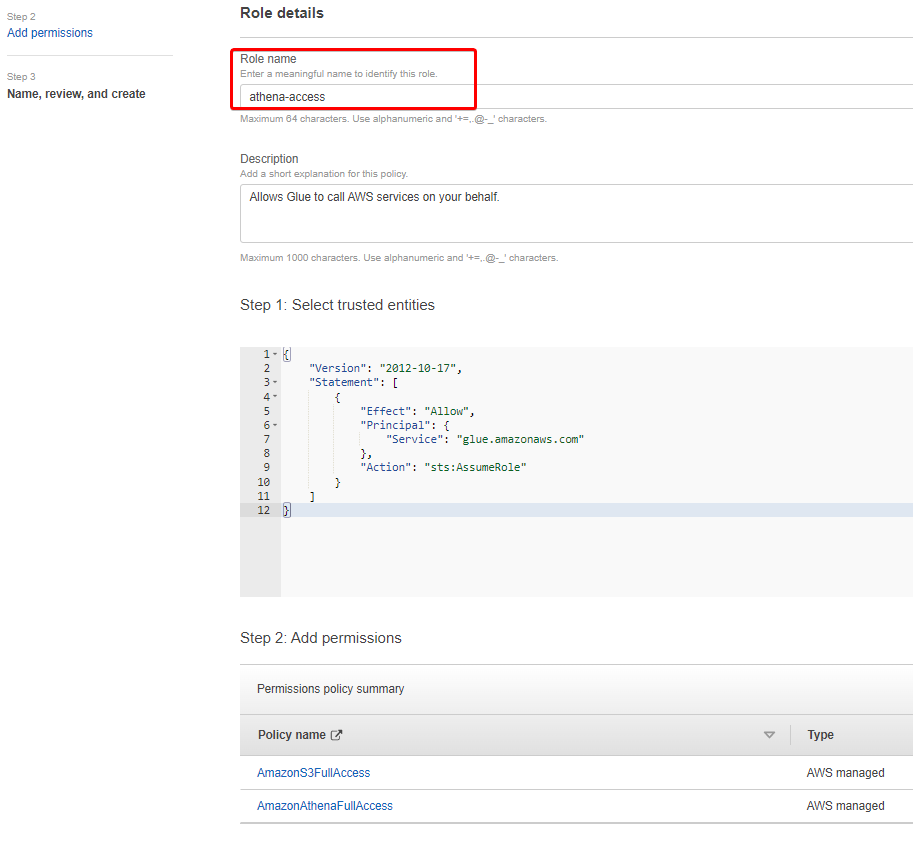
6. Specify a unique role name, but this tutorial’s choice is athena-access.
Review the roles’ settings, and click on Create role (bottom) to create the role.
Configuring the Query Result Location
After attaching Athena-managed policies to your IAM user, you’ll need a place to store your data. How? Set your S3 bucket as the query result location, where the queries are stored as objects.
To configure your query result location:
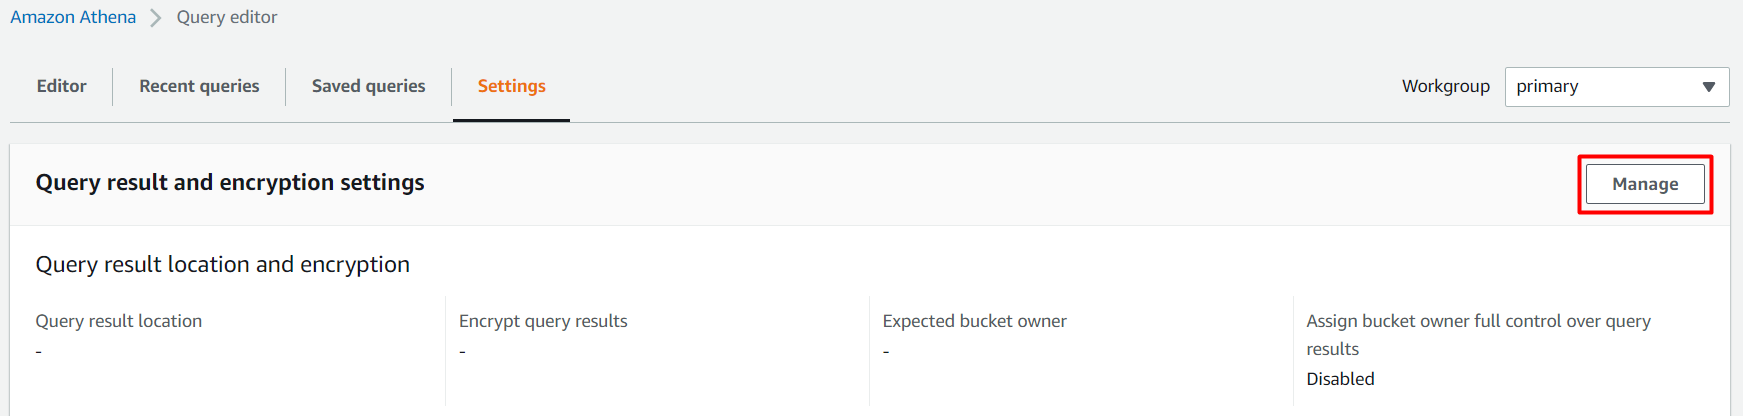
1. Open Athena, and click on View settings from the Query editor to view editor settings.
If you’ve never used Athena, you’ll be asked to provide a result location for queries.

2. Next, click on Manage (right-most), as shown below, and access the Manage settings page for specifying output location and account ID.
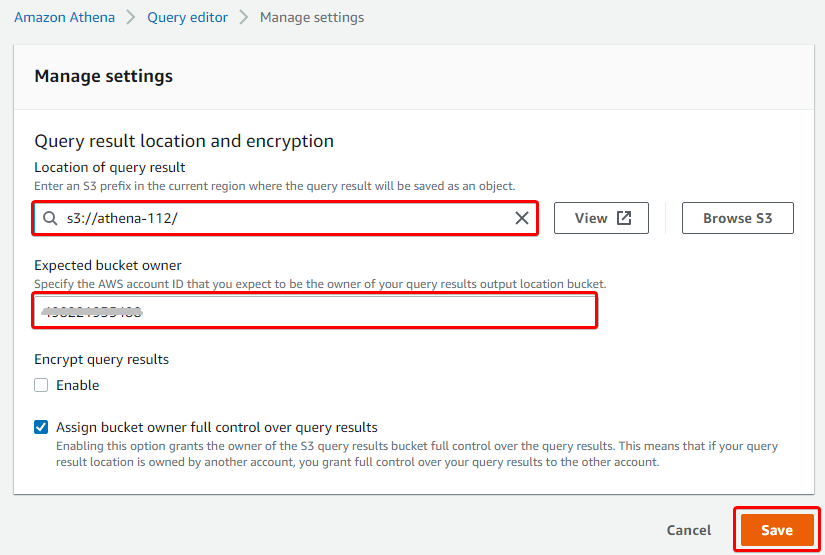
3. Lastly, on the Manage settings page, provide the necessary parameters like in the screenshot below, and click Save.
For the Location of query result, specify the path to your S3 bucket or click on Browser S3 to locate your bucket. In this tutorial, the bucket’s path is s3://athena-112/.
Creating and Scheduling an AWS Glue Crawler
You’ve set your query result location, and now you’re ready to create an AWS Glue Crawler. Athena integrates with the AWS Glue Data Catalog, offering a central metadata repository for S3 data. This feature allows you to create tables and query data in Athena based on a central metadata repository available throughout your AWS account.
An AWS Glue Data Catalog consists of a database and tables populated by an AWS Glue Crawler. On the other hand, AWS Glue Crawler connects with these catalogs to extract the schema of the data with other statistics.
To create and schedule an AWS Glue Crawler:
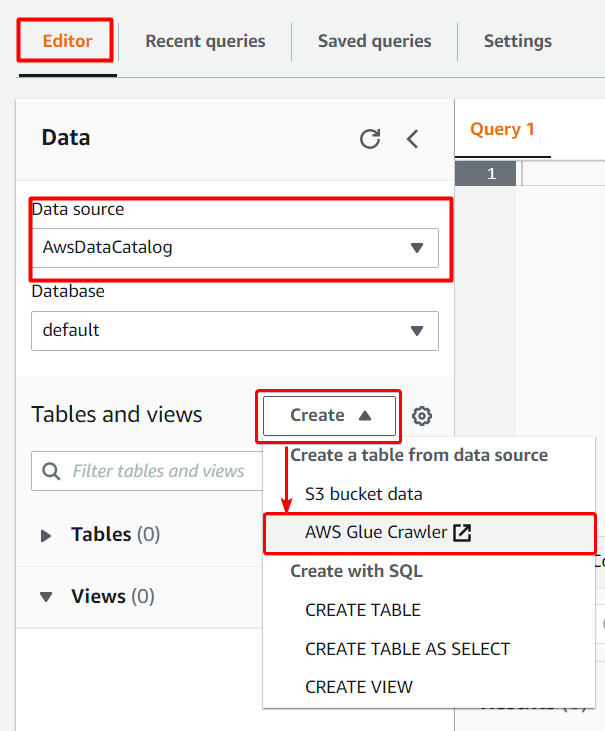
1. On Athena’s query editor page, click on the Editor tab, and you’ll see the AwsDataCatalog option is selected as Data Source by default. This option indicates that AWS Data Catalog will crawl and inspect the objects within the source data’s bucket.
Choose AWS Glue Crawler from the Create dropdown button, and a Glue page opens in a new tab on your browser.
Athena connects to data stored in S3 using the AWS Glue Data Catalog. After the connection is made, data in the form of table appears in Athena’s query editor. The AWS Glue Data Catalog is built on top of other datasets and connects Athena to other data sources using various connectors.
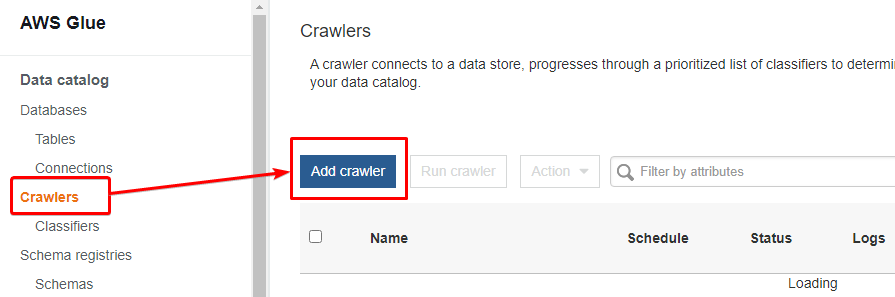
2. On the left menu panel, choose Crawlers, and click the Add Crawlers button to create a crawler.
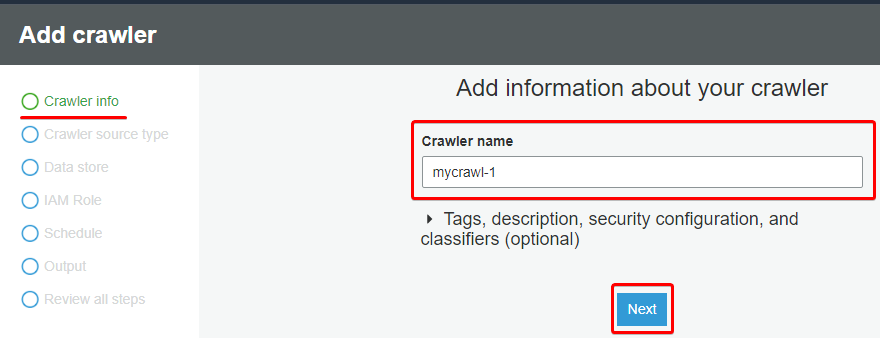
3. Fill in all the details for the crawler, starting with the Crawler name, then click Next.
You can name the crawler as you like, but this tutorial’s choice is mycrawl-1, as shown below.
4. Next, choose Crawler source type as Data stores since you’ll crawl the data from the S3 storage.
Leave the Crawl all folders option selected for repeated crawling, and click Next.
Glue crawler lets you extract information from existing schemas by choosing Existing catalog tables.

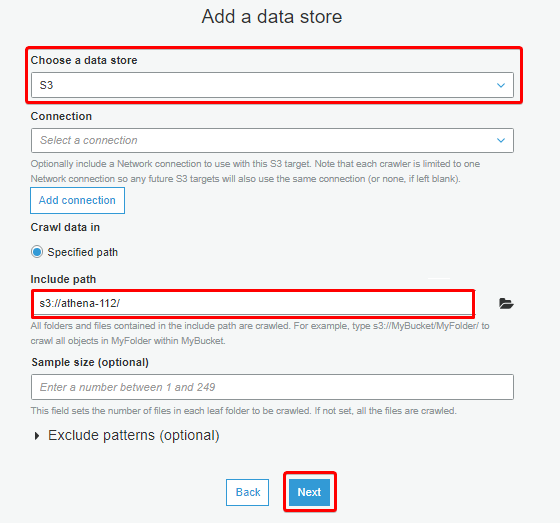
5. On the Add a data store section, select S3 as the data store, specify your S3 bucket path (or click on the directory icon, locate your S3 bucket), and click Next.
6. Ignore the Add another data store section, and click Next.
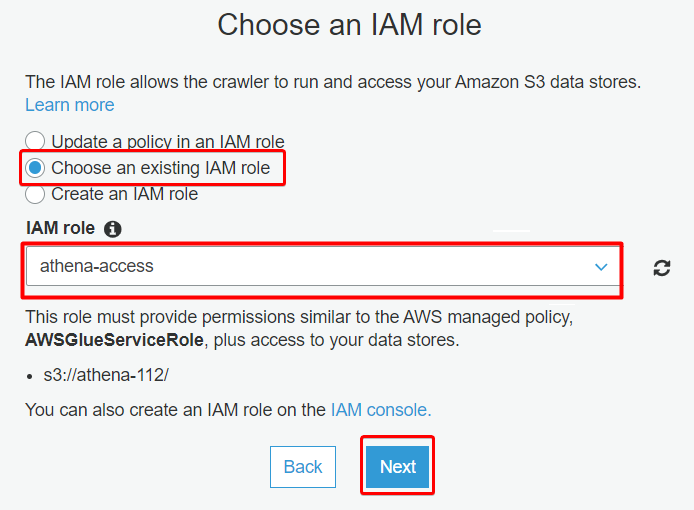
7. Specify the IAM role with the following, and click Next:
- Select the Choose an existing IAM role option.
- Input the IAM role (athena-access) you created for Athena in the “Creating an Identity and Access Management (IAM) Role for Athena” section.
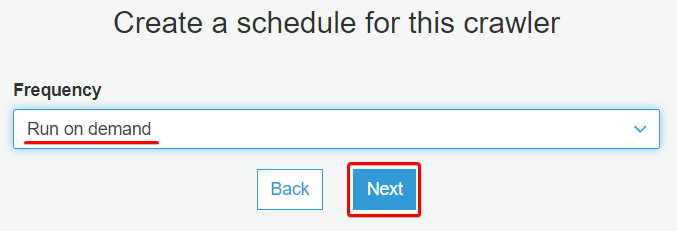
8. Select the Run on-demand option from the Frequency dropdown field, and click Next.
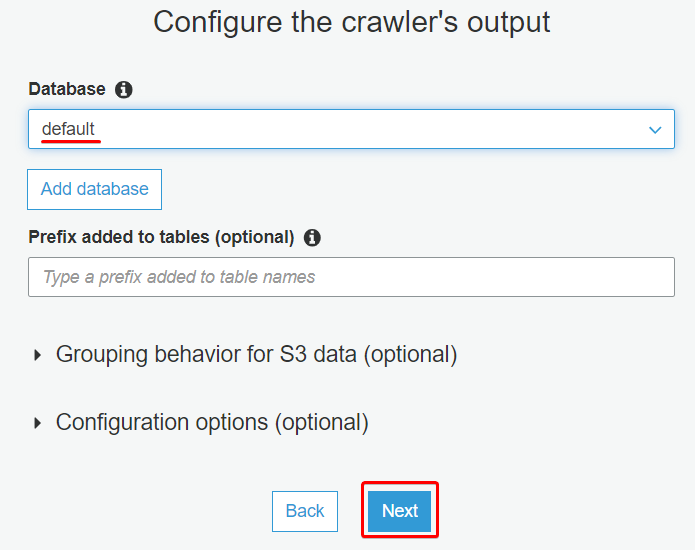
9. Next, select the default option under the Database dropdown field, and click Save. Setting the default option creates a new table under the default database.
For each dataset to query, Athena requires an underlying table that obtains and returns query results. So before querying data, a table must be registered in Athena automatically or manually.
But if you prefer to create a new database, click on Add database instead, and provide a database name.
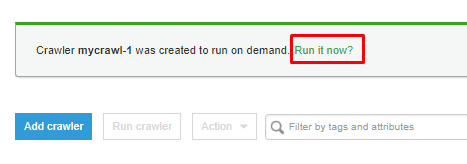
10. Once the crawler is created, click on the Run it now hyperlink to run the crawler.
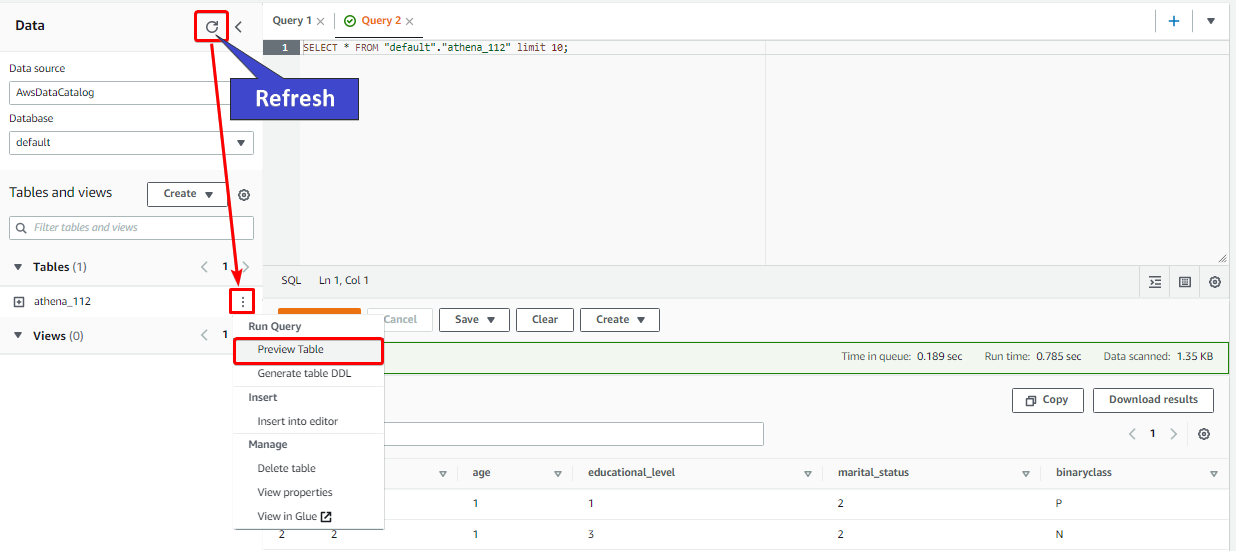
11. Head back to Athena console and hit the refresh icon (left panel). You’ll see a new table added under the Tables section.
Optimized for fast performance, Athena’s ability to execute queries directly from AWS SageMaker brings large quantities of data directly to data scientists’ fingertips.
Click on the vertical ellipsis, and select the Preview Table option to see the table’s data once the query is executed.
You can download the results of previous queries from the Recent queries tab or select the query and choose Download results. Queries are retained for a maximum of 45 days.
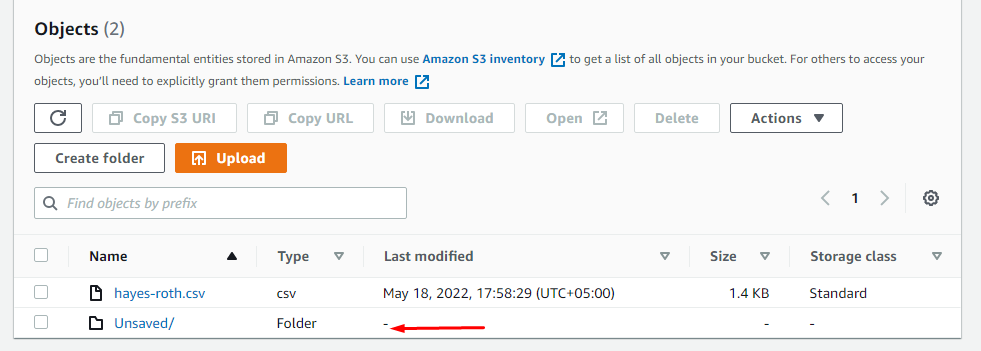
12. Finally, navigate to the specified location of output (s3://athena-112/) for query output. You’ll see a folder similar to the one below.
This folder contains the result of your queries in a CSV file and information about some metadata.
Querying AWS Athena With Boto3
You’ve already dumped a raw CSV file and seen how Athena provides a user-friendly interface to query useful information from documents. But hold your horses because Athena can do more.
Athena also lets you operate on your data using SQL commands, provides different options to run queries, and lets you re-use saved query statements on data stored in S3.
Athena is widely accessible to anyone. Business analysts and data scientists adopt Athena to analyze data using SQL queries regardless of the operating environment.
If you wish to run queries to Athena from Python, you have a few options, PyAthenaJDBC, JayDeBeApi, and boto3. But for this example, you’ll use boto3 to interact with Athena, and you must specify the S3 path where you want to store the results.
To query Athena with Boto3:
1. Create a Python file named app.py with your preferred code editor, add the following code to the file, and save the changes. Ensure to fill the key:value pairs below with your own details.
You’ll add partial codes on each step to better understand the querying process, but you’ll see the complete code in this section’s latter part.<>
The code below provides the query to fetch the entire content from your S3 storage’s file or filter particular results with a function.
import boto3
import pandas as pd
import io
import re
import time

# region - The region where you created your database.
# database - The name of the database.
# bucket - Your bucket name.
# path - The location where the results of the queries will be stored.
# query - store data in the exact location as the CSV file.

params = {
    'region': 'us-east-2',
    'database': 'default',
    'bucket': 'athena-112',
    'path': 'temp/athena/results',
    'query': 'SELECT * FROM "default"."athena-112" limit 10;'
}

session = boto3.Session()2. Next, add the code below to the app.py file. This code dispatches the query to Athena with essential details and returns an execution object using the start_query_execution method.
The start_query_execution method is a built-in method provided by Boto3 to interact with Athena. Athena will process the query asynchronously in the background.
def athena_query(client, params):

# start_query_execution method - runs the SQL query statements.
# QueryString - has SQL query statements to be executed.
# QueryExecutionContext - has the database within which the query executes.
# ResultConfiguration - specifies information about where and
	# how to save the results of the query execution.
# All information is dispatched to an executable object response

        response = client.start_query_execution(
        QueryString=params["query"],
        QueryExecutionContext={
            'Database': params['database']
        },
        ResultConfiguration={
            'OutputLocation': 's3://' + params['bucket'] + '/' + params['path']
        }
    )
    print(response)
    return response
3. Add a new function in the same file (app.py) that establishes a connection between Athena and your S3 storage. The code below polls and stores the results of the query in the specified destination.
# Information about the query execution is saved with a unique ID.

def athena_to_s3(session, params, max_execution = 5):
    client = session.client('athena', region_name=params["region"])
    execution = athena_query(client, params)
    execution_id = execution['QueryExecutionId']
    state = 'RUNNING'

    # Validates and stores information about the successful execution of a query
    # and store the information to the specified path in an S3 bucket

    while (max_execution > 0 and state in ['RUNNING', 'QUEUED']):
        max_execution = max_execution - 1
        response = client.get_query_execution(QueryExecutionId = execution_id)

        if 'QueryExecution' in response and \
                'Status' in response['QueryExecution'] and \
                'State' in response['QueryExecution']['Status']:
            state = response['QueryExecution']['Status']['State']
            if state == 'FAILED':
                return False
            elif state == 'SUCCEEDED':
                s3_path = response['QueryExecution']['ResultConfiguration']['OutputLocation']
                filename = re.findall('.*\/(.*)', s3_path)[0]
                return filename
        time.sleep(1)

    return False

# Calling above function
s3_filename = athena_to_s3(session, params)
4. Now, save the changes on your app.py file, open your terminal, and run the following command to run your code (app.py)
python app.pyBelow, you can see the executed object details. After running the code, results will be stored in the specified location.

5. Add the following cleanup function at the bottom of the app.py file’s content, and save the changes. This function cleans things up by removing all objects from the specified path.
# Cleanup method will delete the results of queries from the specified path

def cleanup(session, params):
    s3 = session.resource('s3')
    my_bucket = s3.Bucket(params['bucket'])
    for item in my_bucket.objects.filter(Prefix=params['path']):
        item.delete()

# Calls the cleanup function to remove all files from the specified S3 folder
cleanup(session, params)Following steps one to five, you’ll end up with the complete code, found on ATA Learning’s GitHub scripts repository.
6. Once the code is downloaded or copied, rerun the python command below to execute your code (app.py).
python app.pyYou’ll see object details the same as seen in step four. But this time, no query results folder on the specified path. Why? Because the cleanup function is invoked right after the queries result are stored in the specified location.
For users, the creation process of results from queries goes unnoticed as the cleanup method is called during the execution of code.
Conclusion
Throughout this tutorial, you’ve learned how AWS Athena integration with AWS Glue creates a unified metadata repository you can use across various services. You’ve also crawled data sources to discover schemas and populate catalogs with new tables.
Athena integrates with other AWS services, including AWS CloudTrail, AWS CloudFormation, and Elastic Load Balancing (ELB). Within these services, you can use queries to identify trends and logs to analyze traffic patterns to and from ELB instances and backend applications.
You’re only charged for the queries you run, which makes the service convenient and cost-effective. So why not try to scale and execute multiple queries in parallel with Athena? Yield quick results even with massive datasets and complex queries with Athena today!


