


Docker containers are a popular way to package and deploy software to your servers. Docker containers offer many benefits, such as portability, isolation, and ease of use. If you wish to enhance your software development, why not deploy with an Ansible Docker container?
Ansible is a powerful tool for automating software and hardware configurations. And in this tutorial, you’ll learn how to use Ansible to deploy Docker containers efficiently.
Ready? Read on and never resort to manually deploying a container again!
Prerequisites
This tutorial will be a hands-on demonstration. If you’d like to follow along, be sure you have the following.
- A Linux machine (Ansible control node) – This tutorial uses Ubuntu 20.04, but any modern Linux distribution will work.
- Two or more machines (Ansible hosts) – These hosts can be virtual machines, physical servers, or Rasberry Pis.
- SSH keypairs are set up between the control node and all the managed hosts.
Creating an Inventory File
Before deploying containers, Ansible needs to identify which hosts to manage. How? You’ll create an inventory file to declare the hosts that Ansible can manage. At the same time, the file contains any variables or settings specific to those hosts.
Inventory files can be in one of two formats, INI or YAML. But this tutorial uses the YAML format since it’s more human-readable. The inventory file is typically named hosts and is stored in the Ansible project directory.
To create a hosts inventory file:
1. SSH to your control host and create a file called hosts in the /etc/ansible directory using your preferred text editor.
Note that creating a hosts file in the /etc/ansible directory requires sudo access.
2. Next, add the following configuration to the end of the hosts file. This configuration declares a group of hosts Ansible can manage.
The managed hosts must be reachable over SSH using the key pairs you set up in the “Prerequisites” section.
Be sure to replace the following, save the changes and close the file:
server1andserver2with the servers’ hostnames.
- <ip address> with the actual IP addresses of your managed hosts.
# Group name of hosts (you can rename this as you like).
[webservers]

# List of hosts (you can name these hosts "ansible_host" as you like).
server1 ansible_host=<ip address>
server2 ansible_host=<ip address>

# Sets variables applied to all hosts.
[all:vars]
# Since the default version of Python on most Ubuntu distributions is Python 2
# set Ansible to use Python 3 on all managed hosts.
ansible_python_interpreter=/usr/bin/python3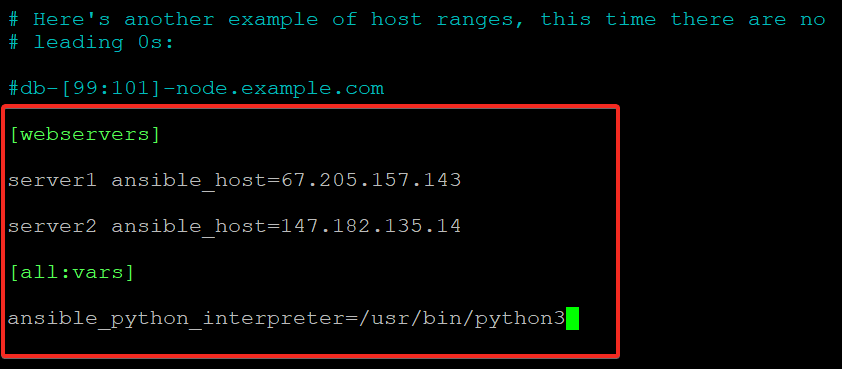
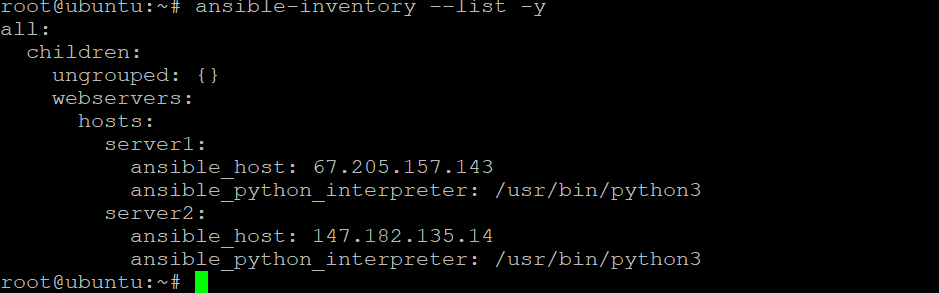
3. Run the below ansible-inventory command to verify that the inventory file (hosts) was created correctly.
ansible-inventory --list -y
Below, you can see two groups (webservers and all), and each group contains the appropriate hosts you declared in the hosts file.
4. Finally, run the below command with the ping module to verify that Ansible can connect to your managed hosts.
ansible all -m ping -u root
As you can see below, the managed hosts are reachable as Ansible can connect to them. The SUCCESS messages indicate that the hosts are running.

Creating the Playbook to Define Tasks
You now have a working inventory file, and that’s a great start. But the inventory file is not doing much right now unless you write a playbook. You’ll write a playbook that deploys a basic Docker container on your managed hosts. A playbook is a YAML file that defines a set of tasks to be carried out on managed hosts.
Ansible and Docker offer a flexible and efficient way to deploy software applications in portable containers with a playbook. As a result, the human error when manually configuring servers is eliminated, and the application environment can be replicated.
Create a new file called playbook.yml in your current working directory using your preferred text editor.
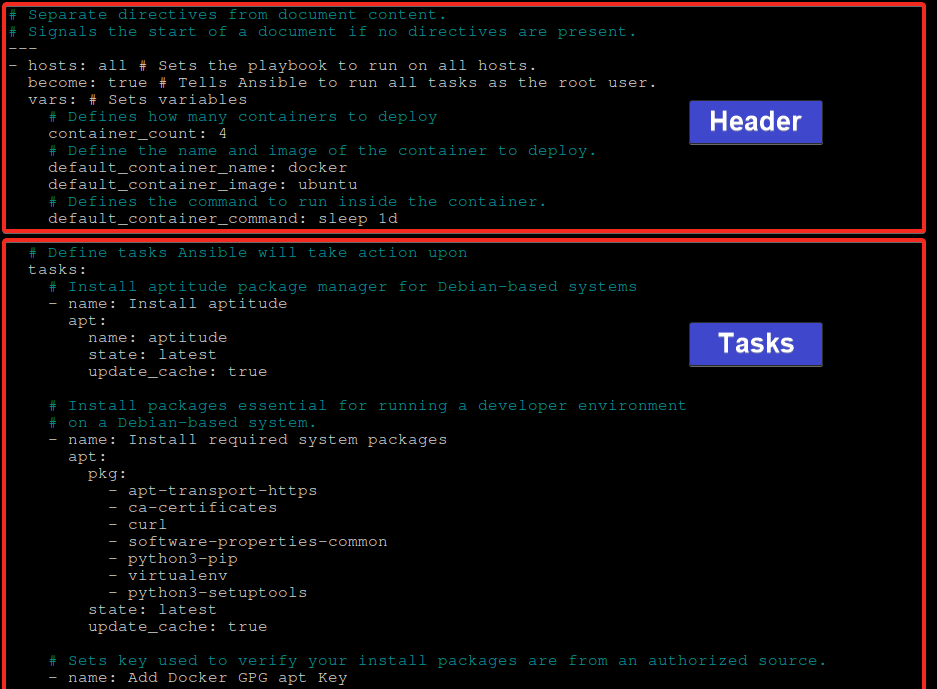
Now, copy/paste the code block from a GitHub repository into the newly created playbook.yml file.
Note that YML is indent-sensitive, so be sure to paste the code as is to the playbook.yml file.
Notice the code is divided into two sections:
- The first header (
---) contains general information which every playbook must have. - The second section (
tasks) is where you write the actual tasks for Ansible to carry out on your hosts.
Securing the Playbook with Ansible Vault
Now that you have a playbook, you might want to share it with other people for collaboration. But not to the point you’re also sharing sensitive information, such as passwords and API keys.
How to secure your sensitive information? Ansible Vault allows you to encrypt playbooks and variables. This way, you can share your playbooks as much as you want without sharing your secrets.
Suppose you want to encrypt the whole playbook file so that only people with the vault password can decrypt, read, and run it. Let Ansible Vault do the trick.
1. Run the following ansible-vault command to encrypt your playbook file (playbook.yml).
ansible-vault encrypt playbook.ymlWhen prompted, provide a secure password (vault password), as shown below. Save the password in a safe place, as you will need it later to decrypt the playbook file.

2. Next, run the cat command to view the playbook file.
cat playbook.ymlAs you can see, the playbook file is encrypted and can only be read by someone who has the password to decrypt the file.
The $ANSIBLE_VAULT;1.1;AES256 string at the header of the playbook file indicates that the file is encrypted with Ansible Vault using the AES256 cipher. The random string of characters at the end of the file is the encrypted version of the playbook.

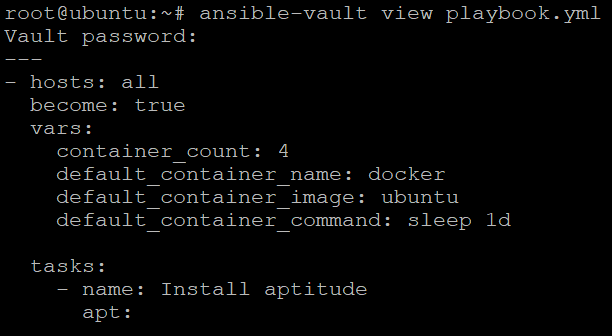
3. Lastly, run the following command to view the contents of the encrypted playbook (playbook.yml).
ansible-vault view playbook.ymlProvide the password you used to encrypt the file when prompted, and you’ll see the decrypted version of the file, as shown below.
Now you can share your playbook file with the right people without worrying about sharing sensitive information.
Running the Playbook to Deploy Ansible Docker Container
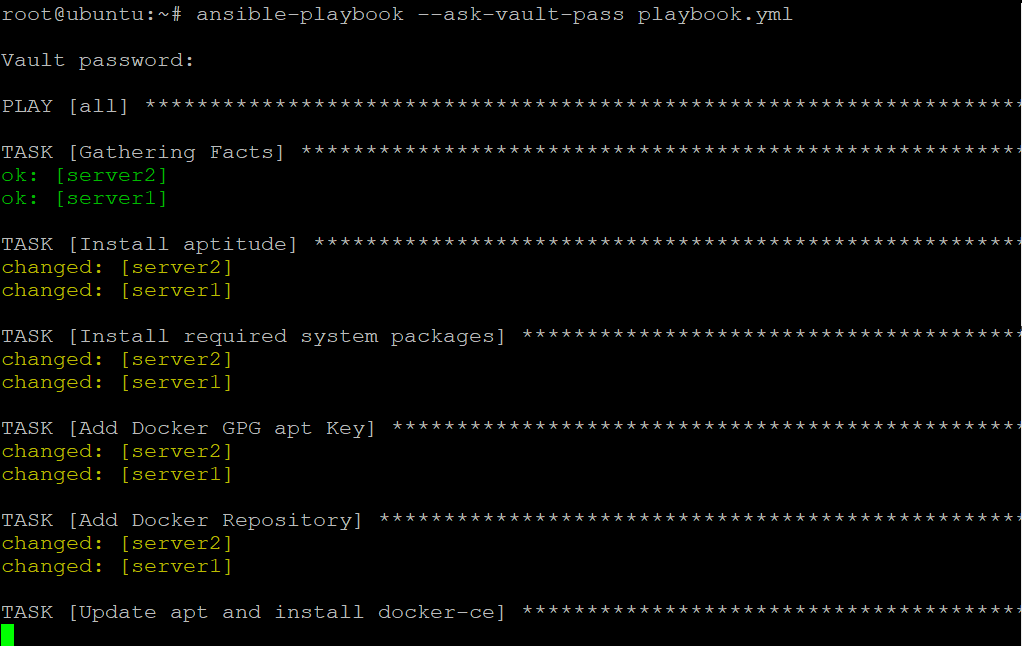
Now that you have all the necessary components, you’re ready to run your playbook to deploy Docker containers on your managed hosts. Since the playbook file (playbook.yml) is encrypted, you’ll have to append the --ask-vault-pass option to ask for the vault password.
Run the following ansible-playbook command against your playbook (playbook.yml) to deploy Docker containers to your managed hosts.
ansible-playbook --ask-vault-pass playbook.yml
Provide the vault password, and Ansible will run the tasks in the playbook (playbook.yml) to create Docker containers on your hosts.
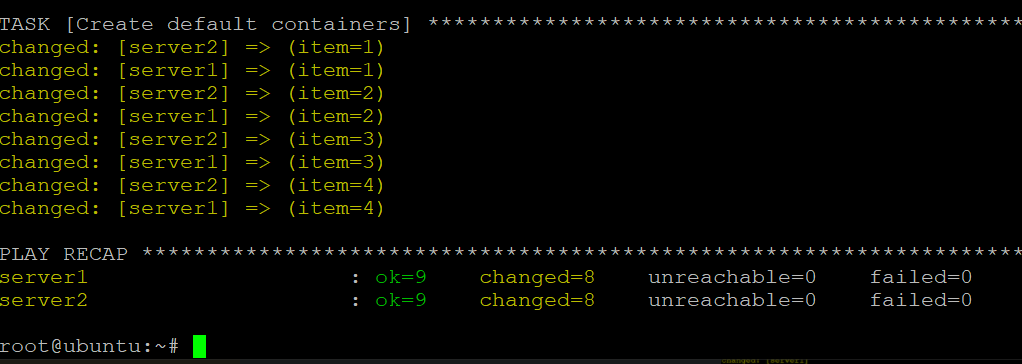
You can see below that Ansible configured both servers successfully with the following status:
- The ok status indicates the task was executed without any problems.
- The changed status indicates changes are made to the server configuration.<>
Now, SSH to each host and run the docker command below. This command lists all (-a) the running and stopped containers on the server.
docker ps -a
Below, you can see four containers running each host you specified in the playbook (playbook.yml) and their container names.

Conclusion
In this tutorial, you’ve learned how to efficiently deploy Ansible Docker containers on your servers while ensuring your playbook file is encrypted using Ansible Vault. And at this point, you can now create Ansible playbooks to deploy Docker containers on your servers on your own without compromising security.
Why not use this newfound knowledge to deploy your applications on other cloud providers, such as Amazon Web Services (AWS) and Google Cloud Platform (GCP)?
Or scale up your application by adding more servers to the inventory file (like hundred of servers), grouped by region or function?


