


Ansible is a popular automation platform that allows you to manage thousands of nodes simultaneously, which can be confusing at some point. Why not take advantage of one of the most valuable features of Ansible, and leverage Ansible variables in roles and playbooks.
In this tutorial, you will learn how to define Ansible variables in your playbooks or roles for a more effective deployment approach.
Now get ready, and start leveraging variables!
Prerequisites
This post will be a step-by-step tutorial on the Ansible variables. If you’d like to follow along, be sure you have the following in place:
- An Ansible controller host – This tutorial uses Ansible v2.9.24 on an Ubuntu 18.04.5 LTS machine.
- A remote Linux computer to test variables’ functionality. The remote Linux computer is called myserver, and the tutorial uses an inventory group called web.
- An inventory file is set up and one or more hosts are already configured to run Ansible command and playbooks.
Declaring Ansible Variables within Ansible Roles
Kick-off this tutorial by setting up Ansible variables inside an Ansible role. You’ll create an Ansible role that uses the ansible-playbook command to download Apache Tomcat on a remote server.
1. First, SSH into your Ansible controller host using your favorite SSH client.
2. Run the commands below to create a directory named ~/ansible_variable_role_demo in your home directory and change to that folder as the working directory. The ~/ansible_variable_role_demo directory will hold this tutorial’s demo files.
mkdir ~/ansible_variable_role_demo
cd ~/ansible_variable_role_demo
3. Next, run the command below to create another directory named roles inside the ~/ansible_variable_role_demo directory. The ~/ansible_variable_role_demo/roles directory will contain the tomcat role that you need to deploy.
By default, Ansible looks for roles in two locations in a directory called roles/ within the directory where playbook resides or in the /etc/Ansible/roles. If you wish to store roles at different paths, declare the paths using the
- role:parameter in the playbook.
mkdir -p roles4. Run the commands below to change the directory to the ~/ansible_variable_role_demo/roles directory (cd roles), and create the folders required by the tomcat role.
The p flag tells the mkdir command to create the parent directory (tomcat) and the folders such as tasks and vars. Each of these folders is common for every Ansible role and will eventually contain a main.yml to deploy the tomcat role.
You can create the role with any name within the role directory.
	cd roles
  mkdir -p tomcat/{tasks,vars}
Each folder required by the tomcat role has a specific purpose:
- tasks: The task directory contains the tasks that a role needs to execute. You’ll define all the tasks within the main.yml file inside the tasks directory.
- vars: The vars directory contains all the variables you need to use in the main.yml file in the tasks directory. You’ll also declare variables in the main.yml file within the vars directory.
5. Now, create the ~/ansible_role_demo/roles/tomcat/tasks/main.yml file and copy/paste the below code (playbook). The playbook below downloads Tomcat on the node it’s run on.
Below, the tomcat_download_url and tomcat_download_location variables will provide the values for the source and destination to download Apache Tomcat.
By including the variables within two curly brackets ({{ }}), you are telling Ansible to evaluate the text as a variable and expand the value. Enclosing the curly brackets within double-quotes forces the content to a string.
The values are declared in the ~/ansible_role_demo/roles/tomcat/vars/main.yml file that you will create in the next step.
# Downloading the tomcat package
- name: Download Tomcat
# Setting the url and dest as the arguments variables
  get_url:
     url:  "{{ tomcat_download_url }}"
     dest: "{{ tomcat_download_location }}"

# Extracting the tomcat archive
- name: Extract tomcat archive
  unarchive:
    src: "{{ tomcat_download_location }}"
    dest: /opt/
    remote_src: yes
6. Lastly, create another file named ~/ansible_role_demo/roles/tomcat/vars/main.yml and copy/paste the below code.
The Ansible role (tomcat) assigns values to the tomcat_download_url and tomcat_download_location variables in the code below. These variables are referenced from the ~/ansible_role_demo/roles/tomcat/tasks/main.yml while running the playbook.
tomcat_download_url: http://archive.apache.org/dist/tomcat/tomcat-7/v7.0.61/bin/apache-tomcat-7.0.61.tar.gz
tomcat_download_location: /opt/apache-tomcat-7.0.61.tar.gz
Deploying Ansible Role Containing the Ansible Variables
You’ve now set up and configured the Ansible role file structure and files/folder within the tomcat Ansible role. But unless you run the playbook, the previously created role is not doing anything. So it’s time to deploy the Ansible role!
1. Create a YML file with a name you prefer, and copy/paste the below code. For this example, the file is named ~/ansible_role_demo/tomcat-download.yml.
The code below deploys the Ansible role (tomcat) that you configured earlier to the destination server address (web) with the remote user (ubuntu) that has admin access.
You can use roles in three ways: At the play level with the
rolesoption, at the tasks level with the include_role, and with import_role options.
---
- name: Tomcat deployment playbook
# Defining the remote server where the package will be deployed
hosts: web
remote_user: ubuntu # Using Remote user as ubuntu
become: true
roles:
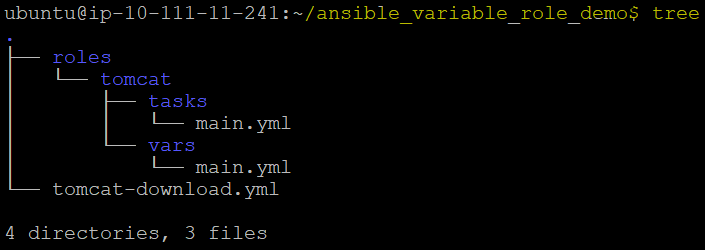
- tomcat2. Run the tree command below to verify all required files are in the ~/ansible_role_demo/ directory.
treeIn the file structure below, you can see the main.yml files are in the tasks and vars folders.
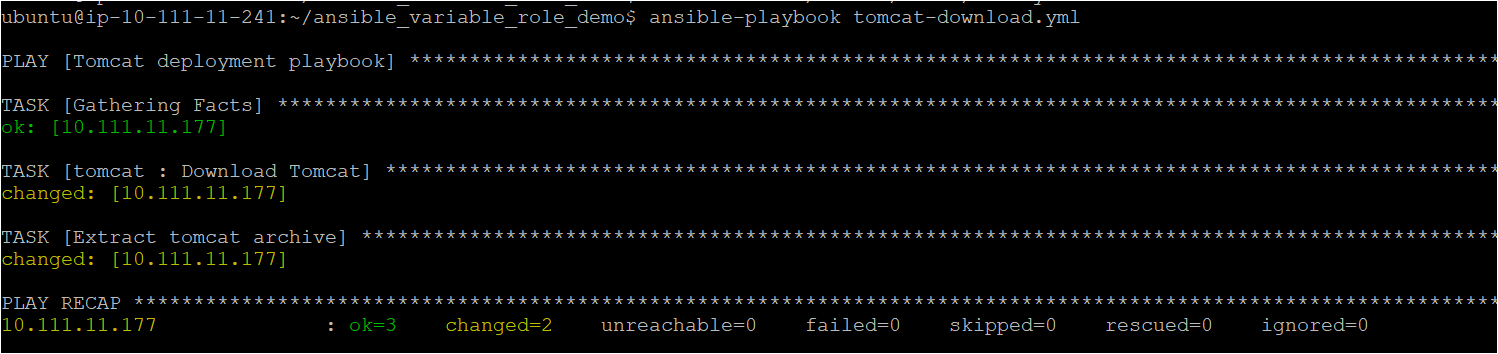
3. Finally, execute the ansible-playbook command below to deploy the tomcat Ansible role to the destination server address. The destination server address is defined in the host’s section (hosts: web) of the playbook tomcat-download.yml.
ansible-playbook tomcat-download.ymlNotice below that the ansible-playbook command successfully deployed the tomcat Ansible role, which downloaded and extracted the Apache Tomcat on the remote host.
Declaring Ansible Variables Directly in Ansible Playbook
You previously learned how to declare Ansible variables within the Ansible roles, and that’s great! But it is also possible to declare the Ansible variables directly in the Ansible playbook.
Assuming you are logged in to Ansible controller host:
1. Run the following commands to create a directory named ~/ansible_variable_playbook and change to that folder as the working directory.
mkdir ~/ansible_variable_playbook
cd ~/ansible_variable_playbook
2. Next, create a file named ~/ansible_variable_playbook/main.yml with your preferred code/text editor, and copy/paste the code below.
The playbook below contains a task that creates different files on the remote machine with the same name specified in the variable ATA_bloggers_names.
---
- name: Using Ansible Variables directly in the deployment playbook
# Defining the remote server where the package will be deployed
hosts: web
remote_user: ubuntu # Using Remote user as ubuntu
become: true
gather_facts: false
# Decalring the variable ATA_bloggers_names
vars:
ATA_bloggers_names: [ Miranda, Adam Listek, Adam Bertram, June, Arman ]
tasks:
- name: Create Multiple File with same names specified as a list in variable ATA_bloggers_names
file:
state: touch
path: /tmp/{{ item }}.txt # Sets the path for the files
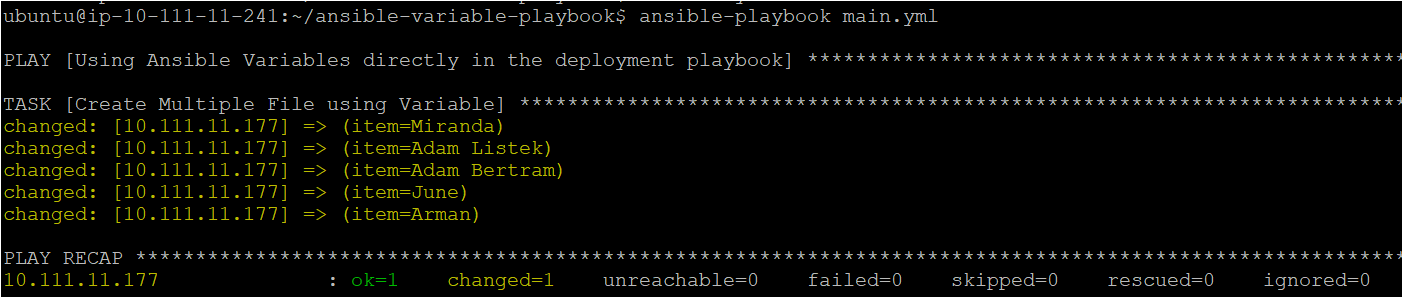
loop: "{{ ATA_bloggers_names }}"3. Lastly, execute the ansible-playbook command to run the playbook (~/ansible_variable_playbook/main.yml).
Once the command completes, you’ll see five files created on the remote node’s /tmp directory.
Perhaps you wish to see the files in the /tmp directory. If so, run the ls -lh command to list the files in the /tmp directory.
ls -lh
Encrypting Ansible variables using Ansible Vault
Incorporating Ansible variables directly in a playbook works fine, but it’s not ideal when you’re hard-coding you’re passwords. Secure your variables and their respective values, then store these variables as secrets using Ansible Vault.
Assuming you are already logged into the Ansible controller host:
1. First, run the below command to navigate to the ~/ansible_variable_playbook directory.
cd ~/ansible_variable_playbook2. Next, open the ~/ansible_variable_playbook/main.yml file and remove the below line of code.
vars:
   ATA_bloggers_names: [ Miranda, Adam Listek, Adam Bertram, June, Arman ]
3. Create a new file named authors.enc in the same ~/ansible_variable_playbook directory and paste the below content. The .enc file is encoded to protect the file from unauthorized use, or to set up the file data encryption.
ATA_bloggers_names: [ Miranda, Adam Listek, Adam Bertram, June, Arman ]4. Now run the ansible-vault command below to encrypt the authors.enc file.
The
ansible-vaultcommand only protects ‘data at rest’. Once the content is decrypted (‘data in use’), avoiding secret disclosures is up to the play and plugin authors.
ansible-vault encrypt authors.enc
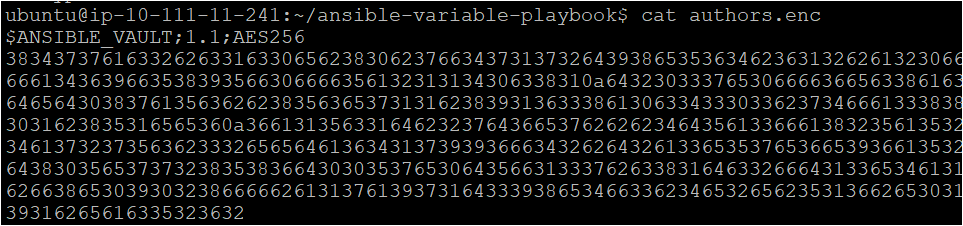
5. Run the cat command below to verify if the ansible-vault command encrypted the authors.enc file successfully.
cat authors.encBelow, you can see a bunch of numbers, which indicate the file data is encrypted.
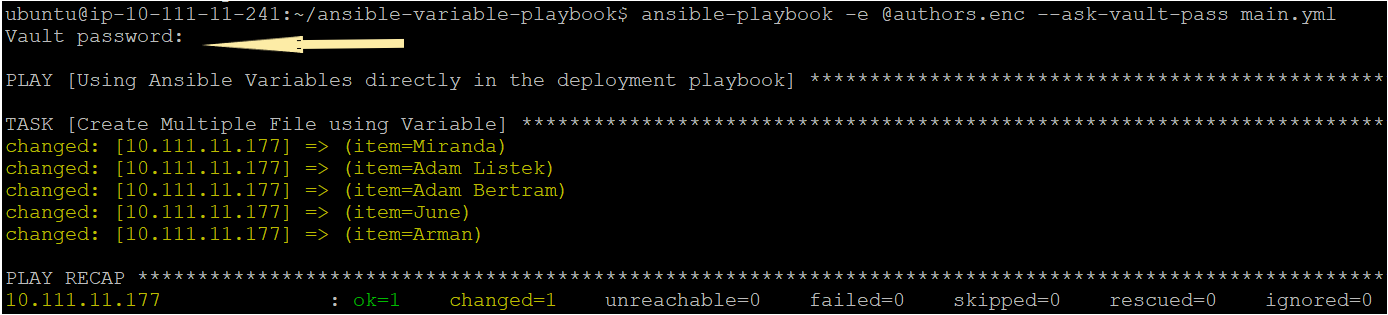
6. Finally, execute the command below to run the playbook (~/ansible_variable_playbook/main.yml). The below command invokes the encrypted variables from the authors.enc file to the playbook.
ansible-playbook -e @authors.enc --ask-vault-pass main.ymlYou can see below that the playbook created the same files from the “Declaring Ansible Variables Directly in Ansible Playbook” section (step three).
Conclusion
In this tutorial, you’ve learned how Ansible variables could be declared in Ansible roles and playbooks that help with effective deployments. You’ve also touched on encrypting files for your variables. At this point, you wouldn’t have to worry about hard-coded sensitive information lying around.
With this knowledge, will you start leveraging Ansible variables in your next deployments? Or perhaps add more control over your playbooks with Ansible when and other conditionals?


