


Have you ever found yourself lost in the labyrinth of command lines, wondering who you are within your computer system? Guess what? You are not alone in this quest for self-discovery within the digital realm. Worry not, though! The whoami command can help unveil your digital identity.
In this tutorial, you will understand your system’s perspective on you and gain insights that will elevate your tech-savviness to a whole new level.
Buckle up as you are about to discover a side of yourself that has been hiding in plain sight!
Prerequisites
Before you dive headfirst into the intricate world of OS user identification, ensure you have access to a Windows, macOS, or Linux machine. This tutorial uses Windows 11 and macOS 12.5 (Monterey) for demonstrations.
Retrieving the Logged-in Username via the whoami Command
Every user has a distinct identity that governs their access and actions. Exploring your identity is not just about typing commands; it is about unveiling the layers of your digital identity.
Open a terminal or PowerShell, and run the below whoami command to acquire information about the currently logged-in user.
whoamiBelow, the output displays the username (i.e., admin) associated with the current session.

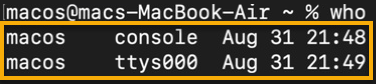
Now, run the following who command, on macOS, to list all logged-in users in your macOS system.
💡 This command does not exist on Windows.
whoThe output below indicates the user macos logged in twice, one through the console and another through the ttys000 terminal. Both logins started on August 31 at different times (21:48 and 21:49).
Users who open multiple terminal windows or log in numerous times might be assigned different terminal device names like ttys001, ttys002, and so forth. These device names help identify and manage the other terminal sessions occurring concurrently on the system.
Verifying a User’s Group Membership
Apart from the basic usage, the whoami command offers additional options to provide more detailed information about the current user. Take a step further into understanding the intricate web of group memberships.
The whoami command lets you unveil a fascinating layer of your digital identity – the groups you are a part of. This invaluable insight equips you to navigate system permissions, access rights, and collaborative environments more effectively.
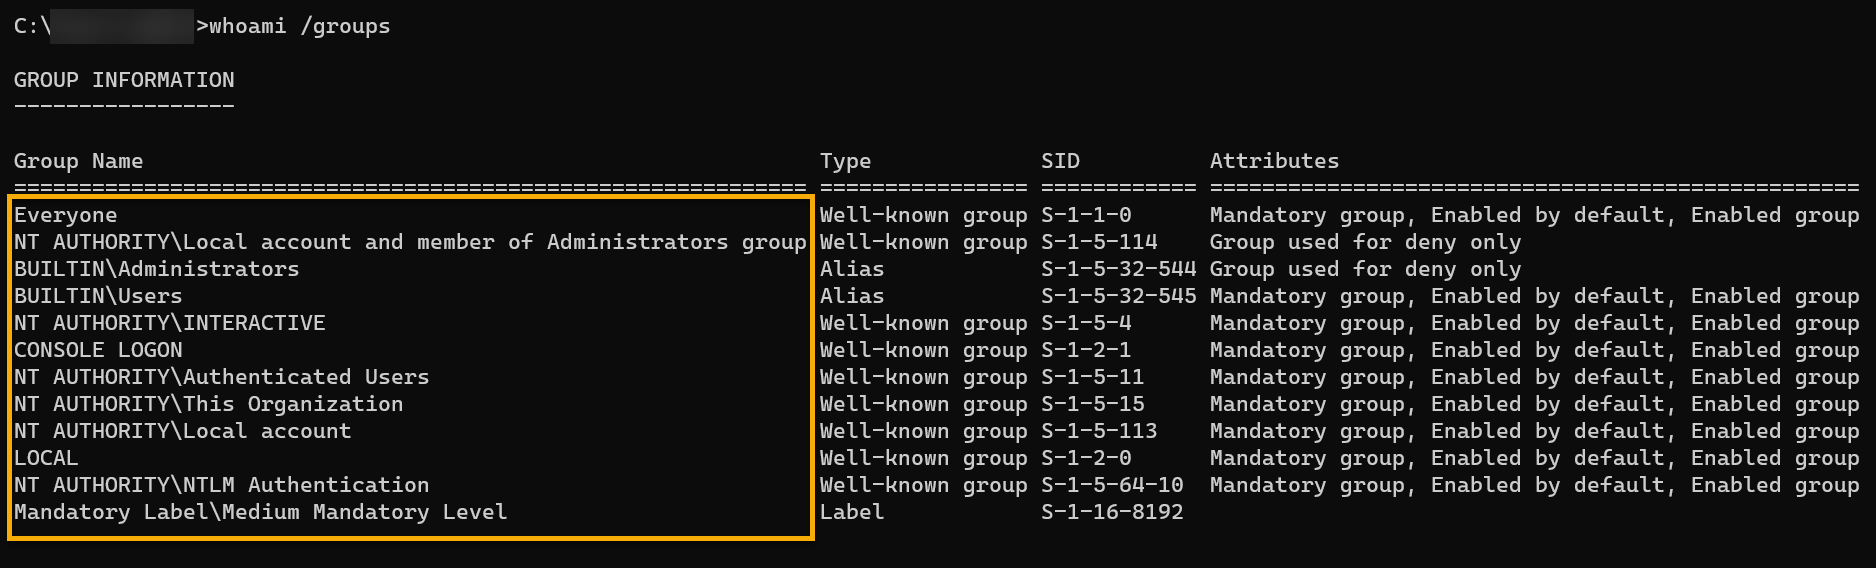
Run the whoami command below to see your user account’s group membership (/groups).
# PowerShell command
whoami /groups
# macOS/Linux command
groups
The output below displays a list of groups your current user belongs to, providing valuable insights into access rights and privileges.
User groups simplify the process of assigning permissions and access rights. Instead of setting individual permissions for each user, you can assign permissions to groups and users who are members of those groups to inherit the group’s permissions.

Obtaining the User Security Identifier (SID)
Your user SID is your digital ID card within your Windows domain. Just like your physical ID helps you access certain places, the SID helps your system manage who can access what.
SID acts like a bouncer, ensuring only authorized users can access specific resources, files, and folders by setting up granular permissions.
Execute the following command to retrieve the current user’s (/user) SID.
# PowerShell command
whoami /user
# macOS/Linux command
id
Below, along with the username, is the user’s corresponding SID (for Windows), which includes a series of numeric components that identify the following:
- Revision – Indicates the version of the SID structure.
- Identifier Authority – A unique value assigned to each authority that generates SIDs.
- Domain Identifier – Represents the domain or security authority.
- Relative Identifier (RID) – A unique number assigned to each security principal within the domain.

In a macOS/Linux system, the id command displays user and group information, including the username, UID (user ID), GID (group ID), and supplementary group IDs as below.

Displaying the Security Privileges of the Logged-in User
The whoami command is not just about knowing your username but also a key to understanding the extent of your digital authority. Leap into a realm that directly affects how you interact with your digital surroundings — security privileges.
Privileges refer to specific rights and permissions that control your user account’s actions on the system. By understanding which privileges are enabled or disabled, you can identify potential vulnerabilities and take appropriate measures to mitigate them.
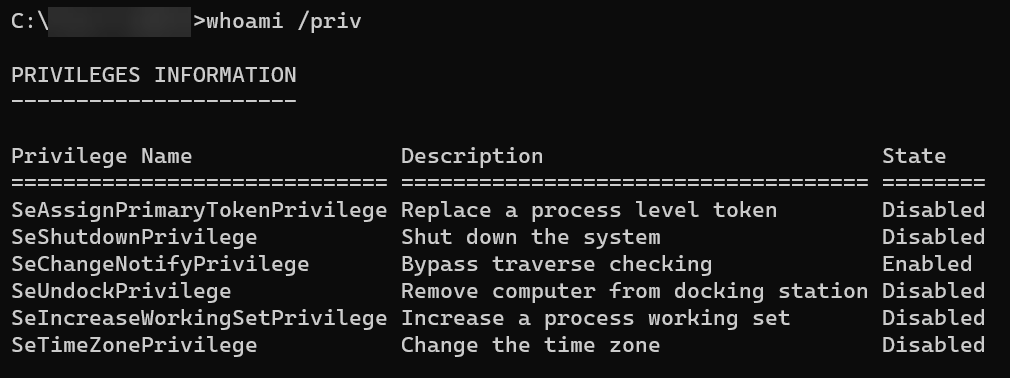
Run the below command to display the current user’s security privileges (/priv).
whoami /priv💡 Unix-based systems have no direct equivalent of the Windows
whoami /privcommand. Instead, theidorgroupscommand can be an alternative. Security privileges are managed through file permissions, user accounts, and access control mechanisms.
You will see a similar output as illustrated below where:
- Privilege Name – Shows the names of different privileges available for the user.
- Description – A brief description of what each privilege allows the user to do.
- State – Indicates the current state of each privilege for the user, and there are two possible states as follows:
| State | Details |
|---|---|
| Enabled | Indicates the user has been granted that specific privilege and can exercise the associated actions on the system. |
| Disabled | Indicates the user does not have the corresponding privilege and is not allowed to perform actions associated with that privilege. |
Formatting the whoami Command’s Output
Formatting the output of the whoami command might seem like a small detail, but it is a nifty trick that can make your life in the terminal much smoother. The whoami command has options for choosing the output format that best suits your needs: a list or a CSV format.
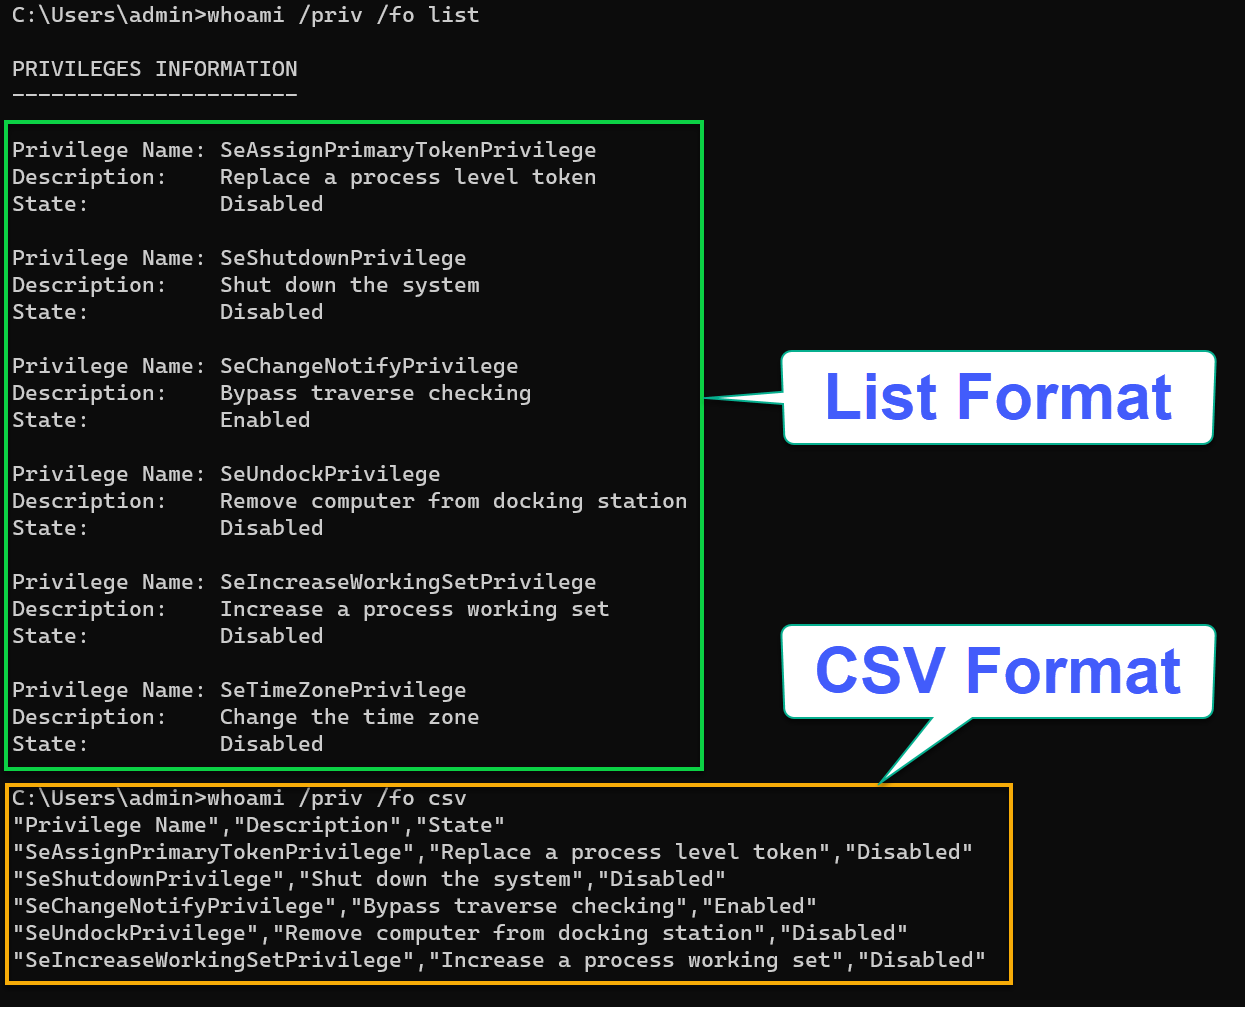
Execute each whoami command below to show the current user’s security privileges (/priv) in two different formats.
The list format (/fo list) can be helpful if you want a more compact display. But if you need information for further processing or analysis in a spreadsheet application, the CSV format (/fo csv) is more appropriate.
# Díplays the result in list format
whoami /priv /fo list
# Díplays the result in csv format
whoami /priv /fo csv
As illustrated below, instead of squinting at a jumble of characters, you get a neat, organized output.
Whether you are a casual user or a terminal ninja, formatting the output of the whoami command is not just about aesthetics but about effective communication.
whoami command’s outputAlternatively, run the id or groups command, piped (|) to stream editor (sed) command to format the output, as shown below. Unix-based systems do not have equivalent commands for whoami /priv /fo list or whoami /priv /fo csv.
The below commands use Regex to perform the following:
- Replace space and comma (
[ ,]) delimiters with newline (/\n/) for each string. - Replace spaces with comma (
tr ' ' ','), capture non-space texts (\([^ ]*\)), and enclose them with double quotes ("\1").
# Dispalying the id command's output in a list format
id | sed 's/[ ,]/\n/g'
# Dispalying the groups command's output in a csv format
groups | sed 's/\([^ ]*\)/"\1"/g' | tr ' ' ','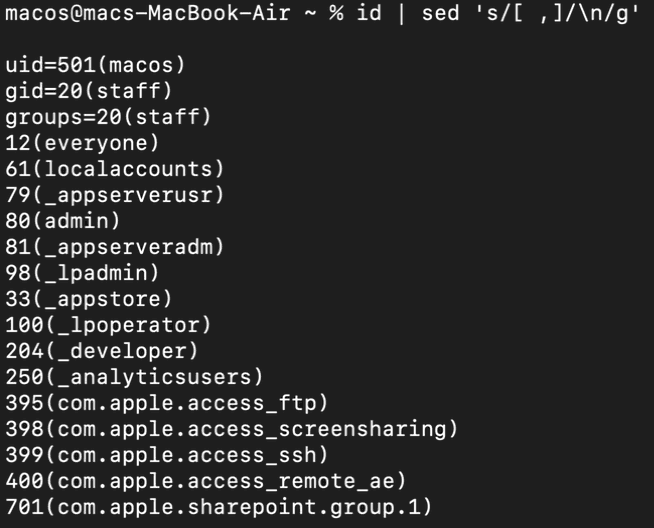
id command’s output in list format
groups command’s output in csv formatConclusion
Throughout this tutorial, you have delved into the intricate art of discovering and understanding user identities via the whoami command. You have learned to acquire the username, group membership, and even the user’s security identifier (SID).
With your understanding of user identification for various administrative tasks, troubleshooting permissions, and ensuring secure system access is within your reach.
Now, why not immerse yourself in the world of authentication and authorization mechanisms? How about multi-factor authentication (MFA), role-based access control (RBAC), and attribute-based access control (ABAC)? Understanding how these mechanisms work can significantly enhance your grasp of user management and system security.


