

Are you concerned about the safety of your virtual machines (VMs)? An unforeseen disaster may cause the loss of critical data in your organization. But worry no more! With Veeam on Windows or Linux, you can protect your necessary data, applications, and systems.
Veeam Backup offers a solution for data backing, replication, and recovery functionality. And in this tutorial, you will learn to use Veeam Backup to back up and restore your data.
Dive in, so you never have to worry about losing your data!
Prerequisites
This tutorial contains hands-on demonstrations. To follow along, be sure you have the following:
- A host computer running Windows Server Edition – This tutorial uses Windows Server 2016 v10.0 Build 14393, but the steps are similar for Linux systems.
- A hypervisor installed – This tutorial uses Hyper-V, but VMware Workstation and other versions of hypervisors can be used.
- VMs running guest operating systems (OS) – This tutorial uses two VMs, each running Microsoft Windows and Linux operating systems.
Downloading and Installing Veeam on Windows and Linux
Veeam Backup is compatible with many backup targets and works with VMware vSphere and Microsoft Hyper-V. But like other software, you must first download and install the Veeam Backup & Replication application.
For this tutorial, you will download and install Veeam Backup & Replication 9.5 for the Windows environment with the following steps:
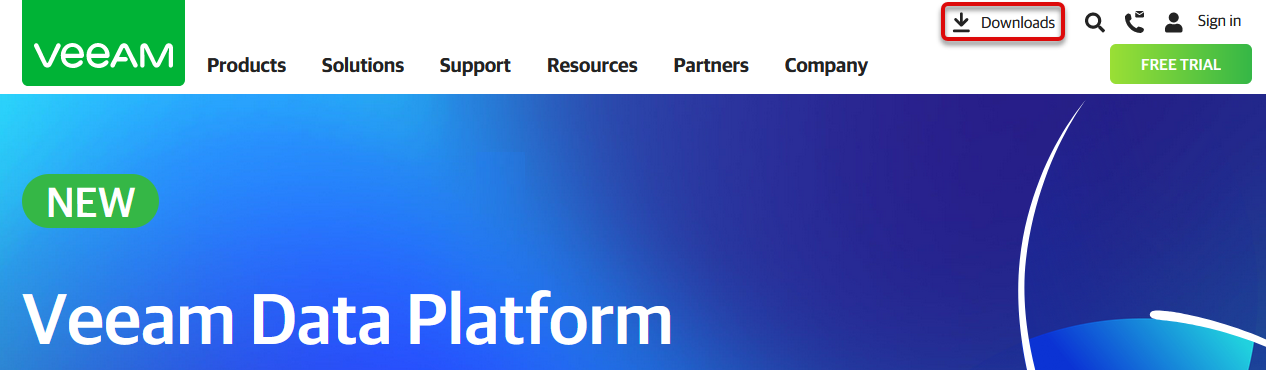
1. Open your favorite web browser, visit the Veeam website, and click Downloads (upper-right) to see available software versions.
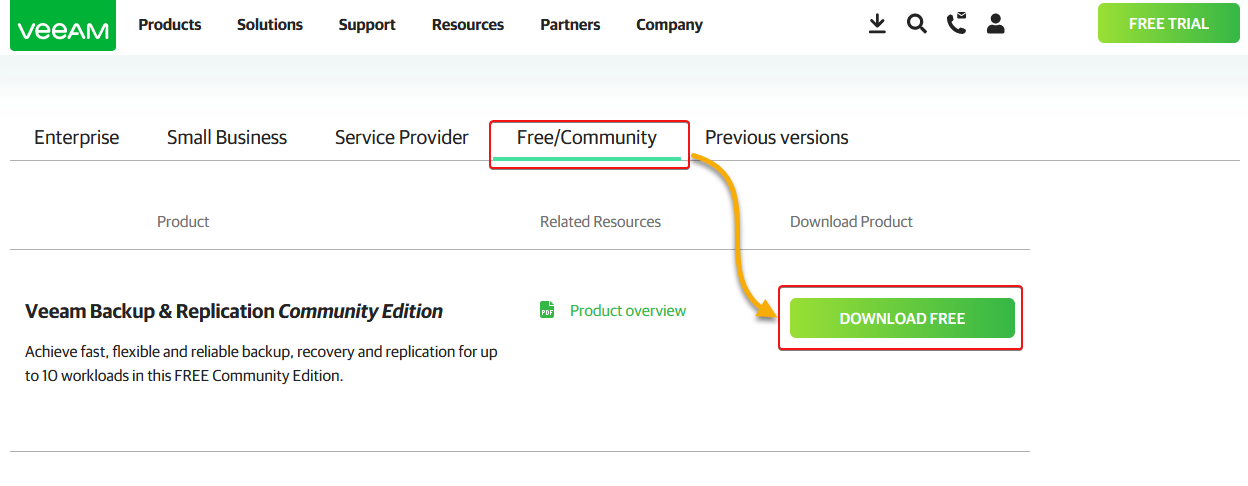
2. Next, navigate to the Free/Community tab, look for the Veeam Backup & Replication Community Edition, and click DOWNLOAD FREE to download the software.
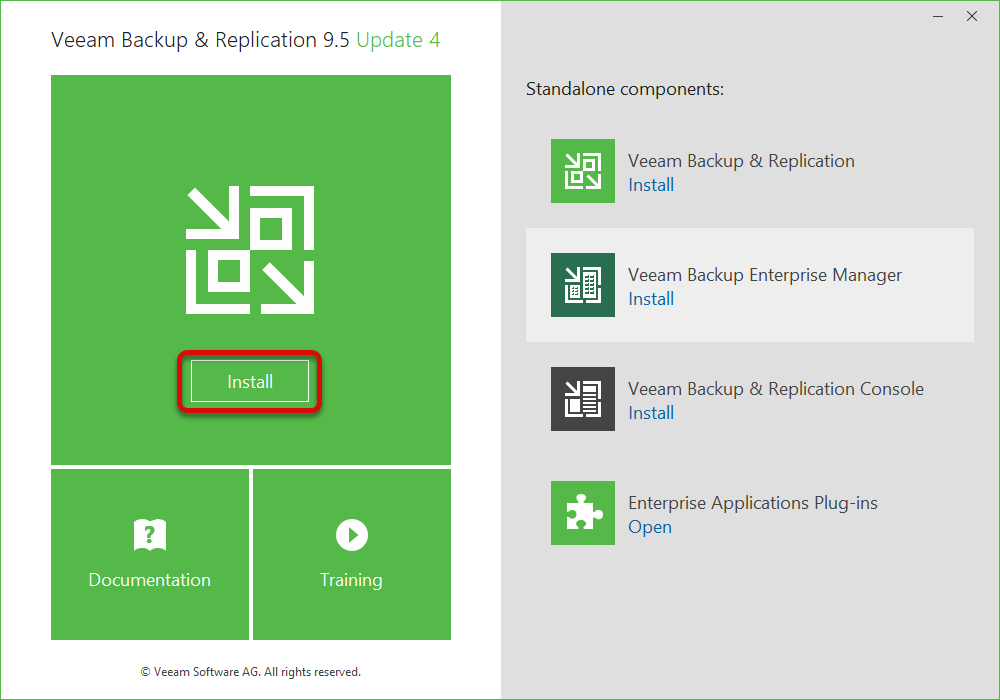
3. Once downloaded, run the Veeam setup file to launch the installation wizard.

4. Now, click Install to start the Veeam Backup & Replication setup.
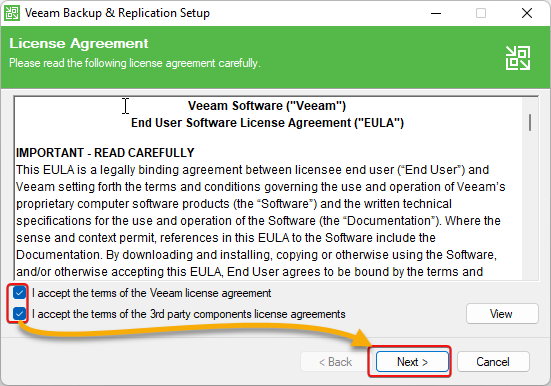
5. Tick on the checkboxes to accept the End User License Agreement (EULA), and click Next.
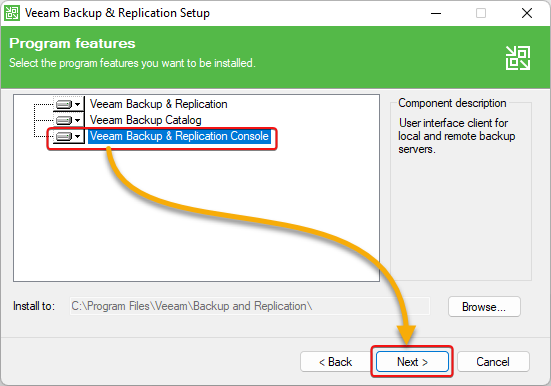
6. Select the option for installing Veeam Backup & Replication Console, and click Next.
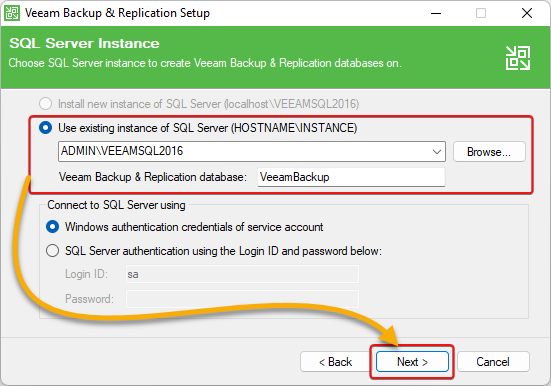
7. Next, choose whether to install Microsoft SQL Server Express, use an existing Microsoft SQL Server, or use a remote Microsoft SQL Server, and click Next.
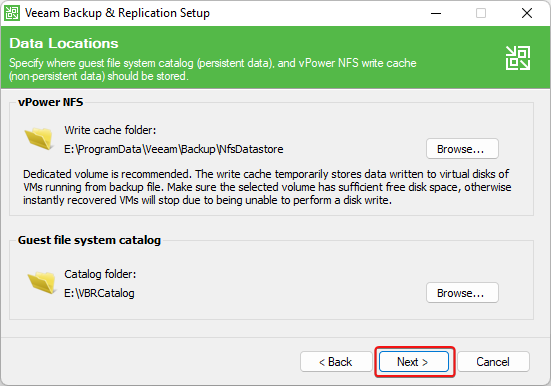
8. Choose the Data Locations options you prefer, and click Next.
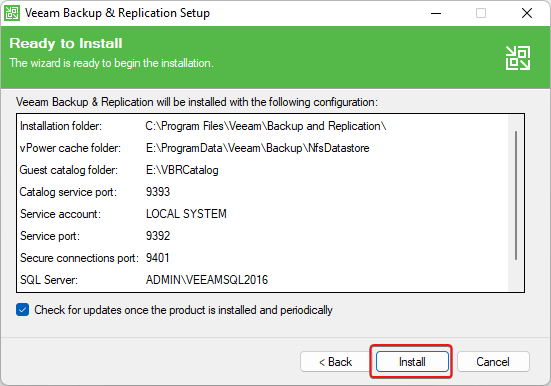
9. Review your selections and click Install to start the installation.
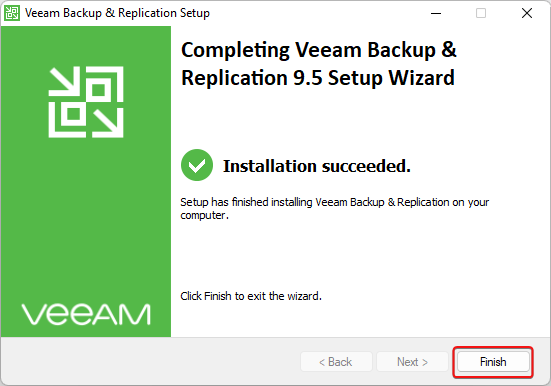
10. Once installed, click Finish to exit the wizard.
Configuring a Backup Repository
With Veeam Backup installed on your system, you must configure the Veeam backup repository before you can start backing up your data. The backup repository is the storage location where Veeam Backup stores the backup files.
To configure a backup repository, follow the below steps:
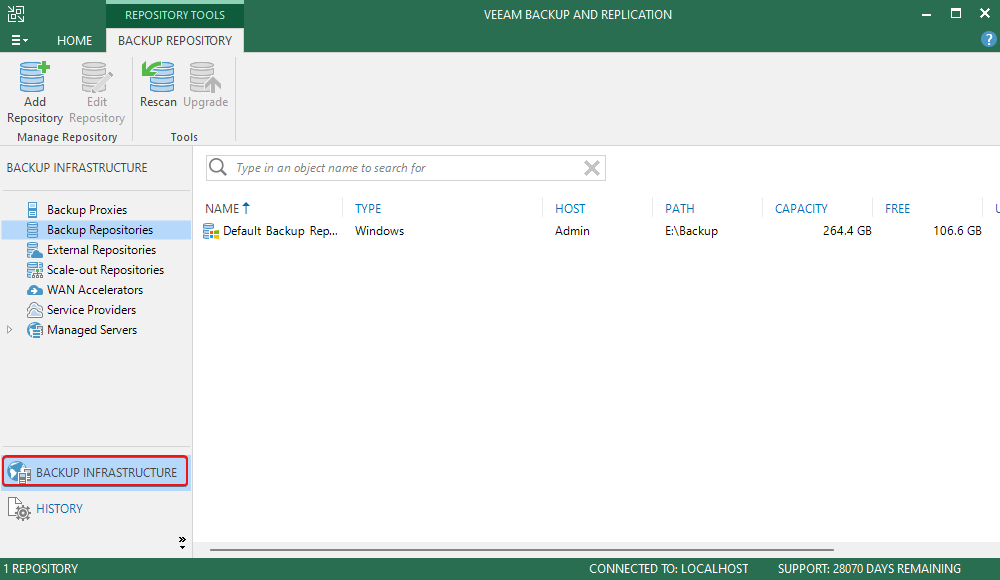
1. Launch the Veeam Backup & Replication console, and select the BACKUP INFRASTRUCTURE option (left pane), as shown below.
2. Next, right-click on Backup Repositories, and click Add Backup Repository in the ribbon toolbar to open the Add Backup Repository wizard.

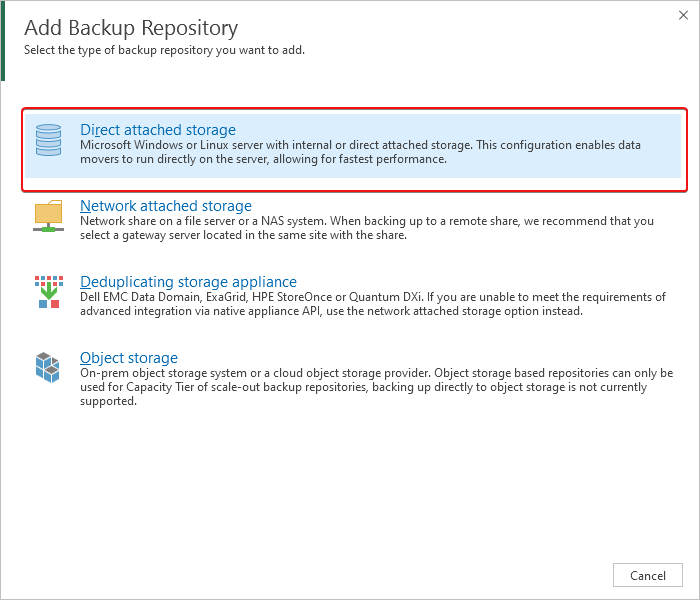
3. On the Add Backup Repository window, select the backup repository type. This tutorial uses the Direct attached storage option.
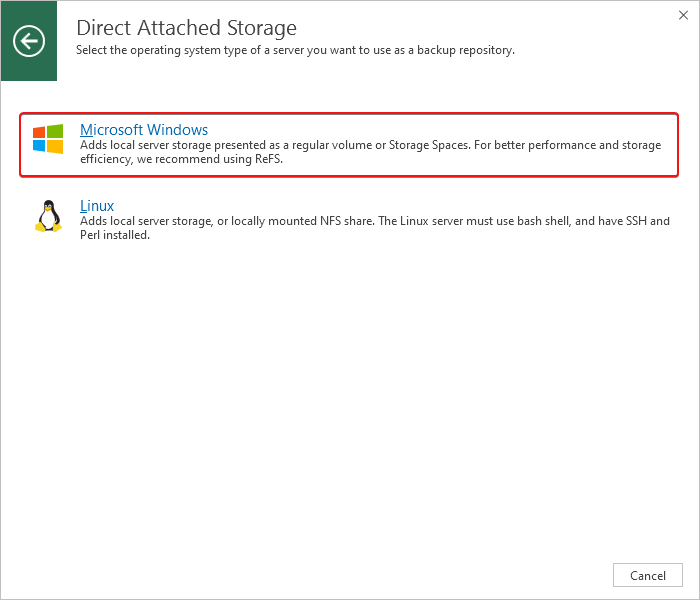
4. Now, select the server OS to use, either Microsoft Windows or Linux) as the backup repository location, and the New Backup Repository window will appear.
Note that if you select Microsoft Windows, you must enter the server name, IP address, and credentials to access it.
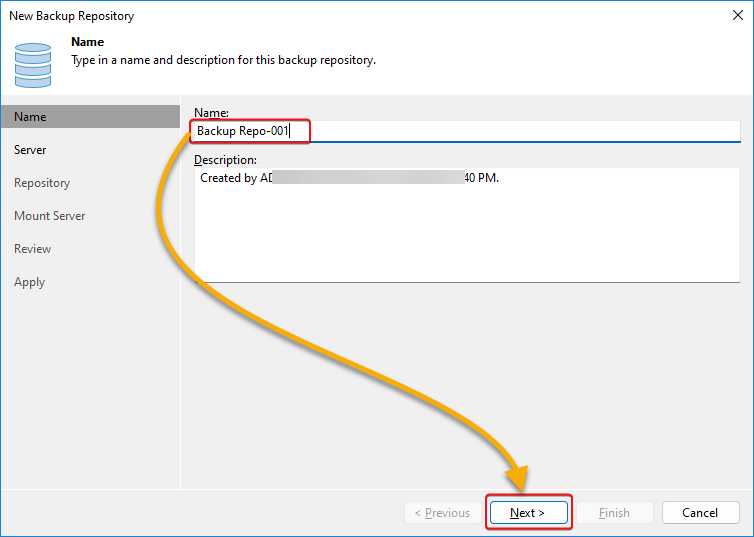
5. In the Name tab, enter your preferred Name for your repository, and click Next.
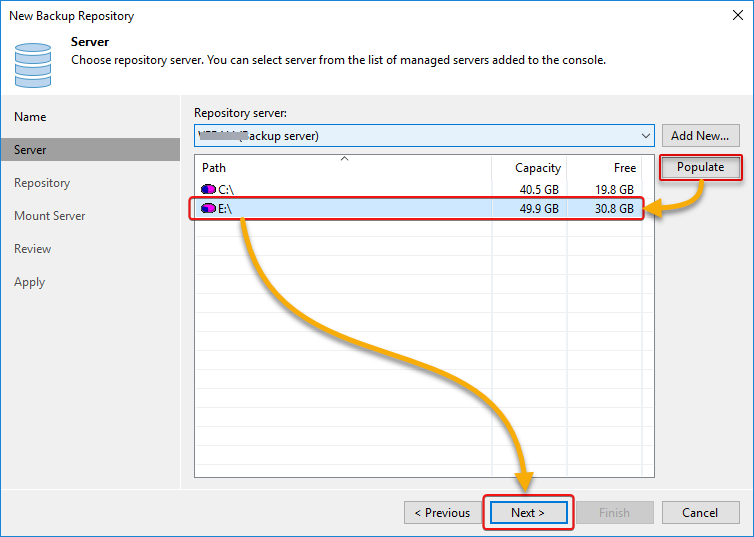
6. Next, click Populate to load the local disks acting as repository server storage, select your desired local disk, and click Next.
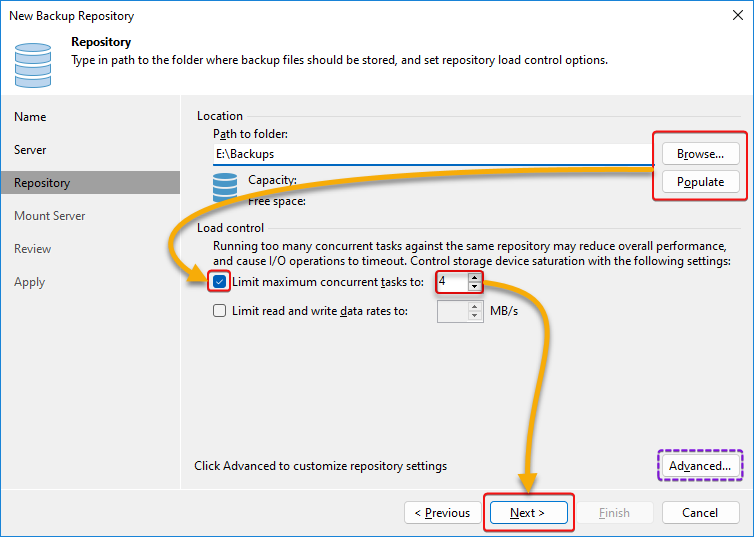
7. Configure the repository settings with the following:
- Click Browse to choose a backup location or Populate to load the server’s local disks, where you can specify the backup storage location.
- Tick the Limit maximum concurrent tasks, and specify the maximum value. This option ensures you have limited the number of tasks Veeam cab creates during data protection or disaster recovery jobs. The maximum value will depend on the type of backup chains stored in the backup repository.
Optionally, click Advanced to configure the advanced settings to enable data compression, encryption, and storage optimization.
Once configured, click Next to mount a new server.
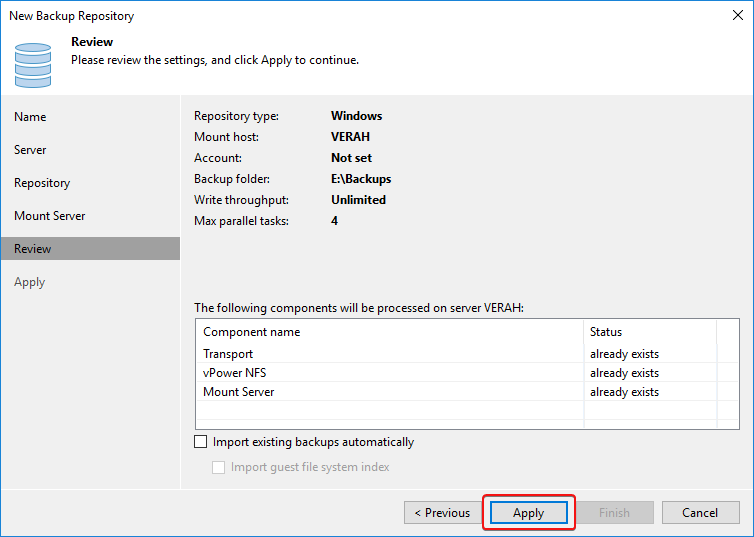
8. Review the summary of your repository configuration, and click Apply to create the backup repository.
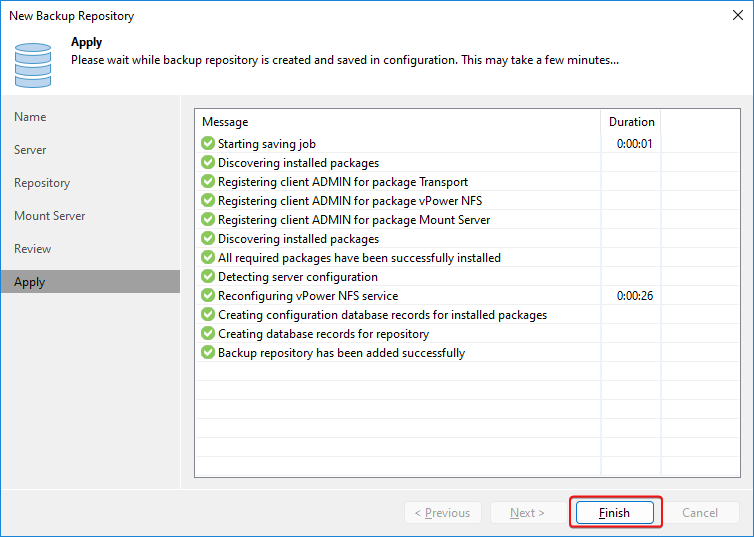
9. Lastly, click Finish to complete to close the New Backup Repository window.
Once the repository has been configured, you can store backup files and perform backup and restore operations.
Regularly checking the repository is strongly recommended to ensure enough free space and backups are appropriately stored.
Creating and Running a Backup Job
After successfully configuring a backup repository, you are ready to test Veeam’s data backup capabilities. How? You will create and run a backup job to start backing up your data.
To create a backup job, follow these steps:
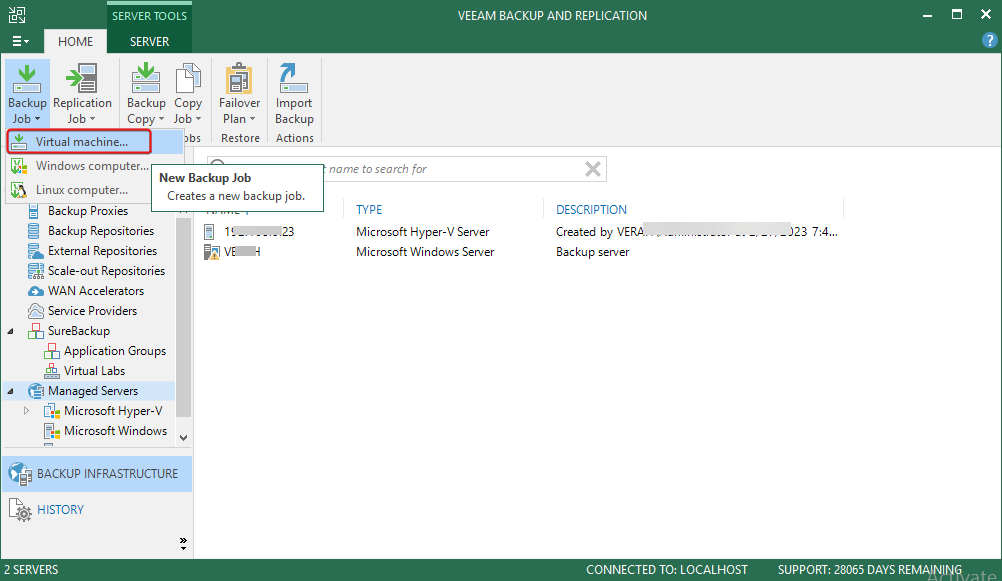
1. Navigate to the Home tab, click Backup Job, and select Virtual machine to open the New Backup Job wizard.
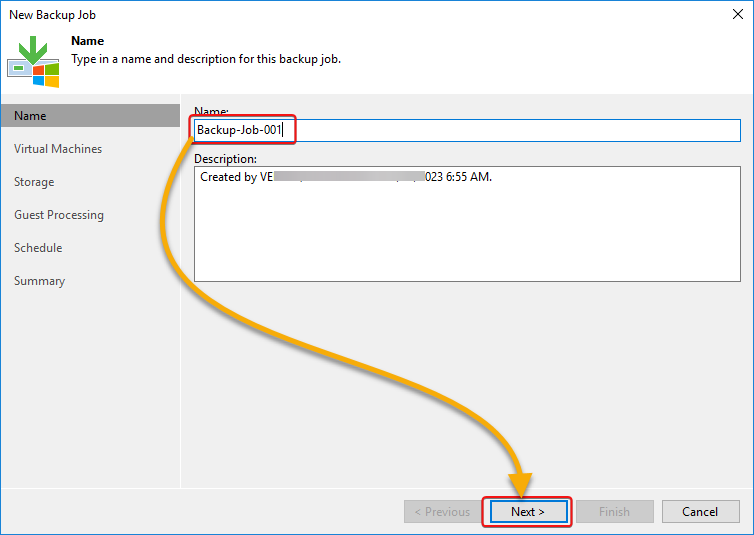
2. On the New Backup Job window, enter a Name for your backup job and a description (optional), and click Next.
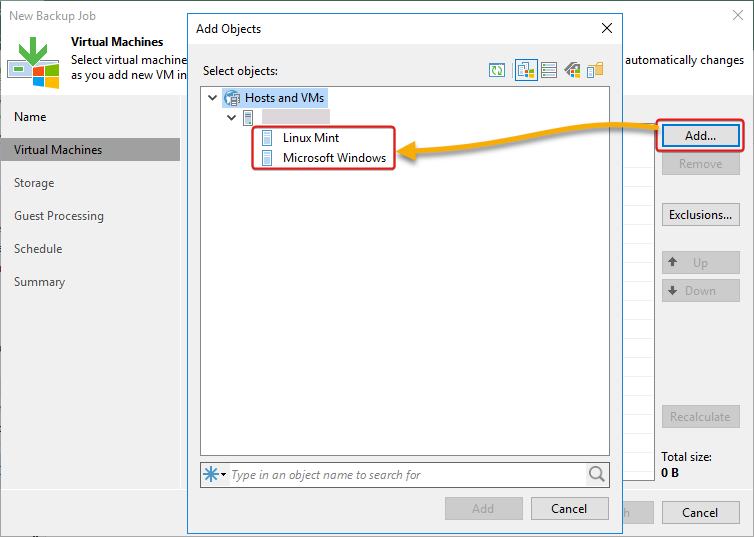
3. Next, click Add (opens the Add Objects window), select the VMs to include in the backup job, and click Next.
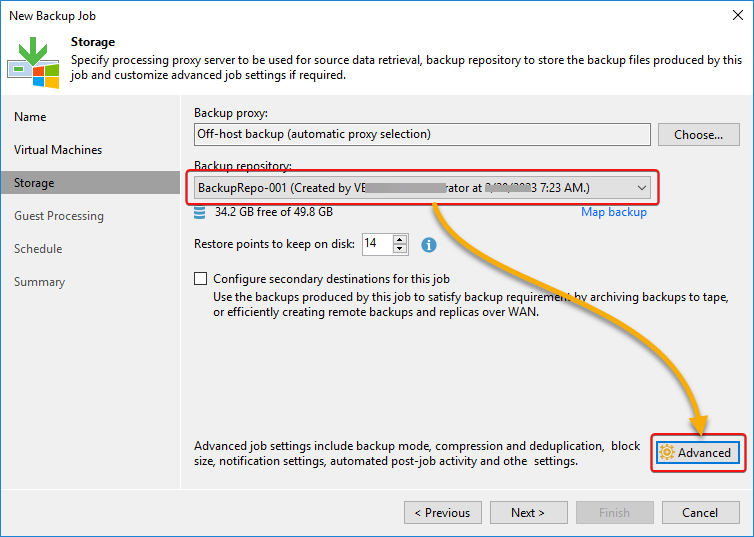
4. Now, choose a Backup repository destination, which you configured in the “Configuring a Backup Repository” section, from the drop-down field, and click Advanced.
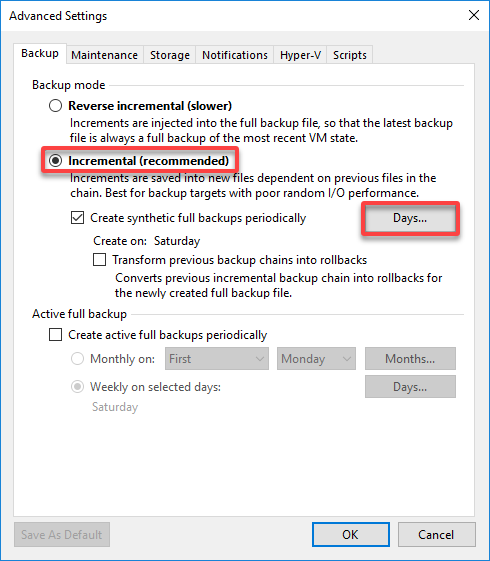
5. In the Advanced Settings window, set the backup schedule with the following:
- Choose the Backup mode – This tutorial uses Incremental, which is recommended.
- Click Days to select the days and times for the backup to run.
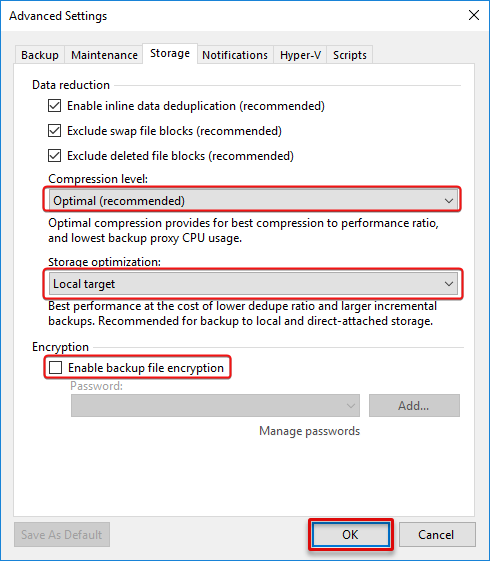
6. Navigate to the Storage tab, configure any advanced settings you require, and click OK to return to the New Backup Job window.
The advanced settings you can configure include but are not limited to retention policies, compression and encryption options, and network traffic throttling.
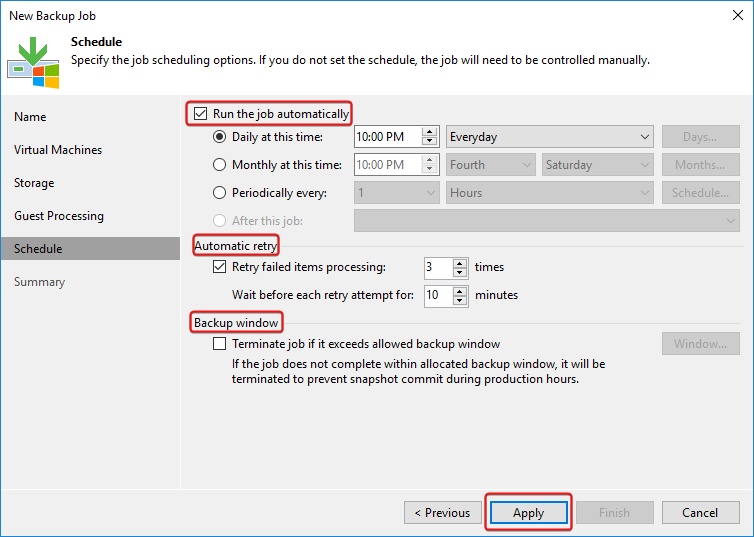
7. Under the Schedule tab, specify the job scheduling options you require, and click Apply button to save and apply your selected settings.
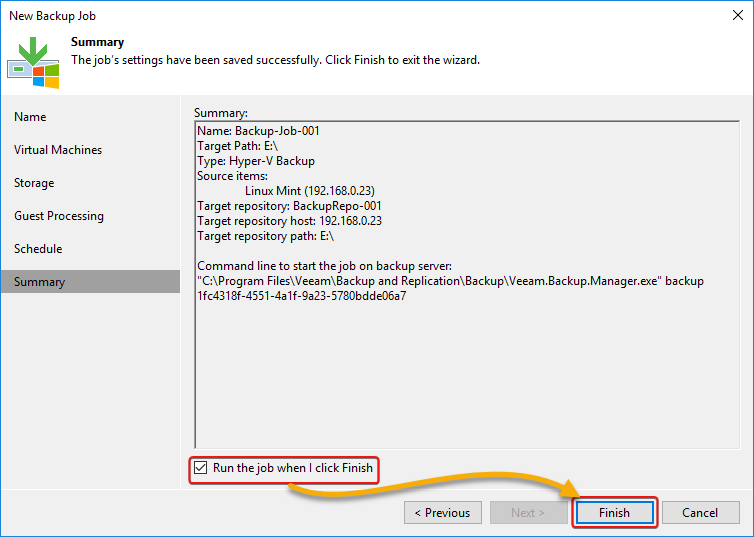
8. Finally, review your backup job settings and click Finish to create the job.
You can either tick on the checkbox below to run the job after closing the New Backup Job window or run it manually later.
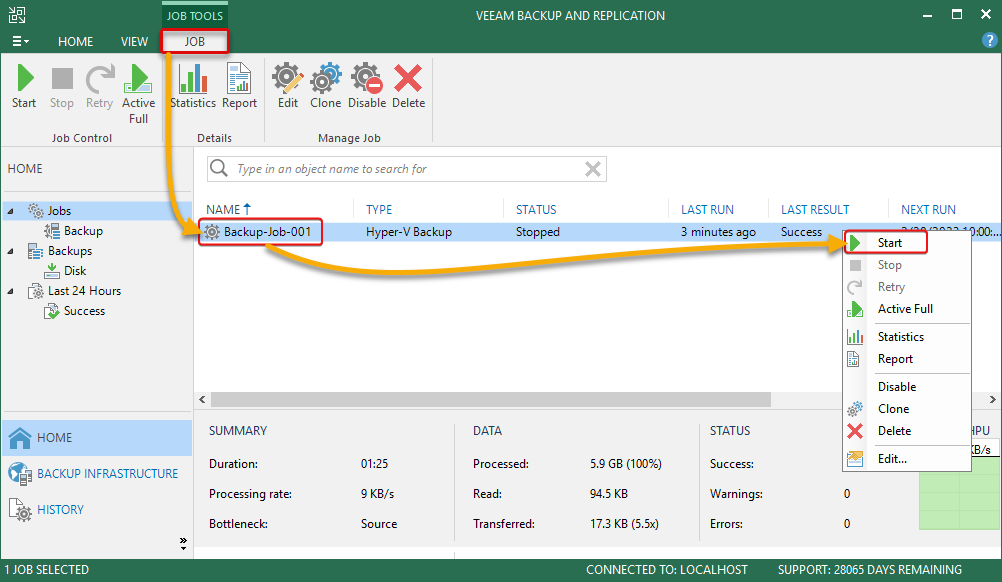
If you choose to run the backup job manually, navigate to the JOB ribbon tab, right-click on the job in the table list, and select Start.
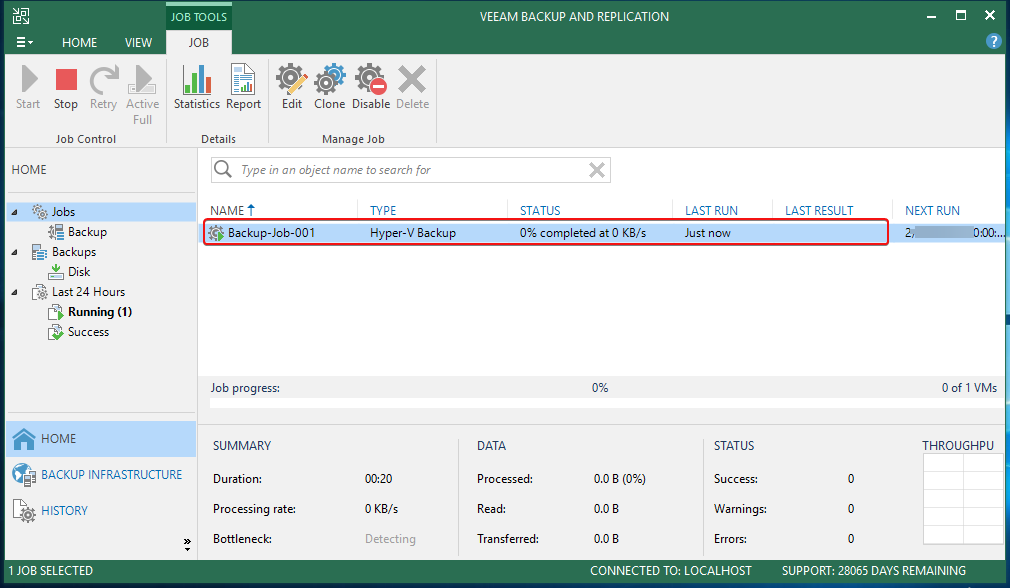
As you can see below, you can monitor the progress of the backup job in the JOBS ribbon tab.
Congratulations! Your backup job is now running, so rest assured that your data is protected.
Restoring Backed Up Data
An unforeseeable disaster can be catastrophic, causing you to lose critical data. But the good news is that Veeam Backup for Windows and Linux lets you restore data from a backup you created,
To restore backed-up data, follow the below steps:
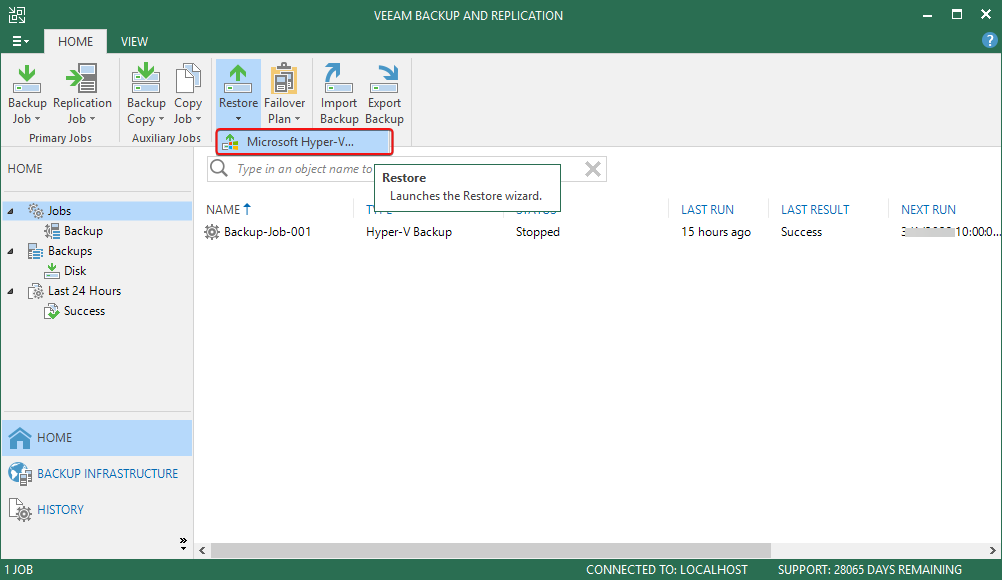
1. Navigate to the Home tab, click Restore, and select the Microsoft Hyper-V option to open the Restore wizard.
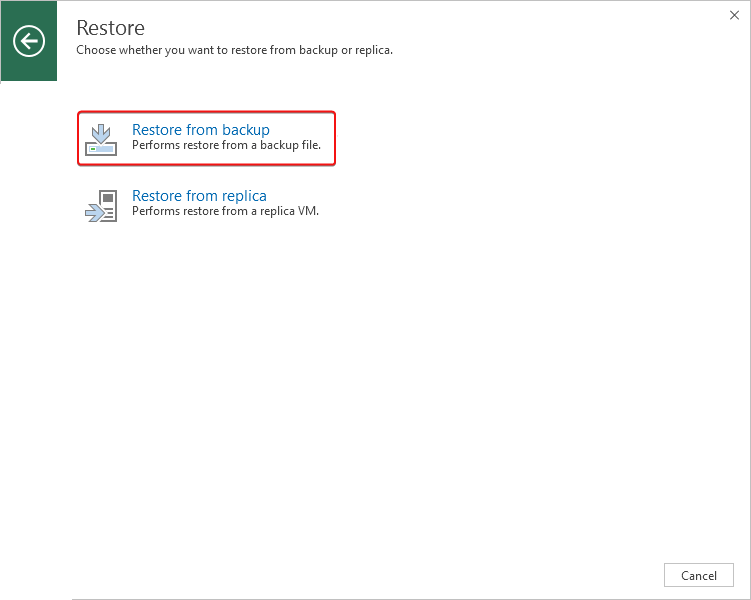
2. Next, select where to restore data, whether from a replica or a backup file. In this example, choose Restore from backup since you have a backup job running.
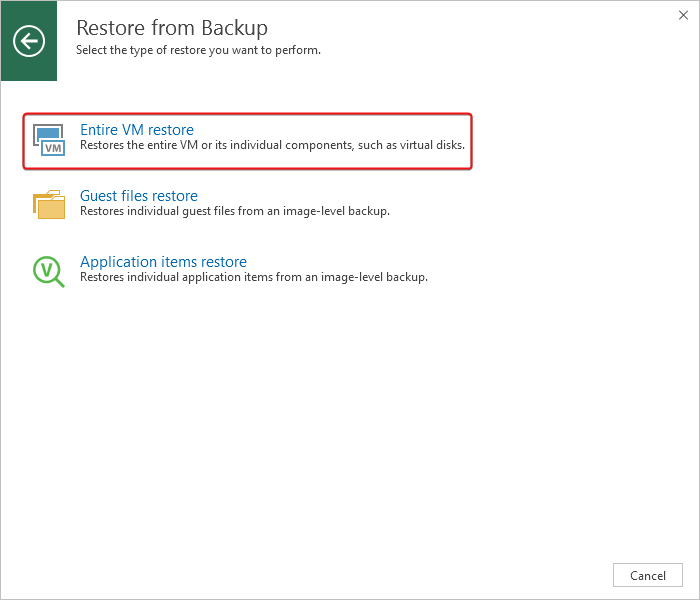
3. Choose the restore type you want to perform. But in this example, choose Entire VM restore since you are restoring VM data.
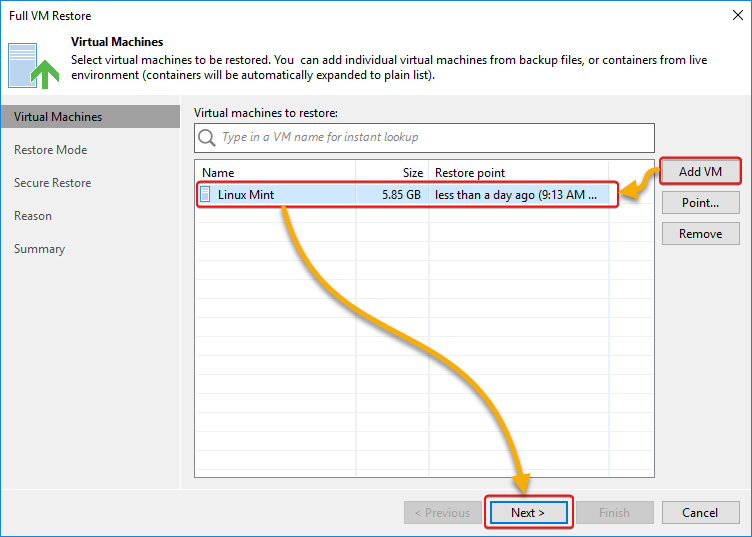
4. Now, click Add VM button to load the VM restore point, select a restore point, and click Next.
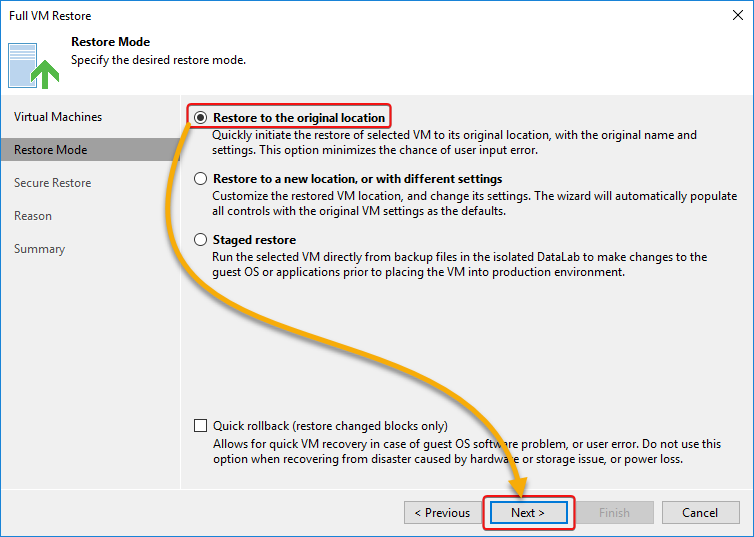
5. Select the desired restore mode, and click Next.
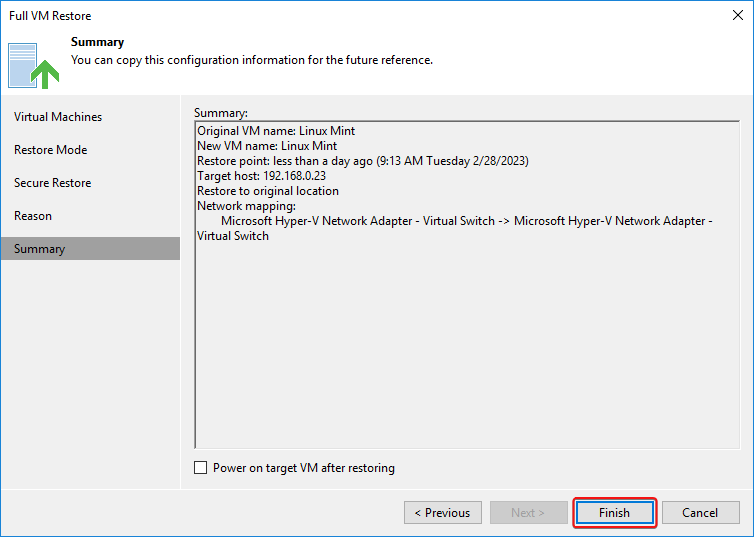
6. Next, review the settings and click Finish to start the restore process.
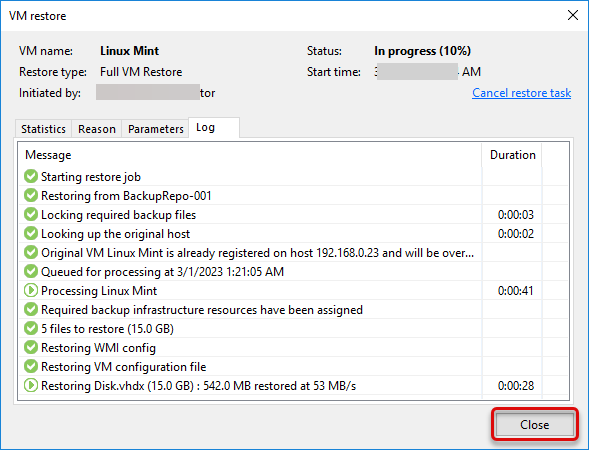
7. Wait for the restore process to complete, and click Close.
8. Finally, launch your hypervisor (i.e., Hyper-V), look for and start your VM to verify the restored data.
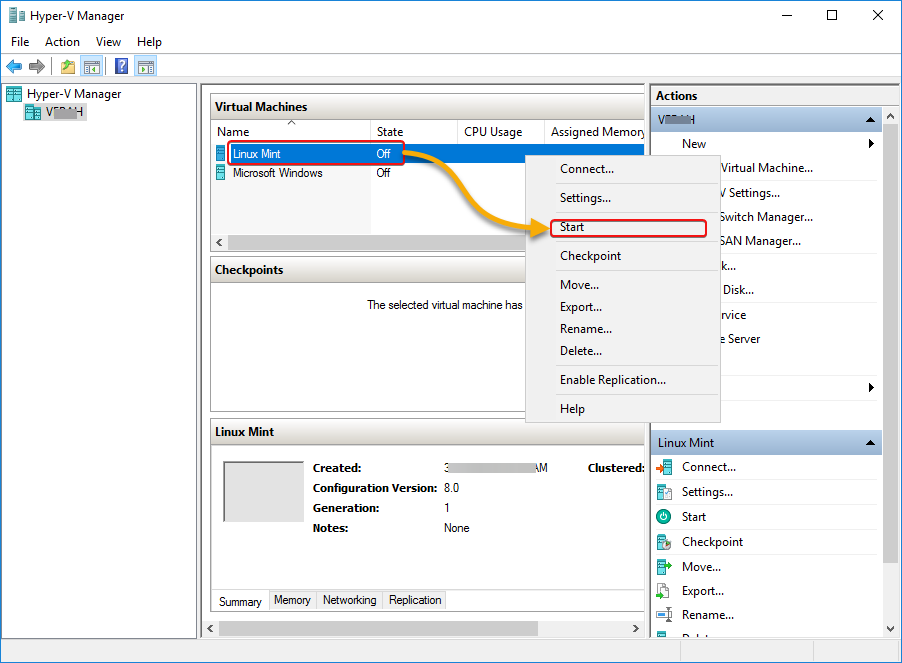
Upon starting your VM, check whether all components are working smoothly and your files are present.
Conclusion
In this tutorial, you have learned how to back up and restore data via Veeam Backup successfully. Keeping data secure has been a definite factor in maintaining businesses in good shape, and Veeam on Windows and Linux is one of the best software to take care of your data.
Now, you have a fail-safe for your data if an unforeseen disaster comes your way!
Why not build up your knowledge by exploring Veeam Backup for cloud environments like AWS and Microsoft Azure? Or perhaps explore how to protect Veeam Backup against cyber threats such as ransomware and malware?


