


Are you struggling to back up your data? Or do you run into countless errors performing a Windows Server backup? The data on your computer is doubtlessly important, and ensuring timely and reliable backups for your Windows Server can be challenging.
How to stop agonizing over your Windows Server backup? Let Veeam take away the agony! In this tutorial, you’ll learn how to quickly and securely back up your data with Veeam.
Make your life easier and turn to Veeam for your Windows Server backups!
Prerequisites
This tutorial is a hands-on demonstration. If you’d like to follow along, make sure you have the following in place:
- A Windows machine or server.
- Veeam Backup & Replication installed on your computer – This tutorial uses Veeam Backup & Replication 11.
- A Veeam recovery account.
Creating a Veeam Recovery Media for Windows Server Backup
When you need to backup your data, but your computer stops working, or the hard disk fails, Veeam Recovery Media is your best option. The Veeam Recovery Media allows you to boot to a media drive, so you can use Veeam and Microsoft tools to fix errors.
At the same time, when you have Veeam Recovery Media, you can recover your computer’s system image along with your data.
To create a Veeam Recovery Media:
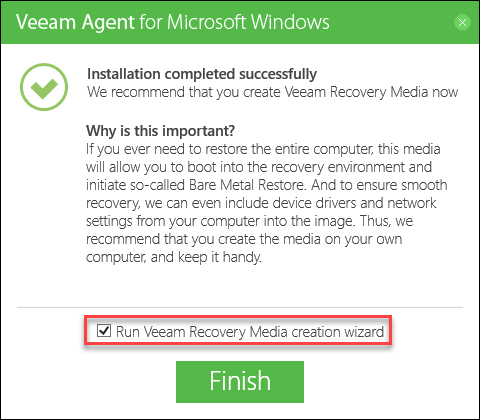
1. Download and install the Standalone Veeam Agent for Microsoft Windows.
As shown below, you’ll be prompted to create a recovery media so long as you keep the Run Veeam Recovery Media creation wizard enabled.
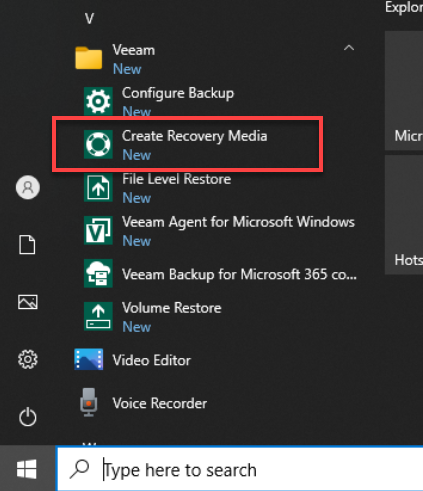
Alternatively, you can launch the Veeam Recovery Media creation wizard from the Start menu, as shown below.
2. Select a bootable media type from the list under Recovery Media, and click Next.
You can see below that the second and third options are enabled by default. But optionally, you may tick other boxes to:
- First option – Includes the decryption key on your backup.
- Fourth option – Includes additional external drives to your backup.
But in this tutorial, leave the defaults. You can’t select a different bootable media type because you’re saving a media file, and only an Image file type is available.  Selecting a media type for recovery media backup
3. Click on Browse to specify the location to save the recovery media’s ISO file, and click Next.  Defining the file name and destination for the recovery media ISO file
4. Now, review the summary of the settings you chose for creating the recovery media, as shown below, and click Create to finalize creating the Veeam recovery media.  Reviewing the summary of configuration for the recovery media
5. Finally, wait for the recovery media creation process to complete, and click on Finish.
And that’s it! You’ve just created a recovery media that you can burn to a CD/DVD or send to a USB flash drive.  Finalizing the recovery media creation
Creating a Backup Job to Automatically Secure Data
Apart from creating a Recovery Media that you can use when your computer fails to work correctly, you also need a way to assure your data is secure. But is it possible to perform a backup without manually doing so on your own? Yes! A backup job will come in handy in these situations.
A backup job systematically backs up your data even when you’re inactive. You can schedule a backup event anytime, any day. This feature lets you freely move along your day-to-day activity.
To create a backup job with Veeam:
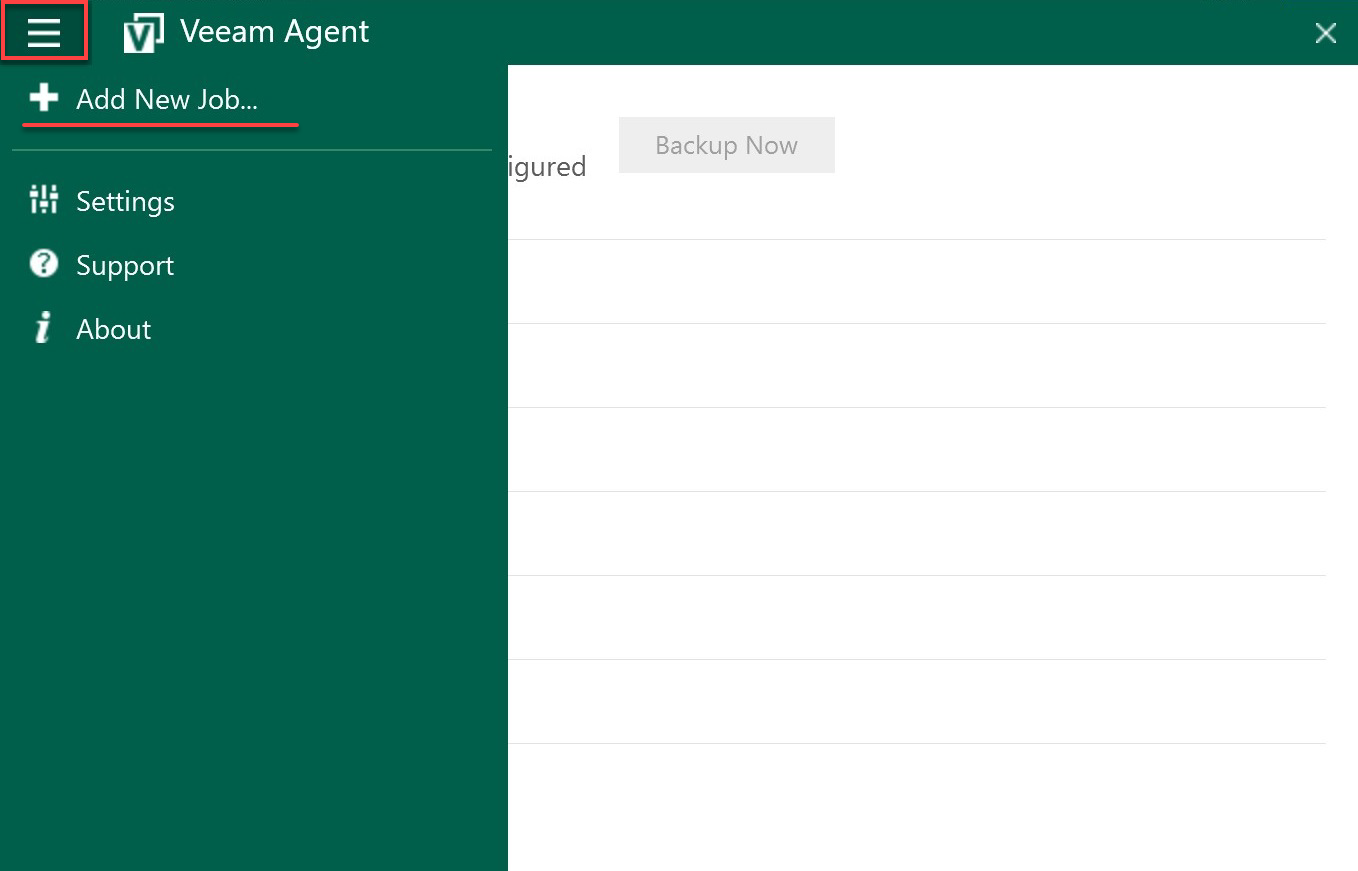
1. Open the Veeam Agent, click the main menu (top-left), and choose Add New Job from the menu panel. A pop-up window appears, where you’ll configure your backup job.
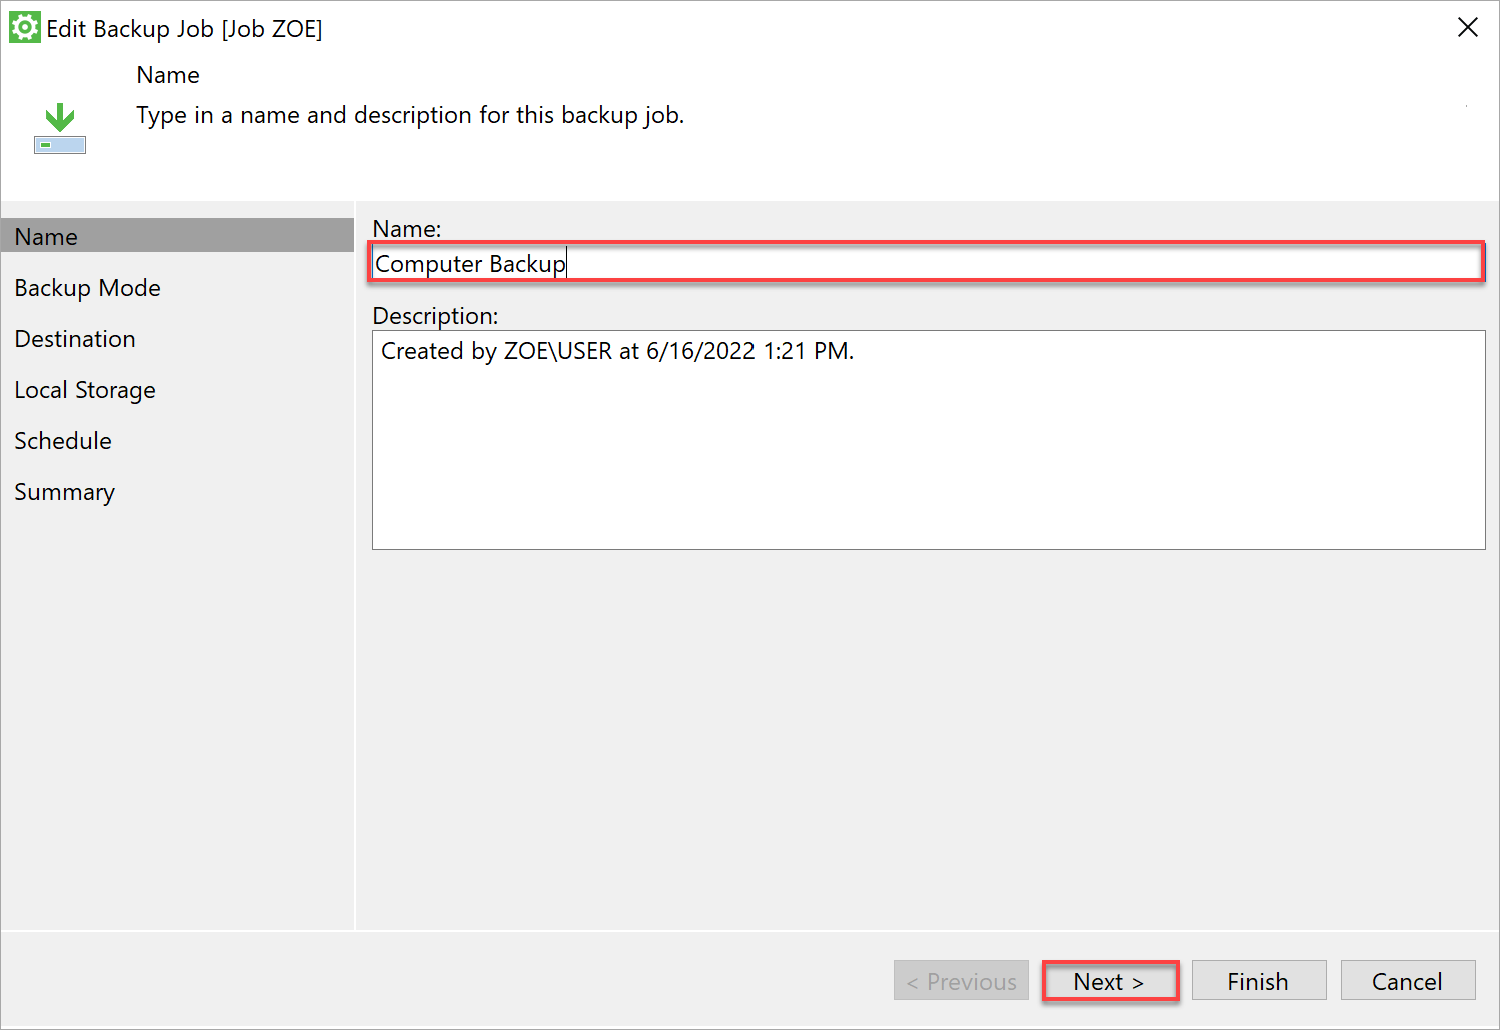
2. Next, name the backup job with the following, and click Next:
- Provide a descriptive name for the backup job. This tutorial’s choice is Computer Backup for simplicity.
- Setting a description is optional but would be great for identifying what the backup job is about.
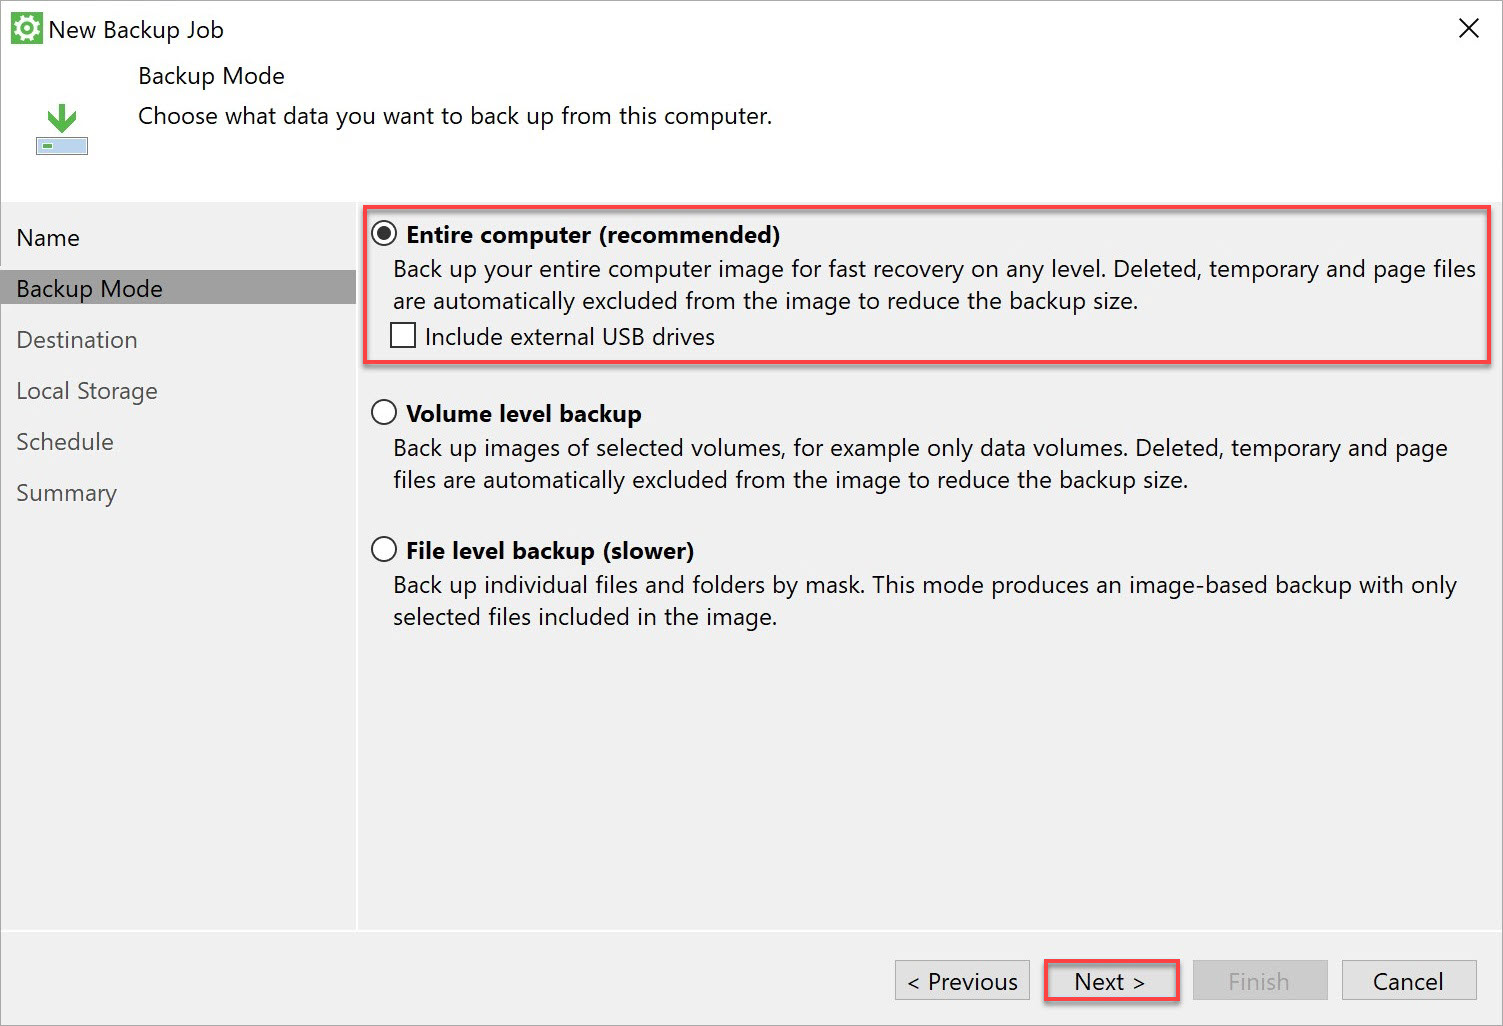
3. Choose a backup mode for the job depending on your need as follows:
- Entire computer – You can choose to backup every file, video, or document on your entire Windows computer. This mode is the first option recommended if you’re trying to change your laptop without losing any information.
- Volume level backup – You can choose the file’s volume to backup. This mode is useful if you plan to back up just a portion of your PC, like an important folder.
- File-level backup – You can perform backup using the folder-by-folder or file-by-file method, basically, one file or folder at a time. But note that the backup process is prolonged on this mode.
But in this, you’ll choose the Entire computer backup mode to backup everything on your Windows Server.
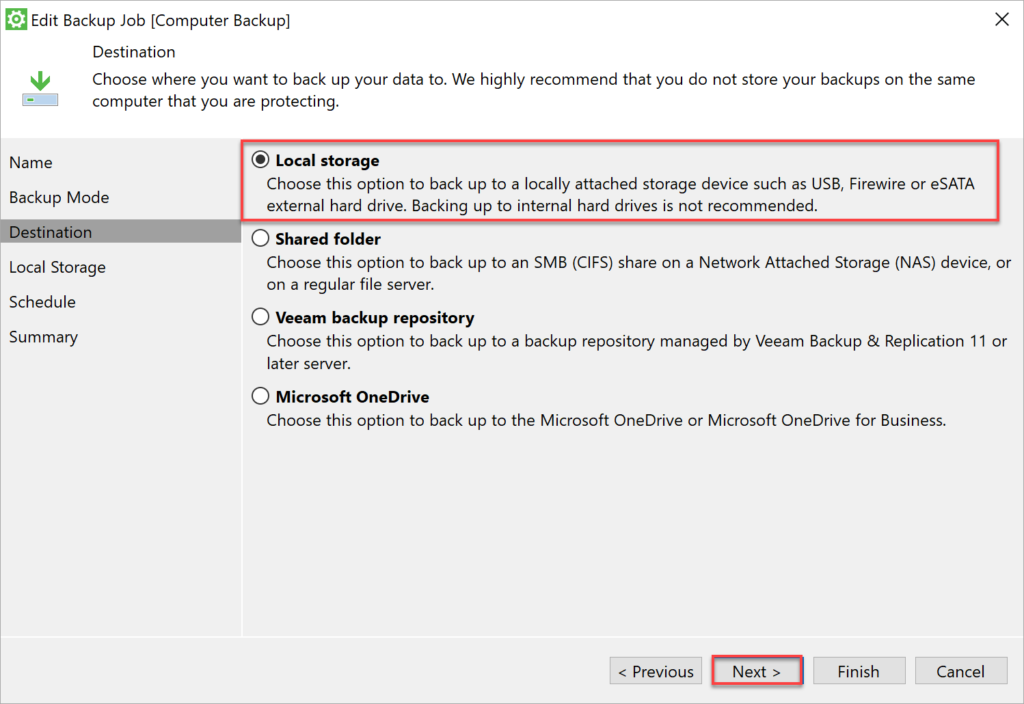
4. Now, select a destination for your backup based on which storage is available to you as follows:
- Local storage – As the name implies, this destination will be on a USB or an external hard drive (with enough space). Selecting an internal drive as local storage is never a good thing.
- Shared folder – This destination lets you back up data to a shared network, like in an office setting or a file server you can access.
- Veeam backup repository – This destination backs up to a repository or a network managed and maintained by Veeam Backup & Replication server. But you must have access-right to the repository before you can use this option.
- Microsoft OneDrive – This destination lets you back up data on your personal Microsoft OneDrive account or Microsoft OneDrive Business account. This option comes in handy if you don’t have access to the Veeam repository, an external drive, or a shared network.
But in this tutorial, you’ll choose the local storage as your backup’s destination. Ensure you have a USB or an external hard drive with enough space.
5. Select the external hard drive, USB, or any other storage device you wish to backup your computer. At this stage, you can also choose how long you want your backups to stay in your backup destination. But in this tutorial, the backups remain for 14 days.
Click Advanced to set the compression level for your backups (step six).  Choosing a storage device for backups
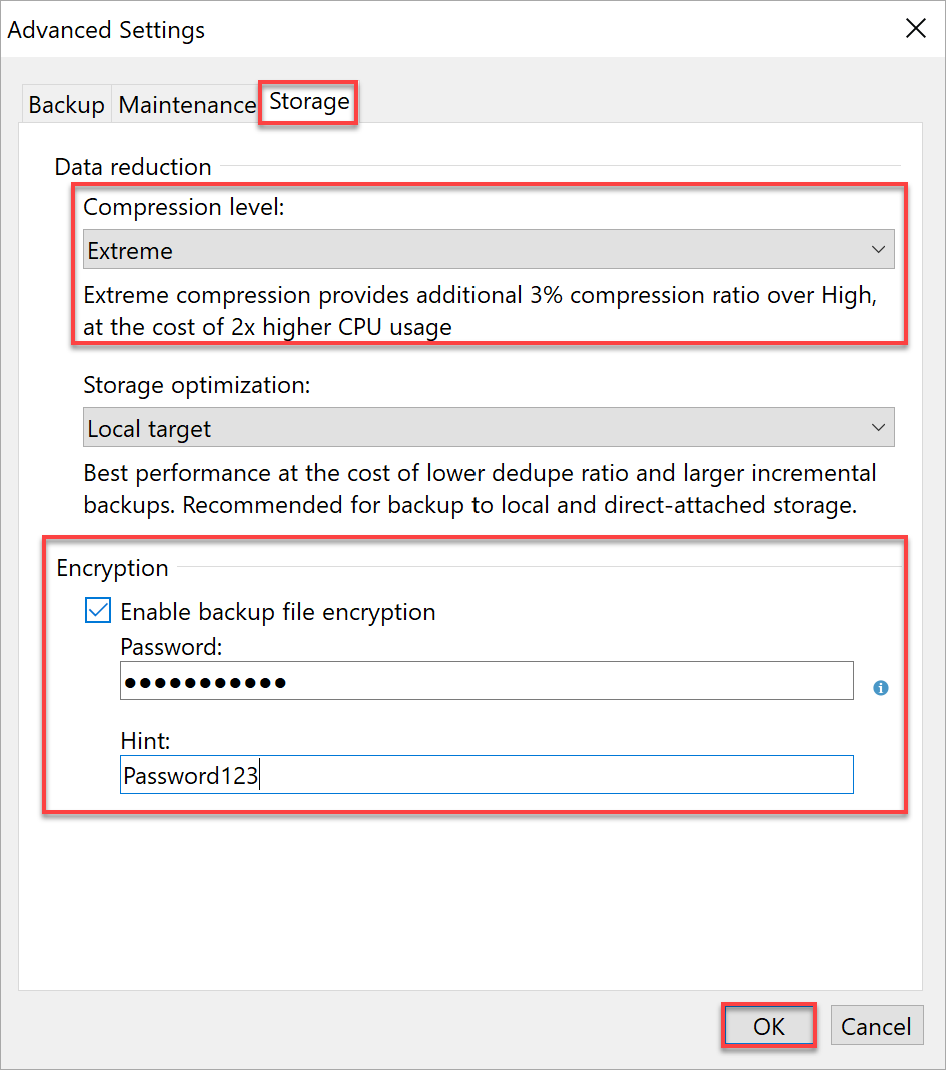
6. On the Advanced Settings window, configure the backup job’s advanced settings as follows:
Navigate to the Storage tab, and set the Compression level to Extreme.
Compression lets you backup your folders/files that are too large so that you can save some storage space.
Set a Password and a Hint to encrypt your backups automatically.
Important files you don’t wish anyone to see can be encrypted when handling files or folders on your local machine or server.
- Click OK to save the advanced storage settings and switch to the New Backup Job wizard.
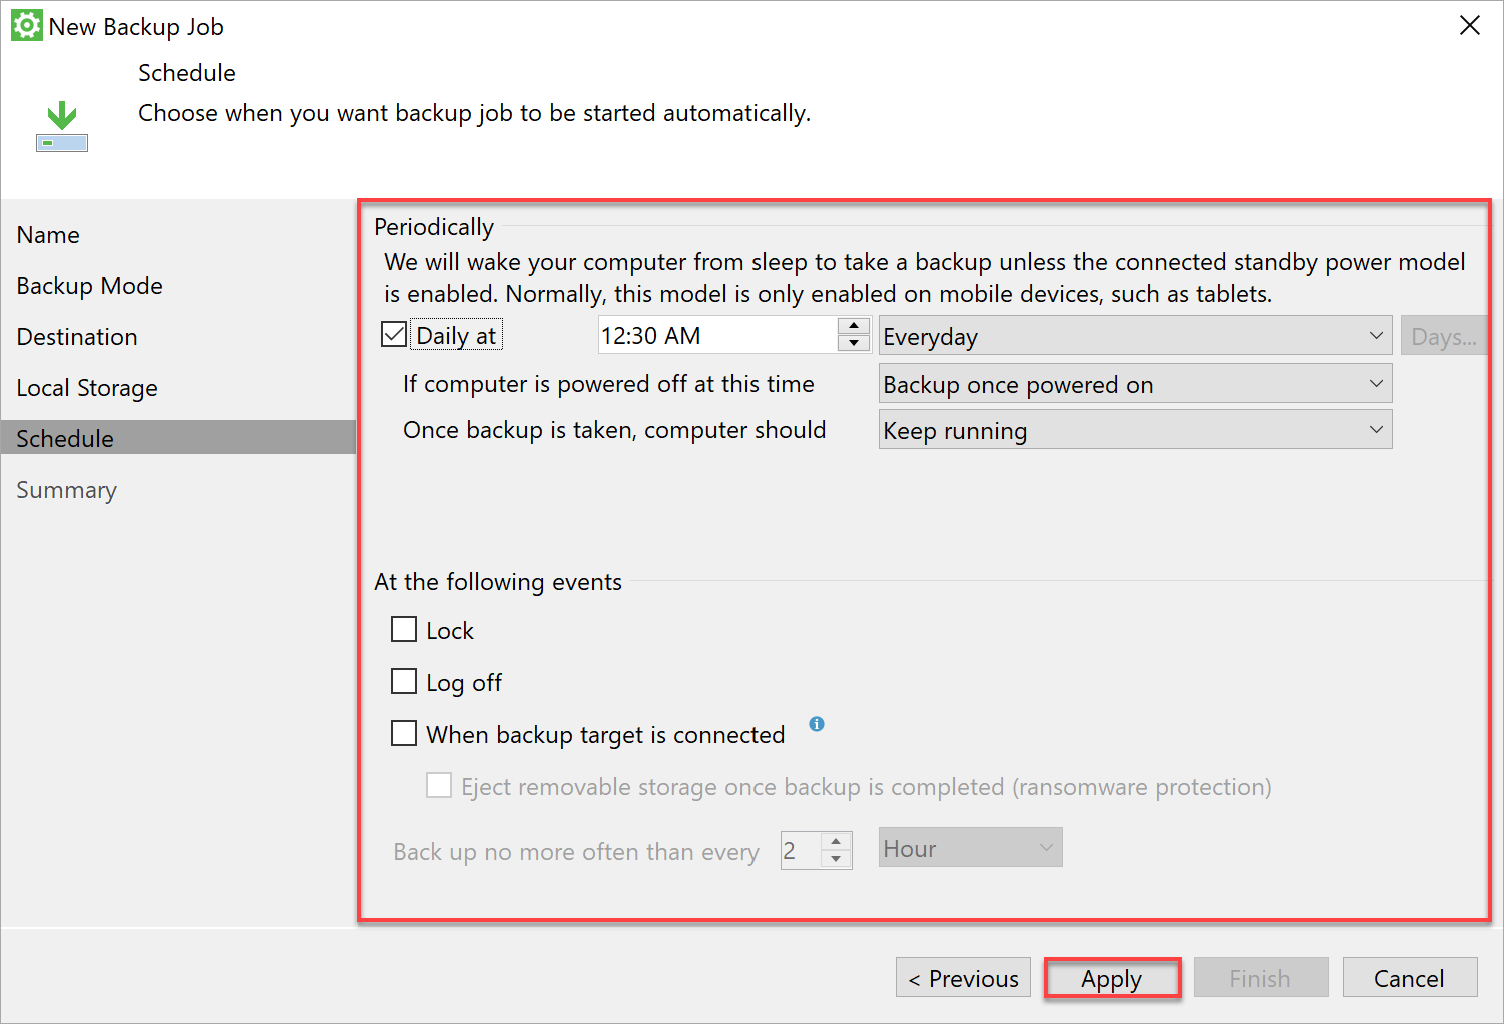
7. Next, set a schedule when your backup job starts and what action your computer takes after backup, and click Apply.
Different settings are there for you that help you start a backup event automatically when you’re busy.
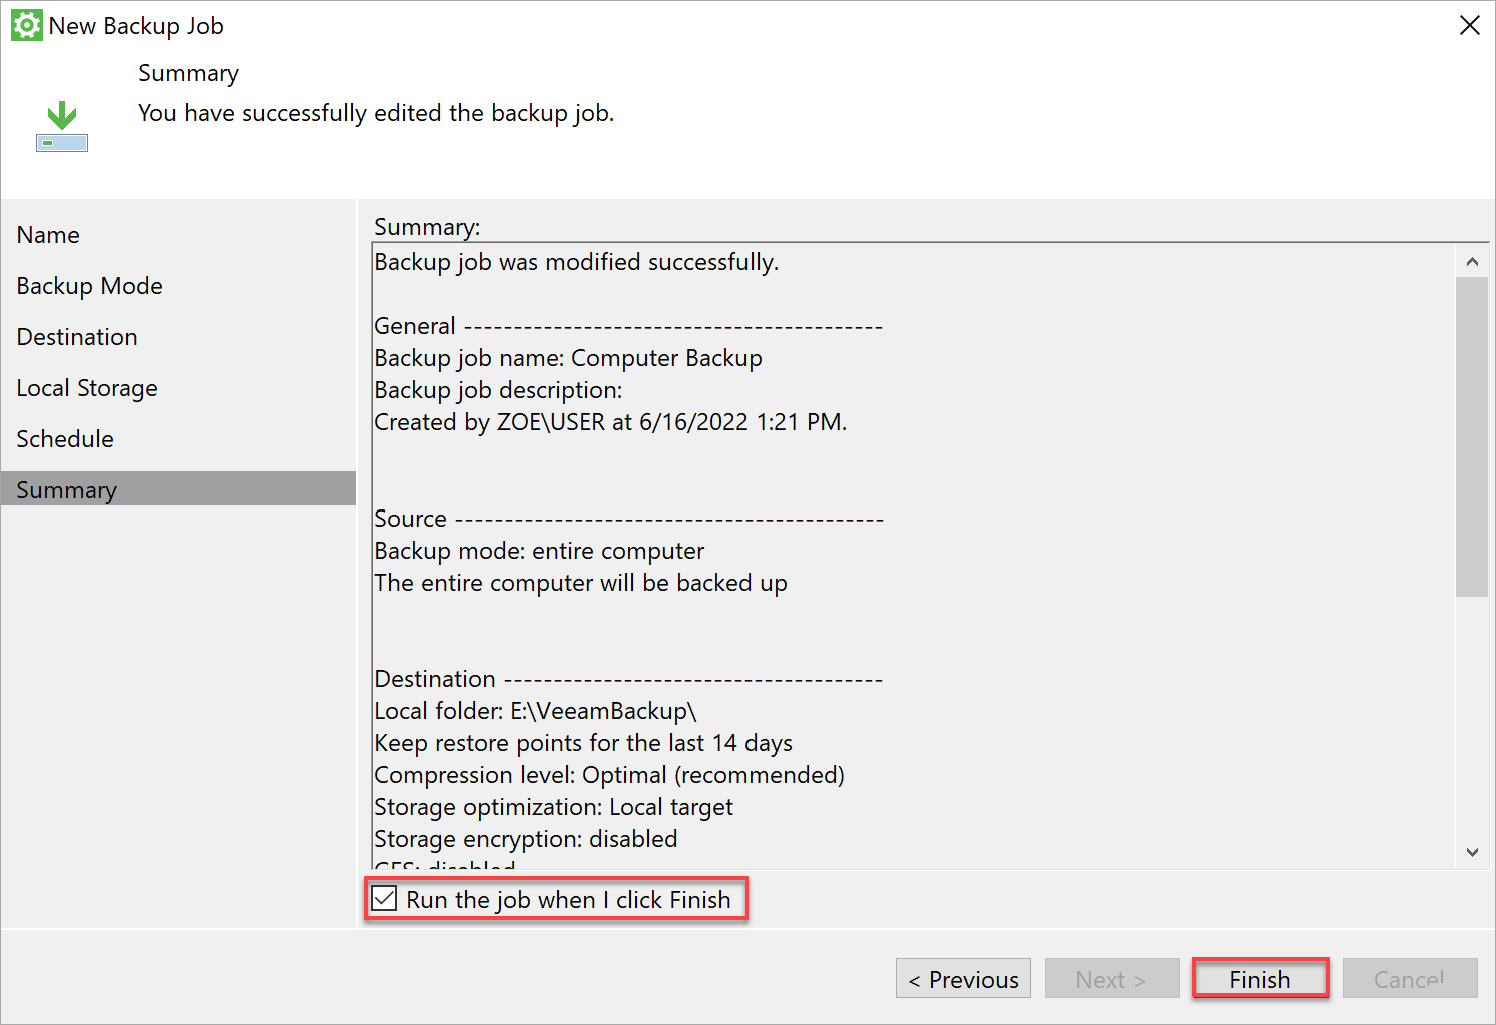
8. Review the summary of what you configured for the backup job.
Enable the Run the job when I click Finish option, then click Finish to run the backup job after you finalize the configuration.
Below, you can see Veeam performed an initial backup on your computer, as shown below. Note that the following backup becomes faster as they increment.  Overviewing the first backup job
Restoring Backups Using the Veeam Recovery Media
Restoring is a great way to know if the backup has been set up and works properly. And your Veeam Recovery Media will come in handy if you need to correct something on your backup.
How to restore backups? Veeam has dedicated software to restore backup files, the File Level Restore.
To restore backup files with File Level Restore:
1. Open File Level Restore from your Start menu.  Opening File Level Restore
2. Next, browse your external drive or where your backed up data is stored, and click Next.
Usually, Veeam detects the location automatically.

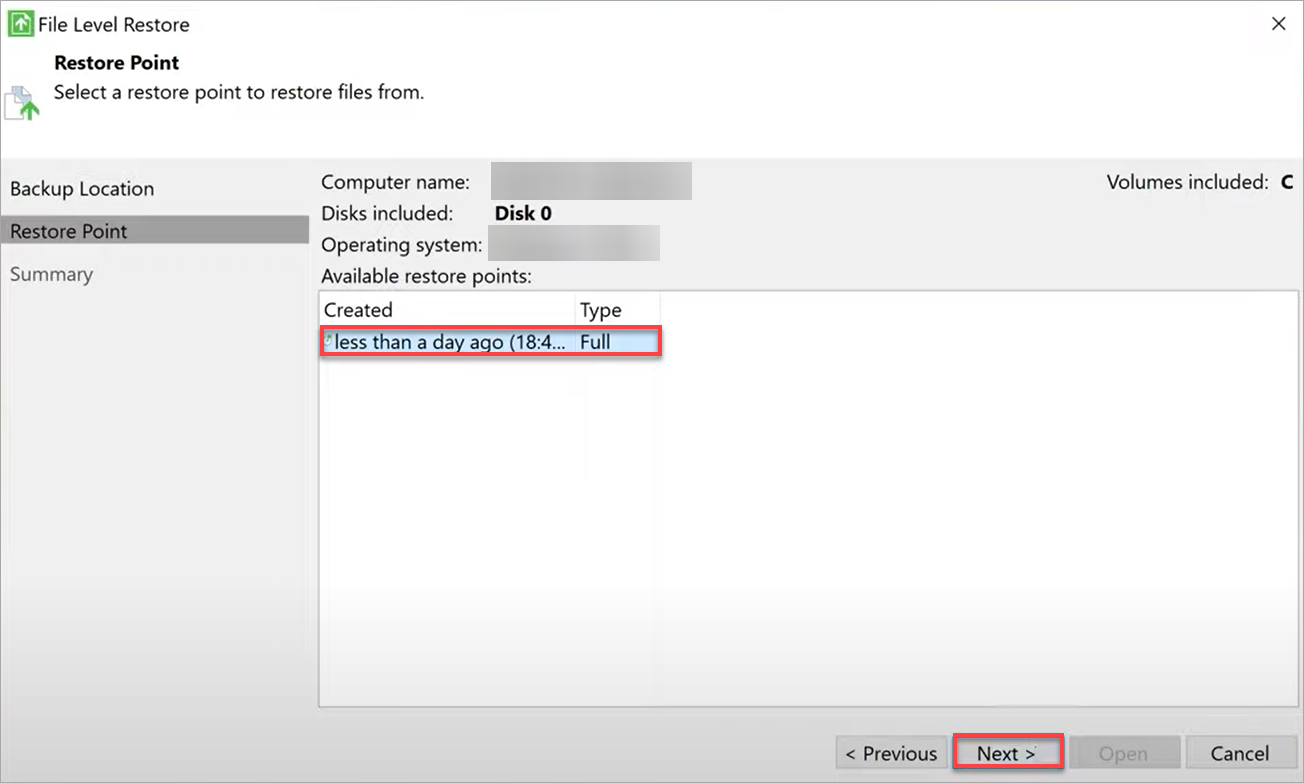
3. Select a restore point and click Next. Veeam allows you to browse the folder on the Veeam Agent and choose files to restore (step four).
4. Now, navigate to the folder that holds the file to restore.  Navigating to the folder of the files to restore
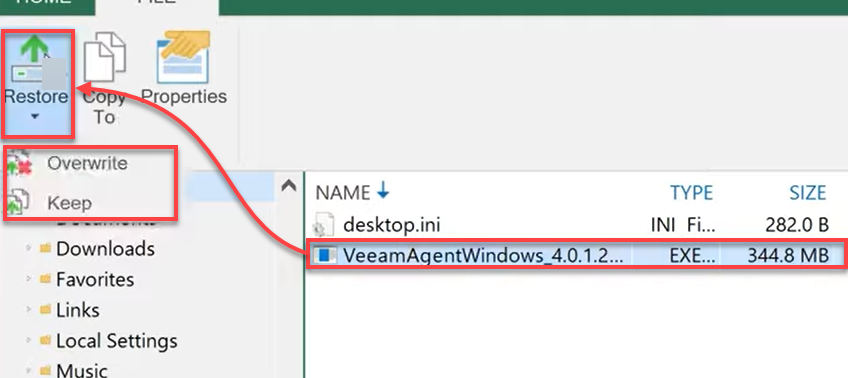
5. Once inside the folder, select all the files you like to restore and click Restore (top left).
Choose to Overwrite any existing files with the same file name, or Keep the current file and rename the newly-restored data.
If you can’t find the file to restore, that file may have been deleted already before you performed a backup. In that case, try recovering the file from your computer instead.
Once restored, you’ll see the following output.  Verifying successful file restoration
Setting up a Backup Email Notification
Having a scheduled backup job that runs at every certain point in time is great and all. But you may want to get a notification whenever the backup runs to better monitor that everything still works.
Luckily, with Veeam, you can set up an email notification that notifies you about a backup run on your server. This feature also helps when you want to know if a backup is successful without trying to restore what you just backed up.
To set up a backup email notification:
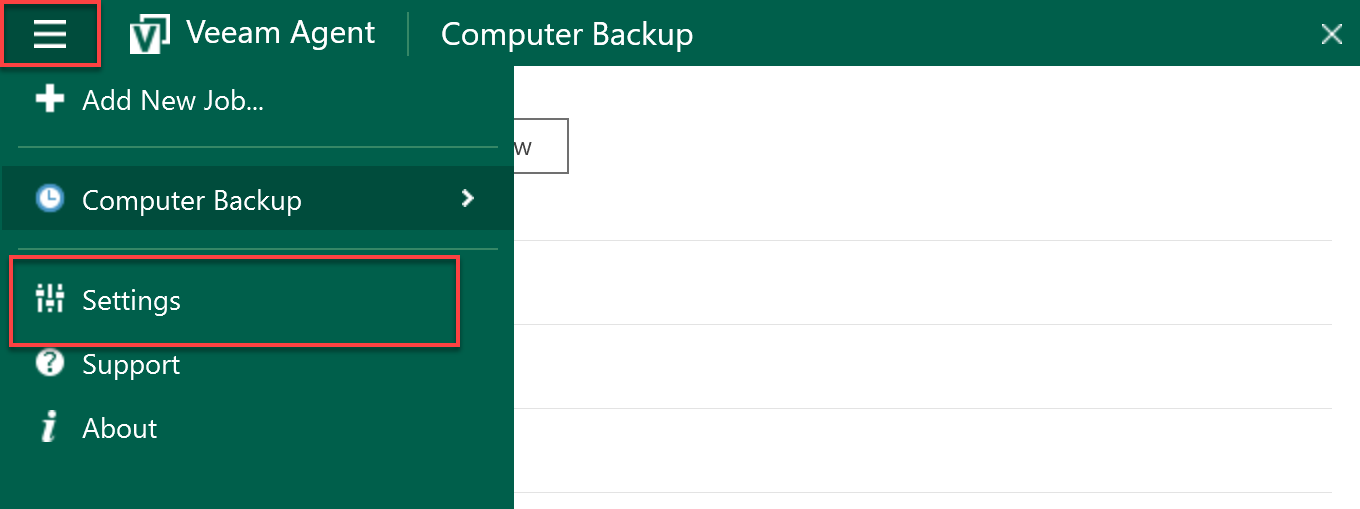
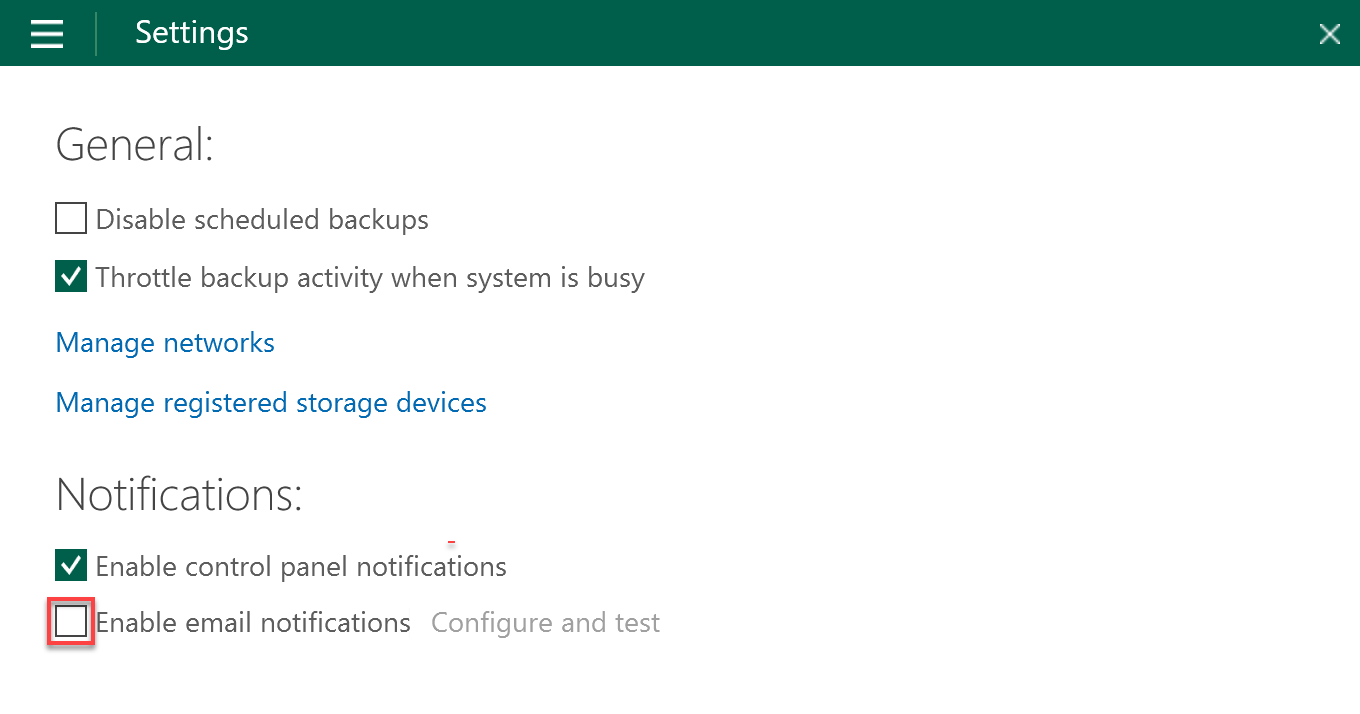
1. Open Veeam Agent for Windows, and navigate to the Settings section.
2. Next, tick the Enable email notifications option.
3. Click on Yes when prompted to install Veeam Agent Tray, as shown below. 
Installing Veeam Agent Tray
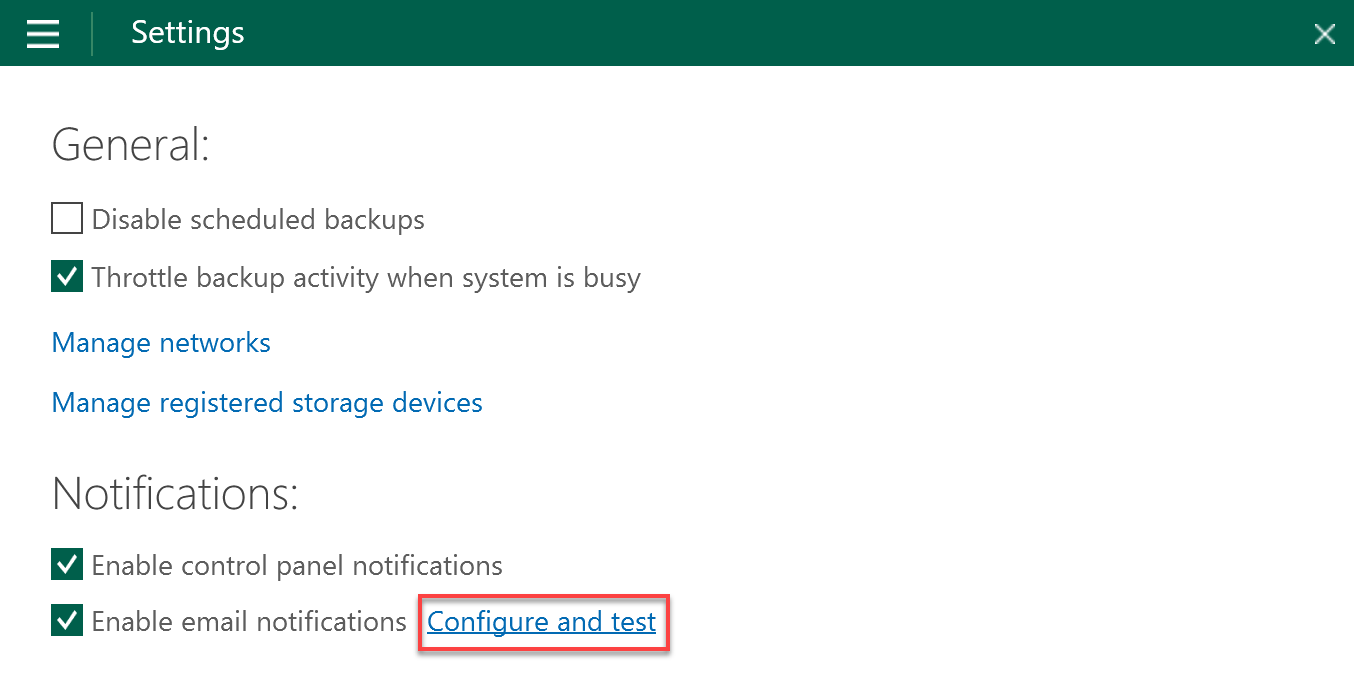
4. Now, click on the Configure and test link to configure the email notification.
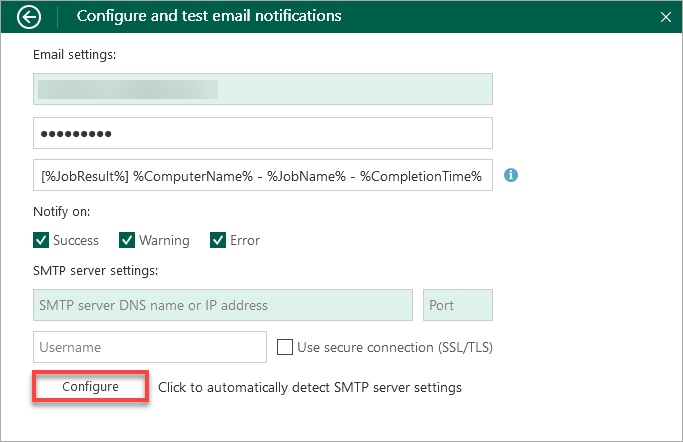
5. Configure your email notification with the following:
- Your email address – Set the email address where you want to receive the email notification.
- Password – Set a password to secure the email so only you can open the email.
- Set how you want the description to be displayed. Click on the information icon to learn more about the description format.
- Notify on – Tick the options to set when you want to be notified. But leaving all options ticked is strongly recommended.
- SMTP server settings – You can also set up an SMTP server but not needed in this tutorial.
- Click Configure to save the email notification configurations.
Another type of restoration that Veeam software agents provide is the bare metal restore. This method is more hands-on, letting you restore if the computer is unavailable or if you are restoring to a new machine and require the recovery media (ISO).
Conclusion
Backing up Windows Servers can be daunting. But with Veeam, you can set up a schedule to securely back up your servers automatically, even without human interventions. You’ve set an email notification to get notified if your backup event goes through or not.
Now you never have to worry about losing data even if your computer gives up on you. Will you let Veeam back up your videos, images, folder, and important documents from now on? Perhaps you’re looking to back up data stored in your Office 365 services?


