


Constantly worrying about your VMs and data ending up corrupted or missing? Why not turn to a cloud-native data protection solution? Whether for a VM or application, a Veeam Azure setup can save the day!
In this tutorial, you will learn how to configure Veeam Backup for Microsoft Azure, run backup policies, and perform recoveries.
Hold tight, as an efficient backup solution for your cloud environment solves your worst worries!
Prerequisites
This tutorial contains hands-on demonstration sections. To follow along, be sure you have the following:
- A Windows machine with the latest web browser – This tutorial uses Windows 10 Pro v21H2 running Google Chrome.
- A Microsoft Azure account with an active subscription – A free trial will suffice.
Deploying Veeam for Azure Backup
Veeam Backup for Microsoft Azure allows you to back up and recover your Azure resources, such as virtual machines (VMs), disks, and file shares. But first, you will install Veeam Backup for Microsoft Azure on your Azure platform and create and configure an Azure VM.
Veeam Backup for Microsoft Azure integrates with the Veeam Backup & Replication platform. This solution provides a unified backup and recovery solution for both on-premises and cloud-based workloads.
To deploy Veeam Backup for Microsoft Azure:
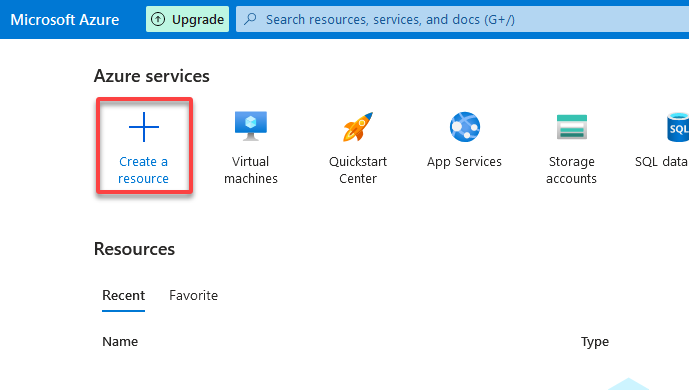
1. Open your preferred web browser, log in to the Azure Portal, and click Create a resource, redirecting your browser to Azure Marketplace.
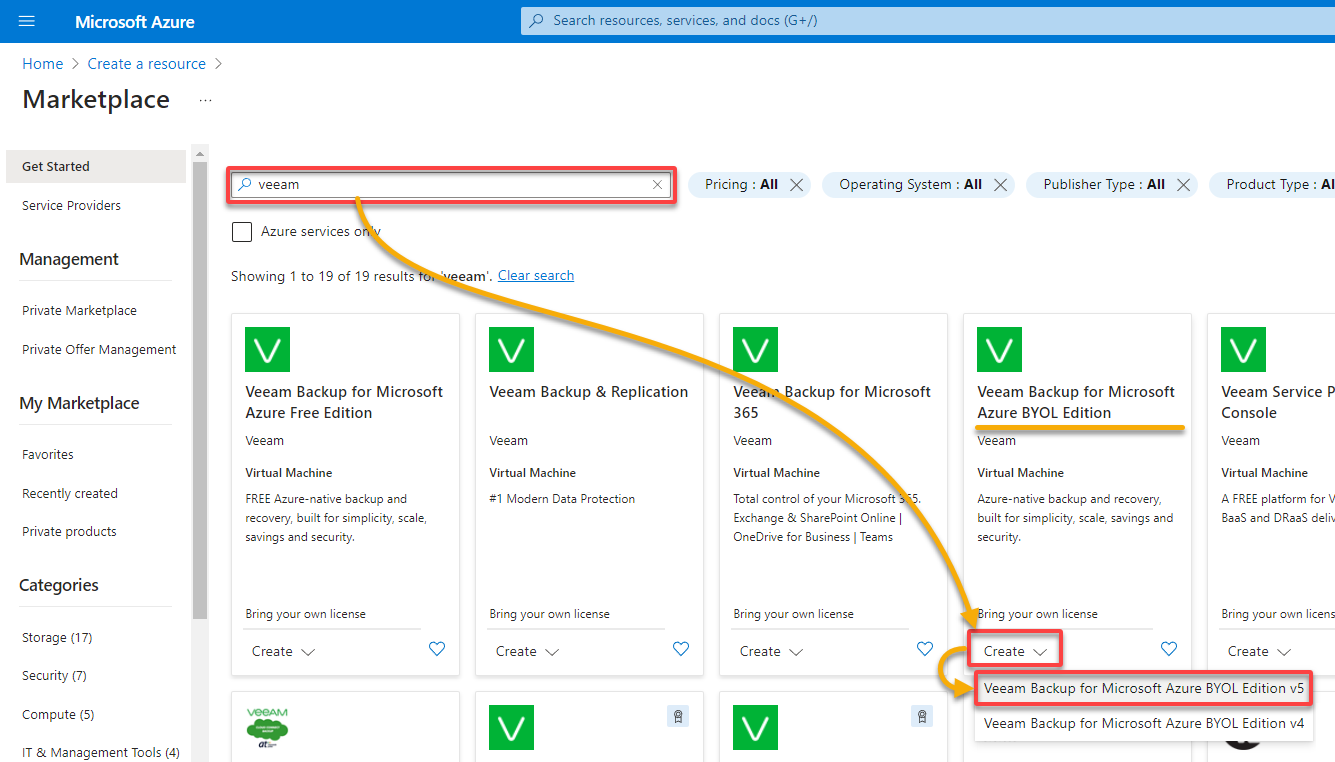
2. Next, create an Azure VM for Veeam Backup for Microsoft Azure, as follows:
- Search for veeam, and look for Veeam Backup for Microsoft Azure BYOL Edition.
- Click the Create dropdown, and choose v5, as shown below.
Your browser redirects to a page where you will create an Azure VM (step three).
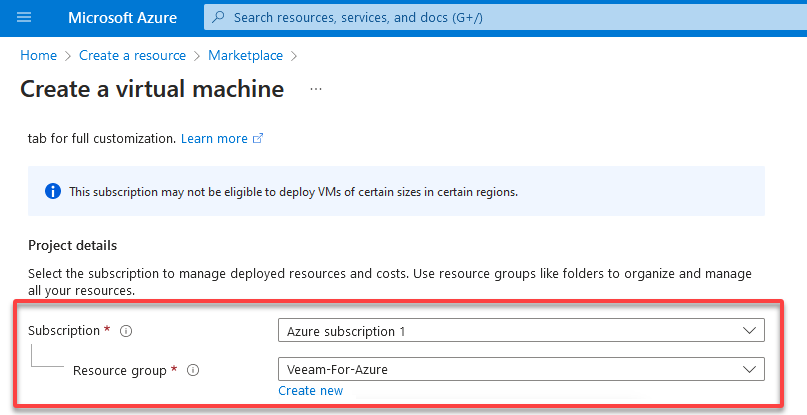
3. Now, configure the following project details:
- Subscription – Select an Azure subscription for managing the costs associated with the backup appliance.
- Resource group – Select a resource group (existing or new) to hold resources related to the backup appliance.
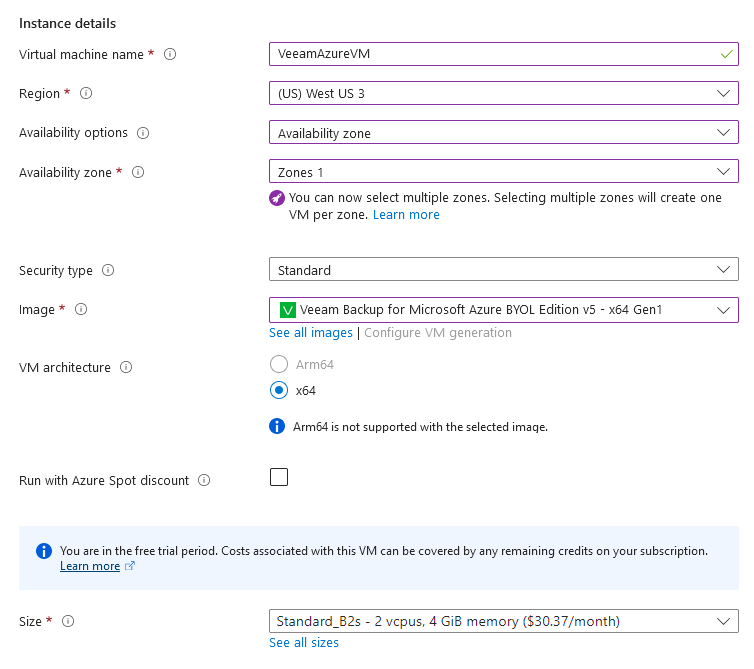
4. Scroll down, and configure the instance details with the following:
- Virtual machine name – Input a name for the backup appliance (i.e., VeeamAzureVM).
- Region – Select a region (i.e., (US) West Us 3) where the backup appliance will operate.
Regardless of your chosen region, you can still manage Azure VMs operating in other Microsoft Azure regions.
Availability options – Choose whether you want any infrastructure redundancy to achieve high availability (Availability sets or Availability zone). But for this tutorial, choose the Availability zone option.
- Availability zone – Choose Zones 1 to place the backup appliance within the selected Microsoft Azure region. Each region contains three availability zones. If one or more data centers in one zone malfunctions, your Azure resources become instantly available in another.
- Image – Select Veeam Backup for Microsoft Azure BYOL Edition **in the dropdown list.
- Azure Spot discount – Ensure the Azure Spot Instance option is disabled. The Azure spot functionality lets Azure redistribute currently unused storage capacity between different Azure resources. But this behavior may cause performance issues for the backup appliance if this option is enabled.
The Azure spot functionality lets Azure redistribute currently unused storage capacity between different Azure resources. But this behavior may cause performance issues for the backup appliance if this option is enabled.
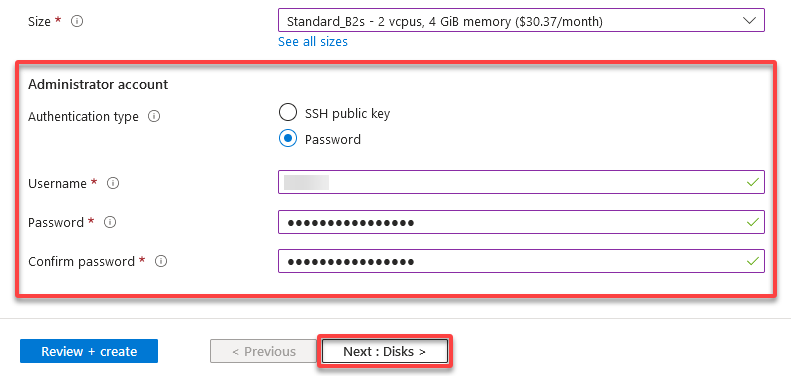
- Size – Choose a size for the backup appliance. The recommended hardware minimum is Standard_B2s with 2 vcpus and 4 GiB memory.
5. Now, configure the Administrator account as follows:
- Authentication type – Choose Password for demonstration purposes.
Note that the SSH Public key is more secure than the Password option but requires extra configurations, which may make things appear complex.
- Username and Password – Specify the default admin account credentials you will use later to log into Veeam Backup for Microsoft Azure.
Once configured, click Next : Disks > to continue.
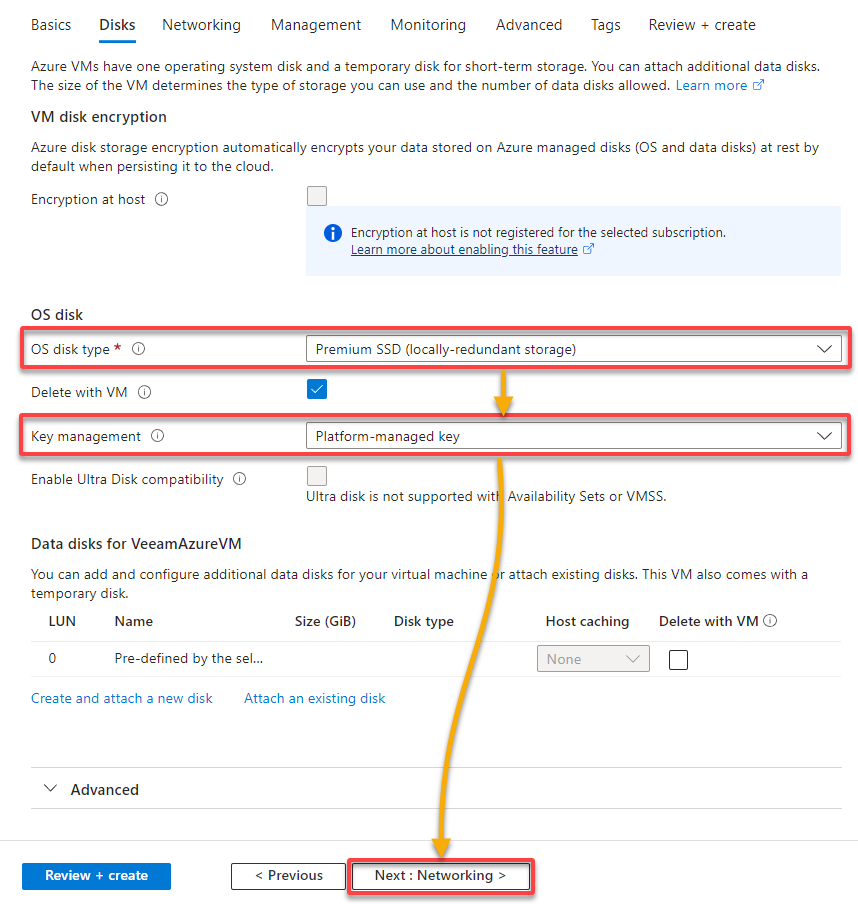
6. Under the Disks tab, configure the VM’s disk settings:
- OS disk type – Select Premium SSD (for better disk performance) to attach to the backup appliance.
- Key management – Choose an encryption type for Veeam Backup for Microsoft Azure data based on your needs:
| Encryption type | Details |
|---|---|
| Platform-managed key | The default encryption type where keys are generated, stored, and managed entirely by Azure. |
| Customer-managed key | Lets you specify your own key and ensures better control of your keys and data, but it has several restrictions. |
For a customer-managed encryption key to be displayed in the Disk encryption set list, it must be created in the Microsoft Azure Portal.
Leave the rest of the options as default (pre-configured by Veeam), and click Next : Networking > to continue.
7. At the Networking tab, configure the following network settings:
- Virtual network, Subnet, and Public IP – Select the virtual network, subnet, and public IP (existing or new) to connect your backup appliance.
- Configure network security group – Select a network security group (existing or new) to associate with the specified subnet.
- Load balancing options – Choose None to disable load balancing since only one VM runs Veeam Backup for Microsoft Azure.
Once configured, click Next : Management > to proceed.

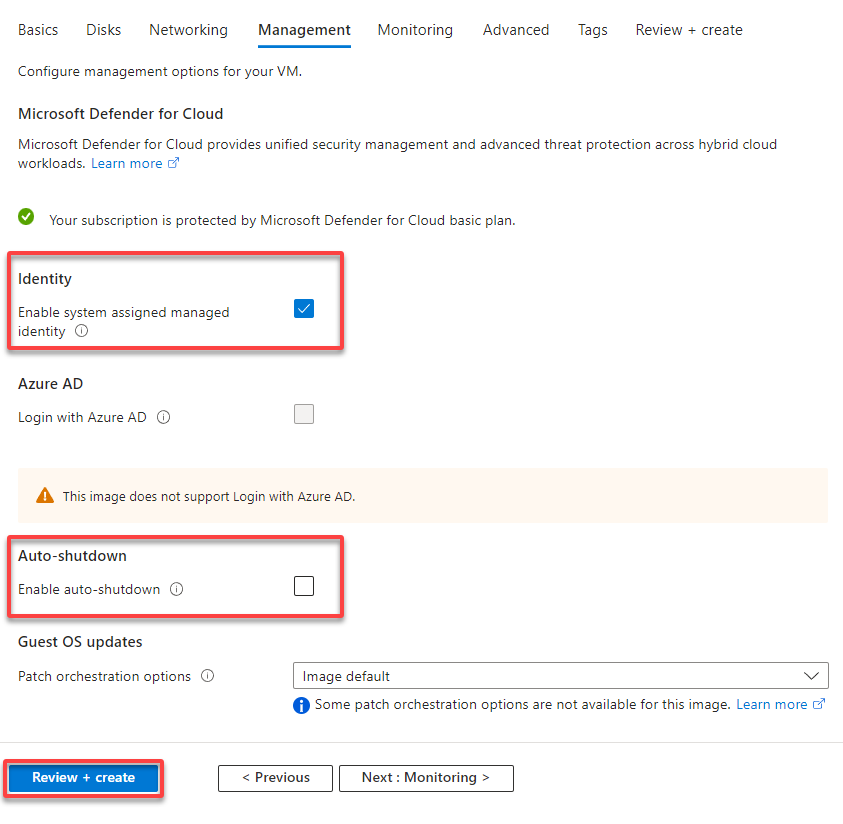
8. Now, configure management options as follows:
- Identity – Tick the box to choose whether to grant identity access to the backup appliance to ensure protected access to Azure resources.
- Auto-showdown – Ensure this feature is disabled to avoid unpredictable performance malfunction of the backup appliance.
After configuring, click Next: Monitoring > to continue.
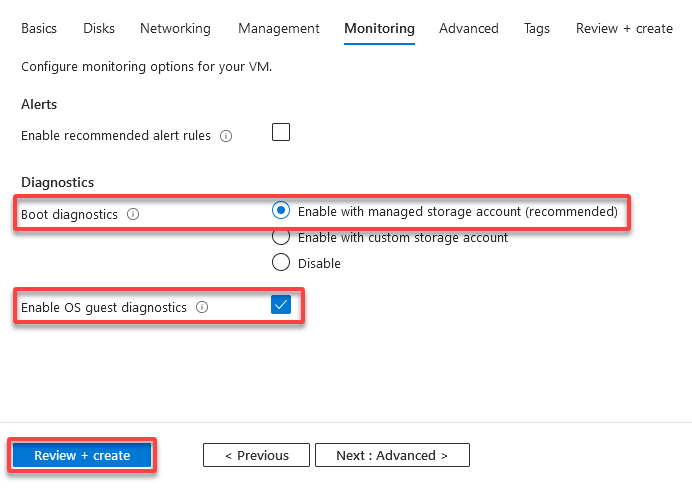
9. Under the Monitoring tab, configure how to monitor your VM, which can help troubleshoot server malfunction issues:
- Boot diagnostics – Select the first option to enable boot diagnostics, so you can choose whether to capture the console output and screenshots of the backup appliance.
- Enable OS guest diagnostics – Tick this box to choose whether to collect capacity-related guest OS metrics.
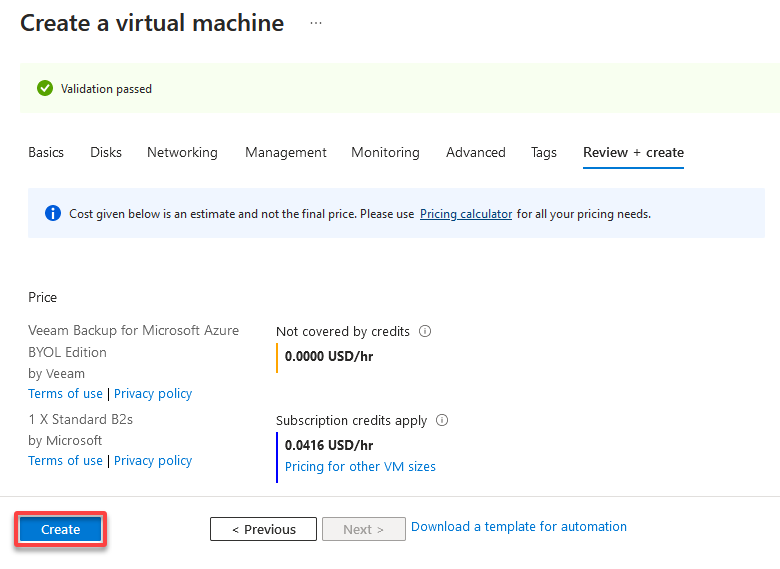
Once configured, click Review + create to review the configured settings for your VM.
10. Lastly, review your selected settings and costs, and click Create to deploy Veeam Backup for Microsoft Azure.
Perhaps you plan to specify advanced configuration settings, deploy additional extensions, pass custom scripts, and assign tags to the backup appliance. If so, navigate to the Advanced and Tags pages, and follow the instructions provided in the wizard.
Accessing Veeam Backup for Microsoft Azure
With your Azure VM running, it is time to configure Veeam Backup for Microsoft Azure and ensure it works. But first, you will need to access Veeam Backup for Microsoft Azure via the Azure Portal.
To access Veeam Backup for Microsoft Azure, follow these steps:
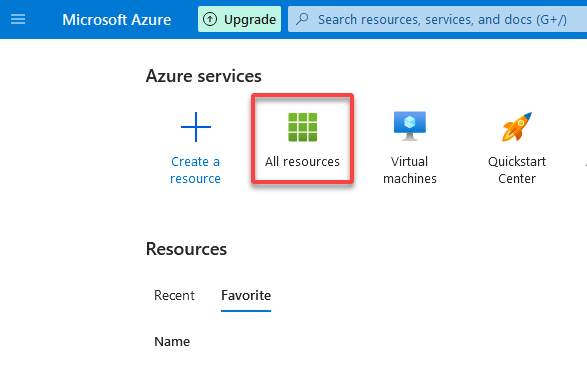
1. Return to the Azure Portal dashboard, and click All resources to view all available Azure resources in your account.
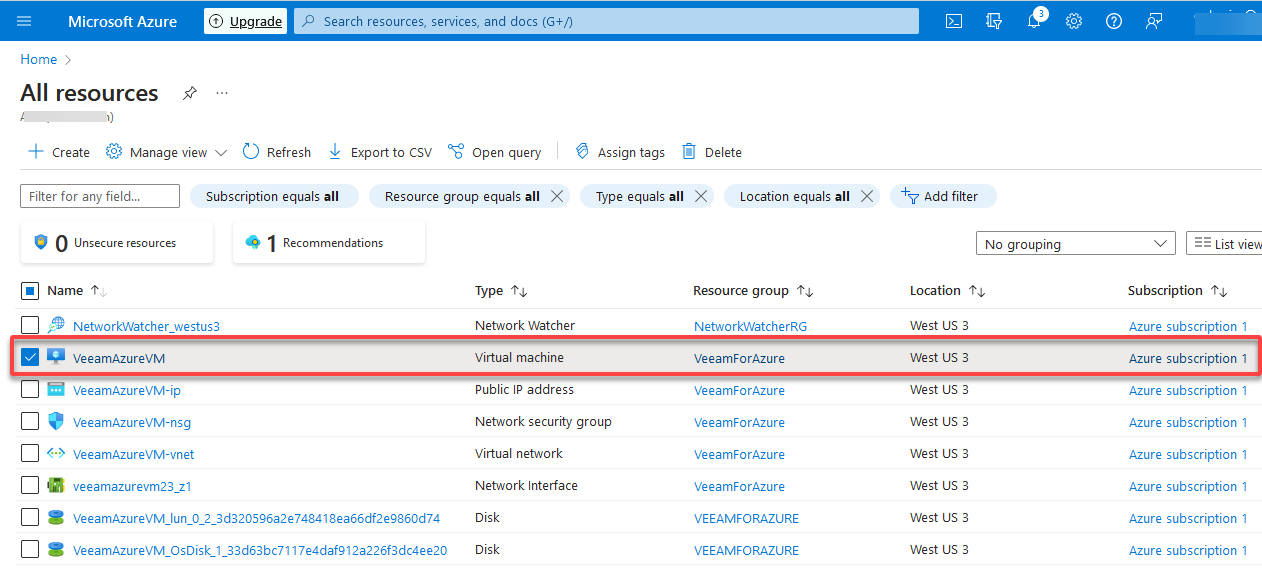
2. Next, click your newly-created VM to launch it, as shown below.
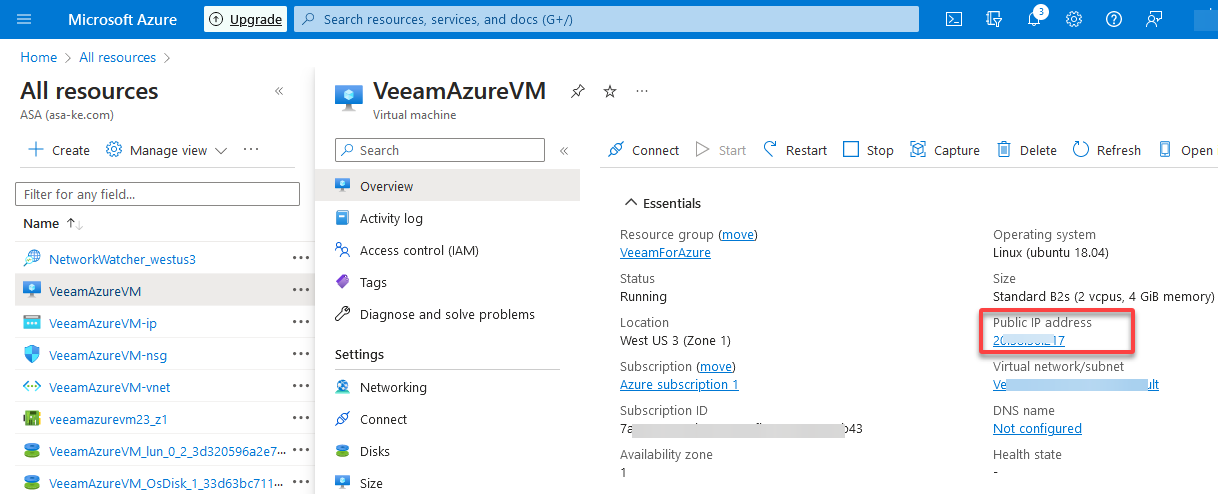
3. Copy and navigate to your VM’s Public IP address (available over HTTPS only) in a new browser tab to access Veeam Backup for Microsoft Azure.
Note that Internet Explorer cannot access Veeam Backup for Microsoft Azure. You must use other browsers’ latest versions instead, like Microsoft Edge, Mozilla Firefox, or Google Chrome.
Wait for the initial run to complete.

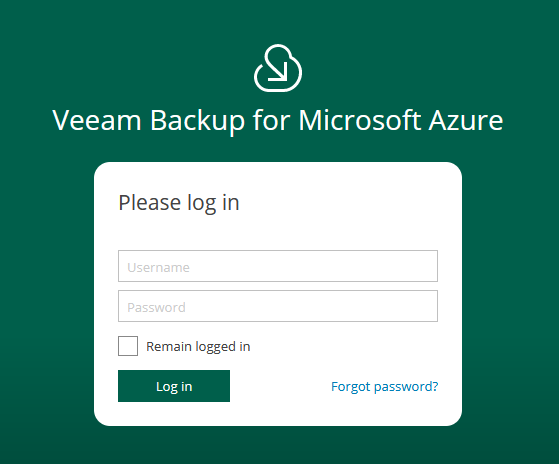
4. Now, log in to Veeam Backup for Microsoft Azure with your administrator credentials.
In the future, you can add other users to grant access to Veeam Backup for Microsoft Azure.
5. Now, read the license agreement, and click Accept.
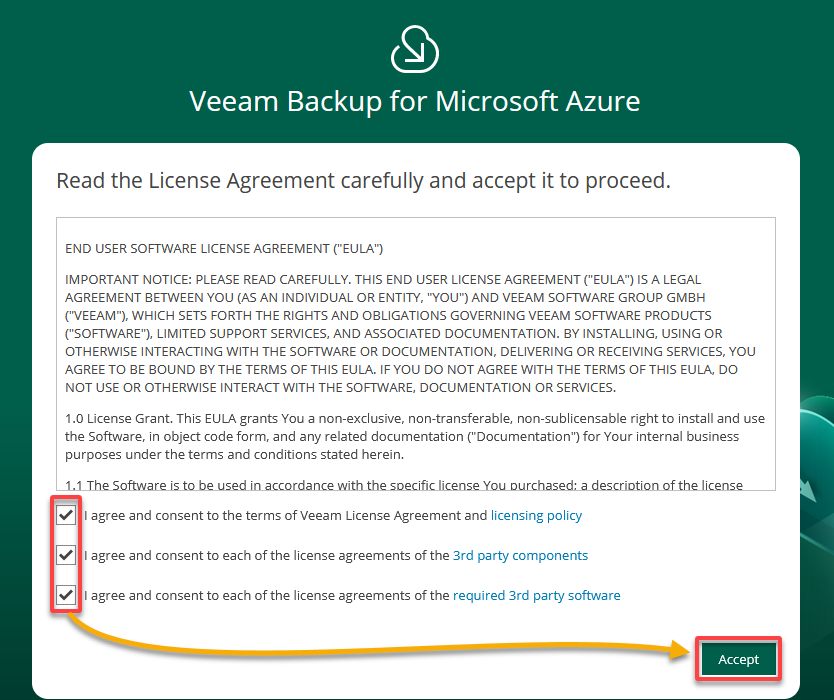
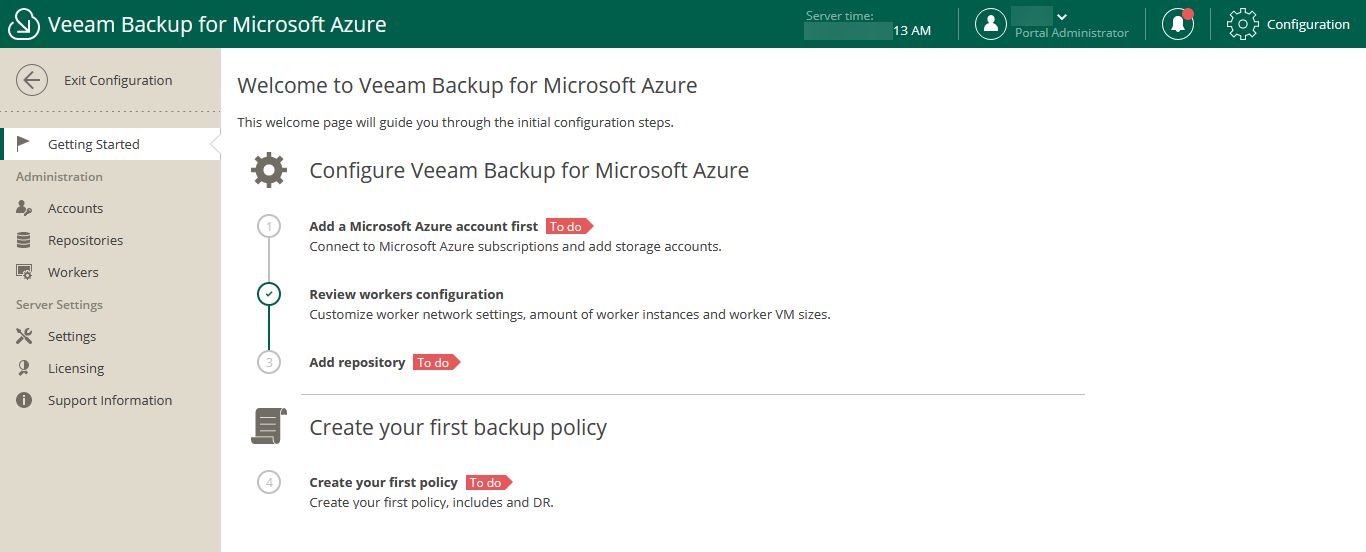
Once logged in, your browser redirects to the Veeam Backup for Microsoft Azure console, as shown below.
Adding Azure Service Accounts
Great job setting up and accessing the Veeam Backup for Microsoft Azure console! But what can you accomplish in the console? You can add an Azure service account to grant applications, services, and tools access to Azure resources.
To add an Azure service account via the Veeam Backup for Microsoft Azure console:
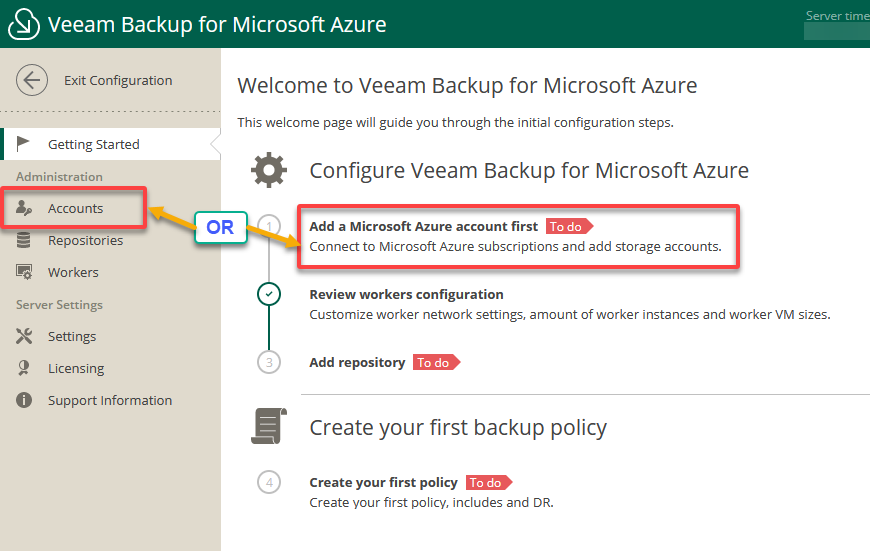
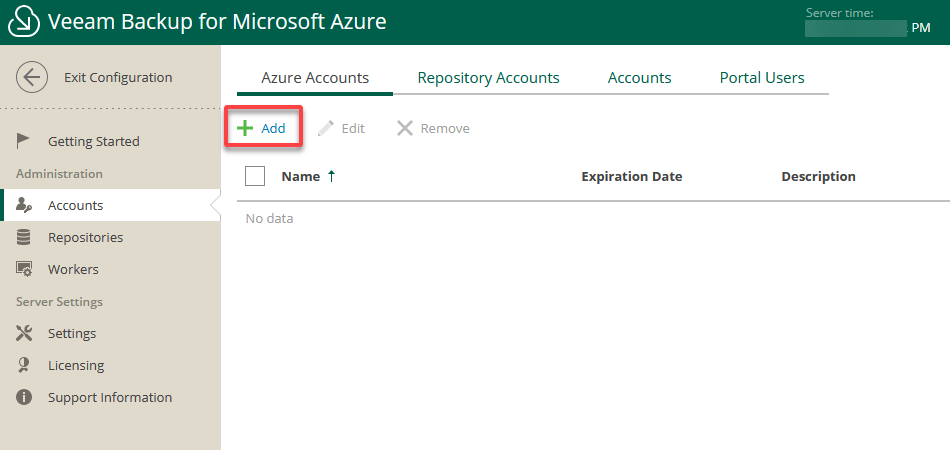
1. Click the first step, as shown below, or navigate to Accounts (left pane) to access the accounts management page.
2. Next, click Add under the Azure Accounts tab to launch the Add Azure Account wizard.
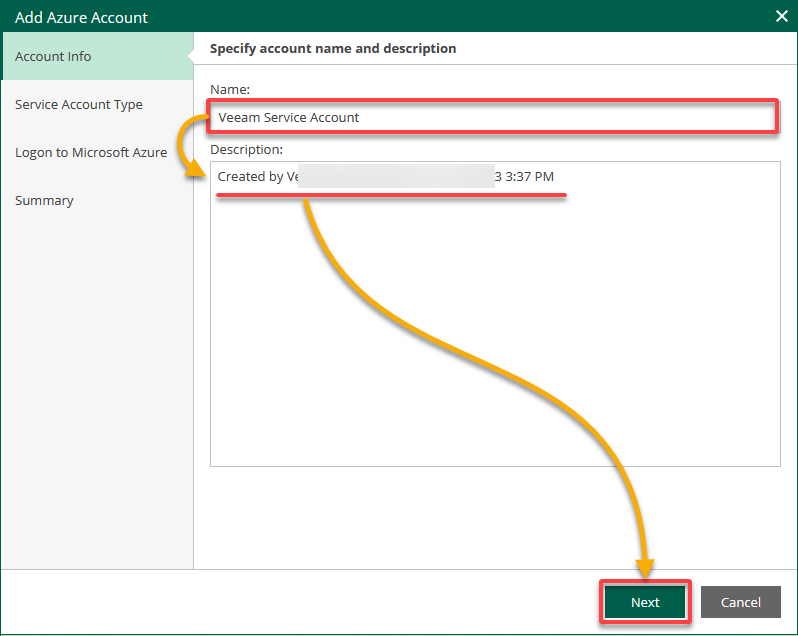
3. Provide an account Name and Description, and click Next.
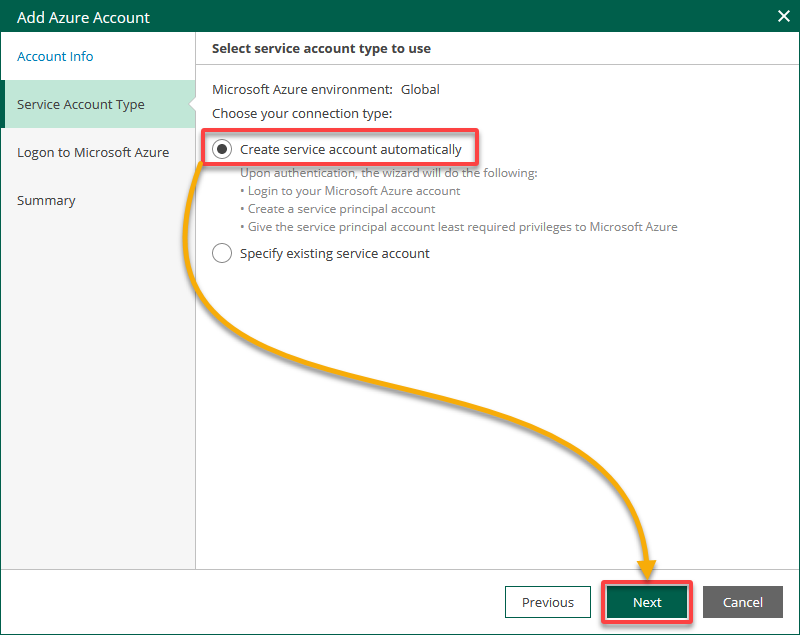
4. Now, choose the first option to create a service account automatically ****to Azure Active Directory (AD), and click Next.
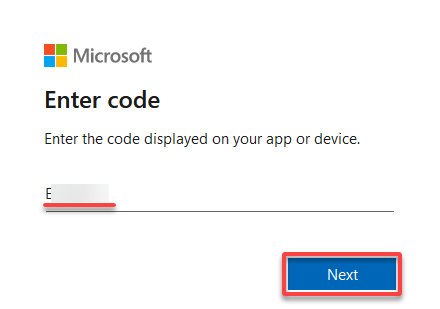
5. Copy the authentication code, and navigate to https://microsoft.com/devicelogin in a new browser tab, which opens the Microsoft Azure device authentication page.
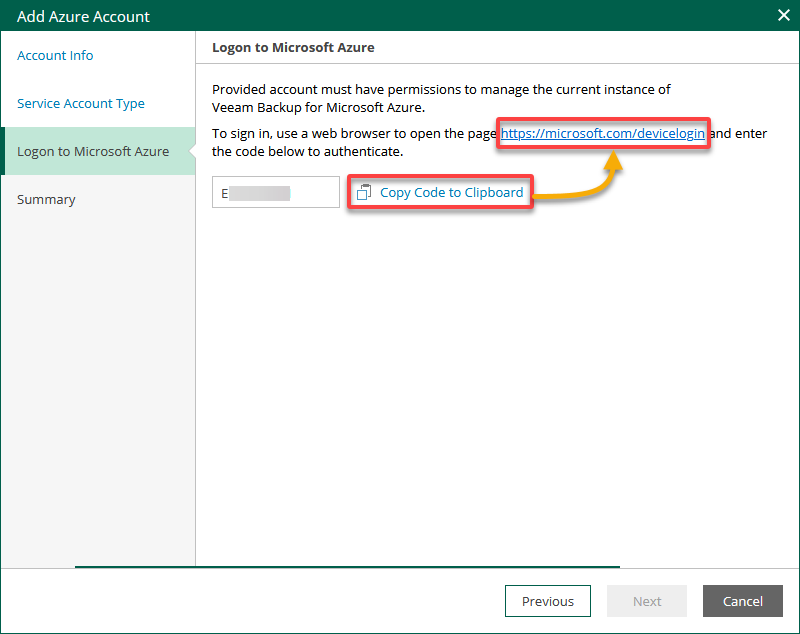
6. Input the code you copied in step five, click Next, and select an account to authenticate in accessing the Azure CLI.
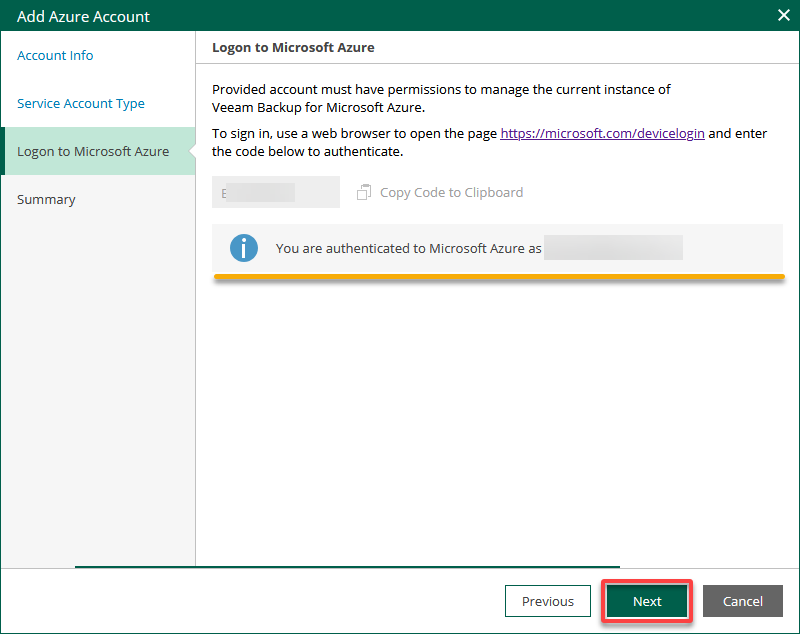
7. Once authenticated, check whether any errors occurred during the authentication process in the Add Azure Account wizard, and click Next.
Note that the account must be assigned either the User Access Administrator or the Owner role.
8. Tick the box below, and select a group to add to the Azure AD application. Doing so allows backing up Azure resources as a group.
Adding service accounts to AD groups allows users to limit access to the service accounts only to specific Azure subscriptions.
Note that a group must be created in the Microsoft Azure Portal to be displayed in the list.

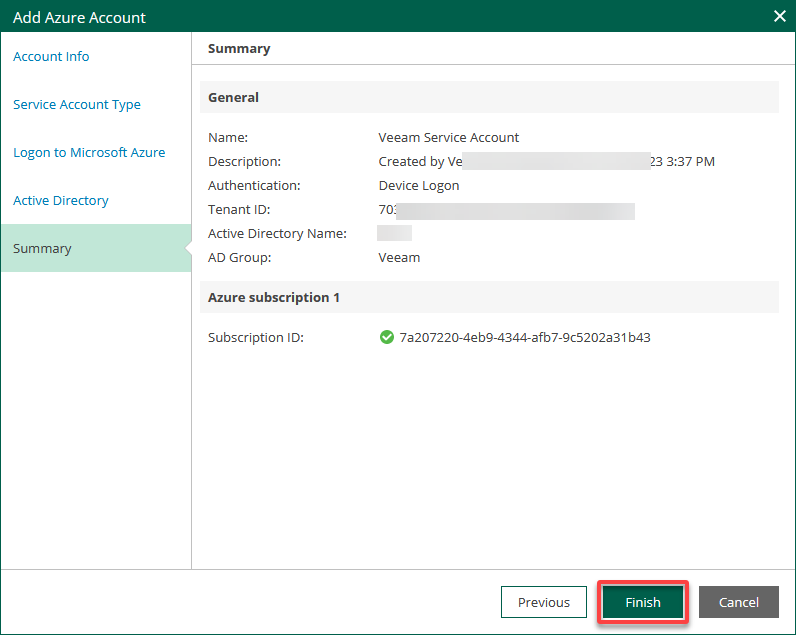
9. Lastly, review the selected configuration information, and click Finish to finalize configuring the new Azure service account.
Configuring Backup Repositories
With a service account logged in, you are almost ready to perform backups for Microsoft Azure resources. How? Veeam Backup for Microsoft Azure uses blob containers as target locations for image-level backups of Azure VMs.
To store backups in blob containers, you must configure backup repositories as follows:
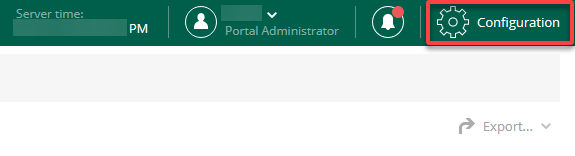
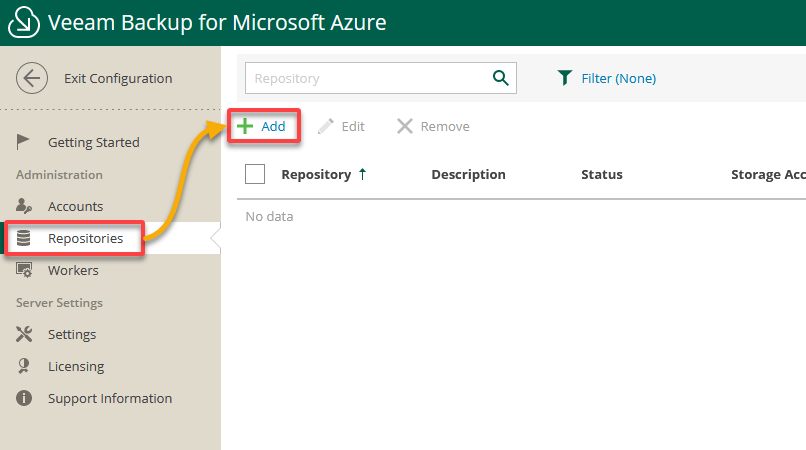
1. On the Veeam Backup for Microsoft Azure console, click the Configuration menu (top-right) to access the configuration settings.
2. Next, navigate to Repositories (left pane), and click Add to initiate adding a new backup repository.
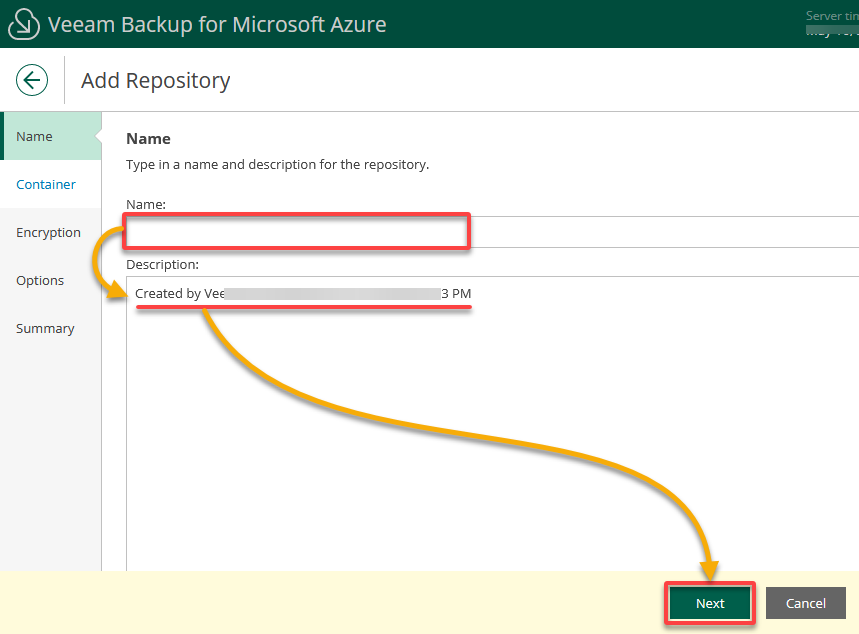
3. Enter a Name and Description for the backup repository, and click Next.
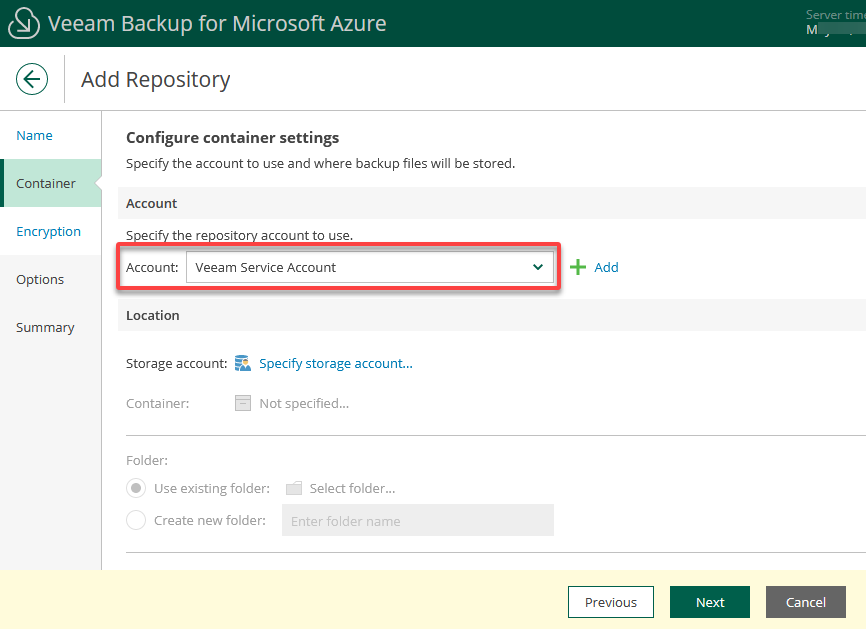
4. Now, select the Azure service account to access your newly-created repository.
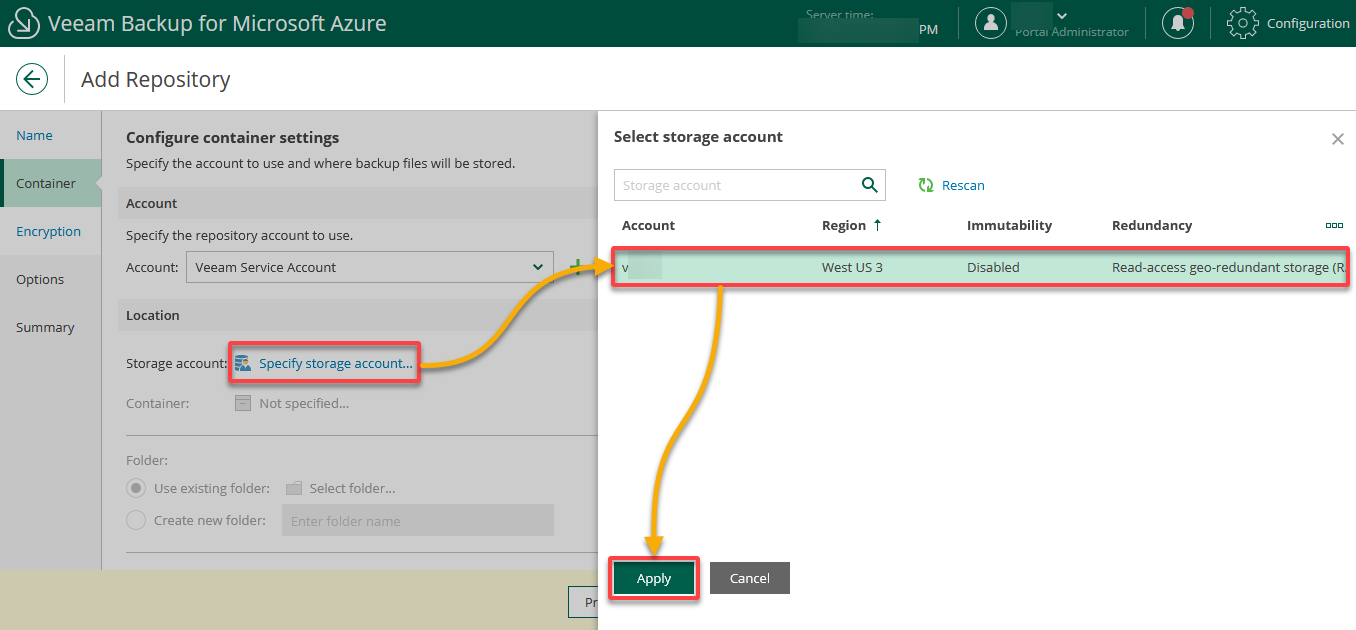
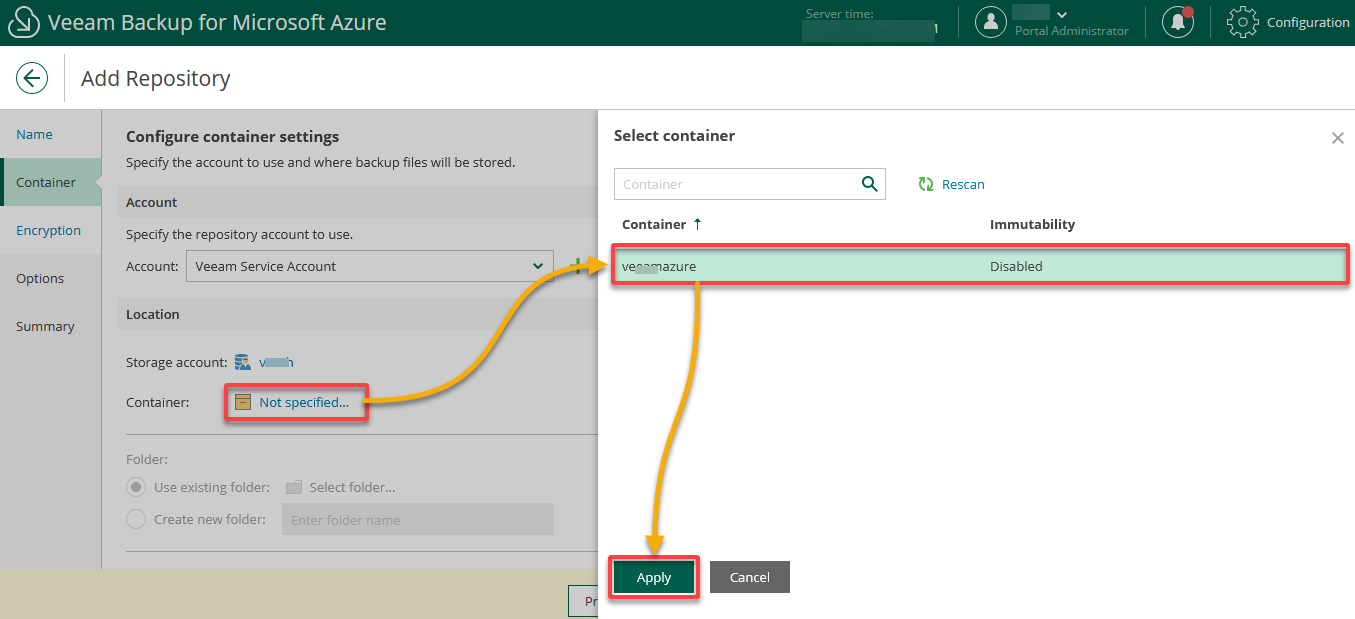
5. Click Specify storage account, select an account to access the backup repository in the pop-up window, and click Apply.
For a storage account to be displayed in the list of available accounts, it must be created in the Microsoft Azure Portal.
6. Click Not specified, select a blob container as a target location for backups of Azure resources, and click Apply.
Note that a container must be created for the selected storage account in the Microsoft Azure Portal to be displayed in the container list.
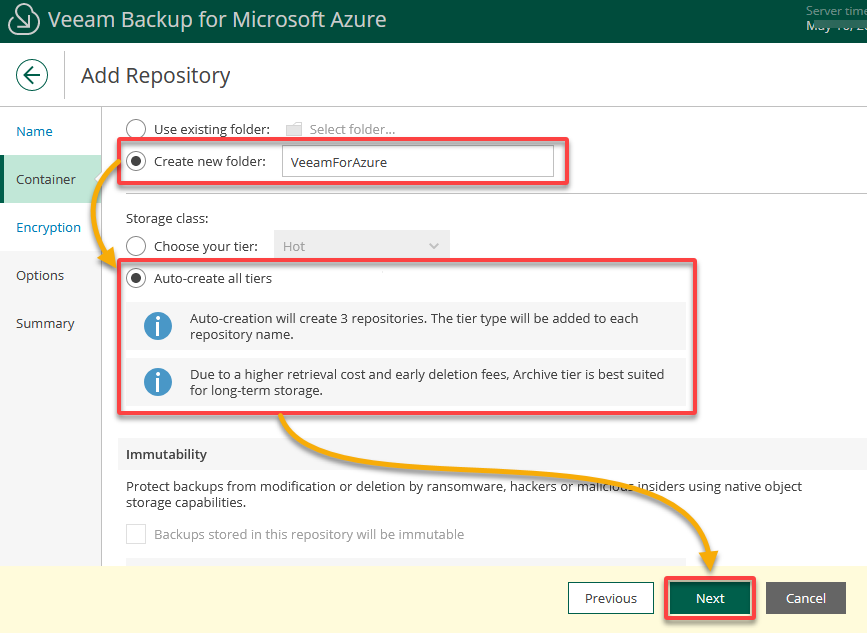
7. Scroll down, and configure the folder and storage class settings:
- Folder – Select the Create new folder option for grouping the backup files stored in the container, and specify a folder name (i.e., VeeamForAzure).
- Storage class – Select the Auto-create all tiers option to create three separate repositories for the Hot, Cool, and Archive access tiers automatically.
Once configured, click Next to continue.
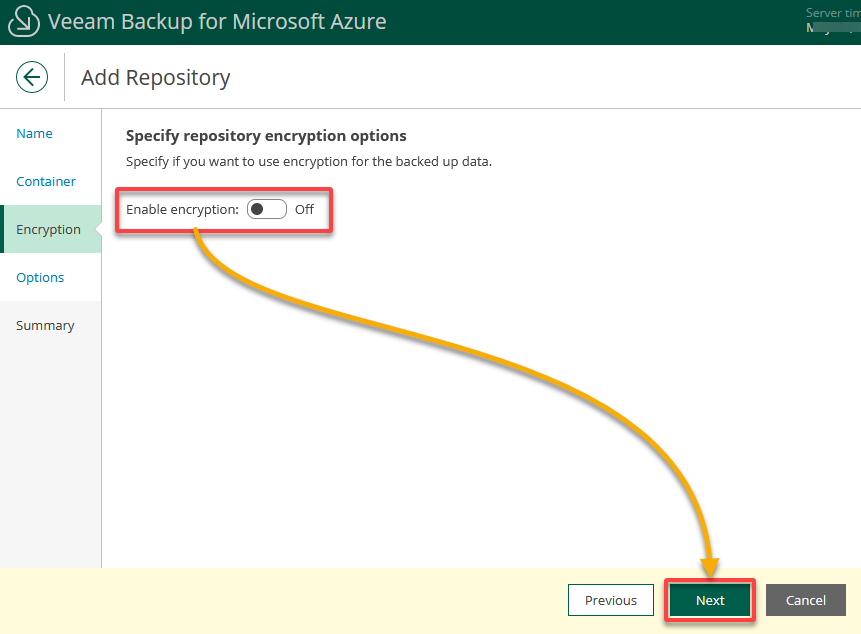
8. Next, choose whether you want to encrypt backups stored in the selected blob container. But for this tutorial, leave the encrypt off, and click Next.
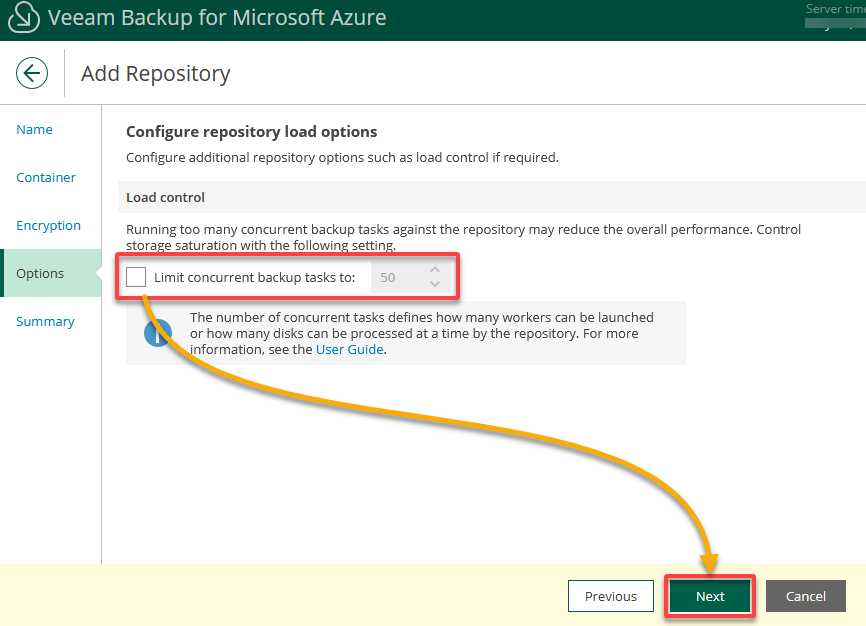
9. Now, leave the Load control option disabled for this tutorial, and click Next. But when necessary, set the repository load options as follows:
- Tick the box shown below to Limit concurrent backup tasks.
- Specify the maximum number of tasks that can be simultaneously processed when addressing the repository.
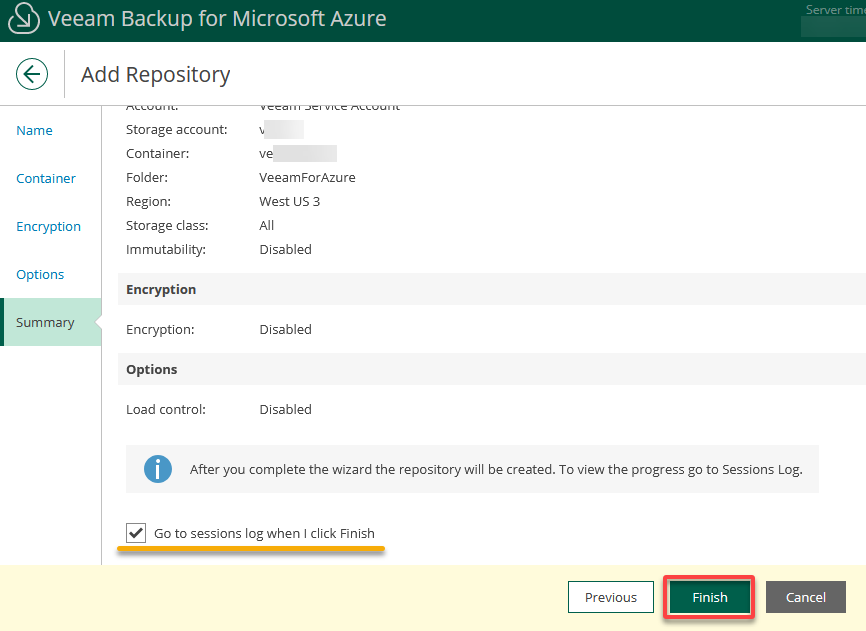
10. Review the summary, and click Finish to finalize adding the backup repository.
Optionally, you can choose whether you want to view the session log to track the progress of the repository creation.
Automating Backups with a VM Backup Policy
Efficiently backing up your VMs is now at your fingertips with a backup repository. But if you have more important tasks to prioritize, Veeam Backup for Microsoft Azure can help.
By creating VM backup policies, you can automate backing up your VMs. This feature ensures your VMs are protected, and you can recover them when data loss or corruption strikes.
To create VM backup policies, follow these steps:
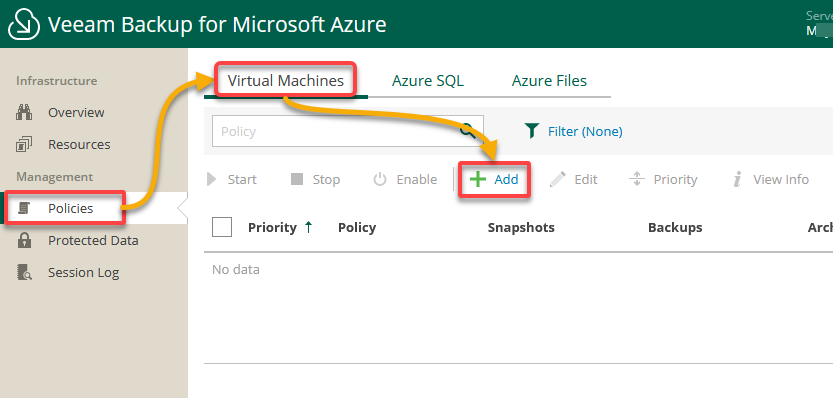
1. Navigate to Policies (left pane), and click Add under the Virtual Machines tab to launch the Add VM Policy wizard.
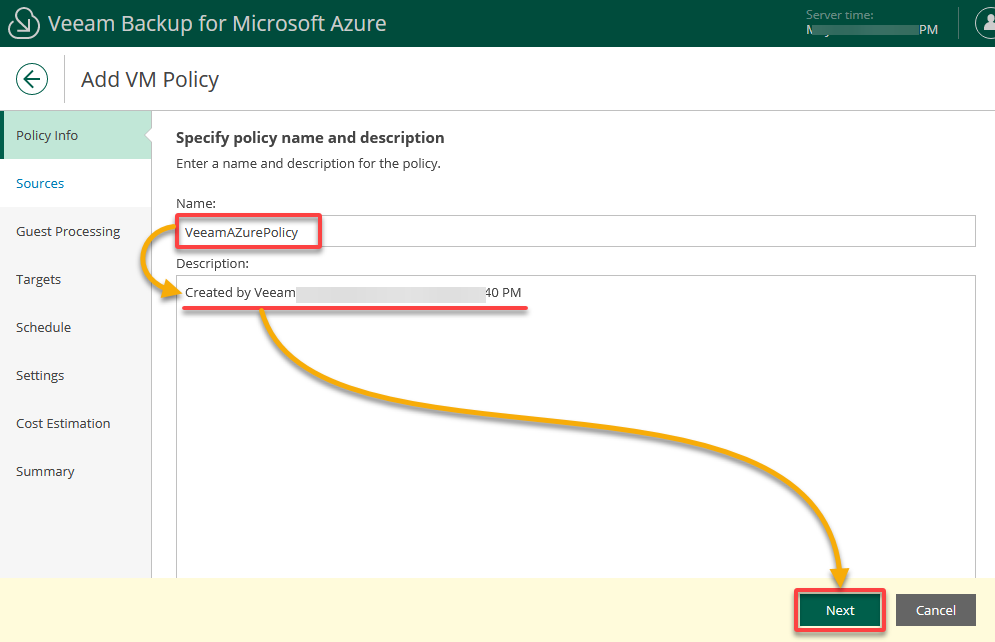
2. Next, provide a policy Name and Description, and click Next.
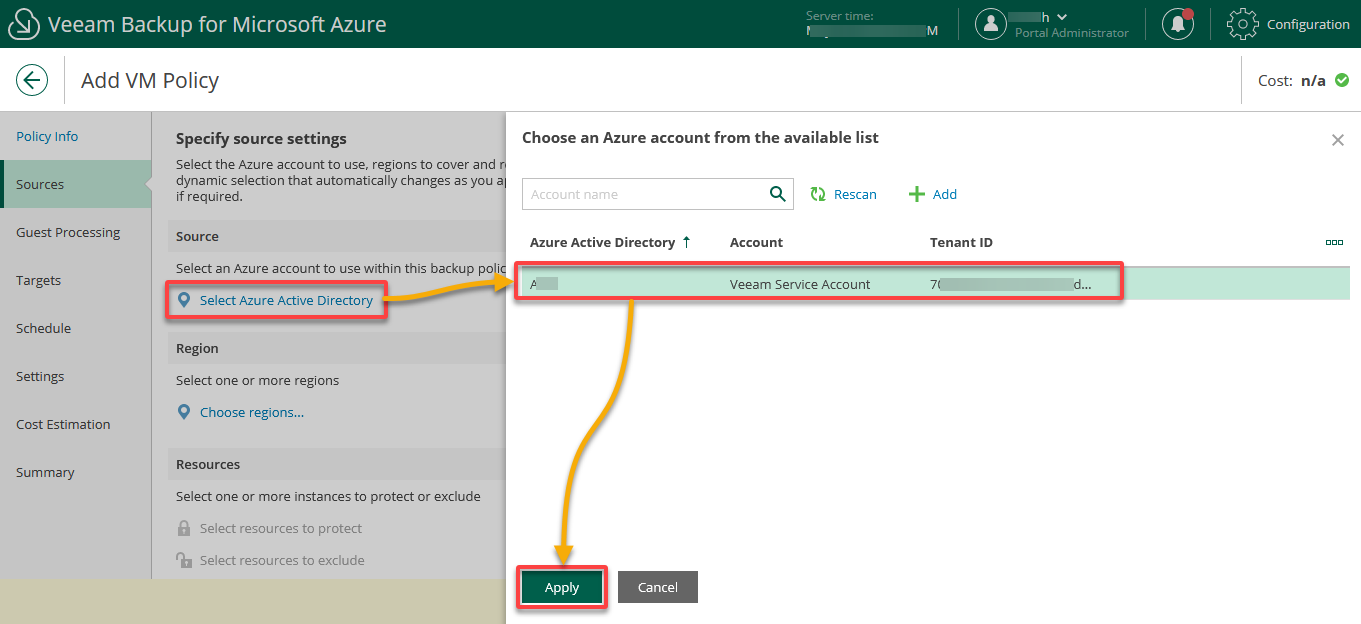
2. In the Sources tab, click Select Azure Active Directory, select your Azure service account from the list, and click Apply.
This Azure account’s permissions will be used to access Azure services and resources.
The specified Azure account must belong to a tenant managing the Azure VMs you want to protect.
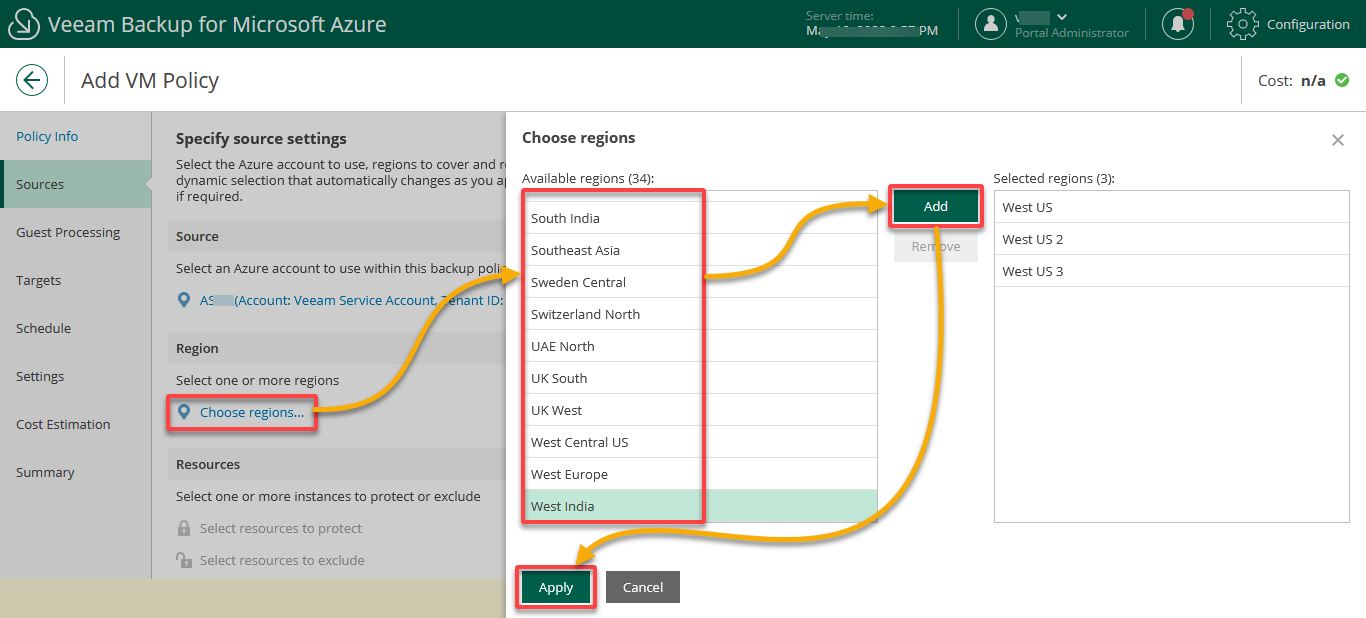
4. Configure the region settings as follows:
- Click Choose regions to view the list of available regions. ****
- Select the necessary regions from the list, and click Add to add them to the table list on the right.
- Click Apply to save the changes.
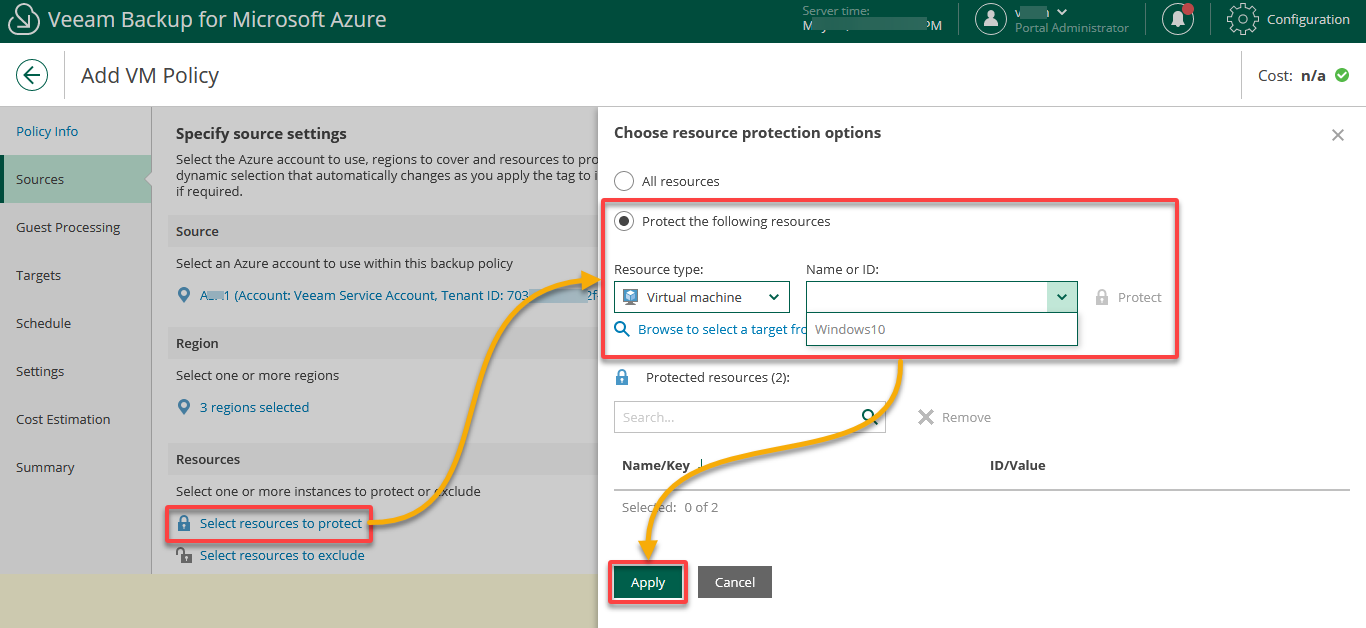
5. Next, click Select resources to protect, specify the resources to backup or exclude from the policy, and click Apply to save the changes.
With all the settings configured, click Next to continue.
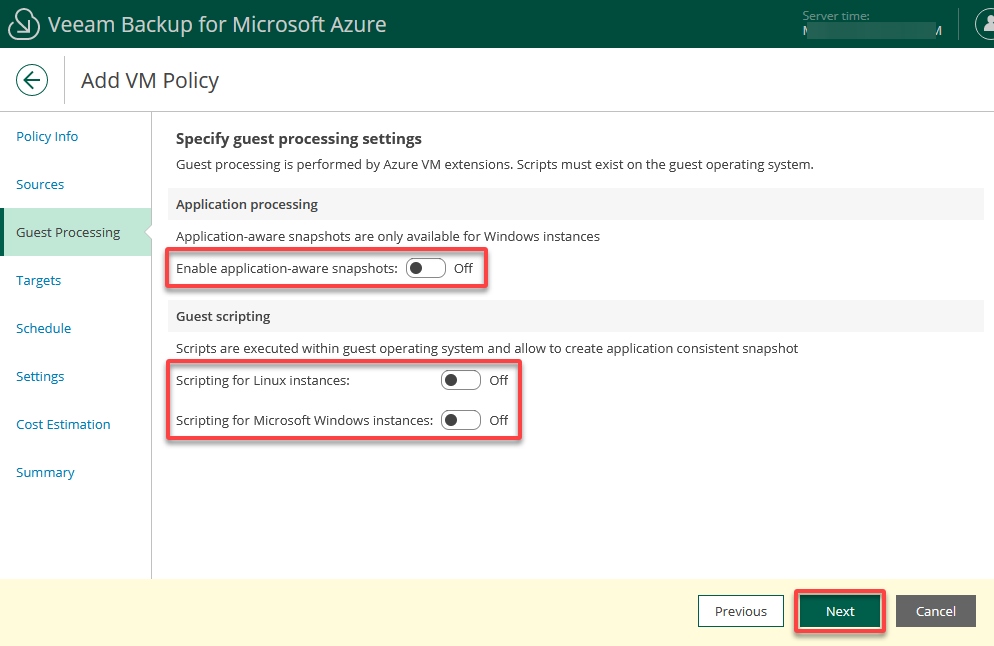
6. Configure the guest processing settings, and click Next.
These settings specify what actions Veeam Backup for Microsoft Azure will perform when communicating with the guest OSes.
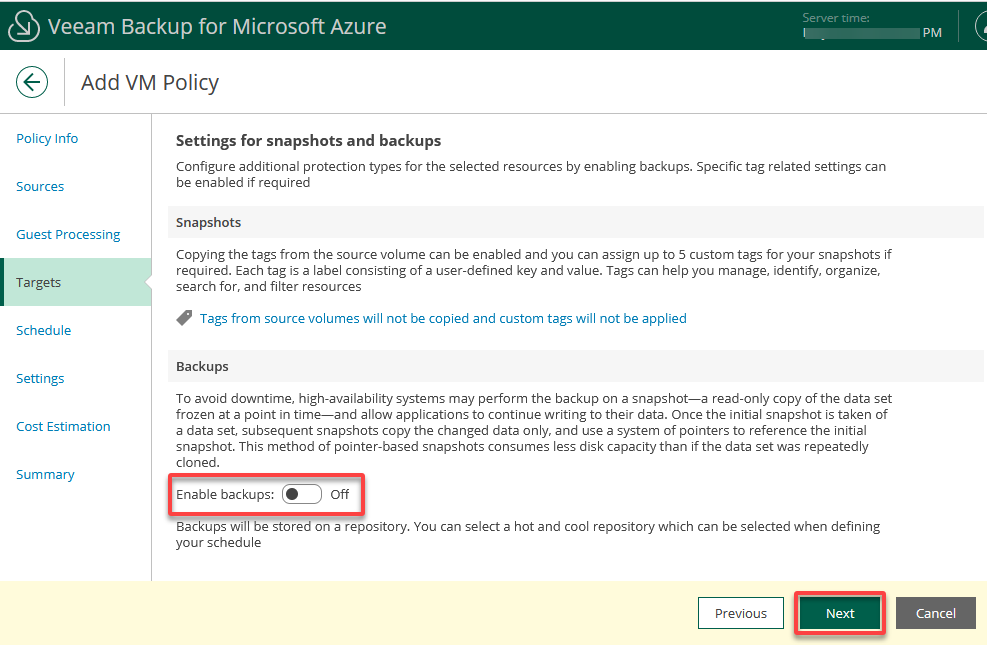
7. Next, configure backup target settings, and click Next.
You can leave the Enable backups option off since backup policies create only cloud-native snapshots of processed Azure VMs.
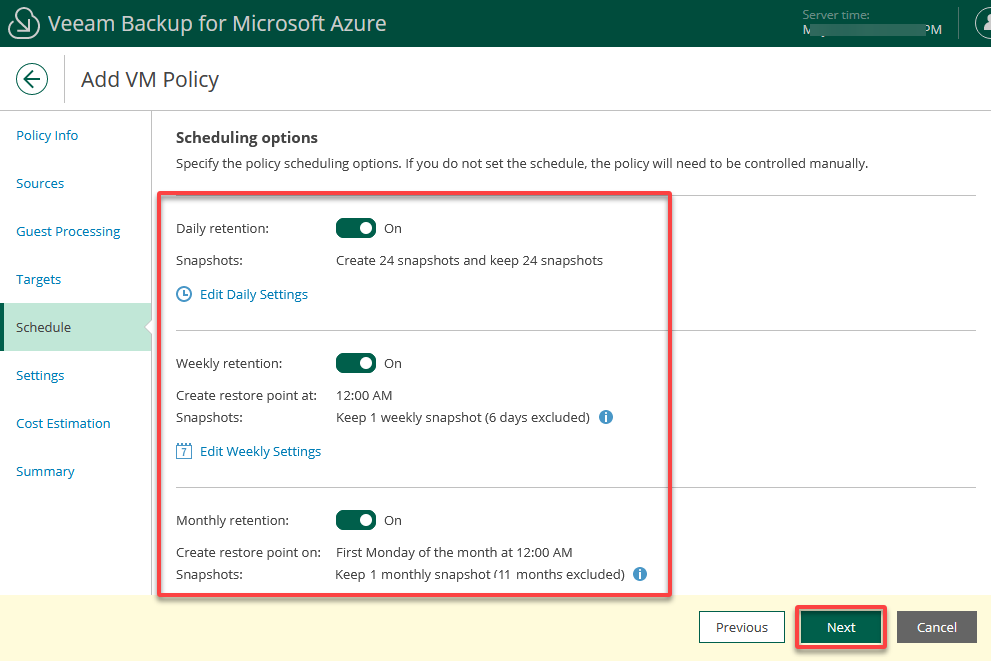
8. Specify the policy scheduling options, and click Next.
These options instruct Veeam Backup for Microsoft Azure to start the backup policy automatically by schedule. The backup schedule defines how often the Azure VMs’ data added to the backup policy will be backed up.
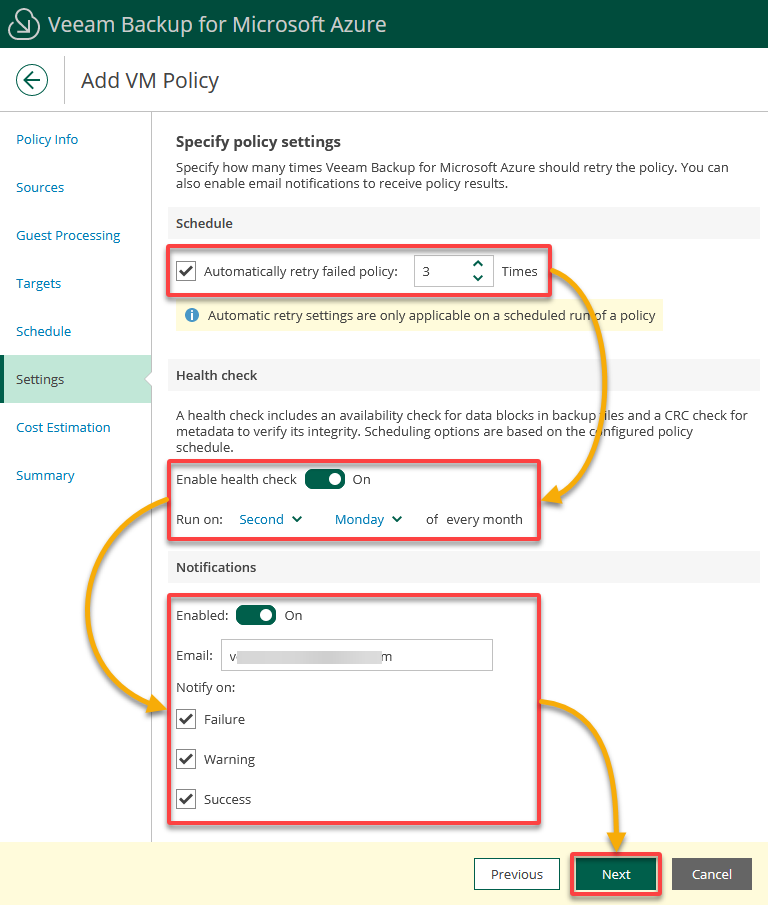
9. Enable automatic retries, schedule health checks, specify notification settings for the backup policy, and click Next.
10. Review the approximate monthly cost of your Azure services, and click Next.
These services are what Veeam Backup for Microsoft Azure will require to protect your Azure VMs added to the backup policy.

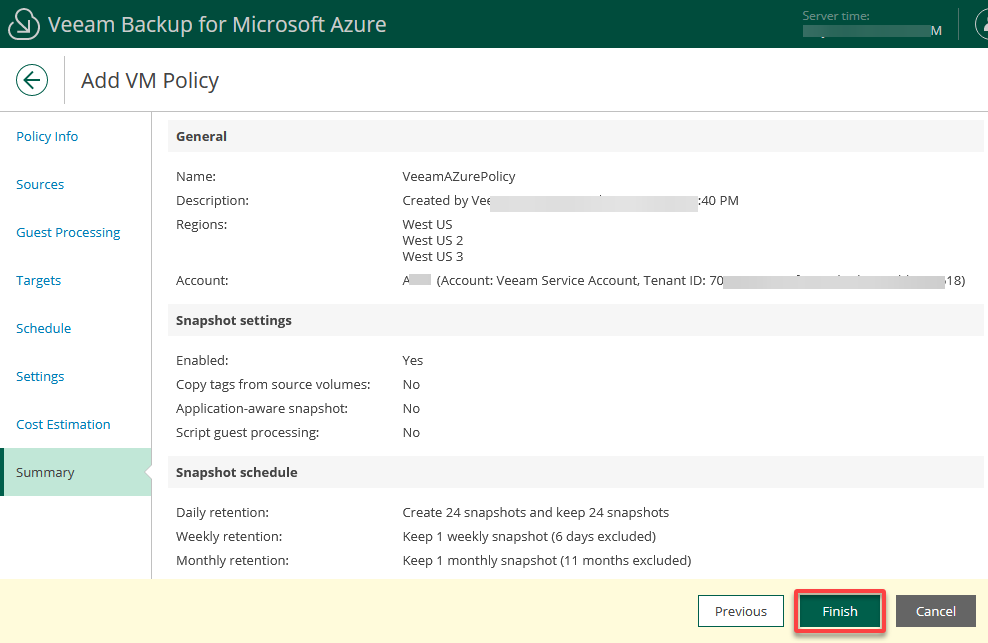
11. Review the summary and click Finish to create the VM backup policy.
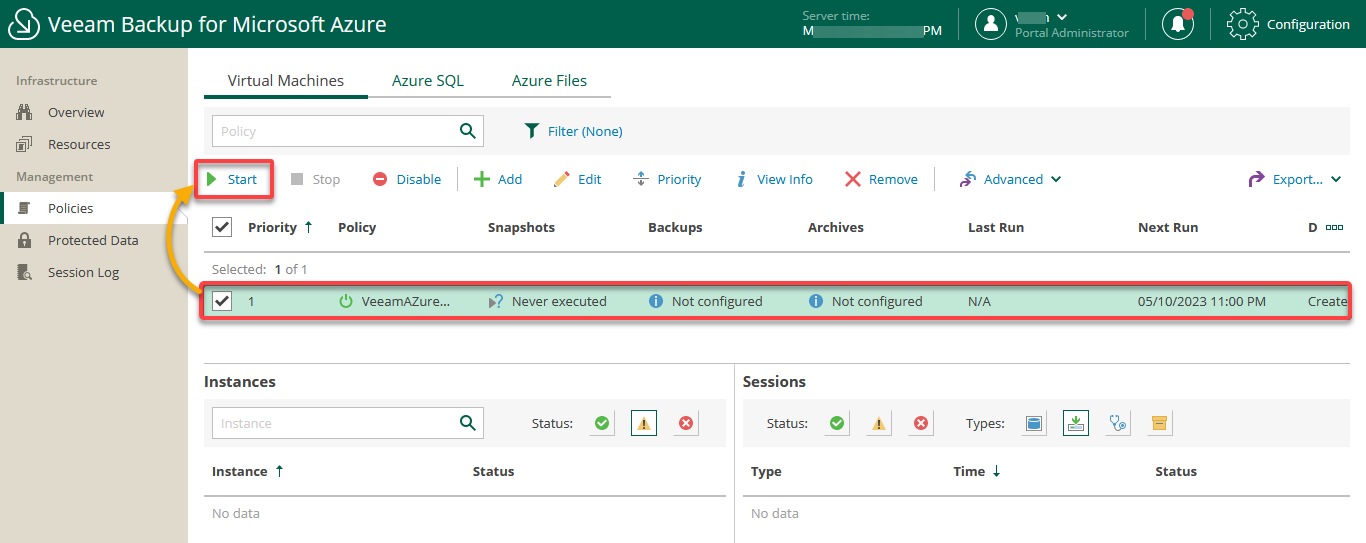
12. Finally, select the newly-created policy, and click Start to run the backup policy.
Performing a VM Restore
You have successfully started a fully functional VM backup policy, which is excellent. But how do you perform a restore when necessary?
You can restore one or more Azure VMs at a time to the original or new locations. If a disaster strikes, you can restore an entire VM from a cloud-native snapshot or image-level backup.
To restore an Azure VM, follow these steps:
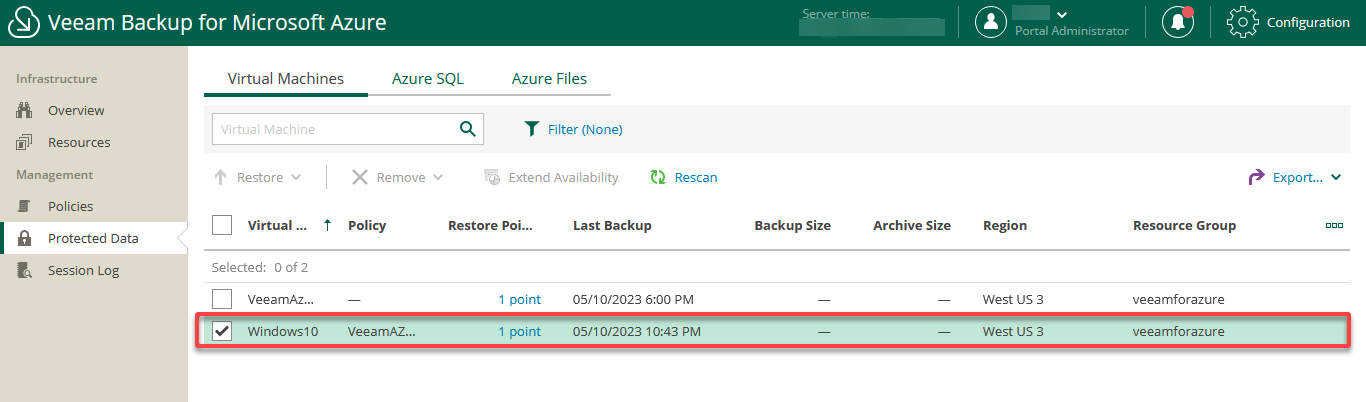
Navigate to Protected Data (left pane), and select your Azure VM to restore under the Virtual Machines tab.
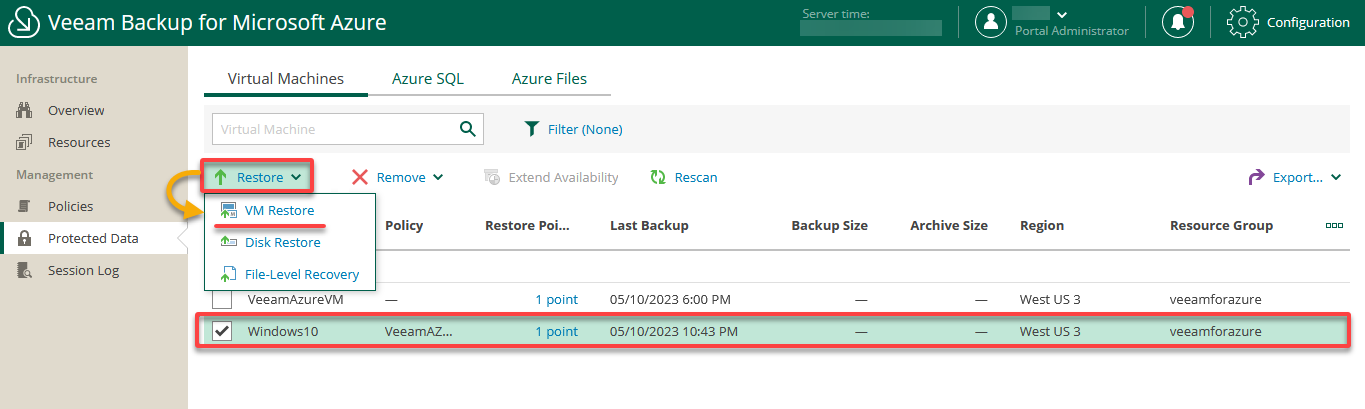
Now, click the Restore dropdown, and choose VM Restore to restore your selected VM.
Performing a Disk Restore
Like restoring VMs, performing a disk restore lets you restore data, but only from a specific disk, instead of wasting time restoring an entire VM.
To restore virtual disks attached to protected Azure VMs:
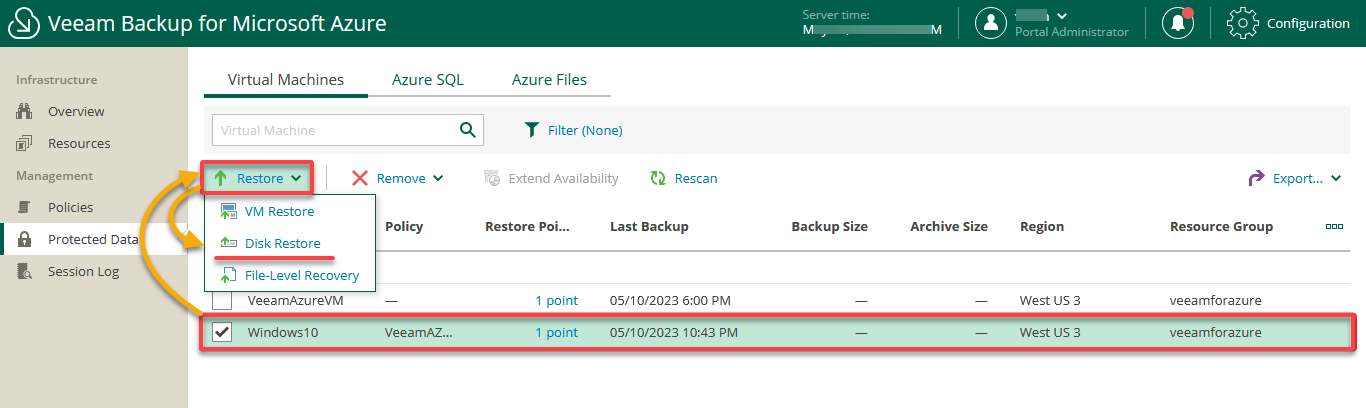
1. While on the Protected Data page, select the VM whose virtual disks you wish to restore, click the Restore dropdown, and choose Disk Restore. Your browser redirects to the Restore Disks wizard page.
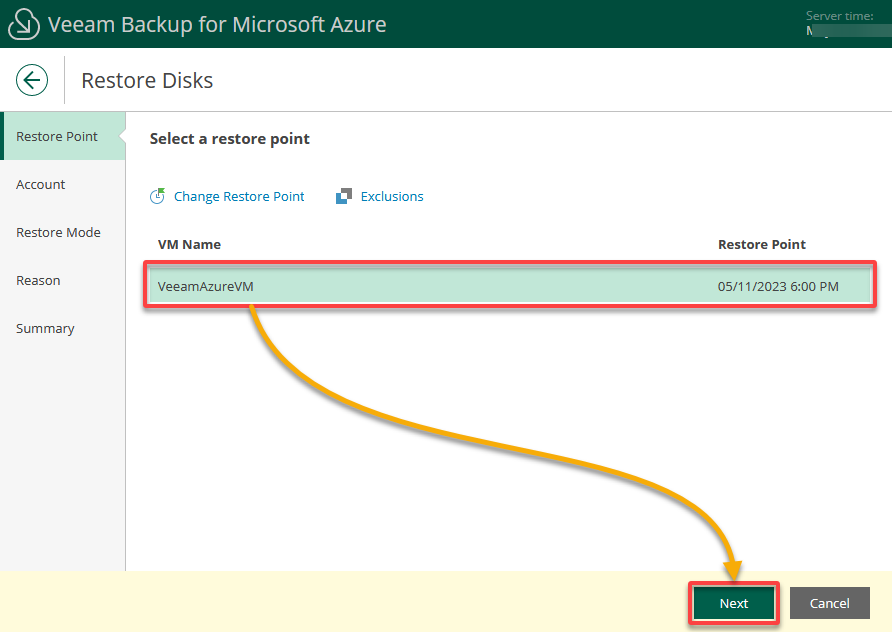
2. Next, select a restore point to restore the virtual disks of the selected Azure VM, and click Next.
By default, Veeam Backup for Microsoft Azure uses the most recent valid restore point, but you can restore the disks to an earlier state.
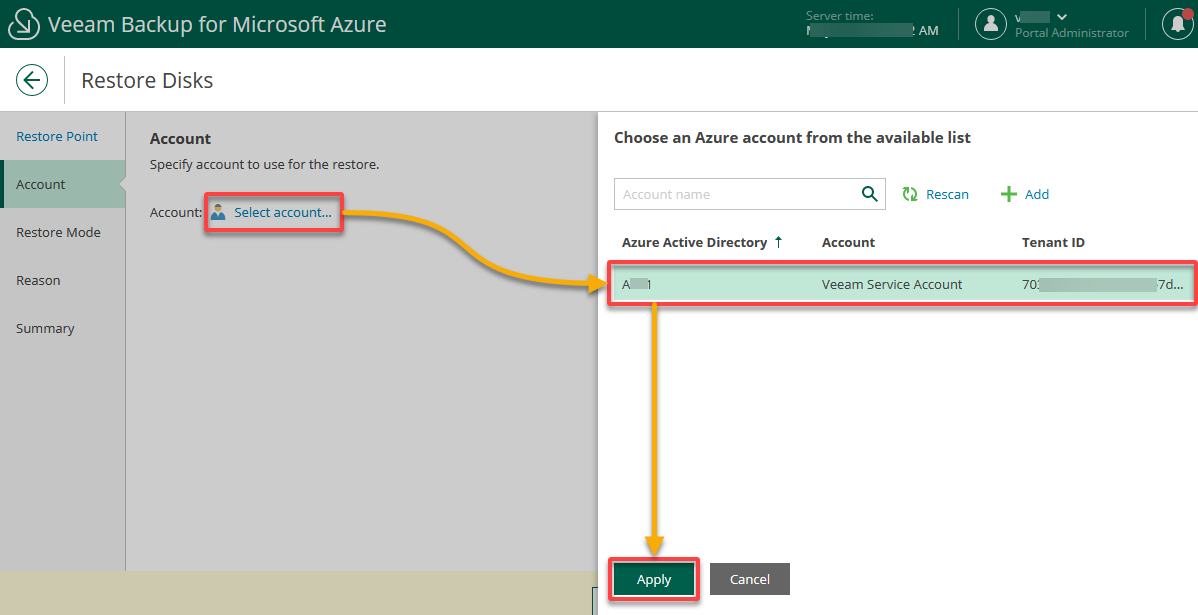
3. Now, click Select account, select an Azure account whose permissions Veeam Backup for Microsoft Azure will use to perform the restore operation, and click Apply.
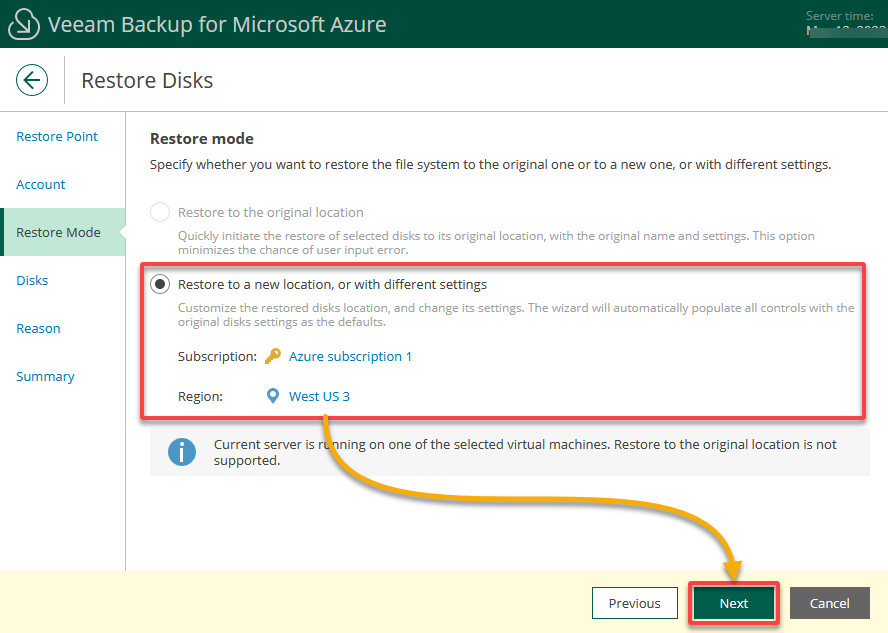
4. Choose the location to restore the selected virtual disks (to the original or a custom location), and click Next.
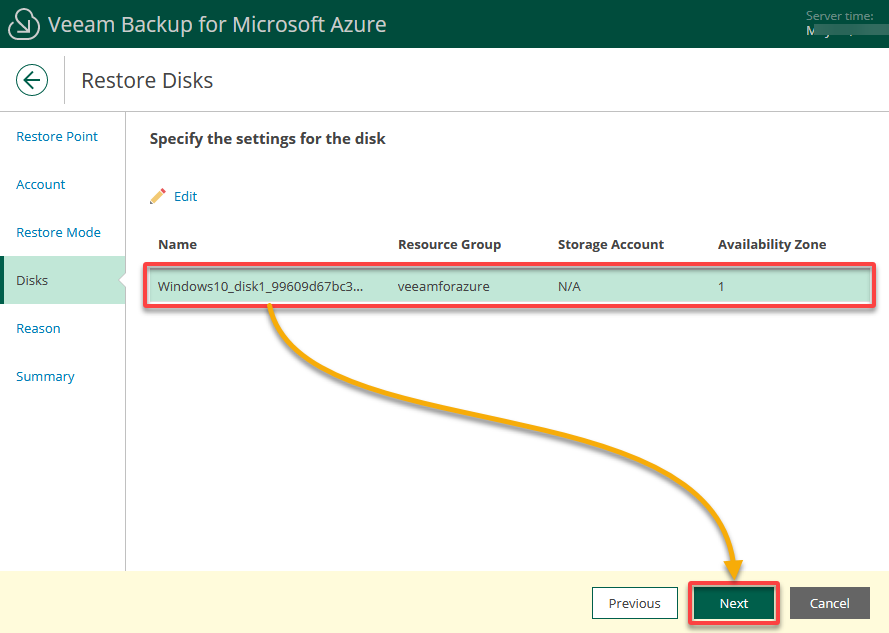
5. Select the necessary disk to restore, and click Next.
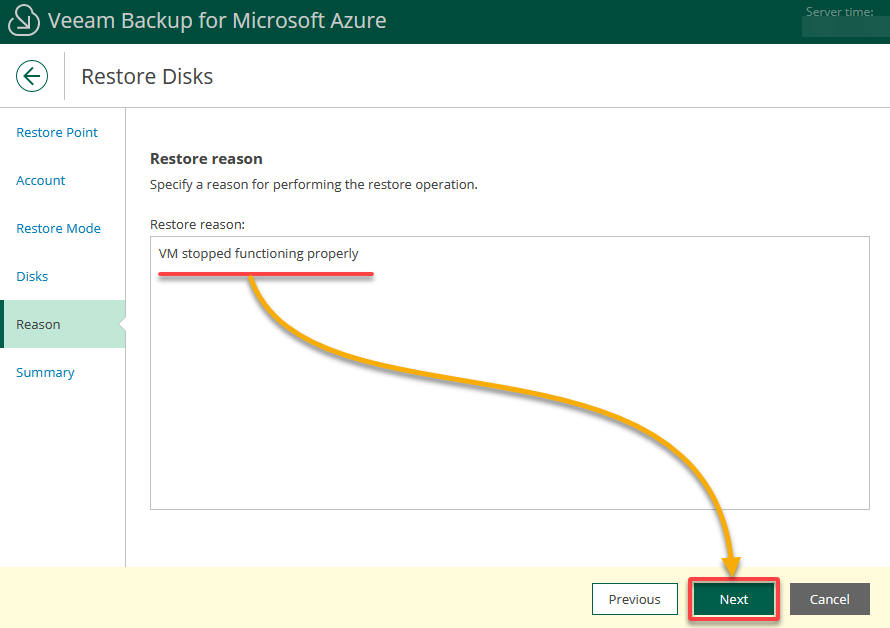
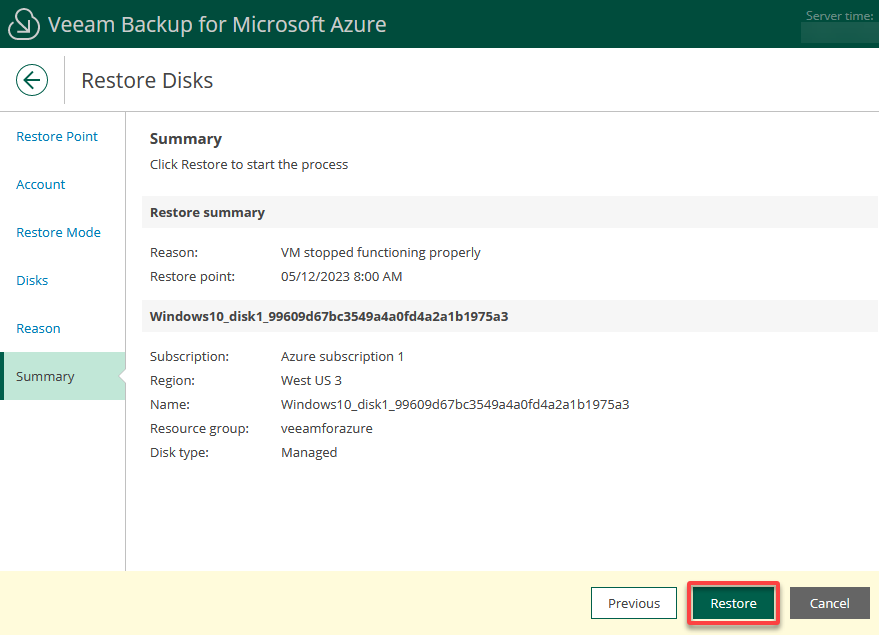
6. Specify a reason for the restoration.
7. Lastly, review the summary information and click Restore to perform the restore operation.
Performing a File-Level Recovery
When you are missing a file or if it is corrupted, performing a VM or disk restore may be overkill. The file-level recovery will suffice if you know exactly which file or folder to restore.
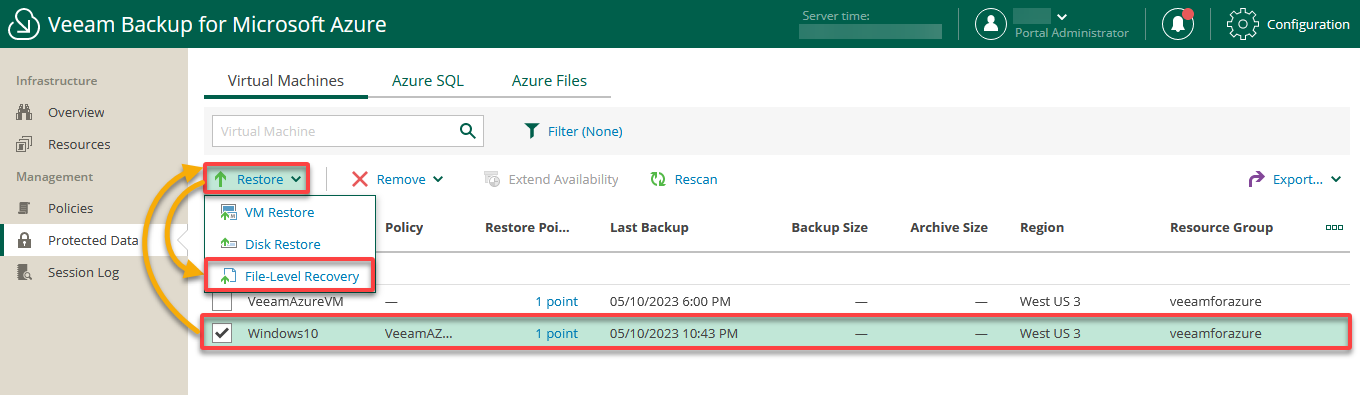
To recover files and folders of a protected Azure VM:
1. Navigate to Protected Data (left pane), and select which VM to restore the file or folder.
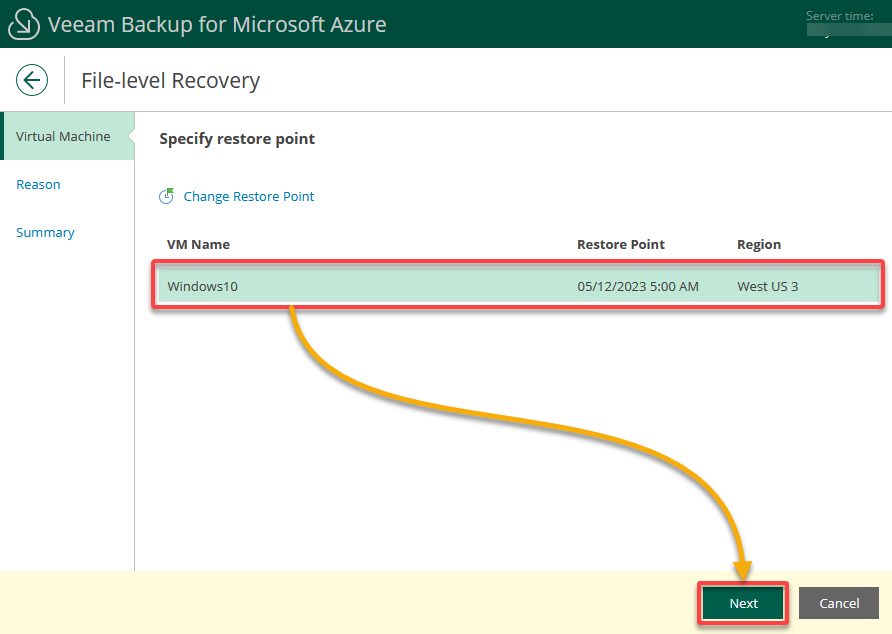
2. Next, select a restore point to recover the file or folder, and click Next. The most recent valid restore point is selected by default.
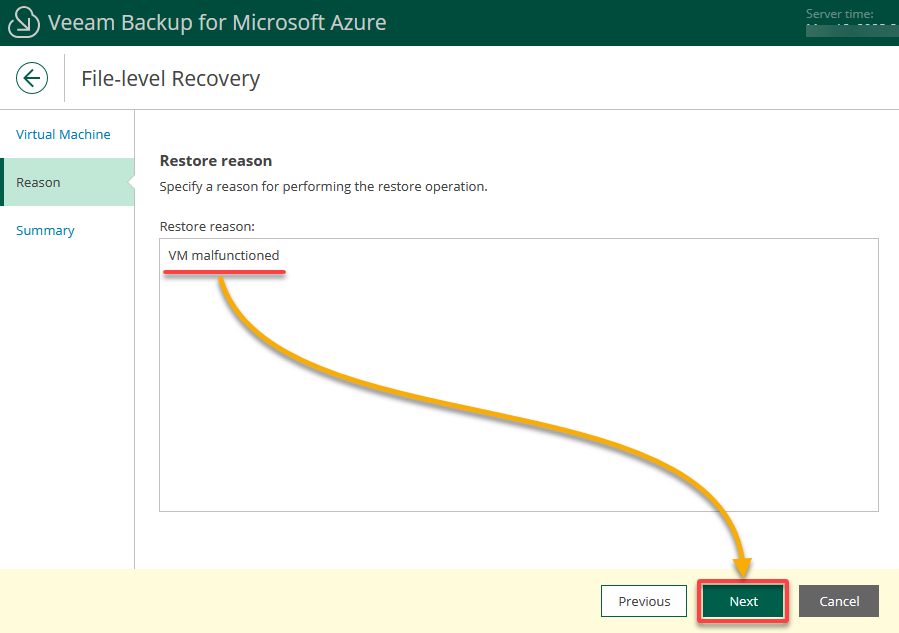
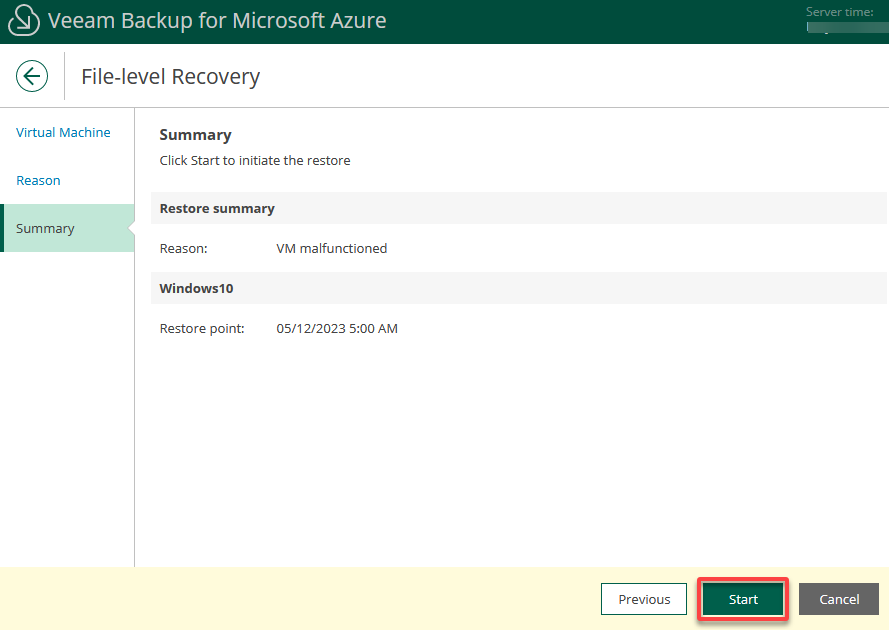
3. Specify a reason for the file-level restore, and click Next.
4. Now, review the summary, and click Start to proceed with the file-level restore process.
Monitoring Backup or Restore Processes
Can you rest easy with an automated backup process for your VMs? Typically, you would want to view each backup and restore process logs.
To monitor backup and restore processes:
1. Navigate to Session Log (left pane), which lists all backup and restore processes for your VMs.
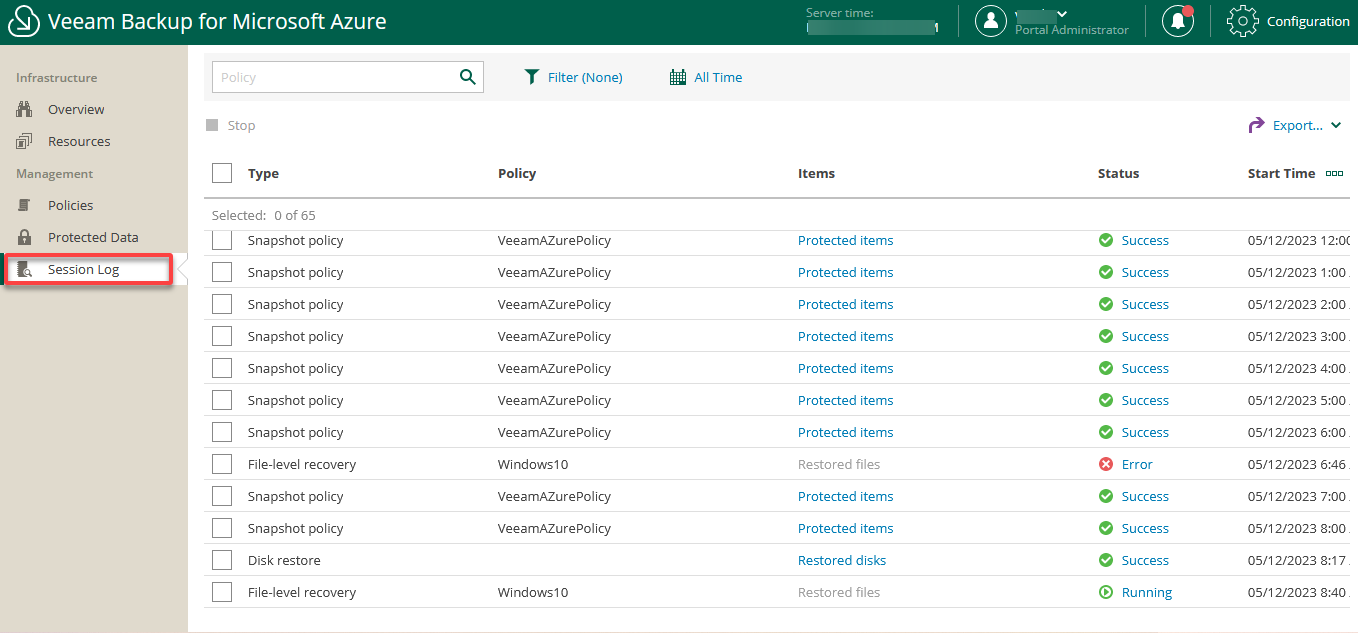
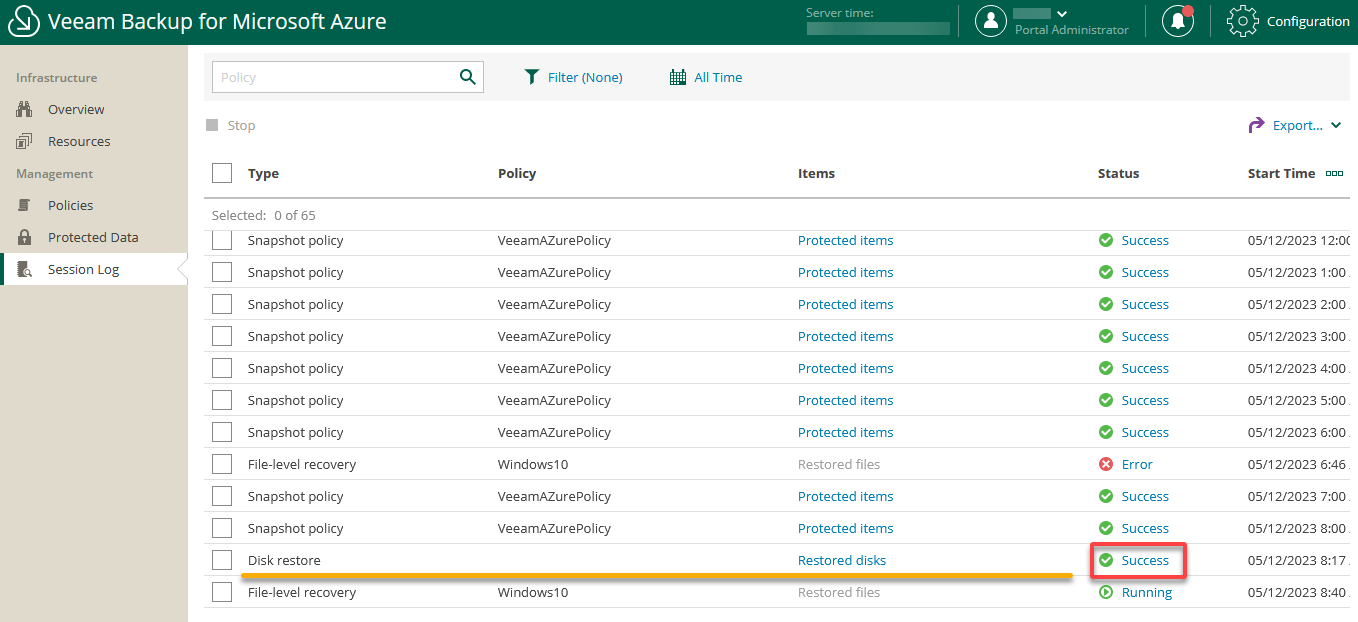
2. Next, identify the session log you wish to monitor, like a Disk Restore, and click on the Status link (i.e., Running, Success, or Error).
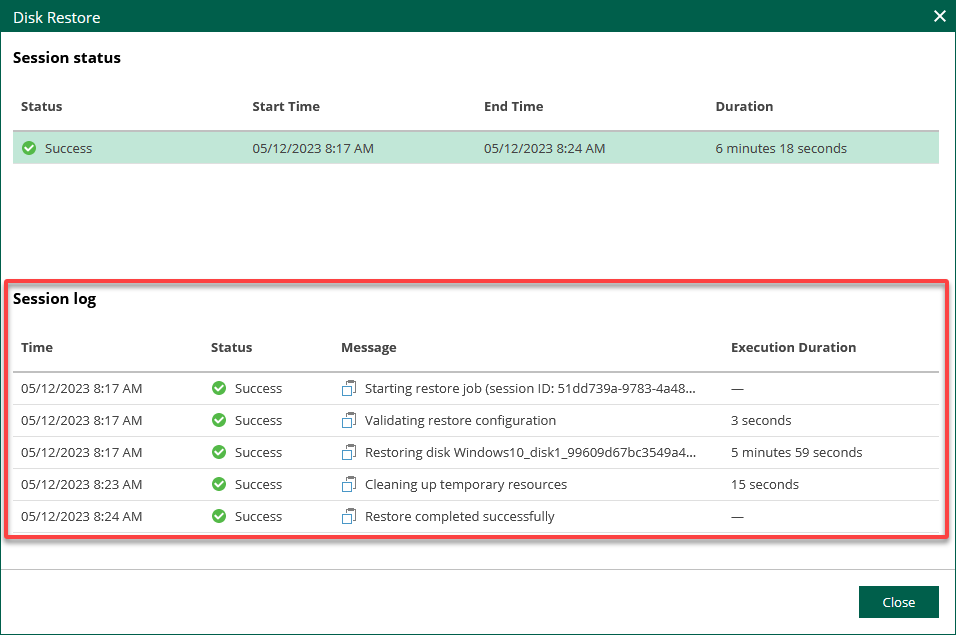
3. Lastly, review the session details and the actions performed so that you can take corrective measures.
Conclusion
Protecting your Azure VMs and data from unforeseeable disasters may seem a bit of a stretch. But in this tutorial, you learned how to back up and restore Azure VMs with the Veeam – Azure setup.
Veeam Backup for Microsoft Azure, a comprehensive backup and recovery solution, reminds you that your Azure resources are safe and sound. You can now ensure business continuity and also meet data protection requirements.
Now, besides Azure VMs, would you trust Veeam to protect your AWS resources?


