


If you plan to start with Microsoft Azure Cloud, nothing could be better than launching your first Azure virtual machine (VM). Azure VMs are hosted on hypervisors, where you can customize all software, such as operating systems (OS), configurations, and so on,
In this tutorial, you will learn how to launch your first Azure VM via Azure Cloud Shell and Azure Portal.
Read on and start your journey to cloud computing!
Prerequisites
This tutorial comprises step-by-step instructions. To follow along, be sure you have the following in place:
- An Azure account with an active subscription or an existing sandbox subscription will suffice.
- Azure CLI version 2.0.79 or newer installed – This tutorial uses the 2.42.0 version.
Activating the Azure Cloud Shell to Create an Azure VM
Azure offers VMs, one of several on-demand, scalable computing resources that improve operational efficiency. With Azure VMs, you can migrate business-critical workloads to Azure infrastructure without buying and maintaining the physical hardware that runs it.
When provisioning a resource on Azure Cloud, like a VM, you have two ways: Azure Cloud Shell CLI (Interfaces) and Azure Management Console (Explorer).
These interfaces allow you to work with Azure Services via the typical Azure Cloud Shell (Commander style). But in this example, you will use the Azure Cloud Shell first to launch your first instance in Azure Cloud, as follows:
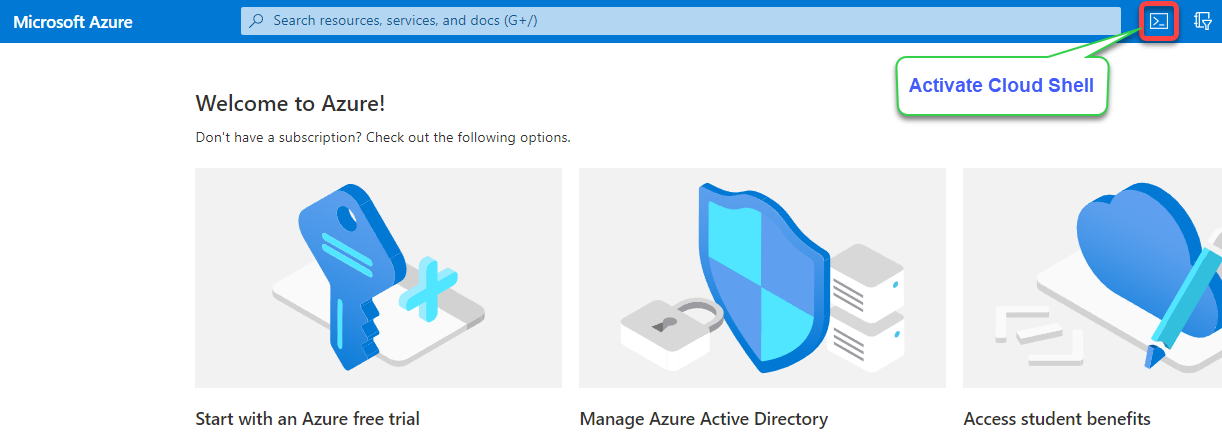
1. Open your favorite web browser, and log in to Azure Portal.
2. Next, click the Cloud Shell icon (upper-right) to launch the Azure Cloud Shell, as shown below.
3. Next, run the below az vm command to launch (create) the instance named (my-vm) on Azure Cloud. Be sure you replace <resource-group-name> with your actual sandbox resource group name. A resource group is a container that holds all the related resources within the Azure cloud.
# THE COMMAND BELOW PERFORMS THE FOLLOWING:
# Set resource group <resource-group-name> the instance will use.
# Set the name of the instance (my-vm).
# Set Ubuntu as the image.
# Set the admin username.
# Generate the keys you can use to login into the instance.
az vm create \
  --resource-group <resource-group-name> \
  --name my-vm \
  --image UbuntuLTS \
  --admin-username azureuser \
  --generate-ssh-keys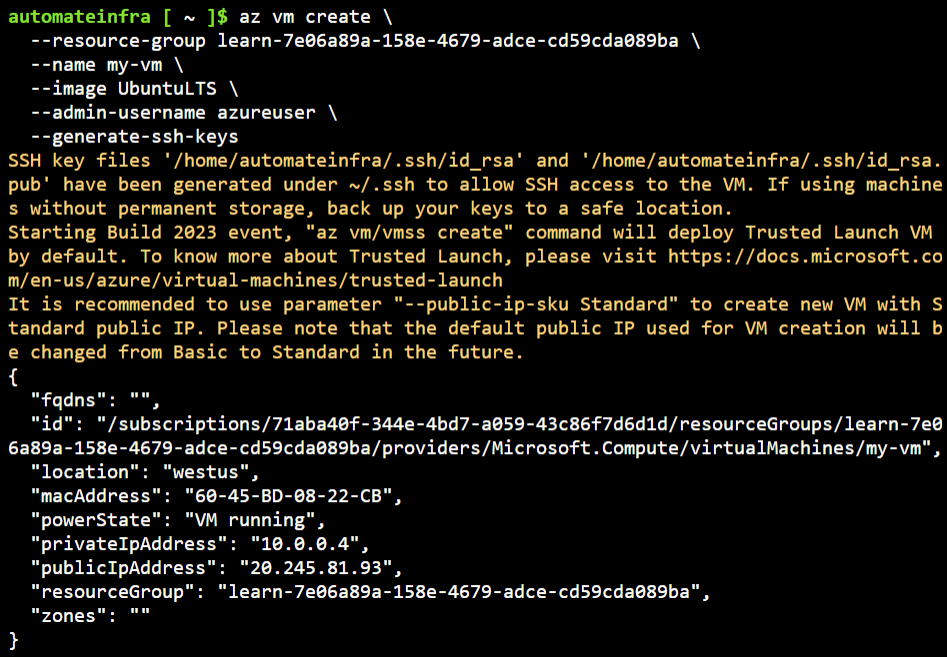
4. Lastly, run the following command to list all available instances by name.
az vm list | grep nameBelow, you can verify your instance has been properly launched.

Create an Azure VM via the Azure Portal
Launching your first Azure VM via CLI works great since it only requires a few steps. But if you prefer to click through configurations, your best option is the Azure Portal.
The Azure Portal provides a GUI where you can create and manage all your Azure resources, like your Azure VMs.
To create an Azure VM via Azure Portal’s GUI, follow these steps:
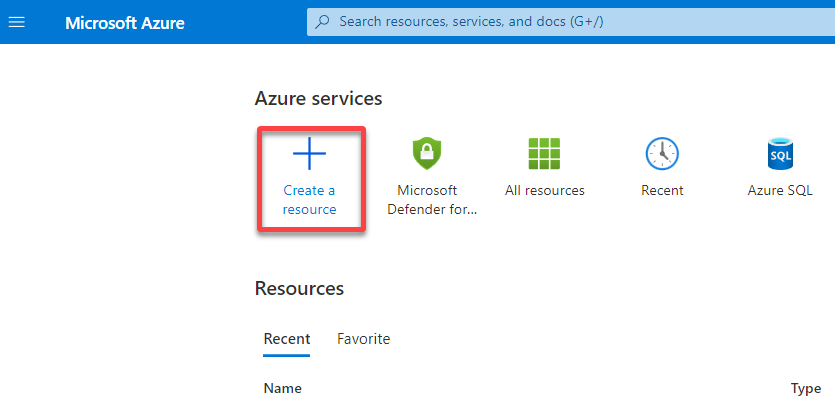
1. On the Azure Portal, click Create a resource (upper-left), as shown below, to initiate creating a new resource.
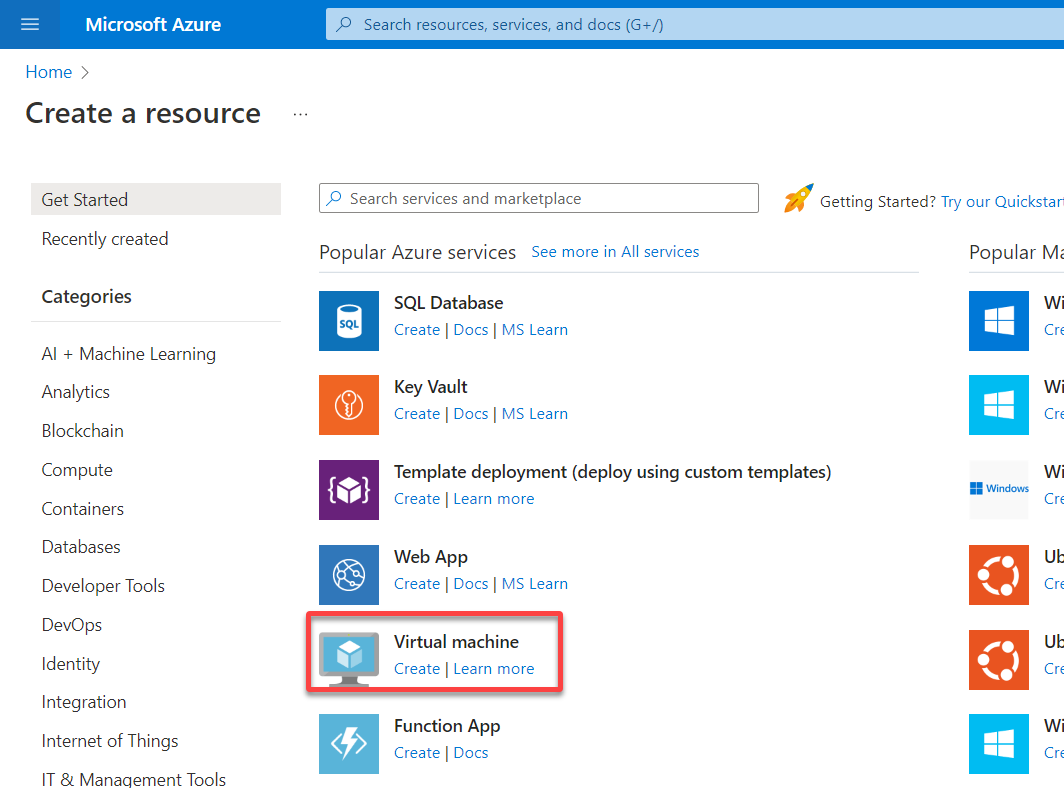
2. Next, click Virtual machine, as shown below, redirecting your browser to a page where you can configure your VM.
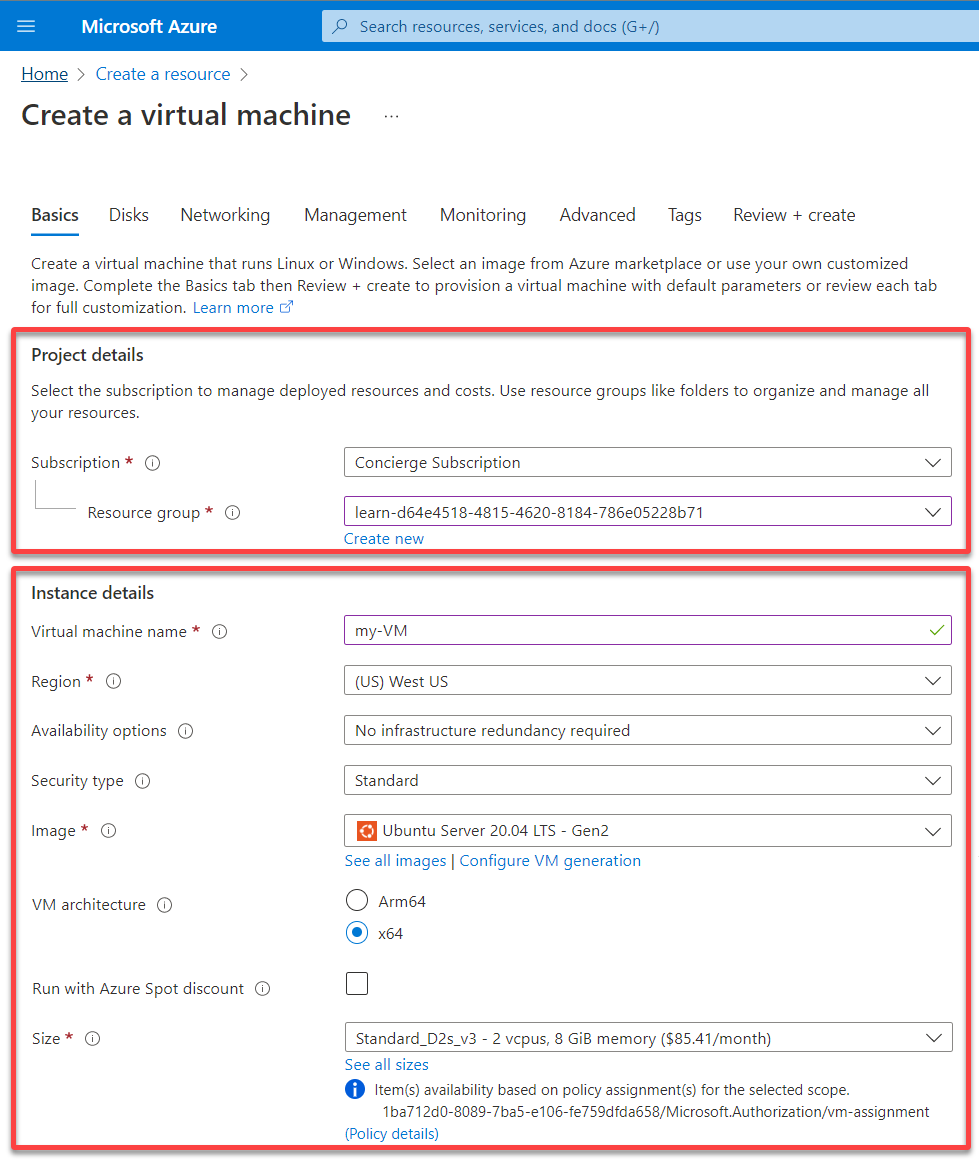
3. Configure the Project details and Instance details for your VM as follows:
- Subscription – Choose your Azure subscription and Resources group.
- Virtual machine name – Set a unique name for your VM (i.e., my-VM).
- Region – Choose the region where you would like to launch your instance.
- Availability options – Choose the No infrastructure redundancy required option. Availability options are designed to procure high availability, which you do not need for this tutorial.
- Security type – Keep the Standard option selected not to restrict any rules, but you can apply rules in the future for particular traffic.
- Image – Select the image as Ubuntu (any version above 16) or any other Linux machine you wish to launch.
- VM architecture – Choose the 64-bit machines (x64) option. While Arm-based provides better price performant, 64-bit machines are much more software compatible.
- Size – Choose the size of the instance you prefer.
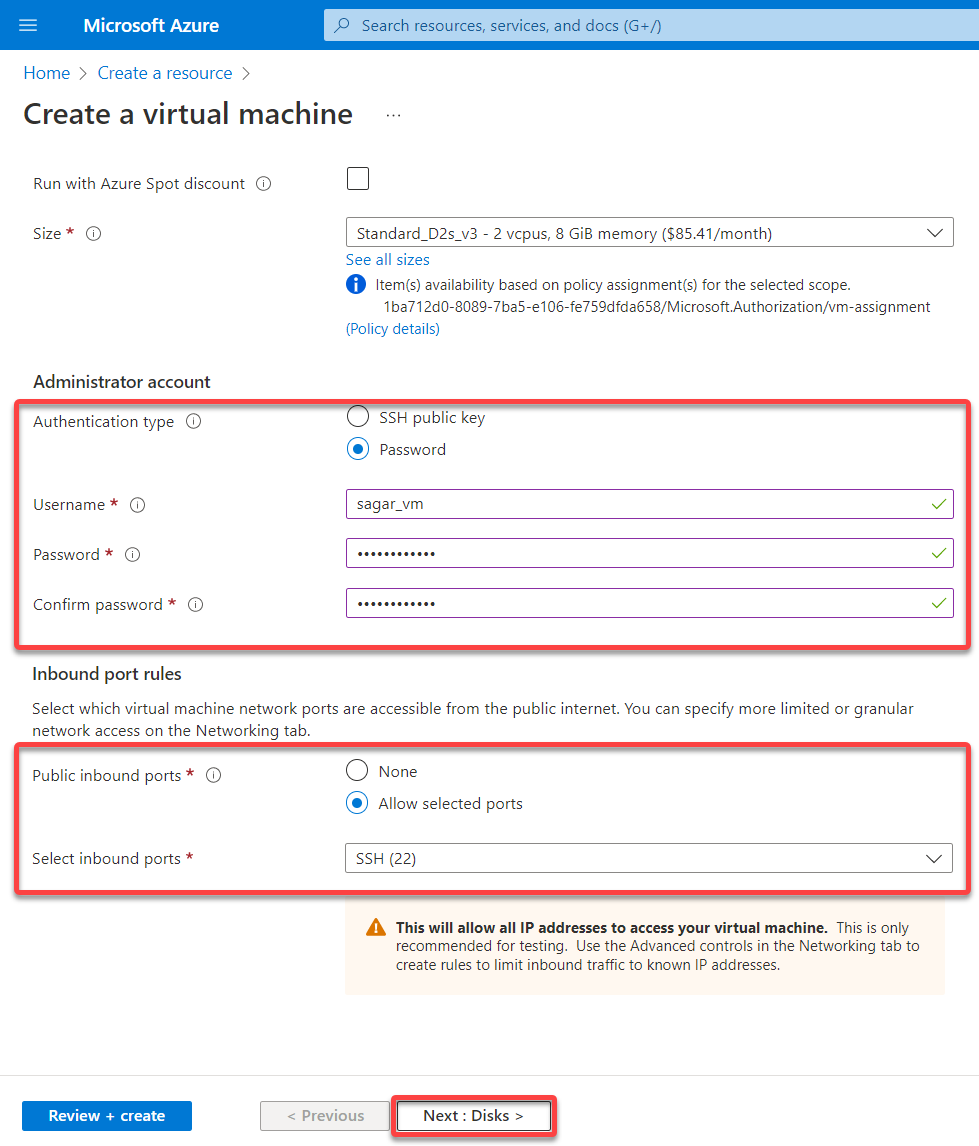
4. Now, scroll down, and configure the following:
Administrator account
- Authentication type – Choose Password as the authentication type. You can choose the authentication type as Password or SSH public key, but keep it as Password for this tutorial.
- Username, Password, and Confirm Password – Set a username and password, which you will use later to log in to your VM.
- Public inbound ports – Choose the Allow selected ports option to allow users to access your machine based on the port you allow. For example, port 22 will enable you to log in, while port 80 allows you to access your server using a web browser.
- Select inbound ports – Select SSH (22) from the dropdown field to allow all IP addresses to access your VM.
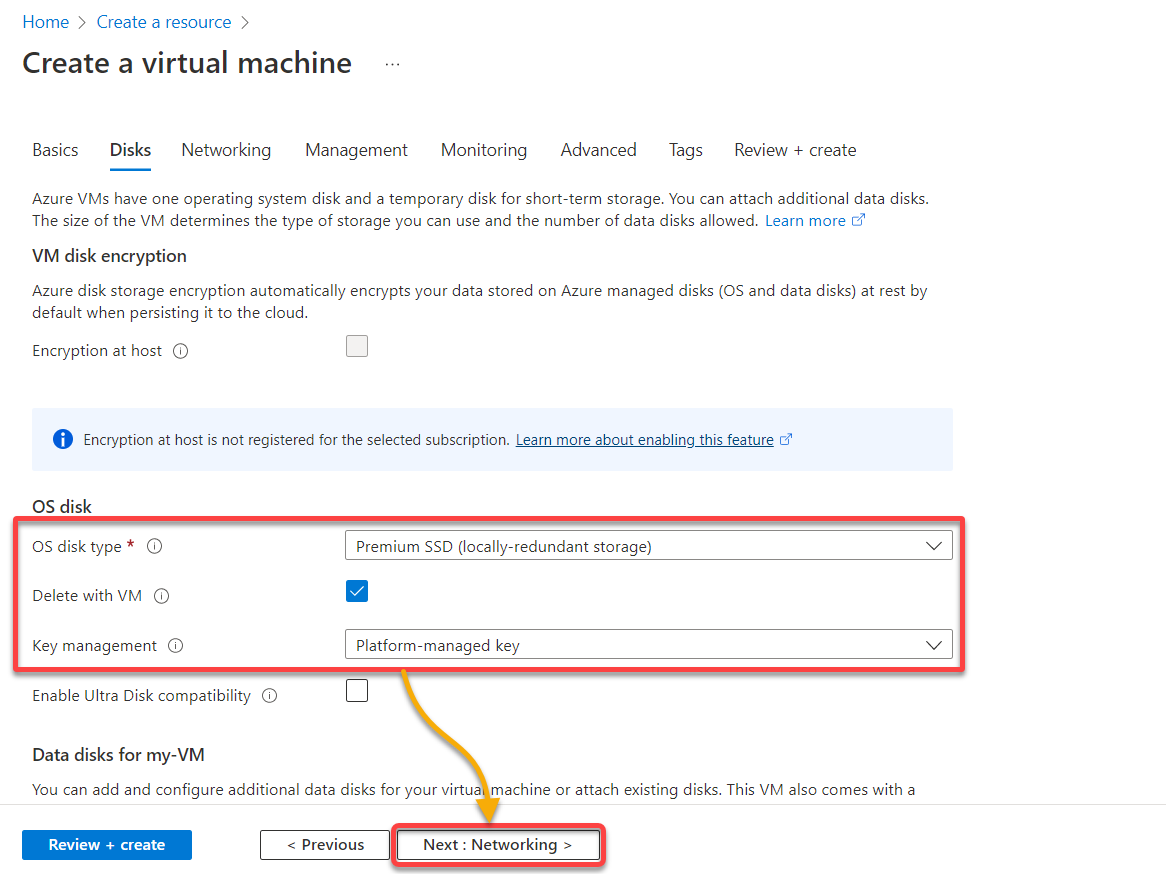
5. Set the following for your VM’s disk configuration:
- OS disk type – Choose storage per your requirement based on OS disk types. This tutorial’s choice is Premium SSD.Delete with VM – Tick this box to set the disk along with the instance deletion.Key management – Choose the key required to manage the instance from the dropdown.
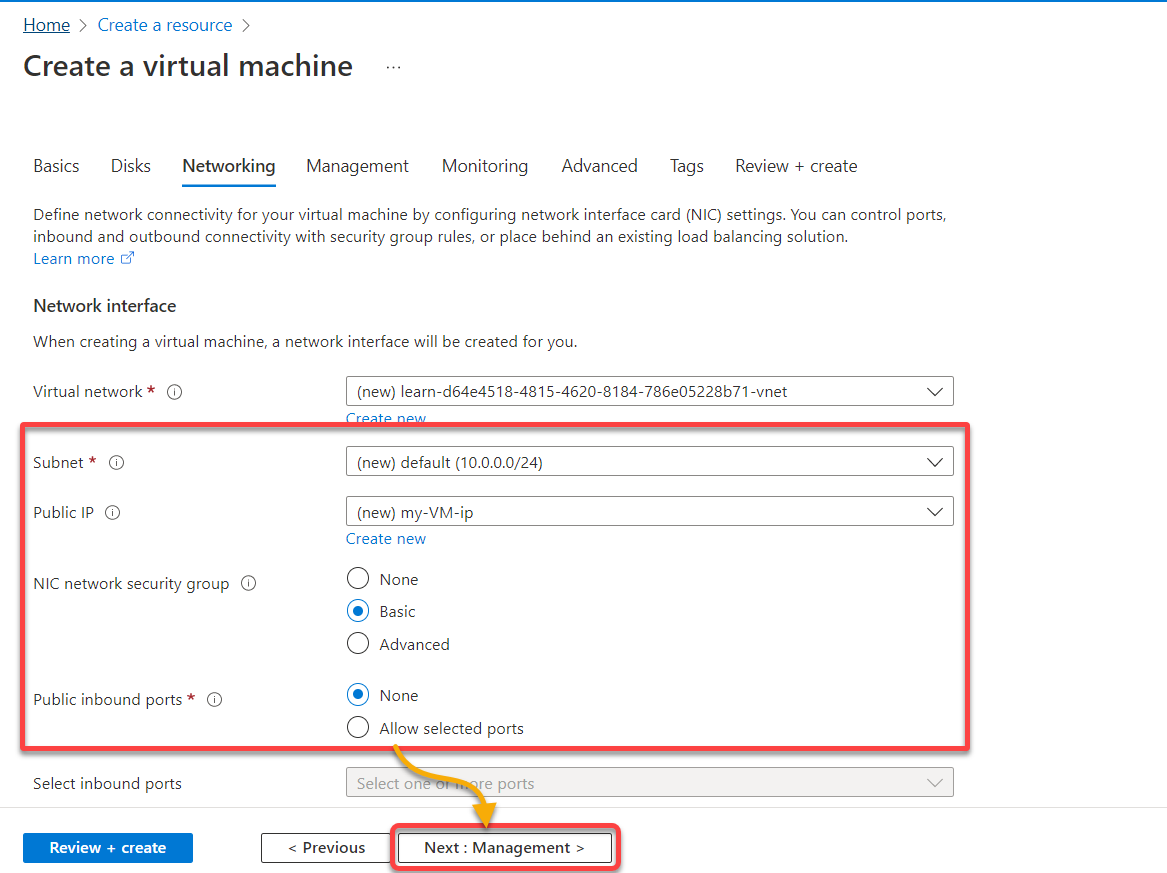
6. Next, specify Network interface details with the following:
- Set the Subnets and the Public IP – Public IP address is used if you need your server to be accessible on the internet.
Subnets enable you to divide the virtual network into one or more sub-networks. Moreover, subnets allocate a portion of the virtual network’s address space to each subnet and further deploy Azure resources in a specific subnet.
- NIC network security group – Choose Basic to specify the rule, such as which ports should be open to access the server.
- Public inbound ports – Select the None option, as you do not need to choose any port for this tutorial. Public inbound ports are more granular network access. This setting defines which ports should be open and from which source or IP address.
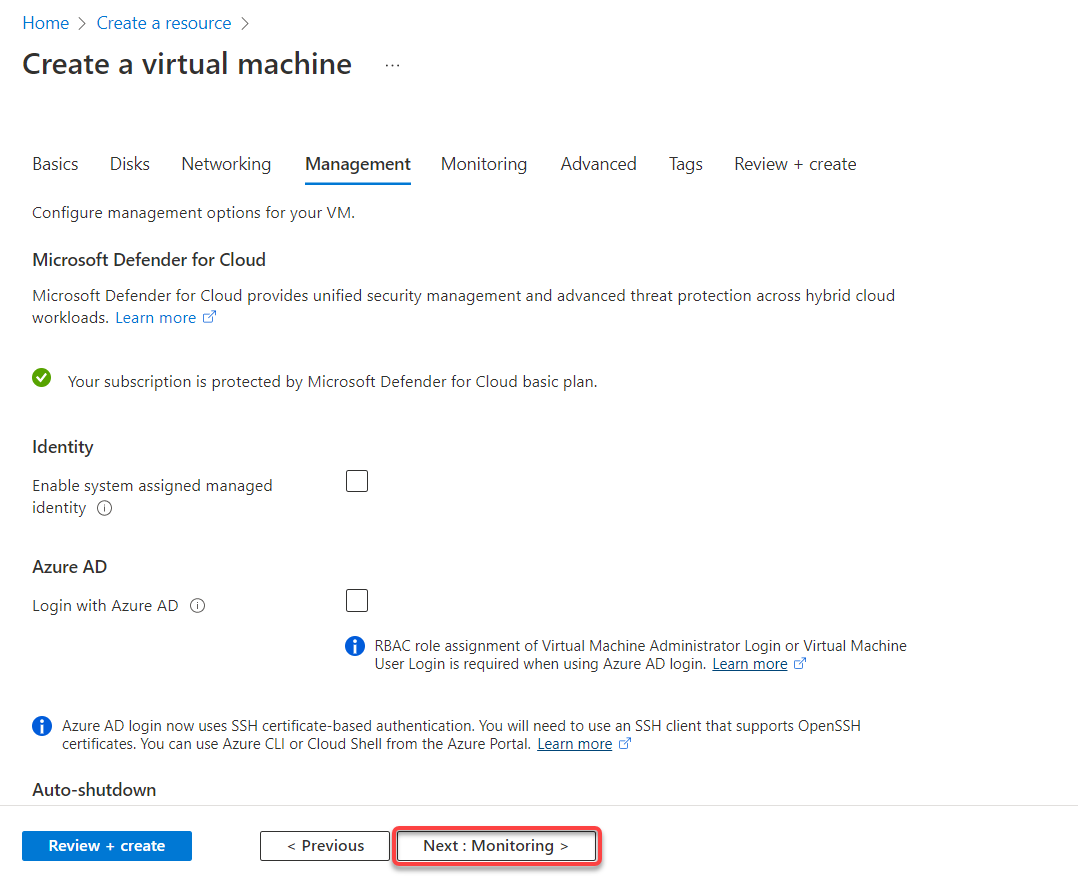
Once VM’s network interface is configured, click Next : Management >to configure management options for the VM.
7. Under the Management tab, click Next : Monitoring > to skip this step, and proceed to configure how you would like to monitor your VM.
If your company requires heavy security of your Azure VMs, integrate with Azure Active Directory (Azure AD) authentication.
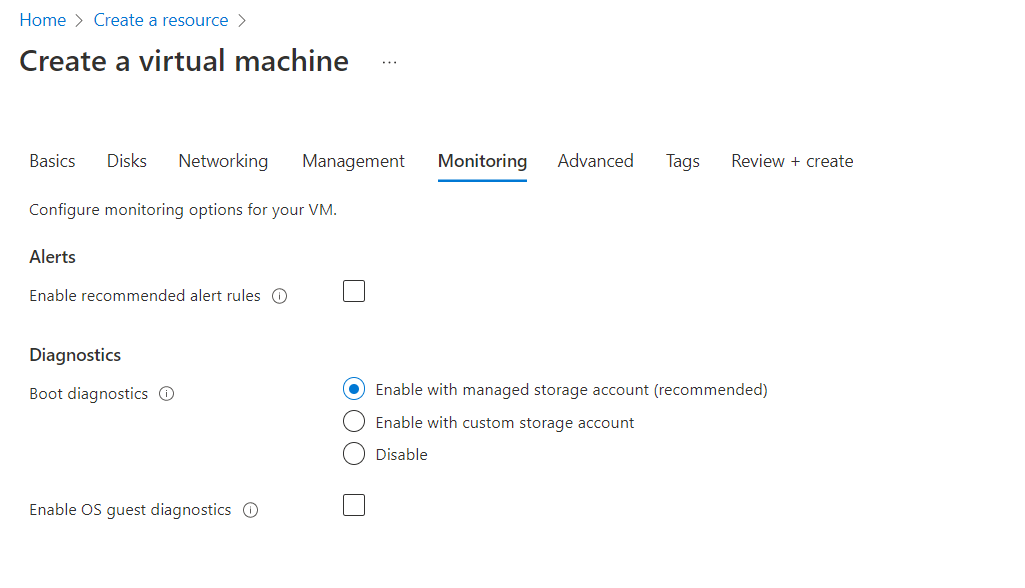
8. Now, choose the monitoring details for your VM, whether you need to diagnose if any reboot happens or any issues on the disk, and click Next : Advanced >.
This tutorial’s choice for Boot diagnostics is the Enable with managed storage account option.
9. Click Next : Tags > to skip changing any advanced settings. But if you wish, you can add the custom data, known as user data, in the Custom data and cloud init field. User data is the set of commands/data you can provide to an instance at launch time.

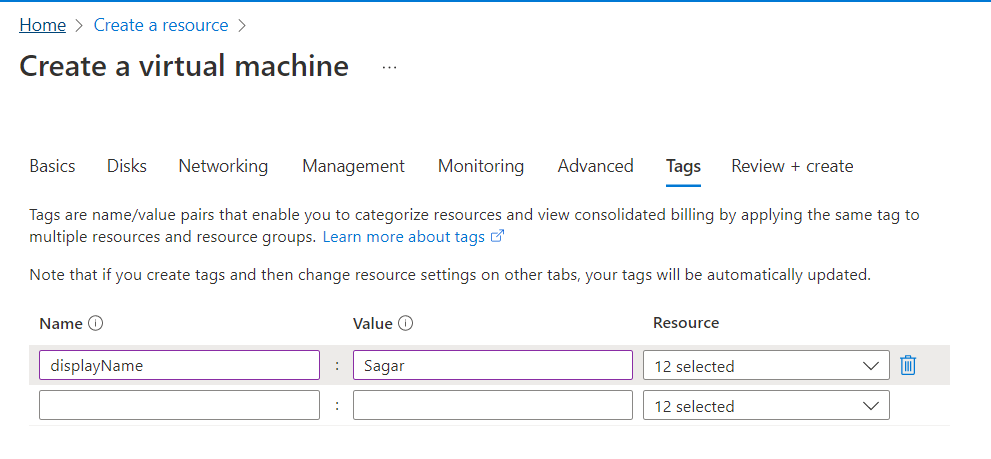
10. Under the Tags tab, add tags (metadata elements) to apply to your Azure resources. Tags are key-value pairs that come in handy for administrators in identifying resources.
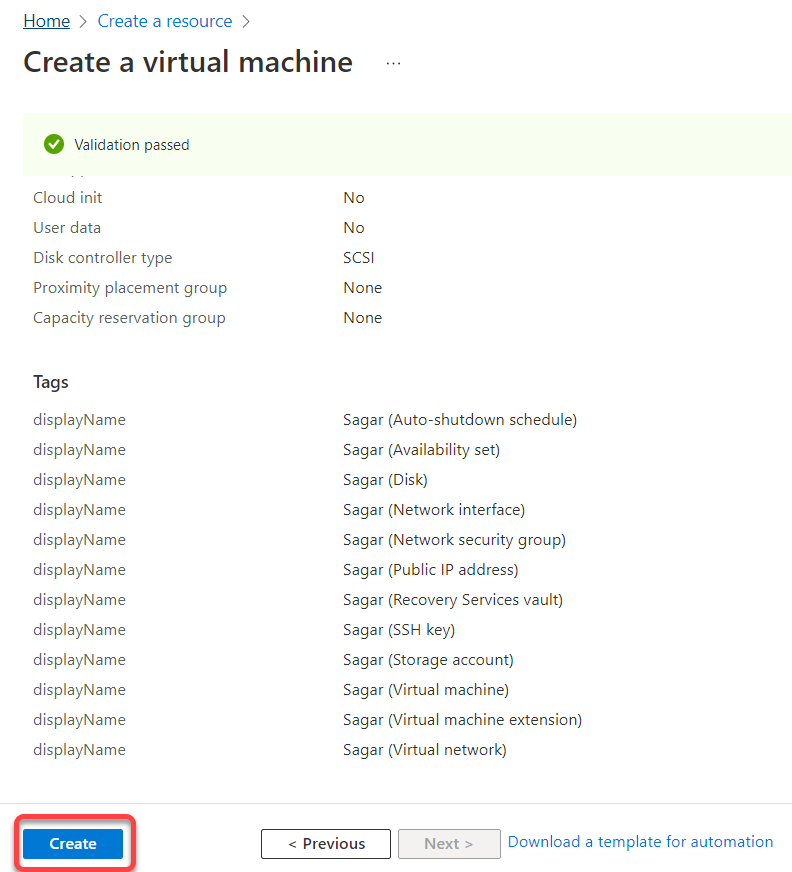
After adding tags, click Next : Review + Create > to validate the settings you selected for your VM.
11. After validation, click Create (bottom-left) to launch your first VM instance on Azure cloud.
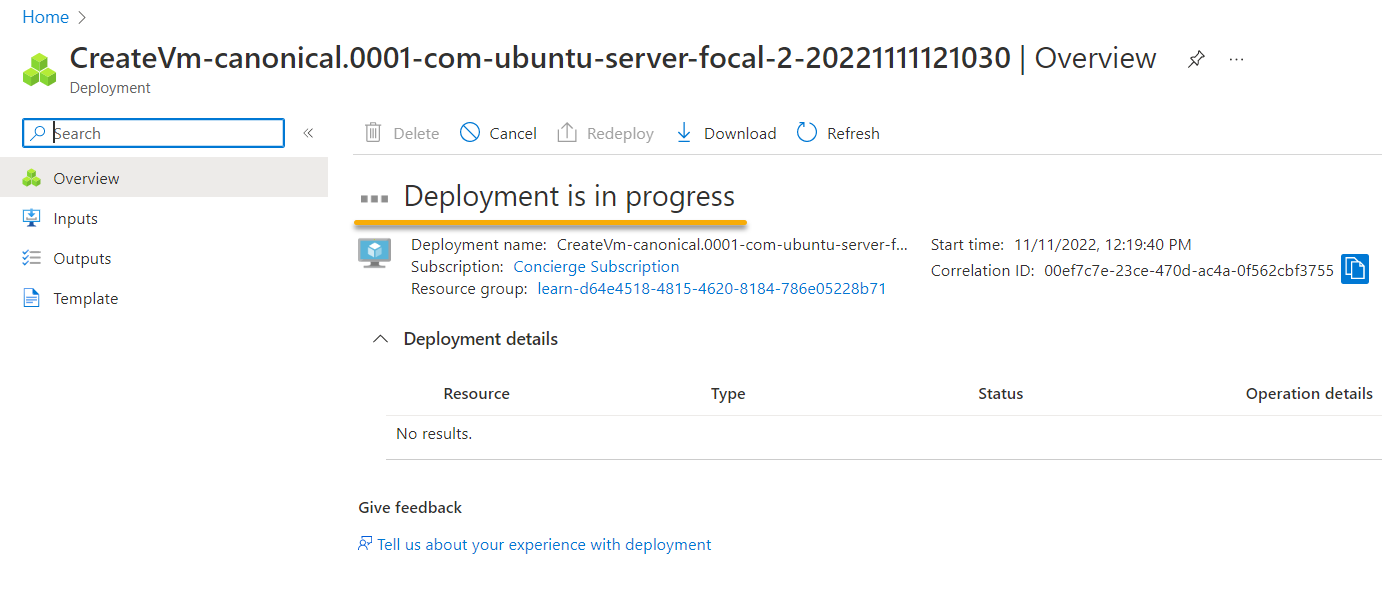
Below, you can see the deployment is in progress.
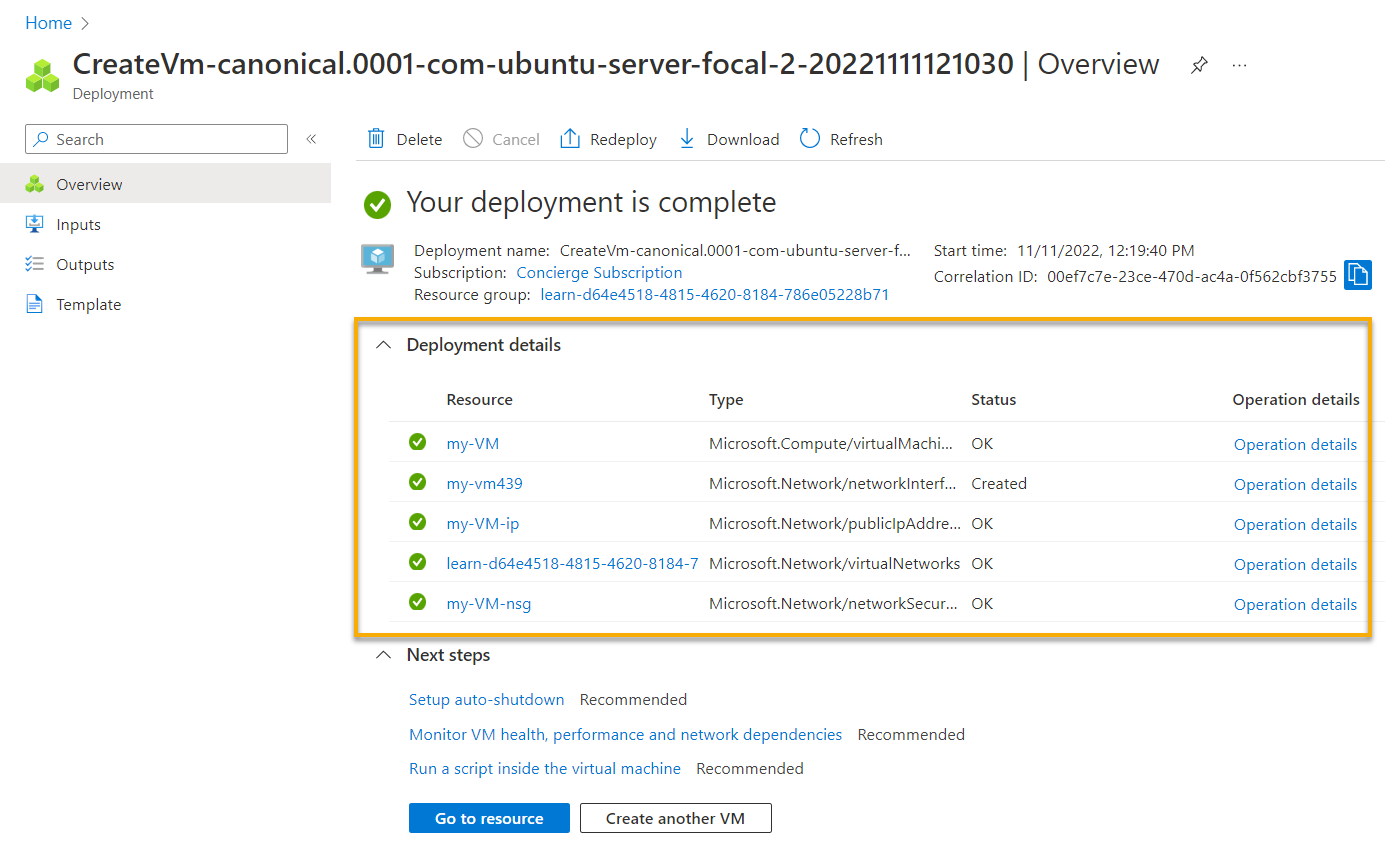
After the deployment completes, you will see all deployment details, such as VM name allocation, IP allocation, and so on.
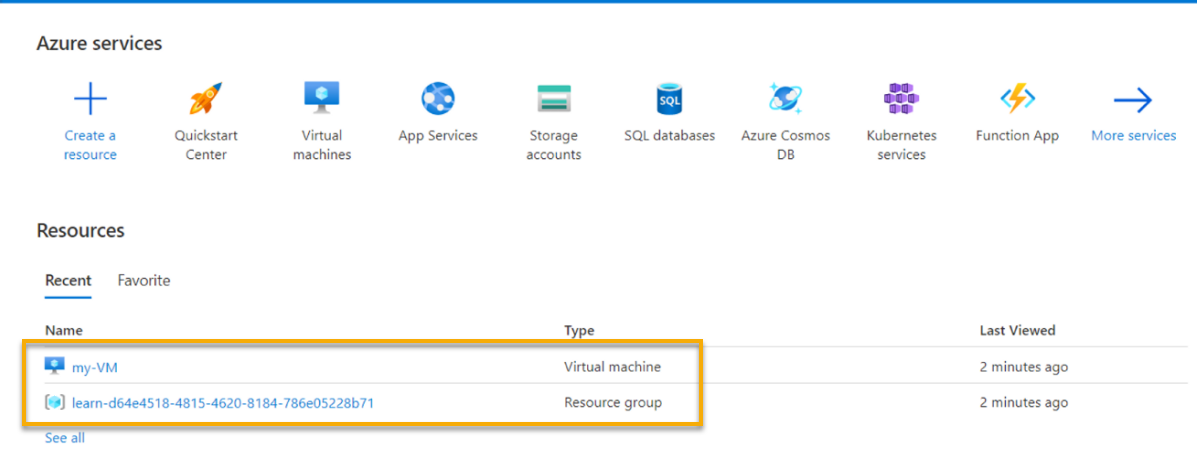
12. Finally, navigate Azure Portal’s home page, and you will see the new VM and resource group listed, as shown below.
Conclusion
In this tutorial, you have discovered how to quickly create an Azure VM in Azure Cloud Shell, with a few commands, and via the Azure Portal.
Regardless of which method you used to set up your Azure VM, you can run various applications in your instance, such as Ansible or Kubernetes. Furthermore, you can set up your Azure instance as your deployment or monitoring instance.
With a fully functional Azure instance running, why not test various software, such as Apache NGINX and Tomcat? Or maybe use it as an Ansible controller?


