


Network configuration is valuable for an administrator or even a regular user to help troubleshoot issues with internal and external connectivity. But what are the various ways of configuring networking? No worries! This Ubuntu network configuration guide has got you covered.
In this tutorial, you will learn how to set up various Ubuntu networking components to control your network better and how your host connects to the internet.
Ready? Stay tuned to level up your Ubuntu networking skills!
Prerequisites
This tutorial will be a hands-on demonstration. If you would like to follow along, be sure you have the following:
- An Ubuntu machine as the host – This tutorial uses version Ubuntu 22.04.
- A user with sudo privileges.
Configuring Network via the CLI
Network configuration is somewhat of a complex task, especially when you do not know which platform to use. But if you are on a command-line environment most of the time, configuring your network via the CLI suits you best.
But first, you must check your machine’s hostname for network identification.
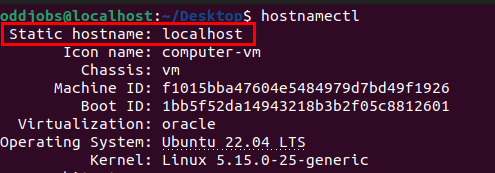
Fire up your terminal, and run the below hostnamectl command to see the current hostname of your machine.
hostnamectl
Below, you can see the machine’s hostname is the generic localhost.
Changing the Hostname for Network Identification
While localhost may be okay when working with just one machine, identifying machines gets confusing when you have to work with more than one machine, and all are called localhost.
1. Run the below hostnamectl command again, but this time, with the set-hostname switch to change the hostname (atamach01).
This tutorial uses atamach01 as the hostname, but you can choose any that works for you or your organization’s naming policy.
hostnamectl set-hostname atamach012. Next, reboot your machine to apply the changes.
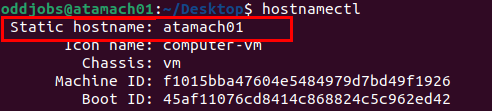
3. After reboot, rerun the following command to confirm the changes have taken effect
hostnamectlAs you can see below, the hostname has changed to atamach01.
Disabling Dynamic Host Control Protocol (DHCP) for All Interfaces
Before configuring Internet Protocol (IP) settings, you must disable DHCP for multiple interfaces. Disabling DHCP creates a scenario where no working configuration is present on a machine, and you have to configure networking from scratch for better control over your network.
Since your machine configuration may differ, you may not have the same network interface names. Ensure you replace the network interface names throughout this tutorial with yours accordingly.
To disable DCHP on your network configuration:
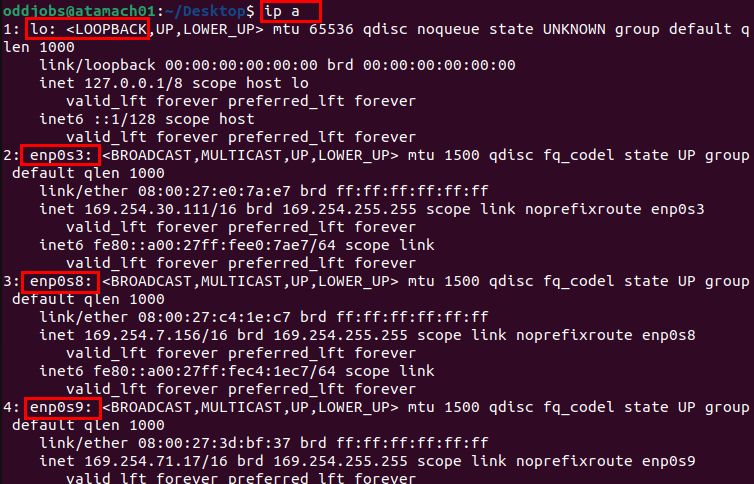
1. Run the following ip a command to list all network interfaces on your machine with their corresponding network addresses (a).
ip aYou will see a list of network interfaces, as shown below. The machine in this tutorial has three network interfaces, and the default loopback interface — yours may differ.
Take note of the interfaces; you will need to disable DCHP on each of them later.
2. Next, open the default Netplan configuration file (/etc/netplan/01-network-manager-all.yaml) on your preferred code editor, and add the following code. Netplan is a network configuration generator for Ubuntu.
Ensure you replace the interfaces under ethernets with the ones you noted in step one.
network:
  version: 2
  renderer: NetworkManager
  # Disabling DCHP on all network interfaces
  ethernets:
    enp0s3:
	    dhcp4: no
    enp0s8:
      dhcp4: no
    enp0s9:
      dhcp4: no
3. Lastly, execute the below netplan apply command, which does not provide output but applies the changes immediately.
sudo netplan applyAdding a Temporary MAC Address
Layer 2 networking involves nodes with Media Access Code (MAC) addresses. Though the MAC address is permanently mapped to the device, you can change the MAC address in modern operating systems if you are privacy conscious (MAC spoofing).
But note that because hardware manufacturers permanently assign MAC addresses, changes to the MAC address are temporary.
Execute the ip link command below to set the temporary MAC address to the enp0s9 network interface to 22:11:33:AA:BB:CC.
sudo ip link set dev enp0s9 address 22:11:33:AA:BB:CC
Now, run the ip a command to confirm the changes have taken effect.
ip a
As in the screenshot below, your MAC address should have changed. Notice that the original address is still attached to the interface.

Adding a Temporary Static IP address
Up to this point, you have seen how to configure non-IP-related networking components. Now, it is time to configure your machine to communicate over the network using IP, starting with assigning an IP address.
Run the ip a command below to add an IPv4 address (192.168.100.16) to the enp0s3 interface.
IP addresses must conform to networking standards and match the subnet details of the network your machine is joined to.
sudo ip a add 192.168.100.16/24 dev enp0s3
Now, run the following ip a command without parameters to confirm that the change has taken effect.
ip a
Your screen should have output akin to the one below.

Perhaps you plan to direct all traffic without an explicitly specified route to the address of the internet-facing router on your network. If so, run the following command to add a default route via an IP address (192.168.100.1).
sudo ip route add default via 192.168.100.1
Configuring a Temporary Name Resolution
After the previous configurations you made, you can now reach the internet. But right now, you cannot install packages or browse the web effectively without domain name resolution.
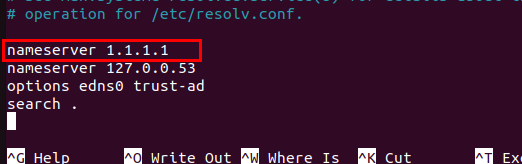
To set up a temporary name resolution, add a public name server to /etc/resolv.conf as follows:
1. Open /etc/resolve.conf in your editor, add the address of CloudFlare’s public nameserver (nameserver 1.1.1.1), save the changes, and return to the terminal.
Place CloudFlare’s nameserver above the first nameserver to ensure your entry is used for resolution, similar to the one below.
2. Now, open your favorite web browser, and navigate to www.google.com (or any reliable website) to confirm your machine is fully configured. You will see Google’s homepage on your screen if all goes well, as shown below.

3. Finally, reboot your machine to clear all the transient network settings.
Configuring Persistent Networking with NetworkManager
Configuring the network with temporal settings is only useful for running tests and troubleshooting. How do you persist configuration on Ubuntu? By using NetworkManager via its Text User Interface (TUI) tool.
To persist network configuration with NetworkManager:
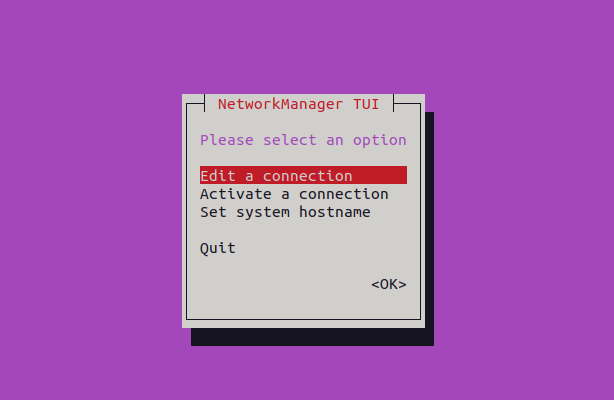
1. Execute the nmtui command below to access NetworkManager TUI.
sudo nmtui2. Select the Edit a connection option, and hit ENTER when greeted with the text-based UI below to access the list of network interfaces available on your host.
3. Navigate with the arrow keys on your keyboard to select a network interface (netplan-enp0s3), select <Edit…>, and press ENTER to configure network settings for the selected interface.
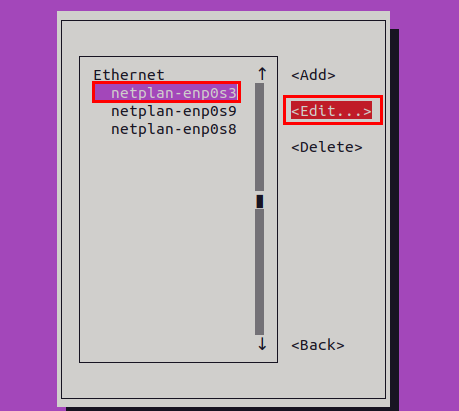
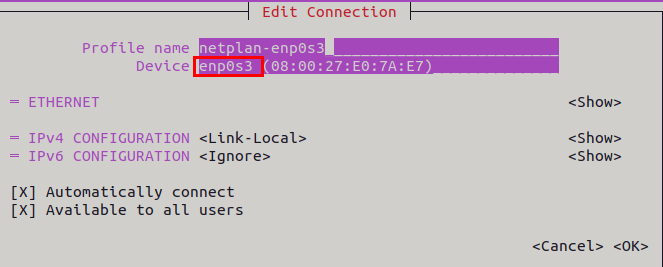
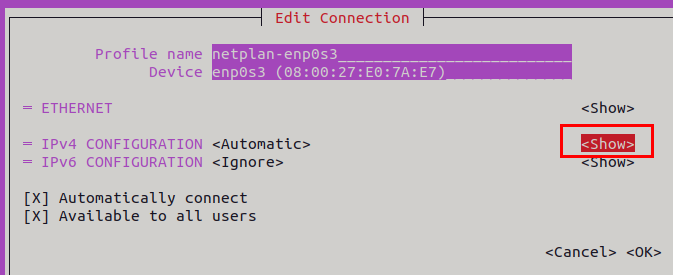
As shown below, you will see a list of editable properties for the selected interface (enp0s3).
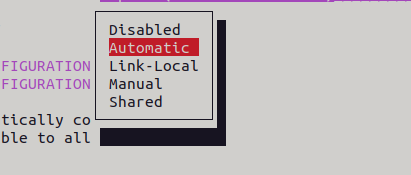
4. Now, navigate to and select <Link-Local> adjacent to IPv4 CONFIGURATION to select the configuration mode for the interface, as shown below.
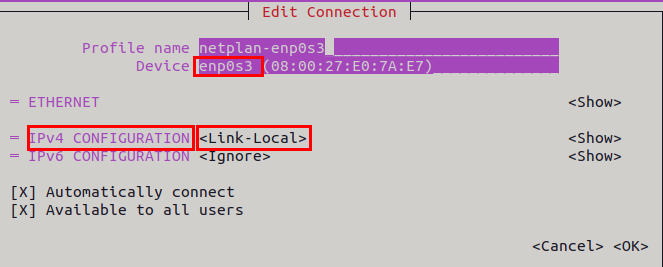
5. Lastly, select Automatic from the menu to direct NetworkManager to use DHCP for the interface.
Configuring Persistent Name Resolution with NetworkManager
If your DHCP server is working fine, your machine should be ready for use. But note that the NetworkManager allows you to do more finetuning, like persisting name resolution.
1. Select <Show> as in the shot below to expand a list of IP settings options you can manually configure.
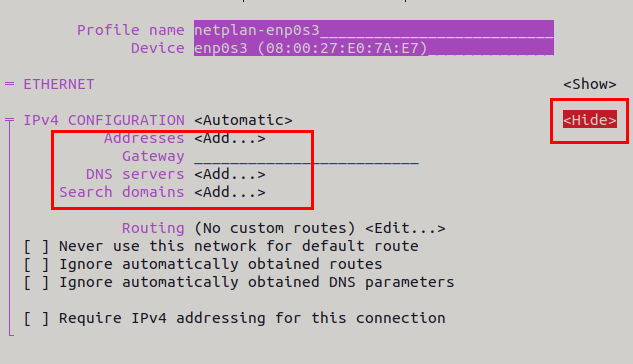
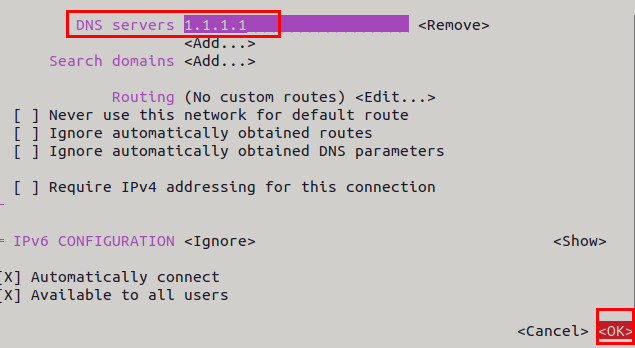
2. Next, navigate to the DNS servers option and enter 1.1.1.1 to override the DNS settings provided by DHCP persistently. Once you have set the DNS server, select <OK> and press ENTER to accept the changes.
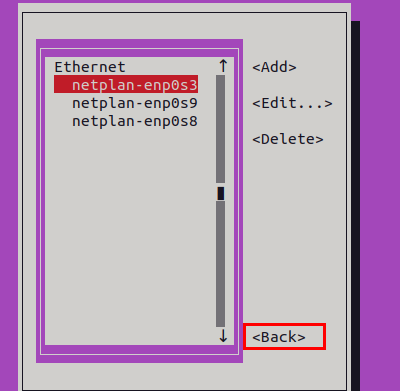
The Edit Connection screen closes, and you will return to the network interface selection screen (step three).
3. Select <Back> and press ENTER to return to the homepage.
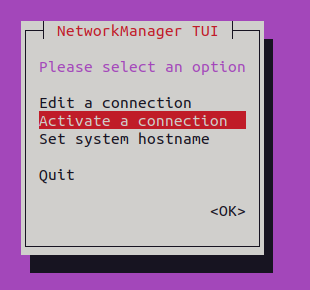
4. Now, select Activate a connection to reload the network connection and cause your changes to take effect immediately.
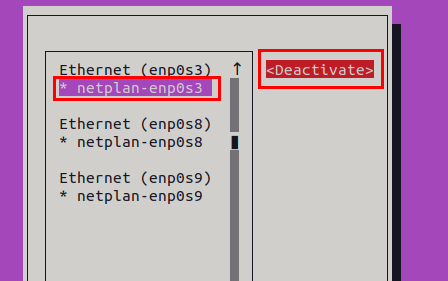
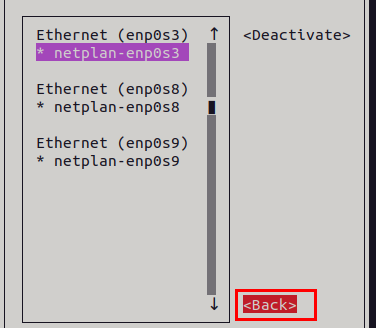
5. Select the Deactivate option once to deactivate the connection you configured (netplan-enp0s3), as shown below.
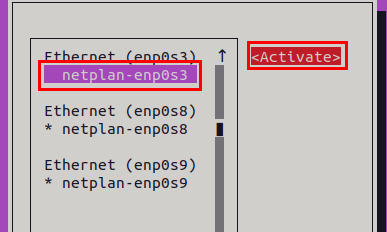
6. Next, select the <Activate>and press ENTER to re-activate the connection with your provided settings.
7. Select Back to revert to the home page.
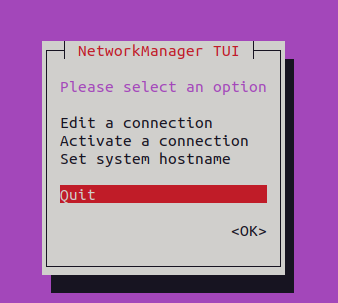
8. Now, select Quit to return to the command line.
9. Finally, navigate to www.google.com on your web browser to confirm the settings work correctly.

Configuring Static Name Resolution
Typically, you require DNS resolution for resources not covered by configured DNS servers. In such scenarios, you can edit the hosts file to make such DNS mappings available to your system. A hosts file also allows you to specify custom mappings as needed.
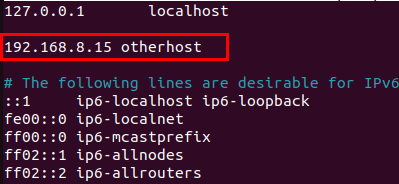
Open your hosts file (/etc/hosts) in your text editor, and add your host’s IP address to domain name mapping, as shown below.
Note that the domain name otherhost and IP address 192.168.8.15 are arbitrary.
Next, execute the ping command to confirm that the DNS resolution for otherhost is as desired.
ping otherhost
If the change has taken effect, you will see the name you specified automatically resolved to the IP address you provided, as in the shot below.

Configuring Persistent Networking with Netplan
In Ubuntu, you can also use Netplan YAML files to implement persistent networking configuration. Netplan’s use of YAML files provides an opportunity for automation with tools like Ansible.
To configure persistent networking with Netplan:
1. Open the Netplan’s default configuration file (/etc/netplan/01-network-manager-all.yaml) in a text editor and add the following snippet. Replace the values with yours accordingly, save the changes, and close the file.
The directives give enp0s8 a static IP with a default route and configure the machine with DNS servers 1.1.1.1 and 8.8.8.8
network:
  version: 2
  renderer: NetworkManager
  ethernets:
    enp0s8:
      dhcp4: no
      addresses:
        - 192.168.8.115/24
      routes:
        - to: default
          via: 192.168.8.1
      nameservers:
          addresses: [1.1.1.1,8.8.8.8]
2. Next, execute the netplan apply command to apply the changes immediately. Note that this command does not provide output, but you will verify the changes in the following step.
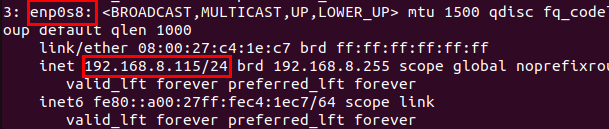
sudo netplan apply3. Now, execute the below ip a command to confirm the changes have taken effect.
ip aIf all goes well, you will see the network assignments, as in the screenshot below, confirming the configuration was successful.
Configuring Networking via the GUI
You have seen that network configuration via the CLI works. But if you are more into a graphical interface that you can navigate around, you can also opt to set up networking using the Ubuntu Settings’ GUI application.
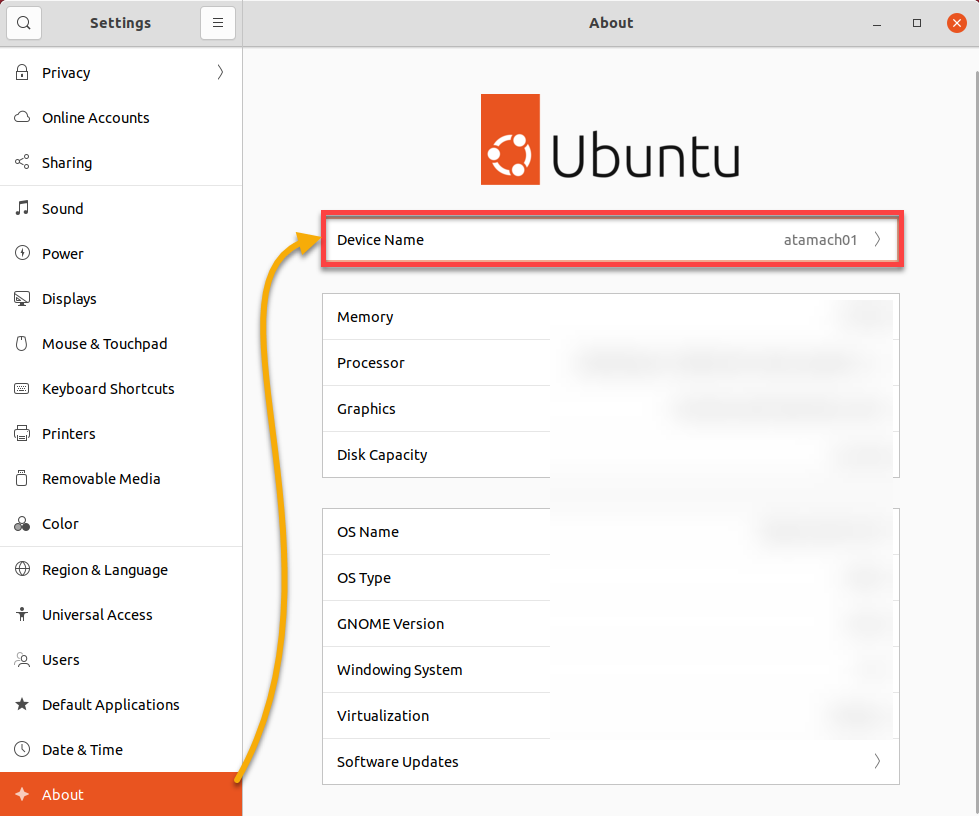
1. Open the Settings app, select the About tab in the navigation pane, and click Device Name to initiate renaming the hostname.
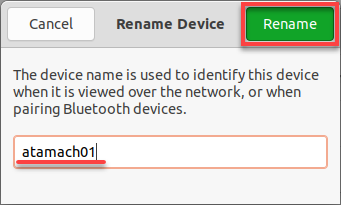
2. Provide a new hostname and click Rename to save the hostname change.
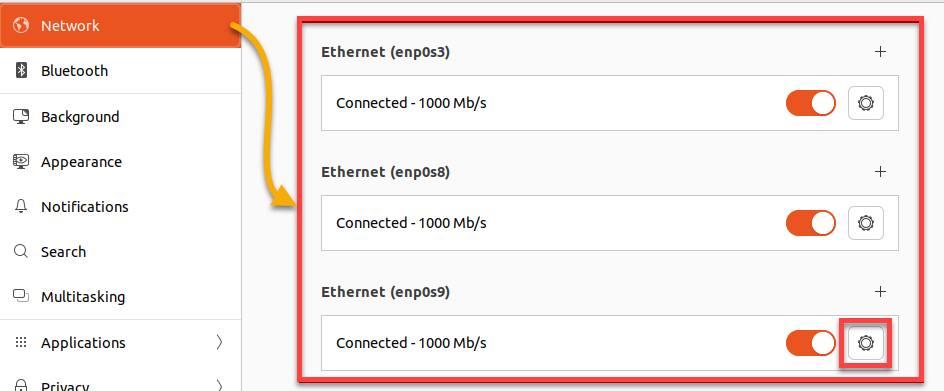
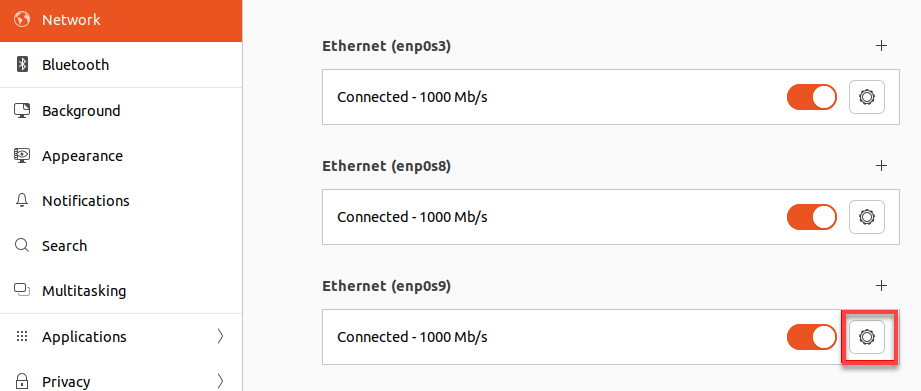
3. Next, select the Network tab to list all interfaces on your machine, and click the cog icon of an interface entry (enp0s9) to bring up the interface configuration window (step four).
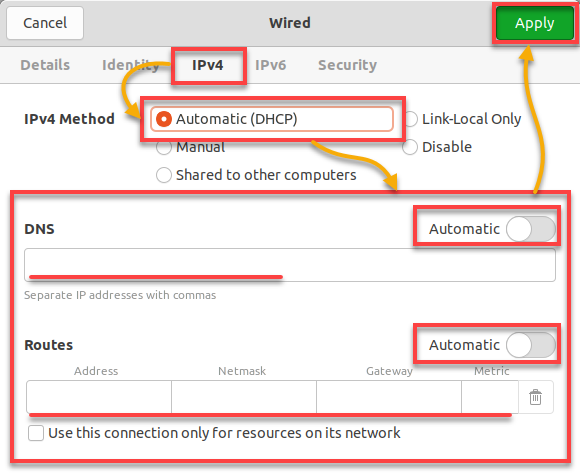
4. Now, configure IPv4 settings with the following:
- Select the IPv4 tab to switch to IPv4 configuration mode.
- Select the Automatic option to allow the interface to receive DHCP settings automatically. By default, these settings include the IP address, DNS servers, and route information.
- Turn off the corresponding Automatic toggle buttons and supply the needed static values for DNS servers and IP Routes.
- Once configured, click on Apply to immediately apply the changes.
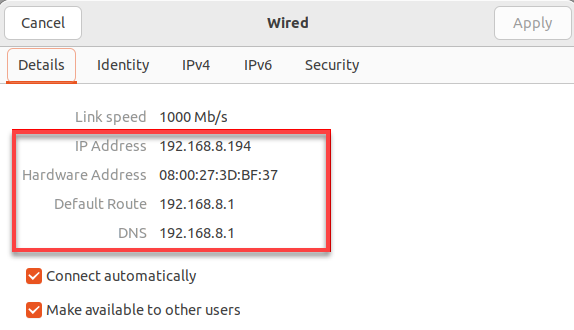
5. Finally, select the cog icon for the interface again (enp0s9) to verify the changes have taken effect.
If all is well, the correct details populate the Details tab, as shown below.
Conclusion
By coming this far, you have learned to manage the network configuration of your Ubuntu machines with this Ubuntu network configuration guide. At this point, you can confidently manage how your host connects to the internet and troubleshoot your network if something goes haywire.
Network configuration management should always come in pair with securing your network. So why not set up a firewall for your Ubuntu machine or server?


