


ts-node is a great way to execute TypeScript files without going through the hassle of compiling them down to JavaScript manually. But how exactly would you execute TypeScript files?
In this tutorial, you’ll learn how to use ts-node to execute TypeScript files while covering some of ts-node’s benefits over traditional compilation methods.
Read on and never get stuck in the compile-build-test-feedback loop again!
Prerequisites
This tutorial will be a hands-on demonstration. If you’d like to follow along, be sure you have the following.
- A Linux machine – This demo uses Ubuntu 20.04, but any Linux distribution will work.
- A non-root user account with sudo privileges.
Installing Node.JS and ts-node
ts-node can be helpful to run a script and get results without having to worry about file changes and compilation. But before you can execute TypeScript files, you’ll first have to install Node.JS on your machine to set up an environment to run ts-node.
1. Open your terminal, and run the apt update command below to update your package list with the latest information from the Ubuntu repositories.
sudo apt update -y
2. Next, run the curl command below to download the nodesource personal package archive (PPA).
This command downloads a shell script (nodesource_setup.sh) to add the most recent Node.JS from the NodeSource PPA to your system.
sudo curl -sL https://deb.nodesource.com/setup_17.x -o nodesource_setup.sh
3. Run the following bash command to add the NodeSource PPA to your system.
This command runs the shell script you downloaded (step two), adding the NodeSource PPA to your system. The local package list will be updated to install Node.JS from the PPA.
sudo bash nodesource_setup.sh
4. Now, run the apt install command below to install Node.JS and its dependencies from the NodeSource PPA to your machine.
sudo apt install nodejs -y
5. Run the node command below to verify that Node.JS is properly installed. This command prints the Node.JS version number to the console, and yours may be different.
node -v
6. Run the npm -v command to verify that npm is installed and working correctly.
Unlike the Node.JS package in the Ubuntu repositories, the package from the NodeSource PPA includes both node and npm. As a result, you won’t have to install npm separately.
npm -v
7. Now, run the command below to install ts-node and dependencies on your machine.
sudo npm i typescript ts-node -g 
8. Finally, run the following command to install packages (build-essential) required for ts-node to compile TypeScript code.
sudo apt install build-essential -y

Executing TypeScript Files
TypeScript is a language that offers more structure and safety than vanilla JavaScript. At the same time, Node.JS is a platform built on Chrome’s JavaScript runtime for building fast, scalable network applications.
The combination of Node.JS and TypeScript lets you build amazing things. But first, you’ll need to know how to execute TypeScript files in a Node.JS environment.
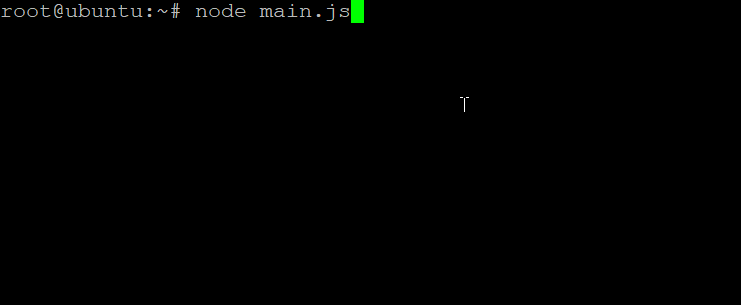
1. Create a new JavaScript file called main.js in your favorite text editor. Populate the code below to the main.js file.
The code below is a basic program that prints the “Hello world! This sample provided by ATA!” message.
// Defines a constant called greeting. The value of this constant is the string "Hello world! This sample provided by ATA!"
const greeting = 'Hello world! This sample provided by ATA!';
// Logs the value of the greeting constant to the console.
console.log(greeting);
2. Next, run the node command below to execute the code in the main.js file.
node main.jsIf the code in the main.js file works, you’ll see the message below printed on the console.
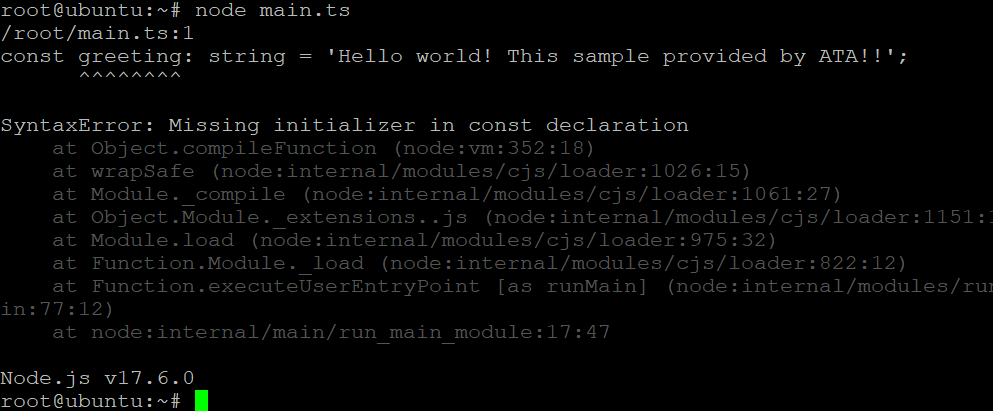
3. Now, create a TypeScript file called main.ts in an editor and populate the file with the same code as the main.js file. Save the changes and close the editor.
const greeting: string = 'Hello world! This sample provided by ATA!!';
console.log(greeting);
4. Run the node command below to execute the code in the main.ts file.
node main.tsThis time, you’ll get a SyntaxError, as shown below, since Node.JS does not support TypeScript natively. But in this lack of support, ts-node comes in to execute TypeScript files (step five).
5. Run the below ts-node command to execute the main.ts file.
ts-node main.tsNotice below that the ts-node command runs slower than the standard JavaScript file (main.js). ts-node uses the TypeScript compiler to compile your TypeScript code into JavaScript, which takes more time.
Though slower, the benefits of type checking, compile-time warnings, and getting the job done are worth the extra time.

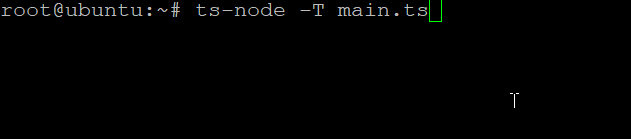
6. Run the following command to compile your TypeScript code (main.ts) without checking for errors (-T). Compiling your TypeScript code into JavaScript is not always necessary. In some cases, you may only need to compile your code without checking for errors.
ts-node offers the -transpile-only or -T flag to compile your TypeScript code into JavaScript. For example, if you’re only testing a small part of your code, you can use these flags to speed up the compilation process.
ts-node -T main.tsAs you see below, the compilation process is quicker when you use the -T flag.
If you have errors in your TypeScript code, the compile will fail. So, use the -T flag wisely.
Making a TypeScript as Shell Executable File
Perhaps you’re wondering how to share and run binary executables on different systems. If so, let ts-node do the trick. Making a shell executable node file is a great way to create reusable binary executables.
You can make a shell executable node file by using the shebang (#!) line and specifying the ts-node-script interpreter you want to use, as shown below.
#!/usr/bin/env ts-node-script
You can also specify a different interpreter if you want, like a ruby interpreter. But note that a shebang like
#!/env ts-node-scriptdoesn’t work since the executable requires a full path.
To see how to make an executable shell file:
1. Create a script called hello.ts, and populate the hello.ts file with the following code, which prints a greeting message.
#!/usr/bin/env ts-node-script
console.log('Hey, Greeting from ATA friends and family.');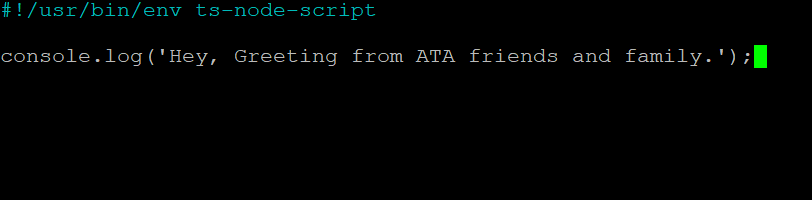
2. Next, run the below command to make the script executable (hello.ts) so that you can run it. This command doesn’t have an output, but you’ll test the script in the next step.
sudo chmod +x hello.ts3. Finally, run the following command to execute the script (hello.ts) from the current directory (./)
./hello.tsIf the script runs as executable, you’ll see the same greeting message below. Now you can share this executable script with your friends, and they can run it on their systems.

Using the TypeScript Read-Eval-Print Loop (REPL)
With the node REPL, when you enter node in the terminal, you get access to the node shell that allows you to run JavaScript code, as shown below interactively. This feature can help test small code snippets or learn new language features.

Like the node REPL, the TypeScript REPL is an interactive shell that allows you to run TypeScript code interactively.
1. Run the following command to launch the TypeScript REPL.
ts-nodeYou’ll be given a REPL prompt, as you see below, where you can type in TypeScript code. The TypeScript compiler automatically compiles your code and prints the results to the console.
This behavior can be a bit cumbersome if you’re writing longer code snippets, but the same behavior comes in handy when trying out small code snippets.

2. Next, copy and paste the following code into the REPL prompt and hit ENTER to declare the addNumbers function.
The addNumbers function below takes two number input parameters (a: number, b: number) and returns a number value.
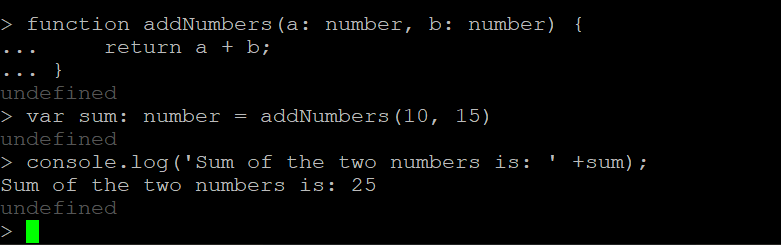
function addNumbers(a: number, b: number) {
return a + b;
}
3. Run the following code into the REPL prompt to declare a sum variable and assign the result of calling the addNumbers function with the input parameters 10 and 15.
The value returned by the addNumbers function is 25, so the sum variable will have the value 25 assigned to it.
var sum: number = addNumbers(10, 15)4. Finally, run the following code to print (console.log) the string Sum of the two numbers is to the console.
console.log('Sum of the two numbers is: ' +sum);As shown below, the sum variable’s value (25) is printed.
Conclusion
In this tutorial, you’ve learned how to install and use the ts-node tool, which allows you to run TypeScript code in a Node.js environment. You’ve also learned how to use the TypeScript REPL to run a TypeScript code interactively.
At this point, you can now write automation scripts using TypeScript to manage your day-to-day tasks. And with the TypeScript REPL, you can quickly try out small snippets of code to see how they work.
Now, why don’t you try out coding a Development Workflow tool using TypeScript with Node.js and see how it works for you?


