

Nowadays, setting a cloud using Infrastructure as Code (IaC) is common, and multiple IaC tools are available for infrastructure provisioning. But which one to choose? CloudFormation and Terraform are two of the big names in the IaC space. See how the Terraform vs. Cloudformation debate plays out.
Not a reader? Watch this related video tutorial!
Not seeing the video? Make sure your ad blocker is disabled.
This tutorial will show you, rather than fight, how these tool uses their way to accomplish the provisioning of various Cloud services.
Stay tuned so you can decide which tool works best for your infrastructure!
Prerequisites
This tutorial will be a step-by-step demonstration. If you’d like to follow along, ensure you have the following in place:
- An Amazon Web Service (AWS) account.
- A code editor – Even though you can use any text editor to work with Terraform configuration files, consider using Visual Studio (VS) Code as it understands the HCL Terraform language well.
- An Ubuntu machine – This tutorial uses Ubuntu 20.04 LTS, but any operating system with Terraform works.
- Terraform installed on your Ubuntu machine – This tutorial uses Terraform v1.1.5.
Terraform vs. CloudFormation
A fight between Terraform and CloudFormation? What’s the difference between the two anyway?
- Terraform is a tool for building, versioning, and updating the infrastructure.
- AWS CloudFormation is a service that allows you to set up and manage your AWS resources and applications that run in AWS.
But read on to understand the differences between the two better, starting with Terraform.
Launching AWS Services Using Terraform
Terraform allows you to build, change, and version infrastructure via a configuration in .tf format or .tf.json or .tfvars format. Terraform configuration files, placed inside the Terraform modules, are written in a tree-like structure to ease the overall code understanding. A Terraform module is a place for multiple resources that are used together.
Since you’ll be using the Terraform modules to create AWS EC2 instance, AWS S3 bucket, and AWS RDS in AWS Cloud, you’ll first have to build a Terraform configuration. This configuration defines all services that Terraform will build.
To build a Terraform configuration:
1. Log in to the Ubuntu machine with your favorite SSH client.
2. Next, run the commands below to create a working directory called ~/terraform-aws-services-demo. This folder will contain all the configuration files you’ll be working on in this tutorial.
mkdir ~/terraform-aws-services-demo
cd ~/terraform-aws-services-demo
3. Create a file called main.tf in your preferred code editor, and add the following configuration to the main.tf file, and save the changes.
The Terraform configuration below is specific to this tutorial and its AWS subscription. Make sure to customize the configuration as needed or if you encounter errors.
Terraform execution and configuration files are written in IaC language, which comes under High-level language that is more human-readable.
The configuration below creates instances for the AWS EC2, S3, and RDS services module.
resource "aws_instance" "my-machine" {
   ami = var.ami
   instance_type = var.instance_type
   tags = {
      Name = "my-machine"
           }
}
resource "aws_s3_bucket" "b" {
  bucket = "my-s3-infra-bucket"

  tags = {
    Name        = "My bucket"
    Environment = "Dev"
  }
}

resource "aws_db_instance" "default" {
# Allocating the storage for the database instance.
  allocated_storage    = 10
# Declaring the database engine and engine_version
  engine               = var.engine
  engine_version       = var.engine_version
# Declaring the instance class
  instance_class       = var.instance_class
  name                 = var.name
# User to connect the database instance
  username             = var.username
# Password to connect the database instance
  password             = var.password
  parameter_group_name = var.parameter_group_name
}
4. Now, create another file called vars.tf, and populate the code below.
The vars.tf file is a Terraform variables file that contains all variables the configuration file references.
# Creating a Variable for ami
variable "ami" {
  type = string
}

# Creating a Variable for instance_type
variable "instance_type" {
  type = string
}
variable "engine" {}
variable "engine_version" {}
variable "instance_class" {}
variable "name"  {}
variable "username" {}
variable "password" {}
variable "parameter_group_name" {}
5. Create one more file named terraform.tfvars, and add the code below to the file.
The code below defines the values that replace the variable references in the configuration file (main.tf).
When Terraform creates the AWS RDS instance, the instance will be a MySQL v5.7 database running on a t3.micro engine. With an admin username of user1 with a password of password
  engine               = "mysql"
  engine_version       = "5.7"
  instance_class       = "db.t3.micro"
  name                 = "mydb"
  username             = "user1"
  password             = "password"
  parameter_group_name = "default.mysql5.7"
6. Create one more file called provider.tf, and populate the following code to define the AWS provider.
This tutorial creates resources in the us-east-1 region. But a list of regions that AWS support is also available.
provider "aws" {
   region = "us-east-2"
}7. Now, run the terraform init command below to initialize the provider and plugins.
terraform init
8. Once initialized, run the below terraform plan command to view what resources need to be created or deleted. Think of this command as a dry-run.
Another factor that makes Terraform powerful is that Terraform provides you with in-depth details of the execution plan. Such as what Terraform will provision before deploying the actual code and resources to create.
terraform planThe output below shows the plan’s summary where there’s nothing to change and destroy/delete, but there ate six (6) resources to add/create.

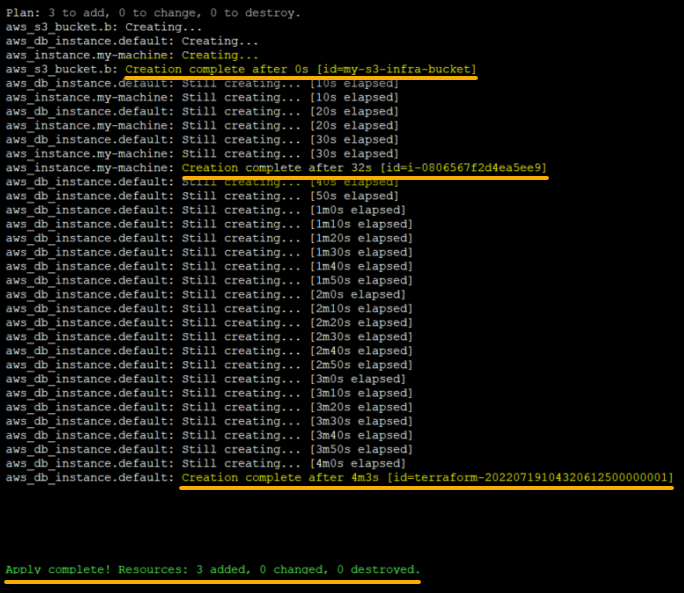
9. Lastly, run the following terraform apply command to apply the plans laid out in step eight.
terraform applyThe output below shows that the AWS resources creation has been completed for AWS EC2, S3, and RDS services module.
But suppose you don’t have any experience writing Terraform modules using HCL Language. In that case, CloudFormation is your best choice. CloudFormation allows you to generate the CloudFormation templates using its designer, where you drop the resource types as diagrams.
Launching AWS Services Using CloudFormation
You’ve seen how to deploy AWS EC2, AWS S3 buckets, and RDS services using Terraform. But this time, you’ll create a YAML formatted template file to create a CloudFormation stack and launch AWS EC2, RDS, and S3 buckets.
Unlike Terraform, CloudFormation uses templates (in JSON or YAML format) instead of modules to describe AWS resources to create. These resources can be but are not limited to AWS EC2 instances or AWS RDS DB instances. CloudFormation then provisions the resources using the stack.
To create and deploy a YAML formatted template using Cloud Formation stack:
1. Create a file named CloudFormation.yml and add the code below to the file, which creates three resources as follows:
- AWS EC2 instance of t2.nano type with key1 as key.
- AWS RDS instance of type db.t3.micro with Postgres as the engine.
- AWS S3 bucket (named ata-this-bucket).
# Creating Cloudformation template
AWSTemplateFormatVersion: 2010-09-09
Description: 'AWS CloudFormation Ec2'
# Resources here mean AWS services.
Resources:
  WebInstance:
    Type: AWS::EC2::Instance
    Properties:
      InstanceType: t2.nano
      ImageId: ami-08d4ac5b634553e16
      KeyName: key1

  WebAppDatabase:
# Defining the RDS Instance
    Type: AWS::RDS::DBInstance
    Properties:
      DBInstanceIdentifier: atadb
      AllocatedStorage: "5"
      DBInstanceClass: db.t3.micro
      Engine: postgres
      MasterUsername: DBUsername
      MasterUserPassword: DBPassword

# Defining the AWS S3 bucket
  S3Bucket:
    Type: AWS::S3::Bucket
    Description: Creating Amazon S3 bucket from CloudFormation
    Properties:
      BucketName: ata-this-bucket
2. Next, switch to the AWS Management Console, and look for and access CloudFormation services, as shown below.
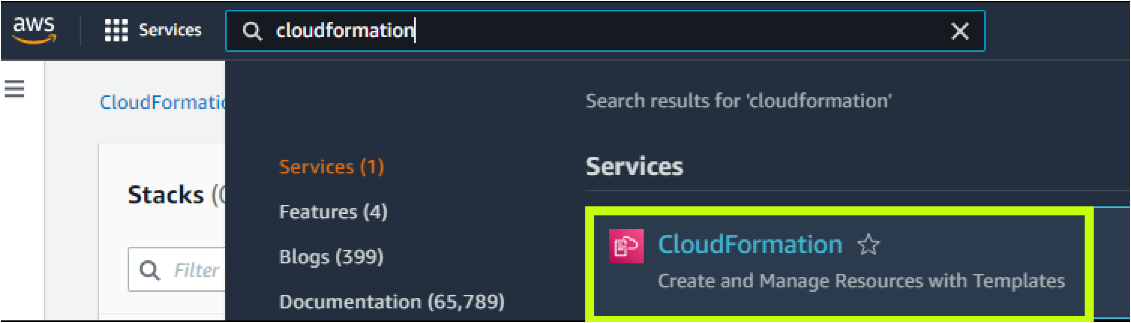
3. On the CloudFormation page, click Create Stack (right-most) to initiate creating a stack (step four).

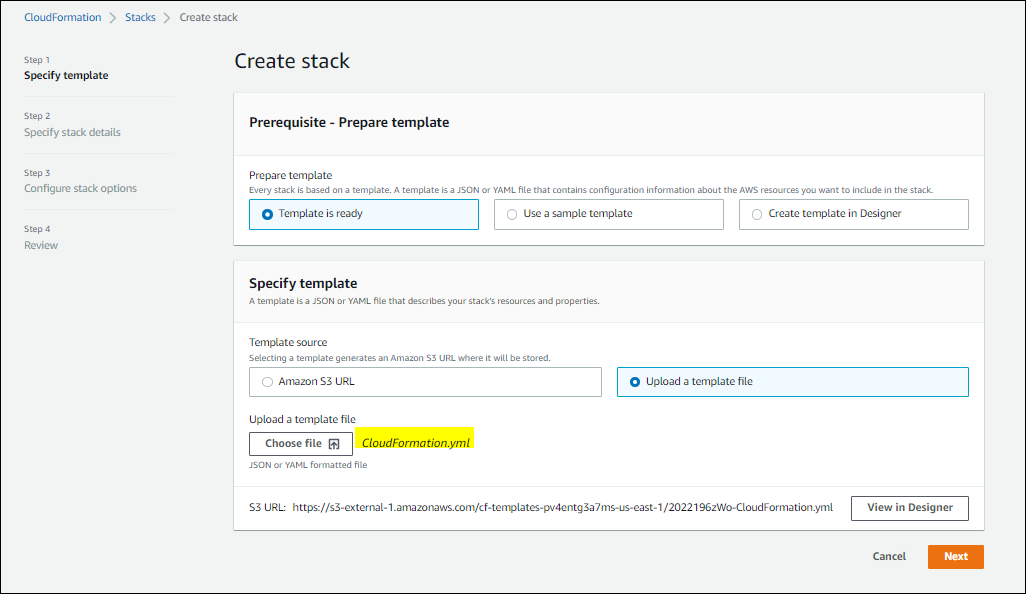
4. Now, configure the new stack with the following:
- Select the Template is ready option under the Prepare template section since you already have a template (CloudFormation.yml).
- Choose the Upload a template file option, and click on Choose file to locate the template file you created in step one (CloudFormation.yml).
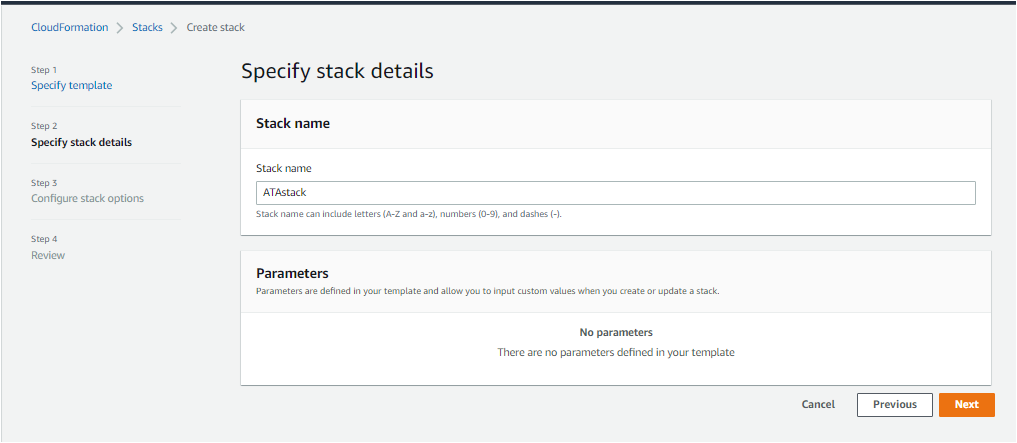
- Click Next to specify the stack details.
5. Specify a unique Stack name (ATAstack), and click on the Next button. The stack will be created and launch all the resources defined in the template file.
As you can see below, the resources (AWS EC2, AWS RDS, and AWS S3) are provisioned successfully.
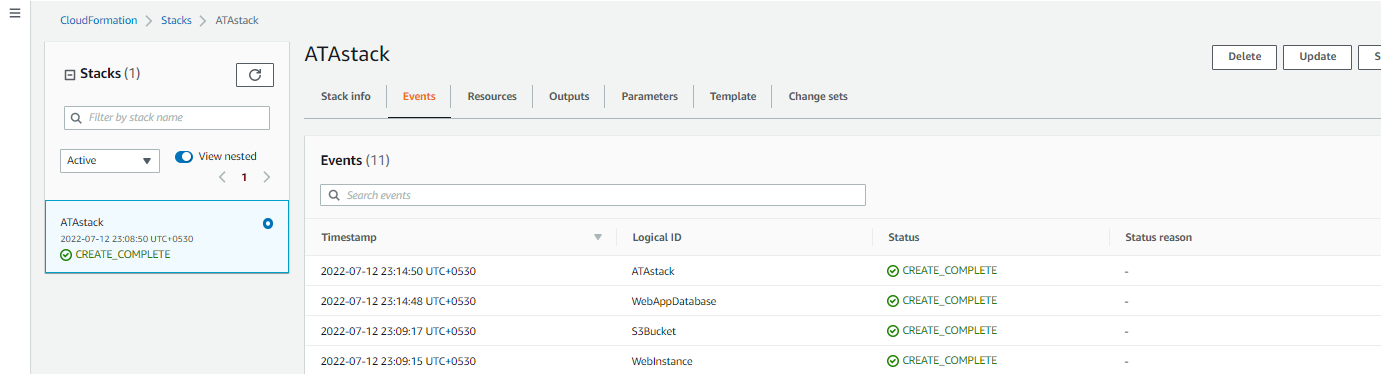
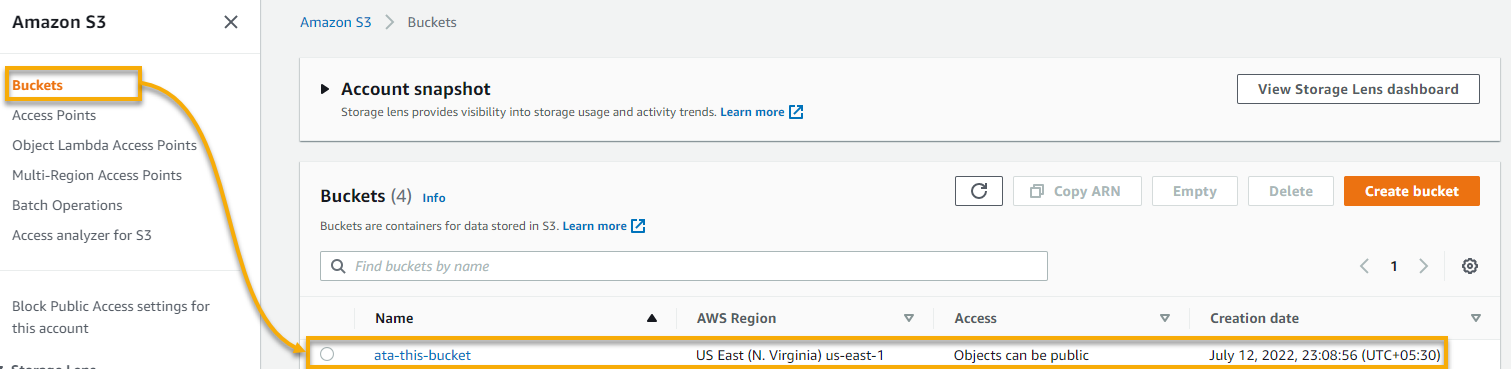
6. Finally, verify all the provisioned components (S3 bucket, AWS EC2 instance, and AWS DB instance).
In the following screenshots, you can verify that you’ve successfully created instances like you would with Terraform but through AWS Management Console.
Even though Terraform works with various public clouds such as oracle, Azure, and Google Cloud, CloudFormation is superficially used to manage AWS services. So if you’re working entirely with AWS services, there is no doubt that CloudFormation suits you.


Both CloudFormation and Terraform are flexible for provisioning resources in AWS resources when using third-party tools such as Postgres or Docker. But it’s worth noting that Terraform is much more advanced and compatible.
Conclusion
Terraform and CloudFormation are both great tools. They set out to perform and achieve a job brilliantly. And in this tutorial, you’ve seen that both tools let you handle provisions of Cloud services depending on your expertise or what fits your needs.
Each tool aims to achieve different things and never completely matches the other’s feature set. This focus is a good thing! So why not get started with Terraform and CloudFormation for your IaC journey?


