


Are you tired of creating infrastructure for your websites and projects manually? Have you been using scripting languages and feeling down because they lack the flexibility and ease of sharing?
You came to the right place! A Terraform Provisioner, in combination with PowerShell, can help automate infrastructure creation. In this guide, you will learn how to use Terraform Provisioners to create infrastructure for you. Dive in to get started.
Prerequisites
This tutorial will be a hands-on demonstration. If you’d like to follow along, be sure you have the following:
- An AWS account with powers to create resources. If you don’t have an AWS account, a free tier account is available.
- An EC2 instance with Terraform installed.
- An installed and configured AWS CLI.
Cloning the Terraform Code
Terraform is an open-source tool that codifies APIs into declarative configuration files. Team members can share the configuration files amongst the team. You and your team can treat the Terraform configuration files as code: edit, review, and; version them.
In this article, you will learn about Terraform and its configuration files by getting your hands dirty by setting up an Apache server on your AWS EC2 instance.
You will kick off this guide by cloning some Terraform code you will need later. Follow the steps below:
1. Open an SSH session to an EC2 instance.
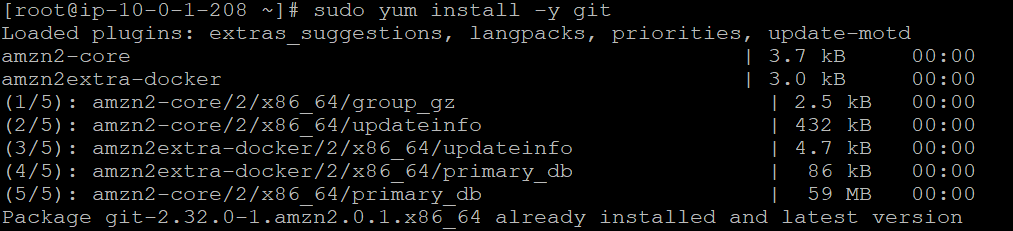
2. Once logged in, install Git with the following command so you can clone the example repository: sudo yum install -y git
3. With Git installed, it is time to clone the GitHub repository to your current local repository. The repository holds code for creating an Apache server that will come in handy later.
git clone https://github.com/Adam-the-Automator/ata-aws-iam.git
Examining the Terraform Files
Now that you have cloned the repository to your local system, it is time to examine the files you cloned to understand their purposes.
Run the cd command to navigate into the working directory for the local repository and run the ls command.
cd ata-apache
ls
The ls command lists three files in it: main.tf, README.md, and setup.tf.

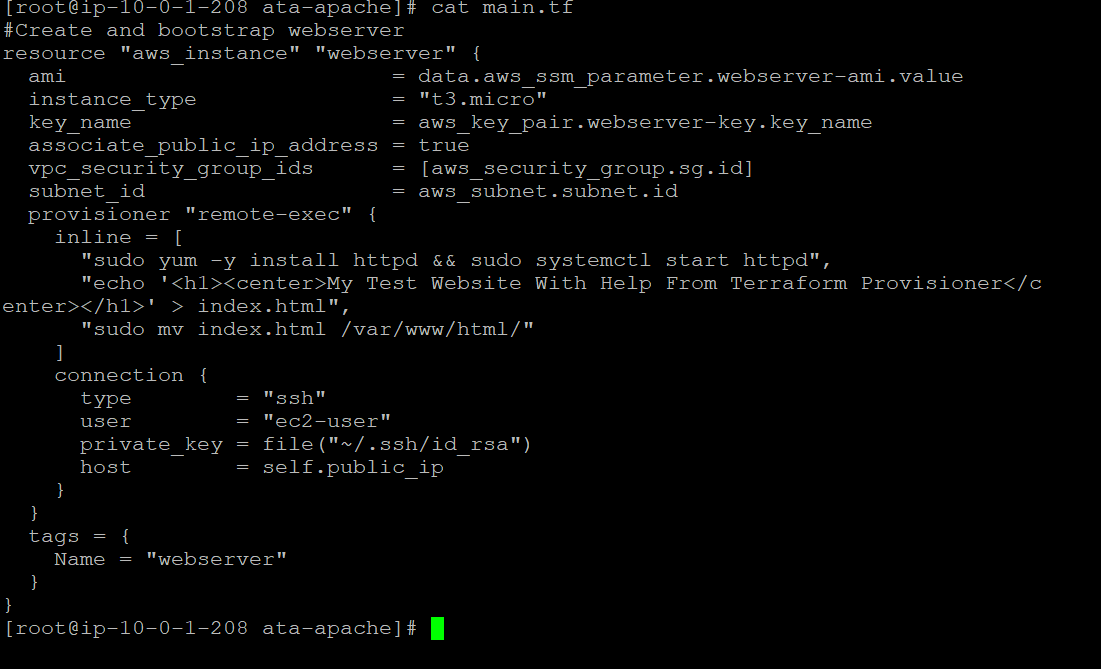
Start by examining the main.tf file with the cat command that shows the contents of the main.tf file.
cat main.tf
When you check the file’s contents, you can see that it is responsible for creating an EC2 VM (aws_instance) and giving it many properties. Such as:
- The image you will install on your VM:
data.aws_ssm_parameter.webserver-ami.value. - A public IP address:
associate_public_ip_address = true. - The VM instance type:
t3.micro. - The key pair you want to use for this VM:
aws_key_pair.webserver-key.key_name - A few security groups:
aws_security_group.sg.id.
Below you can see the output of the main.tf file.
The second file in the directory is the setup.tf file. Again, run the cat command below to check the contents of the setup.tf file.
cat setup.tf
The file contains a few configurations worth examining. As you don’t want to miss anything, a few screenshots will come next, highlighting different relevant parts.
The primary focus of this guide is Terraform provisioners. So you will want to pay special attention to the provisioner block present in setup.tf.
When inspecting the code, you will see the remote-exec keyword, meaning this Terraform provisioner is a remote one. The remote-exec keyword allows you to execute commands on the remote host: your web server, an EC2 instance.
Next, you will see the inline section, which lists commands to run on your newly created VM. For this example, the commands will be for:
- Installing Apache (
install httpd) and starting the webserver (systemctl start httpd); - Creating an index.html file that will have its contents displayed when testing the server. The file contains the text to be shown:
My Test Website With Help From Terraform Provisioner; - Moving the index.html file to /var/www/html/ – Apache web root directory – after provisioning.

Next, comes the connection block: this block tells Terraform what kind of connection to make when it’s running these commands. In this case, the connection type is ssh, and the username is ec2-user.
The private_key is of the typical .ssh/id_rsa format from Linux. This line creates a file called ~/.ssh/id_rsa and puts the AWS EC2 user’s PEM-encoded RSA key in it. Since you are SSHing into the EC2 with the PEM-encoded RSA key, the host has access to execute commands. Terraform will grab the contents from the variable declared earlier (associate_public_ip_address = true).

The last block is the tags block. And it gives the resource you just created the name webserver.

Putting Terraform Provisioner to Work
Now that you have checked the work laid out in the code, you will run Terraform commands to see it in action.
1. Run the terraform init command to download any plugins you need and initialize the state. If everything goes well, you will see no errors.
terraform init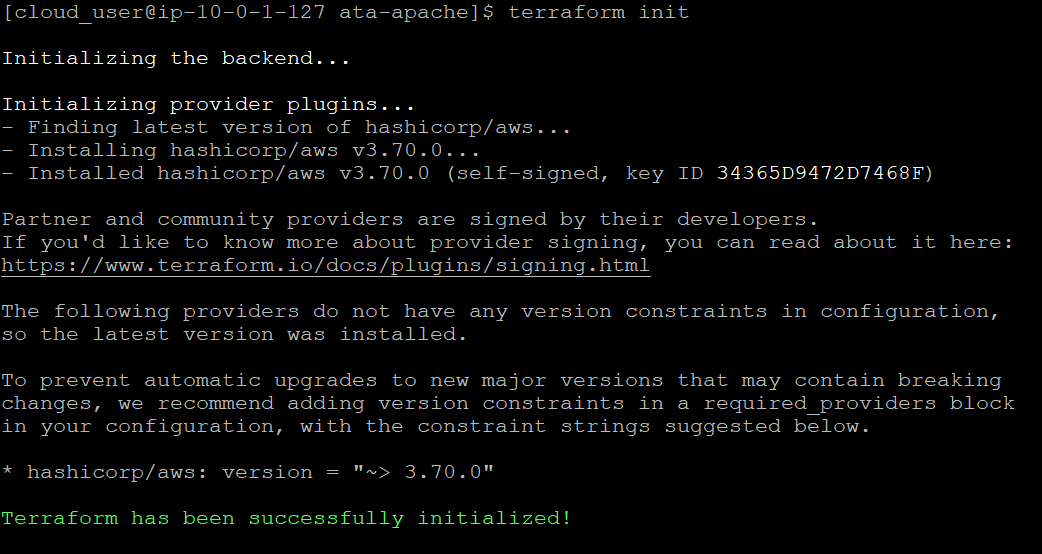
2. The terraform validate command checks if you don’t have syntax errors in your configuration. The command will allow you to catch any mistakes, and it’s a good practice to run this command before applying any changes.
terraform validate
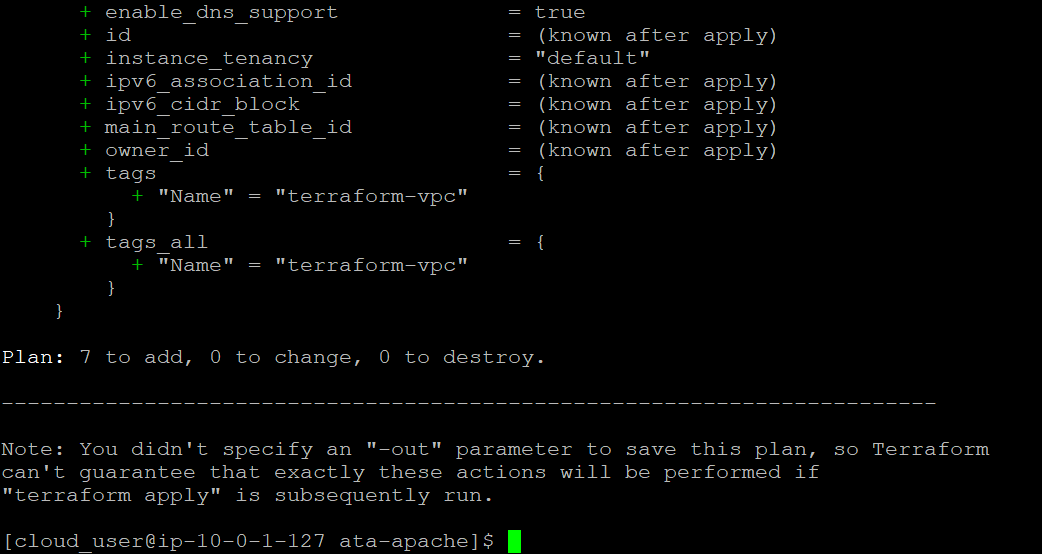
3. Run the terraform plan command to look over the changes you made in your configuration and see what Terraform is about to do. This command gives you a preview of what Terraform intends to do. Running the plan command before applying changes is helpful. It allows you to make sure everything will work as you expect.
terraform planSome of the output you will get:
- Lines starting with +: indicate that Terraform will create one or more resources;
- A line with Plan: 7 to add, 0 to change, 0 to destroy. Meaning:
7 to add: indicates that Terraform plans to create seven resources.
0 to change: Terraform does not plan to change any existing resources.
0 to destroy: means that Terraform does not intend to destroy any existing resources.
4. Run the terraform apply command to apply all the changes you made in your configuration. Terraform will create any resources marked with + in the plan. Enter yes when it asks to Enter a value to continue.
terraform apply
Testing the Apache Server
Now that Terraform has done its magic, it is time to test the resource you just instructed Terraform to create.
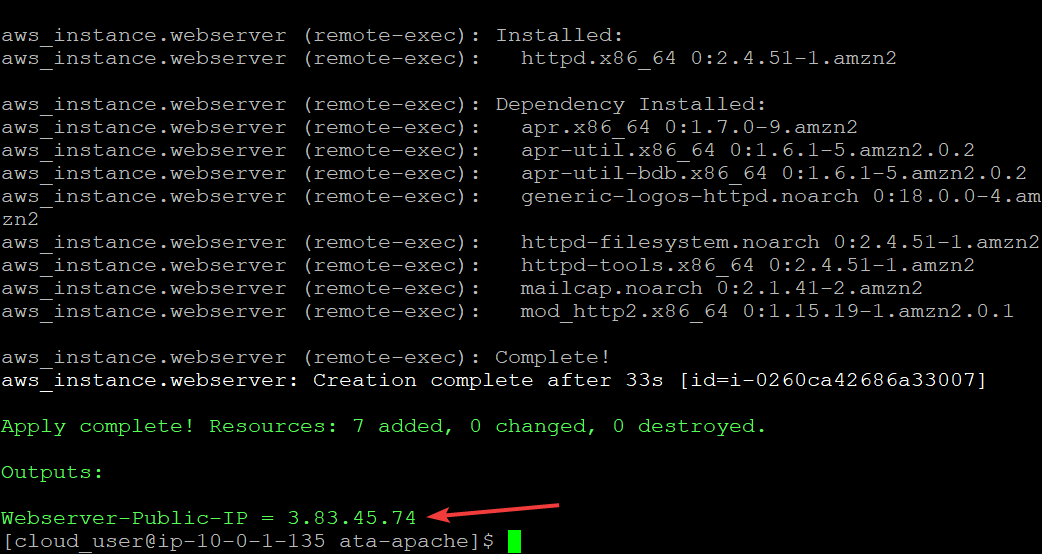
Once the terraform apply process completes, you will see a Webserver-Public-IP displayed in your AWS CLI. The httpd service will be listening on this IP address, which is bound to your EC2 instance on its creation.
The resulting IP address is ephemeral. The IP will change if the instance gets re-created for whatever reason, failure, for example.
Take note of this IP address. You will need to access the test page with this IP address.
You will need to test the server to ensure it is working correctly by running the command below to check your Apache server version.
httpd -v
You should get similar to the following output.

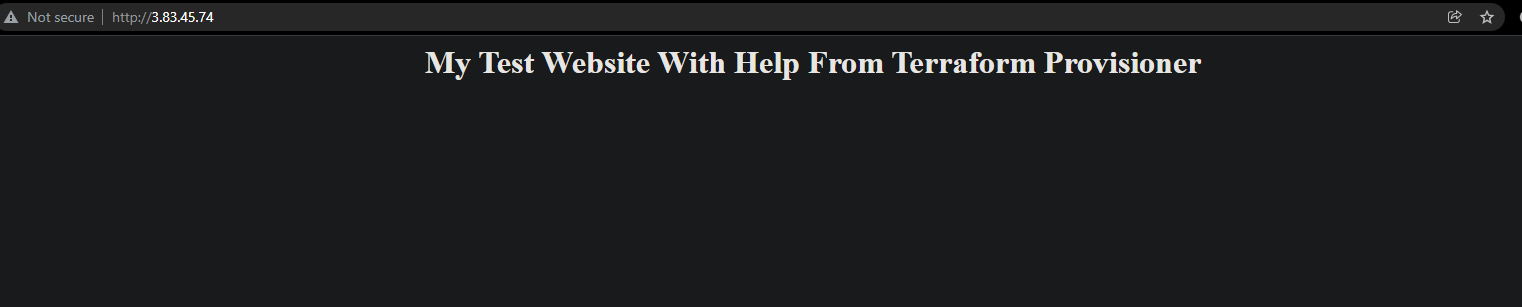
Copy and paste the public IP address of the EC2 instance you noted earlier into your browser and press Enter. You should see the My Test Website With Help From Terraform Provisioner page displayed in your browser. These outputs confirm that your Apache server is working properly.
Conclusion
Throughout this tutorial, you’ve learned how the Terraform provisioner works. You also learned how to create a web server with help from Terraform provisioner.
You can now start using what you learned here in your own infrastructure. You can use it with AWS, Azure, or on-premise resources. The choice is yours.
What’s next for you? Perhaps you will want to learn how to secure your Apache server.


