

Have you been thinking of how you can automate orchestration processes and workflows in Kubernetes? If yes, with Tekton Kubernetes, you are in for a treat! Tekton is a powerful Kubernetes native software that lets you create Continuous Integration and Continuous Delivery (CI/CD) systems.
In this tutorial, you will learn how Tekton provides flexibility to build, test, and deploy any application across multiple cloud providers.
Read on and spin up your automation skills with Tekton!
Prerequisites
This tutorial will be a hands-on demonstration. To follow along, ensure you have the following:
- A Kubernetes cluster that supports a service type of LoadBalancer already running – This tutorial uses a cloud-based Kubernetes cluster.
- A GitHub repository – This tutorial uses a GitHub repository called tekton-nodejs-app.
- A Docker Hub repository – This tutorial uses a repository name node-app.
- A computer with Tekton Pipelines CLI installed – This tutorial uses an Ubuntu 20.04LTS distribution.
Installing Tekton Pipelines
When defining the Kubernetes custom resources needed to run your CI/CD pipeline, you will need to have Tekton Pipelines installed in your Kubernetes cluster. Tekton Pipelines is the main building block of Tekton.
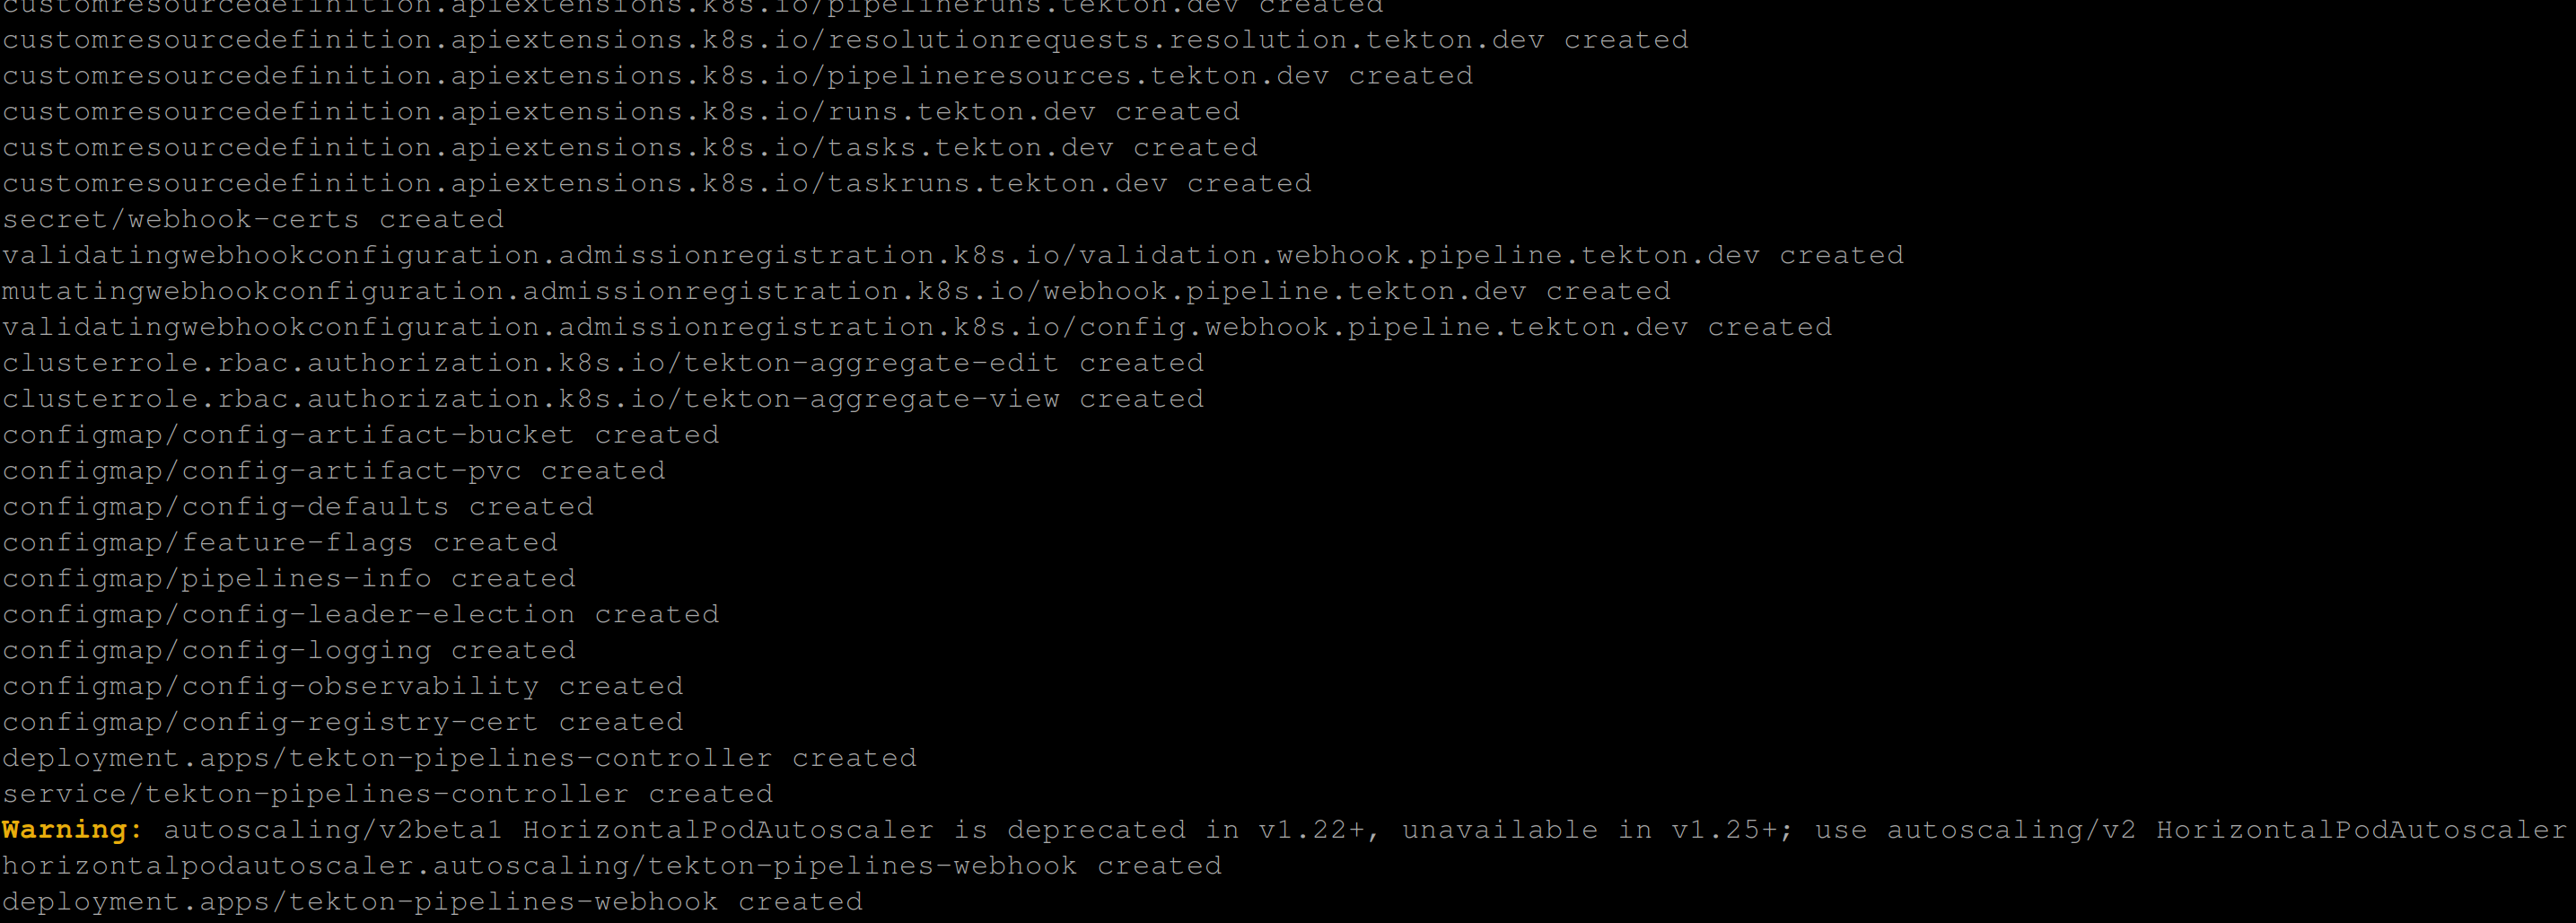
1. Run the kubectl apply command below to install Tekton Pipelines.
kubectl apply -f https://storage.googleapis.com/tekton-releases/pipeline/latest/release.yamlOnce installed, you will see an output similar to the one below.
2. Next, run the below kubectl get command below to list all pods and monitor (–watch) the installation.
kubectl get pods -n tekton-pipelines --watchIf the pods below are Ready (1/1), and Running, as shown below, you are ready to work with Tekton.
- tekton-pipelines-controller
- tekton-pipelines-webhook

3. Now, press Ctrl+C to stop watching so you can start creating your first task in the following sections.
Creating a Tekton Task
Now that you have Tekton Pipelines installed, it is time to see Tekton in action by creating tasks. Tekton tasks let you automatically launch specific build or delivery tools with a series of specified steps.
In this tutorial, you will create tasks with Tekton, from printing a simple text, and advance to more complex stuff later on.
1. Create a file first-task.yaml in your preferred code editor, and add the following code.
The code below creates a task that prints (echo) the Hello World text.
apiVersion: tekton.dev/v1beta1
kind: Task
metadata:
  name: say-hello # Sets the name of the task
spec:
  steps:
    - name: echo-hello # Sets the name of the step
      image: alpine # Sets the image this step uses
      script: |
        #!/bin/sh
        echo "Hello World" # The script/command this step executes
2. Now, run the below command to apply this task (first-task.yaml) to your Kubernetes cluster.
kubectl apply -f first-task.yaml
3. Edit the first-task.yaml file and modify the existing code with the one below.
apiVersion: tekton.dev/v1beta1
kind: Task
metadata:
  name: say-hello # Sets the name of the task
spec:
  params:
    - name: sayHello
      type: string
      default: "Hello World"
      description: greets
  steps:
    - name: echo-hello # Sets the name of the step
      image: alpine # Sets the image this step uses
      command: ["echo"] # The command this step uses
      args: ["$(params.sayHello)"] # The arguments this step executes
4. Lastly, run the command below to apply the modified task to your cluster.
kubectl apply -f first-task.yamlThis time, the output shows that the task has been configured.

Executing Tasks with Tekton Within Kubernetes Cluster
You have successfully created and applied tasks in your Kubernetes cluster. But these tasks are just sitting unless you execute them.
To instantiate your first task with Tekton, you must create a TaskRun.
1. Create a file called first-task-run.yaml and populate the below code.
This code specifies the name of the TaskRun (first-task-run) and the name of the task to run (say-hello).
apiVersion: tekton.dev/v1beta1
kind: TaskRun
metadata:
  name: first-task-run # The name of the TaskRun
spec:
  taskRef:
    name: say-hello # The name of the task this TaskRun should reference to
2. Next, run the below command to apply your TaskRun (first-task-run.yaml).
kubectl apply -f first-task-run.yamlThe output below indicates that the (TaskRun) has been created.

3. Once the TaskRun is created, run the command below to get all TaskRun.
kubectl get taskrun
4. Now, run the following kubectl logs command to see if the specified tasks provide the expected output.
kubectl logs --selector=tekton.dev/taskRun=first-task-runThe output below confirms that you successfully ran your first task, which prints the Hello World text.

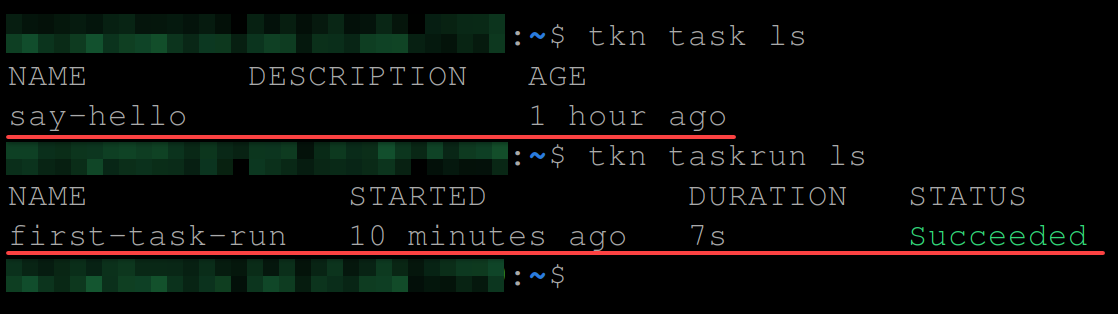
5. Finally, run each tkn command below to check the lists of (task) and (taskrun) in your Kubernetes cluster using the Tekton CLI.
tkn task ls # Outputs tasks
tkn taskrun ls # Outputs taskruns
If successful, you will see the following output confirming the TaskRun has Succeeded.
Creating a Secret and a ServiceAccount
Since you already know the basics of creating tasks and how Tekton works, you are ready to try advanced stuff with Tekton.
You will create a CI/CD pipeline that pulls a source code from a GitHub repository, run some tasks, build a Docker image, push the source to a public Docker repository and deploy to your Kubernetes cluster.
Since you will push to a public Docker registry, you must set up the following:
- Secret – Stores confidential credentials for Docker Hub (username and password).
- Service account – Grants access to your secret.
To create a secret and a service account:
1. Create a docker-secret.yaml file in your preferred code editor, and add the code below.
The following code lets you declare your Docker Hub credentials as secret. Ensure you replace <USERNAME> and <PASSWORD> with your Docker Hub credentials.
apiVersion: v1
kind: Secret
metadata:
  name: dockerhub-user # The name of the secret
  annotations:
    tekton.dev/docker-0: https://index.docker.io
type: kubernetes.io/basic-auth
stringData:
  username: "<USERNAME>" # Your DockerHub username goes here
  password: "<PASSWORD>" # Your DockerHub password goes here
2. Next, run the below kubectl apply command to apply your secret (docker-secret.yaml) in your Kubernetes cluster:
kubectl apply -f docker-secret.yaml
3. Once applied, create a new file called service-account.yaml and populate the code below, which creates your service account.
apiVersion: v1
kind: ServiceAccount
metadata:
  name: tkn-sa # The name of the service account
secrets:
  - name: dockerhub-user # The name of the secret this service account will  use
4. Lastly, run the following command to apply this service account (service-account.yaml) in your Kubernetes cluster.
kubectl apply -f service-account.yaml
Providing Kubernetes Cluster Access to the Service Account
You have created your service account, but your Kubernetes cluster still needs access to that service account (tkn-sa) to apply Tekton resources successfully. How? You will create a Role and a RoleBinding to the service account.
1. Create a file called role.yaml and add the following configuration settings.
The code below will create a role (nodejs-pipeline-role) with the ability to manage some of your Kubernetes cluster resources. In addition, the code creates a role-binding (nodejs-pipeline-role-binding) that binds the role to the service account (tkn-sa).
apiVersion: rbac.authorization.k8s.io/v1
kind: Role
metadata:
  name: nodejs-pipeline-role # The name of the role
rules:
- apiGroups: ["extensions", "apps", ""]
  resources: ["services", "deployments", "pods","pvc","job"]
  verbs: ["get", "create", "update", "patch", "list", "delete"]
---

apiVersion: rbac.authorization.k8s.io/v1
kind: RoleBinding
metadata:
  name: nodejs-pipeline-role-binding # The name of the role binding
roleRef:
  apiGroup: rbac.authorization.k8s.io
  kind: Role
  name: nodejs-pipeline-role # The role this role-binding will use
subjects:
- kind: ServiceAccount
  name: tkn-sa # The service account this role-binding gives access to
2. Next, run the command below to apply the Role and RoleBinding (role.yaml) to your Kubernetes cluster.
kubectl apply -f role.yaml
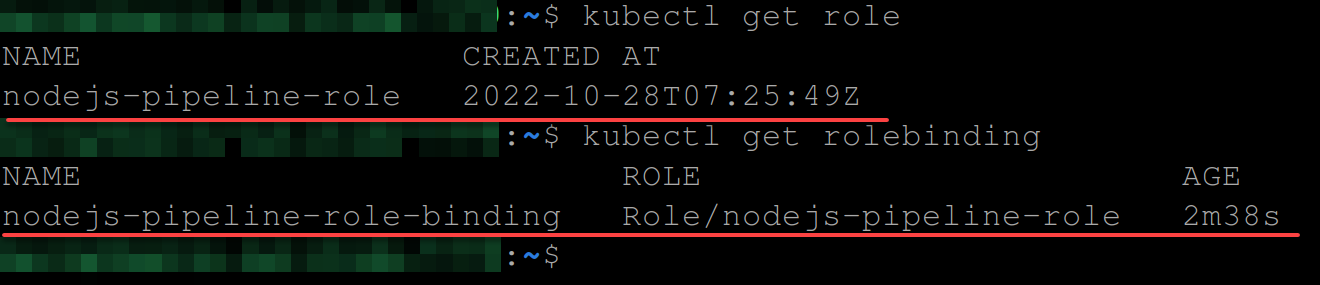
3. Now, run each command below to get the role and rolebinding for your Kubernetes cluster.
kubectl get role # Get role
kubectl get rolebinding # Get role binding
The output below confirms your Role and RoleBinding are ready.
Creating a Pipeline to Streamline Tasks
Now that you have a role and rolebinding ready, you can streamline your workflow tasks by creating your pipeline.
This pipeline will contain three tasks:
- First task – Clones a GitHub repository.
- Second task – Builds a Docker image for the source code in your GitHub repository.
- Third task – Deploys the Docker image to your Kubernetes cluster.
To create your pipeline, you must first install the required tasks:
1. Run each command below to install the following tasks from TektonHub:
Tasks on Tekton Hub are reusable tasks that you can install and customize to suit your needs or use in your pipeline.
| Task | Function |
| git-clone | This task will clone a GitHub repository and be referenced later in your pipeline. |
| buildah | This task is responsible for building the container image for your GitHub repository and push to a Docker Hub repository. |
| kubernetes-actions | This task pulls the container image from Docker Hub and deploys it to your Kubernetes cluster. Also, this task executes any other Kubernetes command you specify in your pipeline. |
# Install tasks (get-clone, buildah, kubernetes-actions)
tkn hub install task git-clone
tkn hub install task buildah
tkn hub install task kubernetes-actions


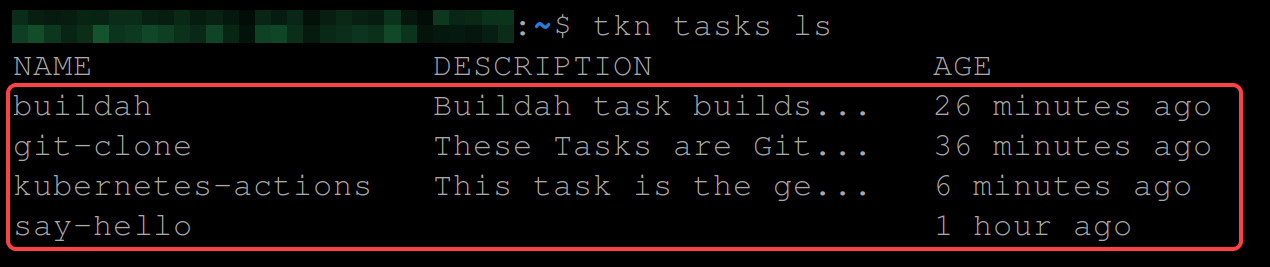
2. Next, run the command below to list (ls) all available tasks.
tkn tasks lsWith the output below, you can see and verify four tasks created and ready in your Kubernetes cluster; three from Tekton Hub, and one is your Tekton task.
3. After verifying the tasks, run the git clone command below to clone a NodeJS application from GitHub (tekton-nodejs-app.git).
This GitHub repository contains the following:
- A Dockerfile that buildah will use to build the container image.
- A manifest/deployment.yaml file that kubernetes-actions will use to deploy the NodeJS application.
git clone https://gitlab.com/mercybassey683/tekton-nodejs-app.git
If you wish to clone your source code from your source control platform, ensure you have a Dockerfile and a deployment.yaml file created in your application.
4. Now, edit the manifest/deployment.yaml file to contain your Docker Hub username and app name. Doing so tells Tekton to deploy the container image to your own Docker Hub repository.
5. Create a file called pipeline.yaml and add the following configuration settings.
The code below creates a pipeline called nodejs-pipeline. This pipeline will run all installed tasks sequentially using a shared workspace called node-workspace.
Replace the corresponding values below:
- DOCKERHUB_REPO – The path to your Docker Hub repository. This tutorial uses https://hub.docker.com/repository/docker/mercybassey/node-app.
- GITHUB_REPO – The path to your GitHub repository. This tutorial uses https://github.com/mercybassey/tekton-nodejs-app
- DEPLOYMENT_FILE – The path to your deployment.yaml file. This tutorial uses https://raw.githubusercontent.com/mercybassey/tekton-nodejs-app/main/manifest/deployment.yaml.
apiVersion: tekton.dev/v1beta1
kind: Pipeline
metadata:
  name: nodejs-pipeline # The name of the pipeline
spec:
  params:
    - name: IMAGE
      description: Image description
      type: string
      default: "DOCKERHUB_REPO"
    - name: TAG
      description: Preferred tag
      default: latest
  workspaces:
    - name: node-workspace
  tasks:
    - name: fetch-repository # The name of the first task
      taskRef:
        name: git-clone # The task this pipeline should run first (git-clone task)
      workspaces:
        - name: output
          workspace: node-workspace
      params:
        - name: url
          value: GITHUB_REPO # The GitHub repository
        - name: subdirectory
          value: ""
        - name: deleteExisting
          value: "true"
    - name: build-push-image # The name of the second task
      taskRef:
        name: buildah # The task second task this pipeline should run
      runAfter:
        - fetch-repository # Indicates this task should run after the "first-repository" task
      workspaces:
        - name: source
          workspace: node-workspace
      params:
        - name: IMAGE
          value: "$(params.IMAGE):$(params.TAG)" # The Docker image and the tag
        - name: CONTEXT
          value: "source" # The path or directory that contains the Dockerfile
        - name: FORMAT
          value: "docker"
    - name: create-deployment # The name of the third and final task
      taskRef:
        name: kubernetes-actions # The name of the task this pipeline should use
      runAfter:
        - build-push-image
			workspaces:
				- name: manifest-dir
					workspace: node-workspace
      params:
        - name: script
          value: |
            kubectl apply -f DEPLOYMENT_FILE
6. Lastly, run the command below to apply this pipeline configuration setting in your Kubernetes cluster.
kubectl apply -f pipeline.yamlIf created successfully, you should have the following output.

Instantiating the Pipeline
Creating a pipeline would be for naught unless you put it to work. But first, you will have to configure a PipelineRun. This PipelineRun will instantiate and execute a pipeline on your Kubernetes cluster.
To configure your PipelineRun:
1. Run the command below to list (ls) available pipelines.
tkn pipeline lsThe output below shows that you have a pipeline created but not running.

2. Next, create a file called pipeline-run.yaml and add the code below.
The configuration settings below create a PipelineRun (nodejs-pipelinerun) that executes your pipeline (nodejs-pipeline) using the service account (tkn-sa).
apiVersion: tekton.dev/v1beta1
kind: PipelineRun
metadata:
 name: nodejs-pipelinerun # The name of the pipeline.
spec:
  serviceAccountName: tkn-sa # The service account to access your DockerHub account.
  pipelineRef:
    name: nodejs-pipeline # References the pipeline used in this PipelineRun.
  podTemplate:
    securityContext:
      fsGroup: 65532 # non-root UID 65532, which allows the git-clone task command.
  params:
    - name: IMAGE
      value: mercybassey/node-app # The image name as a parameter in nodejs-pipeline.
    - name: TAG
      value: latest
  workspaces:
    - name: node-workspace # The workspace used in the pipeline
      volumeClaimTemplate:
        spec:
          accessModes:
            - ReadWriteOnce
          resources:
            requests:
              storage: 25Gi # Amount of storage used
3. Now, run the command below to apply and create your PipelineRun (pipeline-run.yaml).
kubectl apply -f pipeline-run.yaml
4. Once created, run the below command to list (ls) all PipelineRuns.
tkn pipelinerun lsBelow, you can see your PipelineRun (nodejs-pipelinerun) is Running.

5. Run below tkn pipelinerun command to view the logs of your PipelineRun.
tkn pipelinerun logs nodejs-pipelinerunThe output below shows your PipelineRun is still running.

6. Once the PipelineRun stops running, rerun the below command to list all pipelines.
tkn pipeline lsBelow, you can see the status changes to Succeeded, which verifies you have everything configured correctly.

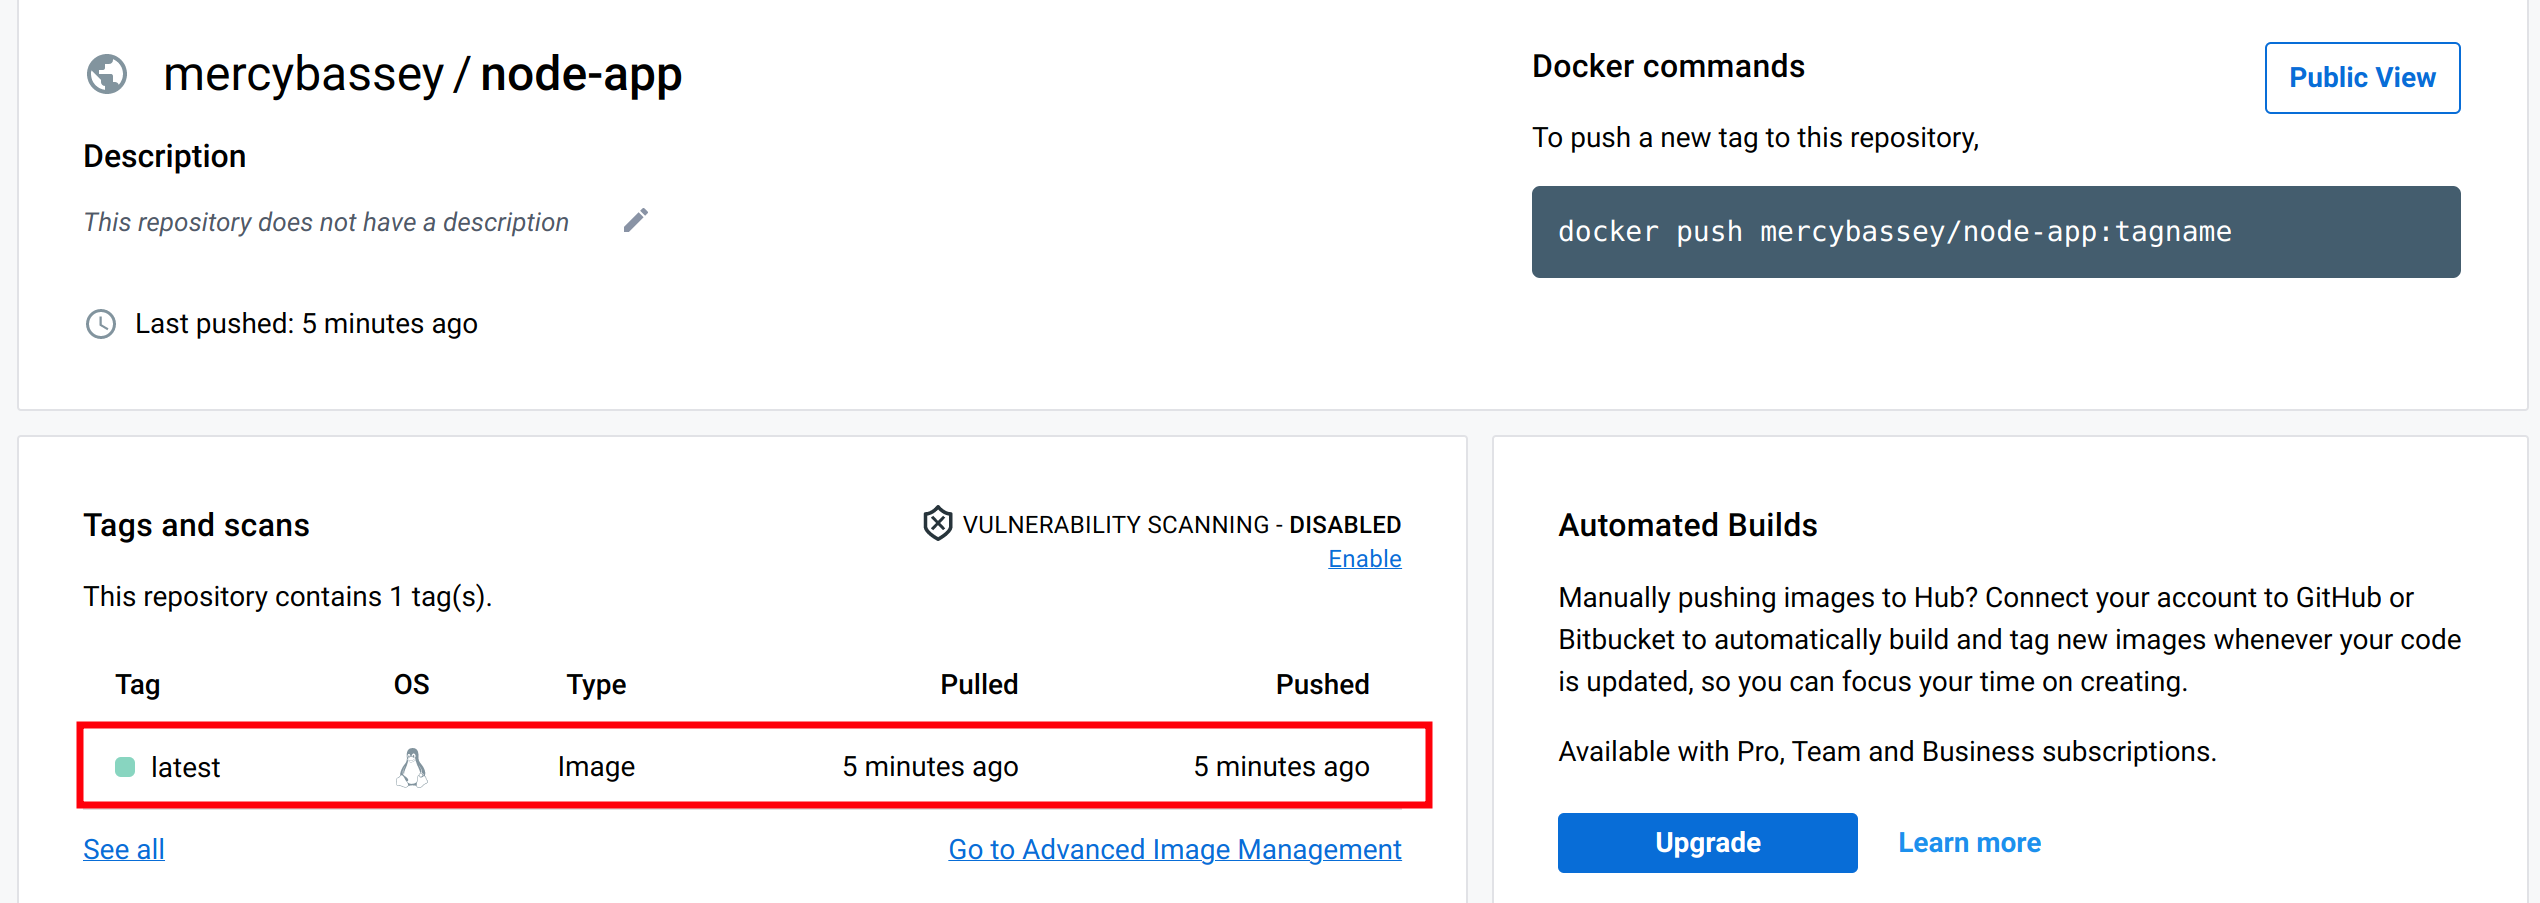
7. Now, head over to your Docker Hub repository to confirm your image was pushed successfully, as shown below.
8. Finally, run the commands below to see your deployment and service in your cluster.
kubectl get deployment
kubectl get service
The output below shows your application has been deployed with three replicas and exposed as a service of type LoadBalancer.

Accessing the Application
You have seen Tekton deploying your application to your Kubernetes cluster. But how do you access your application?
Run the command below, which does not provide output, but retrieves and stores your load balancer IP address to the LB_IP variable.
export LB_IP=$(kubectl get svc/nodejs-service -o=jsonpath='{.status.loadBalancer.ingress[0].ip}')
Now, execute the curl command below to access your application.
curl ${LB_IP} -w "\\n"
If successful, you will get the following message as you specified in your Tekton task (first-task.yaml).

Conclusion
In this tutorial, you have learned how to integrate a CI/CD workflow with Tekton. And at this point, you can confidently create Tekton tasks and a pipeline to streamline your workflow via the Tekton CLI.
But how else will you like to use Tekton? Maybe clone a GitLab repository and use a Docker build task for Tekton Hub? Or perhaps build the container image, push it to a Docker Hub repository, and deploy it to a Kubernetes cluster?


