


Are you tired of managing and working with multiple Docker containers? Why not automate the tasks using Terraform Docker integration? Terraform is one of the most widely used automation and infrastructure as code (IaC) tools.
Docker lets you containerize applications with light-weighted technology and security for quick application deployment. And with Terraform, managing infrastructures become more ideal than the manual process.
In this tutorial, you’ll learn to become your own master in setting up and deploying Docker containers using Terraform.
Get ready and start empowering your infrastructures!
Prerequisites
This tutorial will be a hands-on demonstration. If you’d like to follow along, be sure you have the following in place:
- An Ubuntu machine with Docker installed – This tutorial uses Ubuntu 18.04.5 LTS with Docker v19.03.8.
- Terraform – This tutorial uses Terraform v0.14.9 running on Ubuntu 18.04.5 LTS, but any operating system with Terraform should work.
- A code editor – Even though you can use any text editor to work with Terraform configuration files, you should consider Visual Studio Code (VSCode). VSCode understands the HCL Terraform language well.
- Python v3.9 or later installed – This tutorial uses Python v3.9.2 on a Ubuntu Machine.
Building the Terraform Configuration
Terraform allows you to build, change, and version infrastructure via a configuration. Terraform uses different configuration files, and each file is written either in plain text format (.tf) or JSON format (.tfjson).
To build a Terraform configuration, follow the steps below:
1. Open your terminal, and run each command below to create a folder named ~/terraform-demo-docker, then change (cd) the working directory to that directory.
These commands don’t provide output but create the directory that will contain your configuration file and all associated files that Terraform will create.
mkdir ~/terraform-demo-docker
cd ~/terraform-demo-docker
2. Next, open your favorite code editor, copy/paste the configuration below, and save the file as main.tf inside of the ~/terraform-demo-docker directory.
In the below configuration, Terraform starts a Docker service (myservice) using the ubuntu:latest image and exposes the target port 8080 to the host machine. The target port is the port on which your container is running.
# Creating a Docker Image ubuntu with the latest as the Tag
resource "docker_image" "ubuntu" {
  name = "ubuntu:latest"
}

# Creating a Docker Container using the latest ubuntu image
resource "docker_container" "my_container" {
  # Specifying the name of the container as my_container
  name = "my_container"
  image = docker_image.ubuntu.latest
}

# Creating a Docker Service named myservice using ubuntu image with a latest
resource "docker_service" "my_service" {
  name = "myservice"
  task_spec {
   container_spec {
     image = docker_image.ubuntu.latest
    }
   }
  endpoint_spec {
    ports {
     target_port = "8080"
       }
    }
}
Docker images are available in the DockerHub’s public registry. You can also customize the image by adding more instructions in a Dockerfile.
3. Create one more file inside the ~/terraform-demo-docker directory called provider.tf, and add the following configuration to the file.
This Terraform configuration file defines the Docker provider so that Terraform knows how to interact with Docker containers and images. At the same time, this configuration uses the Docker API to manage the lifecycle of Docker containers.
# Declaring the Required provider (Docker provider)
terraform {
  required_providers {
    docker = {
      source = "kreuzwerker/docker"
      version = "2.16.0"
    }
  }
}

# Specifying the Docker provider configuration
provider "docker" {
  host = "unix:///var/run/docker.sock"
}
4. Lastly, run the tree command below to verify all required files are in the folder.
tree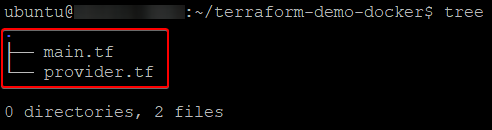
Building Docker Containers with Image using Terraform
Now that you have the Terraform configuration files built, it’s time to initiate Terraform and create the Docker containers.
Terraform typically uses a three-command approach in sequential order to provision a Terraform configuration: terraform init, terraform plan, and terraform apply.
To build Docker containers:
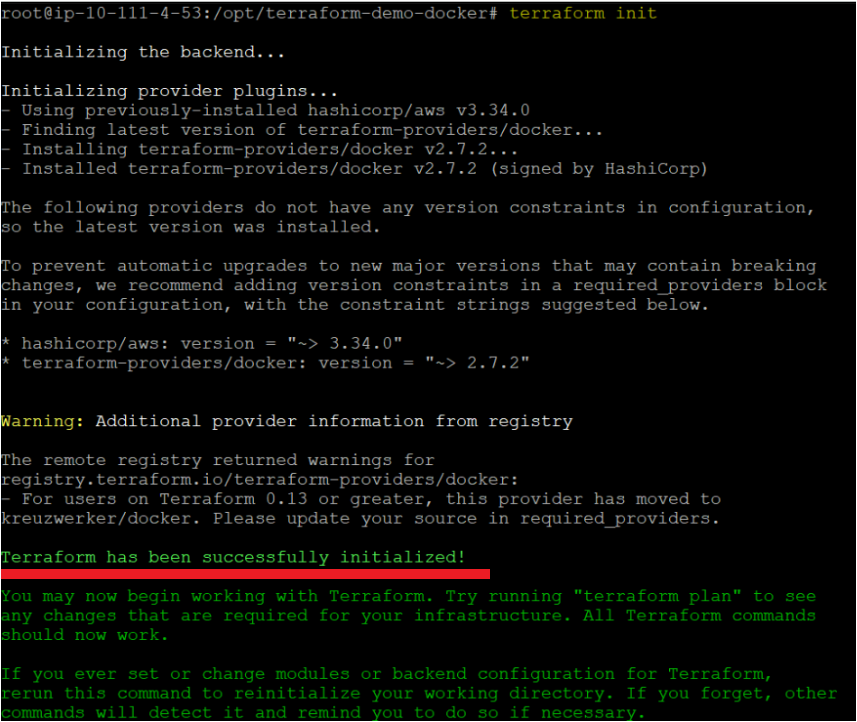
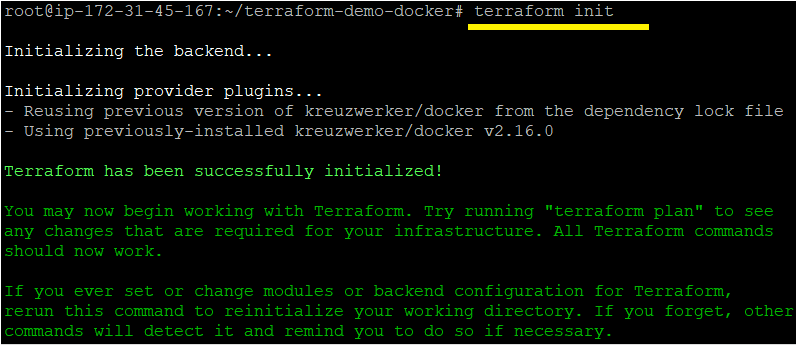
1. Run the below terraform init command in the ~\terraform-demo-docker directory. This command initializes the plugins and providers required to work with resources.
terraform initIf all goes well, you’ll see the message saying Terraform has been successfully initialized, as shown below.
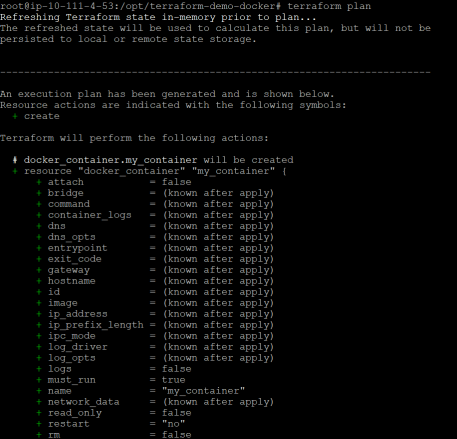
2. Next, run the terraform plan command below to ensure your configuration’s syntax is correct. This command gives you an overview of which resources will be provisioned in your infrastructure.
terraform planIf successful, you’ll see a similar message saying plan: “X” to add, “Y” to change, or “Z” to destroy in the output. This message indicates the command was successful, and you’ll also see every AWS resource Terraform intends to create.
3. Finally, run the following terraform apply command to provision the Docker container.
This command tells Terraform to read the main configuration (main.tf) and the other files to compile a configuration. Terraform will send the configuration to Docker as instructions to build the container and other components.
All the Docker components mentioned will be provisioned on the Docker host (i.e., your Ubuntu machine).
terraform applyAs you can see below, the command ran successfully and created all the three resources ( Docker images, Docker containers, and Docker services)

Verifying the Docker Containers
You’ve successfully deployed Docker components, but you still have to verify, using Docker commands, if they are deployed on the Docker host.
To verify all Docker components:
1. Run the docker images command below to verify if the Docker image (ubuntu: latest) is created.
To pull Docker images on your ubuntu machine rather than creating using Terraform, you can also use Docker pull image command along with the tab. For example, Docker pull hello-world:latest will pull hello-world image on your machine.
docker imagesAs you can see below, the IMAGE ID is successfully created (84XXXXX).

2. Next, run the below docker ps command to list all Docker containers (-a) in whatever state they are in (runnable, stopped, creating, etc.). You can verify on the list if the Docker container you specified is correct..com/engine/reference/commandline/inspect/>) command. </aside>
docker ps -aPerhaps you only want to display the Docker container IDs, add the -quiet option, as shown below: docker ps -a -quiet

To find the image’s name from which a particular container is built, you can run the docker inspect command.
3. Now, run the docker service command below to list all Docker services deployed in your host.
docker service psAs you can see below, the myservice you defined in Terraform main.tf configuration file has been created successfully in the Docker host.

Creating a Terraform Docker Network, Secrets, and Volumes
Up to now, you’ve learned the basics of Docker, such as creating Docker images, containers, and services using Terraform. But there are many more Docker components you can provision using Terraform, like Docker volume, secret, and network on the Docker host.
1. Update the content of your main.tf file in the ~/terraform-demo-docker directory with the below configurations.
The below configuration creates the following components:
docker_volume– can be used as permanent storage for containers.
docker_secrets– can be used to pass any confidential information such as db. password.
- docker_network – can be used to isolate all apps in a separate network.
resource "docker_volume" "docker_volume" {
  name = "dockervolume"
}

resource "docker_secret" "mysecret" {
  name = "mysecret"
  data = base64encode("{\"mysecret\": \"s3cr3t\"}")
}

resource "docker_network" "private_network" {
  name = "my_network"
}
2. Again, run all the three commands (terraform init, terraform plan, and terraform apply) in sequential order to provision a Terraform configuration.


3. Finally, run each command below to verify if your Docker volume, secret, and network are successfully provisioned on the Docker host.
docker volume ls | grep dockervolume
docker secret ls | grep secret
docker network ls | grep network
As you can see below, the Docker volume, secret, and network are created successfully on the Docker host.

Conclusion
In this tutorial, you’ve learned how to deploy and manage Docker images, containers, and services using Terraform configuration files. You’ve realized that you can create multiple containers you need by declaring them in Terraform code.
Deploying and managing Docker containers is the first step toward taking advantage of containerization technology and reducing the overhead. Why not use this first step to explore more and see how Docker services or Kubernetes can help your projects?


