

Creating a private, secure connection to your computers does not have to be complicated or expensive. With Tailscale VPN, gone are the days of needing to configure remote access appliances or firewall rules!
In this tutorial, you will learn how an open-source service called Tailscale lets you build your virtual network.
Read on, and add a layer of security for your online activity with your own VPN today!
Tailscale helps secure private network access, but it does not remove personal details from data broker sites. If exposed personal records are the problem, compare MyDataRemoval privacy monitoring and data broker removal workflows before paying for a personal data removal service.
Prerequisites
To follow along with the examples in this tutorial, you will need the following:
- Two or more computers with Windows, Linux, or macOS – This tutorial uses Windows 10 and Linux (Ubuntu Desktop 22.04 LTS VM).
Creating a Tailscale Account to Setup a Tailscale VPN
Creating a private network with Tailscale can be summed up in three steps: sign up for an account, add a machine to your tailnet (your private network), and repeat the previous step.
💡 The difference between traditional VPNs and Tailscale is that Tailscale uses the WireGuard protocol. WireGuard is a connectionless modern VPN protocol. WireGuard utilizes state-of-the-art cryptography, creating an encrypted point-to-point mesh network or tailnet between your configured devices.
To get started with Tailscale VPN, you first need to create a Tailscale account:
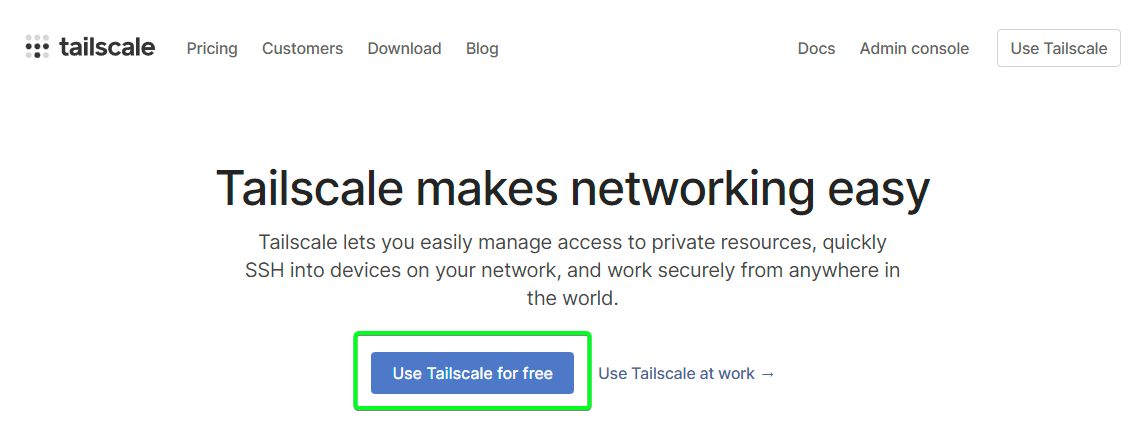
1. Open your favorite web browser and head over to Tailscale’s official website.
2. Next, click Use Tailscale for free, as shown below, to start signing up for Tailscale.
💡 Tailscale offers a personal account for free, but there are paid plans, too, if you wish to test Tailscale out in a business setting. Paid plans provide even more enterprise-type features, such as additional access control lists (ACLs).
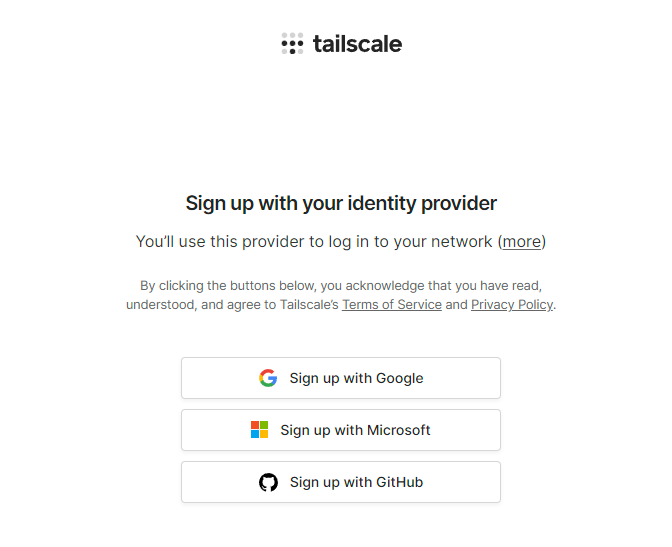
3. Sign up using an identity provider of your choice, and you will be logged in to Tailscale automatically. The identity provider will take care of the single sign-on (SSO) and MFA requirements (if you have configured MFA for the account).
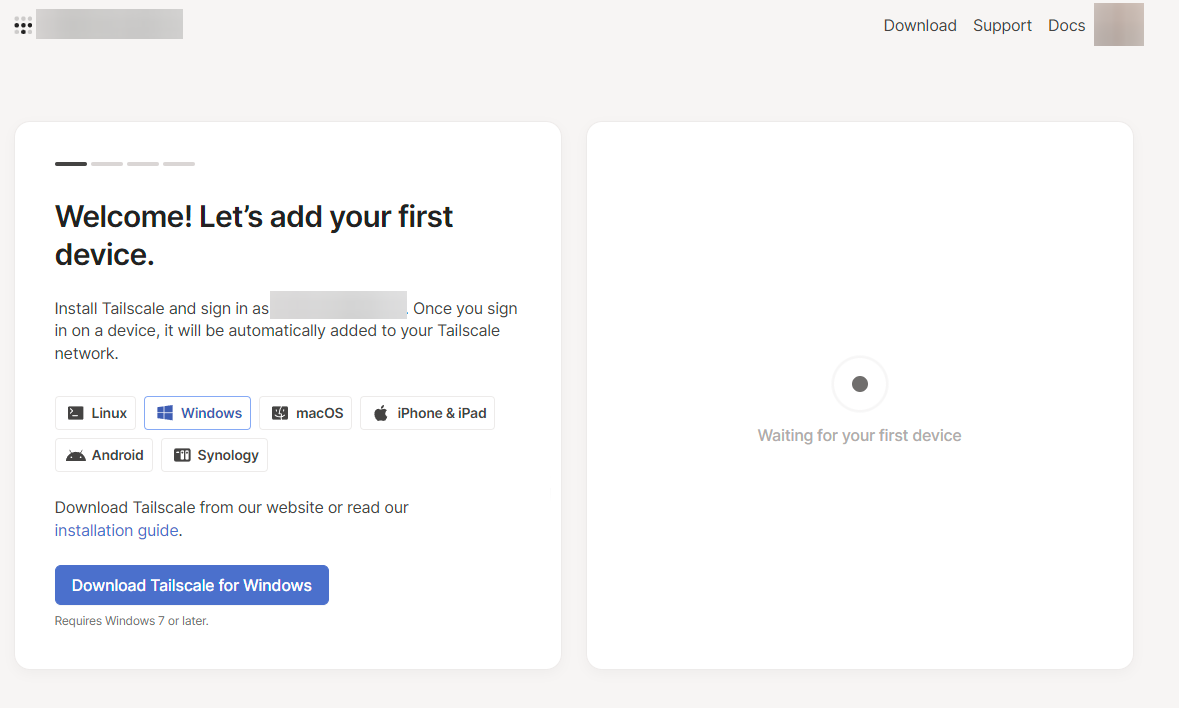
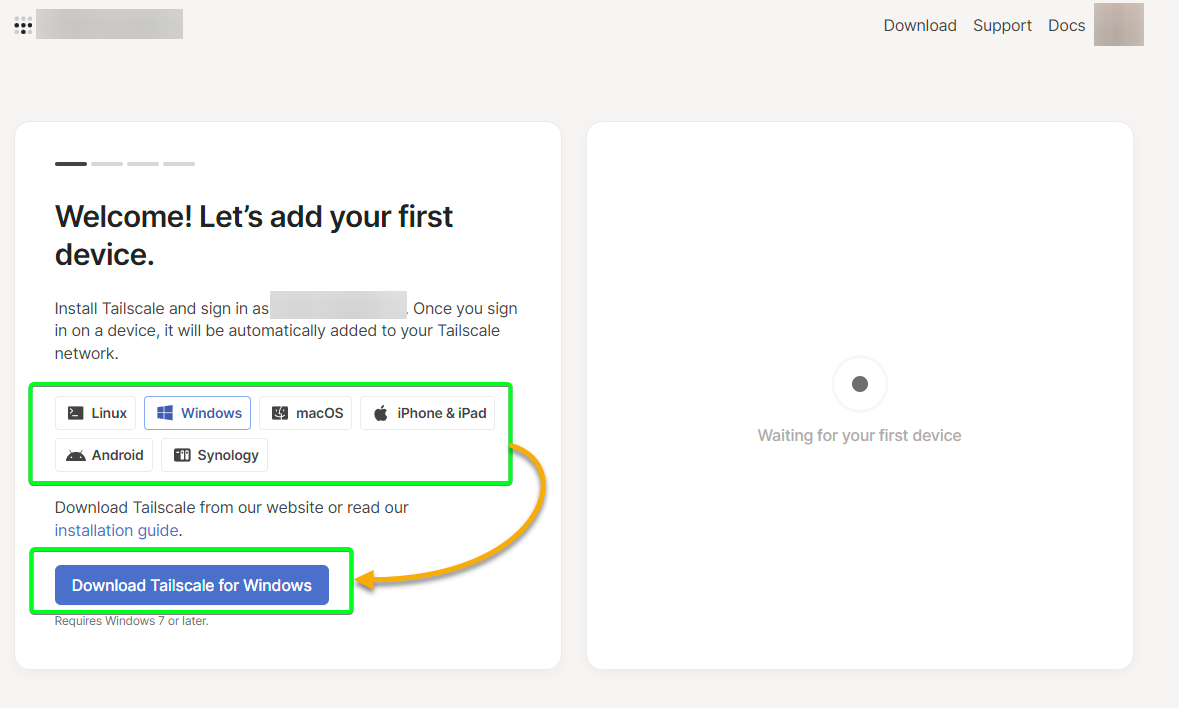
Once logged in, you will be presented with a welcome page, as shown below, since you still need to add a device. This page lets you choose an installation method for Tailscale that suits your needs.
Adding a Windows Node to the tailnet
When setting up your Tailscale VPN, you first need to install Tailscale on your system, which later automatically creates your tailnet.
1. On the Tailscale welcome page, choose Windows and click Download Tailscale for Windows to download Tailscale.
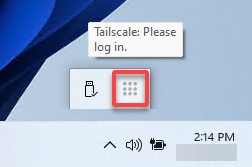
2. Open the Tailscale installer and install Tailscale on your system.

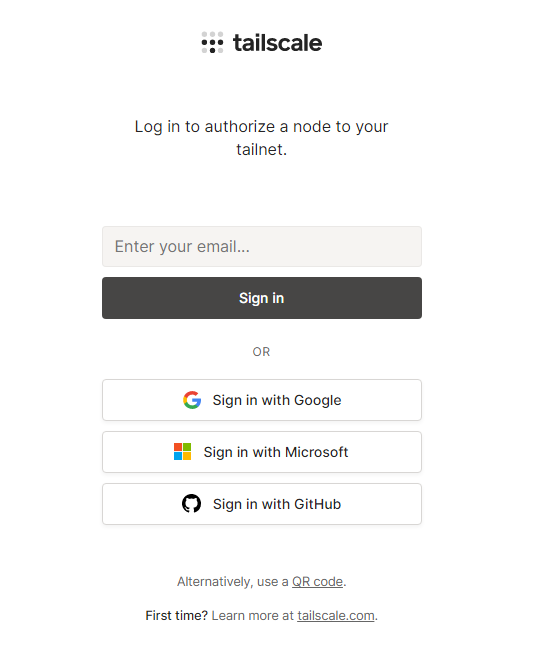
3. Once installed, click the Tailscale icon in your system tray, which opens a Tailscale login page on your default browser.
4. Now, sign in with your Tailscale account.
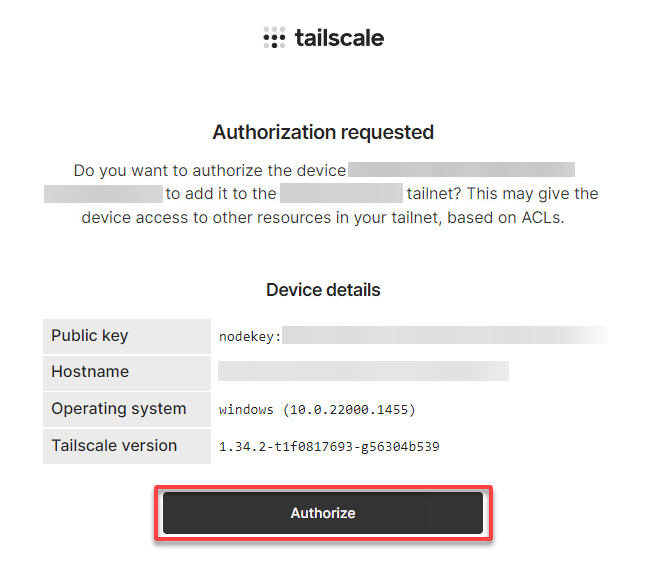
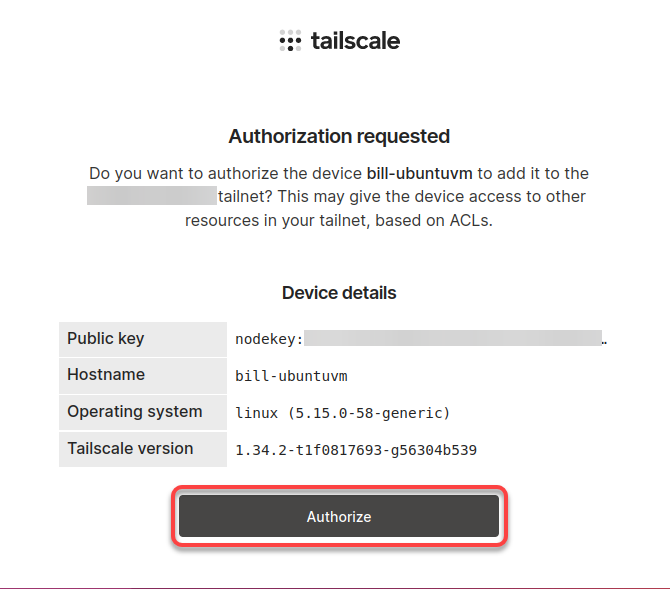
5. Once signed in, click Authorize to authorize the new node.
Note that you can also restrict access using ACLs in Tailscale to prevent users from using machines in your tailnet or force a particular exit node to be used. You also get availability because the nodes connect to each other, not Tailscale servers.
Adding a Linux Node to the tailnet
You already added a Windows node on your tailnet, which is a great start. But to better understand how a Tailscale VPN works, install Tailscale on another machine, which later adds it to your tailnet.
Installing Tailscale works via pre-built shell script or .deb package. But in this tutorial, you will use the pre-built shell script.
1. Open your terminal, and run the following curl command to download and execute Tailscale’s installer script (install.sh) to install Tailscale on your system.
curl -fsSL https://tailscale.com/install.sh | sh
2. Once installed, run the below command to activate the daemon. sudo tailscale up
sudo tailscale upOn the output, click the link provided, which opens a login page on your browser.
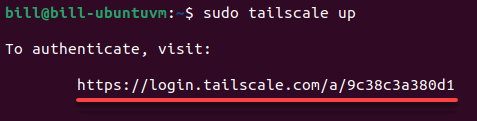
3. Lastly, click Authorize to authenticate using your Tailscale account.
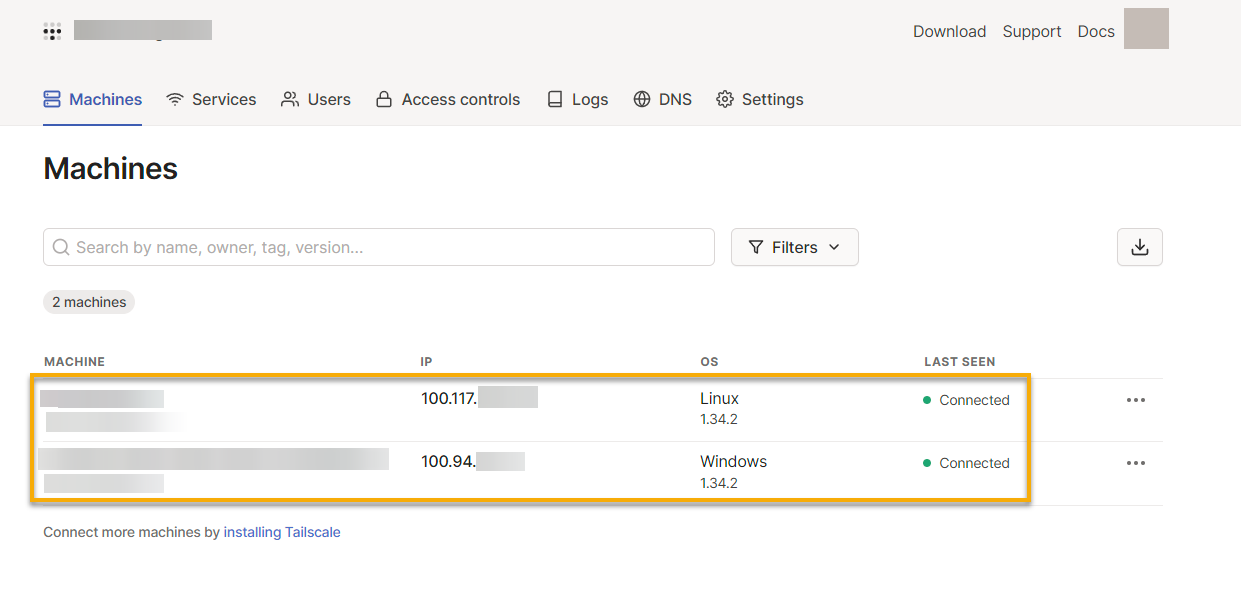
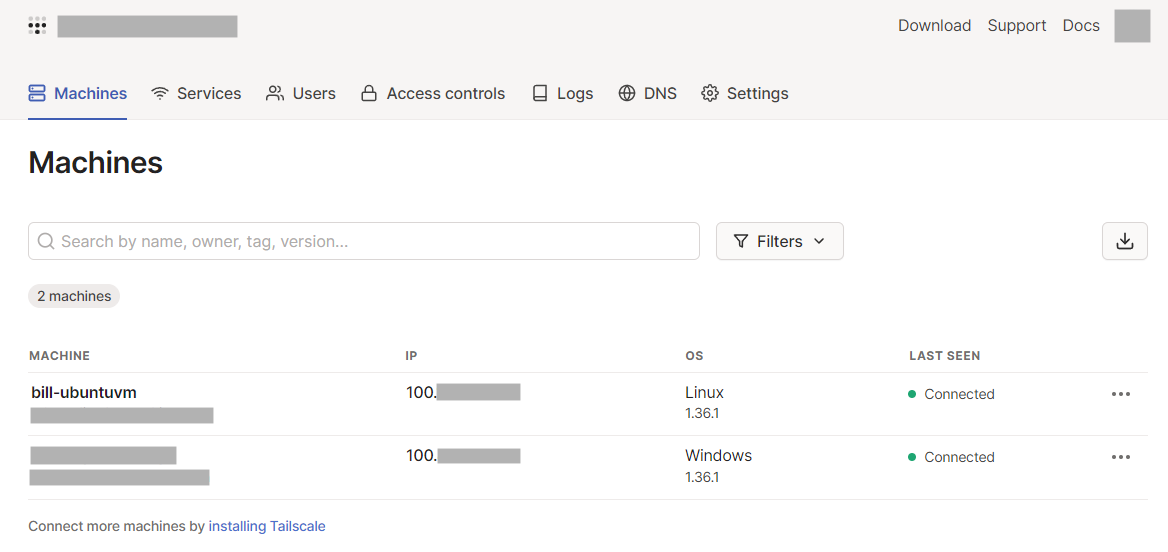
After adding at least two devices, Tailscale gives you an admin panel, as shown below. In this admin panel, you can work with users, access controls, monitor services, inspect logs, and manage DNS.
All tailnet devices are connected instead of a single gateway. This feature results in lower latency and improved stability.
Since Tailscale uses the WireGuard protocol, the traffic is already well encrypted. Even insecure protocols such as Telnet, VNC, FTP, and HTTP are secured with Tailscale.
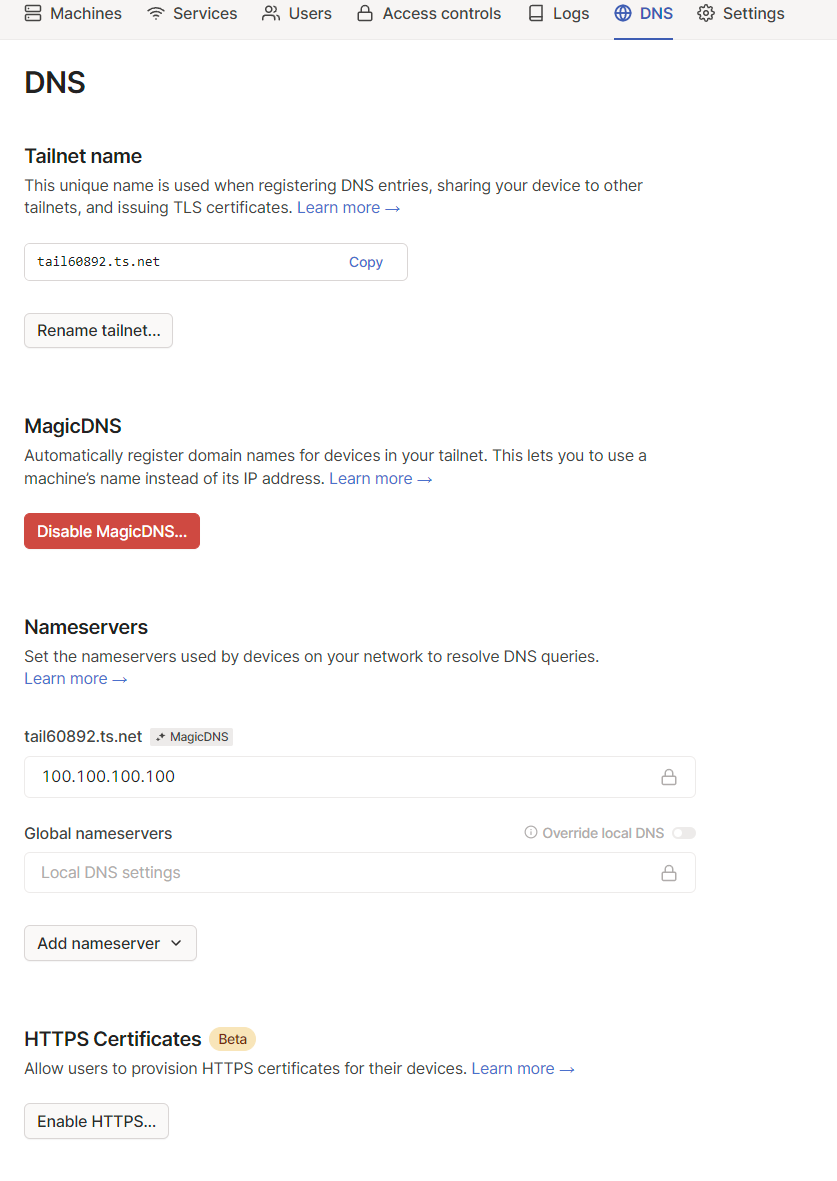
Managing DNS via the MagicDNS
Tailscale offers a service called MagicDNS, which makes Tailscale that much easier to use when configured. With MagicDNS, when enabled, connect with a hostname (friendly name) rather than the direct IP address.
MagicDNS allows you to:
- Although you always have a default name, such as
tail60892.ts.net, you may register a second “fun” name. Tailscale generates several names to pick from when picking a name, but you can “re-roll” until you find one you like.
- Add Global DNS nameservers or private nameservers, with the option to override local DNS and force clients to use the configured nameservers instead of their local DNS settings.
- Allow users to issue HTTPS certificates for themselves while on your Tailnet.
Note that if you have a “fun” domain and an issued HTTPS certificate, you cannot change that certificate to another “fun” domain name.
- Taildrop provides a peer-to-peer (P2P) file transfer service to quickly and securely send files to other hosts within your tailnet.
Of course, it can help to see an example of connecting to a machine in action as shown below.
1. To see this in action, first navigate to the Administrative console and the DNS tab, to ensure that MagicDNS is enabled, as shown below.
2. Next, locate the name of your machine, below the machine is bill-ubuntuvm.
Create a remote connection to the Tailscale machine. Here the connection is via SSH using a password, as noted by the PubkeyAuthentication=no setting (does not check available public keys when connecting).
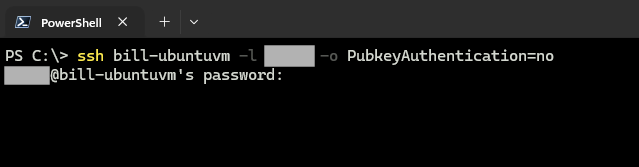
PubkeyAuthentication=no setting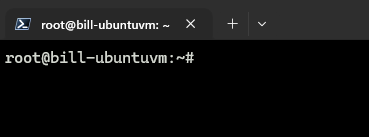
Conclusion
Throughout this tutorial, you have learned how to add a layer of security to your network by creating a secure connection with the Tailscale VPN. Security at Tailscale is the solution to meet MFA and encryption requirements.
At this point, you can confidently set up a VPN to establish a secure, encrypted connection between your devices and applications.
Have you always wanted a private cloud that is inaccessible using the web? With this newfound knowledge, why not self-host a private NextCloud instance or connect your Synology NAS? Or integrate with Opensense and Pfsense firewalls for added security?


