


Security Technical Implementation Guides (STIGs) provide a widely accepted set of steps to improve the security of assets in your organization. But on their own, STIGs can be pretty intractable to read and manage as a Security-Operations (SecOps) engineer. Worry not, though. STIG Viewer has got your back.
STIG Viewer is a human-friendly tool to create and manage checklists, mitigate open vulnerabilities and track security reviews of your technology assets.
Read on and learn how to make the most of STIGs with STIG Viewer!
Prerequisites
This tutorial will be a hands-on demonstration. To follow along, you will need the following:
- A Windows computer to host the STIG Viewer application – This tutorial uses Windows 10.
- Defense Information Systems Agency (DISA) STIGS – This tutorial uses Windows 10 v2R5 and Red Hat (RHEL) 8 v1R8 STIGs.
- PowerShell to perform a manual asset review with a checklist – This tutorial uses PowerShell 7
Downloading the STIG Viewer
Understanding what is inside an XCCDF formatted STIG can be a pain as it is not the same as opening a simple .doc or .pdf file and reading it. But you can rest easy so long as you have the STIG Viewer.
To download the STIG Viewer:
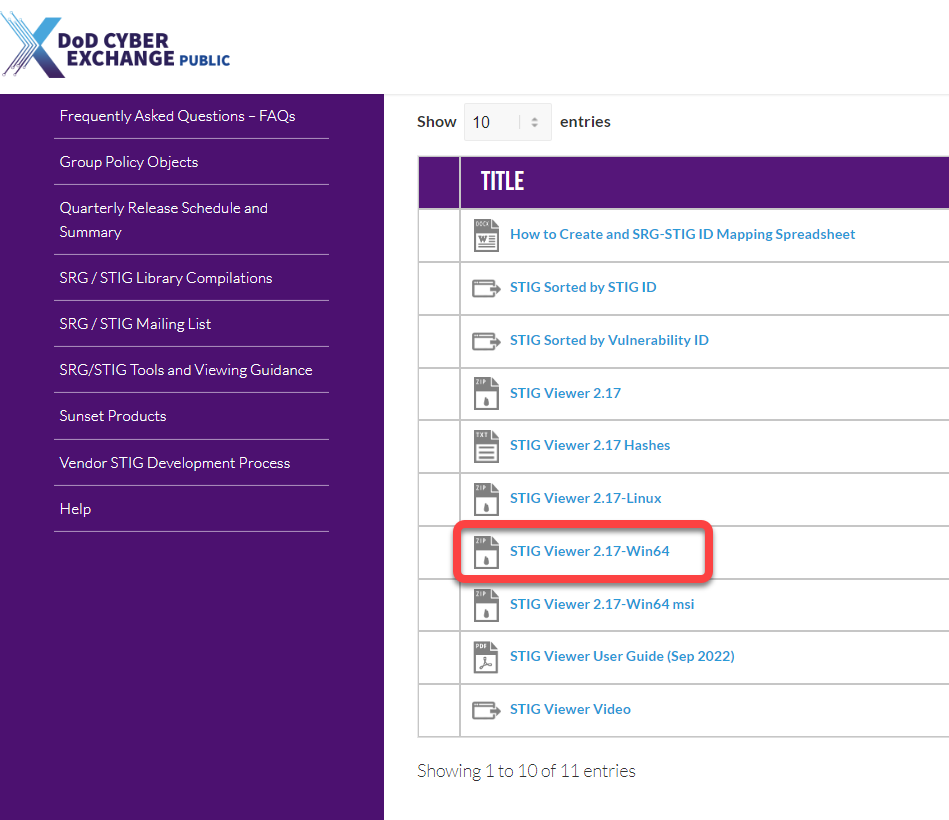
1. Open your favorite web browser, and visit the DISA website.
2. Look for and click the appropriate version of STIG Viewer to download for your computer, depending on your operating system.
But for this tutorial, choose STIG Viewer 2.17-Win64, as 2.17 is the latest version at this time of writing. \
3. Once downloaded, extract the content of the .zip file.
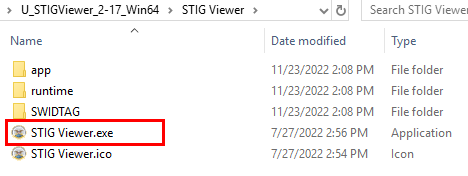
4. Now, look for and double-click the STIG Viewer.exe file to launch the STIG Viewer tool.  Launching the STIG Viewer tool
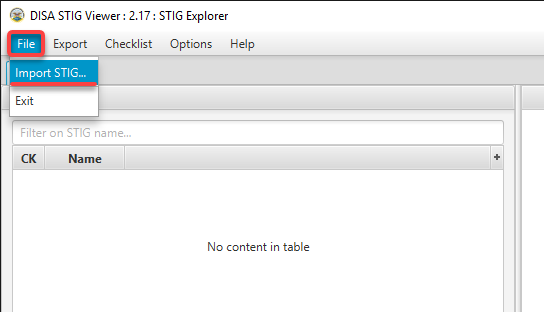
If the executable file works, the STIG Viewer tool opens, as shown below.

Viewing STIG Contents in the STIG Viewer
With your STIG Viewer running, you are ready to start working with STIGs, like analyzing vulnerabilities. But first, you must import a STIG in your STIG Viewer.
To view the content of a STIG:
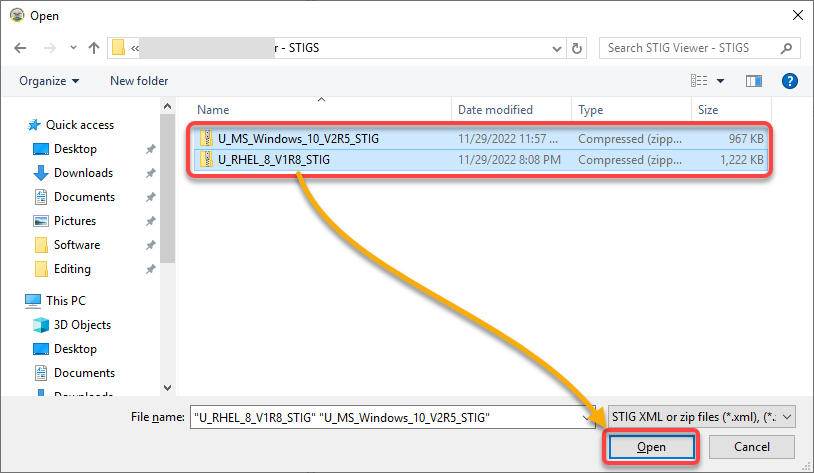
1. On your STIG Viewer, click the File menu and select Import STIG to initiate importing a STIG.
2. Next, look for and select the STIG you like to import. But for this tutorial, hold the CTRL key as you select the Windows 10 and RHEL STIGs to import both, and click Open.
You can import a STIG as a single XML file or zip bundle. The bundle contains other useful files for the implementation of a STIG.
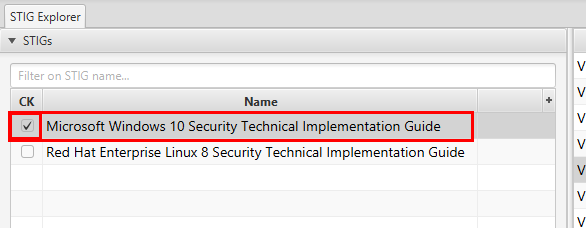
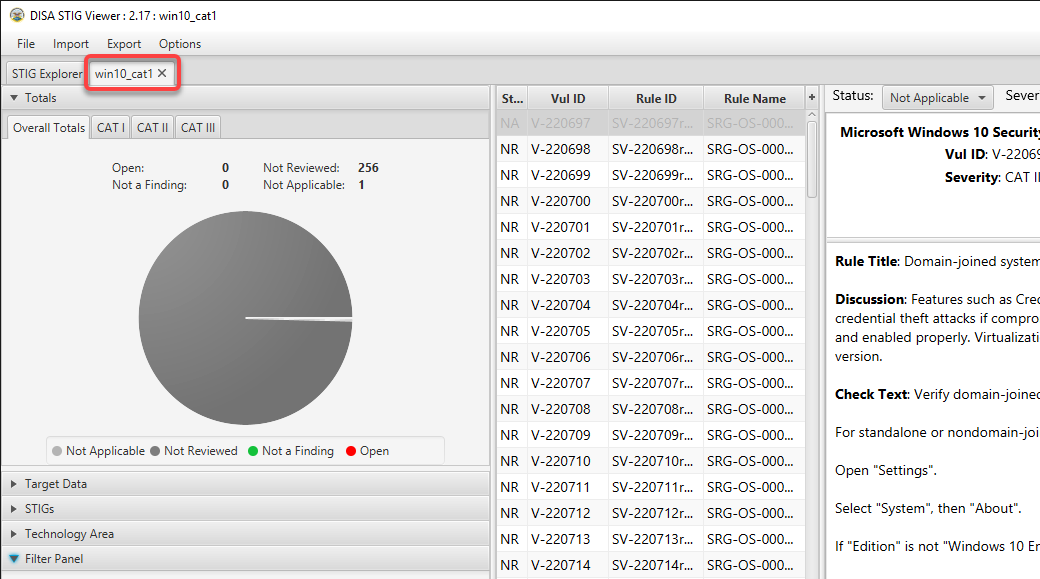
3. Once imported, select a STIG from the STIG Explorer, as shown below. Doing so enables the adjacent checkbox and brings up a list of vulnerabilities in the vulnerability table (middle panel).
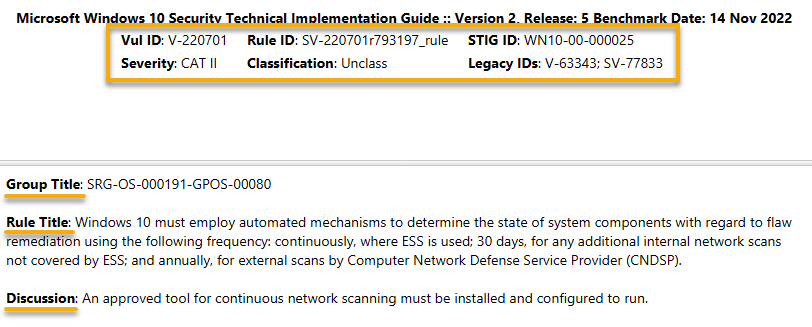
Vulnerabilities are also called Rules in the context of STIG Viewer.
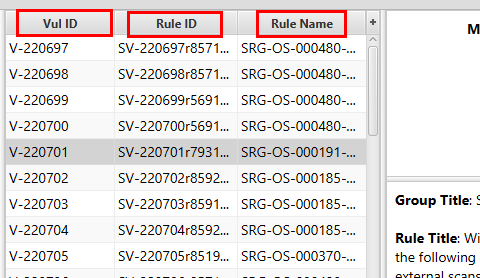
The vulnerability table allows you to see the vulnerability a particular rule is meant to patch, the name of the rule, and its numerical identifier, as in the screenshot below.
4. Select an item in the vulnerability table (middle panel) to dig deeper into the rules that make up a STIG, which displays in the right panel.
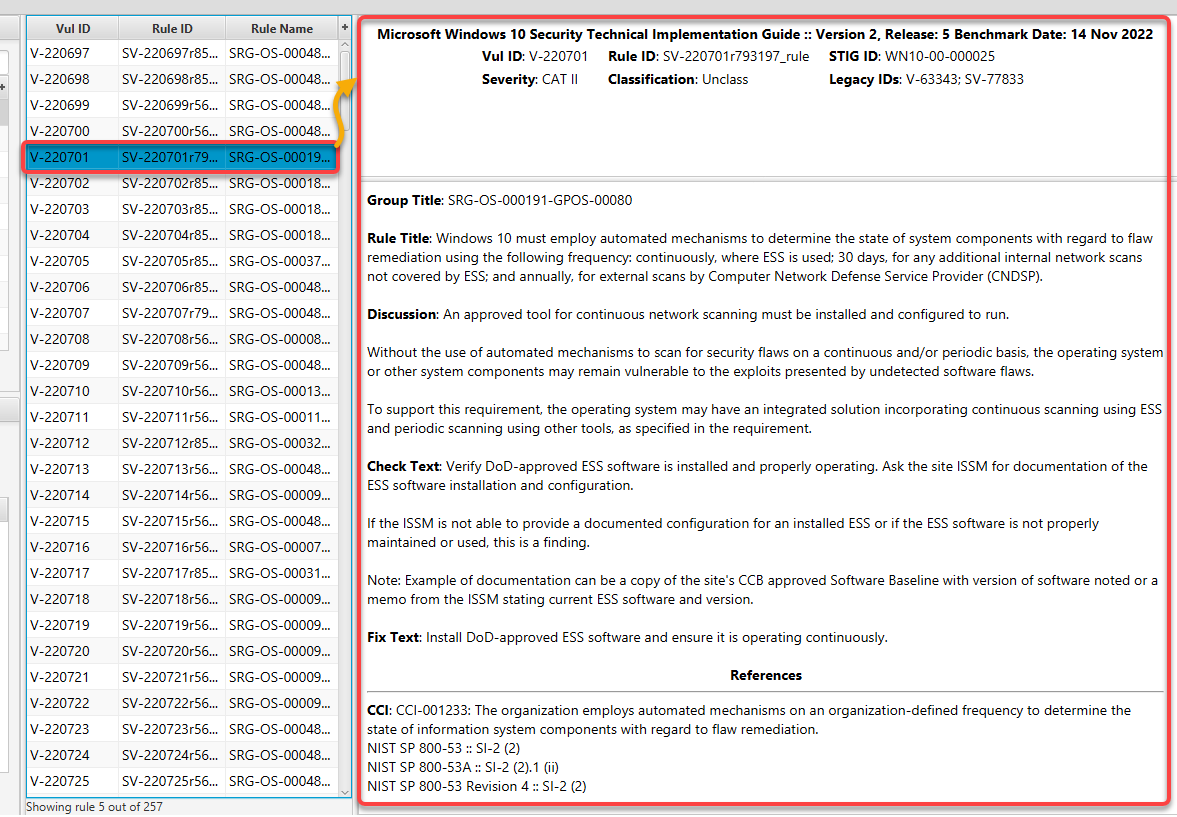
5. Now, look closer into the details of the vulnerability, and you will find the following:
- The severity and classification of a vulnerability.Various relevant identifiers.The rational and expected implementation of some of the guidelines.
Creating a Checklist from a STIG
Aside from the ability to view the rules in a STIG, the STIG Viewer also lets you curate a custom checklist. You can use this checklist to review the security posture of a machine or set of machines.
To create a checklist from a STIG, follow these steps:
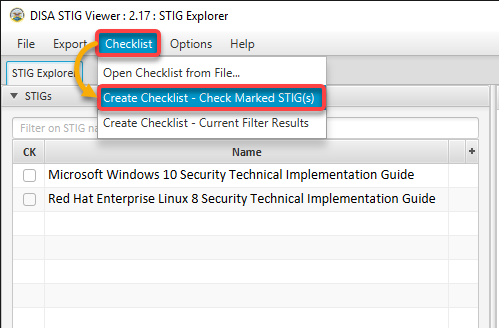
1. Click the Checklist menu, and choose Create Checklist – Check Marked STIG(s) to create a checklist from the selected STIG in the STIG Explorer tab. This action selects all the rules in the STIG.
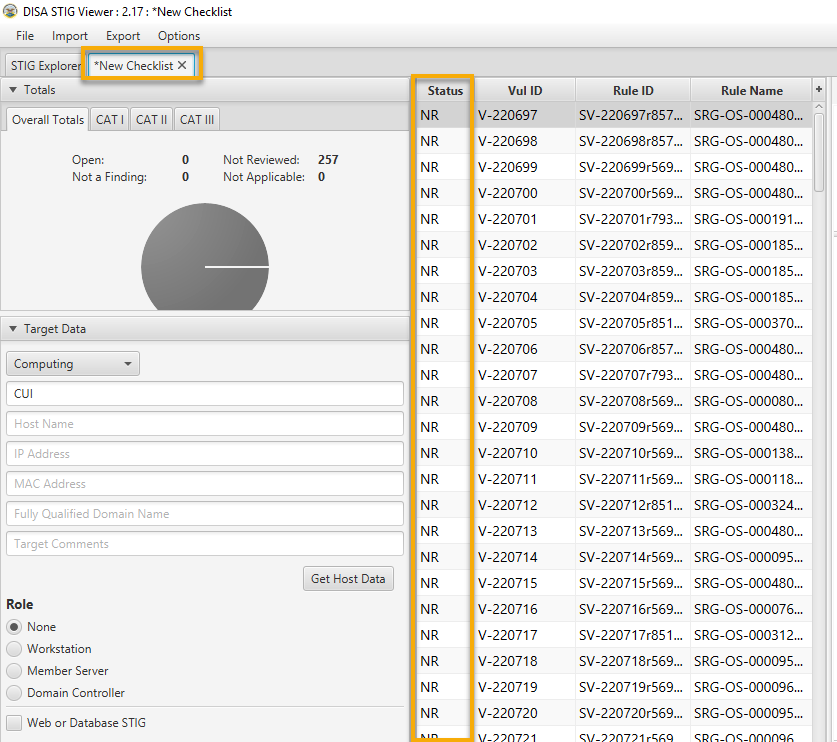
Once created, you will see a new tab called New Checklist, as shown below, with all the same vulnerabilities listed in the vulnerability table. But this time, a Status column is added.
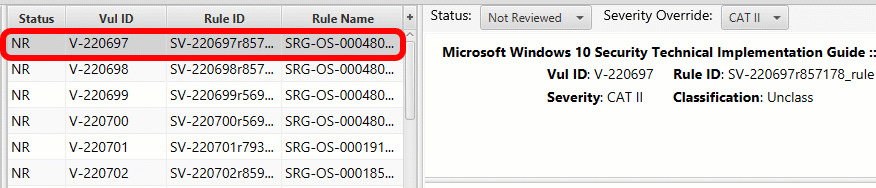
2. Next, select a vulnerability from the vulnerability table, and select a different status (i.e., Not Applicable), as shown below.
Below, you can see the vulnerability turns grayed out after changing the status. This action marks a rule as Not Applicable to your environment.
3. After the status change, select a desired category from the Severity Override drop-down menu to change the severity of a rule. But for this tutorial, choose the CAT III severity category.
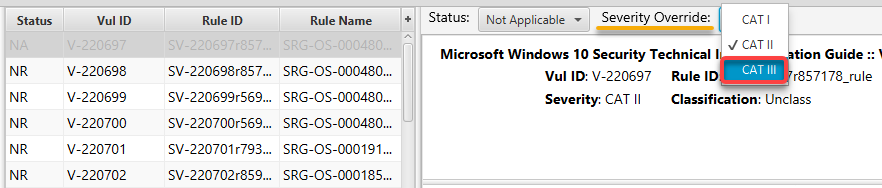
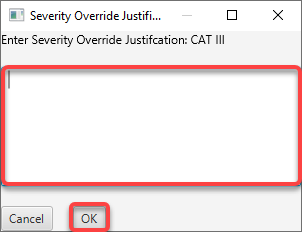
4. Now, input a rationale in the pop-up window, and click OK to apply the change. This note justifies the severity change of a rule.
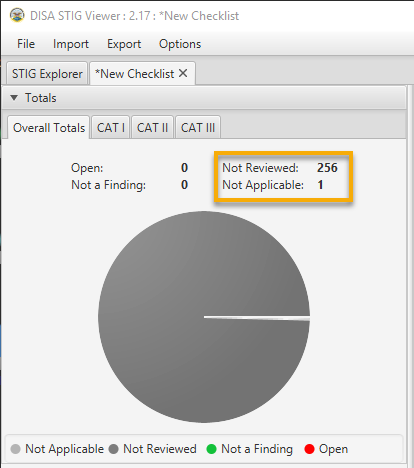
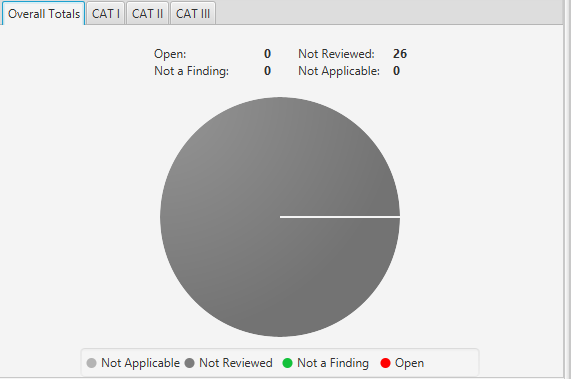
At this point, you can see below there is one rule with Not Applicable status and 256 with Not Review status.
Cherry-picking a Checklist with the Filter Panel
Building and working with a checklist via a series of filters is often faster than individually reviewing not-applicable rules. Perhaps you prefer to create a checklist housing only Category I rules. If so, applying filters will do the trick.
To create a filtered checklist, follow these steps:
1. Click on the Filter Panel toggle list at the bottom of the New Checklist tab to expand the panel and expose more filtering options.
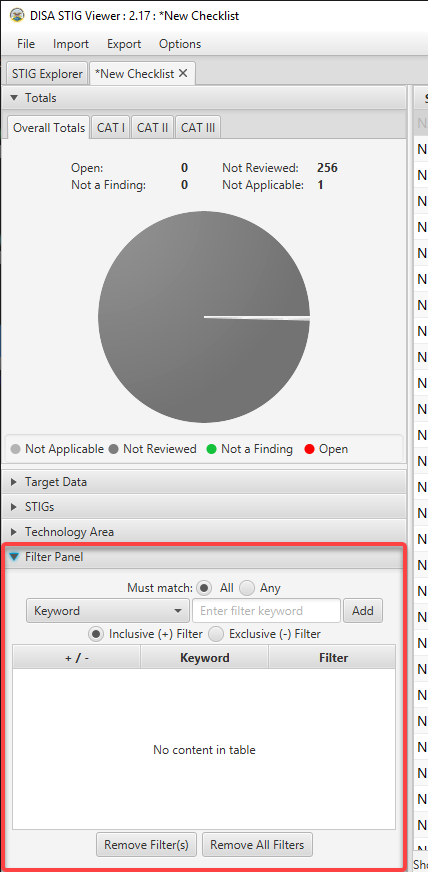
2. Next, configure the filter as follows:
- Click the drop-down field, and choose CAT I as the filter to only select rules with severity equal to CAT I.
- Ensure the filter type is set to Inclusive(+) Filter to add matching rules to the resulting checklist
- Click Add to add the selected filter to the filters already applied when you created the checklist.

Once the filter is created, you will notice the number of rules in the checklist automatically reduce, as shown below.
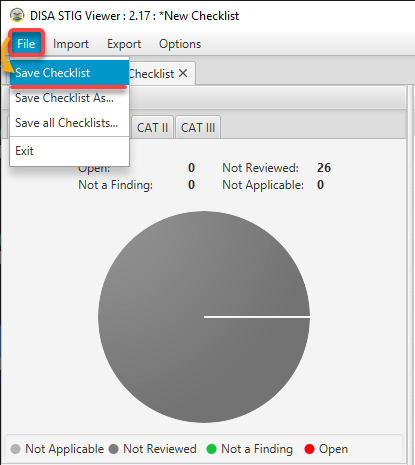
3. Lastly, click the File menu, and select Save Checklist to save the work you have done so far as a checklist file on disk, as shown below.
With this checklist file, you do not have to recreate the checklist when you need it in the future.
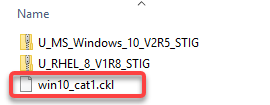
Saved checklist files have the .ckl extension, as shown below.
Performing an Asset Review from a Loaded Checklist
Checklists allow you to review and document the state of an asset against a set of rules. In this example, you will confirm the state of a finding on an asset and update the checklist accordingly.
1. Close and re-open the STIG Viewer first to ensure you do not have any active checklist.
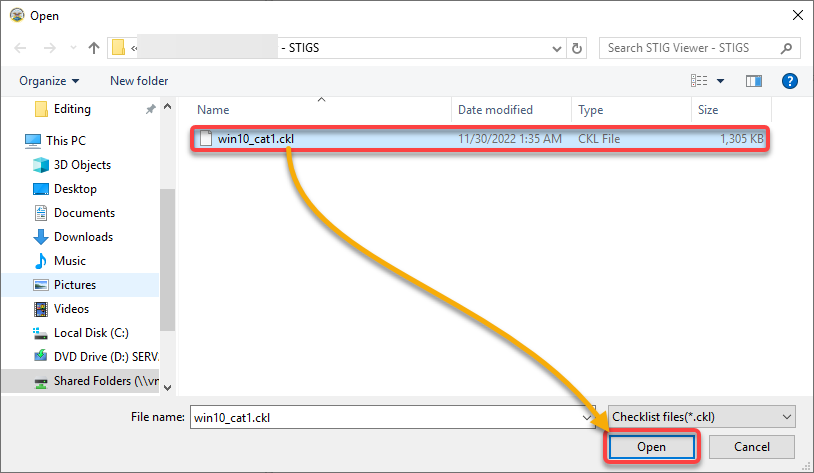
2. Next, click the Checklist menu, and select Open Checklist from File to look for a checklist you like to use.

3. Locate and select the checklist you just created, and click Open.
Once opened, the checklist file loads in a new tab in STIG Viewer, as shown below.
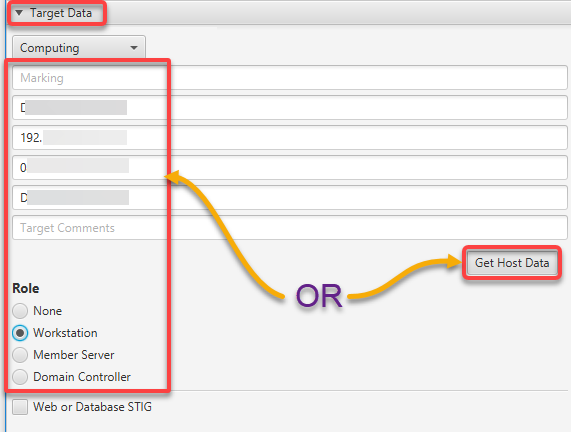
4. Now, expand the Target Data panel, and populate the relevant fields, or click Get Host Data to automatically populate the fields if the machine under review is the local machine.
Once populated, you are now ready to progressively review the individual findings in the Vulnerability table.
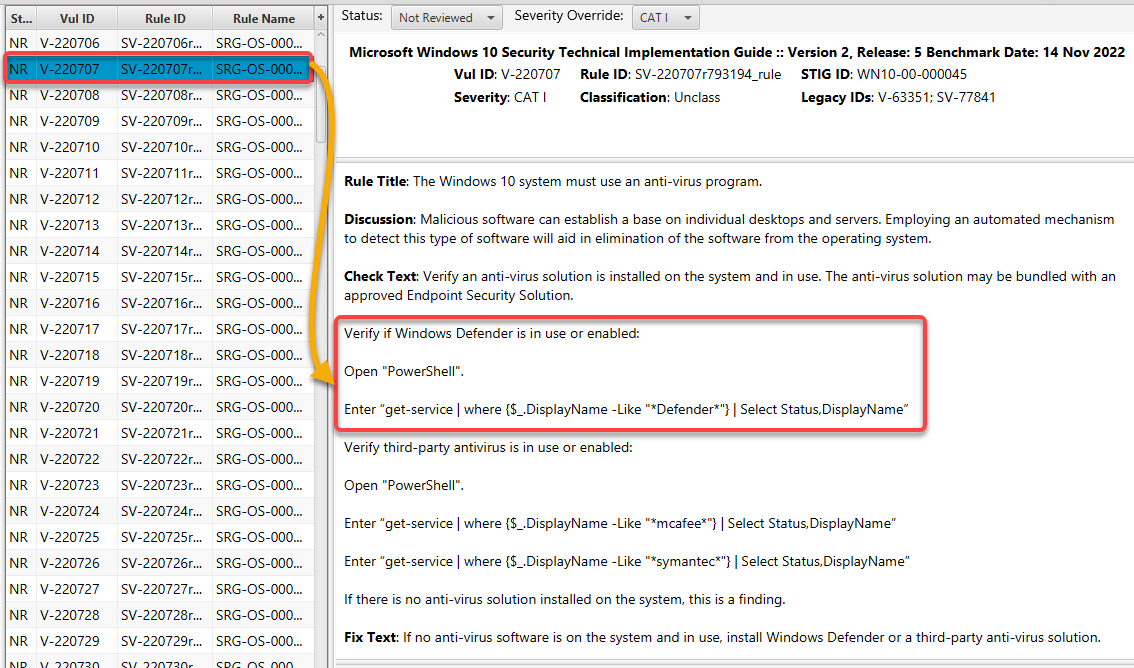
5. Select a rule from the Vulnerability table, as shown below, and carry out the Check Text section steps to verify the rule’s status on the machine.
These steps let you check if an antivirus solution (Windows Defender) is running on the machine as a service.
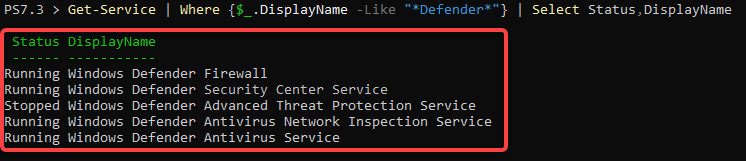
The results should either be a list as in the screenshot below, confirming the finding is mitigated on your machine or empty, in which case you may be non-compliant.
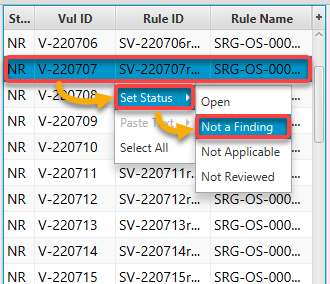
6. Finally, right-click on the rule to set the status to match the assessment result. For this tutorial, set the status to Not a Finding since an antivirus solution is installed.
Congratulations! You have successfully reviewed and changed the state of an asset from the STIG Viewer checklist.
Clearing Local Data Cache for a Clean Slate
STIG Viewer maintains a local cache for the currently loaded STIGs to help you return to the same STIGs when you re-open the program. But you may want to clear the cache so you can start work on a separate set of STIGs or keep the list of loaded STIGs short and manageable.
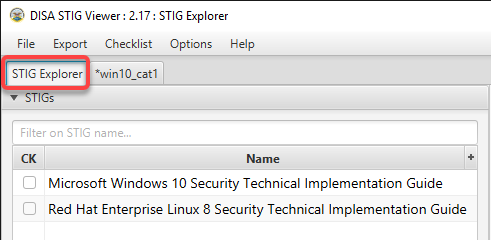
1. Select STIG Explorer to leave the checklist editing workspace.
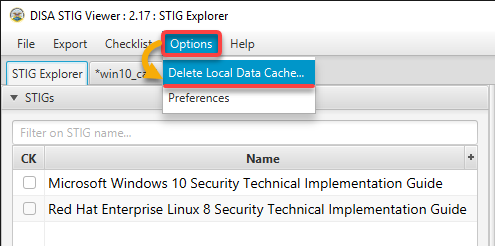
2. Next, click the Options menu, and select Delete Local Data Cache to delete the local data cache.  Deleting the local data cache
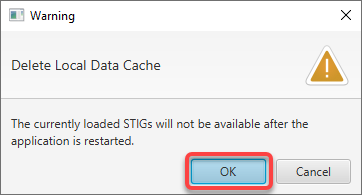
3. When prompted, click OK to confirm the deletion.
Personalizing STIG Viewer via the Preferences Tab
Besides the functionalities, STIG Viewer lets you change the interface’s look to add a personal feel as you work on STIGS.
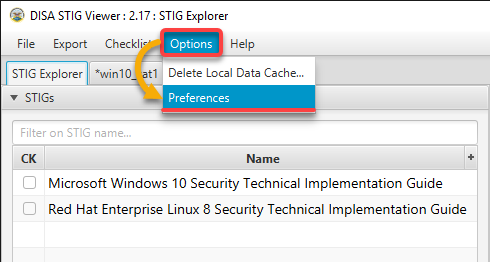
1. Click the Options menu and select Preferences to access STIG Viewer’s preferences.
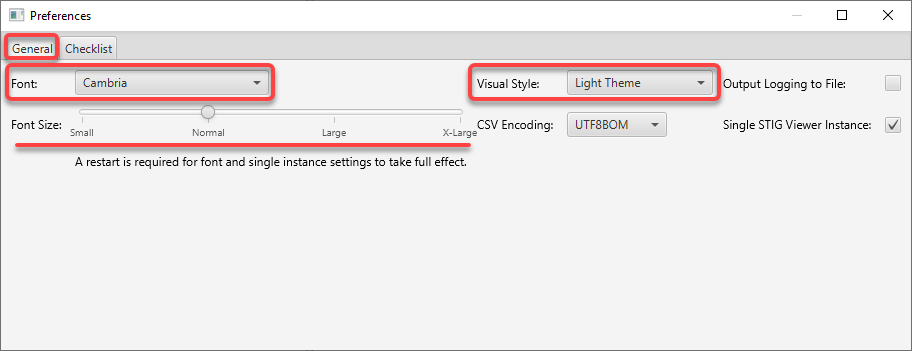
2. In the Preferences window, click the Font drop-down menu and select one that suits your taste under the General tab. You can also change other visual elements, such as the Font Size and the overall Visual Style.
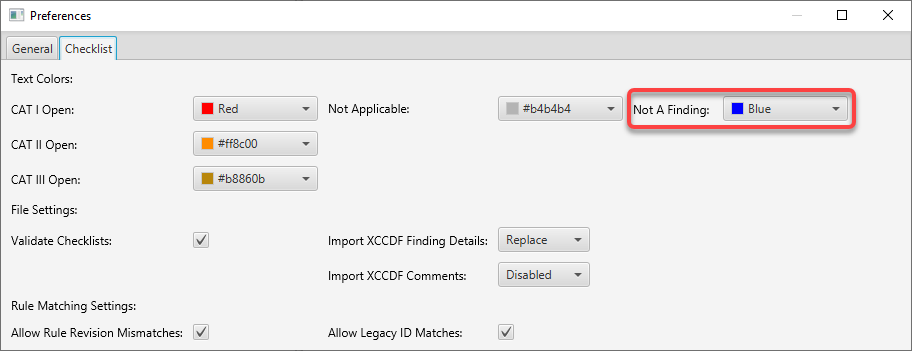
3. Navigate to the Checklist tab, and modify preferences related to the presentation of checklists on your screen. Select the corresponding drop-down field, like for the Not A Finding status and change the color, and close the Preferences window.
By all means, go nuts, and make the STIG Viewer UI your own.
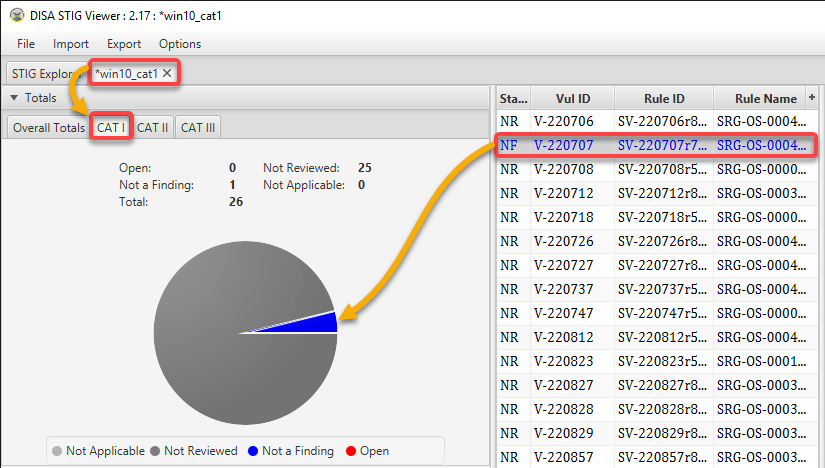
4. Finally, navigate your checklist tab, and select the CAT I filter tab.
Notice the rule’s text with the Not a Finding (NF) status in the table shares the same color as the one in the pie graph, as shown below.
Conclusion
Increasing security when an opportunity comes is always a good thing. And in this tutorial, you have learned to maximize the value of STIG Viewer to improve the security posture of your assets.
As cool as STIG Viewer may be, manual work can sometimes be tedious. Why not get familiar with a handy Security Content Automation Protocol(SCAP)? Start automating tasks with OpenSCAP!


