

Have you ever wanted to run PowerShell commands on a remote machine from the comfort of your workstation? Well, with PowerShell Remoting you can. With remote PowerShell, you can run commands and scripts on multiple remote systems in a sustainable way.
Sounds interesting? Read on to learn how to tame those remote machines the PowerShell way.
Prerequisites
This tutorial will be a hands-on demonstration. If you’d like to follow along, be sure you have at least three computers with PowerShell 7. One will be your management computer, and the other two will be the remote machines.
This tutorial will be using the following computers.
- A Windows 10 PC with PowerShell 7 installed as the management computer. You will launch remote commands from this machine.
- A Windows 10 PC with PowerShell 7 installed. This machine will be the endpoint for remote PowerShell over WinRM.
- A user account on the remote Windows machine with local administrator rights. This tutorial uses a user account called ma.
- Linux Machine with SSHD enabled to serve as a remote PowerShell endpoint over SSH. This tutorial uses Fedora 35.
- A user account to execute remote commands on the Linux machine. The account should have sudo and SSH access. This tutorial uses an account named test. Create a user account at this point if you do not have one on your Linux machine
Enabling Remote PowerShell on Windows Over WinRM
When you install PowerShell 7, there is an option to enable PowerShell remoting, and you may have enabled it then. But, to be sure, follow the below steps to enable remote PowerShell.
1. Log in to the remote Windows 10 PC.
2. Open PowerShell as administrator.
3. Run the below command to enable remote PowerShell.
Enable-PSRemotingThe command executes several configuration changes, which you’ll see on the console.

Enabling Remote PowerShell on Linux Over SSH
WinRM is exclusive to Windows, which means you can’t enable remote PowerShell on Linux with it. Instead, you can enable remote PowerShell over SSH on Linux. Assuming you’ve already installed PowerShell, follow the below steps.
1. Log in to your remote Linux system and open a terminal session.
2. Open the SSH server configuration file in a text editor. Use your choice of text editors, such as Gedit, Sublime, or Nano. This example uses Gedit.
sudo nano /etc/ssh/sshd_config3. Next, add the below line to the file. This line creates an SSH subsystem that hosts a PowerShell process.
Subsystem powershell /usr/bin/pwsh -sshs -NoLogo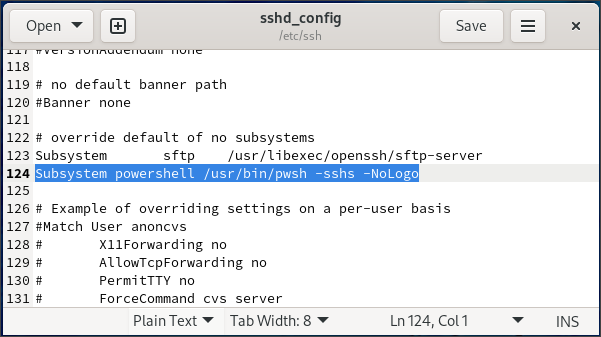
4. Close the editor.
5. Finally, restart the SSH server by running the following command.
sudo systemctl restart sshdAdding Remote PowerShell Trusted Hosts on the Local Machine
At this point, your remote computer is ready to receive commands. But, your management computer may refuse to connect to the remote PowerShell hosts if they’re not on the Trusted Hosts list. To avoid possible remoting issues, you must add the remote hosts to your Trusted Hosts.
Open PowerShell as administrator on your management computer.
Run the below winrm command. This command adds your remote Windows (192.168.8.107) and Linux (192.168.8.171) machines to your computer’s trusted hosts list.
winrm set winrm/config/client '@{TrustedHosts=" 192.168.8.171,192.168.8.107"}'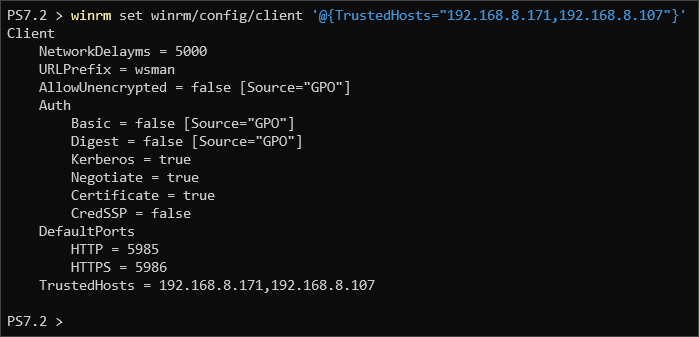
Running Commands on Remote Computers
With all the pieces in place, you will execute commands on the remote machine in this section.
1. Open a new PowerShell session on your management computer.
2. Now, execute the below Invoke-Command command to list the first five services on the remote machine as user ma. The command to run appears between the braces of the ScriptBlock switch, as shown below.
Invoke-Command `
    -ComputerName 192.168.8.107 `
    -Credential 'ma' `
    -ScriptBlock { Get-Process | Select-Object -First 5 }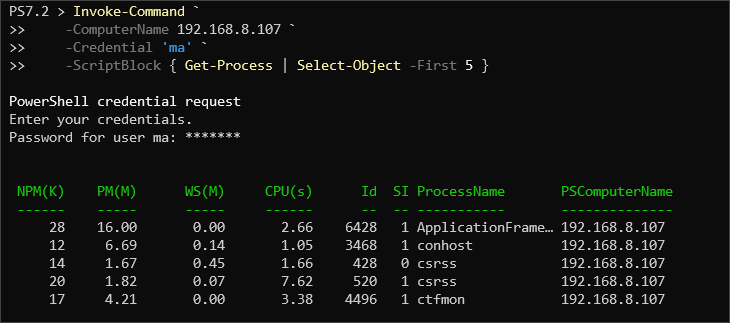
3. To perform the same with a remote Linux host, run the below command instead. Notice that -HostName replaced -ComputerName, and -UserName replaced -ComputerName. These parameters indicate to the Invoke-Command cmdlet that the target is an SSH host.
Invoke-Command `
    -HostName 192.168.8.171 `
    -UserName 'test' `
    -ScriptBlock { Get-Process | Select-Object -First 5 }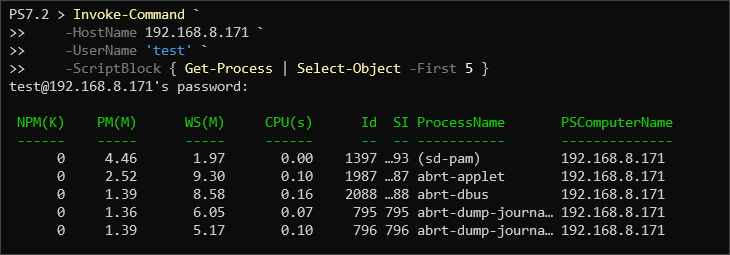
Executing Scripts on Remote Computers
You can also run a PowerShell script file on a remote computer with the Invoke-Command cmdlet. But instead of specifying the -ScriptBlock parameter, you’ll specify the -FilePath parameter followed by the script local path.
1. First, create a PowerShell script file called nametime.ps1 on your local computer.
2. Open the script in your preferred script editor and add the following code. Save the file afterward.
# nametime.ps1
hostname
Get-Date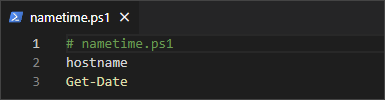
3. Execute the Invoke-command cmdlet with the -FilePath parameter. The -FilePath should point to the script file. In this example, the script file is in the same working directory.
# Invoke the script on the remote PowerShell over WinRM
Invoke-Command `
    -ComputerName 192.168.8.107 `
    -Credential 'ma' `
    -FilePath .\nametime.ps1

# Invoke the script on the remote PowerShell over SSH
Invoke-Command `
    -HostName 192.168.8.171 `
    -UserName 'test' `
    -FilePath .\nametime.ps1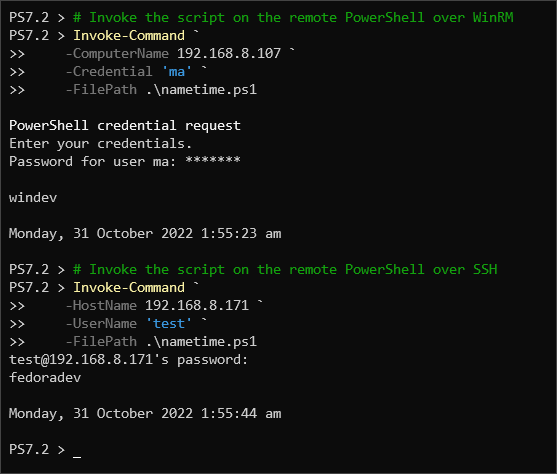
Managing a Remote Computer Interactively
In the previous section, you saw how to run individual commands on a remote machine. In this section, you will learn to open an interactive session, such that you can run multiple commands on the remote machine as though it were local.
1. Execute the Enter-PSSession command to start a remote session on the machine at 192.168.8.107 as user ma.
Enter-PSSession -ComputerName 192.168.8.107 -Credential maEnter the remote user account password, ma, at the prompt as shown below.

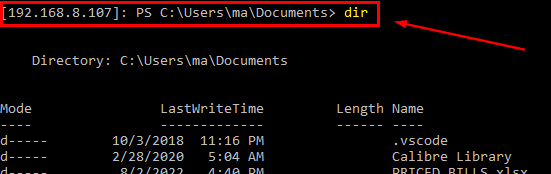
You will see a new prompt, as shown below. The IP address inside the square brackets indicates the remote PowerShell host.

3. List the files in the current working directory with the dir command, as shown below. You can execute as many PowerShell commands as you like within a session dir
dirThe directory’s contents should be on your screen, as in the screenshot below.
4. Execute the Exit-PSSession cmdlet below to exit the session once you’ve finished managing the remote machine.
Exit-PSSessionUpon exit, you should return to a local prompt, as in the screenshot below

Disconnecting and Reconnecting Remote PowerShell Sessions
It is possible to store a session persistently as an alternative to interactive sessions or one-off commands. Storing a session enables you to switch between sessions without losing context. In this section, you will learn to create and manage persistent sessions.
1. Run the New-PSSession cmdlet to create a session on the remote computer, 192.168.8.107, as user ma (-Credential). Save the session in the variable, $var, as follows.
$var = New-PSSession -ComputerName 192.168.8.107 -Credential ma2. Execute the variable, $var, to view its contents as follows
$varAs shown below, you should see a session object with a RemoteMachine ComputerType and State set to Opened.

3. Run the Enter-PSSession command to enter the session stored in $var.
Enter-PSSession $varIf all is well, the prompt will change to a remote prompt without any further output, as shown below.

4. Create a variable,$rem1, within the session. Use any variable name and identifier string that suits you. You’ll use this variable later to determine whether you’ve connected to the same session.
$rem1 = "same session"5. Run the below command to exit the remote PowerShell session.
Exit-PSSession
6. Re-establish a remote PowerShell session.
Enter-PSSession $var7. Execute the $rem1 variable at the remote session prompt, as shown below, to view its value.
$rem1You should see the same value you set earlier before exiting the remote PowerShell session, confirming that you have reconnected to the same session.

8. Run the Exit-PSSession command to exit the session once again as follows.
Exit-PSSession9. Finally, execute Invoke-Command with the session switch set to $var to show the remote machine’s hostname in the same remote session. This method is an alternative way to run commands in the same session without manually connecting, disconnecting, and reconnecting to a single session.
Invoke-Command -Session $var -ScriptBlock {hostname}
10. Run the Remove-PSSession to remove the session stored in $var altogether.
Remove-PSSession $varConclusion
Congratulations! By coming to the end of this tutorial, you have learned how to manage a Windows or Linux system with remote PowerShell. This guide aimed to get your feet wet. Why not take the plunge by getting deeper with PowerShell on Linux over a remote session?


