


Did you know you can add a Windows 10 local account and log in to the PC without using a Microsoft account or an email address? If you’re looking for a way to do it, then this tutorial is for you.
With Windows 10, you have the option of creating a local user or using your existing Microsoft account to log in to the PC. Let’s look at different options in creating a local user account.
In this tutorial, you will learn all the different ways to create a local user account on Windows 10. Let’s jump right in.
Prerequisites
- Windows 10 PC with administrator account. This tutorial will use Windows 10 21H1 Enterprise version.
Creating Windows 10 Local Account User While Installing Windows 10
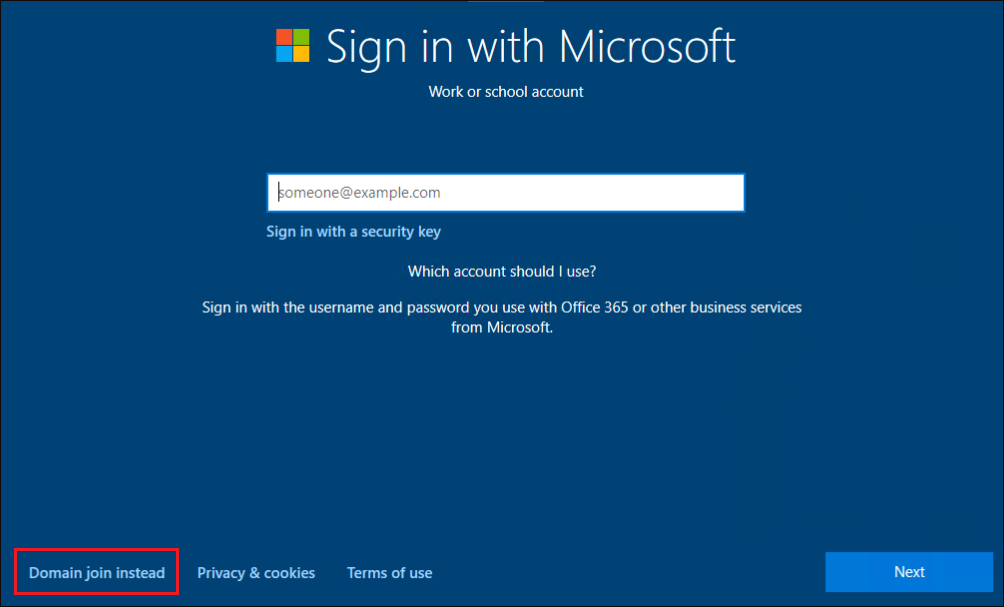
One of the first ways you’ll find to create a local user account in Windows 10 is via Windows Setup. Once installation is complete, you’ll be asked to sign in with a Microsoft account. Even though it seems you must use a Microsoft account, you can create a local account instead. The option to do so is just hidden.
- When prompted to login with a Microsoft account, click Domain join instead option in Sign in with Microsoft work or school account step.
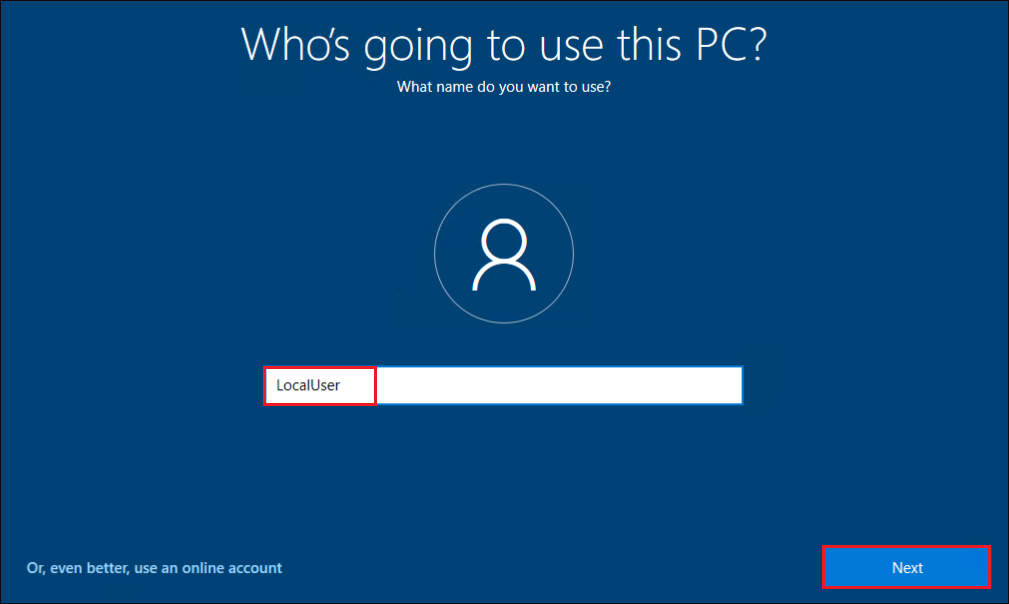
2. Enter a username for the local user account and click Next.
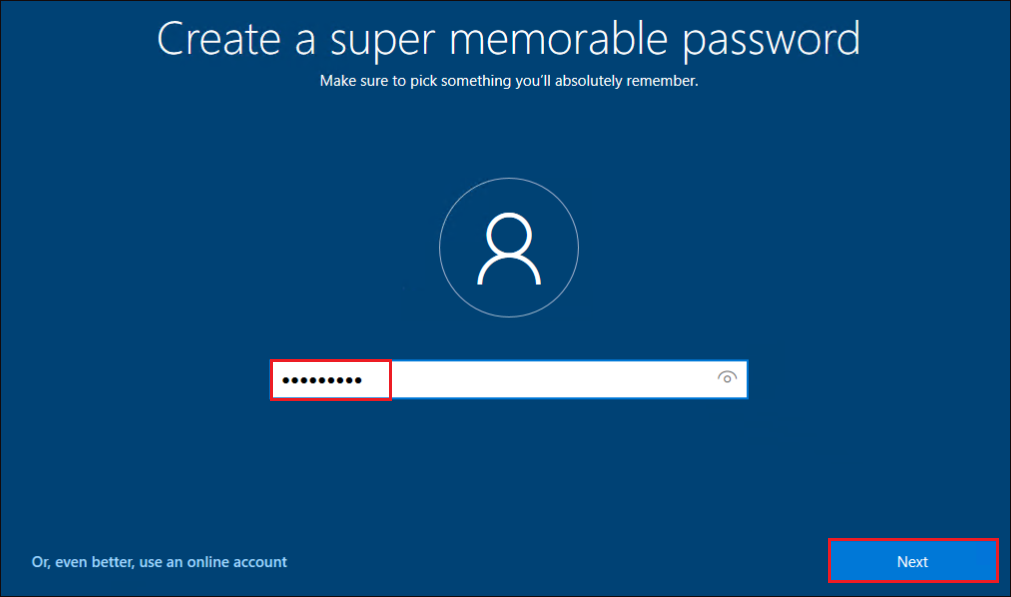
3. Type a password and confirm the password in the next step. Click Next.
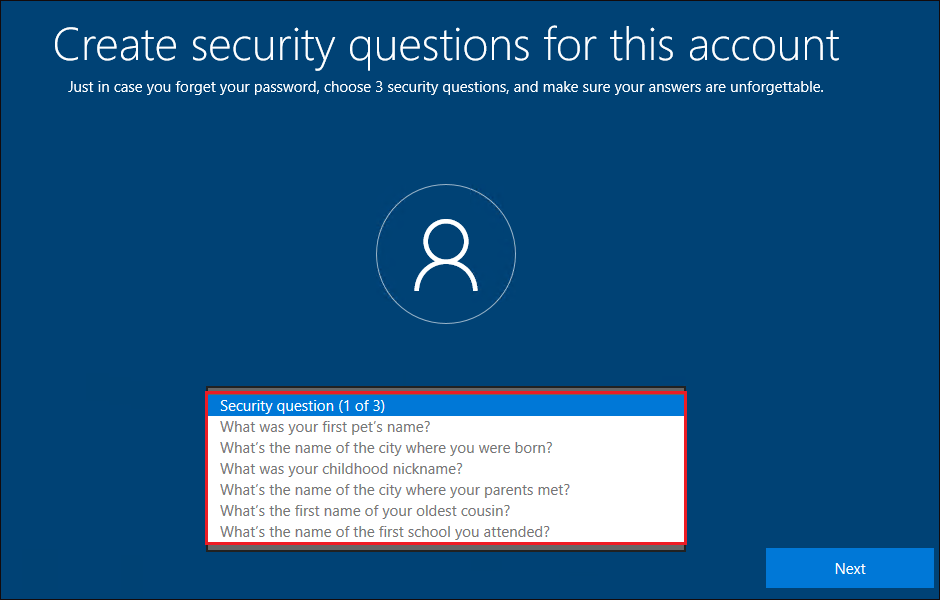
4. Provide answers to the security questions and click Next.
When you forget your login password, you will be prompted to enter answers for all these three questions to reset your password.
5. Accept the defaults through the next few steps. Once complete, you will be logged in with your local account.
Creating a Local User Account From the Settings App
Now that you’ve learned how to create a local user account at the time of OS installation, let’s now dig into creating a local user account post-installation.
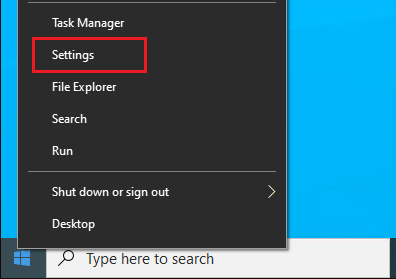
1. Access the Windows settings by right-clicking on the start menu, then select Settings.
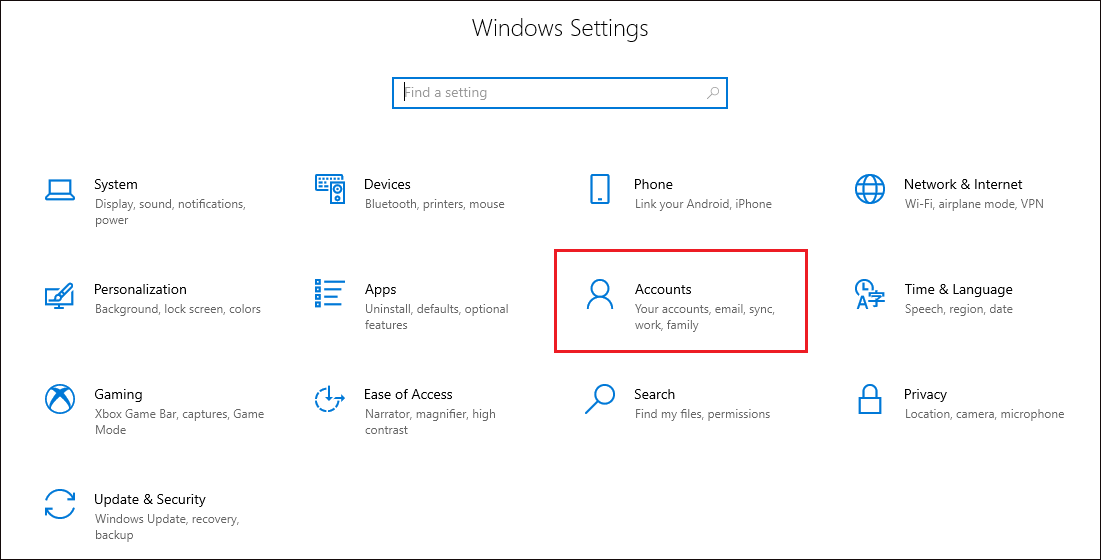
2. Get access to Account settings by clicking on Accounts in the Windows Settings box.
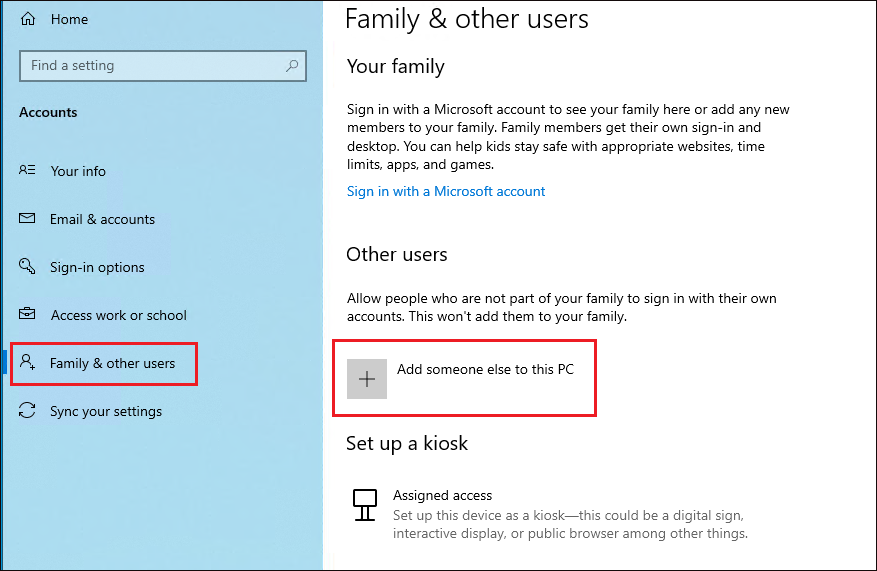
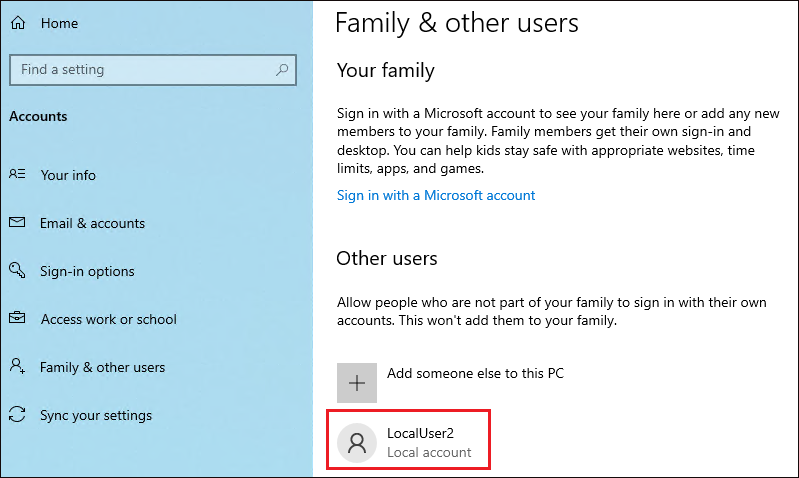
3. To add a local account, click on Family & other users option at the left panel. Click Add someone else to this PC option to the right and Microsoft’s sign-in screen will appear.
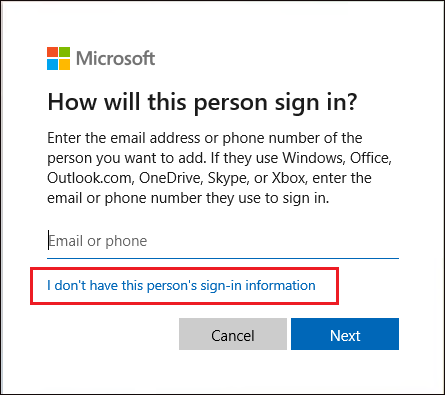
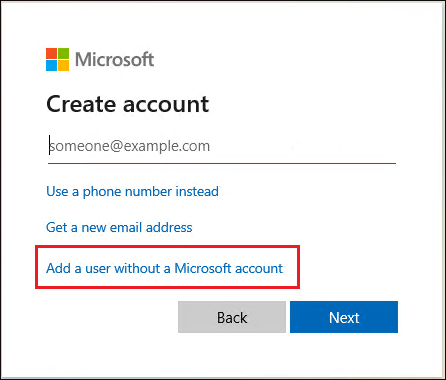
4. In the sign-in window below, an email address is not needed. Since you’re creating a local account, click on I don’t have this person’s sign-in information and click Next.
5. Next click on Add a user without a Microsoft account option.
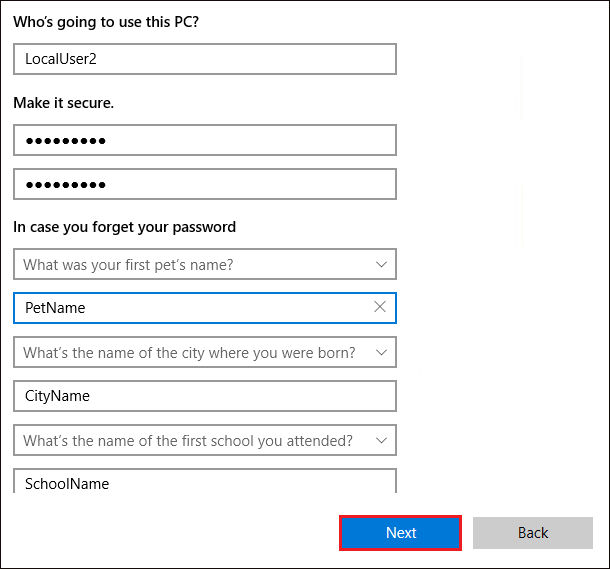
6. Enter a username and password. The moment you start typing, password security questions will be displayed automatically. Once they do, select each security question and provide your answers and click Next when complete.
7. Finally, log off from your PC and log in with the new user account!
Creating a Local User Account with Computer Management
Up to this point, you’ve seen how to create a local user account in Windows 10 post-installation and via the Settings app. Let’s continue on the journey and now dig into creating a local user account via the Computer Management console.
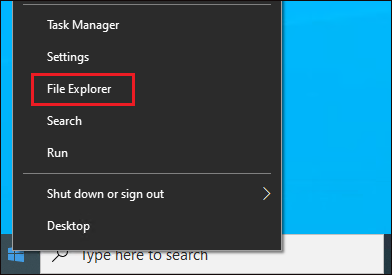
1. Right-click on start menu, and click File Explorer option.
2. Right-click on This PC and click manage. This will open computer management console.
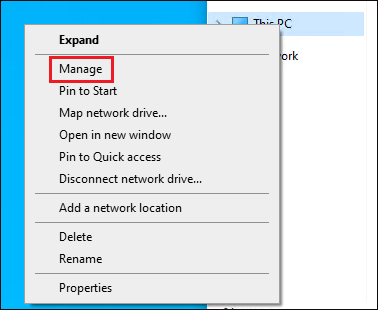
Need another way of opening the computer management console? Open run dialog box and enter compmgmt.msc. This will open computer management console.
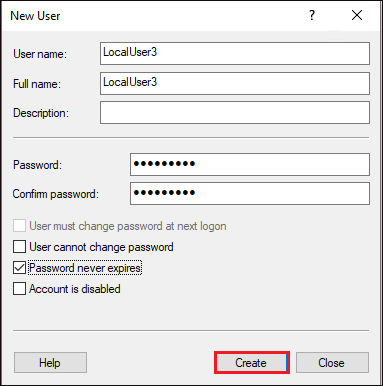
3. In the Computer Management console, expand Local Users and Groups tab. Then right-click on the Users node and click New User to create an account under Users account type.

Optionally open the Local Users and Groups console but running lusrmgr.msc.
4. In the new user dialog box, provide the User name, an optional Full name, and Password. When complete, click Create and then Close.
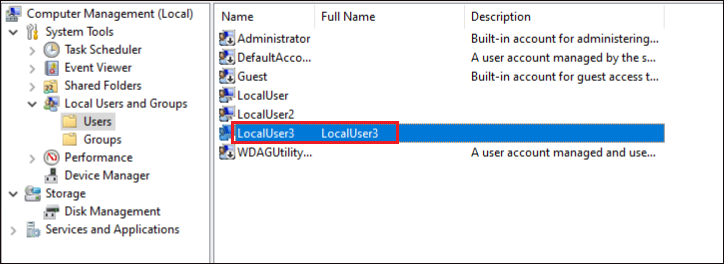
You’ll now notice that the local user account is added under the Users account type folder, in the Local Users and Groups section, as shown below. Now you have an active local account that is just like a Microsoft account in in Windows.
Creating Local User Account with the Advanced User Accounts Control Panel
To finish off this tutorial’s whirlwind tour of creating local Windows 10 user accounts, let’s go through creating a local user account with the Advanced User Accounts Control Panel, sometimes referred to as netplwiz.
1. Click on the Start menu, type netplwiz, and run it.
2. In the User Accounts console, click Add you’ll be taken to the Microsoft account sign-in page.
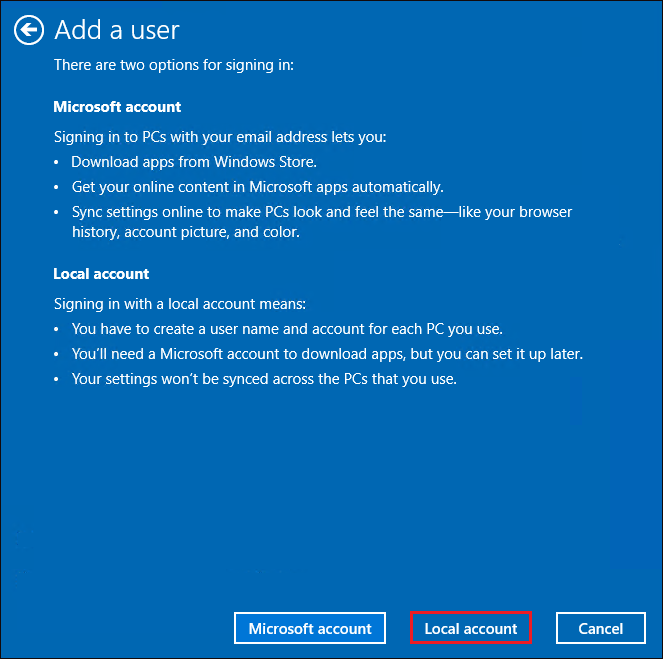
3. On the Microsoft account sign-in page, click on Sign in without a Microsoft account (not recommended) option and click Next.

4. On the Add a user page, click the Local account option.
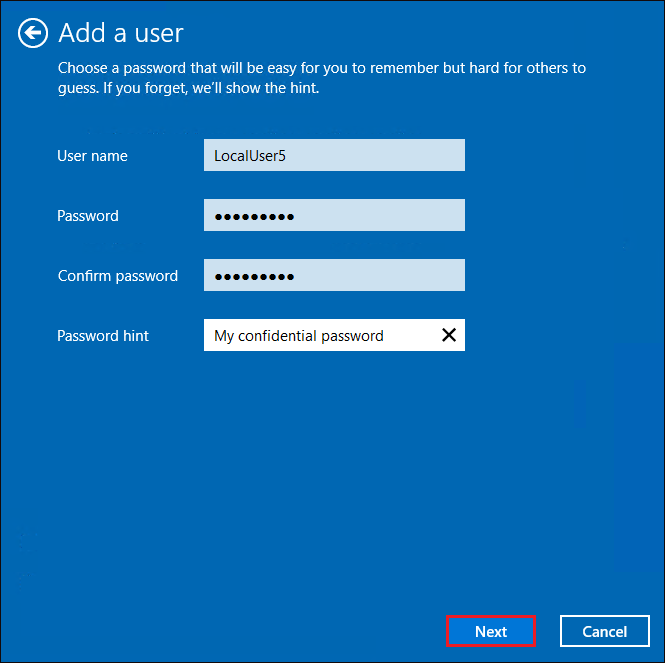
5. Provide a User name, Password and a Password hint for use when resetting the password.
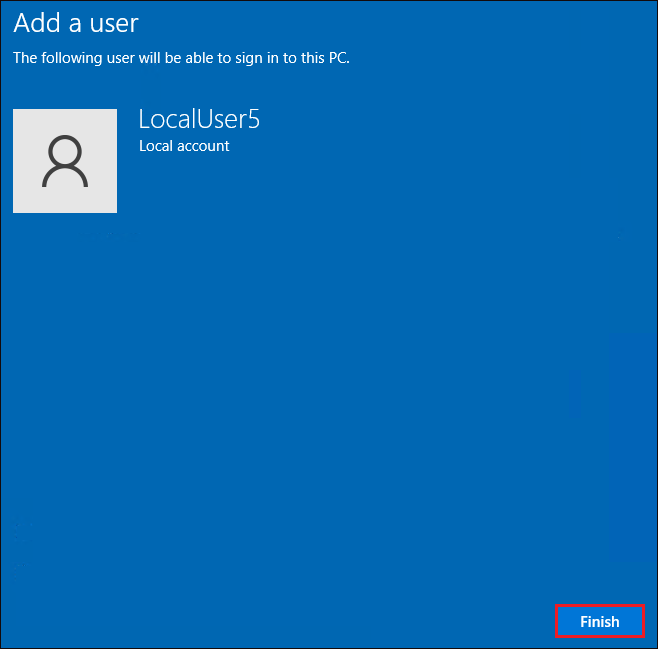
6. Click Finish on the final confirmation page.
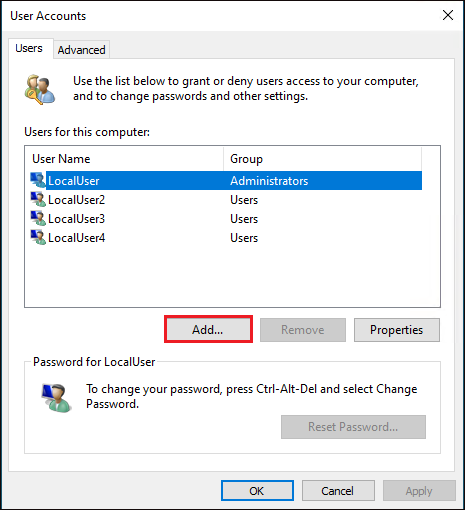
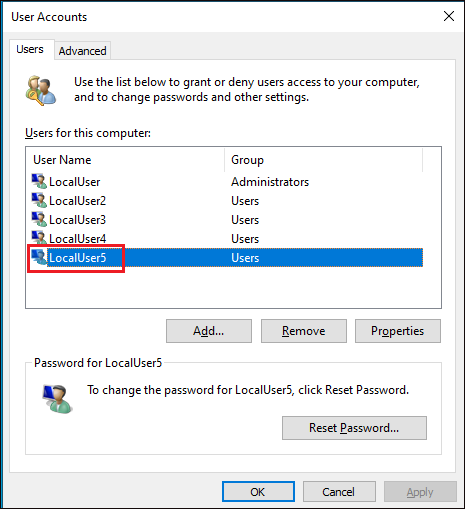
When complete, you’ll then see a new user account displayed in the User Accounts dialog box shown below.
Creating a Local User Account with the Net User Command
If creating a Windows 10 local user account via the GUI isn’t your thing, or you’re working on some automation scripts, the command line is your friend. Let’s now jump into creating local user accounts via cmd.exe.
Open a command prompt as administrator and run the below command. This command creates a new local user (/add) called LocalUser4 with a password of MyPassword!
This command will not enable any of the options like user must change password at next logon, user cannot change password, password never expires and account is disabled.
net user LocalUser4 MyPassword! /add
Creating a Local User Account with PowerShell
Continuing on with the list of ways to create a local Windows 10 user account, next up is PowerShell!
Open PowerShell console as administrator.
Next, run the New-LocalUser cmdlet, as shown below.
The New-LocalUser cmdlet has a Password parameter but you cannot specify a simple string. To pass a password to the Password parameter, you must first convert your password into a secure string or encrypted string using the ConvertTo-SecureString cmdlet.
The below command first encrypts the password of MyComplexPassword!. Then using the $password variable sets the password for a user account called LocalUser6.
$password = ConvertTo-SecureString -String MyComplexPassword! -AsPlainText -Force
New-LocalUser -Name LocalUser6 -FullName LocalUser6 -Password $password
The
New-LocalUsercmdlet also supports other parameters likePasswordNeverExpiresorAccountNeverExpires.
Conclusion
You’ve seen a lot of different ways to create Windows 10 local accounts. Although the GUI options have more steps than the command-line, some prefer the graphical interface walking you through the steps vs. the command line options when automating the process, perhaps.
With what you’ve learned in this tutorial, which option would you choose to create user accounts, GUI way or command line? Let us know in the comments.


