


Security is one of the critical successes of the IT industry, and implementing security compliance for your products is crucial for security and your business. Not sure how? Consider using the free and open-source OpenSCAP and SCAP Security Guide (SSG).
In this tutorial, you’ll learn how to install and use OpenSCAP and SSG for auditing Linux servers. You’ll implement security compliance automatically on your server deployment.
Read on and tightly secure your Linux servers!
Prerequisites
This tutorial will be a hands-on demonstration. To follow along, be sure you have the following requirements:
- A Linux server – This demo uses the latest Ubuntu 20.04 Server.
- A user root and password.
- Ansible and Apache/NGINX installed on the Linux server.
Installing OpenSCAP and SSG Packages
OpenSCAP is a free and open-source security automation tool for managing system security and compliance testing. OpenSCAP provides various tools for auditing systems and fixing problems in your system, according to the SCAP Security Guide (SSG).
To take advantage of OpenSCAP and SSG, you’ll first have to install them on your server:
1. Log in to your server using the root user.
2. Next, run the apt update command below to update and refresh the repository package index on your server. This command lets you get the latest version of any packages to install.
sudo apt update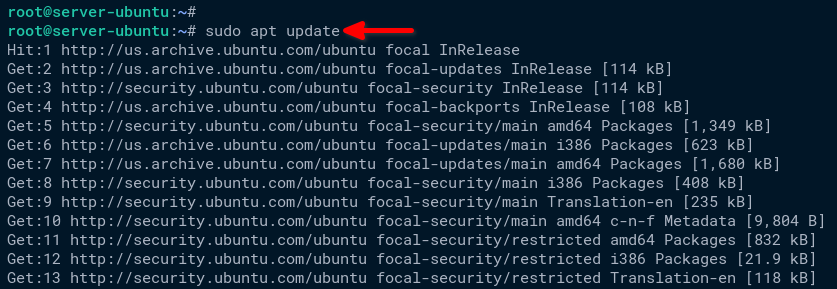
3. Run the following apt install command to install the OpenSCAP and SSG packages for Debian-derived systems (ssg-debderived).
SSG provides security guidance and baseline for Linux systems. SSG contents are based on high-level security compliance, such as NIST, CIS Benchmark, and STIGs security compliance.
This command also automatically installs the libopenscap8 package that provides a command-line tool (oscap) for managing SCAP specifications and guidance.
sudo apt install -y ssg-base ssg-debderived ssg-debian ssg-nondebian ssg-applications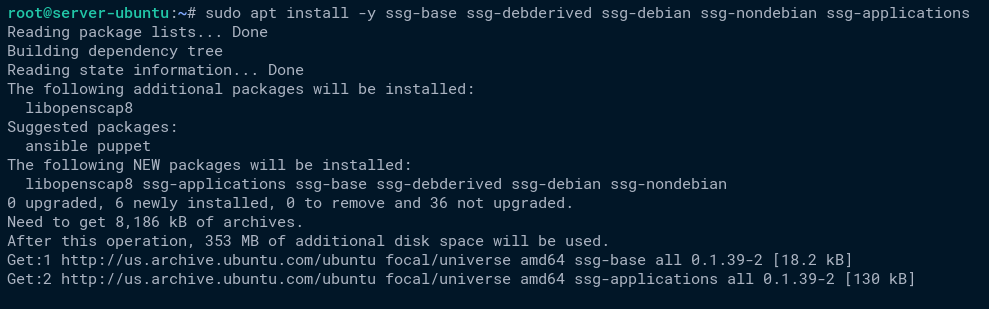
4. Lastly, run the below ls command to verify the list of SSG contents from the official Ubuntu repository (/usr/share/xml/scap/content).
ls /usr/share/xml/scap/ssg/contentAs you can see below, the default SSG packages from the Ubuntu repository do not provide a SCAP guide for Ubuntu 20.04 server. As a solution, you’ll download SSG’s latest version manually from GitHub in the following section.

Downloading the Latest SCAP Contents
Now that you have installed the OpenSCAP security tool, it’s time to download the latest version of SSG packages, which provides SSG contents for the latest Ubuntu 20.04 server.
You can check the official GitHub repository of the ComplianceAsCode Content, which provides complete information about the SSG build system.
1. Run the wget command below to download the latest version of the SSG package from the GitHub repository.
Check the latest SSG package version in the official GitHub repository.
As of this writing, the latest version of SSG packages is v0.1.60.
wget https://github.com/ComplianceAsCode/content/releases/download/v0.1.60/scap-security-guide-0.1.60.zip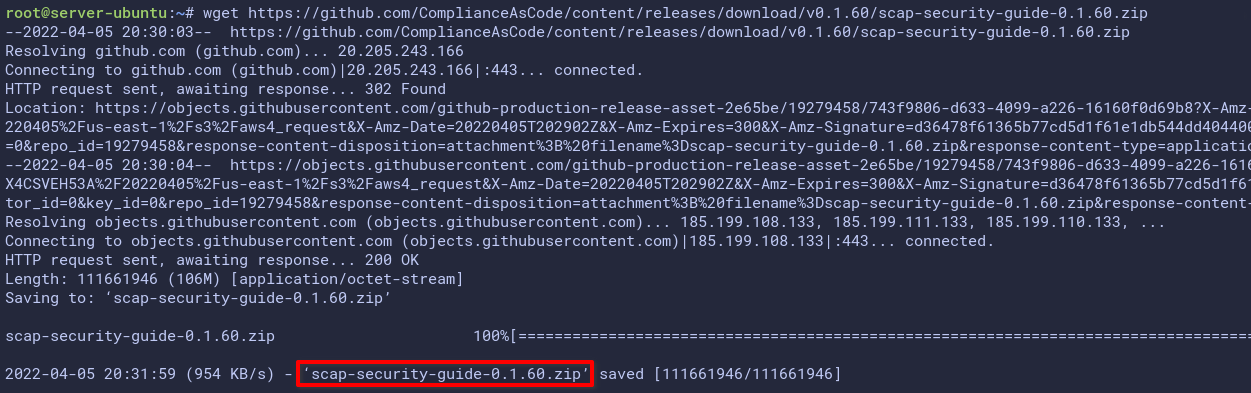
2. Next, run the commands below to extract (unzip) the scap-security-guide-0.1.60.zip file and verify the scap-security-guide-0.1.60 directory exists.
# Unzip the scap-security-guide-0.1.60.zip file
unzip -q scap-security-guide-0.1.60.zip
# List all contents in the working directory
ls
3. Run the below command (with no output) to move the SSG content directory to the /opt/ssg/ directory, and create the /opt/reports directory for storing OpenSCAP audit reports.
# Move SSG contents to /opt/ssg
mv scap-security-guide-0.1.60 /opt/ssg
# Make a directory called /opt/reports
mkdir -p /opt/reports/
4. Lastly, run the ls command below to check available SSG contents on the /opt/ssg/ directory.
ls /opt/ssg/Below, you’ll see a list of SSG contents, including SCAP DataStream for the Ubuntu 20.04 server.
Each SCAP document below with the .xml format contains SCAP DataStream modules, such as XCCDF, OVAL, CPE, and CPE OVAL.

Check out the NIST SCAP documentation to know more about SCAP specifications.
Performing Server Audits and Generating Reports
After successfully installing the OpenSCAP tool and downloading the latest version of SSG contents, it’s now time to start auditing your system. You’ll perform a server audit using OpenSCAP and SSG by running the oscap command.
But before jumping to server auditing, you’ll first check available profiles on a SCAP document. This tutorial uses Ubuntu 20.04 server, so you’ll be using the latest version of the SCAP document (ssg-ubuntu2004-ds.xml) as an example.
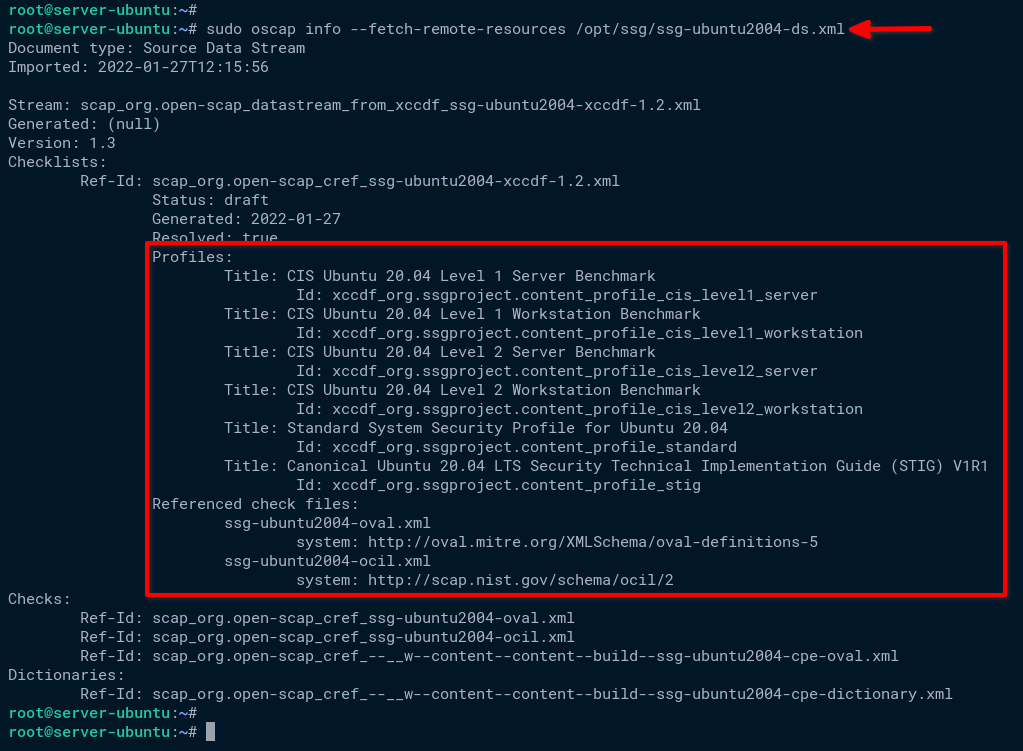
1. Run the oscap command below with the info module to check available profiles on the ssg-ubuntu2004-ds.xml SCAP document.
The –fetch-remote-resources option allows the oscap command to download remote components referenced from DataStream.
sudo oscap info --fetch-remote-resources /opt/ssg/ssg-ubuntu2004-ds.xmlNotice below that there are multiple profiles for guidance and security compliance you can use to audit your system. The profiles include CIS Benchmark, STIGs security compliance, and standard security profile.
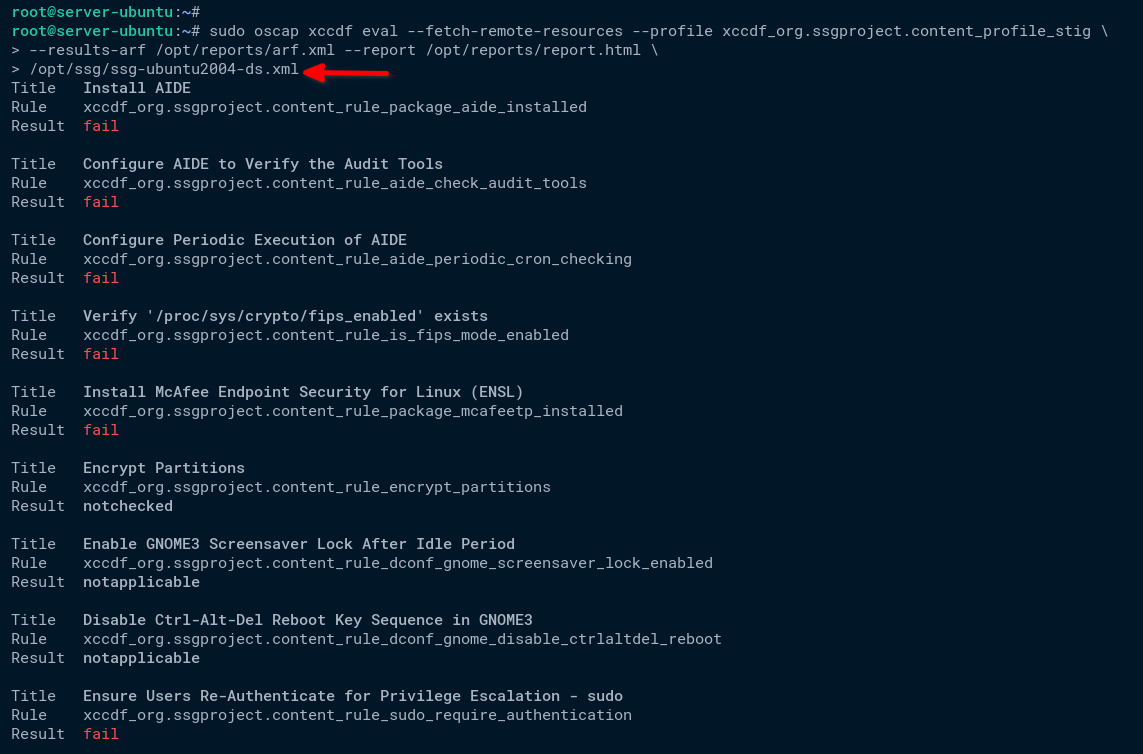
2. Next, run the below oscap command with the xccdf module to audit (eval) your server using OpenSCAP and SSG DataStream (ssg-ubuntu2004-ds.xml).
This command performs the following:
- Audits your server with the
xccdf_org.ssgproject.content_profile_stigprofile (STIGs security compliance).
- Generates an HTML page report (
/opt/reports/report.html).
- Generates the Asset Reporting Format (ARF) file (
/opt/reports/arf.xml).
sudo oscap xccdf eval --fetch-remote-resources --profile xccdf_org.ssgproject.content_profile_stig \
--results-arf /opt/reports/arf.xml --report /opt/reports/report.html \
/opt/ssg/ssg-ubuntu2004-ds.xml
You’ll see a lot of output and tests performed by the oscap command. There are different results in audit reports: pass, fail, notchecked, and notapplicable.
3. Once the audit completes, run the below ls command to check the directory /opt/reports and make sure audit report files are available.
ls /opt/reportsAs shown below, you’ll see two report files, arf.xml, and reports.html.

4. Now, run the below cp command to copy the report.html file to the Apache document root directory (/var/www/html) to show the report from the web browser.
This command doesn’t have an output, but you’ll see the contents of the report file in your web browser in the following step.
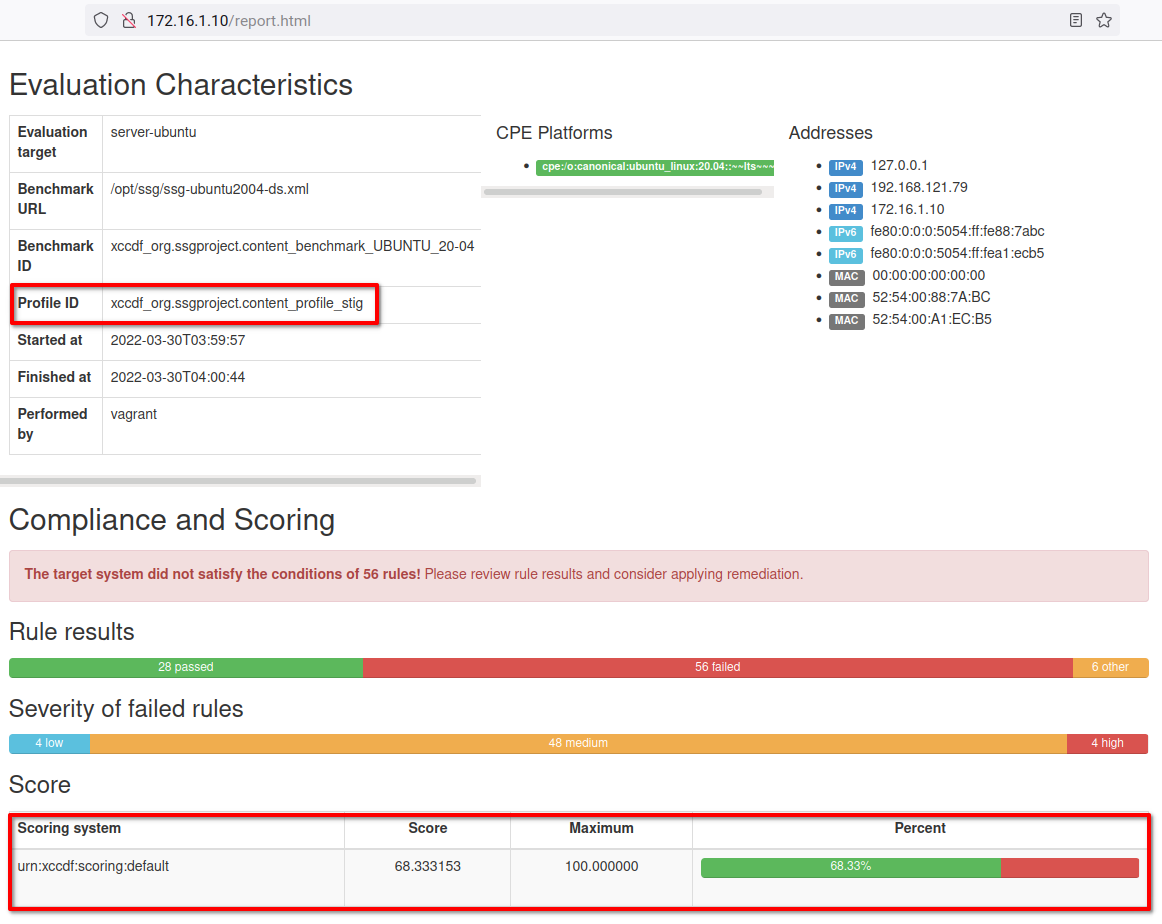
cp /opt/reports/report.html /var/www/html5. Lastly, open your favorite browser and navigate the server IP address followed by the URL path /report.html (i.e., http://172.16.1.10/report.html).
If all goes well, you’ll see the detailed report of your server audit performed with OpenSCAP, as shown below. In this tutorial, Ubuntu 20.04 scored 68% for STIGs security compliance.
Generating SSG Guides and Checklist
You’ve now generated the audit report for your server with a score of 67%, but can your server get a higher score? Yes! You’ll generate an SSG guide for hardening your server with STIGs compliance.
The oscap command can generate detailed instructions on how to set up your system according to the security compliance profile you are using.
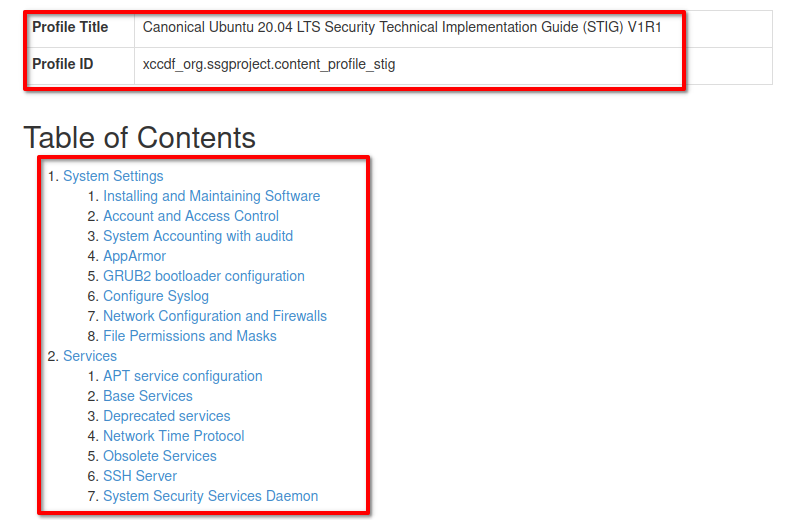
1. Run the below command to generate an SSG guide and security checklist for STIGs security compliance. The output will be available as the /opt/reports/guide-stig-checklist.html file.
sudo oscap xccdf generate guide --profile xccdf_org.ssgproject.content_profile_stig \
/opt/ssg/ssg-ubuntu2004-ds.xml > /opt/reports/guide-stig-checklist.html
2. Next, run each command below to verify the generated guide file (/opt/reports/guide-stig-checklist.html) and copy the file to the /var/www/html directory.
# Checking reports
ls /opt/reports

# Copy guide-stig-checklist.html to /var/www/html
/opt/reports/guide-stig-checklist.html /var/www/html
3. Lastly, switch to your web browser and input the URL path of the /guide-stig-checklist.html guide file (i.e., http://172.16.1.10/guide-stig-checklist.html).
You’ll see the single-page guide for securing your server, as shown below, which includes system settings and services configurations.
Remediating Server Automatically with OpenSCAP and Ansible
You’ve now generated the SSG guide to set up your server based on the STIGs security compliance. Now, you’ll generate an Ansible playbook to remediate your server according to security compliance automatically.
The OpenSCAP is not only an auditing tool but also provides automatic remediation with automation scripts such as Bash and Ansible.
You’ll need the ARF (Asset Reporting Format) result to generate a Bash script or Ansible Playbook for automatic remediation.
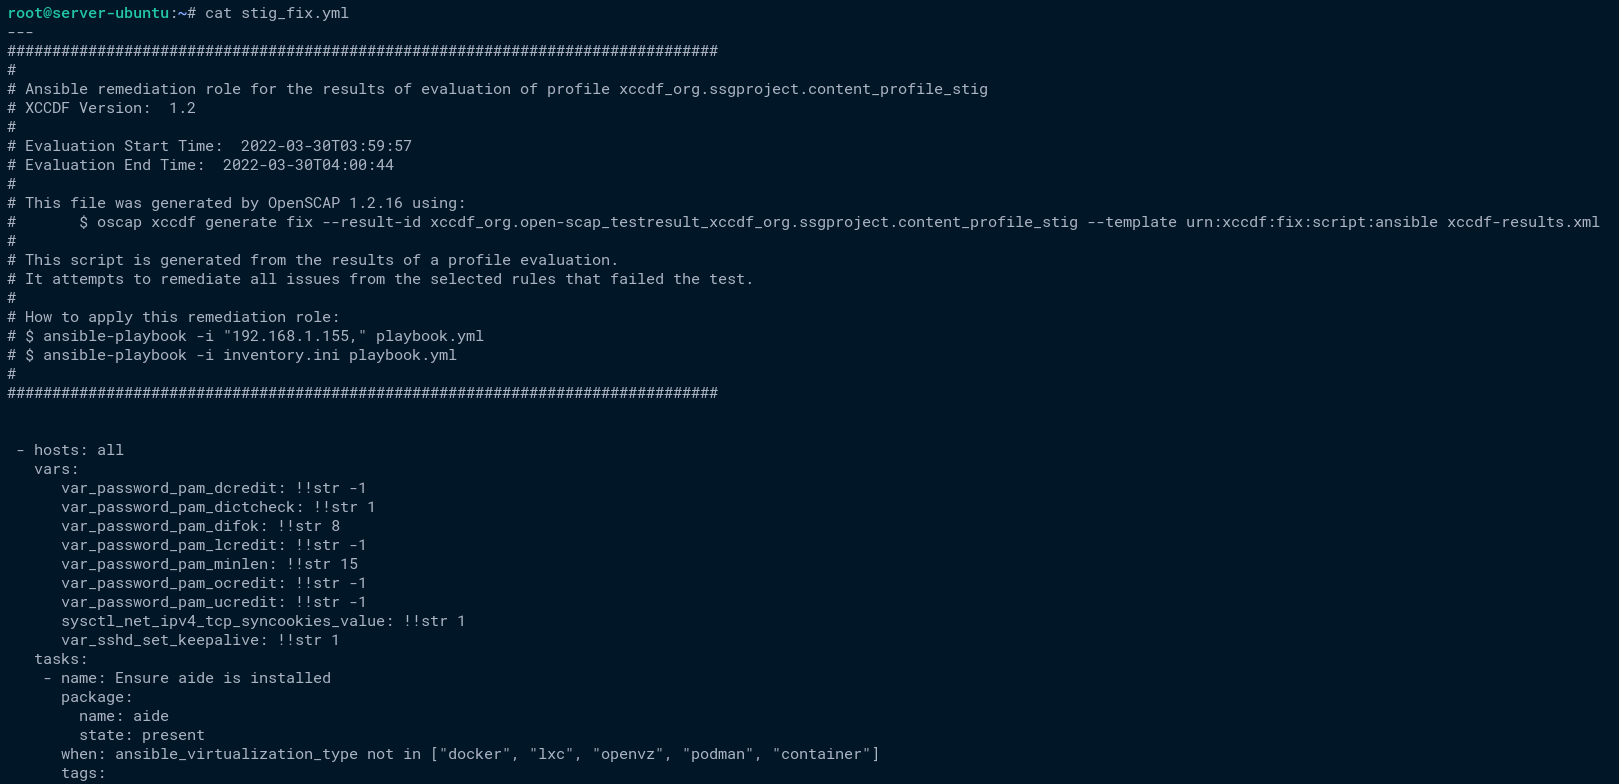
1. Run the below command to generate the Ansible playbook stig_fix.yml based on the audit ARF result file (/opt/report/arf.xml), which uses the STIGs security compliance.
This command doesn’t have an output, but you’ll verify the content of the generated playbook in the following step.
sudo oscap xccdf generate fix --fetch-remote-resources --fix-type ansible --result-id "" /opt/reports/arf.xml > stig_fix.yml2. Next, run the cat command below to show and verify the content of the Ansible playbook stig_fix.yml.
cat stig_fix.ymlAt the top of the file, you will see information about the generated Ansible Playbook.s
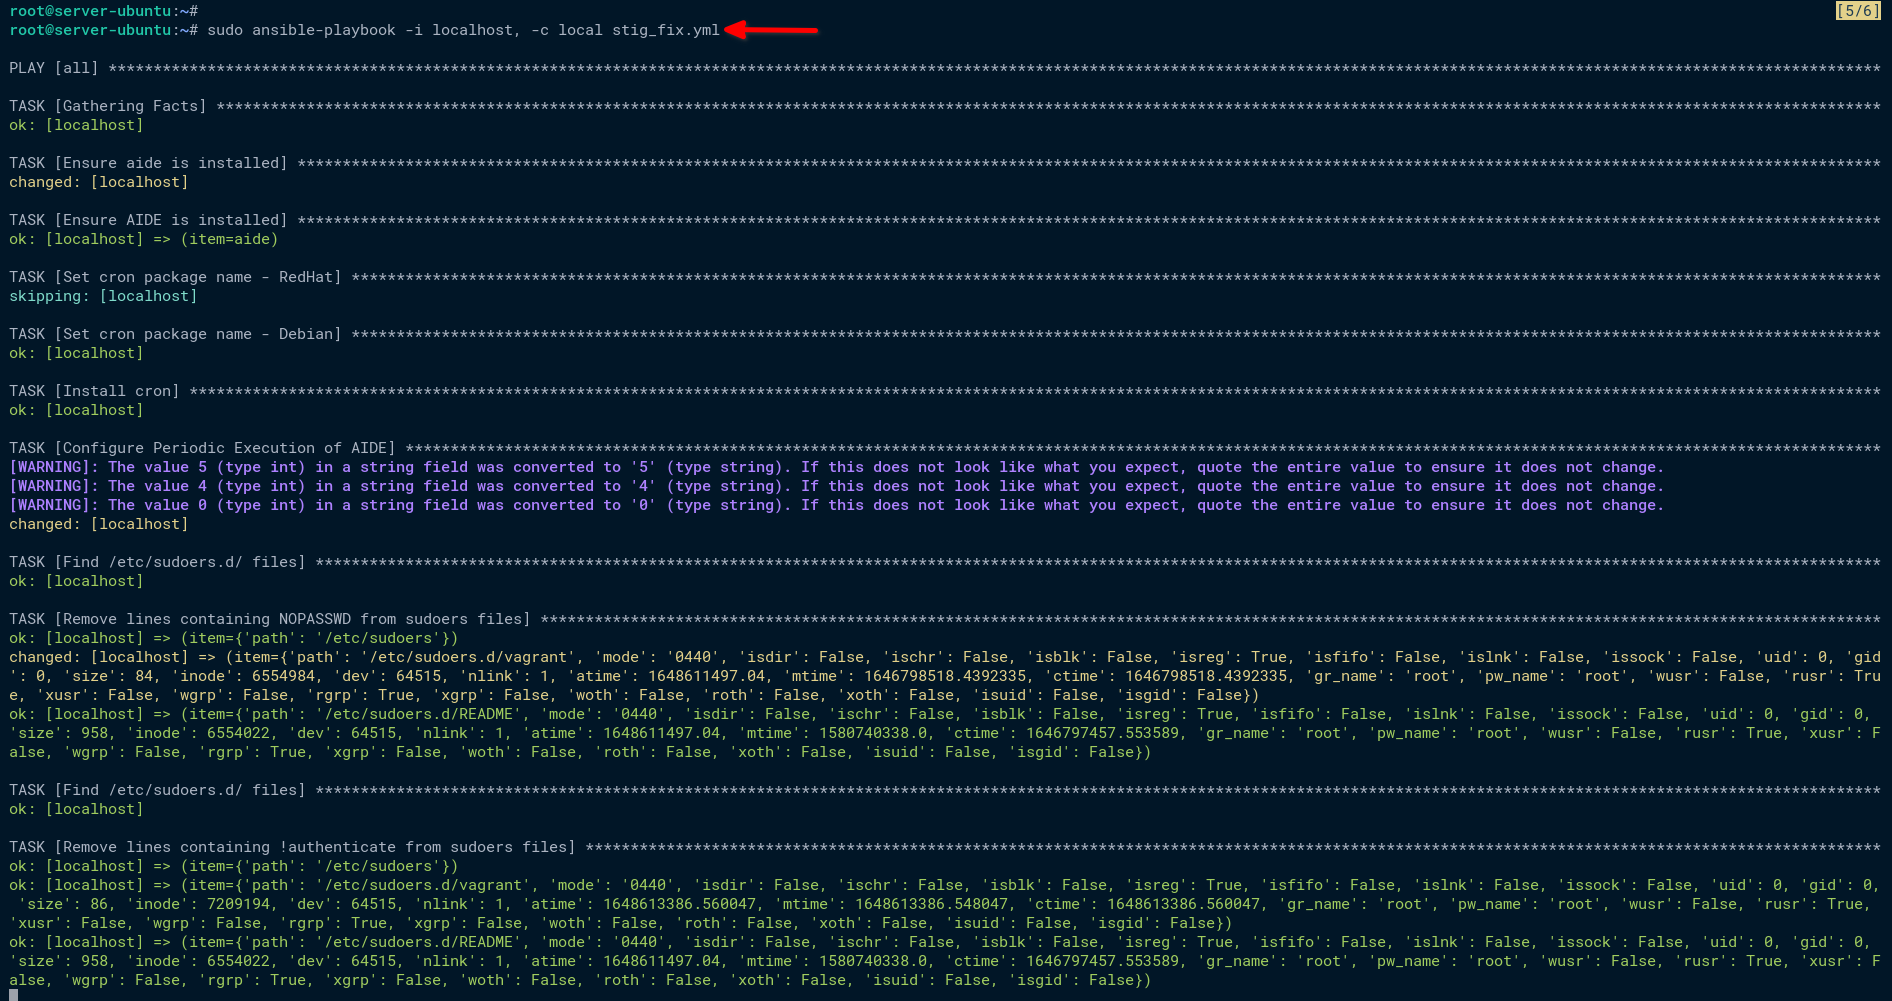
3. Once verifying the playbook, run the ansible-playbook command below to apply the generated Ansible playbook (stig_fix.yml) to the server.
sudo ansible-playbook -i localhost, -c local stig_fix.ymlYou can also run the Ansible playbook from outside the server through the SSH connections. The generated Ansible playbook will not solve all of your server tests but still makes your server more secure.
In the end, you will still need to read and check the audit report, the generated guidance, and the checklist.
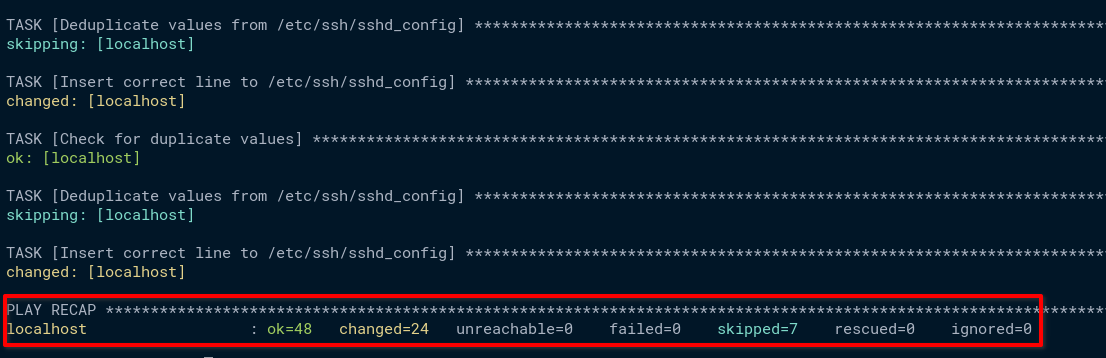
As shown below, Ansible installs some packages and applies new changes to your system as the STIGs security compliance.
Below is the summary of changes done by the Ansible playbook (stig_fix.yml). You may have different outputs, depending on your system.
4. Lastly, reboot your server to apply all new changes on your server.
Verifying Changes to the Server’s Security Compliance
After the server remediation with OpenSCAP and Ansible, you’ll perform another audit on your server to verify the changes.
1. Log in again to your server using the root user.
2. Next, run the oscap command below to generate a new audit report and verify the score.
This command uses the same security compliance to audit the server. The only difference is the report file (/opt/reports/report2.html) and the ARF XML file (/opt/reports/arf2.xml).
sudo oscap xccdf eval --fetch-remote-resources --profile xccdf_org.ssgproject.content_profile_stig \
--results-arf /opt/reports/arf2.xml --report /opt/reports/report2.html \
/opt/ssg/ssg-ubuntu2004-ds.xml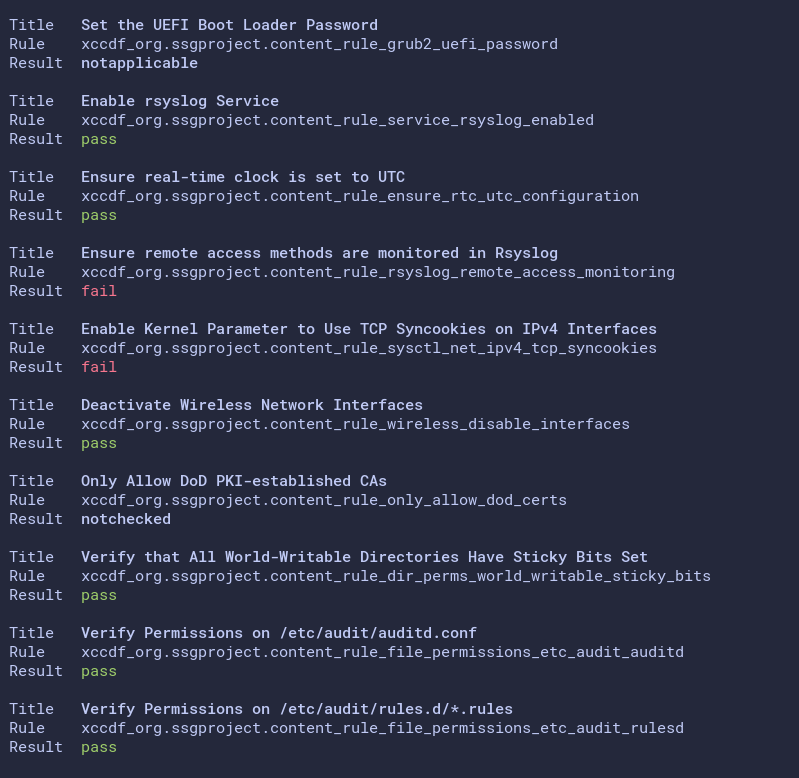
3. After the auditing, run each command below to verify and copy the new audit report (/opt/reports/report2.html) to the /var/www/html directory.
# Verify reports
ls /opt/reports

# Copy report2.html to /var/www/html
cp /opt/reports/report2.html /var/www/html
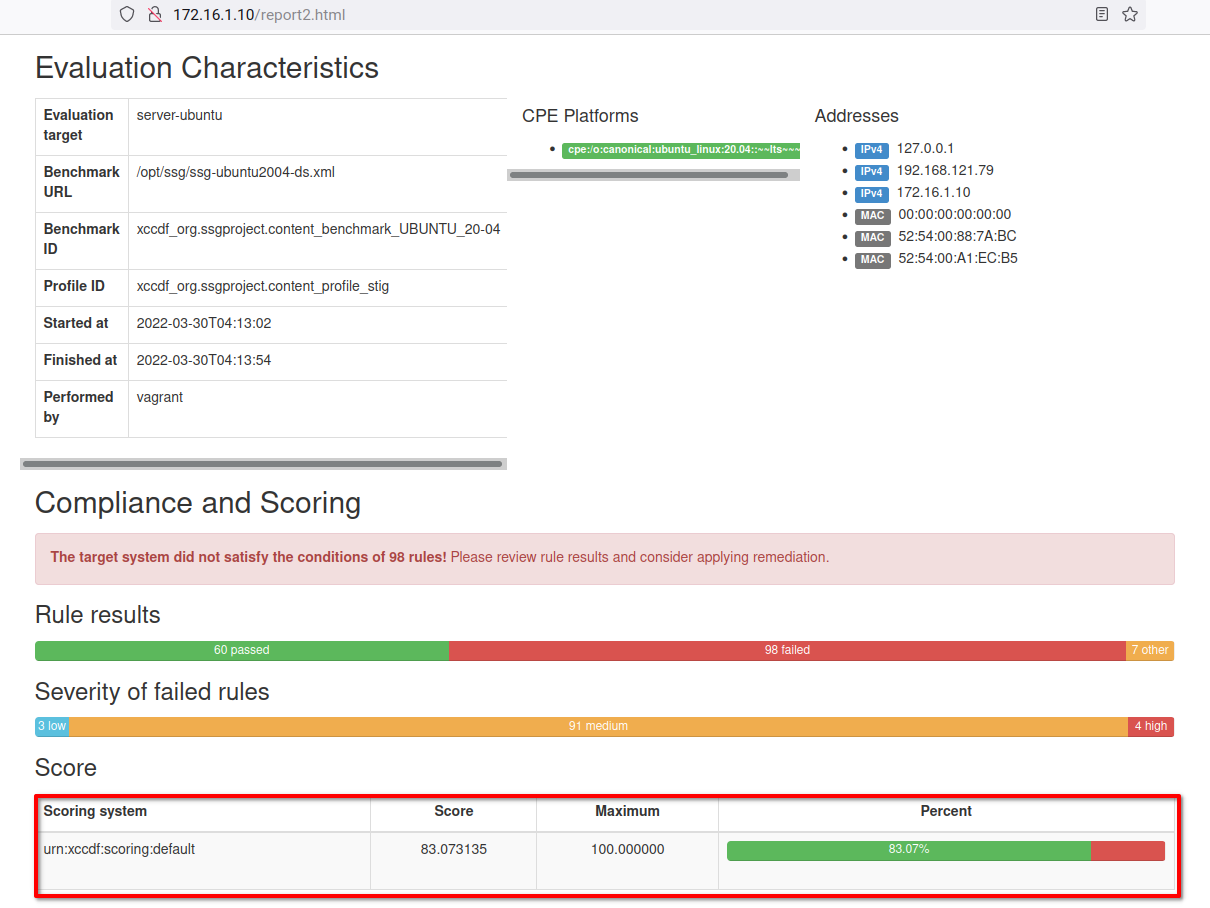
4. Finally, switch back to your web browser and navigate to your server IP address, followed by the new audit report path /report2.html (i.e., http://172.16.1.10/report2.html).
Below, the audit score increased to 83% of the STIGs security compliance. But there is more failed report because the system also has changed. You can now regenerate the guidance and security checklist and try to solve errors manually.
Conclusion
In this tutorial, you’ve learned how to install OpenSCAP and audit your server security using SSG DataStream. You’ve also remediated the system according to security compliance automatically using Ansible playbook and OpenSCAP.
With this newfound knowledge, why not try other SSG policies for your operating system? Or try to implement OpenSCAP to secure the container image?


