


Compressing or expanding single or multiple files is a valuable skill that all PowerShell users can immediately use. Perhaps you want to size down your files a bit or just keeping files in one place other than a folder. If so, let PowerShell unzip and zip your files by running commands.
Not a reader? Watch this related video tutorial!In this tutorial, you are going to learn many ways to zip and unzip files in PowerShell.
Ready? Let’s start rolling!
Prerequisites
The examples in this tutorial will use PowerShell 7.1.x. The commands will also work on Windows PowerShell 5.1.
Compressing Files with the Compress-Archive Command
You have been using applications to compress and archive files for years by clicking on a GUI. But did you know you can do the same task in PowerShell? Using the Compress-Archive command, you can zip up files with ease.
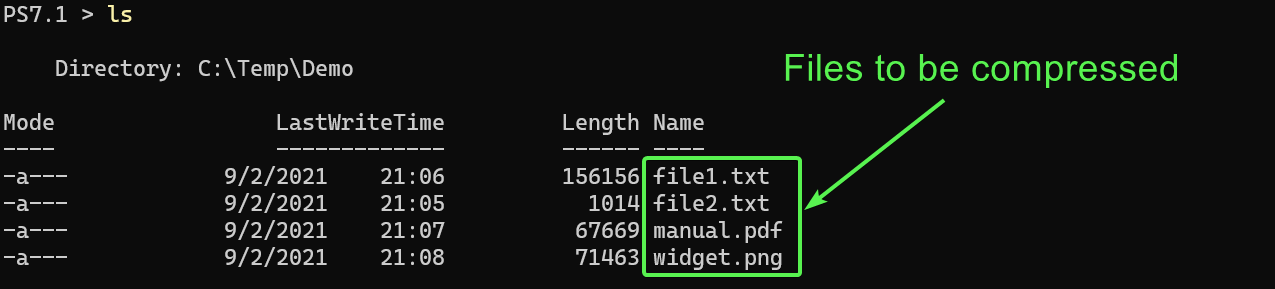
Imagine for a moment that you have a few files to send to a customer. The files are in a folder on your computer that might resemble the screenshot below. This tutorial references these files for running commands, but you can use any files available at your disposal.
Compressing Files One at a Time
Before you can compress a single file, you need two things; a source and a destination.
Open PowerShell as administrator, then run the command below to compress a single file (widget.png) to a ZIP file (archive.zip). The -Path parameter tells the Compress-Archive command the location of the file to compress. While the -DestinationPath tells where to archive the file.
Compress-Archive -Path widget.png -DestinationPath archive.zipCompress multiple files at once by separating them with a comma e.g.
Compress-Archive -Path widget.png,file1.txt,manual.pdf -DestinationPath archive.zip
Compressing All Files From a Folder
If you have organized files in a folder that you want to compress in one go, use wildcard characters like an asterisk (*) to signify all the files is ideal.
Run the command below to compress and archive (Compress-Archive) all files (*) from the C:\Demo folder to the archive.zip file.
Compress-Archive -Path 'C:\Demo\*' -DestinationPath archive.zipNow perhaps you only want to compress files that are of the same type. If so, combine the wildcard symbol with the extension of the files to compress.
Run the command below to compress and archive all log files (*.log) to the archive.zip file.
Compress-Archive -Path '*.log' -DestinationPath archive.zipDefining Compression Levels
With the previous examples, you’ve been compressing files with the default compression level (Optimal), but let’s cover the different compression levels. Compression levels define how much compression applies when you create an archive file.
Below are three compression level parameters you can choose from:
- Optimal (Default) – Compression time depends on the number and size of files.
Fastest– The fastest compression method, resulting in larger file sizes.NoCompression– Leaves file sizes intact.
Run any of the commands below to see how each compression level works. Each command compresses log (*.log) files to the archive.zip file.
# Optimal (Default compression level)
Compress-Archive -Path '*.log' -DestinationPath archive.zip
# Fastest compression level
Compress-Archive -Path '*.log' -DestinationPath archive.zip -CompressionLevel Fastest
# No compression
Compress-Archive -Path '*.log' -DestinationPath archive.zip -CompressionLevel NoCompression
Adding Files to a Compressed File
Now, if you forgot to add a file to an archive, don’t panic! There is an -Update parameter you could use to add files to an existing archive.
Run the command below to add (-Update) your preferred file (manual.pdf) to the existing archive (archive.zip).
Compress-Archive -Update -Path 'manual.pdf' -DestinationPath archive.zip
The
-Updateparameter tells theCompress-Archivecommand to overwrite an existing file with a new one automatically. But be careful when you add files to the archive. You don’t want to overwrite your file with an old one.
Expanding Zip Files with the Expand-Archive Command
Similar to how you compress files, expanding an archive is not all that different. You’ll need to run the Expand-Archive command while specifying the source and destination path. The Expand-Archive command lets you extract archived files.
Run the Expand-Archive command below to extract the contents of the archive.zip file. Since no destination path is specified, the command creates a destination folder in the working directory. The destination folder is named the same as the archive file (archive).
Expand-Archive -Path archive.zip -DestinationPath C:\Demo\ArchiveAdd the
-Forceparameter to suppress all confirmation prompts.
If you use
Expand-Archivewith archives that contain files that were not compressed in a UTF-8 format, the extracted filenames could be different than the source.
Listing Compressed Files via .NET
There’s no way with the previous two cmdlets you’ve learned about that will allow you to peek inside an archive without expanding it first. Perhaps you’ve forgotten which files you already compressed. If so, extracting everything just to verify which files you already archived would be a waste of time.
The better way to peek into an archive is by using the .NET ZipFile class. As a part of the System.IO.Compression namespace, the .NET ZipFile class contains a method called OpenRead(String) that enables you to peek inside an existing archive.
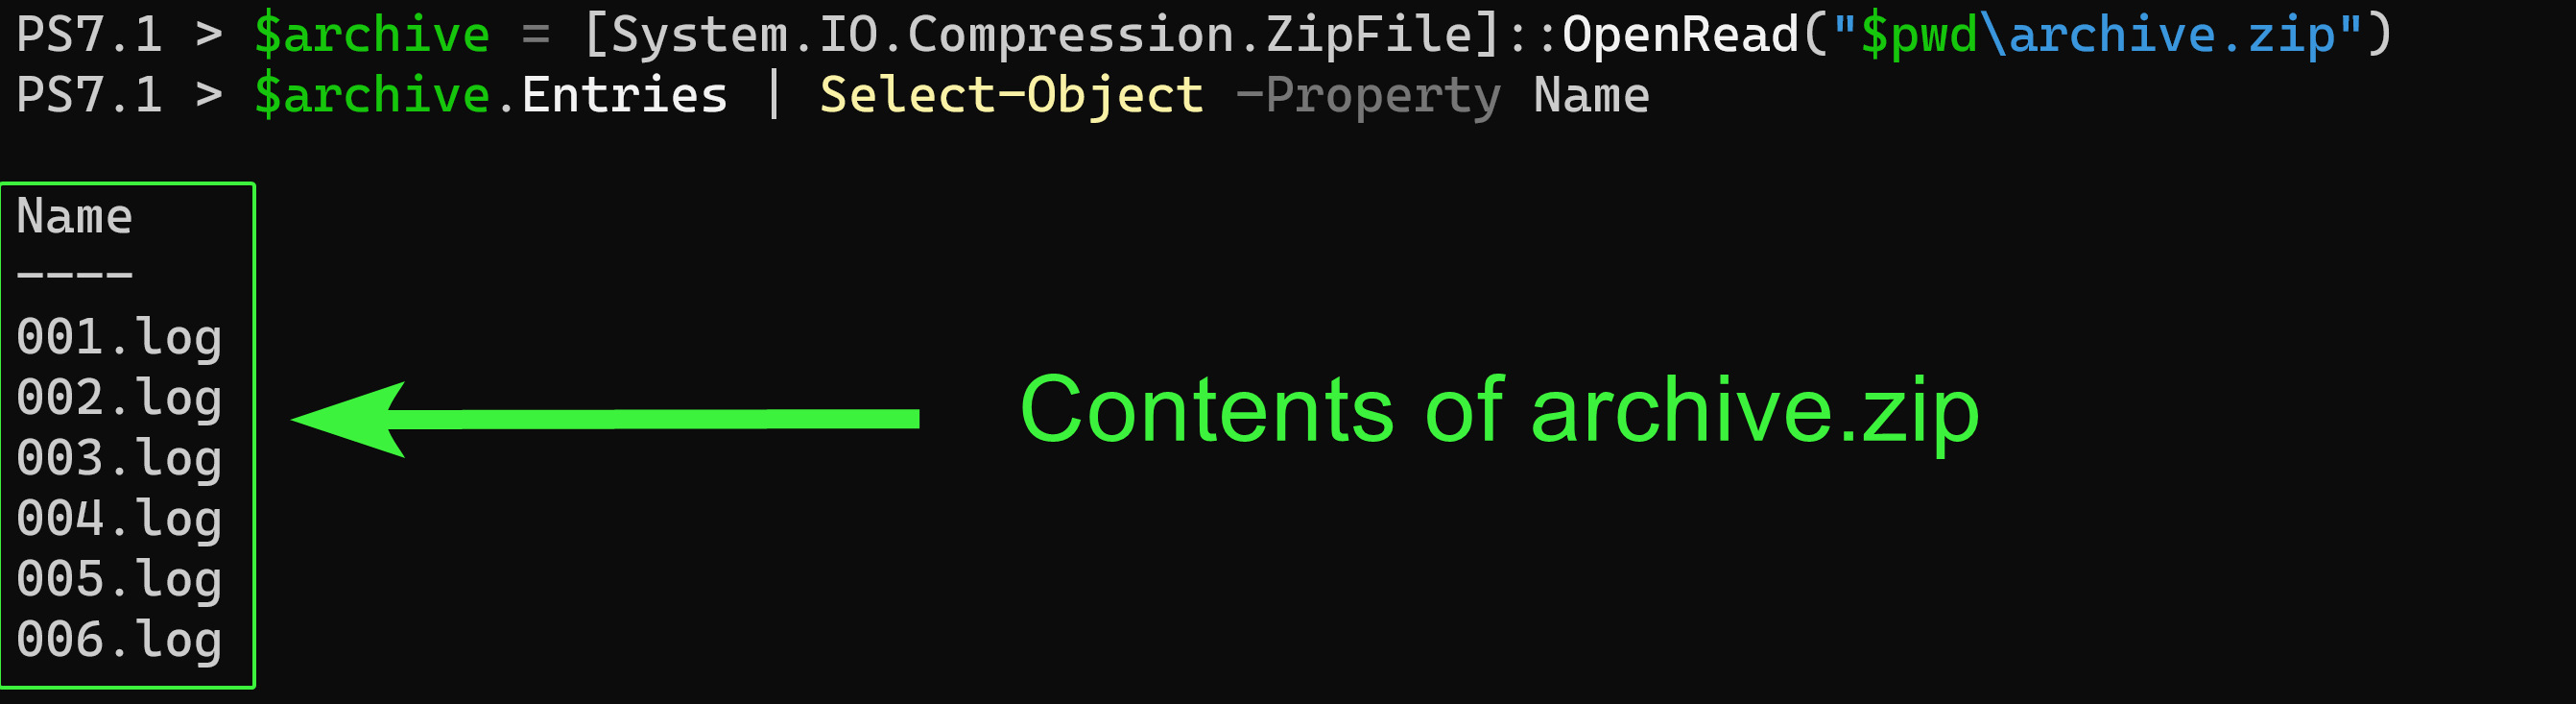
Run the command below to read each file in the archive.zip file (OpenRead("$pwd\archive.zip")) and assign the results to the $archive variable.
# (pwd) - working/current directory
$archive = [System.IO.Compression.ZipFile]::OpenRead("$pwd\archive.zip")
Now run the command below to list each file assigned in the $archive variable by name (Select-Object -Property Name)
$archive.Entries | Select-Object -Property NameBelow, you can see the command listed each compressed file in the archive.zip file.
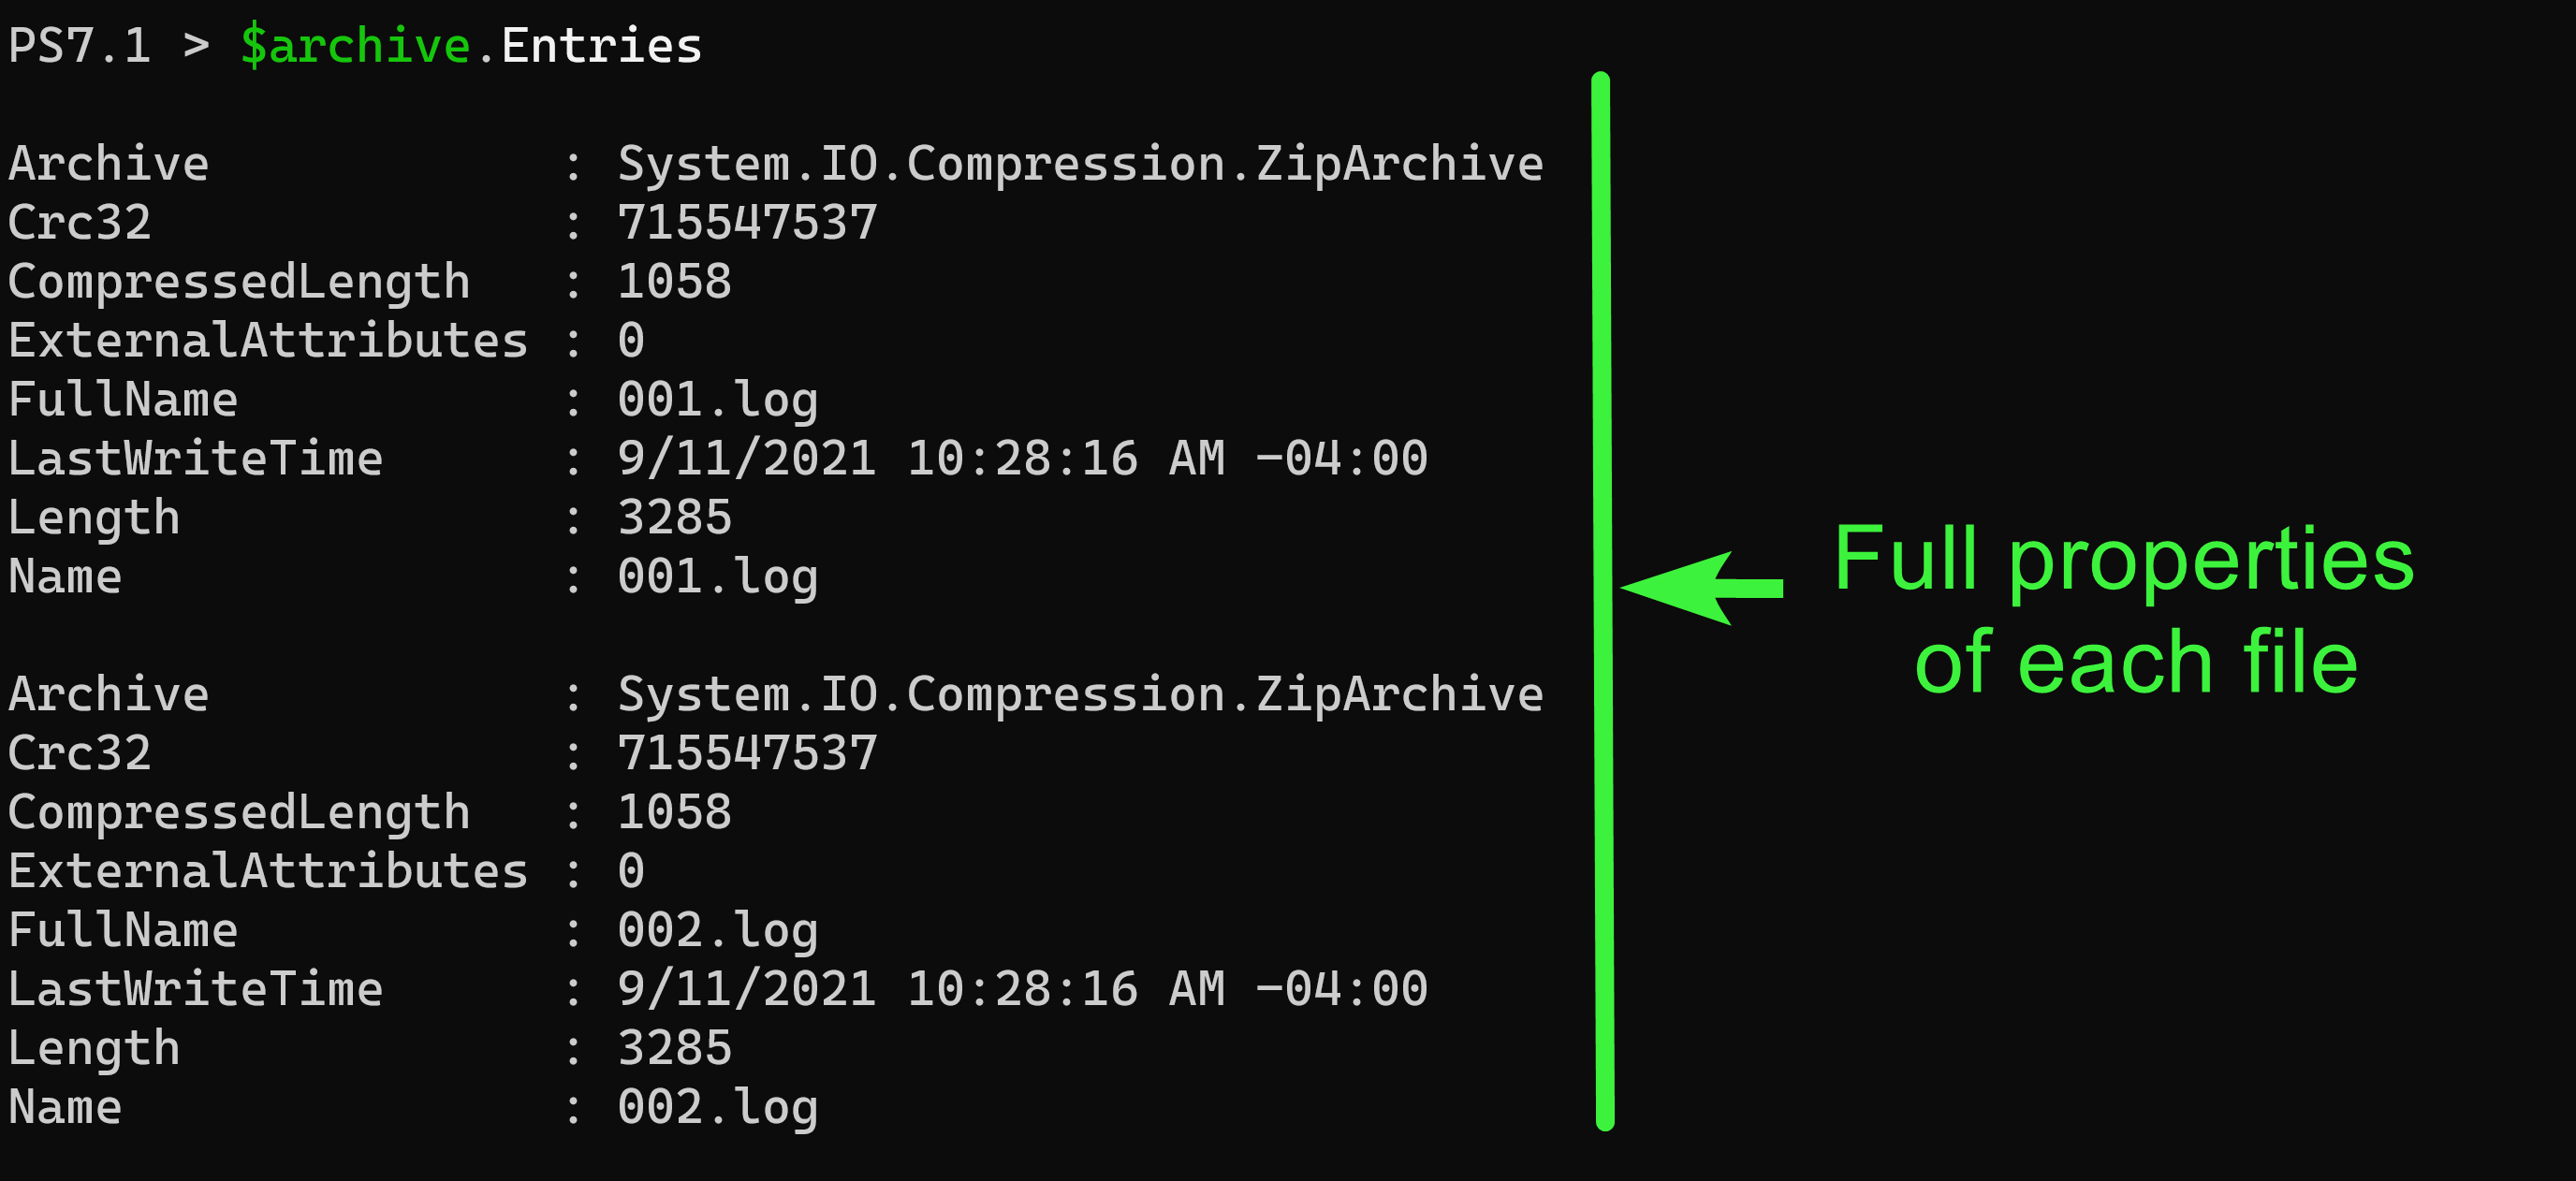
If you also prefer to view each file’s properties instead, references the Entries property instead.
$archive.EntriesYou’ll now see the properties of every file in the archive, similar to the image shown below.
Powershell Unzip and Zip Files with 7Zip4PowerShell Module
A tutorial about compressing and expanding zip archives wouldn’t be complete without mentioning another compression module, 7Zip4PowerShell. 7Zip4PowerShell contains some enhanced capabilities that may make it a feature-rich choice.
For example, you previously learned about .NET classes and methods. With the 7Zip4PowerShell module, the command to list archived files is less complicated.
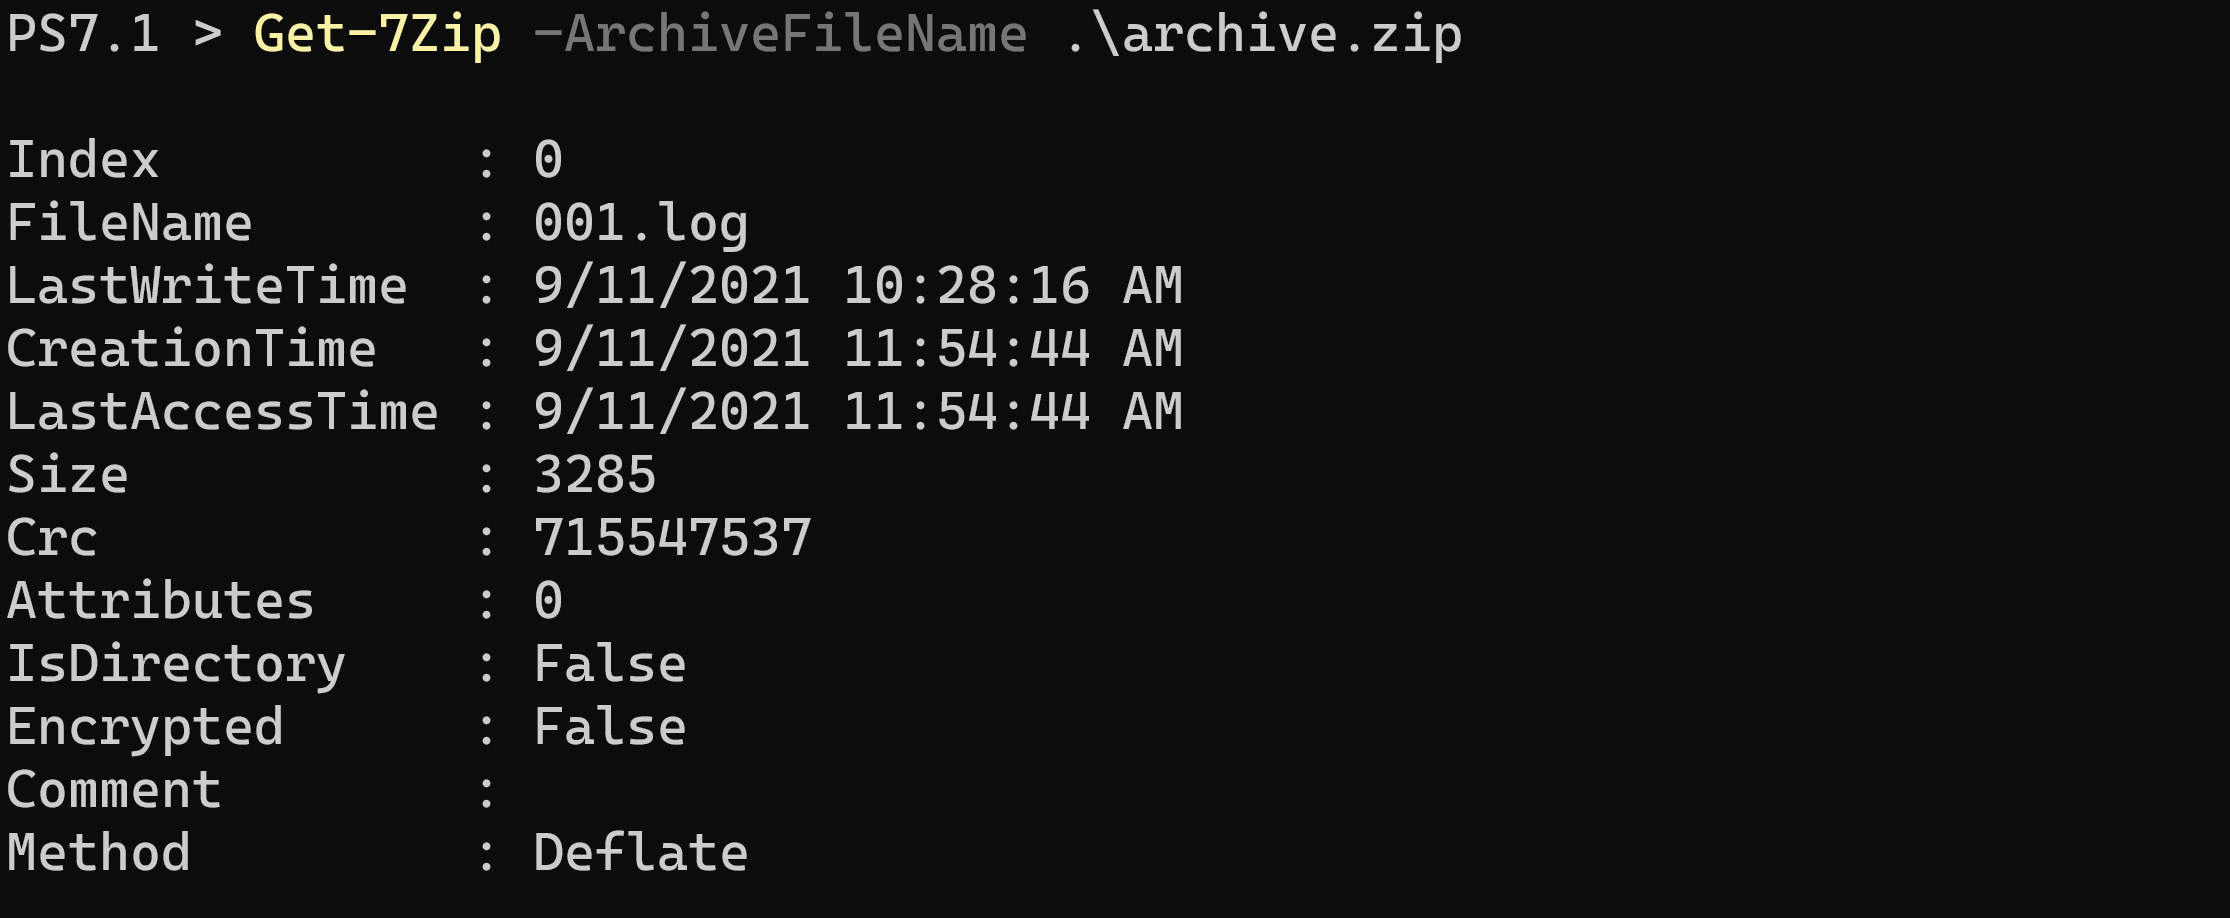
Run the Get-7Zip command below to list all the files inside the archive.zip file (-ArchiveFileName .\archive.zip).
With 7Zip4PowerShell, the
Compress-7Zipcmdlet gives you more options for different types of archives, such as Tar, GZip, BZip2, SevenZip, XZ, and Zip.
You can also view information about the archive itself by running the
Get-7ZipInformationcommand, like this:Get-7ZipInformation -ArchiveFileName archive.zip. The command lists all properties of the archive.zip file.
Conclusion
By now, you’ve learned how PowerShell unzip and zip files with built-in commands and with the 7Zip4PowerShell module. This newfound knowledge comes in handy whether you’re sizing down your files or when you’re just sending many files over as one. But is that all PowerShell has to offer?
Instead of running commands as a rudimentary backup solution, why not make a script to archive files and automatically email or transfer them to long-term storage?


