

If you are seeking an effortless way to remotely control your Raspberry Pi’s GUI, Virtual Network Computing (VNC) is the ideal solution.
With Raspberry Pi VNC, you can remotely access your device’s GUI, no matter where you are. And in this tutorial, you will walk through the steps of setting up and using VNC on your Raspberry Pi.
Read on and take complete control of your Raspberry Pi from anywhere!
Prerequisites
This tutorial houses hands-on demonstrations. To follow along, be sure you have the following:
- A Raspberry Pi – This tutorial uses a Raspberry Pi model 4B with Raspbian Bullseye installed.
- A host machine with the VNC viewer client installed to access the Raspberry Pi remotely – This tutorial uses Windows 10.
- A stable internet connection.
Installing Raspberry Pi VNC
SSH is a valuable tool when accessing the command line interface of the Raspberry Pi remotely and securely without needing a GUI. But many tasks require a GUI, such as running applications or remotely controlling the desktop of your Raspberry Pi. In such cases, VNC comes in handy.
With VNC, you can remotely access the Raspberry Pi’s desktop environment and control it as if sitting in front of it. But before using VNC, you must install the VNC Server on your Raspberry Pi.
Open a terminal, and run the following apt update command to update the list of available packages. Doing so ensures you have the latest version of the VNC Server.
sudo apt update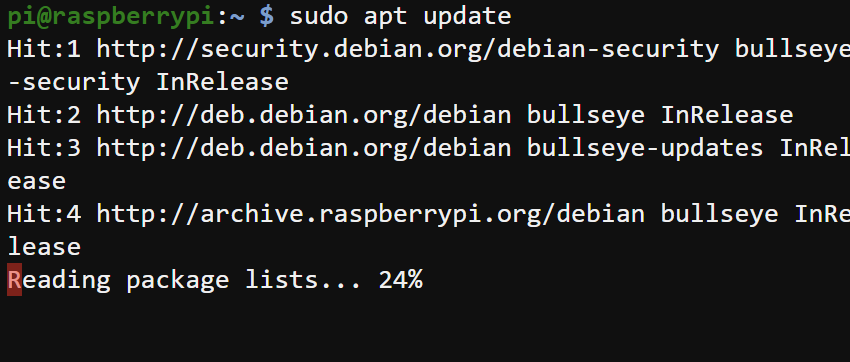
Now, run the following apt install command to install the VNC Server package, specifically two packages as follows:
| Package | Details |
|---|---|
realvnc-vnc-server | The package for the actual VNC Server software that runs on the Raspberry Pi |
realvnc-vnc-viewer | A separate program that allows you to connect to and control the Pi’s desktop environment from another device. |
sudo apt install realvnc-vnc-server realvnc-vnc-viewer
Enabling the VNC Server
Installing the VNC Server does not automatically run it. Post installation, you must enable the VNC server on your Raspberry Pi. Enabling the VNC Server starts the VNC service, which allows incoming connections on Raspberry Pi’s network port (5900).
To enable the VNC server, follow these steps:
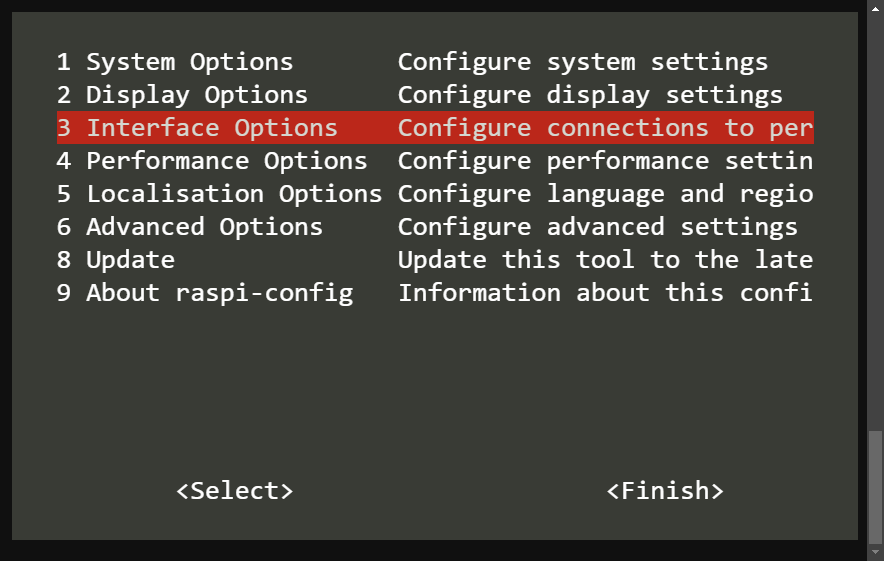
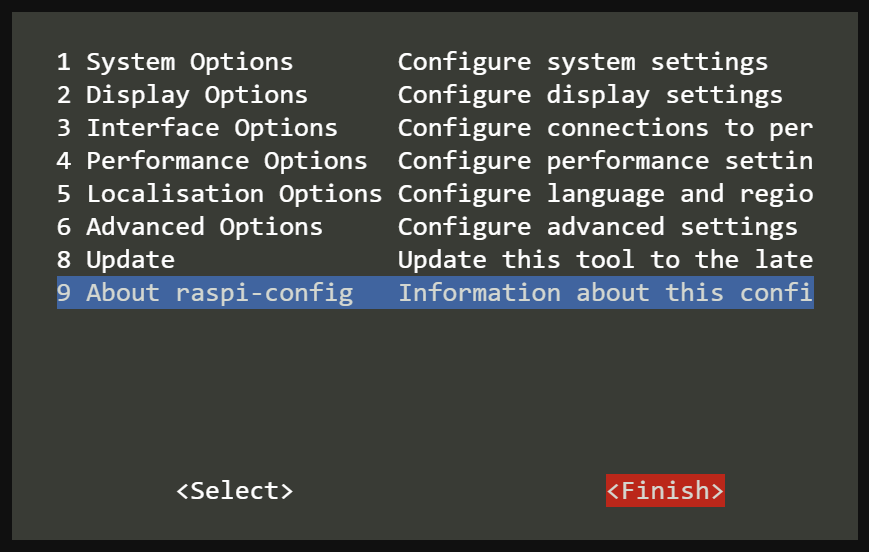
1. Run the below raspi-config command to open the Raspberry Pi configuration tool.
This tool allows you to configure various system settings, such as:
- Enabling/disabling interfaces.
- Setting up networking options.
- Changing the Raspberry Pi hostname, and much more.
sudo raspi-configNavigate to Interfacing Options and press Enter to access a list of interface options.
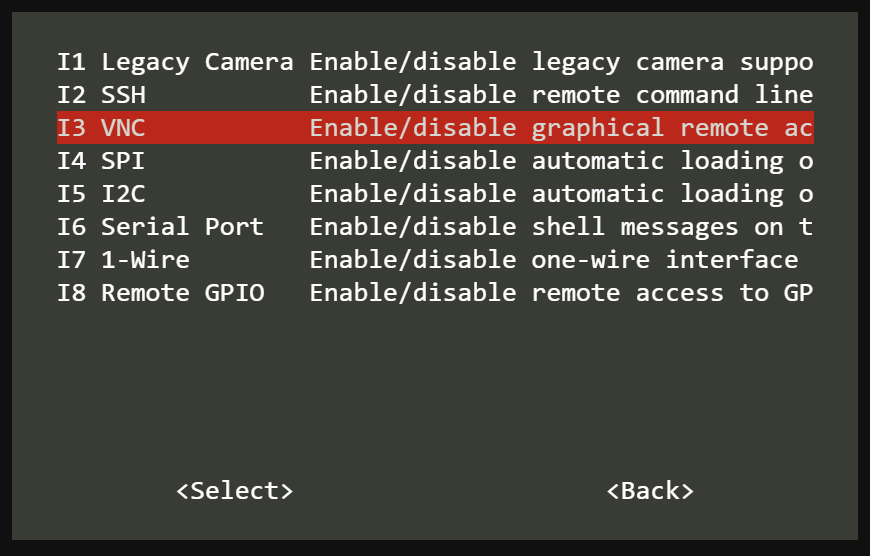
2. Next, select VNC from the list below and press Enter to enable your VNC Server.
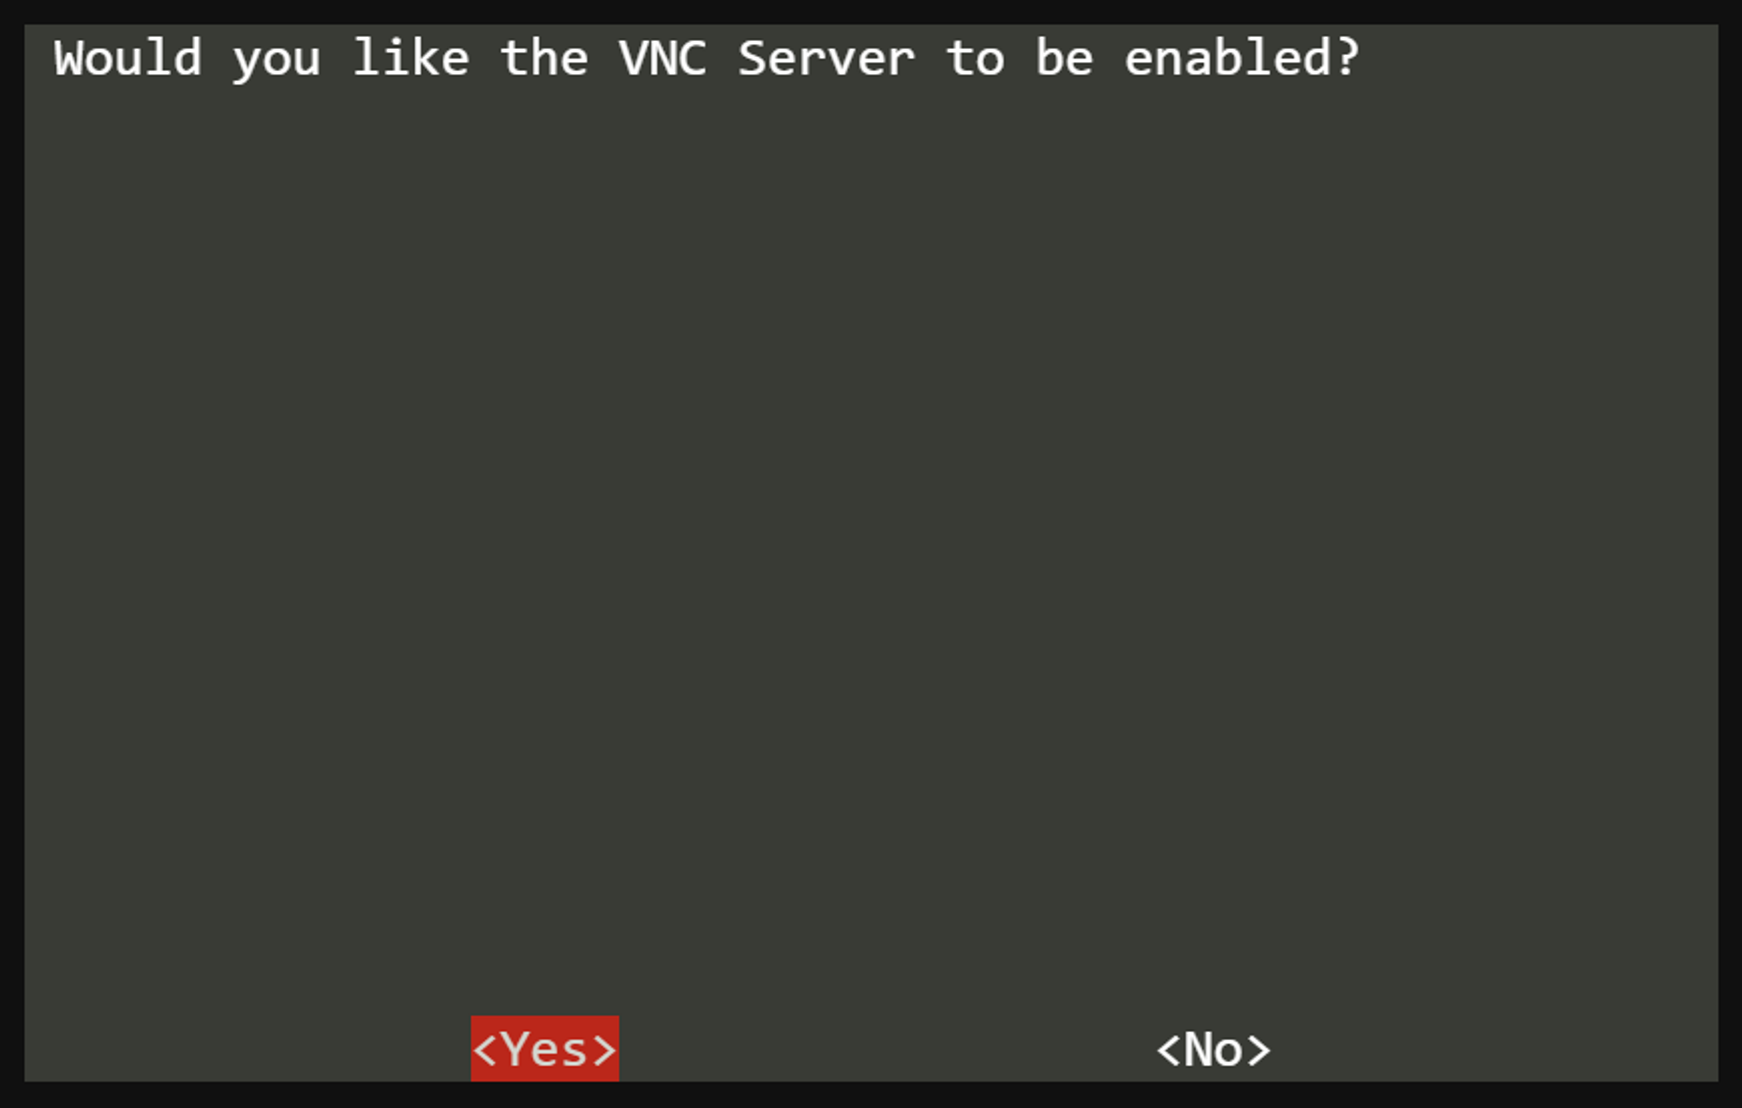
3. When prompted, select <Yes> and press Enter to confirm enabling your VNC Server.
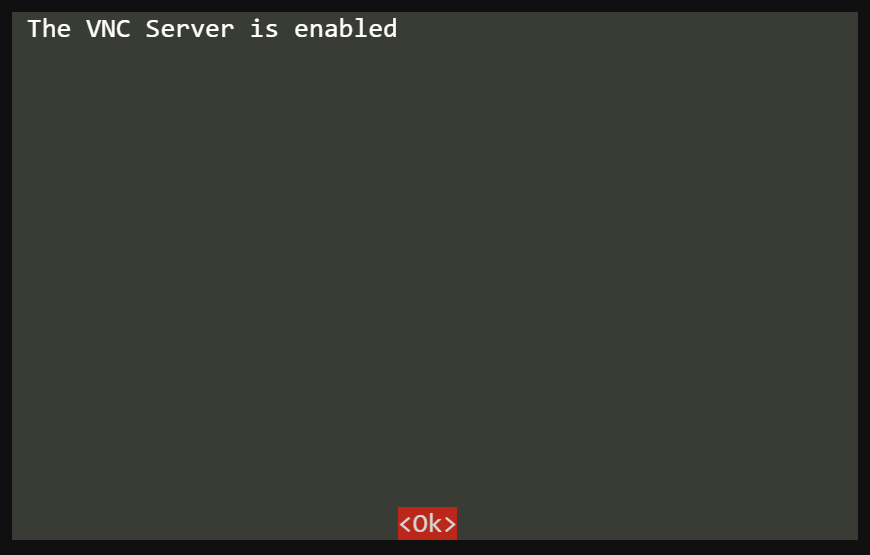
4. Once the VNC Server is enabled, press Enter to continue.
5. Now, press Tab to highlight the <Finish> button and Enter to exit the configuration tool.
6. Next, run the below command, which does not produce output, but restarts (reboot) your Raspberry Pi to apply the changes.
sudo reboot7. Once your Raspberry Pi boots up, run the below systemctl command to check the status of the VNC service.
sudo systemctl status vncserver-x11-serviced.serviceIf all goes well, you will see an output similar to the one below that shows the VNC server is active (running).

8. Lastly, run the hostname command below to get all IP addresses (-I) associated with your Raspberry Pi.
hostname -INote down your Raspberry Pi’s IP address, as shown below. You will need this IP address to connect to your Raspberry Pi later.

Connecting to the Raspberry Pi Remotely
With the VNC Server running, you can now remotely connect to your Raspberry Pi. How? You will use the VNC Viewer from your host machine.
To connect to your Raspberry Pi remotely:
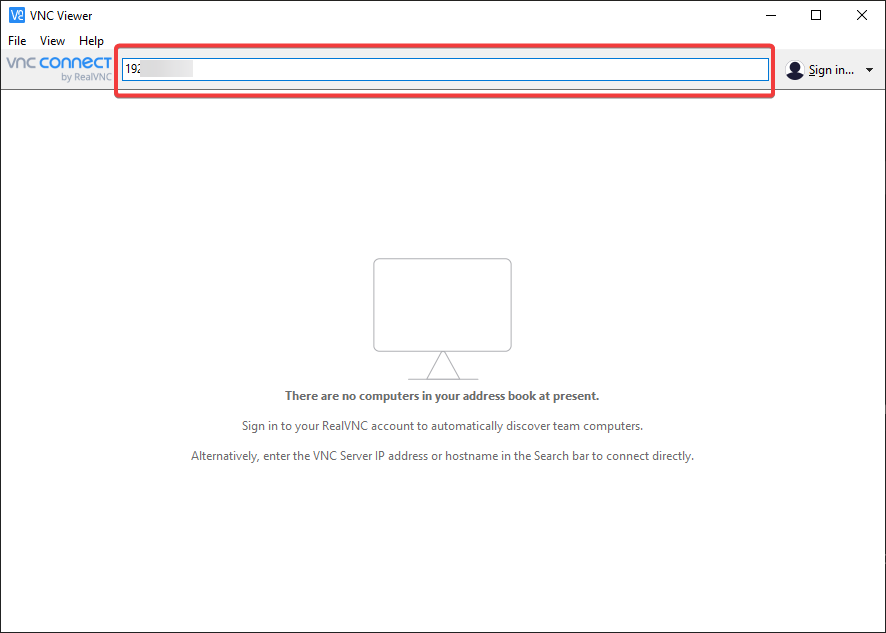
1. Open the VNC Viewer program on your host machine.
2. Enter your Raspberry Pi’s IP address, as shown below, and press Enter to establish a remote desktop connection to your Raspberry Pi.
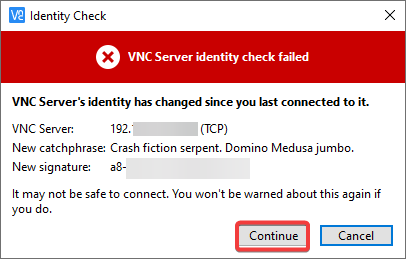
3. When prompted, click Continue to authorize the remote connection to your Raspberry Pi.
This warning message only appears when you connect to your Raspberry Pi remotely using VNC for the first time.
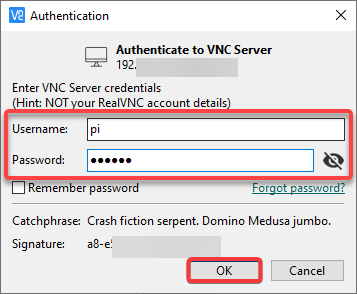
4. Finally, enter the root user and password of your Raspberry Pi and click OK to log in.
In most cases, the default username is pi, and the password is the one you set during the initial setup of your Raspberry Pi (not the one above).
You need to provide the username and password of the administrative account on your Raspberry Pi to gain access to perform administrative tasks on the Raspberry Pi.
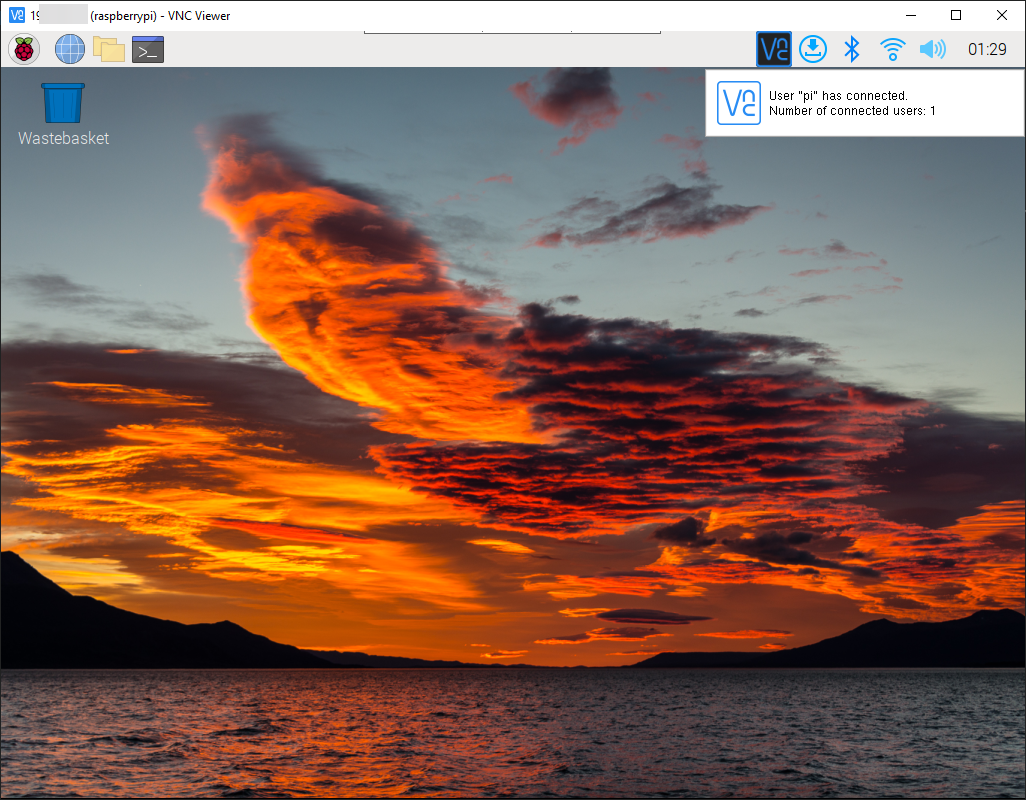
If everything is set up correctly, you will see the Raspberry Pi’s desktop environment in your VNC Viewer window, as shown below.
Congratulations! You now have complete control of your Raspberry Pi’s desktop environment remotely. Feel free to securely access your files, install packages, and perform tasks to your heart’s content.
Conclusion
Whether you are a developer, hobbyist, or educator, remote access via Raspberry Pi VNC can be a valuable tool for various applications. And in this tutorial, you learned how to set up VNC Server on your Raspberry Pi and establish a remote connection via the VNC Viewer.
With a fully functional VNC Server, securely accessing your Raspberry Pi remotely only takes a few clicks. Take advantage of Raspberry Pi’s powerful computing capabilities from anywhere.
Now, why not learn how to stream a PiCamera video stream as a background in your Raspberry Pi’s VNC Server? Or create a motion detector using the same VNC-enabled Raspberry Pi?


