

Are you looking for a more efficient way to move files around your file system? Look no further than the PowerShell move file approach to move a file or two with the Move-Item cmdlet!
In this tutorial, you will learn how this powerful cmdlet allows you to quickly move not just files but also directories with a few commands, along with other features included.
Read on and say hello to a streamlined workflow with the PowerShell Move-Item cmdlet!
Prerequisites
This tutorial houses hands-on demonstrations, and to follow along, be sure you have a Windows computer with PowerShell 5.1 or later. This tutorial uses Windows 10 and PowerShell 7.
Moving Files from One Directory to Another
Suppose you saved a file in the wrong directory and wish to move it to the right one. One of the most basic uses of PowerShell’s Move-Item cmdlet is moving files from one directory to another.
There are other variations of this command that you can use to move multiple files with the same or different file extensions. But starting with the basic usage is an excellent way to get familiar with the Move-Item cmdlet and its syntax.
Below is the basic syntax for the Move-Item cmdlet where:
| Parameter | Details |
|---|---|
Path | Specifies the file or files to move. |
Destination | Specifies the directory to move the file. |
[CommonParameters] | Provides additional functionality in customizing the command’s behavior. |
Move-Item [-Path] <string[]> [-Destination] <string> [CommongParameters]To see how to move files from one directory to another, follow these steps:
Open PowerShell as administrator, and run the below command to move a file from one directory to another. The below example moves the log.txt file from the C:\logs (source) to the D:\logs (destination) directory.
This command does not provide output to the console, but you will verify the file you moved in the following step.
Move-Item -Path C:\logs\log.txt -Destination D:\logs\Now, run the following Test-Path command to verify whether the has been moved successfully to the destination directory (D:\logs).
Test-Path D:\logs\log.txtIf the file exists, the command returns True, as shown below, and returns False otherwise.

Overwriting Existing Files via PowerShell Move File Approach
Perhaps you wish to replace an obsolete file version with an updated one. If so, appending a parameter, specifically the -Force parameter, will do the trick. By default, if a file with the same name already exists in the destination directory, Move-Item will not overwrite it and will throw an error message.
To demonstrate overwriting existing files:
Run the below command to try and move a file named log.txt to the D:\logs directory.
Move-Item -Path C:\logs\log.txt -Destination D:\logs\An error occurs, as shown below since the log.txt file already exists in the destination directory.

Now, run the command below to move the same file (log.txt), but this time, append the -Force parameter. This parameter tells the Move-Item command to overwrite the existing file in the destination directory without generating an error message.
Move-Item -Path C:\logs\log.txt -Destination D:\logs\ -ForceIf the move is successful, you will get a blank output, as shown below.

Displaying Verbose Output
By default, PowerShell only displays standard output when executing commands. But what if you need the command execution’s detailed information for troubleshooting issues that may arise?
Like other cmdlets, the Move-Item cmdlet supports displaying verbose output by appending the -Verbose parameter.
Run the below command to overwrite a file (-Force) in the destination location and display a -Verbose output of the command execution.
Move-Item -Path C:\logs\log.txt -Destination D:\logs\ -Force -VerboseBelow, the verbose information can help confirm that the correct file is being moved and that the command is executing as expected.

Moving an Entire Directory to Another Location
When you have tons of files to move, doing so individually can be time-consuming and error-prone. Why not move the entire directory instead for a more efficient and reliable way to move your files around? Yes, the Move-Item command lets you move an entire directory and all its contents (files and sub-directories) to another location.
Run the below command to move the C:\logs directory and all its contents to the D:\logs directory. Of course, remember to append the -Verbose parameter to get a better view of what happens in the background during command execution.
Move-Item -Path C:\logs\ -Destination D:\logs\ -Verbose
Now, run the following commands to verify (Get-ChildItem) the logs directory and list all its contents (ls) after moving to the destination directory (D:\logs).
# Verify the logs directory exists
Get-ChildItem D:\logs\
# Lists all contents of the logs directory
ls D:\logs\logs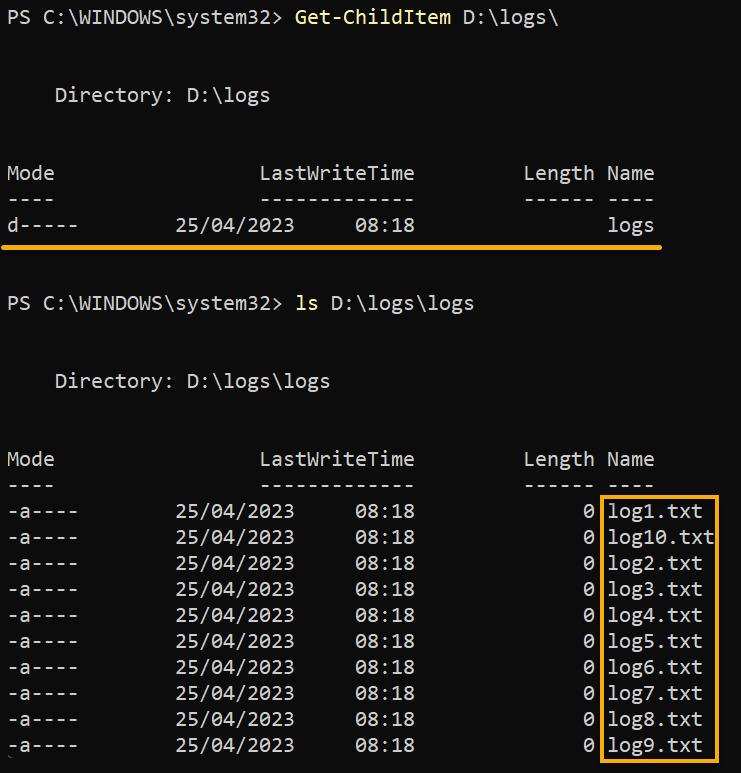
Moving and Renaming Files Simultaneously
When tasked with moving files and changing their names for organizational or naming convention reasons, the Move-Item command can help.
Suppose you have documents (i.e., PDF files) related to a project you are working on, and you need to organize them in a directory called Project_X. Below is a sample naming convention you can use for your files.
[Prefix]_[Category]_[Name].[Extension]To move and rename files simultaneously:
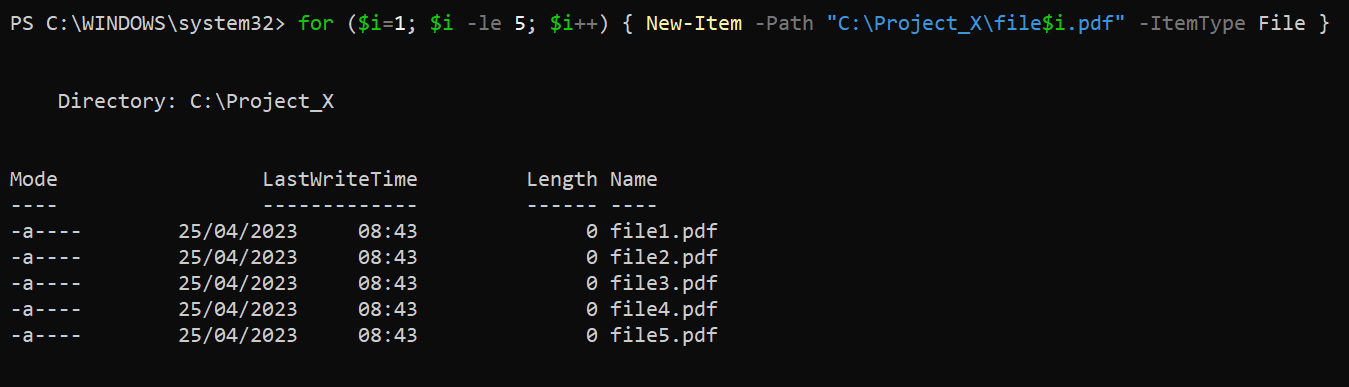
1. Run the for loop construct below to create five PDF files in the C:\Project_X\ directory.
for ($i=1; $i -le 5; $i++) { New-Item -Path "C:\Project_X\file$i.pdf" -ItemType File }Below, five PDF files are created with names starting with file, then numbers, and the file extensions (.pdf).
2. Next, run the code below, which does not provide output to the console but moves your newly created PDF files to a new location.
This code renames each file by adding the prefix PX, category (determined by the current file extension), name (without the extension), and file extension.
Get-ChildItem C:\Project_X\ | ForEach-Object {
    $prefix = "PX"
    $category = $_.Extension.Replace(".", "")
    $name = $_.Name.Replace($_.Extension, "")
    $newname = "{0}{1}{2}{3}" -f $prefix, $category, $name, $_.Extension
    Move-Item $_.FullName -Destination "D:\Project_X\$newname"
}3. Lastly, run the following Get-ChildItem command to verify the files have been moved and renamed correctly.
Get-ChildItem "D:\Project_X\"In the output below, you can see each file has a prefix of PX followed by the file type (pdf), the file name (file#), and the file extension (.pdf).

Moving Files Based on Extension
Besides naming convention, another way to organize your files and declutter your file system is by moving files based on extension. Regardless of the file type, seeing files of the same type organized in a dedicated folder is eye-refreshing.
For example, if you have many image files scattered across a directory, you can move all image files to a dedicated folder for image processing. Similarly, if you have tons of log files generated by different applications, you can move them all to a dedicated folder for quick access and analysis.
To see how moving files based on extension works:
1. Run the below for loop construct to create five sample PNG files in the C:\Images\ directory.
for ($i=1; $i -le 5; $i++) { New-Item -Path "D:\Project_X\image$i.png" -ItemType File }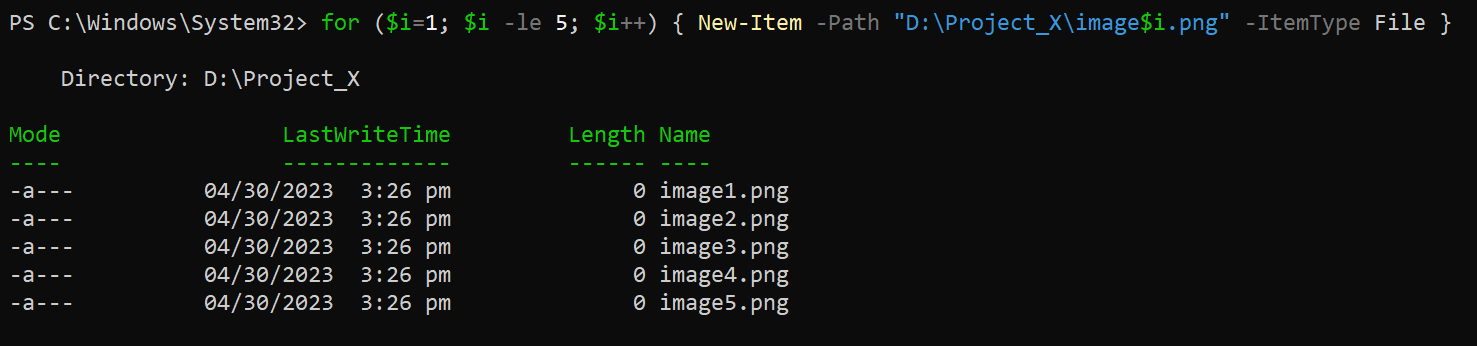
2. Next, run the command below to get a list (Get-ChildItem) of all PNG files (*.png) in the C:\Images\ directory, and move them (Move-Item) to a dedicated directory.
Get-ChildItem D:\Project_X\*.png | Move-Item -Destination D:\ProcessedImages\ -Verbose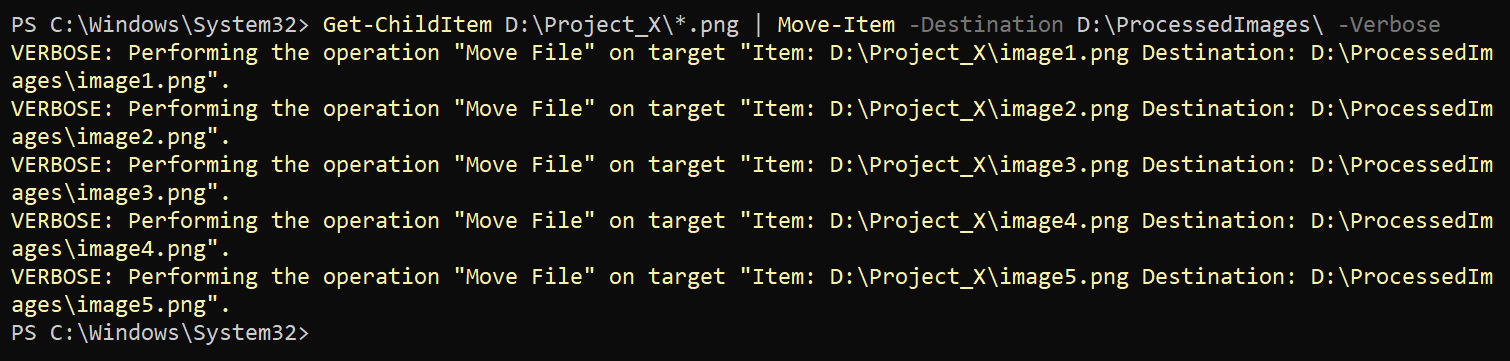
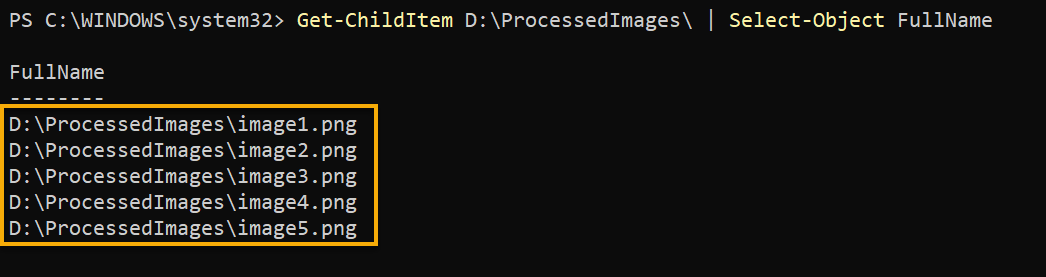
3. Finally, run the following command to verify that the PNG files (by FullName) have been moved successfully to their dedicated directory (D:\ProcessedImages\).
Get-ChildItem D:\ProcessedImages\ | Select-Object FullNameAs you can see below, regardless of the different file types in the D:\Project_X\ directory, only the PNG files were moved to the D:\ProcessedImages\ directory.
Conclusion
Being able to move files around your file system quickly proves that the Move-Item command is a powerful tool to keep. In this tutorial, you have learned to engage PowerShell to move any file from one location to another, as is or based on their extensions.
Overall, you can now move files confidently and follow naming conventions for better file management with the Move-Item command.
Now, why not explore more of what PowerShell can offer? Perhaps learn many ways to navigate your file system to enhance productivity and efficiency? Take control of your file system and streamline your workflow!


