


PowerShell is a powerful tool for managing data, but also typically provides too much information at once. As you know, too much information can be overwhelming and difficult to parse through. Not to worry, though. The PowerShell Select-Object cmdlet will come in handy.
In this tutorial, you will learn the basics of the Select-Object cmdlet to narrow down or filter results in many ways.
Read on and start painless data management!
Prerequisites
This tutorial comprises hands-on demonstrations. To follow along, be sure you have a system with PowerShell installed. This tutorial uses Windows 10 with PowerShell 7, but any modern version should also work.
What is PowerShell Select-Object cmdlet?
The Select-Object cmdlet simplifies data management by allowing you to select specific properties from an object or dataset. At the same time, you can rename properties or create calculated properties based on existing ones.
The basic syntax of Select-Object is as follows where:
| Parameter | Function |
|---|---|
-InputObject | Specifies the object or data set you want to work with, which can be an object, an array of objects, or an output of another cmdlet. |
Property | Specifies the property or properties to select from the InputObject parameter. You can specify multiple properties separated by commas. |
Optional Parameters | Allows you to refine your selection, such as selecting a certain number of objects or skipping objects. |
Select-Object [-InputObject] [Property] [Optional Parameters]Selecting Objects by Properties
Since more than a short introduction is needed to satisfy your desire to learn about the Select-Object cmdlet, why not start with one of its common use cases? Kick off this tutorial by selecting a specific property from an object with the Select-Object cmdlet.
Suppose you have a list of processes running on your computer, but you only wish to see the names of each process. Specifying the Name property to the Select-Object cmdlet will do the trick.
Open PowerShell and run the below Get-Process command to retrieve and print a list of all processes only (Select-Object) by Name.
Get-Process | Select-Object Name
Besides running processes, the
Select-Objectcmdlet lets you work on a CSV file. Suppose you have a CSV file with many columns but only need a few of them. In that case, let theSelect-Objectcmdlet choose only the relevant columns so you can manipulate and analyze the data.
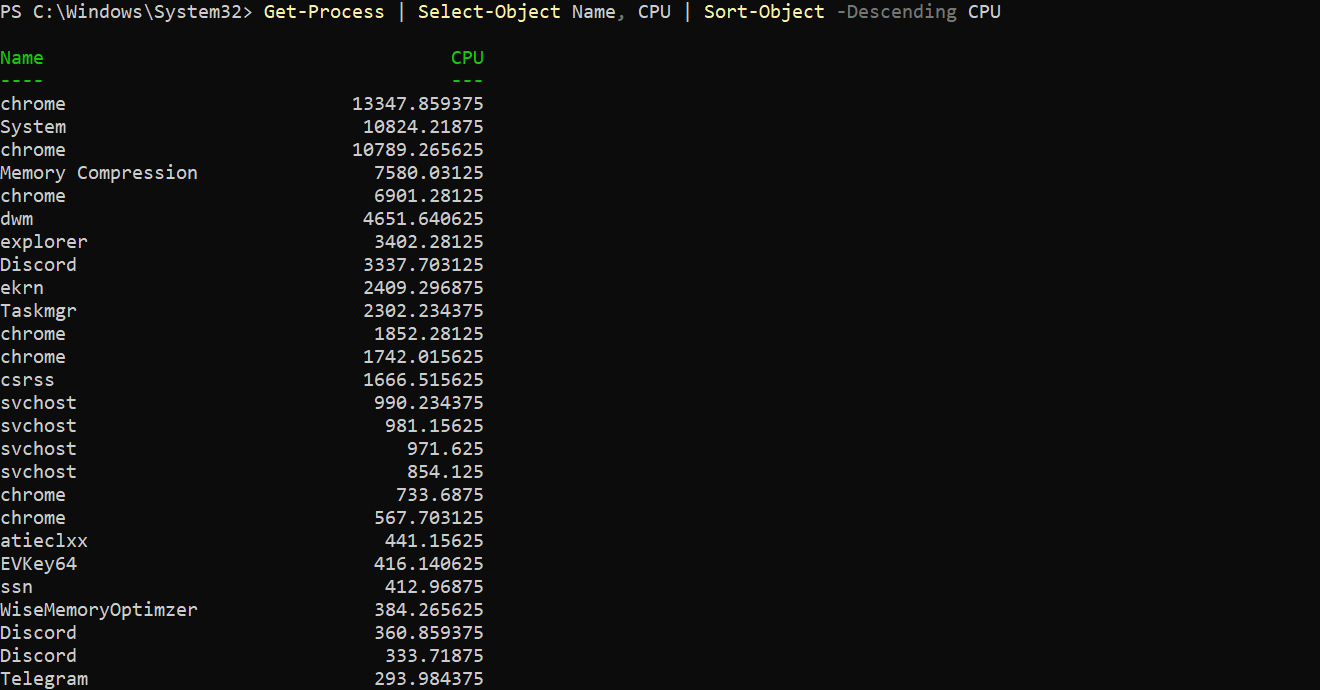
Now, run the following command to select multiple properties (Select-Object): Name and CPU (separated by commas). This feature helps when working with large data sets where you only need some properties of each object.
In addition, this command also sorts the list of objects (Sort-Object) in -Descending order with the CPU property as the reference.
Get-Process | Select-Object Name, CPU | Sort-Object -Descending CPUBelow, you can see the processes listed, starting from the most resource-consuming one, Google Chrome (if you have one installed).
Creating a Calculated Property
When looking for properties that better fit your needs, consider creating a calculated property. Why? Calculated properties allow you to manipulate and transform data, combine existing properties, perform mathematical operations, or format data in a specific way.
To create a calculated property, you must specify a new property name and an expression that defines how to calculate the property value:
Run the command below to perform the following:
- Retrieve a list of running processes (
Get-Process), selecting only (Select-Object) theNameandCPUproperties. - Create a new calculated property with the
NameMemory (MB), which calculates the memory usage of each process in megabytes. The memory usage is calculated using anExpressionthat divides theWorkingSetproperty by1MB. Any valid PowerShell expression works in creating a calculated property. - Prints all retrieved running processes in
-Descendingorder by the calculatedMemory (MB)property.
Get-Process | Select-Object Name, CPU, @{Name="Memory (MB)";Expression={$_.WorkingSet/1MB}} | Sort-Object -Descending "Memory (MB)"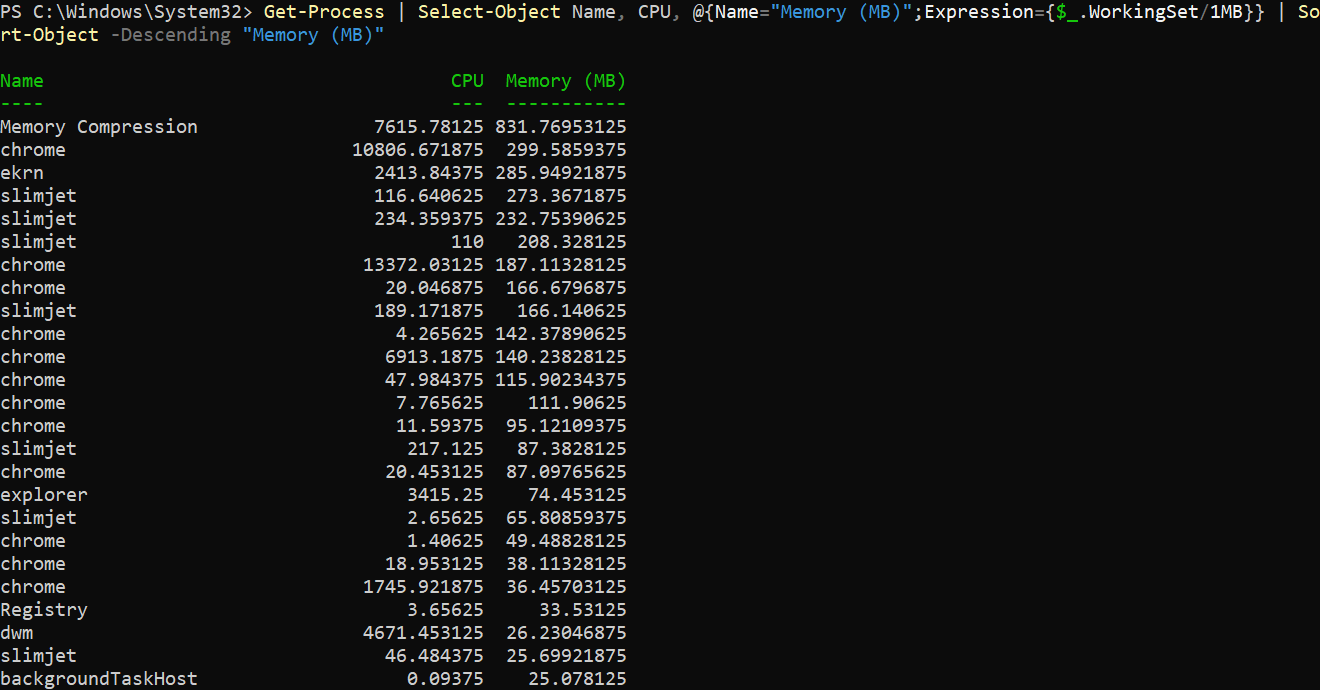
Excluding a Specified Property
In real life, the results of a Select-Object command may contain sensitive information, such as usernames and passwords. How to avoid this risk?
To prevent sensitive data from being displayed in the output, append the -ExcludeProperty parameter to exclude a specified property from the output.
Run the following command to perform the following tasks:
- Retrieve a list of all the files and folders (
Get-ChildItem) in theC:\\directory recursively (-Recurse).
- Pipe the output to the
Select-Objectcmdlet to select theName,Length, andLastWriteTimeproperties. - Exclude (
-ExcludeProperty) theFullNameproperty from the output. Doing so prevents the full paths from being displayed in the output, which may contain confidential information.
Get-ChildItem -Path C:\ -Recurse | Select-Object Name, Length, LastWriteTime -ExcludeProperty FullName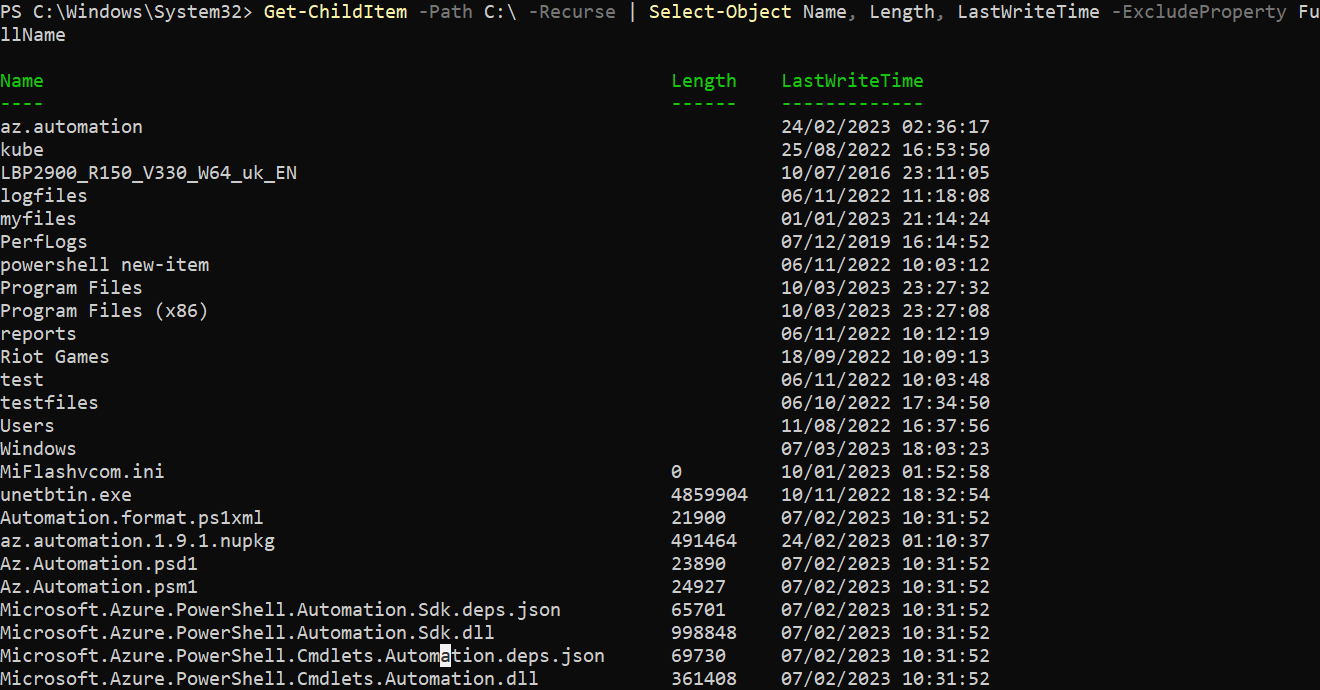
Skipping the First or Last Number of Objects
When working with massive datasets, finding the data you need can be like searching for a diamond in a coal mine. But why waste time sifting through irrelevant data?
In PowerShell, the Select-Object cmdlet provides two parameters that let you exclude the first (-Skip) and last (-SkipLast) number of objects in the output, respectively.
To see how skipping several objects from an output works:
Run the below command to get all running processes (Get-Process) but -Skip the first 100 objects returned.
Note that the number of objects skipped is based on integer values (positive and whole numbers without decimal points), which in this case is
100.
Get-Process | Select-Object -Skip 100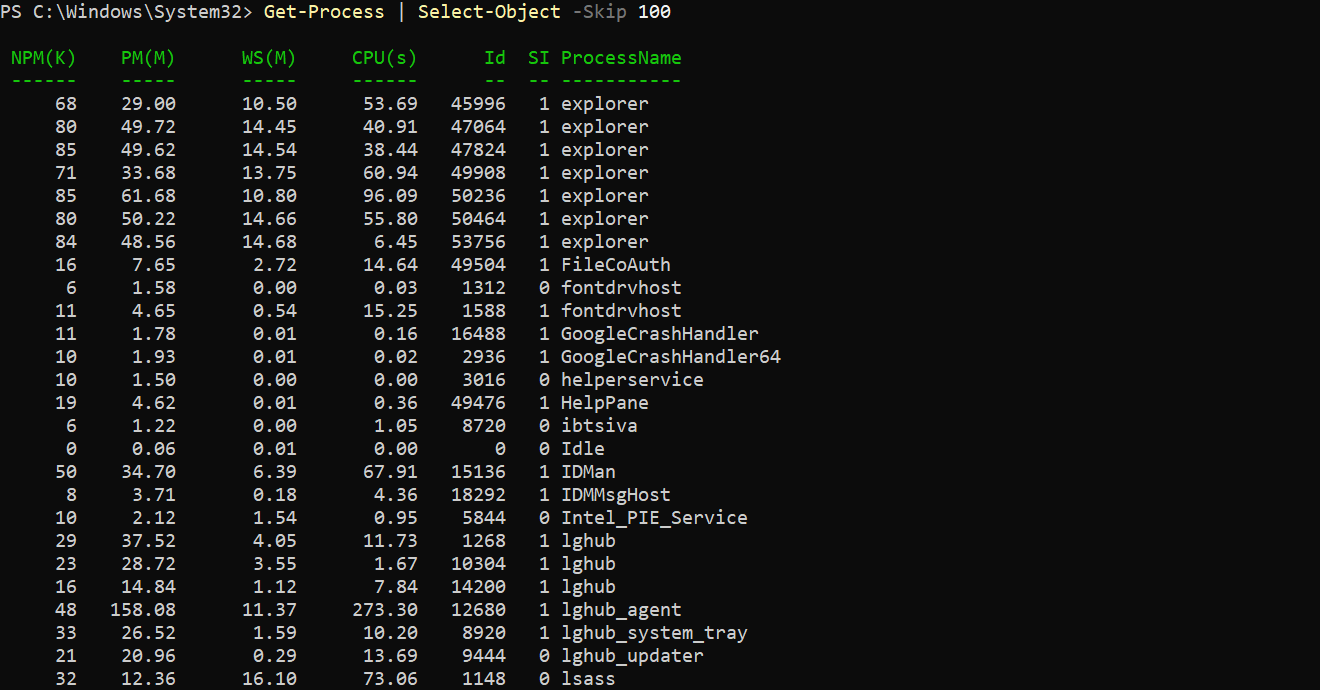
Now, run the following command to get a list of the working directory’s contents (Get-ChildItem) but skip the last (-SkipLast) 100 objects returned.
Get-ChildItem | Select-Object -SkipLast 100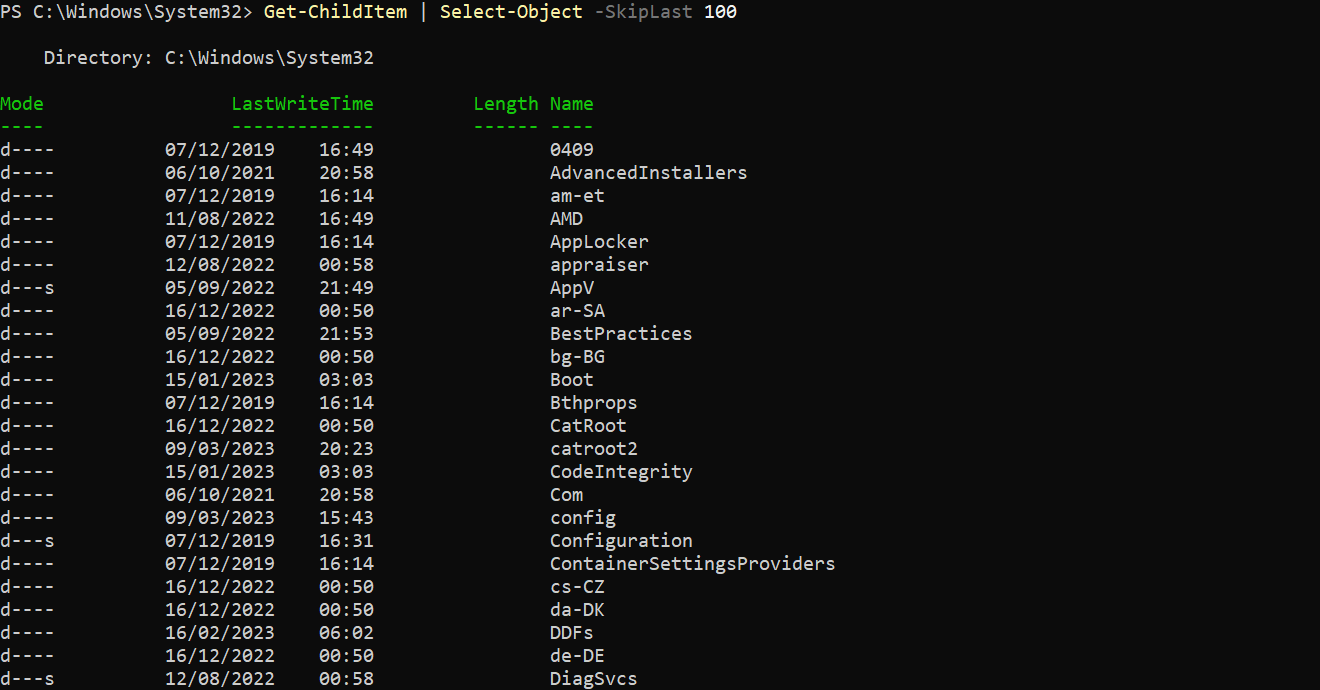
Selecting the First or Last Number of Objects
Besides skipping the first and last number of objects, you may also be interested in selecting the first and last number of objects instead. The Select-Object cmdlet supports this feat with the First and Last parameters that let you skip everything else to save time and resources.
Run the following command to get all processes but only select (Select-Object) the -First 10 objects returned.
Get-Process | Select-Object -First 10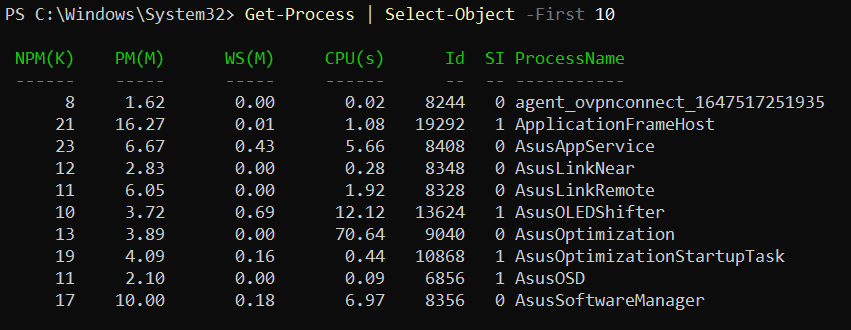
Now, run the command below to get all contents of the working directory (Get-ChildItem) but only select (Select-Object) the -Last 10 objects returned.
Get-ChildItem | Select-Object -Last 10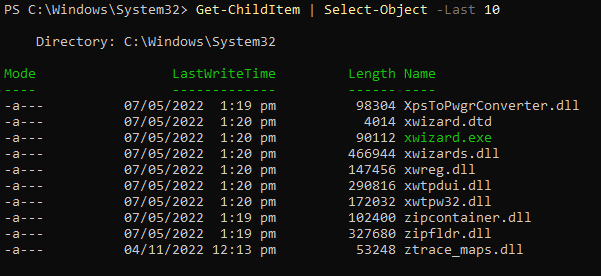
Selecting Unique Objects Exclusively
As you work with larger datasets, you will encounter duplicate values you may want to exclude from the output, which is typical. But the good thing with the Select-Object cmdlet is that you do not have to exclude duplicate values manually.
Appending the -Unique parameter allows you to select only the unique objects from the output, streamlining your analysis and improving your results’ accuracy.
Run the command below to select (Select-Object), and return the -First 2 objects.
"1","1","2","3" | Select-Object -First 2Below, you can see two returned objects regardless if the other is a duplicate value.

Lastly, run the following command to return only one -Unique value for each of the -First 2 objects selected.
"1","1","2","3" | Select-Object -First 2 -UniqueThis time, you can see only one returned from the first two objects selected since the other is just a duplicate value. As you realize, this output proves that the -Unique parameter is handy for quickly discarding any duplicate objects in your data.

Conclusion
PowerShell tends to produce an overload of information. But in this tutorial, you learned how the PowerShell Select-Object cmdlet helps streamline your data to see only the needed information.
You have seen how different parameters allow you to select and exclude data, especially duplicated values from an output. With the Select-Object cmdlet, managing large amounts of data does not have to be a daunting task.
At this point, you can quickly refine your results to be better suited for analysis and troubleshooting. But why not learn how to format your calculated properties next to improve readability and usability?


