


Feels unsafe as you browse the internet? You may have to change your default web browser. If you are looking for a fast and secure way to browse the internet, why not install Google Chrome for Ubuntu?
Google Chrome is one of the most popular web browsers available today and is an excellent choice for Ubuntu users. And in this tutorial, you will learn how to install and make the most out of Google Chrome for Ubuntu.
Ready? Jump right in and safely browse the internet with Google Chrome!
Prerequisite
This tutorial will be a hands-on demonstration. To follow along, you need an Ubuntu machine available. This tutorial uses Ubuntu 20.04 64-bit, but other Ubuntu versions will also work.
Installing Google Chrome for Ubuntu via the GUI
The quickest way to install Google Chrome on Ubuntu is through the GUI. But like any other software, you must first download the installer package for Google Chrome.
You will not find Google Chrome in the Ubuntu Software Center since it is not an open-source application. Instead, you will download Google Chrome from the official website.
1. Open your default web browser, navigate to Google Chrome’s official download page, and click Download Chrome to download Google Chrome’s installer.

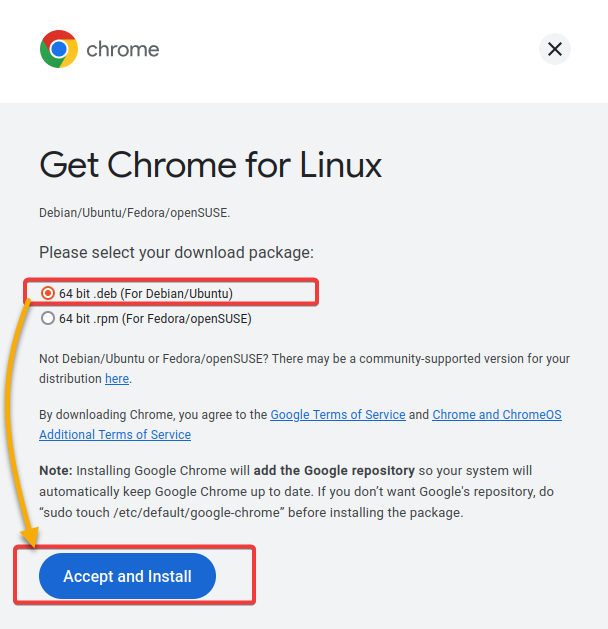
2. On the next screen, select your preferred version of Google Chrome (32 or 64-bit) and click Accept and Install.
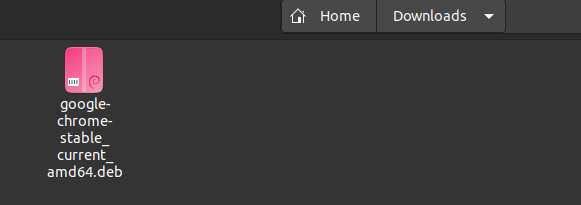
3. Once downloaded, you will have a file called google-chrome-stable_current_amd64.deb in your ~/Downloads directory. The deb file format is the software package format used by Ubuntu and other Debian-based Linux distributions for quickly installing software.
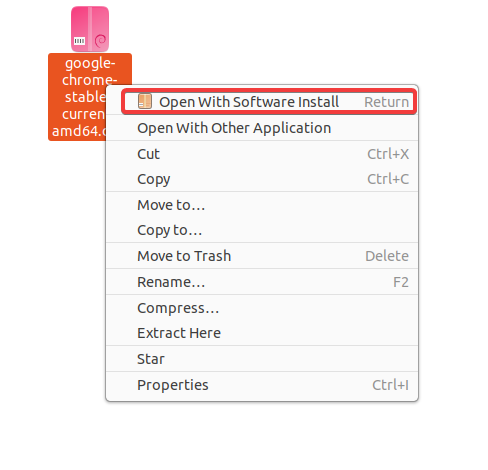
4. Now, right-click the .deb file you downloaded, and select Open With Software Install from the context menu to open the package in the Ubuntu Software Center (step five).
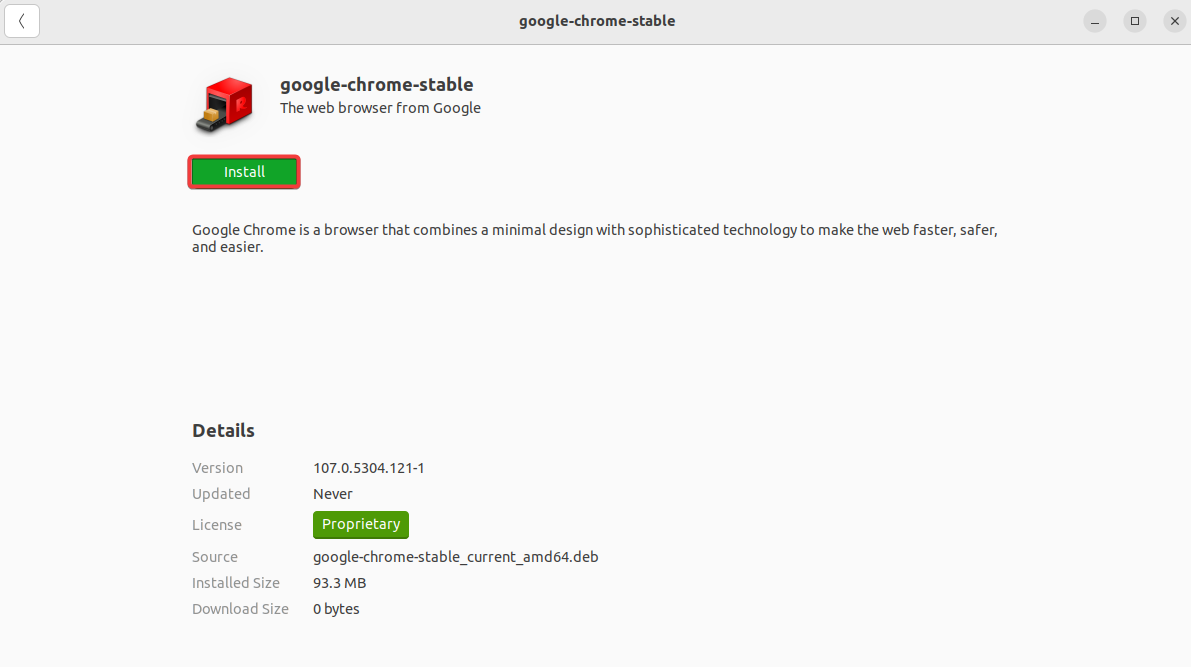
5. On the Ubuntu Software Center, click Install to install Google Chrome for Ubuntu.
6. When prompted, provide your password to authenticate and continue the installation.

As the installation starts, you will see a process bar indicating the progress.

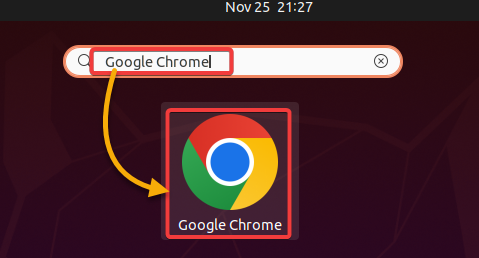
7. Once the installation completes, search for and select Google Chrome in the Ubuntu search bar to launch it.
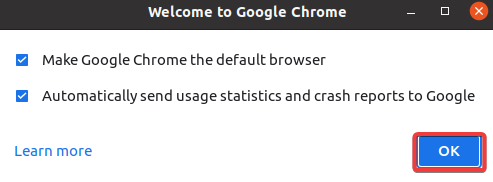
8. Keep all the default settings as is, and click OK. This prompt shows up when you open Google Chrome for the first time.
These options let you set Google Chrome as your default web browser and send crash reports to Google.
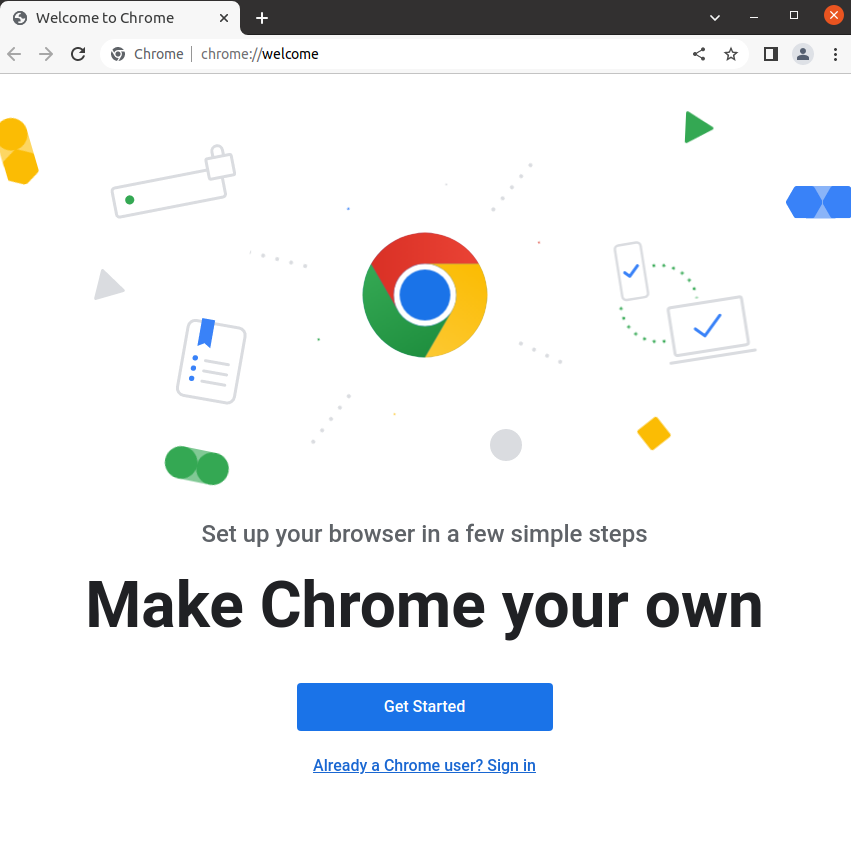
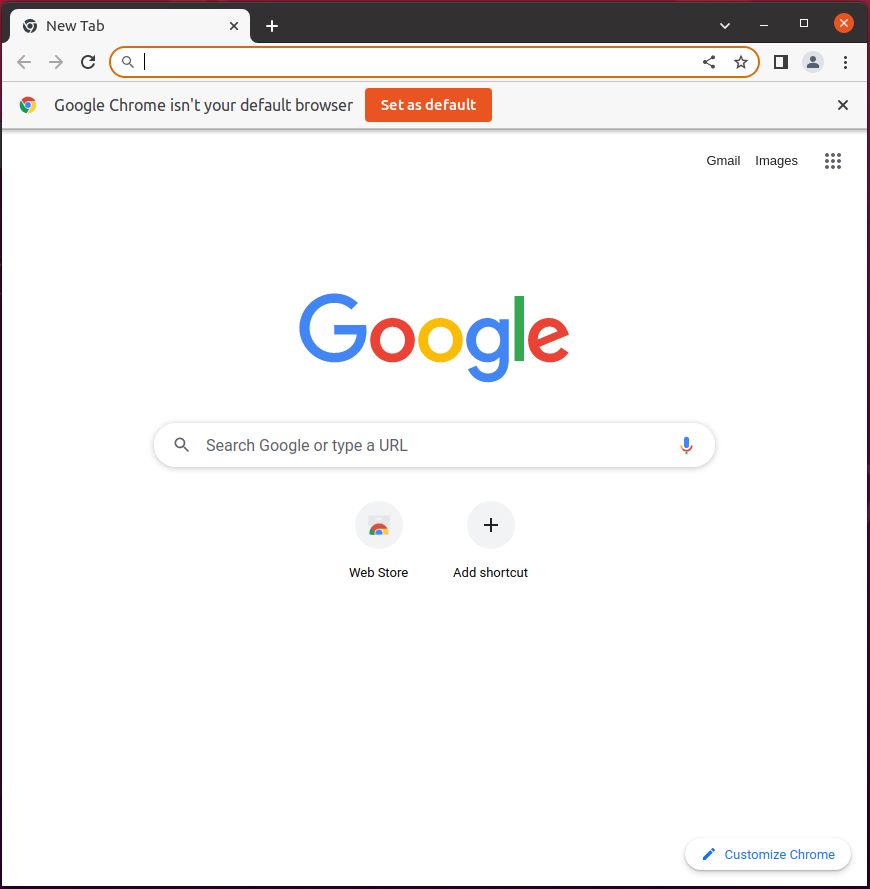
If all goes well, you will see the main Google Chrome window with the welcome screen, as shown below. At this point, you can enjoy browsing the internet securely and quickly with Google Chrome!
Installing Google Chrome for Ubuntu via the Terminal
Not into clicking your way to install applications? Worry not. If you like the command-line environment more, you can install Google Chrome on Ubuntu from the terminal.
This method is useful when setting up a headless server or using the command line to manage your system.
1. Open a new terminal window, and run the apt update command below to update your package list.
sudo apt update -y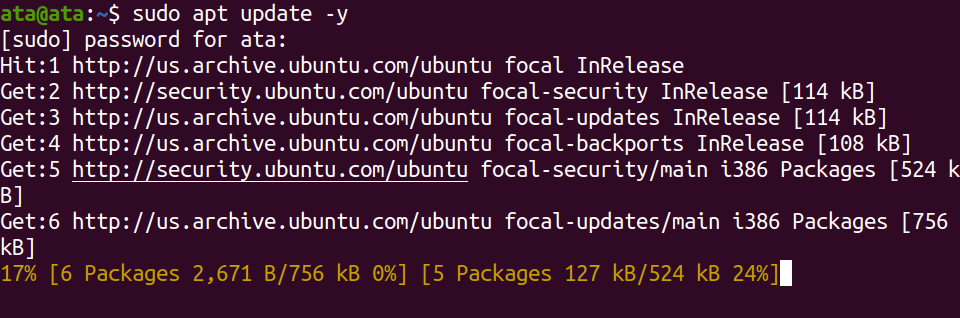
2. Next, run the following wget command to download the latest version of the Google Chrome package.
wget https://dl.google.com/linux/direct/google-chrome-stable_current_amd64.deb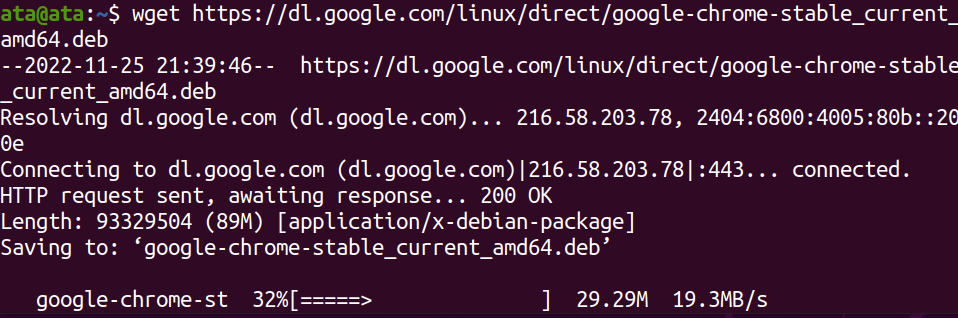
3. Once the download completes, run the below apt install command to install Google Chrome for Ubuntu.
sudo apt install ./google-chrome-stable_current_amd64.deb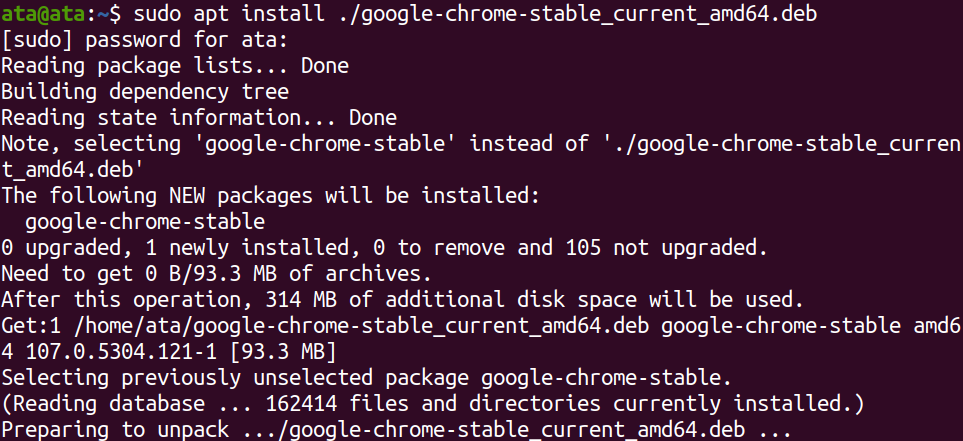
4. Now, wait for the installation to finish and run the google-chrome below, which does not provide output but launches Google Chrome.
google-chromeIf the Google Chrome window shows up, you are all set! You have successfully installed Google Chrome for Ubuntu via the terminal.
Making Google Chrome the Default Web Browser
By default, Ubuntu uses the Firefox browser as its primary web browser. Firefox has improved a lot in recent years. But if you like to use Google Chrome instead, you can set it as your default web browser.
💡 Why make Google Chrome your default web browser? Google Chrome provides top-of-the-line site isolation, phishing prediction security, protected DNS lookups, and several other features. With these features in place, rest assured that your browsing experience is always protected.
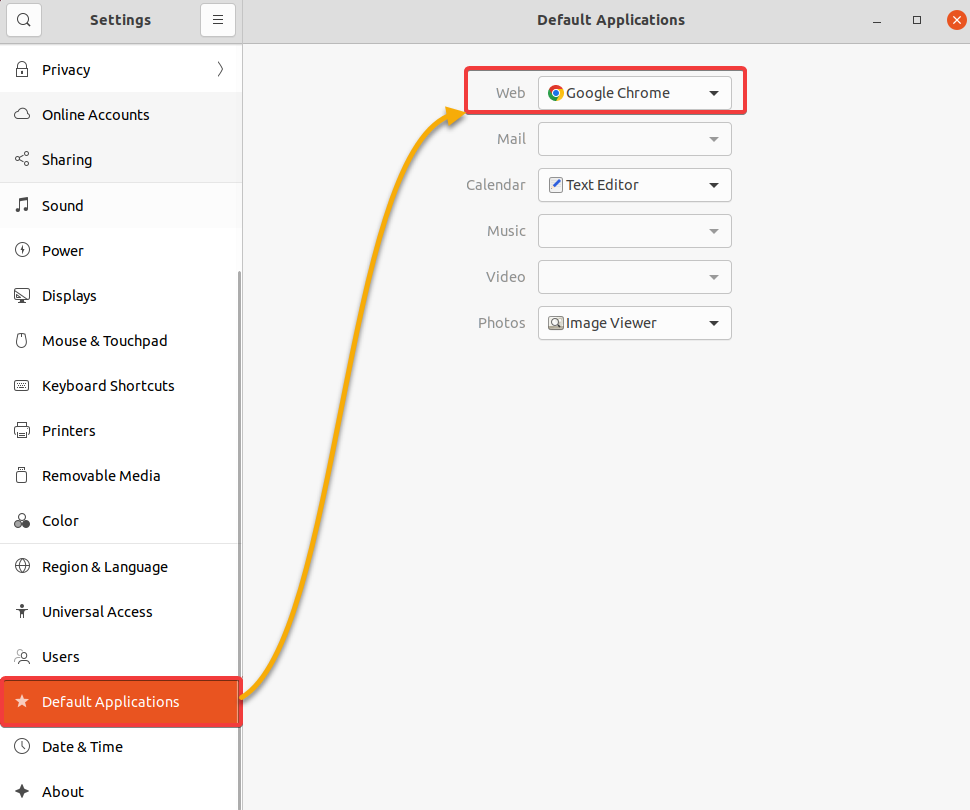
Search for and open the Settings app, as shown below.

Now, click Default Applications (left panel) to access the default applications manager, and select Google Chrome in the Web dropdown field. Doing so sets Google Chrome as your default web browser.
At this point, any links you click will open in Google Chrome.
Updating Google Chrome to the Latest Version
Google Chrome is regularly updated with bug fixes and new features. You should keep your version of Google Chrome up to date for the best experience.
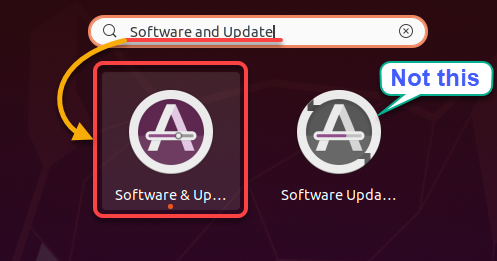
1. Search for and open the Software & Update app.
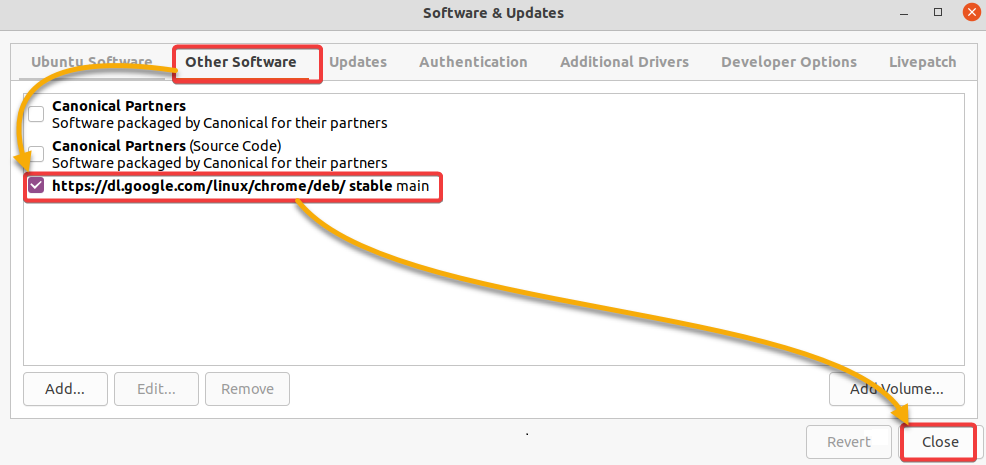
2. In the Software & Updates window, navigate to the Other Software tab, tick the box for the Google Chrome repository listed, as shown below, and close the window.
This action enables the Google Chrome repository, which contains the latest version of Google Chrome.
3. Now run the following command to update all your installed packages, including Google Chrome.
sudo apt update
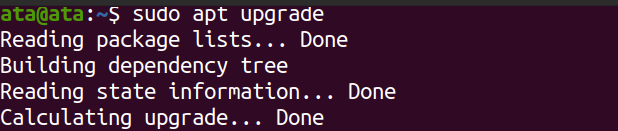
4. Finally, run the apt upgrade command below to upgrade Google Chrome if a new version is available. sudo apt upgrade
sudo apt upgradeWait for the process to complete, and you are all set! You have successfully updated Google Chrome to its latest version on Ubuntu.
Installing a Google Chrome Extension
Google Chrome offers a wide variety of useful extensions that can improve your browsing experience. An extension is like a small “software program” that can modify and enhance the functionality of Google Chrome, such as ad blockers, password managers, and so on.
To install a Google Chrome extension:
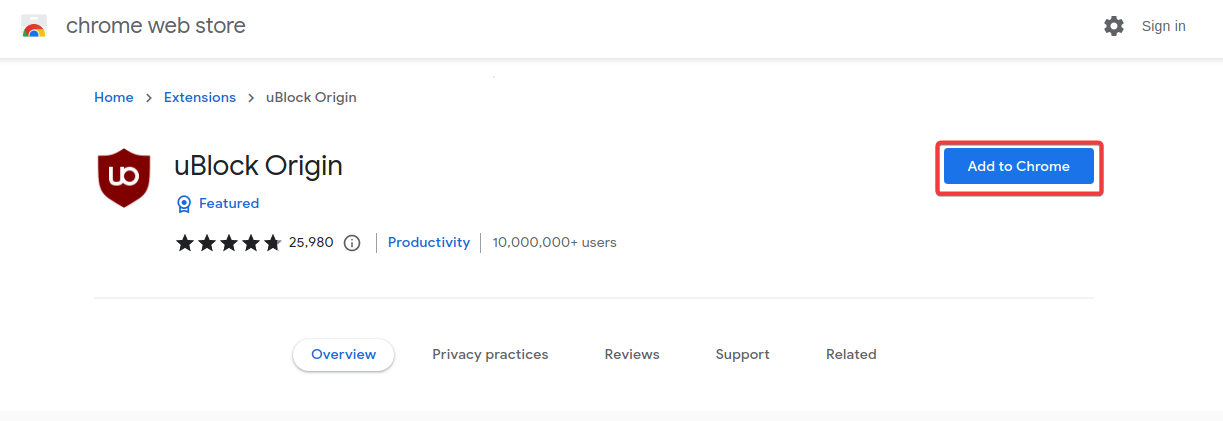
1. Navigate to the official Chrome Web Store in Google Chrome.
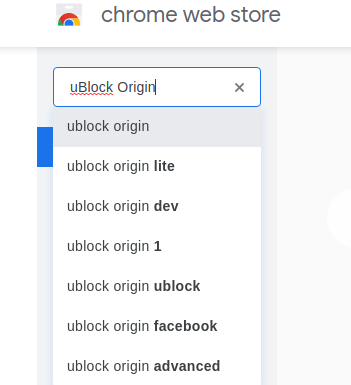
2. Search for a specific extension in the search bar (or browse through the categories to find one). This tutorial uses the uBlock Origin extension for demonstration.
3. Click Add to Chrome on the extension’s page to install the extension.
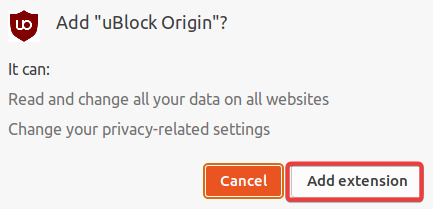
4. Now, click Add extension when prompted to continue installing the extension. Wait for a few seconds until the installation completes.
Managing Google Chrome Extensions
Extensions lets you make the most out of Google Chrome’s potential. But as cool as extensions may appear, they can also degrade the browser’s performance. Why not disable or remove some of the extensions, especially the ones you do not need?
To manage installed Google Chrome extensions:
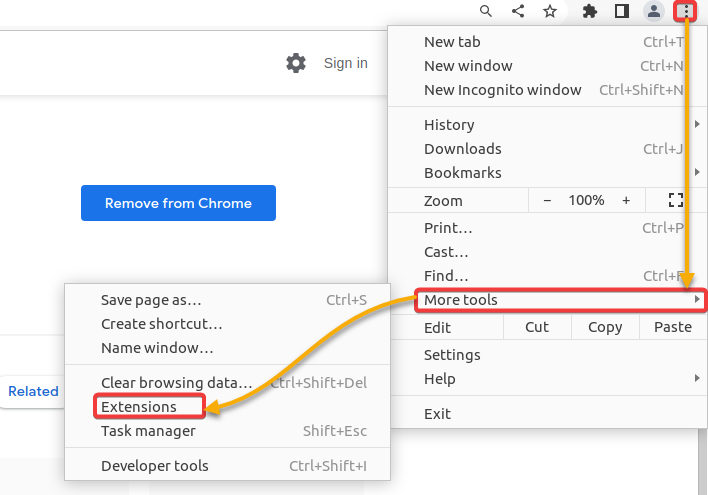
Click the ellipsis (top-right) → More Tools → Extensions to open the Extensions page. The Extensions page lets you see and manage all installed extensions according to your preference.
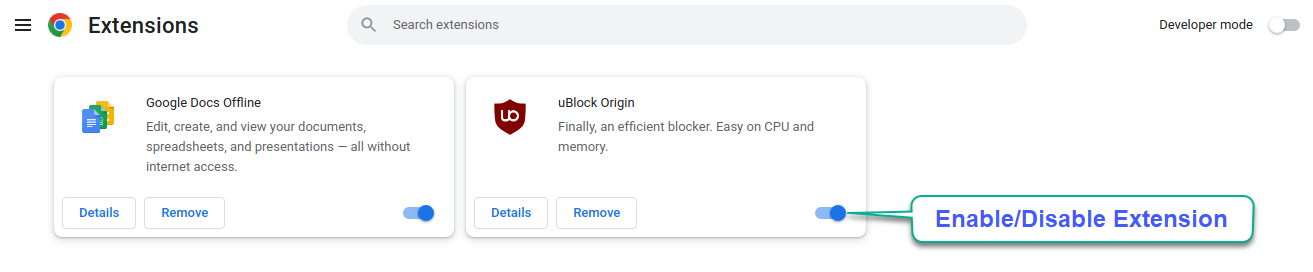
On the Extensions page that appears, click on the toggle button to disable or enable an installed extension or click Remove to uninstall the extension.
Conclusion
Fast and safe web browsing is a key factor for every internet user, and Google Chrome fulfills that key factor and provides a secure way to browse the web. In this tutorial, you have learned to install Google Chrome for Ubuntu, make it the default browser, and upgrade it to its latest version.
At this point, you have a full-fledged Google Chrome experience on your Ubuntu system and a way to up the experience via extensions. With its robust encryption protocols and various security measures, Google Chrome ensures that your data remains private and secure while browsing online.
With a complete setup of Google Chrome on Ubuntu, why not enable Google Chrome’s developer mode and explore what else it offers?


