


When you first begin writing PowerShell scripts, you’ll inevitably come to a place where you need to process multiple items from a collection. It is then you will need to dig into PowerShell foreach loops and learn what they’re all about.
Not a reader? Watch this related video tutorial!
Not seeing the video? Make sure your ad blocker is disabled.
Nearly all programming languages have a construct called loops; PowerShell is no different. One of the most popular types of loops in PowerShell is the foreach loop. At its most basic, a foreach loop reads an entire collection of items and foreach item, runs some kind of code.
One of the most confusing aspects of the PowerShell foreach loop for beginners is all of the options you have. There’s not just one way to process each item in a collection; there are three!
In this article, you’re going to learn how each type of foreach loop works and when to use one over the other. By the time you’re done with this article, you’ll have a good understanding of each type of foreach loop.
PowerShell ForEach Loop Basics
One of the most common types of loops you’ll use in PowerShell is the foreach type of loop. A foreach loop reads a set of objects (iterates) and completes when it’s finished with the last one. The collection of objects that are read is typically represented by an array or a hashtable.
NOTE: The term iteration is a programming term that references each run of a loop. Each time a loop completes a cycle, this is called an iteration. The act of running a loop over a set of objects is commonly referred to as iterating over the set.
Perhaps you need to create a text file across some folders spread out across a file system. Let’s say the folder paths are C:\Folder, C:\Program Files\Folder2 and C:\Folder3. Without a loop, we’d have to reference the Add-Content cmdlet three times.
Add-Content -Path 'C:\Folder\textfile.txt' -Value 'This is the content of the file'
Add-Content -Path 'C:\Program Files\Folder2\textfile.txt' -Value 'This is the content of the file'
Add-Content -Path 'C:\Folder2\textfile.txt' -Value 'This is the content of the file'
What’s the only difference between each of these command references? It is the Path value. The value for Path is the only value that’s changing amongst each of these.
You’re duplicating a lot of code. You’re wasting time typing and opening yourself up for problems down the road. Instead, you should create a “set” that just includes all of the items that are changing. For this example, we’ll use an array.
$folders = @('C:\Folder','C:\Program Files\Folder2','C:\Folder3')You now have each of these paths stored in a single “set” or array. You’re now primed to use a loop to iterate over each of these elements. Before you do that, though, it’s a good time to mention a topic that usually trips up those new to PowerShell. Unlike other types of loops, foreach loops are not one of the same.
There are technically three types of foreach loops in PowerShell. Although each is similar to use, it’s important to understand the difference.
The foreach Statement
The first type of foreach loop is a statement. foreach is an internal PowerShell keyword that’s not a cmdlet nor a function. The foreach statement is always used in the form: foreach ($i in $array).
Using the example above, the $i variable represents the iterator or the value of each item in $path as it iterates over each element in the array.
Note that the iterator variable doesn’t have to be
$i. The variable name can be anything.
In the below example, you can accomplish the same task as repeating the Add-Content reference by doing this:
# Create an array of folders
$folders = @('C:\Folder','C:\Program Files\Folder2','C:\Folder3')

# Perform iteration to create the same file in each folder
foreach ($i in $folders) {
    Add-Content -Path "$i\SampleFile.txt" -Value "This is the content of the file"
}
The foreach statement is known to be a quicker alternative than using the ForEach-Object cmdlet.
The ForEach-Object CmdLet
If foreach is a statement and can only be used in a single way, ForEach-Object is a cmdlet with parameters that can be employed in a lot of different ways. Like the foreach statement, the ForEach-Object cmdlet can iterate over a set of objects. Only this time, it passes that set of objects and the action to take on each object as a parameter as shown below.
$folders = @('C:\Folder','C:\Program Files\Folder2','C:\Folder3')
$folders | ForEach-Object (Add-Content -Path "$_\SampleFile.txt" -Value "This is the content of the file")
Note: To make things confusing, the
ForEach-Objectcmdlet has an alias calledforeach. Depending on how the term “foreach” is called, theforeachstatement is run, or theForEach-Objectruns.A good way to differentiate these situations is to notice if the term “foreach” is followed by
($someVariable in $someSet). Otherwise, in any other context, the code author is probably using the alias forForEach-Object.
The foreach() Method
One of the newest foreach loops was introduced in PowerShell v4 called a foreach() method. This method exists on an array or collection object. The foreach() method has a standard script block parameter that contains the actions to take over each iteration, just like the others.
$folders = @('C:\Folder','C:\Program Files\Folder2','C:\Folder3')
$folders.ForEach({
	Add-Content -Path "$_\SampleFile.txt" -Value "This is the content of the file"
})
The most significant difference with the foreach() method is how it works under the hood.
Using the
foreach()method is considerably faster and is noticeably so over large sets. It is recommended to use this method over the other two if possible.
Mini-Project: Looping Over a Set of Server Names
One of the most common uses for a loop in PowerShell is reading a set of servers from some source and performing some action on each of them. For our first mini-project, let’s build some code that will allow us to read server names (one per line) from a text file and ping each server to determine if they are online or not.
For this workflow, which type of loop do you think would work best?
Notice that I mentioned the word “set” as in “set of servers”. This is a clue right there. You already have a specified number of server names, and you’d like to perform some action on each of them. This sounds like a great chance to try out the most common PowerShell loop used; the foreach loop.
The first task is to create a set of server names in code. The most common way to do that is by creating an array. Lucky for us that Get-Content, by default, returns an array with each element in the array represented by a single line in the text file.
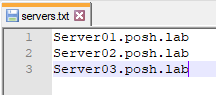
First, create an array of all of my server names and call it $servers.
$servers = Get-Content .\servers.txtNow that you have the array created, you’ll now need to confirm if each server is online or not. A great cmdlet to test a server’s connection is called Test-Connection. This cmdlet performs a few connection tests on a computer to see if it’s online or not.
By executing Test-Connection inside of a foreach loop to read each file line, you can pass each server name represented by the $server variable to Test-Connection. This is how PowerShell to loop through a text file. You can see an example of how this works below.
foreach ($server in $servers) {
	try {
		$null = Test-Connection -ComputerName $server -Count 1 -ErrorAction STOP
		Write-Output "$server - OK"
	}
	catch {
		Write-Output "$server - $($_.Exception.Message)"
	}
}
When the foreach loop is executed, it will then look something like this:

You’ve now successfully tested the connection of a text file full of server names! At this point, you now can add or remove server names inside of the text file at will without changing the code.
You’ve successfully practiced what we’ve been preaching, the DRY method.
ForEach PowerShell Examples
Let us look at a few examples of how to use the ForEach loop. These are based on real-world use cases showing the concept which you can modify to fit your requirements.
Example 1: Creating a File in Each Sub-Folder in a Directory using the ForEach Statement
This example demonstrates the common use of PowerShell foreach folder in a directory.
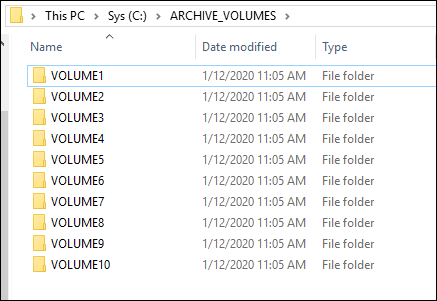
Suppose there are ten sub-folders inside the C:\ARCHIVE_VOLUMES folder. Each sub-folder represents an archive volume that gets backed up daily. After each backup is complete, a file named BackupState.txt is created inside each folder containing the date when it was backed up.
You can see an example of what this might look like below.
The script below performs three actions:
- gets the list of all sub-folders inside
C:\ARCHIVE_VOLUMES - loops through each folder
- creates a text file named
BackupState.txtcontaining the current date and time its value
The example below is using the foreach statement.
# Define the TOP-level folder
$TOP_FOLDER = "C:\ARCHIVE_VOLUMES"
# Get all sub folders recursively
$Child_Folders = Get-ChildItem -Path $TOP_FOLDER -Recurse | Where-Object { $_.PSIsContainer -eq $true }
# Create a text file in each sub-folder and add the current date/time as value.
foreach ($foldername in $Child_Folders.FullName) {
(get-date -Format G) | Out-File -FilePath "$($foldername)\BackupState.txt" -Force
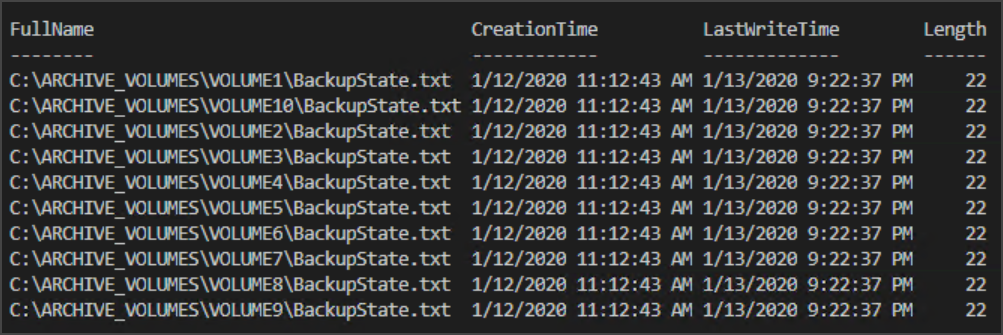
}Using the Get-ChildItem cmdlet, you can confirm that the files were created or update inside each of the sub-folders.
Get-ChildItem -Recurse -Path C:\ARCHIVE_VOLUMES -Include backupstate.txt | Select-Object Fullname,CreationTime,LastWriteTime,LengthThe screenshot below shows the output of the script displaying all BackupState.txt files found in each sub-directory.
Example 2: Reading the Contents of each Text File in Sub-Directories
Next, to demonstrate the use of PowerShell foreach file in a directory, the script below will read each BackupState.txt file created in Example 1.
- Recursively find all
BackupState.txtfiles inside each sub-directory. - Using the
foreachstatement, read each text file to get the “last backup time” value. - Display the result on the screen.
## Find all BackupState.txt files in C:\ARCHIVE_VOLUMES
$files = Get-ChildItem -Recurse -Path C:\ARCHIVE_VOLUMES -Include 'BackupState.txt' | Select-Object DirectoryName,FullName
## Read the contents of each file
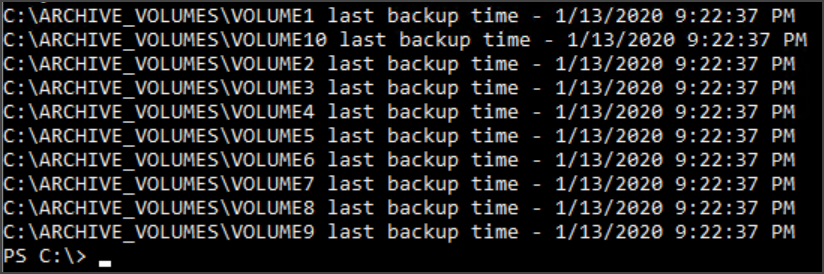
foreach ($file in $files) {
Write-Output ("$($file.DirectoryName) last backup time - " + (Get-Content $file.FullName))
}Once the script is executed in your PowerShell session, you should see a similar output to the screenshot below. This shows that PowerShell loop through files, read the contents and display the output.
Example 3: Getting Services and Starting Them using the ForEach-Object CmdLet
System admins often need to get the status of services and trigger either a manual or automatic workflow to remediate any failed services. Let’s look at the sample script using the ForEach-Object cmdlet.
For this example, the script below will do the following:
- Get a list of services that are configured for an automatic startup but are currently not in a running state.
- Next, the items in the list are piped to the
ForEach-Objectcmdlet to attempt to start each service. - A message of either success or failed is displayed depending on the result of the
Start-Servicecommand.
## Get a list of automatic services that are stopped.
$services = Get-Service | Where-Object {$.StartType -eq 'Automatic' -and $.Status -ne 'Running'}

## Pass each service object to the pipeline and process them with the Foreach-Object cmdlet
$services | ForEach-Object {
    try {
        Write-Host "Attempting to start '$($.DisplayName)'"
        Start-Service -Name $.Name -ErrorAction STOP
        Write-Host "SUCCESS: '$($.DisplayName)' has been started"
    } catch {
        Write-output "FAILED: $($.exception.message)"
    }
}
When the script is executed, it will look like the output screenshot below. As you can see, each service was issued a start command. Some were started successfully while some of them have failed to start.

Example 4: Reading Data from CSV using the ForEach() Method
Using data from CSV files is popular among system admins. Putting records inside a CSV file makes running bulk operations easy using the Import-CSV and ForEach combination. This combination is commonly used for creating multiple users in Active Directory.
In this next example, it is assumed that you have a CSV file with two columns – Firstname and Lastname. This CSV file should then be populated with the names of new users to be created. The CSV file would look something like below.
"Firstname","Lastname"
"Grimm","Reaper"
"Hell","Boy"
"Rick","Rude"
Now for the next script block. First, import the CSV file by passing the content path to the Import-CSV cmdlet. Then, using the foreach() method, loop through the names and create the new users in Active Directory.
# Import list of Firstname and Lastname from CSV file
$newUsers = Import-Csv -Path .\Employees.csv

Add-Type -AssemblyName System.Web

# Process the list
$newUsers.foreach(
    {
        # Generate a random password
        $password = [System.Web.Security.Membership]::GeneratePassword((Get-Random -Minimum 20 -Maximum 32), 3)
        $secPw = ConvertTo-SecureString -String $password -AsPlainText -Force

        # Formulate a username
        $userName = '{0}{1}' -f $_.FirstName.Substring(0, 1), $_.LastName

        # Build new user attributes
        $NewUserParameters = @{
            GivenName       = $_.FirstName
            Surname         = $_.LastName
            Name            = $userName
            AccountPassword = $secPw
        }

        try {
            New-AdUser @NewUserParameters -ErrorAction Stop
            Write-Output "User '$($userName)' has been created."
        }
        catch {
            Write-Output $_.Exception.Message
        }
    }
)
When run, you should now have created an AD user for each row in the CSV file!
Summary
The logic behind the foreach loop in PowerShell is no different than that of other programming languages. It only changes with how it is used and which variation of the foreach loop is chosen for any specific task.
In this article, you’ve learned the different types of foreach loops available in PowerShell, and what to consider as to which one to use. You’ve also seen the three types of foreach loops in action using different sample scenarios.


