

PowerShell is a powerful scripting language, and scripting means capacity for automation. But installing PowerShell on a Mac can be a bit tricky. Worry not, though! This tutorial will walk you through installing PowerShell on a Mac.
After following this tutorial, you can use PowerShell on your Mac as on any Windows computer.
Read on to power up your Mac with PowerShell!
Prerequisites
This tutorial will be a hands-on demonstration. If you’d like to follow along, be sure you have a Mac with macOS High Sierra (or later), Homebrew, and Xcode installed.
Installing PowerShell for Mac Using Homebrew
Homebrew is a package manager for Mac, like apt for Ubuntu or Yum for Fedora. It makes installing software on a Mac more convenient than doing it manually.
Homebrew lets you install the latest stable or preview PowerShell for Mac version on your computer by running a few commands.
Installing PowerShell for Mac (Stable)
A stable version means that the software has been thoroughly tested and is suitable for use in a production environment.
To install the stable PowerShell for Mac using Homebrew, follow these steps:
1. Launch the Terminal application.
2. Run the below command to install PowerShell. The brew portion is the core Homebrew command, and the cask portion is an extension that allows Homebrew to install macOS applications.
brew install --cask powershellOnce the installation completes, you will see an output similar to the one below. The latest stable PowerShell version is 7.2.6 as of this writing.

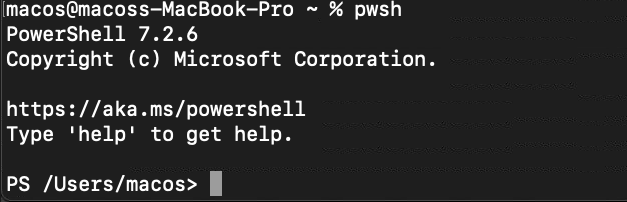
3. Finally, run the below command to launch PowerShell.
pwshYou will see something similar to the screenshot below, which indicates that PowerShell is running on your Mac.
Installing PowerShell for Mac (Preview)
Microsoft also releases preview versions of PowerShell. These versions contain new features that haven’t been thoroughly tested yet and aren’t advisable for production use. But you may want to install a preview version to test the new features.
To install a preview version of PowerShell for Mac, follow the steps below.
1. Run the below command to add the Homebrew versions repository. This repository contains preview versions of various applications, including PowerShell.
brew tap homebrew/cask-versions 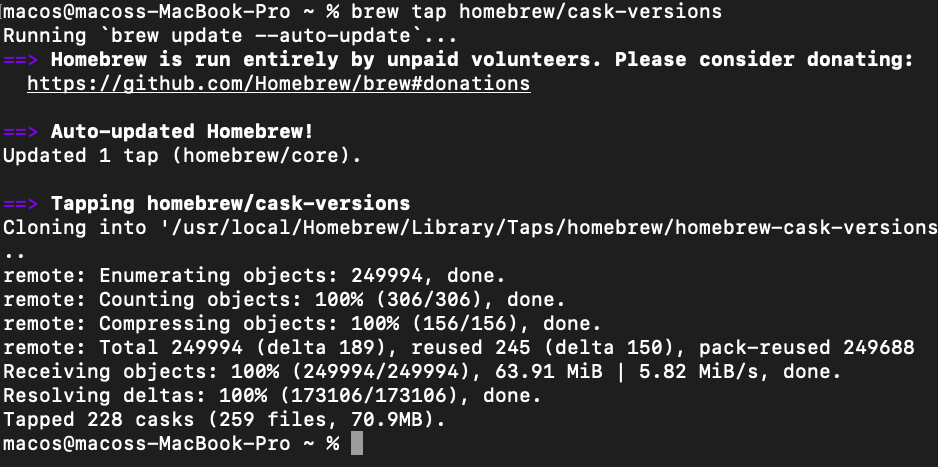
2. Next, run the below command to install the latest PowerShell Preview version.
brew install --cask powershell-previewOnce the installation completes, you will see an output similar to the one below. As of this writing, the latest PowerShell Preview version is 7.3-preview.7.

3. To launch PowerShell Preview, run the below command in your Terminal.
pwsh-preview
Upgrading PowerShell for Mac
PowerShell for Mac receives regular releases, and you can upgrade to the latest one using Homebrew. New versions often contain bug fixes and performance improvements.
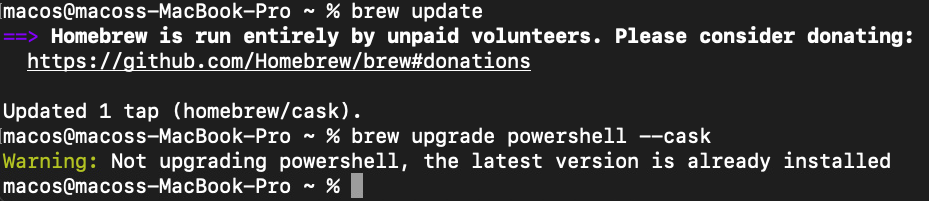
To upgrade PowerShell for Mac to the latest stable, run the below commands in your Terminal. The first command updates Homebrew’s package list. The second and third commands upgrade PowerShell for Mac to the latest stable and preview versions, respectively.
# Update the Homebrew package list
brew update
# Upgrade PowerShell (Stable)
brew upgrade powershell --cask
# Upgrade PowerShell (Preview)
brew upgrade powershell-preview --cask

Installing PowerShell for Mac Using PKG Files
Microsoft also offers PowerShell for Mac in the form of PKG installer files. You can download these files from the PowerShell GitHub releases page.
The PKG installer is for you if you prefer installing software using the GUI instead of the command line. To install PowerShell using a PKG file, follow these steps:
1. Open your browser, open the PowerShell GitHub latest releases page and click the Assets drop-down menu.
2. Click on the PowerShell PKG file link for your computer’s CPU type. If you have a Mac with an M1 chip, select the arm64 option; otherwise, choose the x64 link. As of this writing, the latest stable version is 7.2.6.
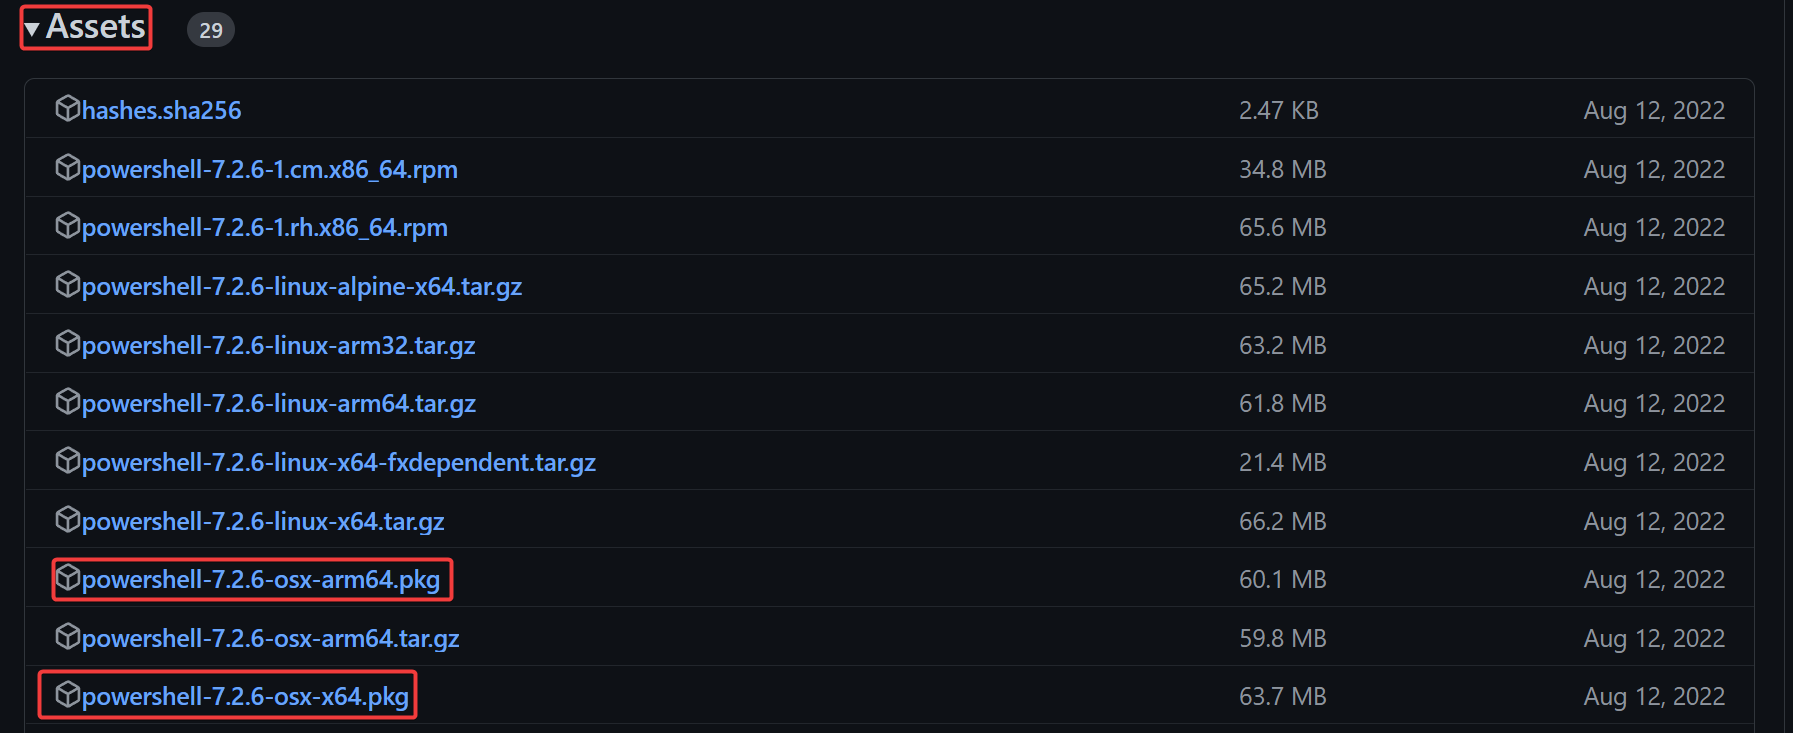
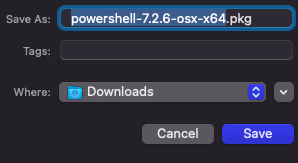
3. Save the file to your Downloads folder.
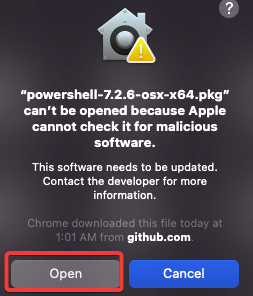
4. After downloading the file, double-click on it to launch the installer and click Open.
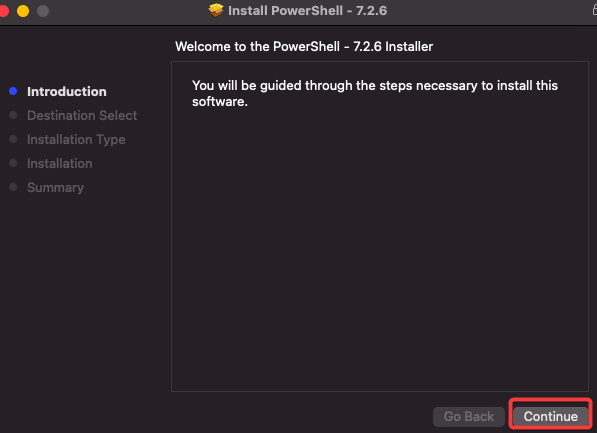
5. Click Continue on the Introduction screen.
PowerShell for Mac only supports installation on the current user account. You cannot choose a custom installation destination path.
6. Click Install on the Installation type screen.

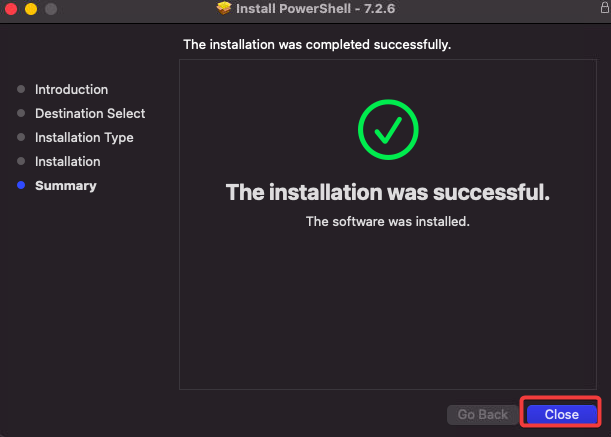
7. Click Close on the Summary screen to complete the installation.
8. Finally, launch PowerShell from the Launchpad and type PowerShell in the Search field. Click on PowerShell from the results to open it.

Installing PowerShell for Mac Using Dot Net Developer CLI
Another way to install PowerShell for Mac is using the Dot Net Developer CLI. The Dot Net Developer CLI is a cross-platform DOTNET command-line interface (CLI) that allows you to develop, build, run, and publish DOTNET applications.
If you are a developer and already have dotnet CLI installed on your Mac, this method might be the most accessible way to install PowerShell.
1. Run the below command to install PowerShell using dotnet CLI.
dotnet tool install --global PowerShellOnce the installation completes, you will see an output similar to the one below.

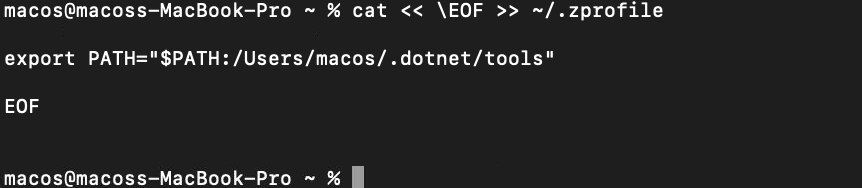
2. Now, run the below cat command to update the PATH variable. This command will add the PowerShell installation directory to your PATH environment variable so that you can launch PowerShell from any directory.
3. Next, run the below command to reload the environment variable in your terminal session.
zsh -l
4. Lastly, launch PowerShell by running the pwsh command in your Terminal.
pwsh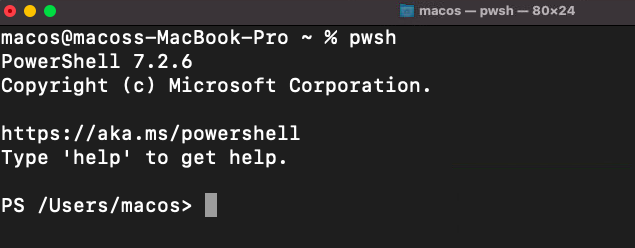
Conclusion
PowerShell is an excellent tool for automating tasks on any platform it supports. This tutorial taught you how to install PowerShell for your Mac using Homebrew, PKG files, and the Dot Net Developer CLI.
At this point, you should have a good understanding of how to install PowerShell on your Mac. You can now start using PowerShell to automate tasks on your Mac. With this newfound knowledge, as an administrator, why not start scripting some complex processes that you know will save you time?
Who knows, maybe your next script could be the one that helps you automate your company’s release process!


