


Have you ever run into an issue on a Windows machine with network connectivity? Maybe it was some rogue software installer making unknown changes to registry keys, or perhaps you suspect a virus is installed and need to track down its activity. Luckily Network Shell (netsh) utility is just around to help.
Netsh is a command-line utility that allows you to configure and display the status of various network configurations of Windows machines or servers. And in this tutorial, you’ll learn just about every command-line feature Netsh provides.
Ready? Read on and keep your network connectivity at its peak!
Prerequisites
This tutorial comprises hands-on demonstrations. But so long as you have a Windows PC or server, you’re good to go – This tutorial uses Windows 2019 Datacenter Edition, but Netsh works in all modern Windows editions.
What is Network Shell (Netsh)?
Before you dive into executing your first netsh command, kick-off this tutorial by getting a high-level overview of Netsh. So, what is Netsh anyway?
You might have worked with dozens of networking command-line tools such as ping, tracert, telnet, etc., but they are bound for a specific purpose.
With the Netsh command-line utility, you can configure and work with various network components. These network components are not limited to network interfaces, Windows firewalls, server roles, etc., on computers running Windows Server.
Running Netsh Commands
You now have a basic idea of Netsh and its usefulness for monitoring and configuring your network. But how do you actually execute netsh commands?
You can execute netsh commands on command-line consoles like PowerShell or the command prompt on a Windows machine. But as the command prompt’s successor, this tutorial demonstrates running the netsh commands on PowerShell.
1. Log in to your Windows Server using your RDP client. Windows has a default RDP client installed.
2. After you log in, open PowerShell as administrator, and run the netsh command below to access the netsh command-line session.
netsh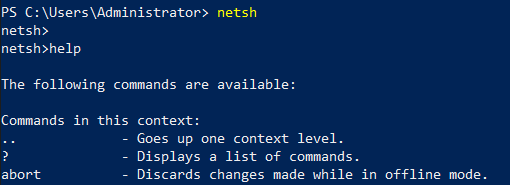
3. In the netsh prompt, run the help command to see all commands you can use inside your netsh command-line session. help
helpPick one command you’d like to run, but this tutorial uses the interface command.
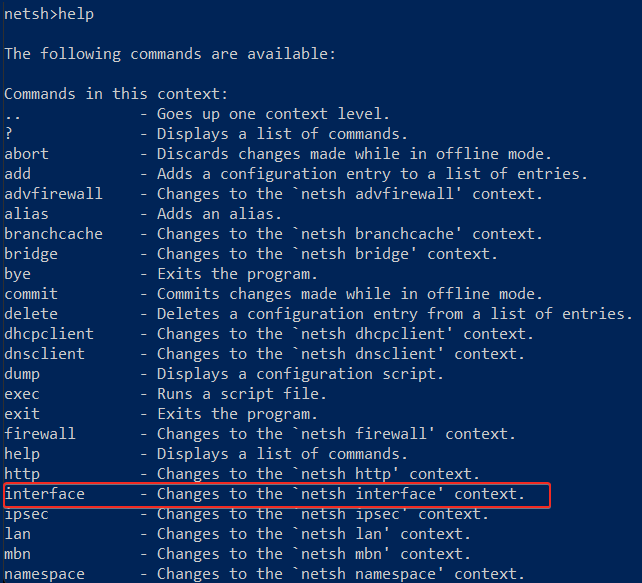
4. Lastly, run the interface command below to show all available network interfaces. interface show interface
interface show interface
Using Netsh Utility Commands
You now have access to the netsh prompt, and you’re almost ready to manage your network connectivity. But before you dive deeper into Netsh, you’ll be running basic Netsh utility commands to familiarize yourself with how Netsh works.
There are two ways you can run Nesh utility commands as follows:
- Run the
netshcommand alone to access the netsh prompt, then run the Netsh utility command.
netsh
help- Running the
netshcommand followed by the Netsh utility command.
netsh helpLike the help command you learned in step three of the “Running Netsh Commands” section, run some other Netsh utility commands below that Netsh offers:
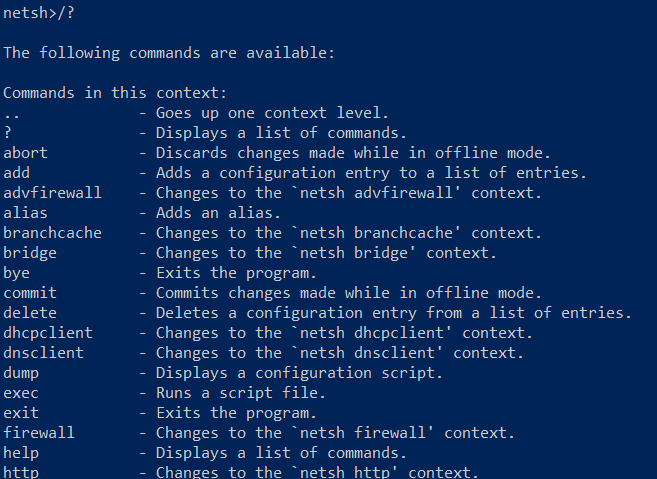
/?– Similar tohelpbut commonly used for most of the commands you can use within Netsh utility.
show– This command displays the commands available with each context.

popd allows you to restore a context from a first-in-last-out (FILO) stack, while pushd pushes the current context on a stack.
Both commands don’t have outputs, but you can append the help command to see how these commands function, as shown below.
popd help
pushd help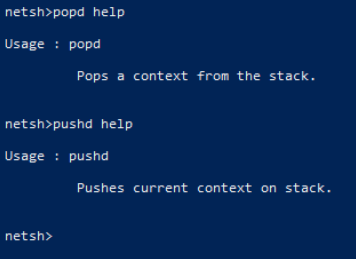
- The
commitcommand commits changes made to the running configuration while in offline mode. In contrast, theabortcommand discards changes made in the running configuration while in offline mode.
These commands don’t have output, but appending the help command lets you view the command’s usage.
commit help
abort help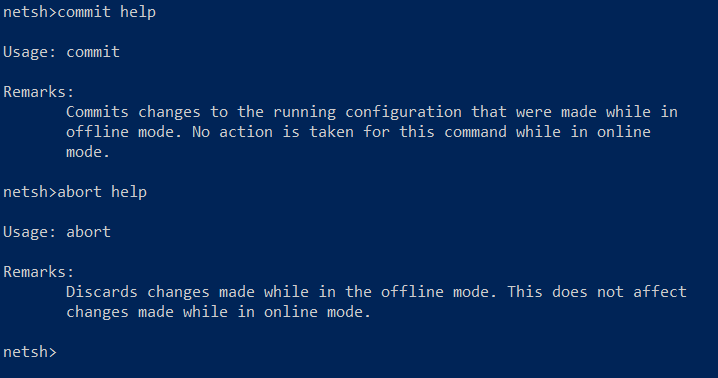
quitandbye– Lets you exit out of Netsh utility.

Fetching and Executing Netsh Utility Commands from a Text File
Like every other command, the netsh command allows you to declare parameters while executing tasks for simplicity and flexibility.
When working with Windows network configurations, you’ll find yourself dealing with Netsh. And using parameters in your netsh commands comes in handy. One good example is calling upon commands from a dedicated source, like a text file.
Create a file named myfile.txt on your desktop and add the help command in the file.
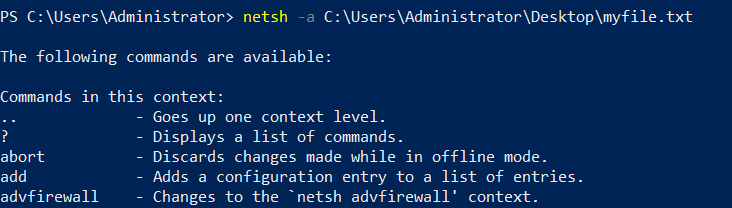
Now, run the netsh command below with the -a flag to specify the file’s path containing the netsh command.
netsh -a C:\Users\Administrator\Desktop\myfile.txt
Below, you can see the netsh command called and executed the help command from the myfile.txt file.
If you wish to run the command on a remote windows machine, consider using the
-rflag, as shown below. But make sure the Remote Registry service runs on the remote computer. netsh -r shanky
Executing Netsh Commands Under a User Account
If you like to keep track of changes you make to your network configuration, run Netsh commands under a user account. How? By using the -u parameter followed by the account’s username.
Run the following netsh command to list available network interfaces under a user account (-u) named shanky.
To specify the user’s password, append the
-pparameter followed by the password.
netsh -u shanky -p hellopass interface show interface

netsh Commands Under a Different User AccountIf you need to run the
netshcommand under a user account from a specific domain, consider using theDomainName\\usernameparameter.
Listing Available Network Interfaces
A network interface connects your computer and a private or public network. And knowing which interface your machine uses and the network configurations to troubleshoot is crucial.
This information helps resolve issues or provide your network configurations to third-party vendors for support.
1. Execute the netsh interface command below to show all available interfaces currently present on your machine.
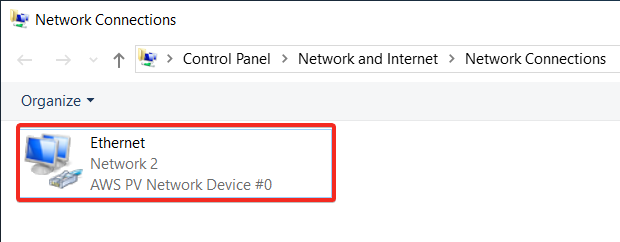
Running netsh Commands Under a Different User AccountAs you can see below, only one interface (Ethernet) takes care of all the network flow (in/out) from your machine.

2. Now, click the start menu, type ncpa.cpl, as shown below, and press Enter to open the Network Connections window (step three).
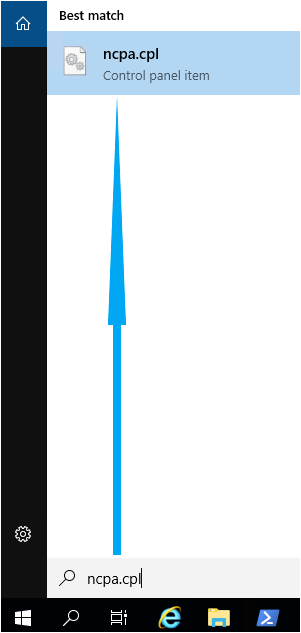
3. Finally, verify if the netsh command returned the correct details of interfaces. Below, you can see the name of the active interface is Ethernet.
Gathering Information on Network Interfaces
What other good things come with listing available network interfaces on your system? Dig deeper to get comprehensive information from your network interfaces. Why? In a large organization, other departments require those details if they need to host applications on your network.
Run the following command that works the same as listing (show) each network interface available. But this time, you’ll get more details about each network interface configuration (config), such as DHCP status, IP address, etc.
netsh interface ipv4 show config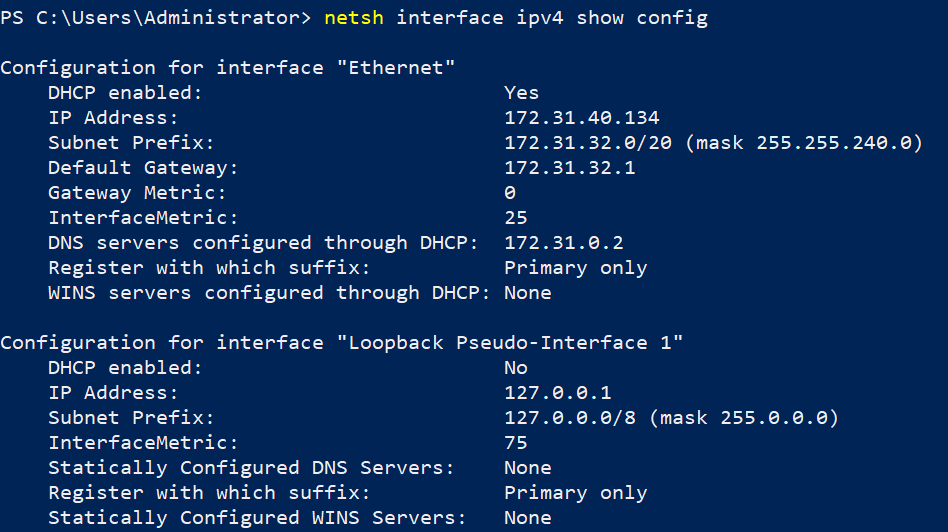
The Loopback Pseudo-Interface is used mainly for troubleshooting purposes and allows you to connect to servers running on the local machine for testing. But note that the loopback interface does not represent any actual hardware.
Setting a Static IPv4 Address and DNS Server
From the detailed listing of available interfaces, one of the most important concepts is the IP address of the Windows machine. The IP address for the Ethernet network interface is Dynamic. As a result, the IP address is allocated by itself from the pool of available IP addresses of the subnet.
But at times, you need to have a static IP address allocated to your machine, such as to test applications where a reboot of the machine is required. So change the dynamic IP address settings to manual type where IPs remain persistent.
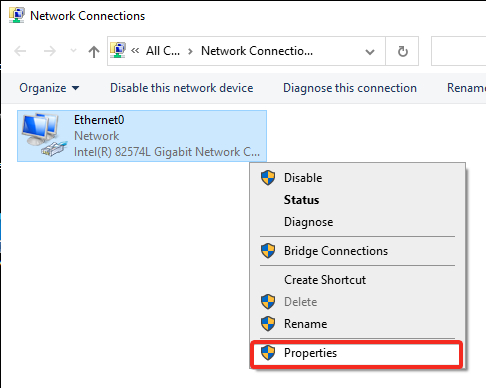
1. Open the Network Connections window to see available network interfaces.
2. Next, right-click on the Ethernet interface and select properties, opening Ethernet’s Properties window.
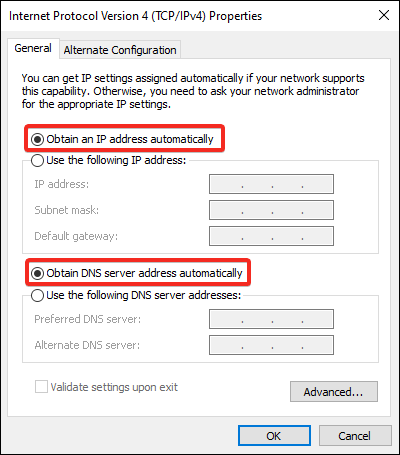
3. Select Internet Protocol Version 4 (TCP/IPv4), as shown below, and click on Properties to open the IPV4’s properties window.
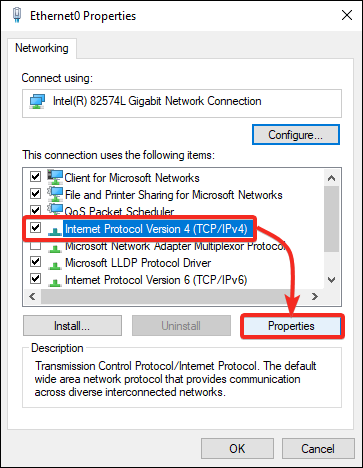
As you can see below, the IP settings are set to obtain an IP address automatically.
Click on Cancel to close the Properties window, and you’ll manually change the IP address in the following step.
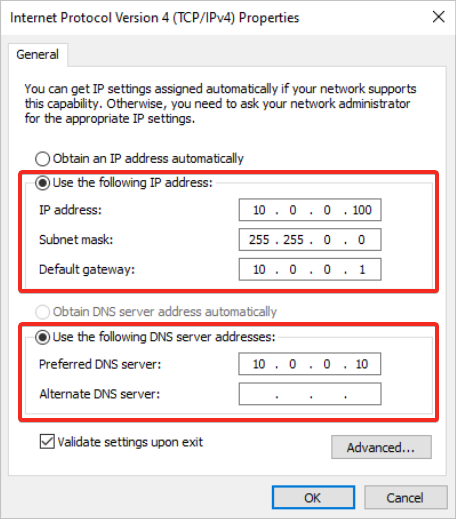
4. Now, run the below netsh interface command to manually set the following IP address settings:
- IP Address –
10.0.0.100 - Subnet mask –
255.255.0.0 - Default gateway –
10.0.0.1
netsh interface ip set address "Ethernet" static 10.0.0.100 255.255.0.0 10.0.0.1 To change the IPv6 address of the Ethernet interface, you will need to use
netsh int ipv6 set to address 7 2001::2
To roll back to using a dynamic IP address, run the following command:
netsh interface ip set address "Ethernet" dhcp
5. Run the following command to define a DNS server. Doing so allows your Windows machine to communicate to other networks.
netsh interface ip set address "Ethernet" static 10.0.0.100 255.255.0.0 10.0.0.1 To disable the Ethernet interface on your Windows system, consider running the following command:
netsh interface set interface name="Ethernet" admin=disabled
6. Lastly, as shown below, open the IPv4 settings again as you did in steps two to three to verify the interface’s IP address settings changed.
Managing Wired Network Interfaces
You previously managed the Ethernet network interface, but there could be multiple interfaces, such as wireless, wired, and Bluetooth-based network interfaces. What if you need information only for wired network interfaces as they are most important?
Consider using Netsh commands for wired LAN that provide methods to configure connectivity and security settings. The Netsh lan commands configure the local computer or multiple computers using a logon script.
Run the netsh lan command below to list all the wired network interfaces available on your Windows machine.
netsh lan show interfaces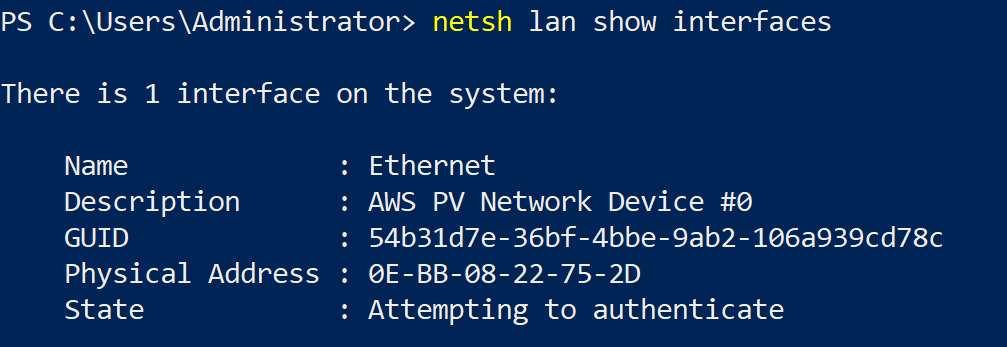
Now, run the below command if you need to display the list of wired profiles configured on the computer.
If the interface parameter is defined, only the profile contents for the specified interface are displayed. Otherwise, all profiles will be displayed with their name and description.
netsh lan show profiles interface ="Ethernet"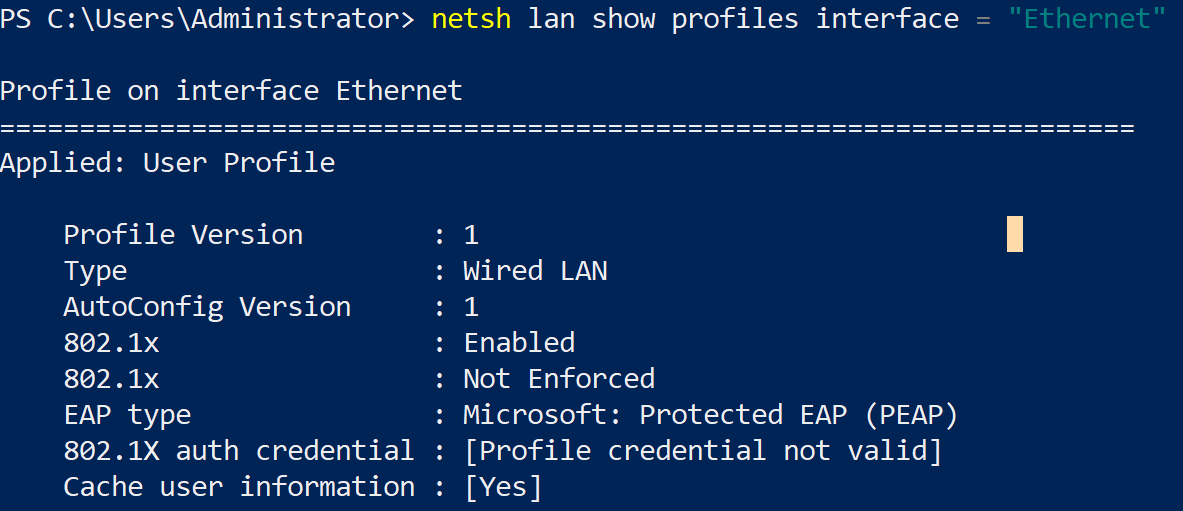
Managing the Windows Firewall
Securing your network is a top priority achievable by managing your Windows firewall. How? By adding firewall rules with the Netsh advfirewall command. The advfirewall command allows you to control and manage your Windows firewall.
The
advfirewallcontext works mainly on three profile settings; domain, private and public
Run the below command to enable (action=allow) the ping protocol (icmpv4) from your Windows firewall by setting a rule named ALL ICMP V4.
netsh advfirewall firewall add rule name="All ICMP V4" dir=in action=allow protocol=icmpv4
Now, run the below command to add a rule named Open Port 80 on your machine.
You can choose any port that you’d like to open. But this command opens port 80, allowing traffic to flow in and out.
netsh advfirewall firewall add rule name= "Open Port 80" dir=in action=allow protocol=TCP localport=80
The
advfirewallcontext provides the same functionality that thenetsh firewallcontext gives. But thenetsh firewallcontext might be deprecated in the future.
Capturing Network Traces
Trace is another crucial context to troubleshoot and collect event information regarding network connections. You can use the trace context to collect event information using Event Tracing for Windows (ETW) to log network events.
But first, you’ll have to identify scenarios you can trace your network connections.
You can use Netsh to collect a packet capture without installing third-party tools like Wireshark.
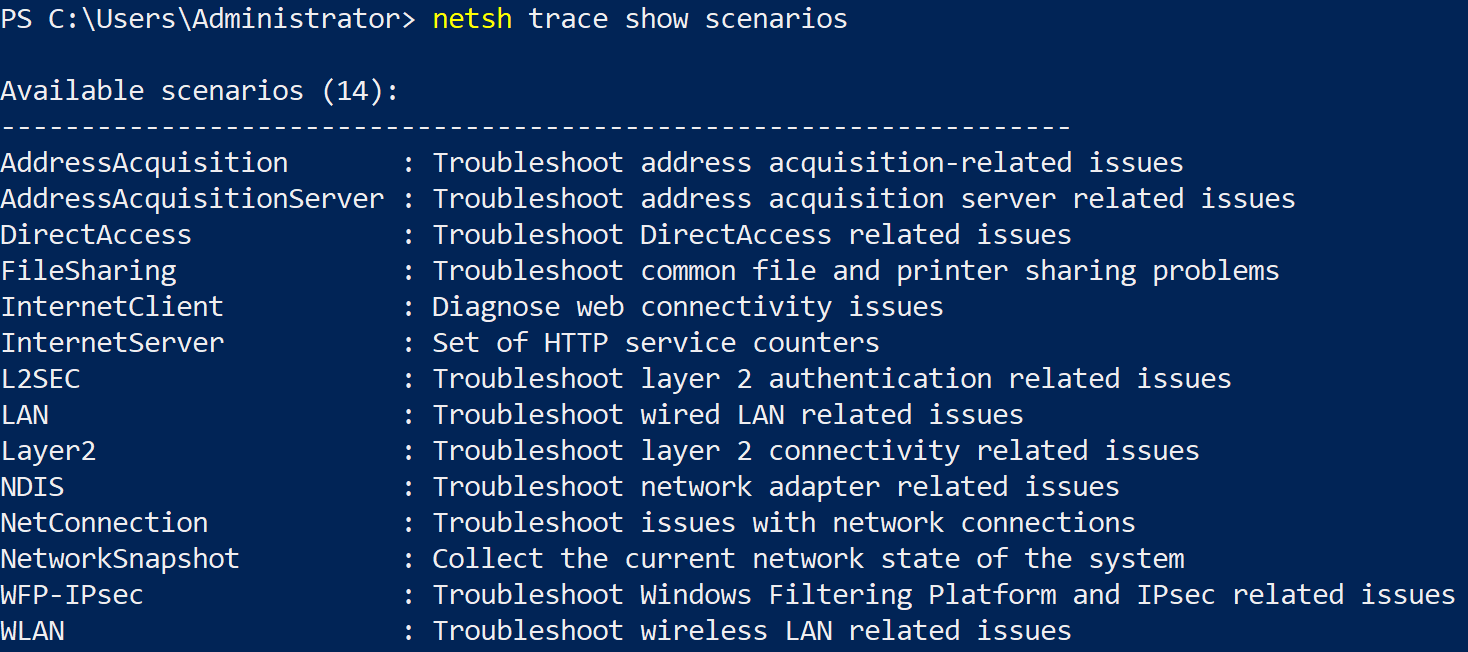
Run the command below to help you find available scenarios where tracing your network connections would work based on the issue you’re dealing with in your network.
netsh trace show scenariosAs you can see below, multiple scenarios are available to work with trace.
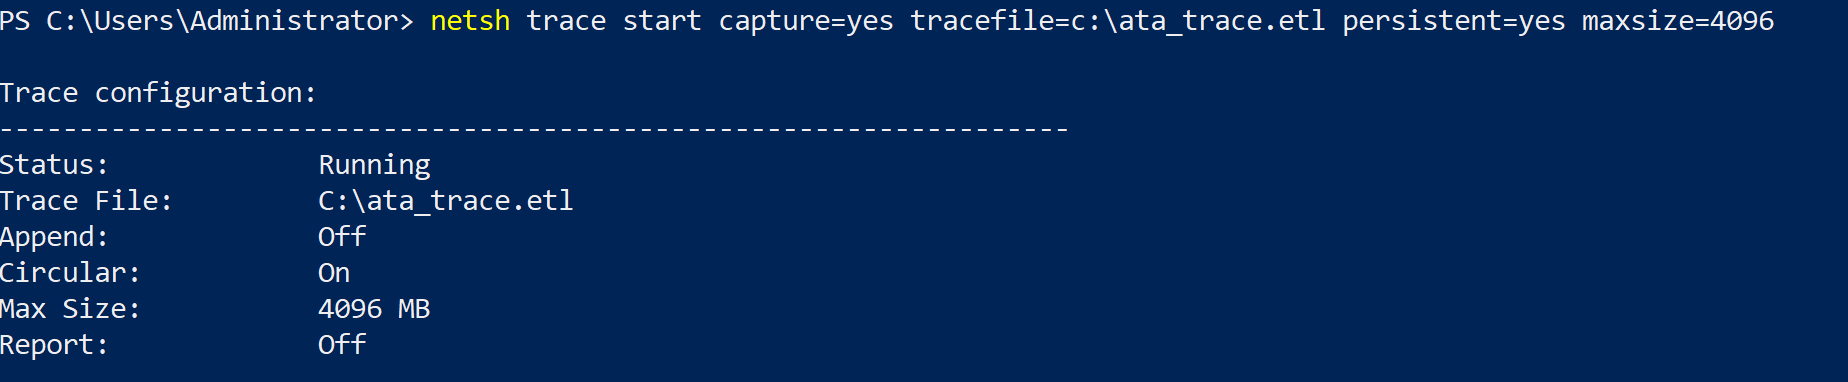
Now, execute the below netsh trace start command to capture (capture=yes) all network details to a specified ETL file (tracefile) called ata_trace.etl. The persistent parameter permanently stores the file in the specified location when the value is true (yes).
netsh trace start capture=yes tracefile=c:\ata_trace.etl persistent=yes maxsize=4096If you wish to stop the traces from getting captured, run the below command instead:
netsh trace stop
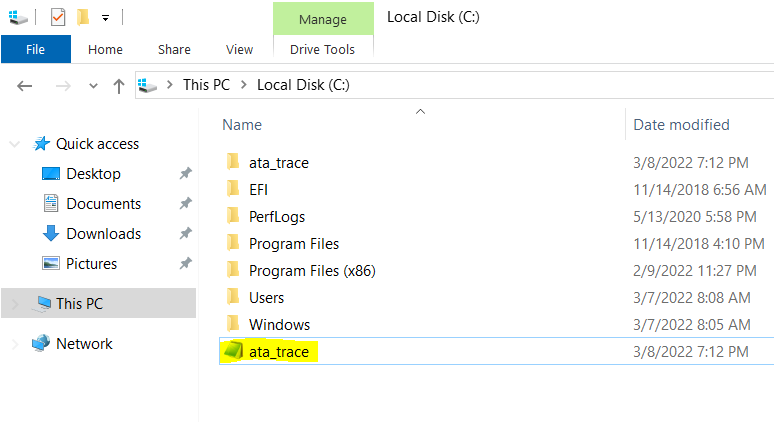
As you can see below, the file (ata_trace) has been created and stored in the C:\ drive.
Diagnosing the Windows Firewall and IPsec Events
Nowadays, monitoring alerts is crucial for any organization running applications or microservices. Perhaps you’ve decided to spin up some new Windows machine or Virtual host and check filtered data about the connectivity and firewall settings. If so, consider using the Windows Filtering Platform (WFP).
The Netsh commands for the WFP allow you to conduct checks and filtration on the firewall for systems that support Windows firewall and IPsec.
Run the following command to save the current operational state of the WFP and IPsec to an XML file (wfpstate.xml) on the working directory by default.
netsh wfp show stateWith a copy of the state file (wfpstate.xml), you can further examine the WFP and IPsec state to find the root cause of a problem.

Perhaps you like to save the XML file to another location. If so, append the file flag and specify a save location, as shown below. Replace location with the actual save location and statefile.xml with your preferred file name.
netsh wfp show state file="location\statefile.xml"
Now, run the below command to save a list of network traffic events (netevents) to a file called netevents.xml in the working directory by default.
Like with the wfpstate.xml file, you can also specify a save location and file name for the network traffic events XML file (netevents.xml).
netsh wfp show netevents
If you need to diagnose a specific protocol only, use the protocol parameter below.
The below command saves a list of network traffic events only for the TCP/IP protocol in XML format, where 6 is TCP/IP’s protocol number.
netsh wfp show netevents protocol=6
Validating Incoming and Outgoing Traffic
If you’re working with many applications where traffic comes in and leaves your network, you need to validate that traffic. How? Winsock is an interface that allows you to handle all the input/output requests for internet applications in a Windows system.
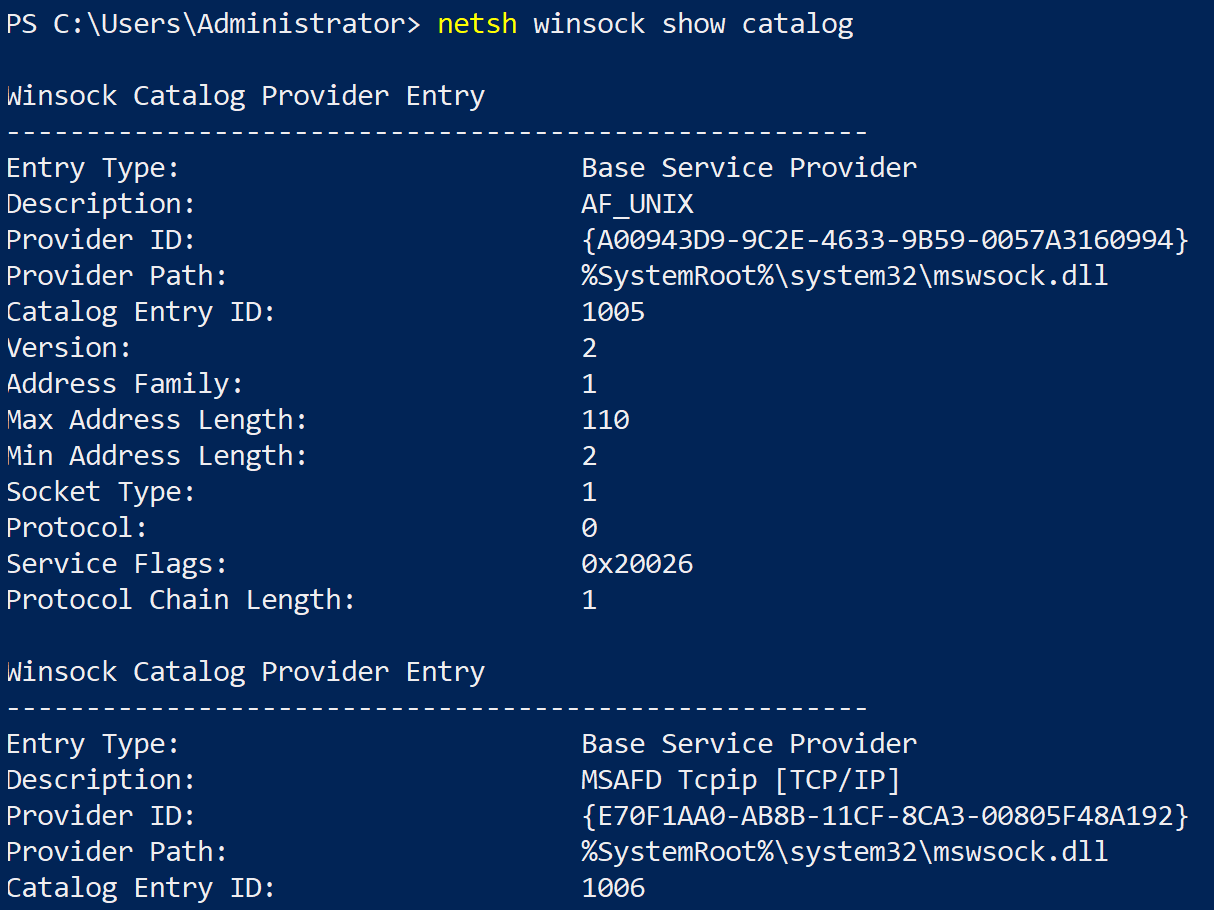
Execute the following netsh winsock command to show all the stored Windows sockets installed on your machine.
netsh winsock show catalogBelow, you can see all the Windows sockets entries and details of each one.
The Winsock catalog tends to contain incorrect entries or becomes corrupt. In that case, run the netsh command below to perform a Winsock reset. This command sets the Winsock catalog and associated registry settings to their defaults
netsh winsock reset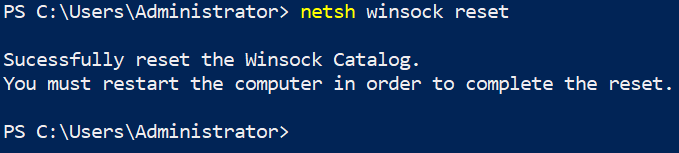
Working with Alias and Unalias Using Netsh Command
Alias is an essential concept in networking. An alias instructs the shell to replace one string with another while executing the commands. Similarly, Netsh also uses Alias, a user-defined character string, which Netsh treats as a look-alike to another character string.
The syntaxes to add and delete an alias are below:
# Adds an alias
netsh add alias
# Deletes an alias
netsh delete alias
Reserving a Uniform Resource Locator (URL)
Reserving a URL properly in your system is crucial to defining the syntax of a URL endpoint to a web application. A reserved URL is defined for both the Web service and the web portal when configuring the applications on a server.
Three options are used along with the netsh command, add urlacl, show urlacl, and delete urlacl.
1. Run the below command to reserve a URL entry in the system where, url specifies the fully qualified URL, and user specifies the user or user-group name (DOMAIN).
netsh http add urlacl url=https://127.0.0.1:80/ user=\Everyone
Next, run the below command to show the list of all access control lists for a particular reserve URL (https://127.0.0.1:80/)
netsh http show urlacl url=https://127.0.0.1:80/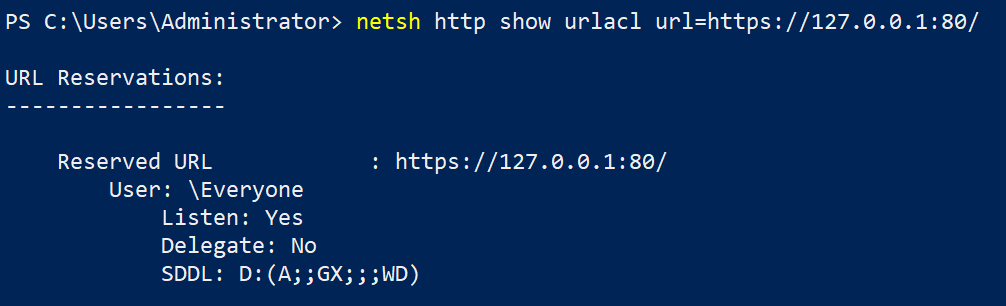
3. Finally, execute the command below to delete reserved URLs.
netsh http delete urlacl url=https://127.0.0.1:80/
Managing Netsh Configuration and Query Commands
Nowadays, broadband and networking are crucial on laptops, computers, and mobiles. And knowing how to query and configure mobile broadband settings and parameters comes in handy.
But first, you must ensure the WWAN AutoConfig service is running.
1. Run the below command to start the wwanSvc service. net start wwanSvc
net start wwanSvc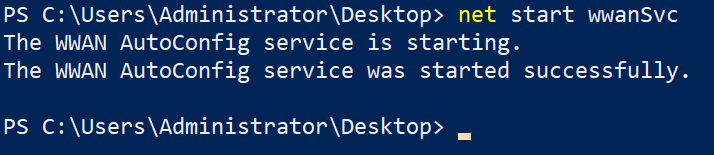
2. Next, run the netsh add command below to add a network profile (Wi-Fi-Marriott Bonvoy.xml) in the mobile broadband interface’s profile data store configuration table.
Be sure to change Wi-Fi-Marriott Bonvoy.xml with the network profile (XML file) you like to add.
To check all the Mobile Broadband interfaces, run the below command.
netsh mbn show interface
netsh wlan add profile filename="c:\New folder\Wi-Fi-Marriott Bonvoy.xml"
Perhaps you like to export a network profile. If so, run the following command, where
SSIDis the network interface, anddestinationis the network profile’s save path:netsh wlan export profile "SSID" key=clear folder=destination
3. Run the following command to connect to a particular mobile broadband network interface (delhi_Sagar_5GHz). Replace Wi-Fi Network with your Wi-Fi network name.
netsh wlan connect name="Wi-Fi Network"
4. Execute the below command to delete a network config profile (Marriott Bonvoy).
Deleting a network config profile from the profile data store is similar to running add command. The difference is that you’ll replace add with the delete sub-context in the command.
netsh wlan delete profile name="Marriott Bonvoy"
5. Now, run the following netsh dump command to capture and display interface configuration scripts.
netsh dump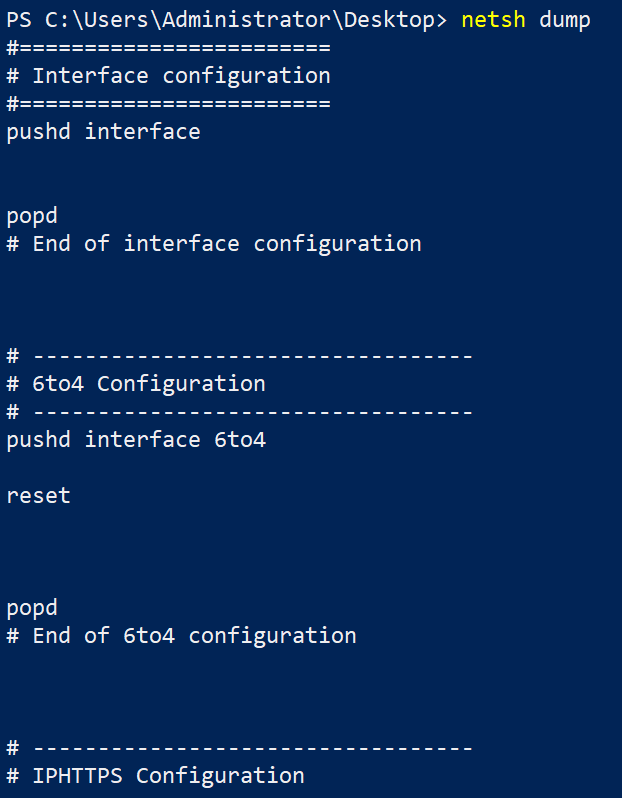
If you wish to have a copy of the configuration details you can later review, run the following command. This command doesn’t print anything on the console but instead saves the output to a text file (netconfig.txt).
netsh dump > netconfig.txt6. Execute the netsh set command below to set the configuration of specified interfaces, such as the following:
- Setting the mobile broadband data auto-connect state for the given interface.
- Turning the mobile broadband data on or off for the specified profile set or interface.
- Setting the mobile broadband data highest connection category for the given interface.
netsh set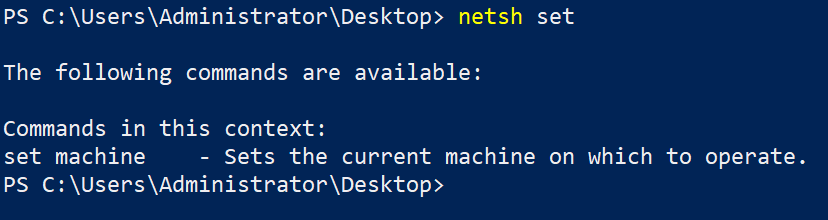
Managing HTTP System Settings
Another important netsh command to look at is netsh http, which allows you to query and configure HTTP.sys settings and parameters.
These HTTP.sys settings can be, but are not limited to the following:
- The cache of the HTTP service.
- All the cached URL resources of the HTTP service.
- All certificate bindings.
- A snapshot of all the HTTP services.
Windows HTTP Services provides developers with an HTTP client API to send requests through the HTTP protocol to other HTTP servers.
Execute the below netsh command to show you a list of all the commands you can run to view the http service-related settings and configurations.
netsh http showBelow, you’ll see various options you can use with the netsh http command.
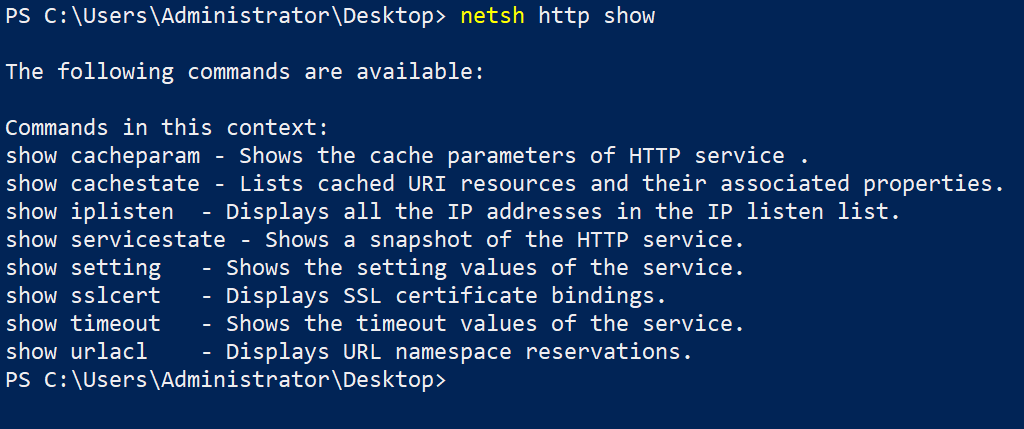
netsh http CommandNow, run the below command to verify the HTTP settings and configuration, cacheparam perhaps.
netsh http show cacheparam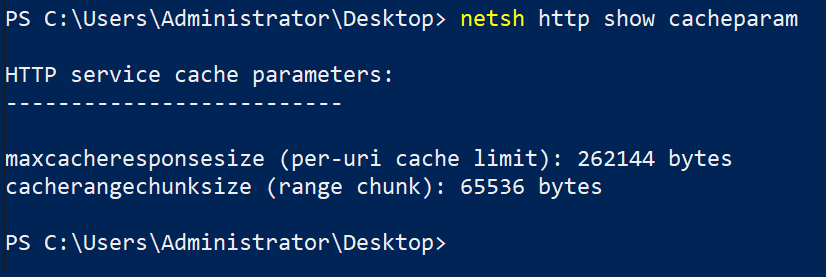
Automating Netsh Commands Execution with Batch Scripts
So far, you learned everything you need to know about Netsh utility, so consider yourself a pro. But at times, you need to run dozens of commands in one go and store the results. So why not automate executing Netsh commands with Batch scripts?
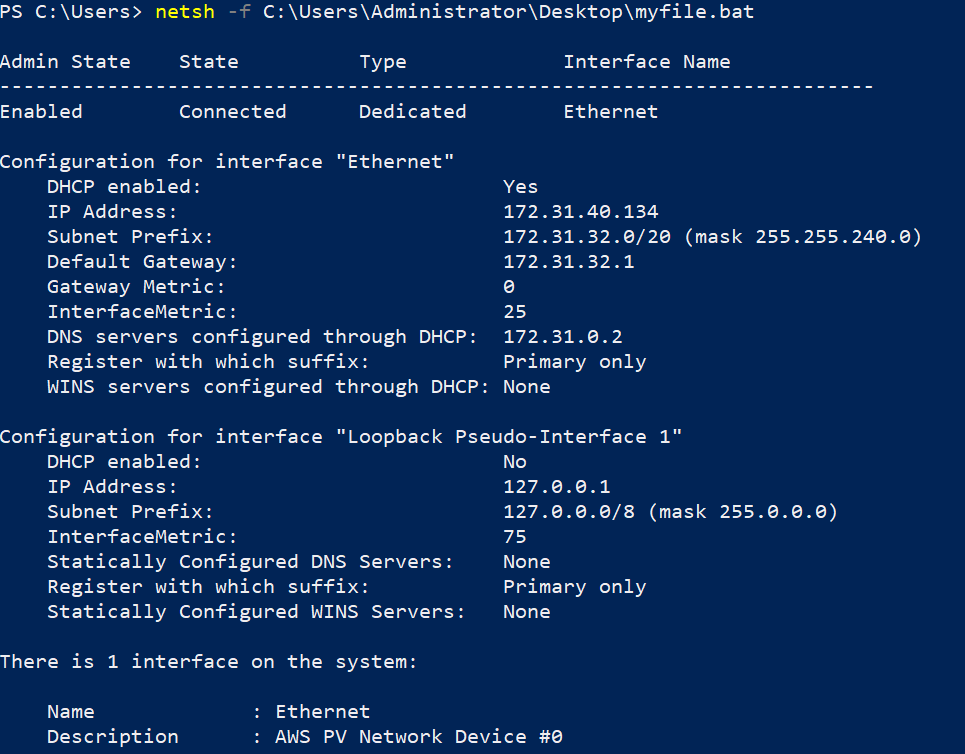
Create a file named myfile.bat on your desktop and copy/paste the code below to the myfile.bat file. The code below shows all network interfaces and configurations of all network interfaces.
# Show all the interfaces of the Windows System
interface show interface
# Show the configurations of all the interfaces
interface ipv4 show config
# Show all the Wired lan network interfaces
lan show interfaces
# Updating the firewall rule to add ping protocol
advfirewall firewall add rule name="All ICMP V4" dir=in action=allow protocol=icmpv4
# Show all the events in the network
wfp show events
# Show all the network events
wfp show netevents
Next, run the below netsh command to execute the myfile.bat script from the specified folder path (-f C:\Users\Administrator\Desktop\).
netsh -f C:\Users\Administrator\Desktop\myfile.batAs you can see below, the netsh commands inside the batch file (myfile.bat) were executed successfully.
Conclusion
Throughout this tutorial, you’ve learned different netsh commands to control your network configuration and diagnose potential issues. Netsh utility is a free tool with many features you can use whether you’re just checking out your network configuration or monitoring your network closely.
With this newfound knowledge, you can now monitor interfaces, run trace commands and scripts, and even convert all IP address settings.
Now that you’re a Netsh guru, how do you plan to use it? Why not automate command executions by compiling commands into a PowerShell script you can run at will?


