


If you wonder how basic network configuration is managed across your environment, today is your lucky day. You’ll learn how to connect to your Microsoft DHCP server and manage all of the common components from DHCP scopes, DHCP policies, DHCP reservations, and DHCP leases!
Not a reader? Watch this related video tutorial!Prerequisites
This article is a tutorial. If you plan on following along step-by-step, you will need the following:
- A Microsoft DHCP Server in an Active Directory environment- This tutorial uses Windows Server 2019, but any server from 2008R2 onwards would work. The server is called dc01.stevesherry.com.
- An Active Directory account that is a member of the DHCP Administrators group or equivalent.
DHCP Scopes
At its simplest, a Microsoft DHCP server is a machine on a network that hands out IP addresses to clients. It ensures all clients receive IP addresses so they can communicate on the network. It does this through DHCP scopes.
A DHCP scope represents contains various components such as:
- Assignable IP addresses for a particular group of devices (address pools)
- A client’s DNS server and default gateway
- IPs to only assign to certain devices (DHCP reservations)
- Address pools (groups of assignable IP addresses)
The DHCP scope is a core element on a network and that allows you to configure network settings common to all of the clients on that network.
Creating a DHCP Scope via Server Manager
Let’s kick off this tutorial by learning how to add DHCP scopes to an existing DHCP server. For this first demo, you’re going to learn how to set up a DHCP scope via the Windows Server Manager.
Assuming you’re at the Windows desktop of a test DHCP server:
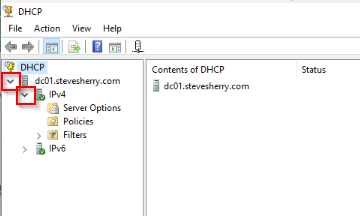
1. Click on your Start menu and type dhcpmgmt.msc to open the DHCP Microsoft Management Console (MMC).
2. Once the DHCP MMC opens, click on the dropdown to the left of the server name and then on IPV4.
Microsoft DHCP Server supports both IPv4 and IPv6 address allocation to clients. This tutorial will only focus on IPv4 scopes.
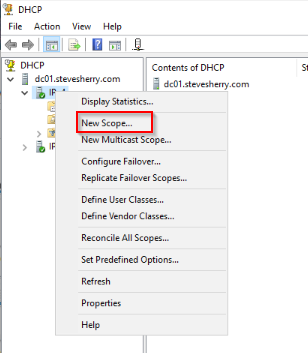
3. Right click on IPv4 and select New Scope to start the New Scope Wizard, and click Next on the introduction screen.
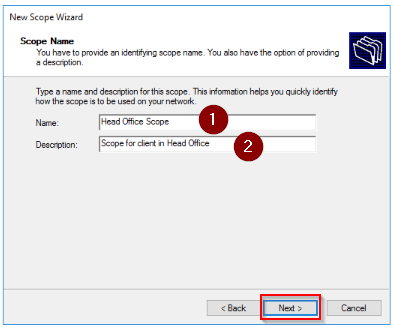
4. Provide a name of your choice for the Name and Description. This tutorial will create a scope for the company’s head office. Click Next when complete.
Scopes are commonly assigned to physical buildings or sometimes IP subnets.
5. Next, define an IP Address Range indicating the IP address range you’d like to assign to the DHCP server’s clients. The tutorial will ensure the first IP address allocated to clients will be 10.0.0.100 and the last IP address will be 10.0.0.200. These start and end IP addresses create the scope’s address pool which you’ll learn about later.
Also on this screen, enter a CIDR Length or Subnet mask which will be assigned to all clients.
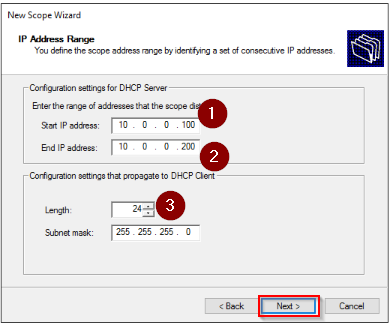
It is common to deliberately leave the beginning and end of the address pool free to allow for any statically assigned addresses.
6. Click Next to skip past the Add Exclusions and Delay step.
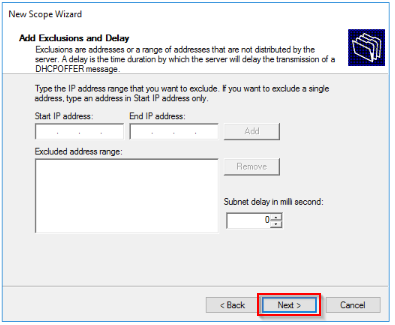
If you know of one or more IP addresses that are already in use within the defined address range, an exclusion prevents the DHCP server from attempting to assign a particular IP address in its address pool.
7. For now, click Next to accept the default Lease Duration. You’ll learn a lot about DHCP leases later in this tutorial.

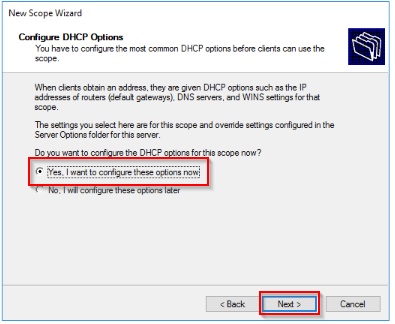
8. Leave the default setting of Yes, I want to configure these options now and click Next on the Configure DHCP Options step. You will configure various scope options shortly in this tutorial.
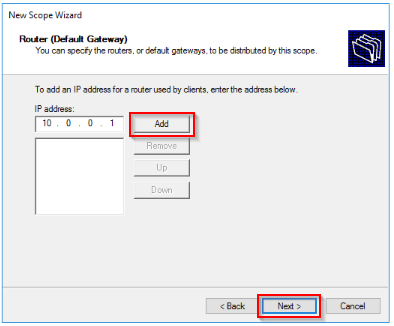
9. Next, provide an IP address of 10.0.0.1 for the Router (Default Gateway). Once the DHCP scope is available to clients, the DHCP server will hand out this IP address as the clients’ default gateway. The default gateway is the primary way clients can communicate with other networks or the Internet in general.
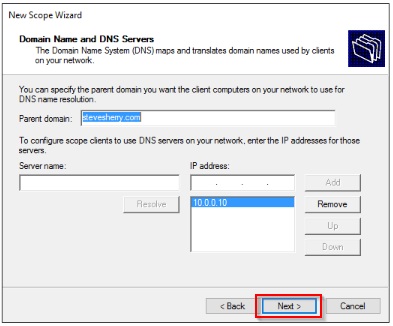
10. Since this tutorial is using an environment that has a DNS server located at 10.0.0.10, provide the IP address on the Domain name and DNS Servers step. This IP address will be handed out as the DNS client for DHCP clients to translate names into IP addresses.
The Parent domain should automatically populate based on the Active Directory domain the DHCP server is a member of.
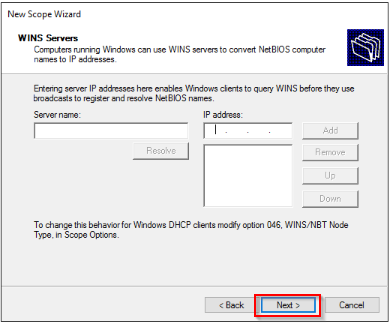
11. If your environment still uses a WINS server, provide its IP address on the WINS Server step. This tutorial does not use one, so click Next to continue.
12. Finally, activate the new DHCP scope and make it available to clients by ensuring that Yes, I want to activate this scope now is selected. Then click Next to continue.

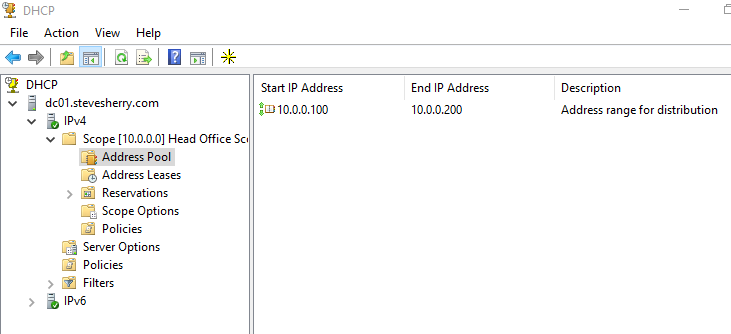
Once all of the above steps are followed, you should now see the new scope under IPv4 as shown below.
Creating a DHCP Scope with PowerShell
If you’re not a fan of the GUI or simply need to automate DHCP tasks, look no further than PowerShell. Let’s now cover the same process as just performed via the Server Manager, only this time with PowerShell.
Assuming you’re at the Windows desktop of a test DHCP server:
1. Open Windows PowerShell as administrator.
2. Run the Get-DhcpServerv4Scope cmdlet to find all existing DHCP scopes.
As you’ll see in the below example, this server only has the scope that you’ve created using the GUI in the previous steps.

3. Run the Add-DhcpServerv4Scope cmdlet to create a new DHCP scope. Since this cmdlet has many parameters, save time by defining each parameter in a PowerShell hashtable and using splatting to pass all parameters to the cmdlet.
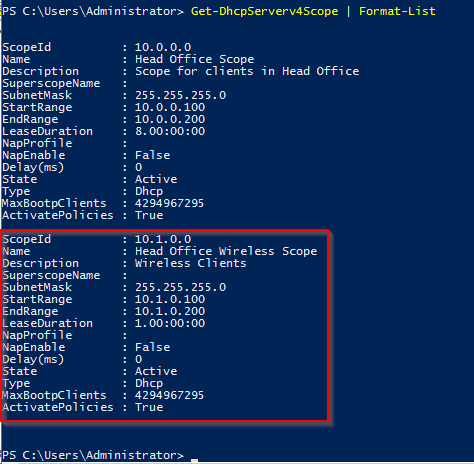
This cmdlet will create a DHCP scope called Head Office Wireless Scope that, when activated, will hand out IP addresses 10.1.0.100 – 10.1.0.200 with a subnet mask of 255.255.255.0 with a lease that expires after one day (day.hrs:mins:secs).
# Create an IPv4 DHCP Server Scope
 $HashArgs = @{
     'Name' = 'Head Office Wireless Scope';  # This sets the name of the wireless scope
     'Description' = 'Wireless Clients';     # This is the human-readable description of the scope
     'StartRange' = '10.1.0.100';            # Specifies the starting IP address in the scope
     'EndRange' = '10.1.0.200';              # Specifies the end IP address in the scope
     'SubnetMask' = '255.255.255.0';         # Specifies the subnet mask of the scope
     'State' = 'Active';                     # Activates the scope
     'LeaseDuration' = '1.00:00:00';         # Specifies the length of the lease duration
 }
 Add-DhcpServerv4Scope @HashArgs
4. Now, run Get-DhcpServerv4Scope again to verify PowerShell successfully created the DHCP scope.
Piping output to the
Format-ListPowerShell cmdlet allows you to see each property name and it’s value rather than a truncated row.
Managing Scope Options
Once you’ve created a scope, you can modify any attribute you’d like. Microsoft DHCP has an area specifically called Scope Options which allows you to change some common DHCP attributes sent to DHCP clients.
Let’s now walk through the available scope options and cover their affect on your clients.
While in the DHCP MMC:
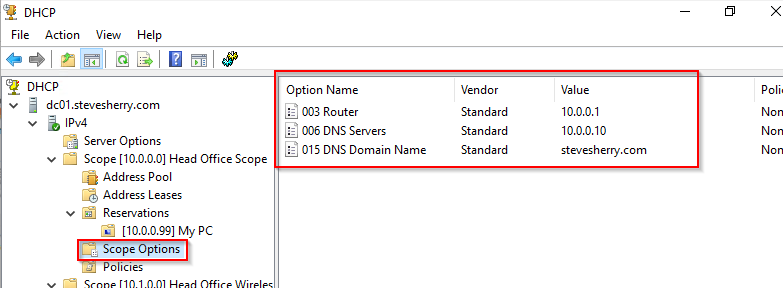
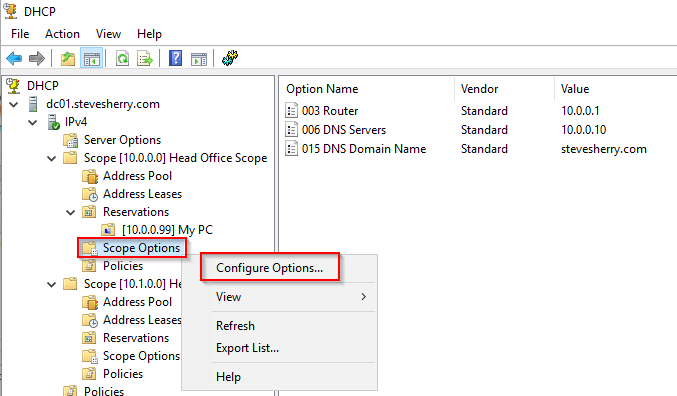
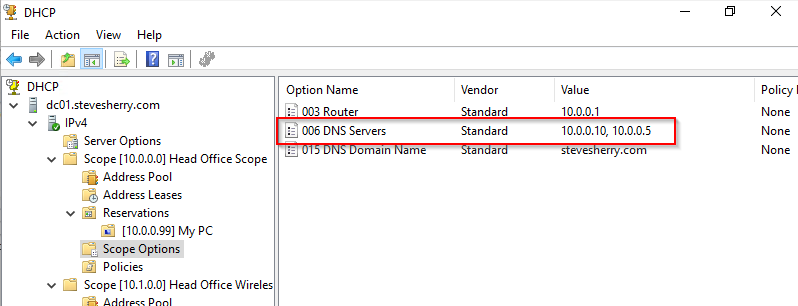
- Click on Scope Options under <server name> —> IPv4 —> Scope [X.X.X.X]. In the screenshot below, you can see the scope previously created. Here you can see the Router, DNS Servers, and DNS Domain Name that this scope will hand out to DHCP clients.
2. Right click on Scope Options and choose Configure Options to navigate to the Scope Options box to change these options.
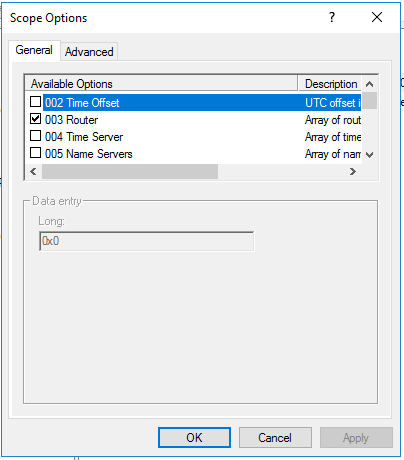
3. Scroll down the available options under the General tab. You’ll see dozens of options that the DHCP server can assign to clients.
If you have a specific setting that is not available to you by default, you’ll need to follow the vendor’s specific information using the Advanced tab to create a custom Option.
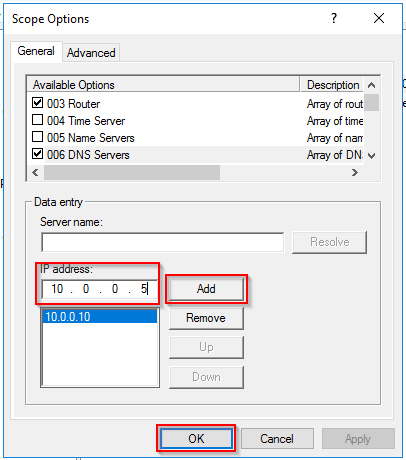
4. Perhaps you forgot to add one of your DNS servers. Find the 006 DNS Servers option, enter it’s IP address, click Add, and OK. This tutorial will be using the IP address of 10.0.0.5.
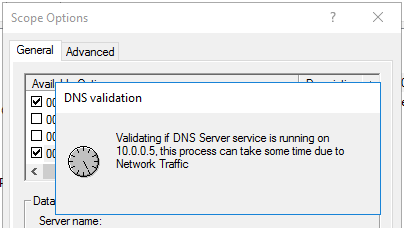
Once you click OK, Windows will then validate if DNS services are available on your provided IP address.
5. Return to the main screen and review the Options pane. You’ll now see two IP addresses listed under 006 DNS Servers.
DHCP Leases
An important part of DHCP is the lease. A device is known to “lease” an IP address from a DHCP server for a certain period of time (lease time).
Network administrators typically configure DHCP servers to lease IP addresses based on different use cases. For example, for devices on a wired connection that rarely leave the network, administrators may assign a longer lease time like eight days. If the device never leaves the network, it’s not efficient to go through the lease renewal process.
On the other hand, if a wireless device roams on and off the network several times a week, administrators may assign a shorter lease period (12-24 hours) to save available IP addresses for other devices.
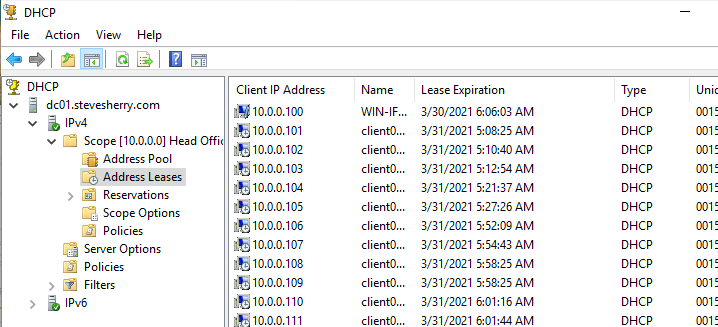
While in the DHCP console, you can find all current leases in <server name> —> IPv4 —> Scope [X.X.X.X] —> Address Leases as shown below.
Once on the Address Leases window, you’ll see each IP address that the DHCP server has assigned along with the Lease Expiration date.
Setting the Microsoft DHCP Lease Period
Let’s now discover how to set the DHCP lease period at the server level for DHCP clients.
While still in the DHCP console on the DHCP server:
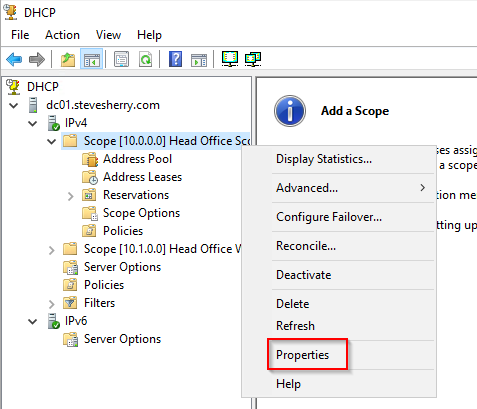
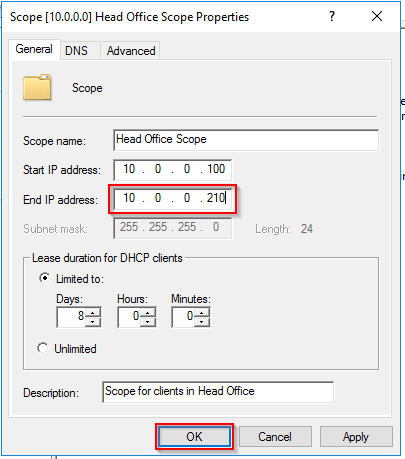
1. Find the scope containing the IP address pool you’d like to look at, right-click on the scope name, and select Properties.

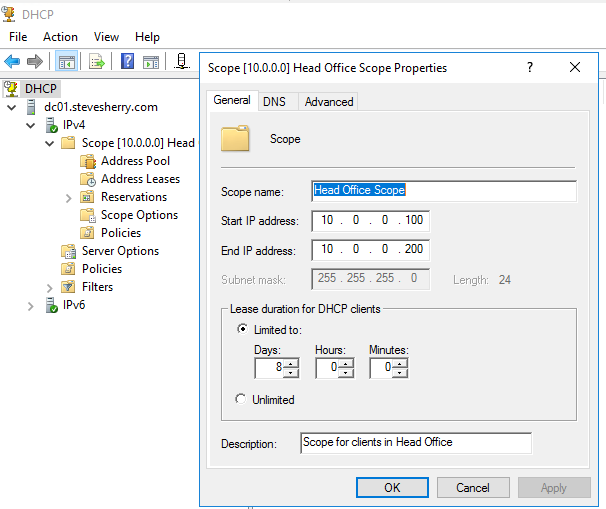
2. Within the Properties window, you’ll now see a Lease duration for DHCP clients. This setting is the DHCP lease time for all IP addresses in that scope.
The default DHCP lease period on Microsoft DHCP servers is eight days, but it can be updated to any period of time to suit the business needs.
3. Click Cancel to close the Properties box.
Finding Assigned DHCP Lease Times
DHCP services can only assign one IP address per device. How does the DHCP server know when it can re-use an IP address in the pool? The DHCP lease time.
If a device doesn’t renew its dynamically assigned IP address within the lease time, the lease expires and is available to other devices to lease.
How do you actually discover the lease time on a device? Unfortunately, each operating system (OS) has a different way of exposing the DHCP lease time. This tutorial will cover how to determine lease time on Windows 10.
In Windows 10, you see your DHCP lease time on the command-line either with the command prompt (cmd.exe) or PowerShell. This tutorial assumes you are an IT pro so let’s use PowerShell.
To find a Windows DHCP client’s lease time, on the Windows client console, open Windows PowerShell and run the ipconfig /all command.

You’ll see the time the lease was made (Lease Obtained) and when it expires (Lease Expires). The Lease Obtained field is the exact time the DHCP server assigned the IP address to this device. The Lease Expires field indicates the time the device will ask the DHCP server to renew its lease.
Subtract the Lease Expires value from the Lease Obtained value and you have your DHCP lease time.
DHCP Address Pools
Once you’ve configured the scope, you already have an address pool. The address pool is the range of IP addresses the DHCP server will assign to clients in a lease. Let’s navigate through the address pool already set up.
Updating the Address Pool
IP address scopes are not fixed in stone. It’s inevitable that after some time you’ll need to expand the address pool to allow more devices to connect to your network. Rather than creating a new address pool, it’s often easier to expand an existing pool. To do that:
1. Right click on <server name> —> IPv4 —> Scope [X.X.X.X] and click on Properties to open the Scope Properties configuration wizard.
2. Update the fields to increase the range of IP addresses for your existing address pool so that more addresses are available for any future allocation. Once complete, click OK.
3. Click on <server name> —> IPv4 —> Scope [X.X.X.X] —> Address Pool to bring up the address pool. Notice below that it now shows the expanded Address Pool in the scope.

Adding Exclusion Ranges to the Address Pool
Imagine that you need to create a small list of IP addresses within the address pool that are not assigned to any new devices on the network. Exclusion ranges are how you’d achieve this.
Assuming that you still have the DHCP console open:
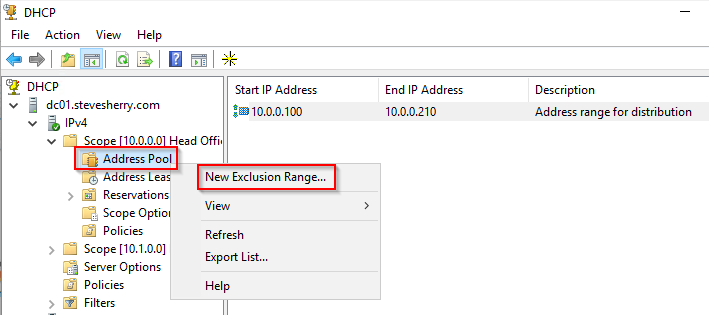
1. Click on <server name> —> IPv4 —> Scope [X.X.X.X] —> Address Pool to bring up the address pool.

2. Right-click on Address Pool and click on New Exclusion Range to open the Add Exclusion wizard.
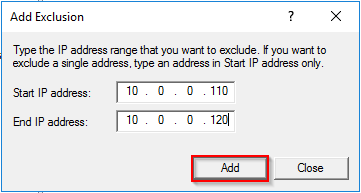
3. Complete the fields to create a small range of IP addresses within your existing address pool that will not be included in any future allocation of leases. Once complete, click Add.
4. Back on the DHCP console, refresh the screen and note that the exclusion is now in place.
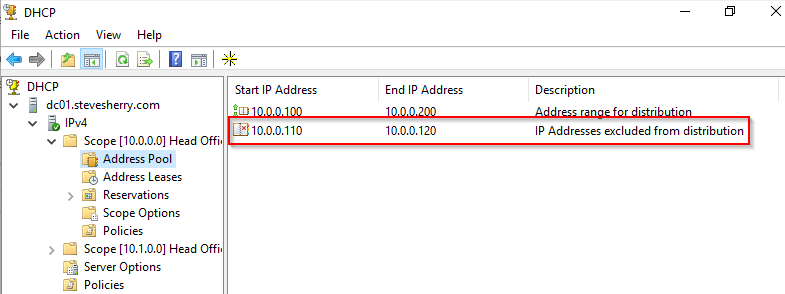
At this point, whenever a new device connects to the network, your DHCP server will not lease an address from within this exclusion range.
DHCP Reservations
IP addresses are, by their nature, dynamic. Most of the time this is OK as you typically don’t care what the IP address of your PC is. Occasionally you’ll need to manually specify the address of a device such as an admin laptop or a printer.
When you need to statically assign an IP address to a particular device, use a DHCP reservation.
Adding Reservations
Let’s start out by adding a reservation to a scope previously created. While in the DHCP console on the DHCP server:
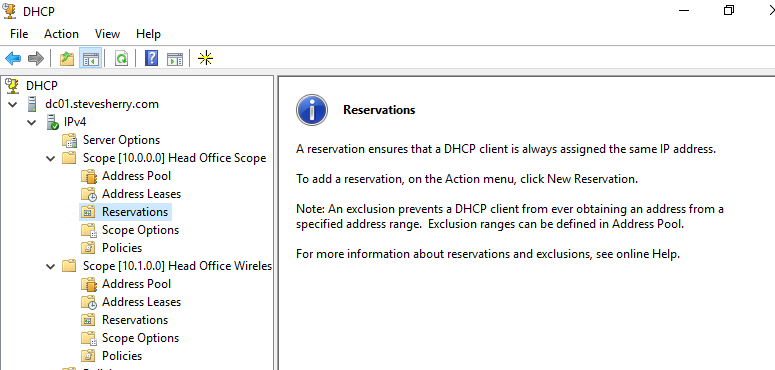
1. Select <server name> —> IPv4 —> Scope [X.X.X.X] —> Reservations to open the Reservations window. You’ll see no reservations exist.
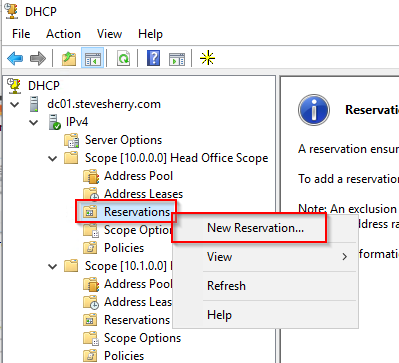
2. Right-click on Reservations and then choose New Reservation to open the New Reservation input box.
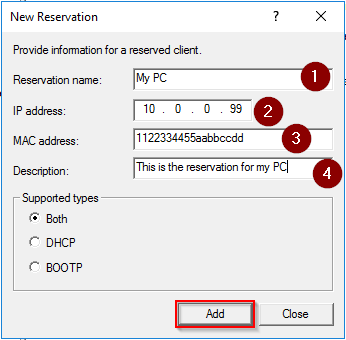
3. Complete the fields with details that are relevant to a device you’d like to assign a “static” IP address to.
- The Reservation name – This name is commonly as a hostname for the device or other identifying attribute.
- The IP address to reserve for the device.
- The MAC address of the device
Find the MAC address of a device from either the label that is on the back, or by using these methods.
- The Description – Be sure to make sense here so that other administrators can understand what this reservation is for.
Once complete, click Add.
4. Back on the DHCP console, refresh the screen and note that the reservation is now in place.
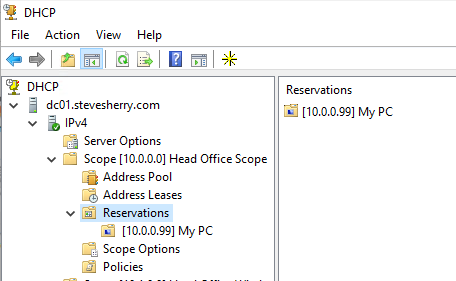
At this point, when the device that has the MAC address you’ve provided in the reservation goes through its DHCP lifecycle, it will be assigned the expected reserved IP address.
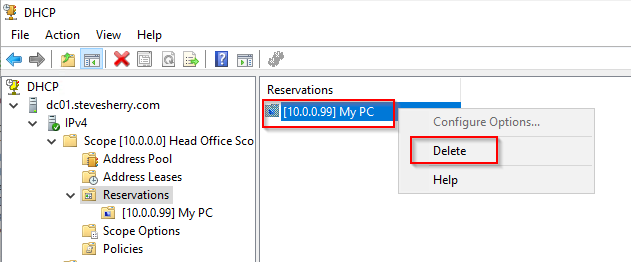
Removing Reservations
As part of the general lifecycle of devices within your organization, you’ll occasionally have to retire old devices, some of which will have DHCP reservations.
Assuming you’re still in the DHCP console, removing DHCP reservation requires a right click on the reservation and clicking Delete.
DHCP Policies
Previously, you learned how to set reservations by MAC address. Although reservations are useful, they don’t allow you to assign addresses or specific scope options based on other criteria. Using a DHCP policy, you can define various conditions a client must meet to assign an IP address.
Using a DHCP policy, you can assign a specific category of devices a different DNS server, default gateway, or TFTP server, for example.
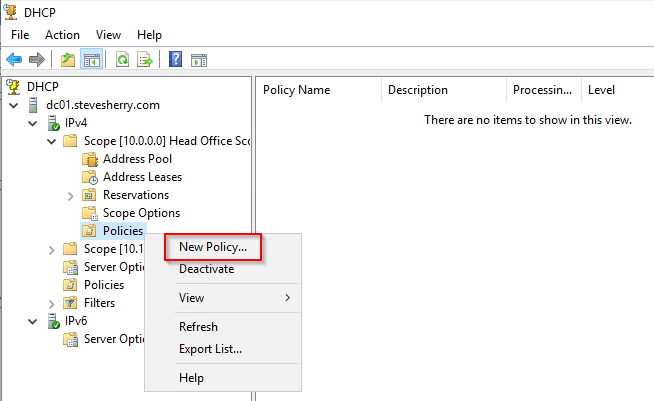
To create a DHCP policy:
1. Right click <server name> —> IPv4 —> Scope [X.X.X.X] —> Policies and click on New Policy to open the Policy configuration window.
2. Complete the fields with details of the Policy Name and a Description for the policy. Click Next, once complete.

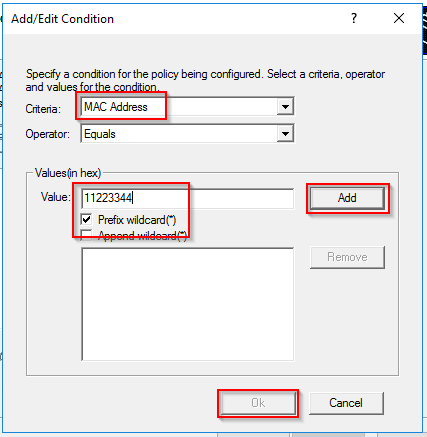
3. Click on the Criteria dropdown and notice the many conditions you can check for on a client. For this tutorial, select MAC Address and add a relevant Value, selecting Wildcard.
Click Add, and then OK to move along.
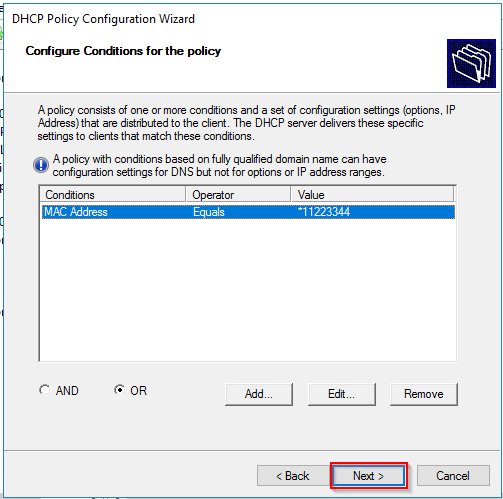
4. Either Add another condition for the policy or click Next to continue.
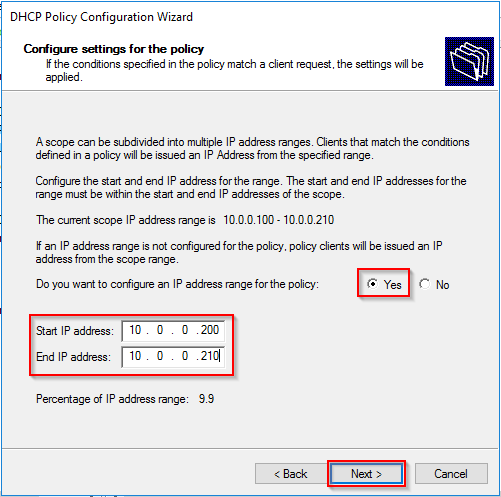
5. Next, add a subset of IP addresses from within your existing range. The DHCP server will assign devices matching the conditions defined earlier an IP address from this range. Once complete, click Next.
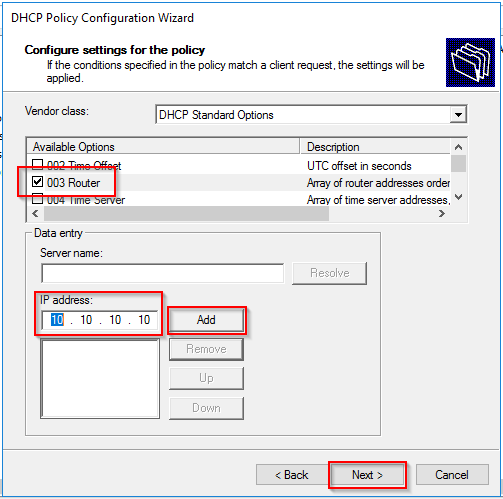
6. Now it’s time to define the options the client will receive if it meets the condition. For this tutorial, select 003 Router to modify the default gateway clients matching the condition will receive.
Enter an IP address for the new gateway, click Add and then Next.
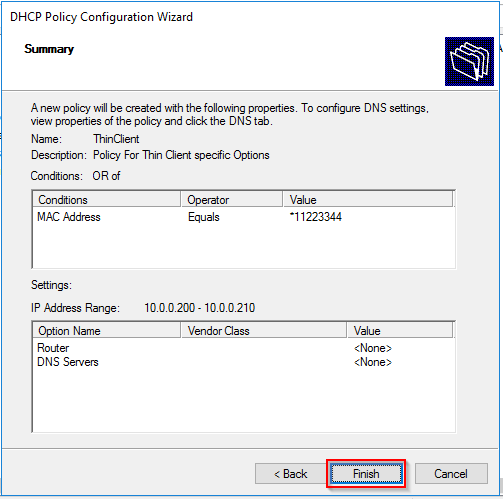
7. Review the screen and confirm that the details are correct. Click Finish to close the wizard.
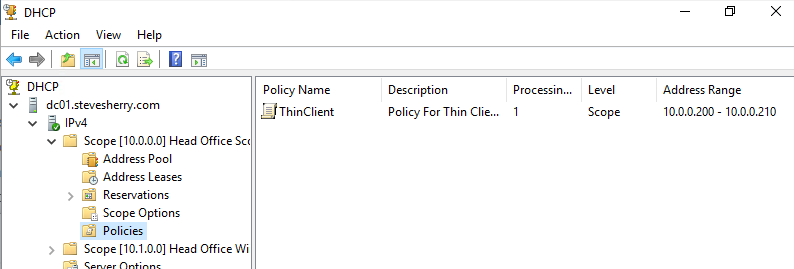
8. Refresh the screen to confirm that the new policy is in place.
Conclusion
In this article, you’ve covered a lot of ground when it comes to DHCP. You’ve learned how to set up DHCP scopes and everything that comes with them. You also learned how DHCP assigns IP addresses and other information to clients.
Armed with all of this new information, you can now confidently tackle DHCP like a champion. How are you planning on using this knowledge?


