

Manually deploying Kubernetes can be challenging for administrators, especially on bare-metal infrastructure deployment. Luckily, there is an automation tool for deploying production-ready Kubernetes called Kubespray.
Kubespray is an Ansible Playbook for deploying Kubernetes Cluster and provides a High Availability cluster, composable attributes, components, and supports multiple Linux distributions. Kubespray also supports cloud services like AWS, GCE, and Azure.
Continue reading and learn automatic Kubernetes cluster deployment using the Ansible Kubespray.
Prerequisites
This tutorial will be a hands-on demonstration. To follow along, be sure you have the following requirements.
- Two or more Linux servers – This demo uses four Ubuntu 20.04 servers for the Kubernetes cluster. Refer to the table below to know each server’s details and roles.
| Hostname | IP Address | Used as |
| master | 172.16.1.10 | Control Plane |
| node1 | 172.16.1.21 | Worker Node |
| node2 | 172.16.1.22 | Worker Node |
| node3 | 172.16.1.23 | Worker Node |
- A Linux client Ansible host – This demo uses Ubuntu 20.04 as the client. Hostname IP Address Used as ansible-node 172.16.1.5 Ansible host
| Hostname | IP Address | Used as |
| ansible-node | 172.16.1.5 | Ansible host |
- Set up passwordless SSH from ansible-host to Kubernetes cluster servers.
Setting up Ansible Kubespray
Before deploying the Kubernetes cluster using Kubespray, you must download the Kubespray source code and install some Python dependencies.
Follow the following steps to set up Kubespray on your Ansible host. In this example, the Ansible host is the Ubuntu 20.04 system with the hostname ansible-host.
1. Open your preferred SSH client and log in to the Ansible host.
2. Run the apt command below to update and refresh the package index. This step ensures that you’re installing the latest packages.
sudo apt update3. Now, run the below command to install the python3-pip and git packages. You’ll use python3-pip to install Python dependencies for Kubespray and git to clone/download the Kubespray source code.
# install python3-pip and git
sudo apt install python3-pip git -y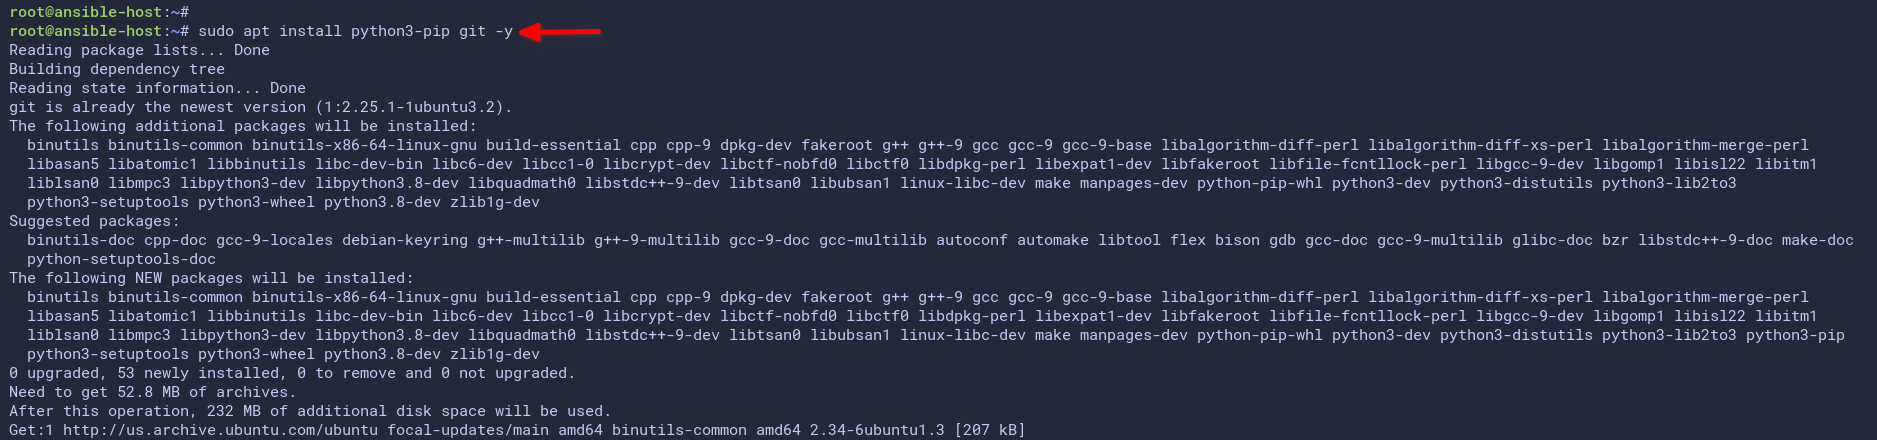
4. Next, run the below git command to clone the Ansible Kubespray repository to the Ansible host.
# clone the Kubespray repository
git clone https://github.com/kubernetes-incubator/kubespray.git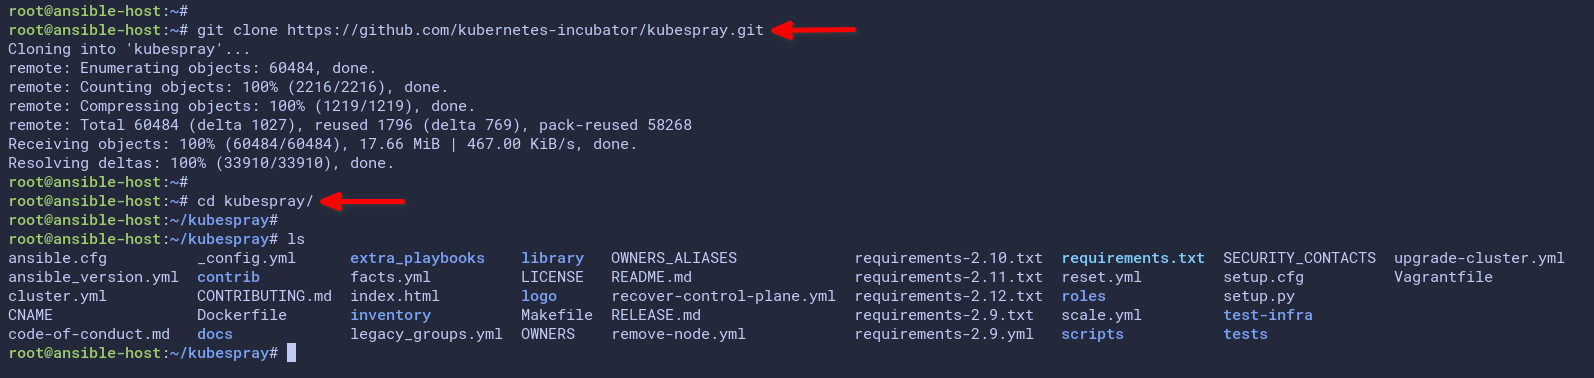
5. Lastly, change your working directory to the kubespray project and run the pip3 command to install the Kubespray dependencies.
# change working directory and install Python
cd kubespray
sudo pip3 install -r requirements.txt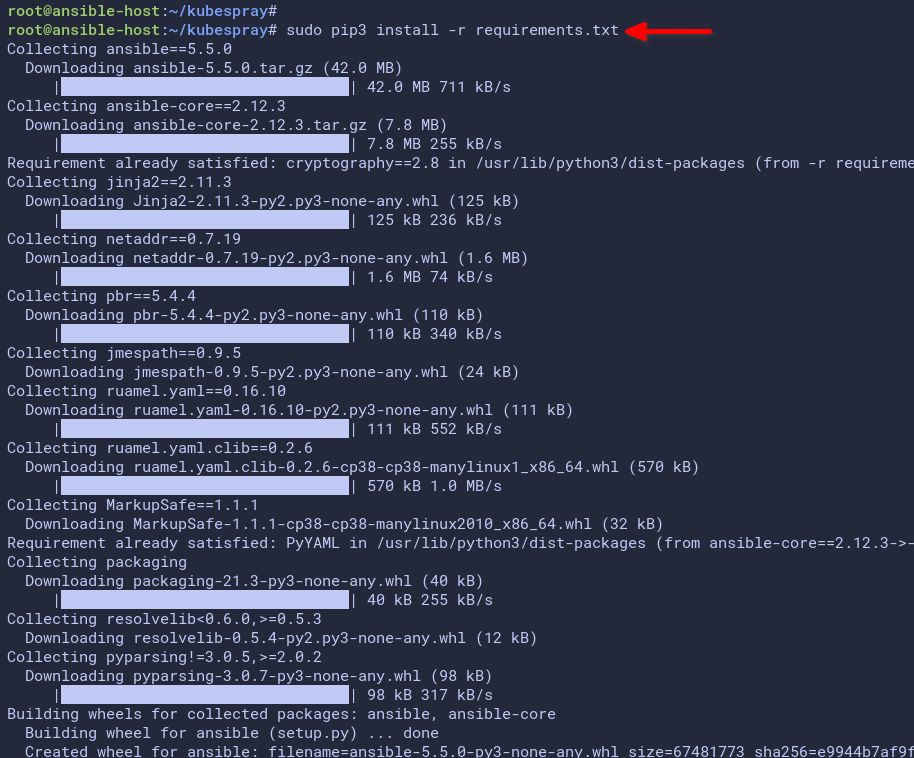
Generating the Ansible Inventory List
Since you have downloaded the Kubespray project, it’s time to set up an Ansible Inventory for deploying the Kubernetes cluster.
Kubespray provides a Python script for generating Ansible inventory configuration to deploy the Kubernetes cluster. The Kubespray inventory configuration has three groups:
- kube_node for the Kubernetes worker nodes.
- kube_control_plane for the Kubernetes control plane.
- etcd for the etcd servers.
Proceed with the following steps to generate the Ansible inventory list.
1. First, run the below pip3 command to install some additional Python dependencies on the ansible-host.
# install Python dependencies
sudo pip3 install -r contrib/inventory_builder/requirements.txt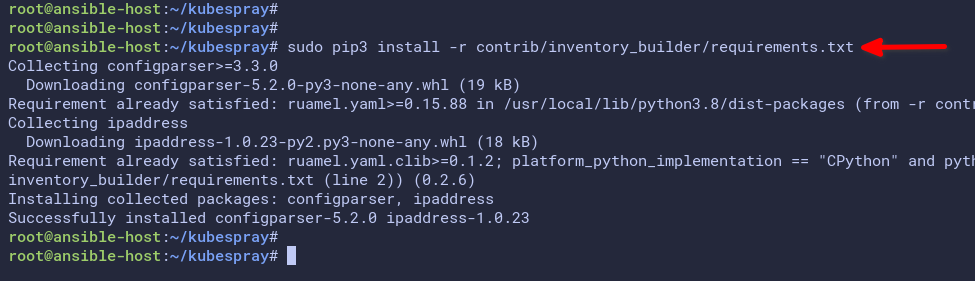
2. Now, copy the sample directory inventory/samples to inventory/kubecluster. Feel free to change the directory name kubecluster if you prefer.
The directory inventory/kubecluster will be the main directory for setting up the Kubernetes cluster.
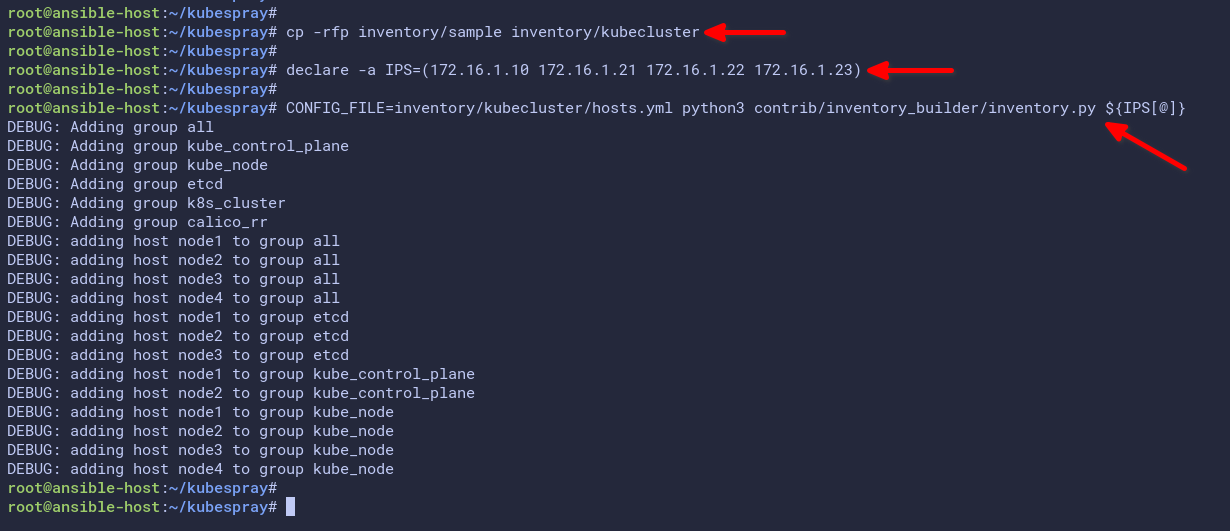
# copy sample of inventory to kubecluster
cp -rfp inventory/sample inventory/kubecluster
3. Next, run the below command to create a new variable called IPS, which contains the IP addresses of all servers in the Kubernetes cluster.
This example will be using four servers with IP address 172.16.1.10 for the master node or Kubernetes control-plane, server IP addresses 172.16.1.21, 172.16.1.22, and 172.16.1.23 as Kubernetes nodes or worker nodes.
# create variable IPS
declare -a IPS=(172.16.1.10 172.16.1.21 172.16.1.22 172.16.1.23)
4. Now run the following command to generate the Ansible inventory using the inventory builder script inventory.py and using the IPS variable.
This command will generate a new inventory configuration file called hosts.yml inside the inventory/kubecluster directory.
# generating inventory file
CONFIG_FILE=inventory/kubecluster/hosts.yml python3 contrib/inventory_builder/inventory.py ${IPS[@]}
You will get a similar output to the below image.
5. Lastly, open the file in your preferred text editor, such as nano or vim, to inspect and confirm the inventory.
nano inventory/kubecluster/hosts.ymlIn the below example, the Kubernetes control plane and etcd will be available at the master server with IP address 172.168.1.10. And node1, node2, and node3 are the Kubernetes worker nodes.
all:
    hosts:
    master: # change to master - for control-plane node
        ansible_host: 172.16.1.10
        ip: 172.16.1.10
        access_ip: 172.16.1.10
    node1: # node1 worker
        ansible_host: 172.16.1.21
        ip: 172.16.1.21
        access_ip: 172.16.1.21
    node2: # node2 worker
        ansible_host: 172.16.1.22
        ip: 172.16.1.22
        access_ip: 172.16.1.22
    node3: # node3 worker
        ansible_host: 172.16.1.23
        ip: 172.16.1.23
        access_ip: 172.16.1.23
    children:
    kube_control_plane:
        hosts: # master server as control-plane
        master:
    kube_node:
        hosts: # node1 node2 node3 as worker node
        node1:
        node2:
        node3:
    etcd:
        hosts: # etcd on master server (on production - put multiple nodes for etcd)
        master:
    k8s_cluster:
        children:
        kube_control_plane:
        kube_node:
    calico_rr:
        hosts: {}
At this point, the inventory file you generated is already sufficient. But, if you need to, you can make changes, such as changing which server will be the control plane, adding or removing nodes, etc.
Exit the text editor to close the file.
Deploying the Kubernetes Cluster with Kubespray
Now that you have generated the inventory hosts.yml file, you’re ready to start the Kubernetes cluster deployment. But, before you do, there are a few things to verify and change first.
1. First, open the main Kubespray file inventory/kubecluster/group_vars/all/all.yml in your text editor, in which you can set up an additional variable for the Kubernetes cluster deployment.
nano inventory/kubecluster/group_vars/all/all.yml2. Next, look for the below line and uncomment it to open the kubelet port 10255. Doing so enables metrics for Kubernetes resource utilization. Save the file and close the editor.
kube_read_only_port: 102553. Next, open another file called inventory/kubecluster/group_vars/k8s_cluster/k8s-cluster.yml using your preferred editor.
The default configuration is using the Calico network plugin, and for this example, leave the default and close the file.
# Choose network plugin (cilium, calico, contiv, weave or flannel.# Use cni for generic cni plugin)# Can also be set to 'cloud', which lets the cloud provider# setup appropriate routing
kube_network_plugin: calico
Other network plugins are available, such as weave, flannel, contiv, and cilium. Each network plugin has different implementations. For example, the calico plugin runs on the layer 3 network stack while the flannel runs on layer 2 .
4. Now run the ansible-playbook command to deploy the Kubernetes cluster.
Include the correct inventory host file inventory/kubecluster/hosts.yml and append the option –become to enable privileges escalation for all Ansible tasks. Also, the additional option –become-user=root will enforce all commands to run as the root user.
# deploy Kubernetes Cluster
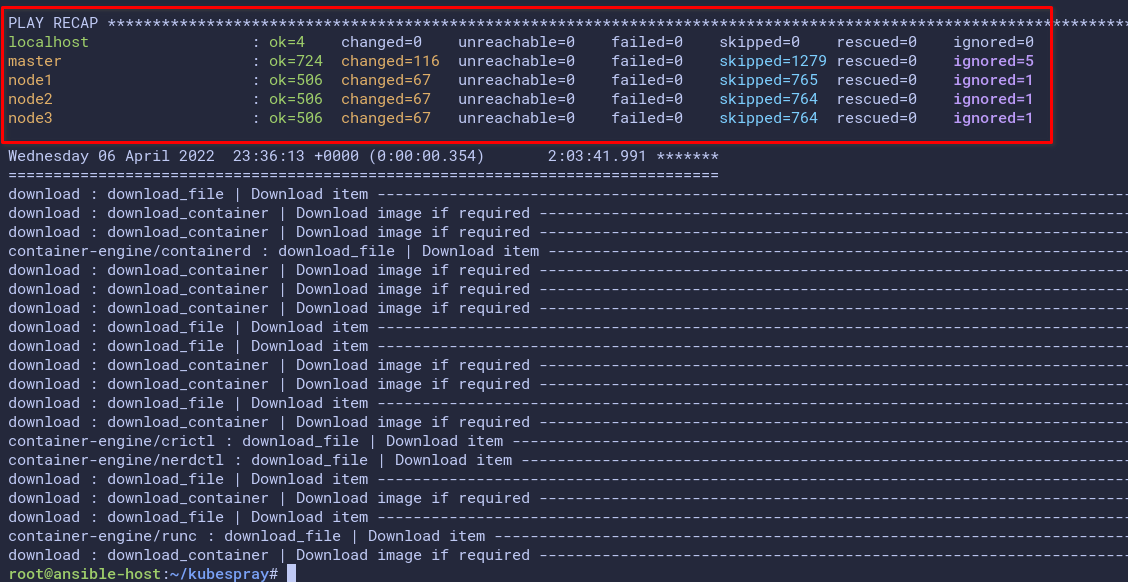
ansible-playbook -i inventory/kubecluster/hosts.yml --become --become-user=root cluster.ymlDepending on your environment, the Kubespray deployment could take 20-30 to finish or more. If you are stuck with some tasks, you can press Ctrl+c to exit and re-run the ansible-playbook command.
Below is the screenshot when running the ansible-playbook command. The Playbook checks every package dependencies of the Kubespray to install.

And the below screenshot shows the result after Kubespray completed the Kubernetes cluster deployment.
5. Next, log in to the master server to verify the deployment of the Kubernetes cluster.
6. After logging in, run the below kubectl command to verify the Kubernetes cluster deployment.
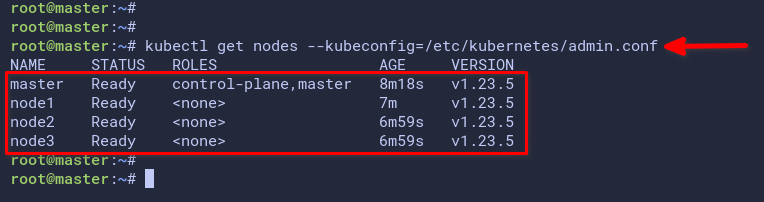
# check Kubernetes cluster
kubectl get nodes --kubeconfig=/etc/kubernetes/admin.conf
The screenshot below shows you the Kubernetes cluster deployment details. You’re now using the Kubernetes v1.23.5, and the master server is the Kubernetes control plane. Node1, node2, and node3 are the worker nodes.
Accessing Kubernetes Cluster from Ansible Host
At this point, you have completed the deployment of the Kubernetes cluster using Kubespray. Your Kubernetes is accessible but only from the master server. How do you enable access to the Kubernetes cluster from the Ansible host?
You must install the kubectl tool on the Ansible host and set up the kubeconfig for authentication to the Kubernetes cluster. Follow the below steps to install kubectl and set up kubeconfig.
1. Run the below command to download the kubectl binary file to the Ansible host.
# download kubectl binary file
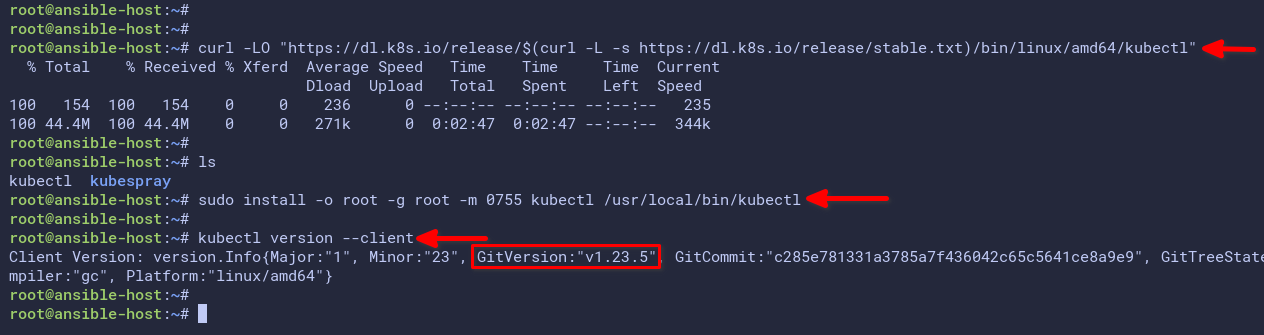
curl -LO "https://dl.k8s.io/release/$(curl -L -s https://dl.k8s.io/release/stable.txt)/bin/linux/amd64/kubectl"2. After the downloading, run the below command to install kubectl to the /usr/local/bin directory.
# install kubectl
sudo install -o root -g root -m 0755 kubectl /usr/local/bin/kubectl
3. Now run the below kubectl command to verify the installation.
# checking kubectl
kubectl version --client
The screenshot below shows that the kubectl version you installed is v1.23.5, the latest version as of this writing.
4. Next, run the following command to create a new directory .kube under your home directory. This directory is where you’ll store the kubeconfig file.
# create ~/.kube directory
mkdir -p ~/.kube
5. Now run the scp command below to copy the kubeconfig file /etc/kubernetes/admin.conf from the master server to the Ansible host ~/.kube/config.
# copy the kubeconfig file
scp [email protected]:/etc/kubernetes/admin.conf ~/.kube/config
After your Kubernetes cluster runs, the directory /etc/kubernetes will contain some configuration for your Kubernetes cluster, including the kubeconfig file for authenticating to the Kubernetes cluster.
6. After copying, open the configuration file ~/.kube/config for editing.
Change the IP address on the server line to the IP address of the Kubernetes control plane (master) server. In this example, the Kubernetes control plane runs on the server IP address 172.16.1.10. Leave the default port number (6443) unchanged.
# change the IP address to Kubernetes control plane
server: https://172.16.1.10:6443
Save and close the file.
7. Next, run the following command to change the ownership of the kubeconfig file ~/.kube/config to your user account.
# change ownership
chown $USER: ~/.kube/config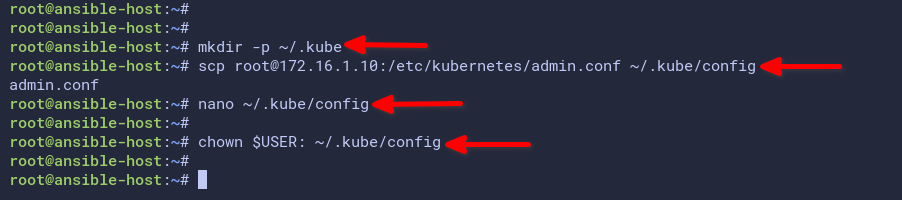
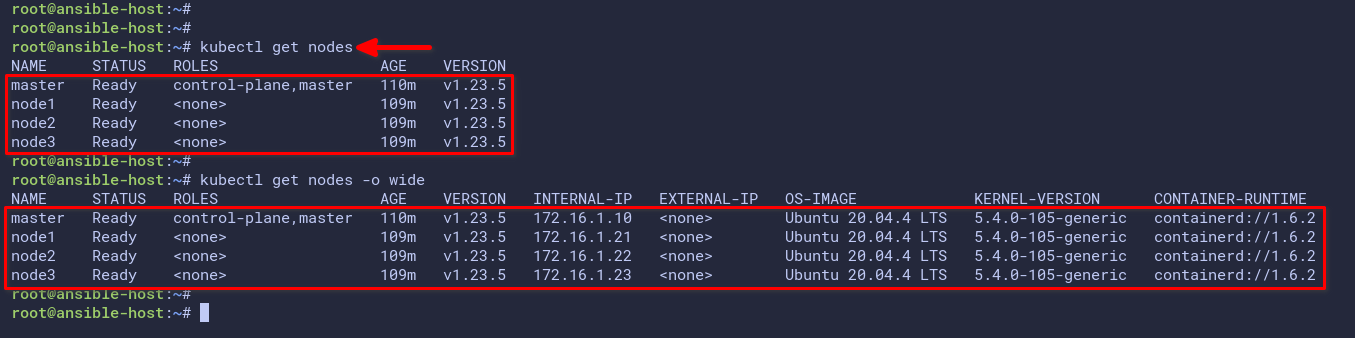
8. Lastly, run the kubectl command below to verify access to your Kubernetes cluster.
# checking nodes
kubectl get nodes

# checking nodes with detailed info
kubectl get nodes -o wide
The below screenshot show you the Ansible host is successfully connected to the Kubernetes cluster. As a result, you can now manage your Kubernetes cluster from the Ansible host.
Additionally, in the below screenshot, you will see a detailed version and components for your Kubernetes cluster. In this example, all nodes’ operating systems are Ubuntu 20.04.04 LTS and containerd v1.6.2 as the default container runtime.
Verifying the Kubernetes Cluster Networking
Kubernetes creates new pods on a random worker node when the developer creates a deployment. But, even if pods are on different worker nodes, they should still communicate with each other.
In this section, you will create two different pods on the Kubernetes cluster and verify the connection between the two pods.
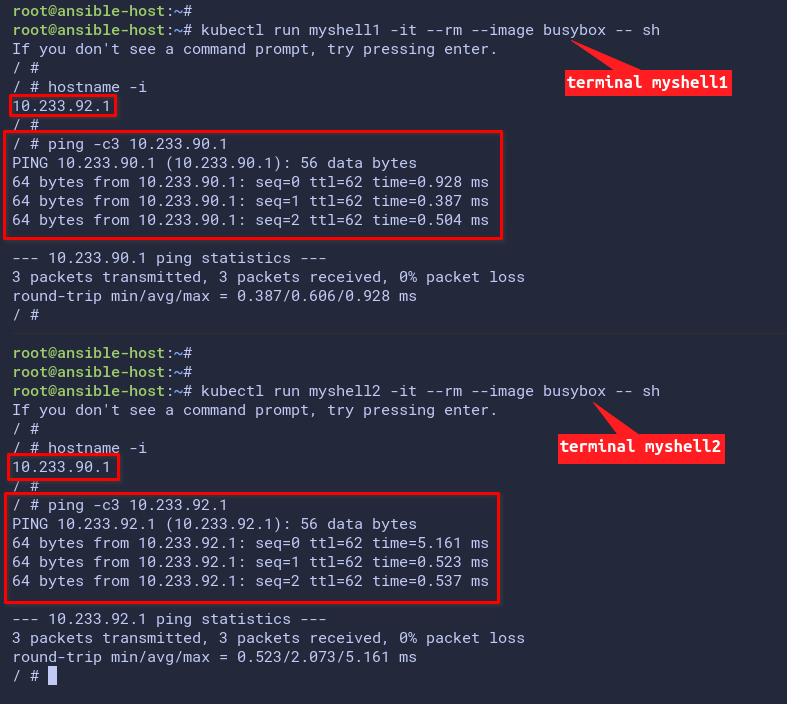
1. Run the below command to create a new pod called myshell1 and run the sh command to log in to the pod.
# run pod myshell1
kubectl run myshell1 -it --rm --image busybox -- sh
2. Now run the below command to display the hostname and IP address of the myshell1 pod.
# check IP address
hostname -i
You will see the internal IP address of the pod myshell1. In this example, the myshell1 pod has an IP address of 10.233.92.1.
3. Next, open a new terminal window and run the kubectl command below to create another pod with the name myshell2 and run the sh command to log in to the pod.
In the below example, the pod myshell2 gets an IP address of 10.233.90.1.
# run pod myshell2 and check IP address
kubectl run myshell2 -it --rm --image busybox -- sh
hostname -i
4. Now, go back to the pod myshell1 and run the ping command below. Be sure to change the IP address with the IP address of the pod myshell2.
# ping to myshell2 IP address
ping -c3 10.233.90.1
5. Lastly, on the terminal myshell2 pod, run the ping command to the myshell1 pod IP address.
# ping to myshell1 IP address.
ping -c3 10.233.92.1
The output below shows you the pod myshell1 can reach the myshell2 and vice-versa. This result confirms that the Kubernetes cluster networking is working.
Creating a Test Deployment
After successfully testing the Networking on the Kubernetes cluster, it’s time to create a basic deployment to the Kubernetes cluster. In this example, you will be the NGINX web server.
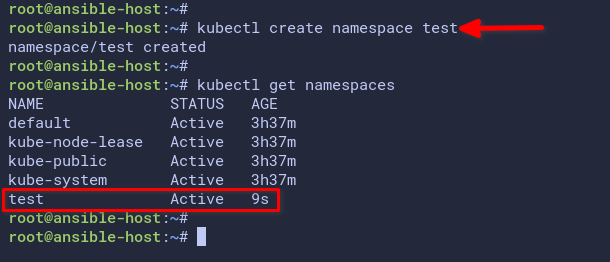
1. Run the below command to create a new namespace test, then verify the namespace list on the Kubernetes cluster.
# create namespace
kubectl create namespace test

# checking namespace
kubectl get namespaces
The below output shows you have created the test namespace.
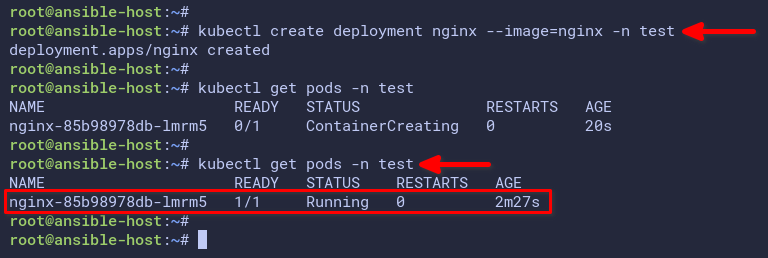
2. Now, run the below command to create a new deployment using the nginx container image in the test namespace.
# create nginx deployment
kubectl create deployment nginx --image=nginx -n test
3. Next, run the command below to verify the available pod in the test namespace.
# checking pod
kubectl get pods -n test
As you can see on the screenshot below, the pod nginx-85b98987db-lmrm5 is running.
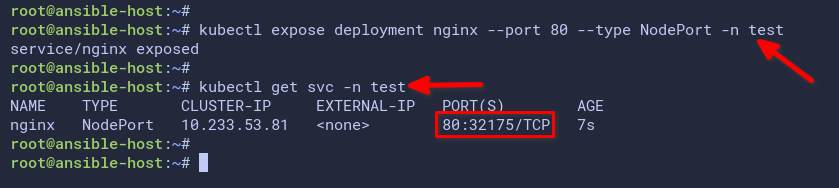
4. After creating the nginx deployment, run the below command to create a new NodePort service for the nginx deployment. Afterward, verify the list of available services on the test namespace.
# create nginx service type NodePort
kubectl expose deployment nginx --port 80 --type NodePort -n test

# checking service
kubectl get svc -n test
The below screenshot shows you the nginx service type NodePort exposed the port 31272 that redirects to the nginx pod on port 80.
You may have a different port because the NodePort will randomly select a port between 30000-and 32767 for your service.
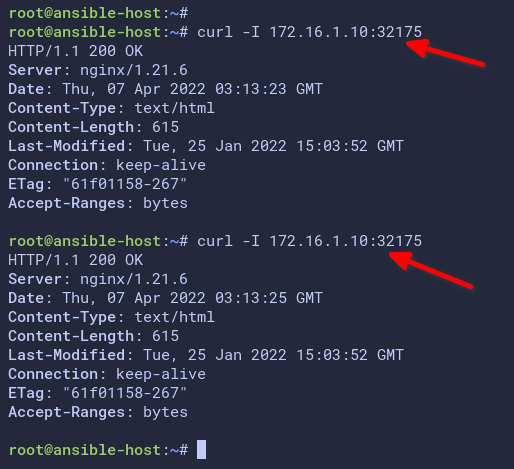
5. Next, run the curl command below to access the nginx deployment. Replace the IP address and port with your Kubernetes control plane IP address and NodePort.
# access nginx pod with curl
curl -I http://172.16.1.10:31272/
As you can see on the screenshot below, the nginx pod is accessible through the NodePort.
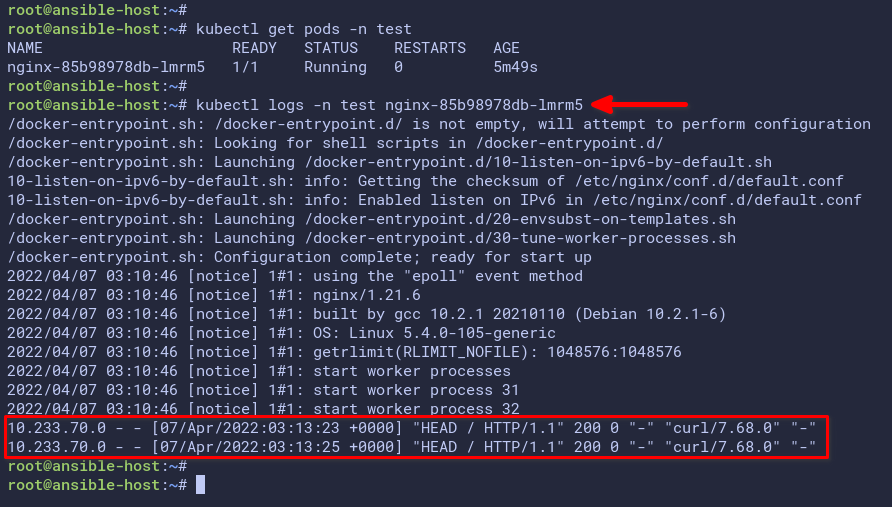
6. Lastly, run the kubectl command below to check the logs of the nginx-85b98987db-lmrm5 pod.
# checking logs
kubectl -n test logs nginx-85b98987db-lmrm5
The below screenshot shows the access logs of the nginx-85b98987db-lmrm5 pod.
Conclusion
Throughout this tutorial, you have completed the deployment of the Kubernetes cluster automatically using the Ansible Kubespray. You also learned how to install kubectl and set up authentication using the kubeconfig file.
At this point, you’ve got a fully functional Kubernetes cluster. What’s next? Perhaps you will want to learn about the NGINX Ingress Controller and cert-manager on Kubernetes.


