


If you need help separating resources for different projects, environments, or applications, do not prolong the agony. Why not turn to namespaces? In particular, Kubernetes namespaces let you partition resources within a Kubernetes cluster.
In this tutorial, you will learn about creating and managing Kubernetes namespaces in your own Kubernetes environment and how to use them effectively.
Dive in and master containerizing applications at scale!
Prerequisites
This tutorial comprises hands-on demonstrations. To follow along, be sure you have the following:
- A Kubernetes cluster already running.
- Krew installed (Kubernetes’ package manager).
Creating Kubernetes Namespaces via the kubectl
Namespaces work great in isolating groups of resources in a cluster. Each group is logically separated from others but capable of communicating with each other.
There are two ways to create a Kubernetes namespace: the kubectl or a manifest file. But for a start, you will create a Kubernetes namespace via the kubectl command-line tool. kubectl lets you communicate with a Kubernetes cluster’s control plane, like creating a namespace, via the Kubernetes API.
Open a terminal, and run the following kubectl command to create a namespace called demo (arbitrary).
kubectl create namespace demo
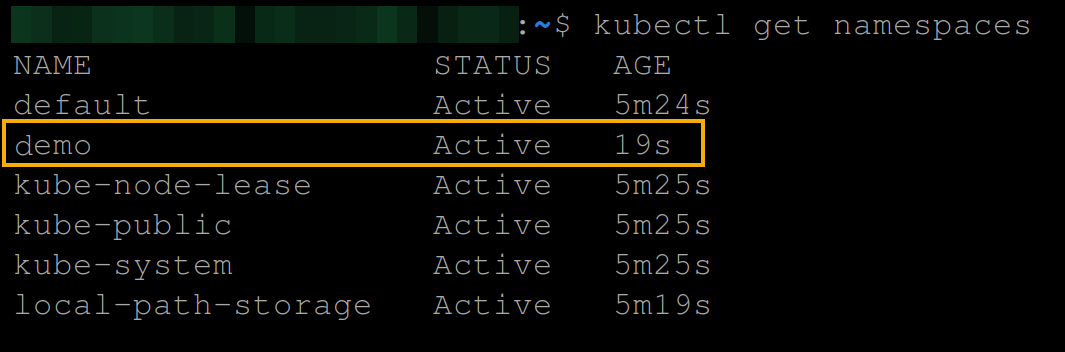
Now, run the below command to get all Kubernetes namespaces available and verify your newly-created namespace.
kubectl get namespacesBelow, you can verify that the newly-created namespace called demo exists, is Active, and is 19 seconds old.
Creating Kubernetes Namespaces via Manifest Files
Besides the kubectl command-line tool, you can also create a Kubernetes namespace via a manifest file. A manifest file is a YAML file that describes each deployment component or resource and defines your cluster’s state once applied.
Why use a manifest file? Doing so can be useful when version-controlling your namespace creation or if you wish to deploy your namespace as part of a more extensive configuration.
To create a namespace via a manifest file:
1. Create a YAML file with your preferred editor, and populate the following code to the file. This tutorial uses the filename namespace.yaml, but you can name the file differently.
This manifest file creates a new Kubernetes namespace called my-namespace (arbitrary) using the Kubernetes API version v1.
# Set the API version
apiVersion: v1
# Create a namespace
kind: Namespace
metadata:
  # The name of the namespace
  name: my-namespace
2. Next, run the below kubectl apply command to create the namespace specified in your manifest file (namespace.yaml).
kubectl apply -f namespace.yaml
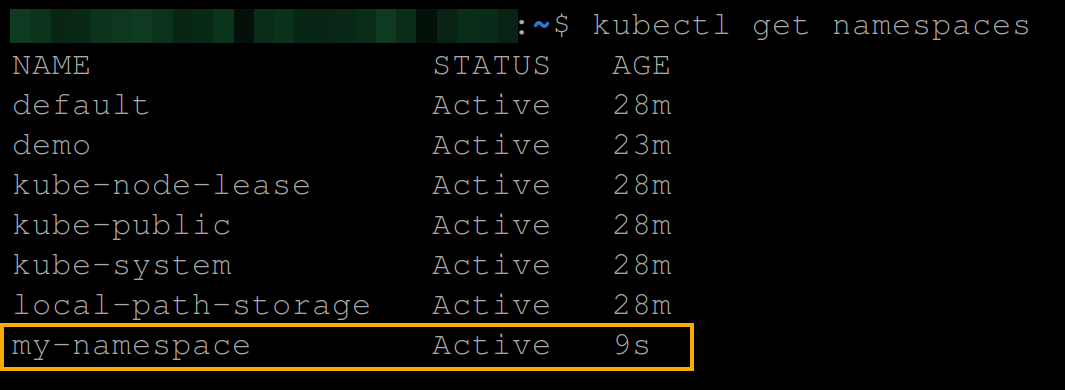
3. Lastly, run the following command to get the list of all available namespaces.
kubectl get namespacesThe output below shows the newly-created namespace (my-namespace).
Deploying Resources to Namespaces via the kubectl
Regardless of your method of creating your namespace, you can now better organize and manage your resources and provide better isolation and security. But how do you know your namespace works?
You will deploy a Kubernetes resource to your namespace in two ways: via the kubectl command-line tool or by using a manifest file. But for a start, you will deploy a resource via the kubectl first.
To deploy a Kubernetes resource via the kubectl:
Execute the following create deploy command to deploy a busybox image from the Docker Hub registry to your demo namespace. The deployment uses the default settings, such as creating a replica and running in a single container.
kubectl create deploy nginx-web-server --image nginx -n demo
Now, run the following command to get all deployments in the demo namespace.
kubectl get deployments -n demoLike shown below, you will see the nginx-web-server deployment, which confirms the deployment is successful.

Deploying Resources to Namespaces via Manifest Files
Manifest files do not only create namespaces but also deploy resources to your namespaces. You will specify configurations like creating namespaces, but deploying resources requires writing more.
To deploy a resource to your namespace via a manifest file:
1. Create a YAML file (i.e., busybox.yaml) and populate the following configuration to the file.
The code below creates a Pod in your specified namespace (my-namespace), which runs a container based on the busybox image.
apiVersion: v1
# Specify the resource to create (a Pod)
kind: Pod
metadata:
  # The name of the Pod.
  name: busybox-pod
  # The namespace where the resource should be created.
  namespace: my-namespace
spec:
  containers:
  # The container name
  - name: busybox
  # The image to use
    image: busybox
    # Make the container sleep for 3600 seconds (one hour) before exiting
    command:
      - sleep
      - "3600"
2. Next, run the below command to create and deploy (apply) the resource specified in your manifest file (busybox.yaml).
kubectl apply -f busybox.yaml
3. Now, run the following command to get all pods available in your namespace (my-namespace).
kubectl get pods -n my-namespaceThe output below shows the newly-created Pod, which confirms your deployment via a manifest file is successful.

Managing Namespaces with kubens
You now have one namespace with deployed resources, which is a good start in containerization. But suppose you have multiple namespaces; how do you switch from one namespace to another?
Traditionally, managing and switching between namespaces takes work. But the good news is that kubens, a command-line tool, lets you quickly switch between namespaces.
The
kubenscommand’s close neighbor is thekubectxcommand-line tool, which lets you switch between Kubernetes clusters.
To manage and switch between namespaces:
1. Run the following command to install kubens (ns) as a kubectl plugin.
The command below installs
kubenson a Linux and MacOS machine. See the installation guide if you are using a different OS.
kubectl krew install ns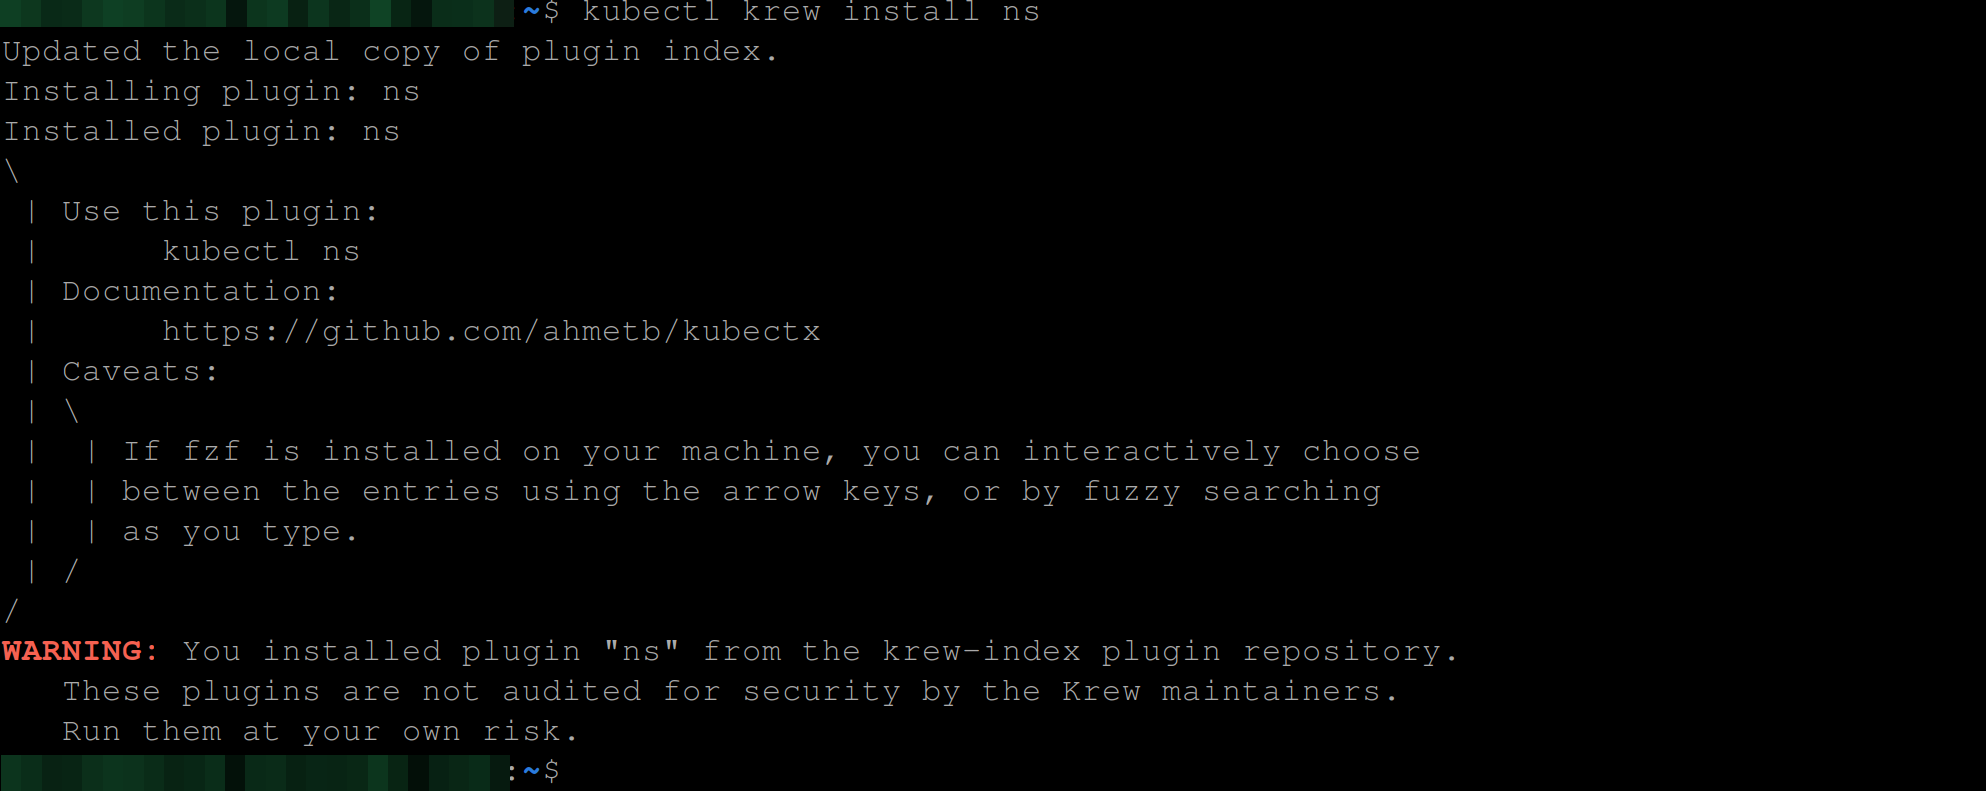
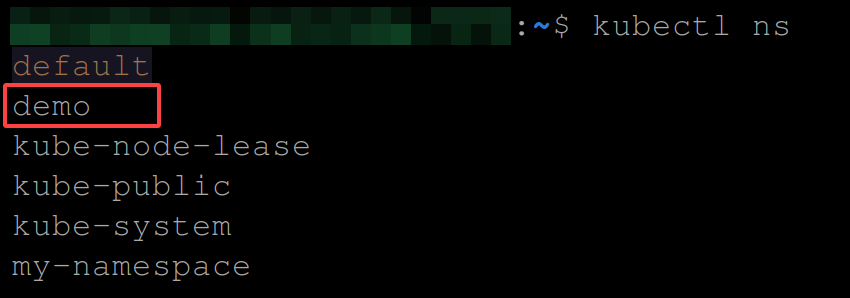
2. Next, run the command below to see all active namespaces in your Kubernetes cluster.
kubectl nsPick one namespace from the list, but this tutorial’s choice is the demo namespace.
3. Run the below kubectl ns command to set your target namespace (demo) as your current namespace.
kubectl get podsThe output below shows you have successfully switched to the demo namespace.

4. After switching, run the below command to get all pods available in the current namespace, which is the demo namespace.
kubectl get pods
5. Now, run the following command switch to another namespace (my-namespace).
kubectl ns my-namespace
6. Now list all the pods in this namespace using the following command:
kubectl get podsDo you see a different pod than the one in step four? Congratulations! The output below confirms your namespace switch is successful.

Conclusion
In this tutorial, you have learned to isolate resources confidently via Kubernetes namespaces, regardless of how many projects you are working on simultaneously.
Confusion between resources, environments, and applications no longer exists when you have Kubernetes namespaces in your cluster.
But besides namespaces, why not try using kubectx to manage your Kubernetes clusters? Enjoy the journey of mastering containerization!


