

Installing Java on Raspberry Pi can be an excellent asset for any project. Java, the most widely used programming language, lets you create almost anything you can imagine.
In this tutorial, you will learn how to install Java on Raspberry Pi and the know-how to start with Java.
Keep reading to have Java running on your Raspberry Pi in no time!
Prerequisites
This tutorial comprises hands-on demonstrations. If you wish to follow along, ensure you have the following:
- At least a Raspberry Pi 2 device or later, running on Raspbian OS – This tutorial uses Raspberry Pi 4 running Raspbian 11 (bullseye) 64-bit.
- An established SSH connection to your Raspberry Pi. Alternatively, you can use a monitor and keyboard for direct access.
Installing Java on Raspberry Pi via APT
Java is known for its “write once, run anywhere” capability, which signifies that you can execute code written in Java on different platforms without major modifications. But, like other programming languages, you must install Java before you can use it.
The quickest way to install Java on a Raspberry Pi is via the Advanced Packaging Tool (APT), included with Raspbian.
💡 Installing Java on your Raspberry Pi lets you run Java applications developed on other platforms, such as Windows, macOS, or Linux.
To install Java on your Raspberry Pi via APT, follow these steps:
1. Open your terminal and execute the following apt update command to update the local package index on your system. Doing so ensures that you have the latest available versions of all packages.
sudo apt update -y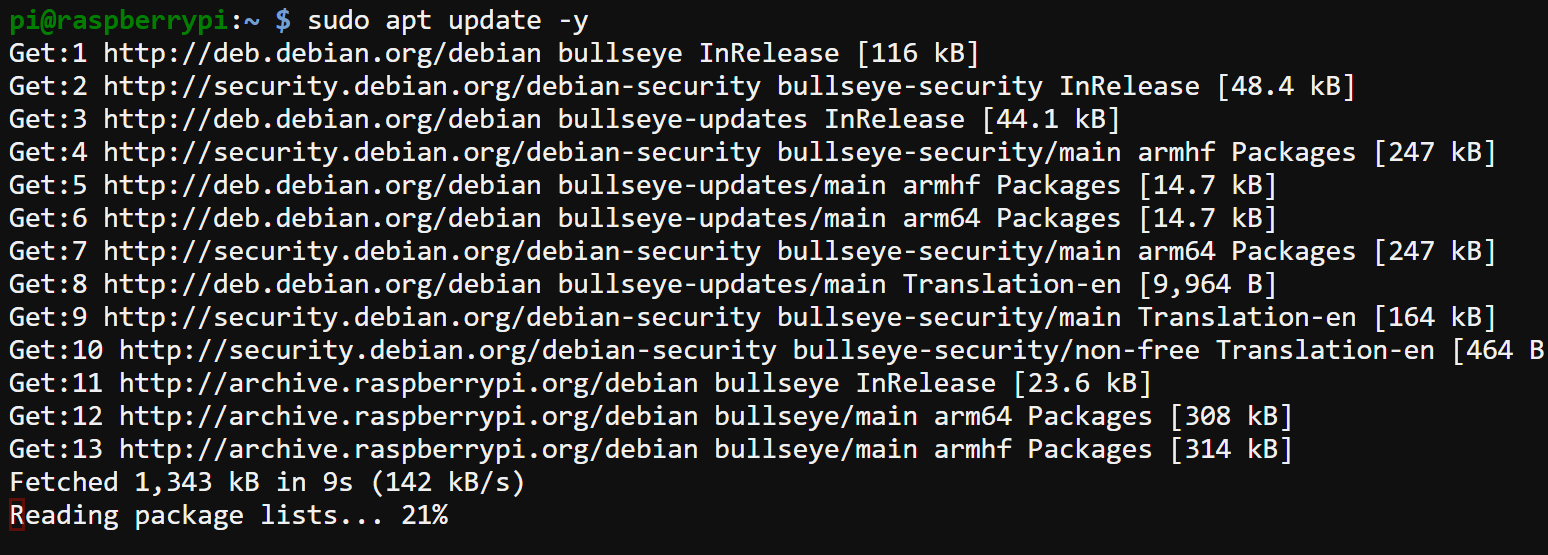
2. Once updated, run the below apt install command to install the default Java Development Kit (JDK) (default-jdk), a fundamental package for Java development. Installing this JDK provides essential tools for coding, compiling, and running Java applications.
This JDK package equips you with a comprehensive set of programming utilities, executables, and binaries to facilitate the creation, testing, and deployment of Java applications on your Raspberry Pi.
sudo apt install default-jdk -y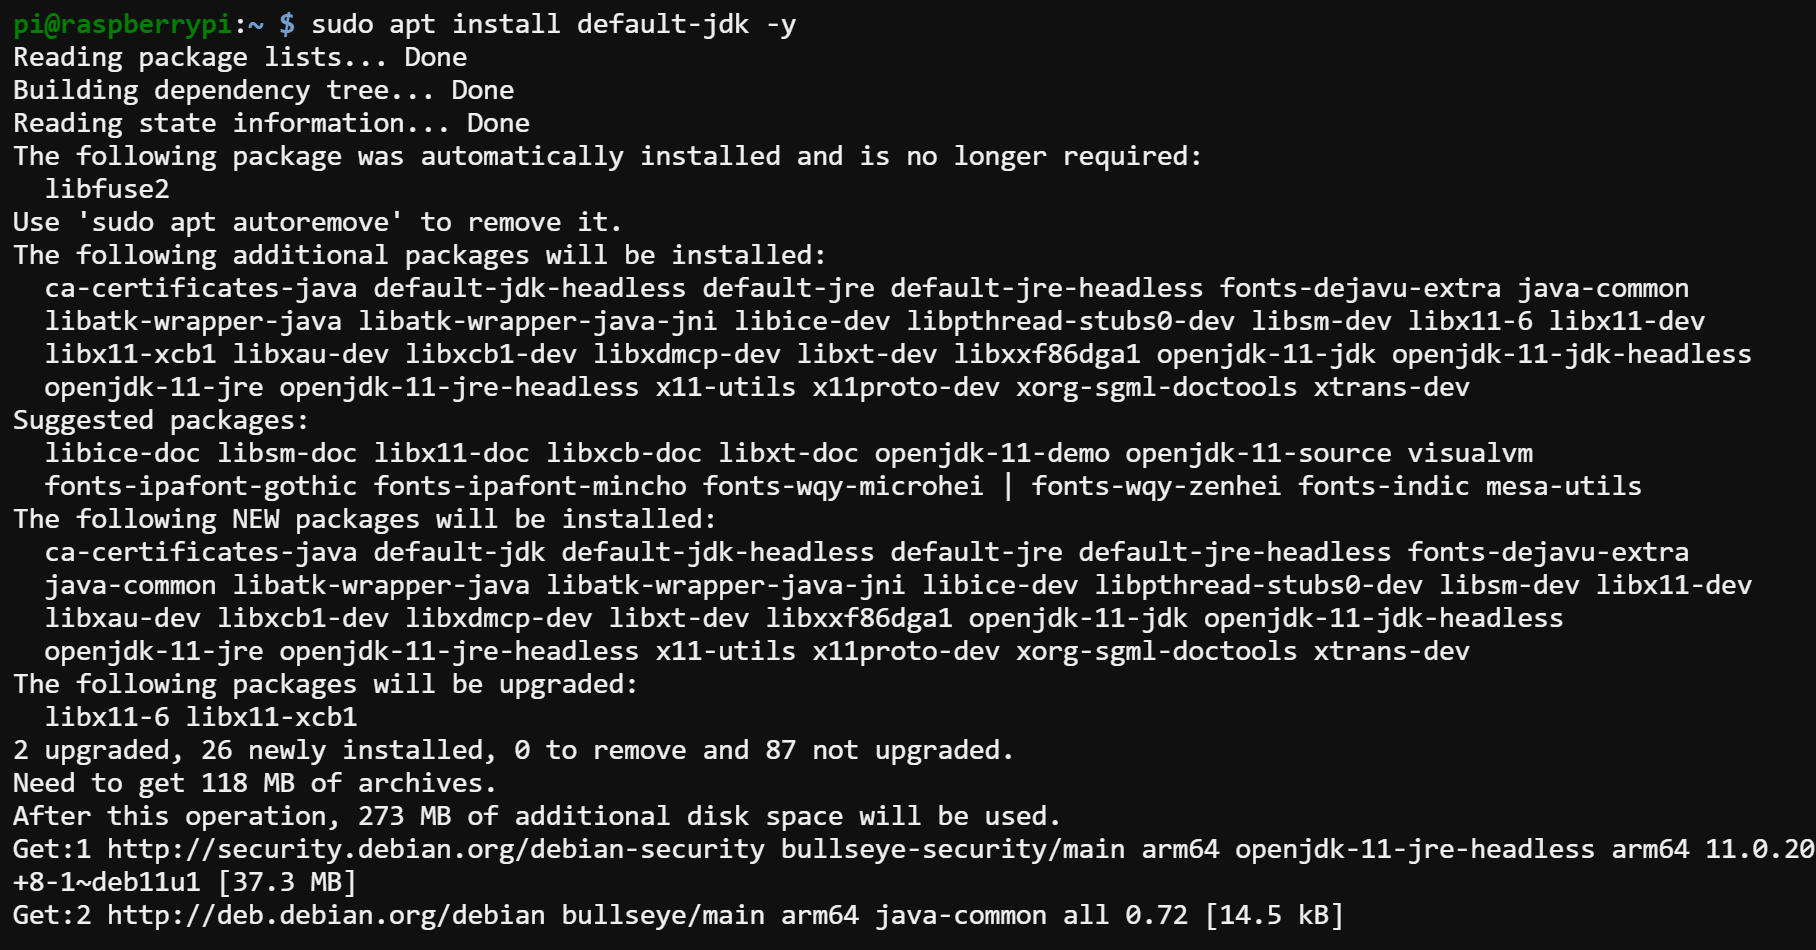
💡 Alternatively, run the below command instead if you wish to install the latest Java version, v17, at this time of writing.
sudo apt install openjdk-17-jdk -y
3. Now, run the java command below, which displays the -version of Java installed in your system.
java -versionThe output below confirms the version of your Java installation and that Java has been successfully installed. You can now start developing your applications in Java with your Raspberry Pi.

Installing Java on Raspberry Pi via SDKMAN
Besides installing Java from the default package repositories, you can also install a newer version of Java via the Software Development Kit Manager (SDKMAN) for development purposes.
SDKMAN is a tool that simplifies the installation, management, and switching between different software development kits (SDKs) and related tools.
💡 SDKMAN primarily focuses on managing SDKs for languages like Java, Kotlin, Groovy, Scala, and others and tools like Gradle and Maven.
To install Java on your Raspberry Pi via SDKMAN:
1. Run the following command to install zip and sdkman as follows:
- Installs the
ziputility command-line tool for creating and manipulating ZIP archives. - Fetches (
curl) and pipes (|) the SDKMAN installation script from the specified URL to thebashshell for execution. - This script then installs SDKMAN on your Raspberry Pi.
sudo apt install zip && sudo curl -s "https://beta.sdkman.io" | bash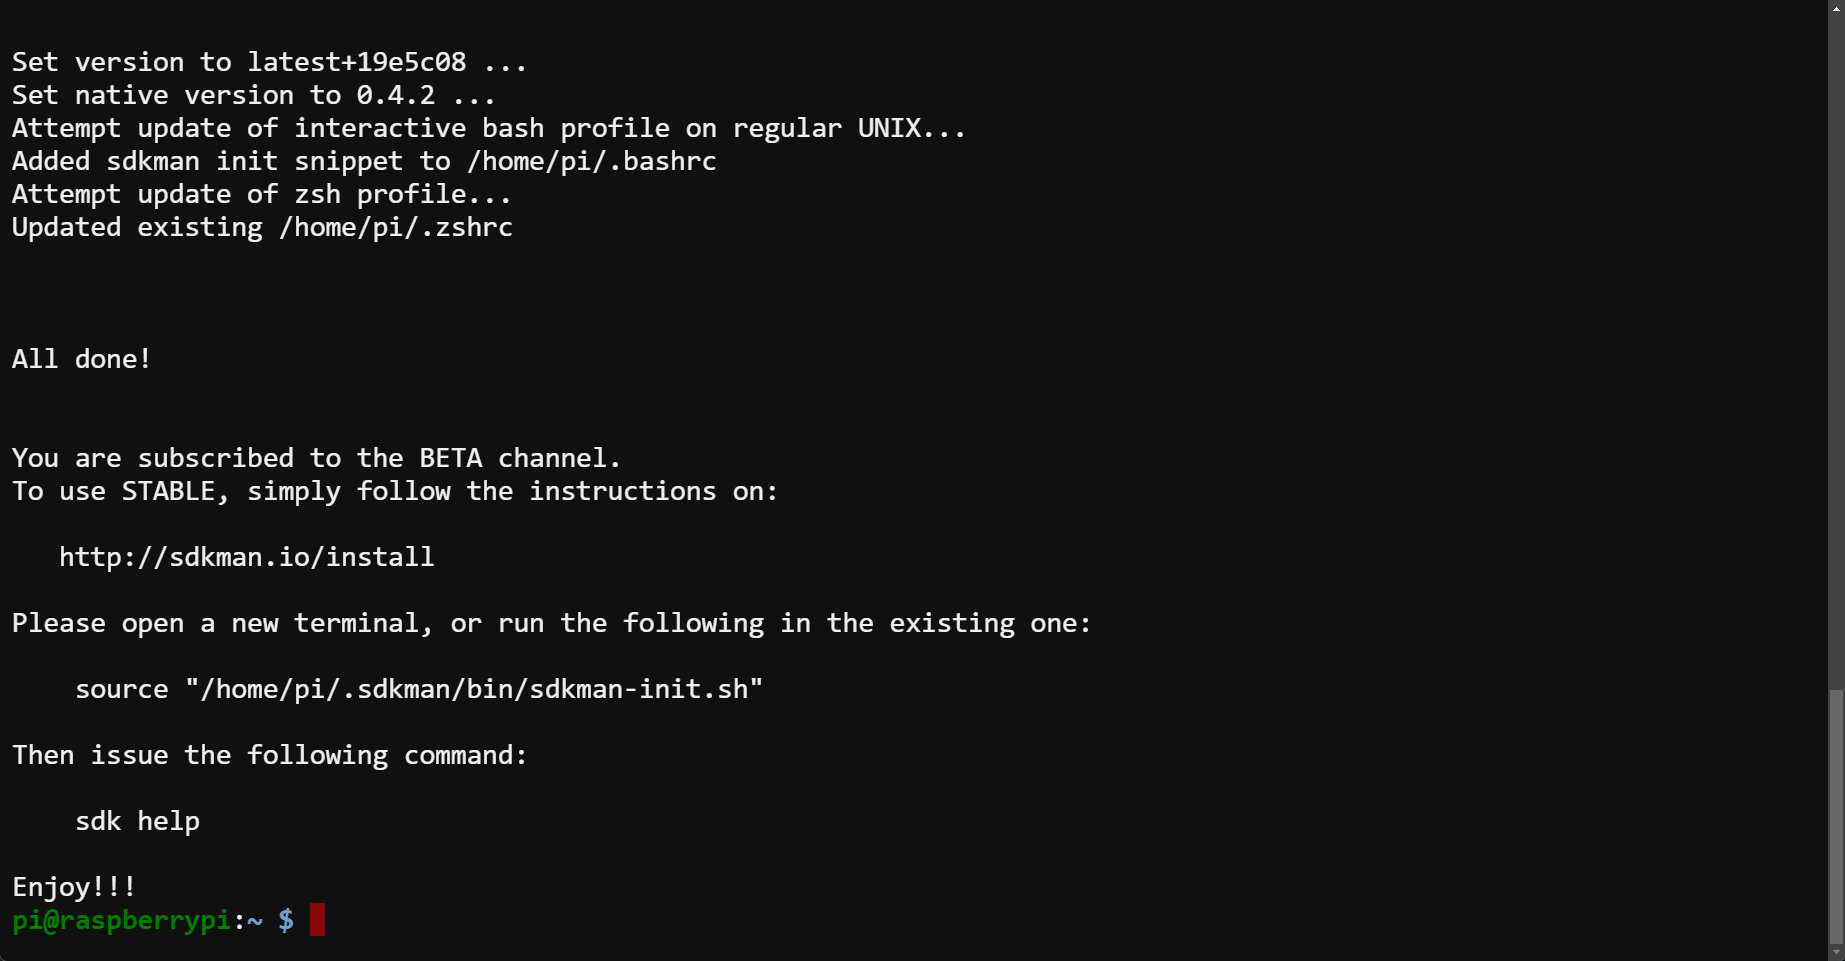
2. Next, execute the below source command to initialize the environment variables and settings required for SDKMAN to work correctly in the current shell session.
This command does not provide output, but you will test your SDKMAN installation later.
source "$HOME/.sdkman/bin/sdkman-init.sh"3. Once initialized, run the below sdk command to list all the available java versions.
sdk list javaTake note of the version (in the Identifier column) you wish to install.
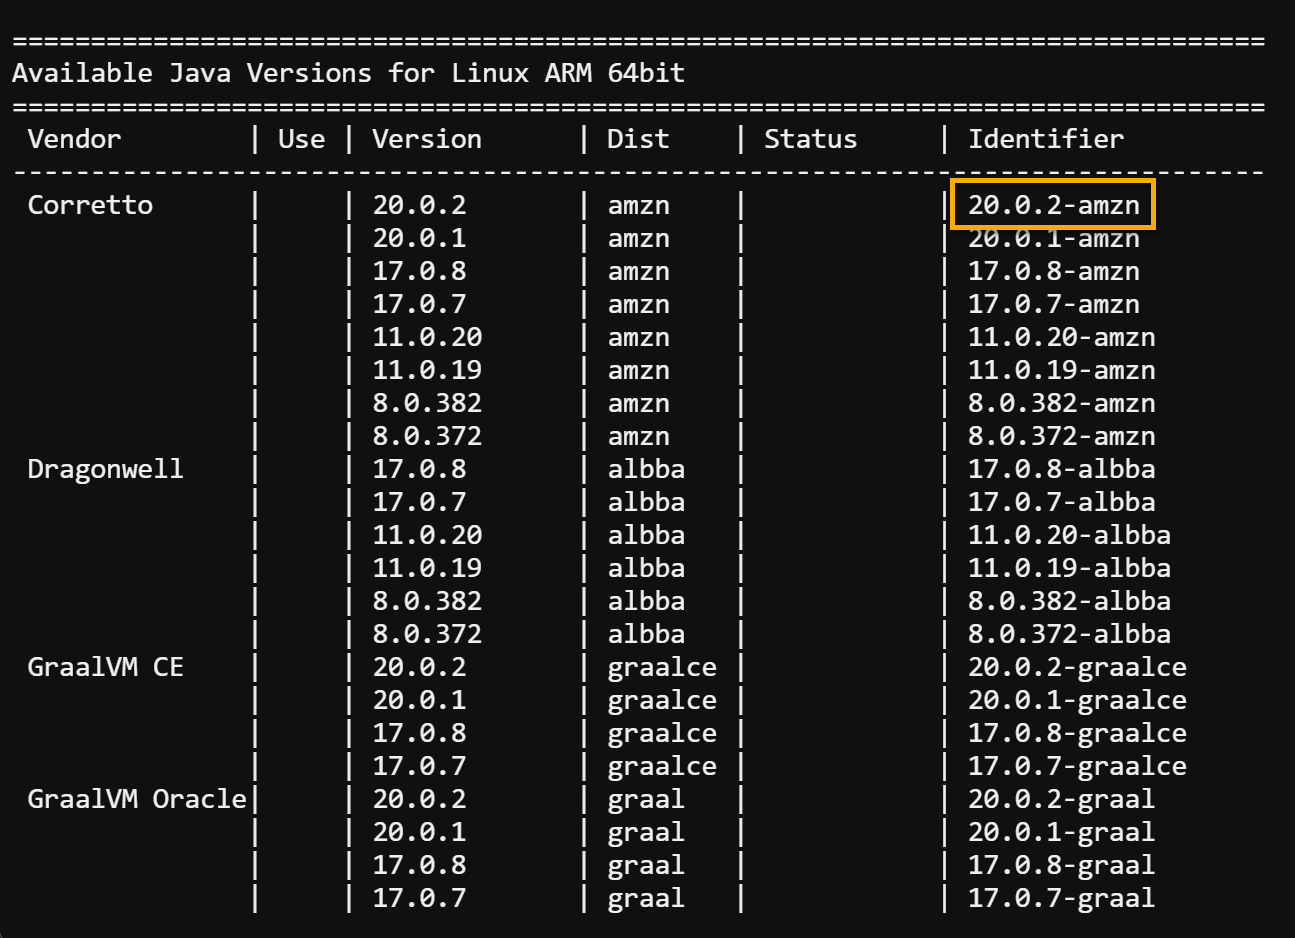
4. Now, run the following command to install your desired java version. Ensure you replace version with the one you noted in step three.
sdk install java versionThis tutorial’s choice of version to install is 20.0.2-amzn, as shown below.

5. Finally, the exact java command below to check the currently installed Java -version.
java -versionBelow, you can verify your desired version of Java has been installed.

Configuring a Default Java Version
In scenarios where multiple Java versions are installed on your PI, the need to establish a default version becomes apparent. This default version would then be automatically invoked whenever Java commands are executed.
Different Java applications require specific versions of the JDK to run correctly, and setting the default Java version ensures the correct JDK version is used when you execute or compile code.
To configure the default version of Java on your Raspberry Pi:
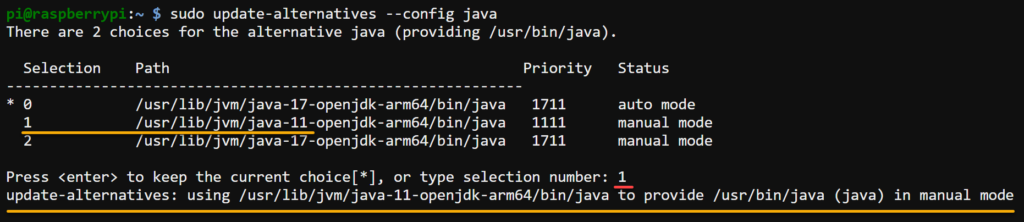
Execute the following update-alternatives command to list all installed versions of Java.
sudo update-alternatives --config javaNow, input the corresponding number of your desired version from the list, as shown below, and press Enter.
In this example, your selected version will be configured accordingly as your system’s default version of Java, which is Open JDK 11.
This feature of freely switching to another Java version helps avoid compatibility issues and ensures your code works as expected.
Verifying the Java Installation on Raspberry Pi
Before proceeding with more complex tasks, you must confirm your Java installation functions correctly. One way to do so is by writing a simple Java program that displays a welcome message to the user and then performs an addition operation on two provided numbers.
To create and execute a Java program:
Create a new Java source file named addnumbers.java (arbitrary) with your preferred editor, populate the code below, and save the file.
This code is a program that, when executed, prints a welcome message, performs a mathematical operation (addition), and prints the result.
public class addnumbers {
public static void main(String[] args) {
// Display a welcome message to the user
System.out.println("Welcome to the Java Program!");
// Define and initialize two numbers for addition
int num1 = 5;
int num2 = 7;
// Calculate the sum of the two numbers
int sum = num1 + num2;
// Display the result of the addition
System.out.println("The sum of " + num1 + " and " + num2 + " is: " + sum);
}
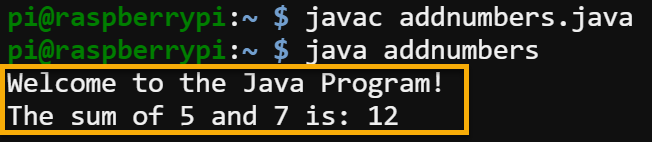
}Next, run the following commands to compile (javac) and execute (java) your program (addnumbers.java).
javac addnumbers.java
java addnumbers
If Java is properly installed and configured, you will see the welcome message below, followed by the sum of the two provided numbers.
SDKMAN provides a simple command-line interface that allows you to install various SDKs and tools easily. It automatically handles downloading, extracting, and configuring the SDKs for you, including Java.
Conclusion
Throughout this tutorial, you have learned how to install Java on your Raspberry Pi, opening up a world of possibilities for your various projects and applications.
Regardless of which method you used to install Java, you now have the tools to develop applications. Java provides you with everything to create simple command-line tools to more complex graphical interfaces and web applications.
Now, with this newfound knowledge, why not try creating an interactive game or a smart home assistant?


