


How to Install Webmin on Ubuntu Linux
Need a lightweight GUI application for Linux server management? You may have heard of Webmin’s web-based interface for managing Linux servers. But how do you install Webmin to manage and administer Linux servers?
Webmin provides modules to simplify Linux server administration. And in this tutorial, you’ll learn to install Webmin and set up LAMP Stack on an Ubuntu server through the Webmin dashboard.
Read on and ease up your daily tasks with Webmin!
Prerequisites
This tutorial houses step-by-step demos. To follow along, ensure you have the following requirements:
- A Linux server – This tutorial uses the latest version of the Ubuntu 20.04 server.
- A root user or a user with admin privileges.
- A domain name pointed to your server IP address. This tutorial uses the domain webmin.example.io and example.io.
Adding Webmin GPG Key and Repository
Webmin is a web-based application for simply Linux server management through the web browser. Webmin allows you to administer Linux management tasks, such as managing users, managing packages updates, and monitoring basic services.
Webmin provides its official repository to install, and you’ll be adding the Webmin GPG key and repository to your system.
1. Open your terminal and log in to your server.
2. Next, run the below command to add the GPG key (apt-key add) for Webmin on your system.
wget -qO - http://www.webmin.com/jcameron-key.asc | sudo apt-key add -3. Run the below commands to add Webmin repository and refresh the package index on your system.
# adding Webmin repository
sudo sh -c 'echo "deb http://download.webmin.com/download/repository sarge contrib" > /etc/apt/sources.list.d/webmin.list'

# refresh package index
sudo apt update
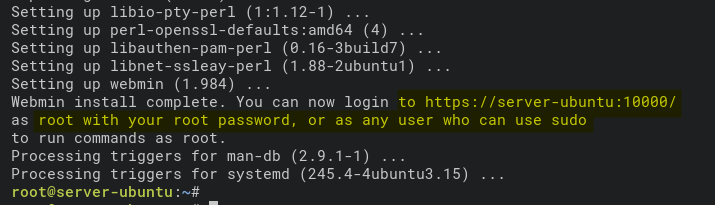
4. Lastly, run the apt command below to install webmin.
sudo apt install webmin -yAs you can see below, Webmin is installed on the Ubuntu system and is running on default port 10000.
Securing Webmin with SSL Certificates
You’ve now installed Webmin on your system for managing your Linux server. And naturally, you’d want to secure your Webmin installation. But how? You’ll secure Webmin with SSL certificates and Apache reverse proxy.
SSL certificates encrypt connections between client and server, and the Apache reverse proxy keeps Webmin running locally on your server.
You can use free SSL certificates from LetsEncrypt. Be sure you have the domain name pointed to your server IP address.
1. Generate SSL certificates using the certbot tool.
2. Next, run the apt command below to install the Apache2 web server.
sudo apt install apache2 -y3. Run the below command to enable Apache2 modules (ssl, proxy, and rewrite). The Apache2 mod_ssl (ssl) will enable HTTPS on your web server. While mod_proxy (proxy) and mod_proxy_http (proxy_http) allow you to set up Apache as a reverse proxy for your application.
sudo a2enmod ssl proxy proxy_http proxy_balancer rewrite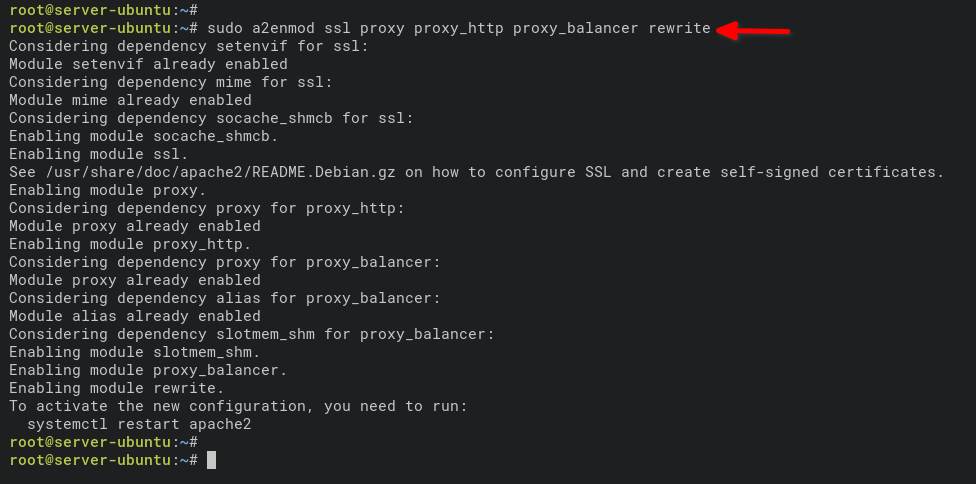
Now, create a new virtual host configuration (/etc/apache2/sites-available/webmin.conf) using your preferred editor and populate the following configuration.
Be sure to change the following values:
- Change the domain
webmin.example.iowith your domain name. - Change the path of the public key certificate (
/etc/letsencrypt/live/webmin.example.io/fullchain.pem) with your public key certificate. - Change the path of the private key
# configuration of Apache2 reverse proxy for Webmin with SSL/HTTPS enabled
<VirtualHost *:80>
    ServerName webmin.example.io
    ErrorLog /var/log/apache2/webmin_error_log
    CustomLog /var/log/apache2/webmin_access_log combined
    RewriteEngine On
    RewriteCond %{SERVER_PORT} =80
    RewriteRule ^/(.*)$ https://%{SERVER_NAME}:443/$1 [R,L]
</VirtualHost>

<VirtualHost *:443>
    ServerName webmin.example.io
    ErrorLog /var/log/apache2/webmin-ssl_error_log
    CustomLog /var/log/apache2/webmin-ssl_access_log combined
    SSLEngine On
    SSLCertificateFile  /etc/letsencrypt/live/webmin.example.io/fullchain.pem
    SSLCertificateKeyFile  /etc/letsencrypt/live/webmin.example.io/privkey.pem
    ProxyRequests Off
    ProxyPreserveHost Off
    SSLProxyEngine On
    SSLProxyVerify none
    SSLProxyCheckPeerCN off
    SSLProxyCheckPeerName off
    RewriteRule ^/$ / [R]
    ProxyPass / https://127.0.0.1:10000/
    ProxyPassReverse / https://127.0.0.1:10000/

    <Proxy *>
    Order deny,allow
    Allow from all
    </Proxy>
</VirtualHost>
5. Run the following commands to activate the virtual host configuration (webmin.conf) and verify the Apache configuration.
# activate virtual host configuration webmin.conf
sudo a2ensite webmin.conf

# verify Apache2 configuration
sudo apachectl configtest
You’ll see the output message below (Syntax OK) if your configuration is correct.

6. Execute the systemctl command below to restart the Apache2 service and apply a new configuration.
sudo systemctl restart apache27. Open the Webmin configuration (/etc/webmin/config) in your preferred editor and add the following configuration. Make sure to change the server-ubuntu with your system hostname.
# change the referer to system hostname
referrer=server-ubuntu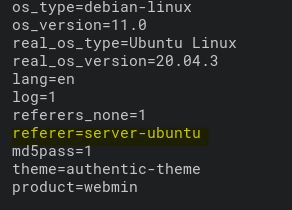
8. Now run the below command to restart the webmin service and apply new changes. sudo systemctl restart webmin
sudo systemctl restart webmin9. If you have the UFW firewall running on your system, run the below command to add and allow HTTP and HTTPS connections on your firewall.
# Add HTTP and HTTPS to UFW firewall
sudo ufw allow http
sudo ufw allow https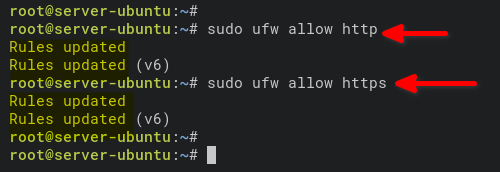
10. Lastly, open your web browser and navigate to the domain name of your Webmin (i.e., https://webmin.example.io/).
If your Webmin configuration is correct, you’ll get the Webmin login page as below. Input your root user and password, and click Sign In to access the Webmin dashboard.

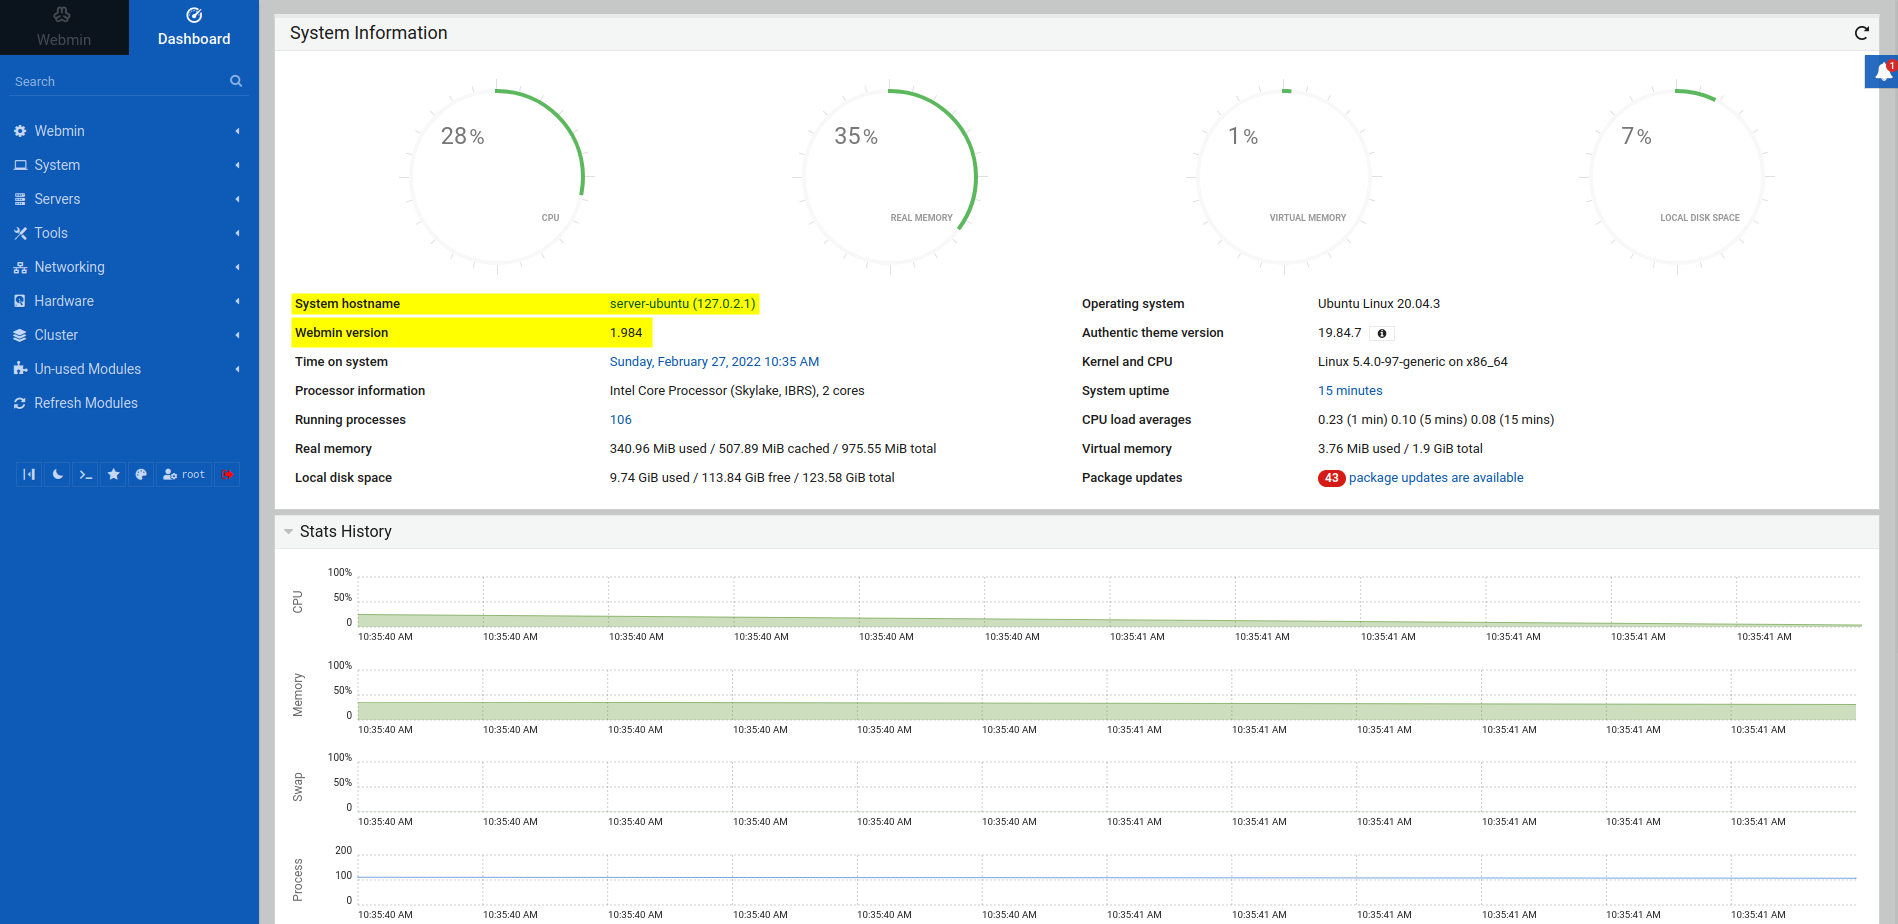
After logging in, your browser redirects to the Webmin dashboard as below.
Managing Users in Webmin
You’ve now installed and secured Webmin on your server, so feel free to create a new user through the Webmin dashboard. Using a non-root user to log in to your server is always recommended for security reasons.
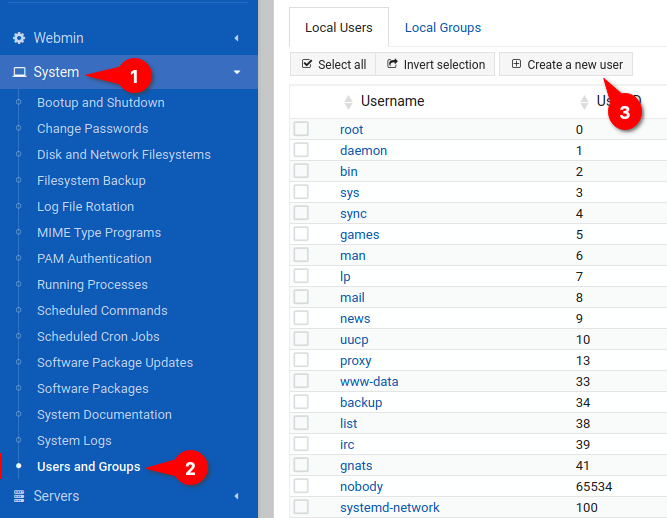
1. Click on the System menu at the left panel, then click Users and Groups to see the list of users on your system, as shown below. Click the button Create a new user under the Local Users tab to create a new user.
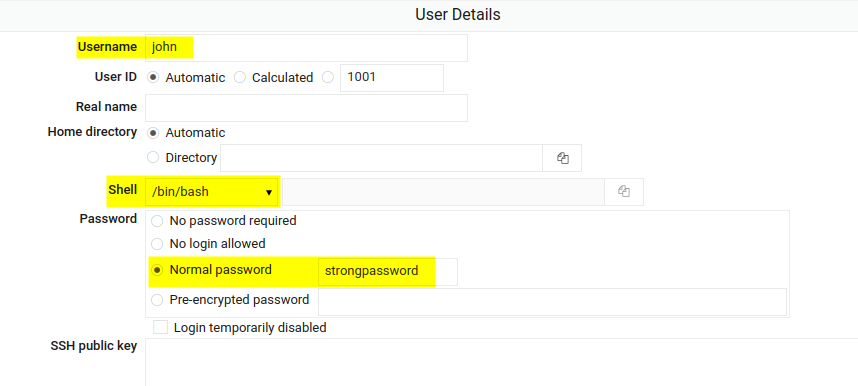
2. On the User Details section, input the Username, default Shell, and Password you prefer.
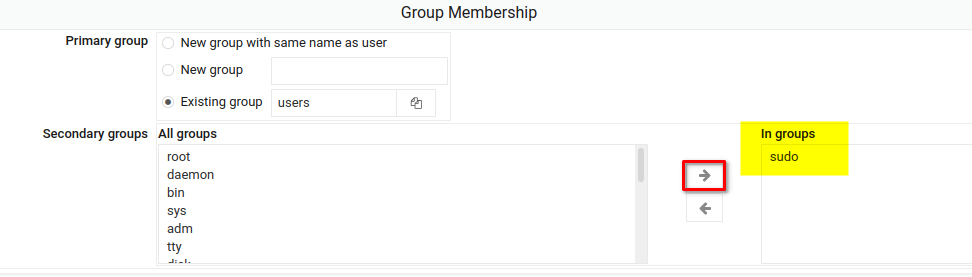
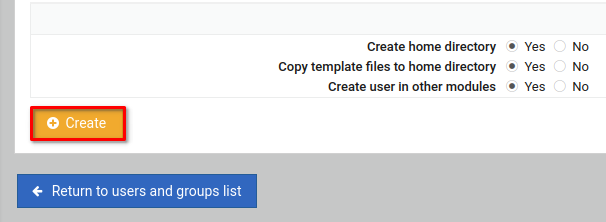
3. Move to the Group Membership section, add the sudo group to your new user, then click Create to confirm and create a new user. This action allows the new user (john) to manage and administer the server using the Webmin dashboard.
4. Next, click the Sign out button to log out from the Webmin dashboard.
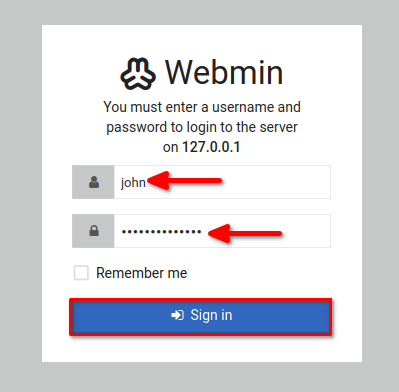
5. Log in again to the Webmin dashboard, but this time login with the new user john and the password you set for the user (StrongPassword).
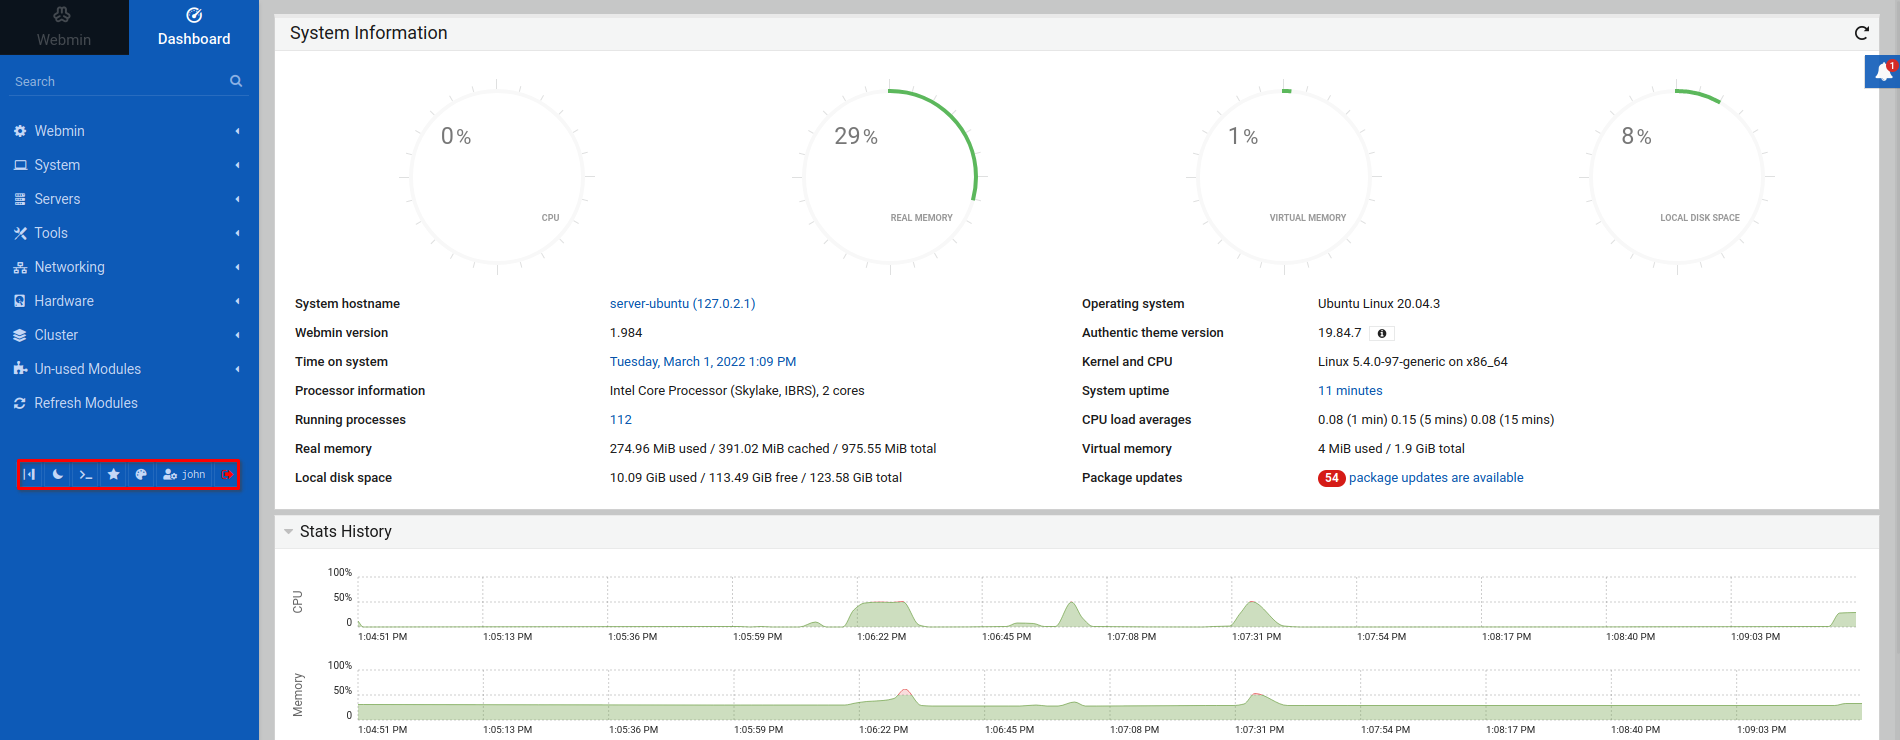
You should get the Webmin dashboard, as shown below, after logging in with the new user (john).
Setting up Package Updates
Apart from managing users in Webmin, you can also set up a package update to ensure you’re using the latest version of packages on your system and the latest patches.
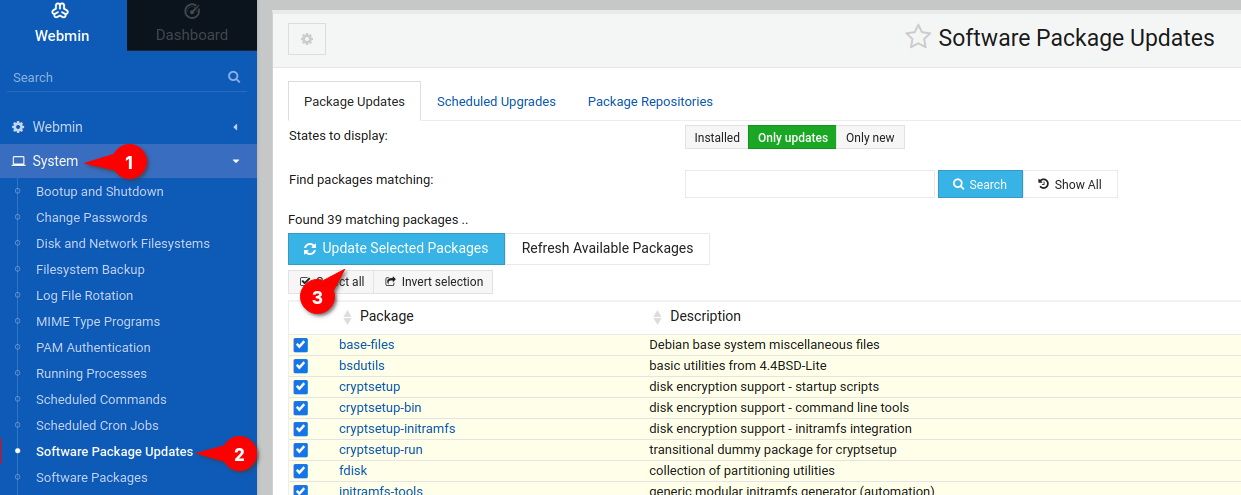
1. Click the System menu and click on Software Package Updates to see packages with available updates.
2. On the Packages Updates tab, click the button Update Selected Packages and update all packages manually.
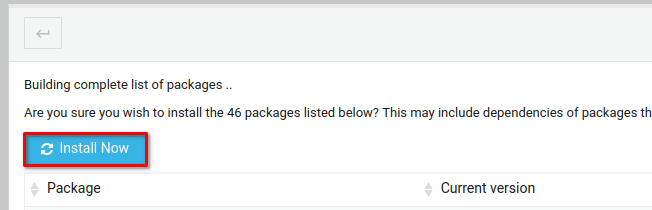
3. Now click Install Now to apply a new update.
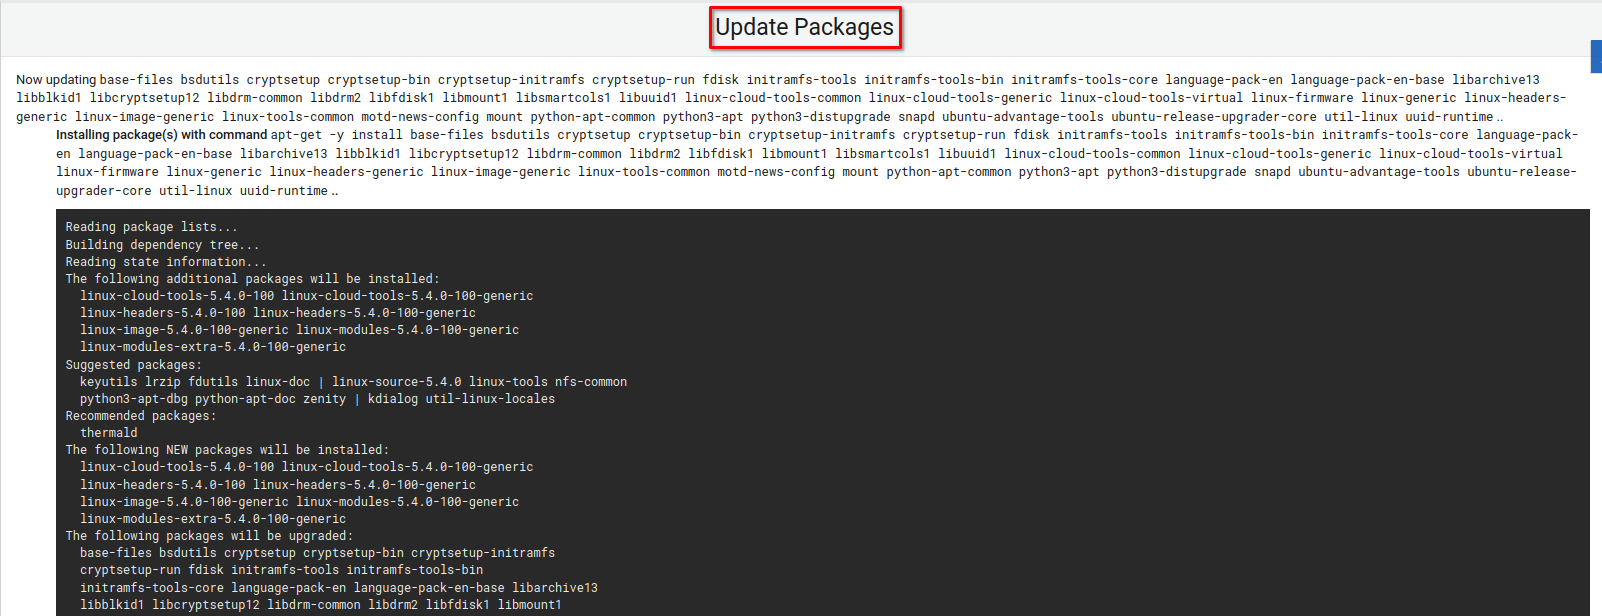
The update will run on your web browser, as shown below. Wait until all packages updates are completed.
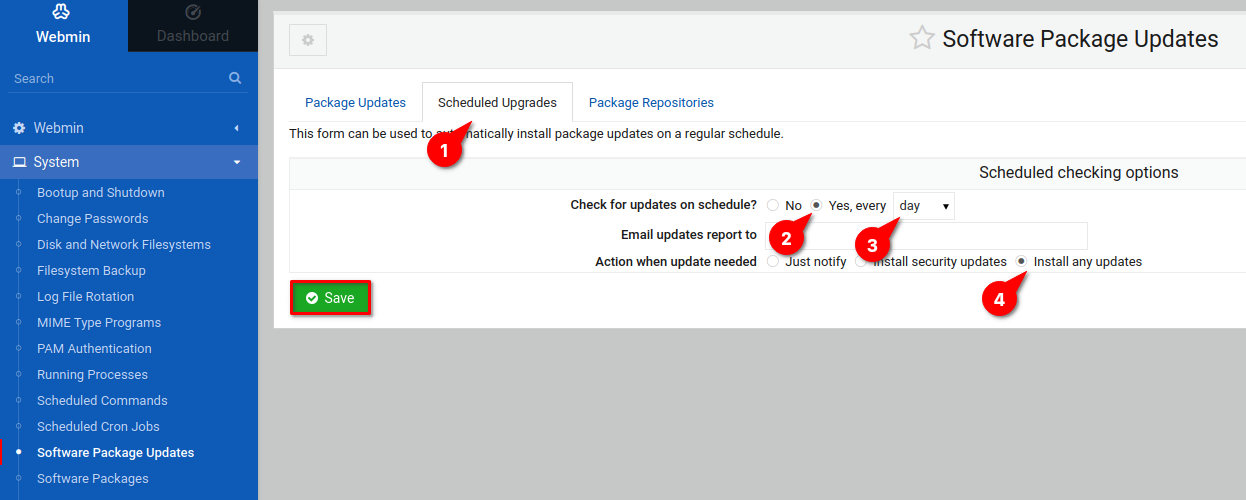
4. Next, move to the Scheduled Upgrades tab and configure an automatic package update with the following:
- Select Yes, every option, then select the time for the update to day.
- Select the Install any updates option as Webmin’s action when updates are needed.At this point, the automatic updates will keep your packages updated to the latest version every day.
Creating a New Virtual Host
Updating packages on Webmin is out of the way, and as preparation for installing PHP web applications, you’ll need to install the LAMP Stack. You’ll create a virtual host for your domain name via the Webmin dashboard.
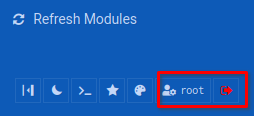
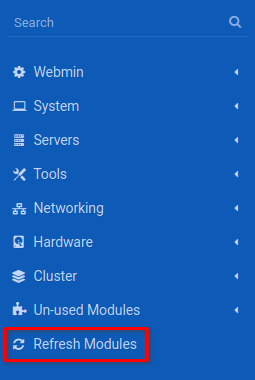
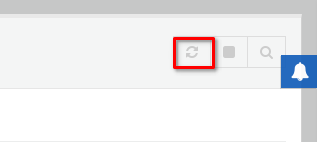
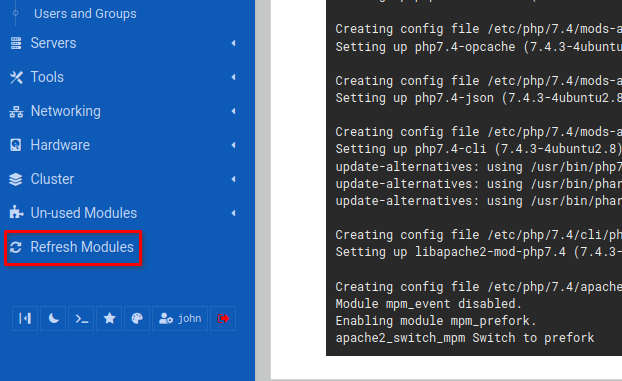
1. Click the Refresh Modules button to reload Webmin modules and apply the Apache2 web server module.
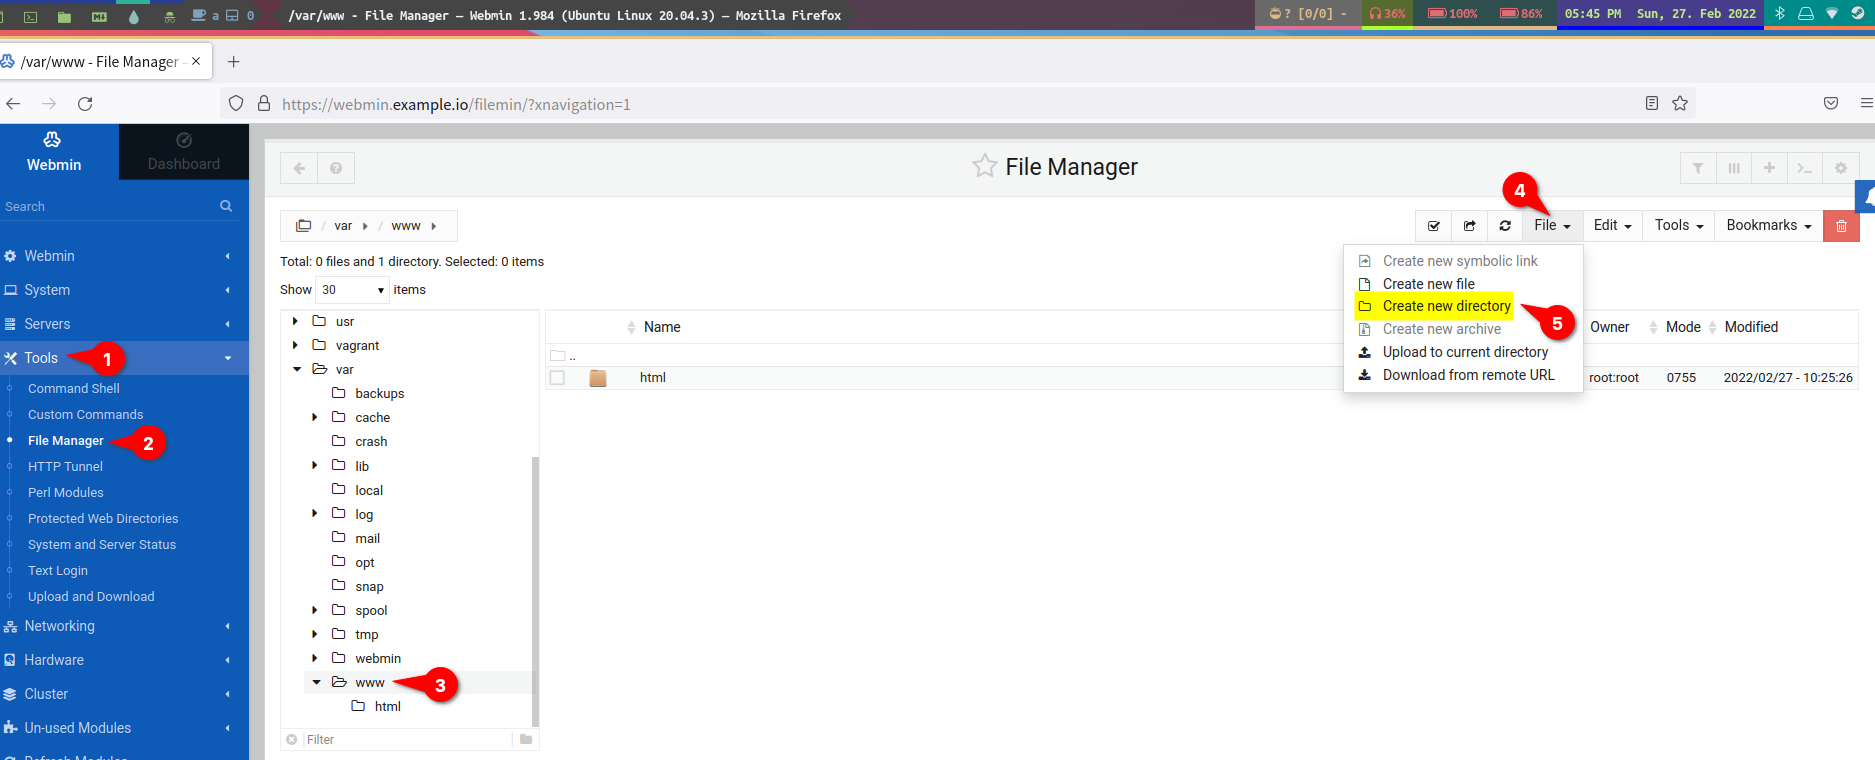
2. Next, click on the Tools menu, then click File Manager to access your system’s File Manager.
Select the /var/www/ directory, click the File menu and select Create new directory to initialize creating a new directory.
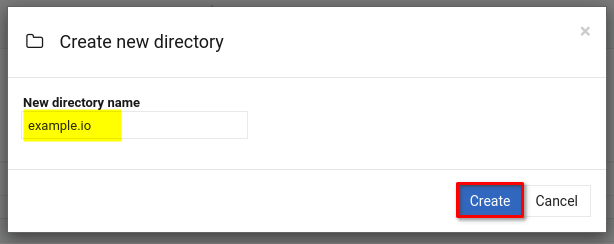
3. Input new directory name, and click Create. This demo sets the directory name as example.io. This directory will be used as the DocumentRoot directory for the example.io domain.
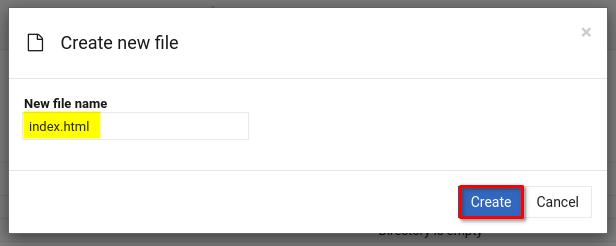
4. Now, click the example.io directory, click the File drop-down button and select Create new file.

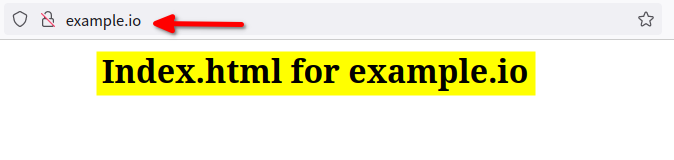
5. Input a unique file name, but this demo sets the file name as index.html. Click on Create to finalize creating the file. This file will be the default index.html file for the example.io domain.
After creating the index.html file, Webmin opens the file to a text editor (step six).
6. Populate the following HTML script to the index.html file and click the Save icon. <center><h1>Index.html for example.io</h1></center>
<center><h1>Index.html for example.io</h1></center>
7. Next, click on the menu Servers, then click Apache Webserver to access the page where you’ll create a virtual host.
Click on the Create virtual host tab and input details for virtual host configuration as below, then click on Create Now to confirm and create a new virtual host:
- Port: 80
- Document Root: /var/www/example.io
- Server Name: example.io

8. Now, click the reload button (top right) to reload the Apache webserver and apply new changes.
9. Lastly, open a new tab and visit your virtual host domain name (i.e., http://example.io), and you should get the default index.html for your domain name.
Installing MySQL Server for Database Backend
You’ve successfully created Apache virtual host for your domain name. And in case you plan to install web applications, such as WordPress, Joomla, or Magento, you’ll need to install the MySQL server for the database backend.
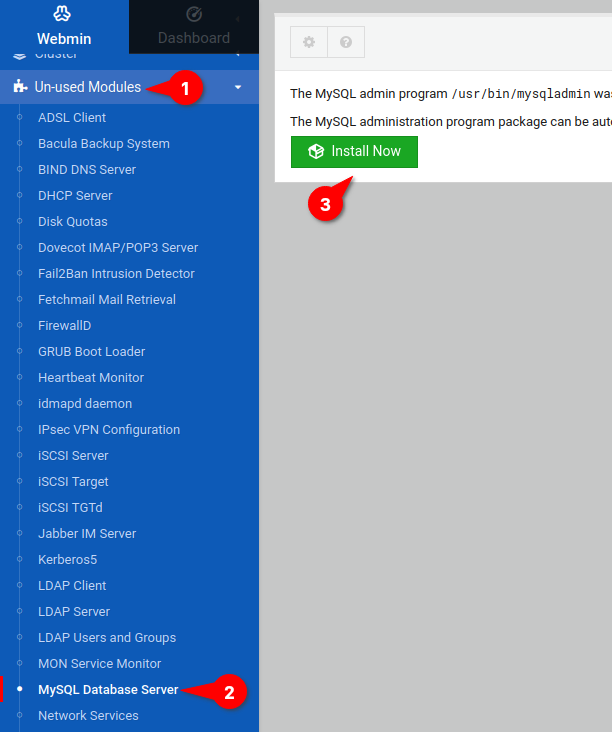
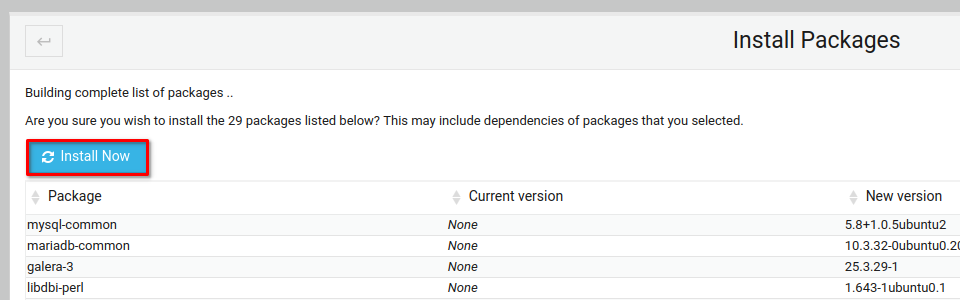
Click on the Un-used Modules menu —> MySQL Database Server, and click the Install Now button to initialize installing MySQL server packages. This action will populate all packages and dependencies for the MySQL server.
2. Next, click the Install Now button to confirm the package and dependency installations.
3. Once installed, click the Refresh Modules menu to reload all installed modules on Webmin.

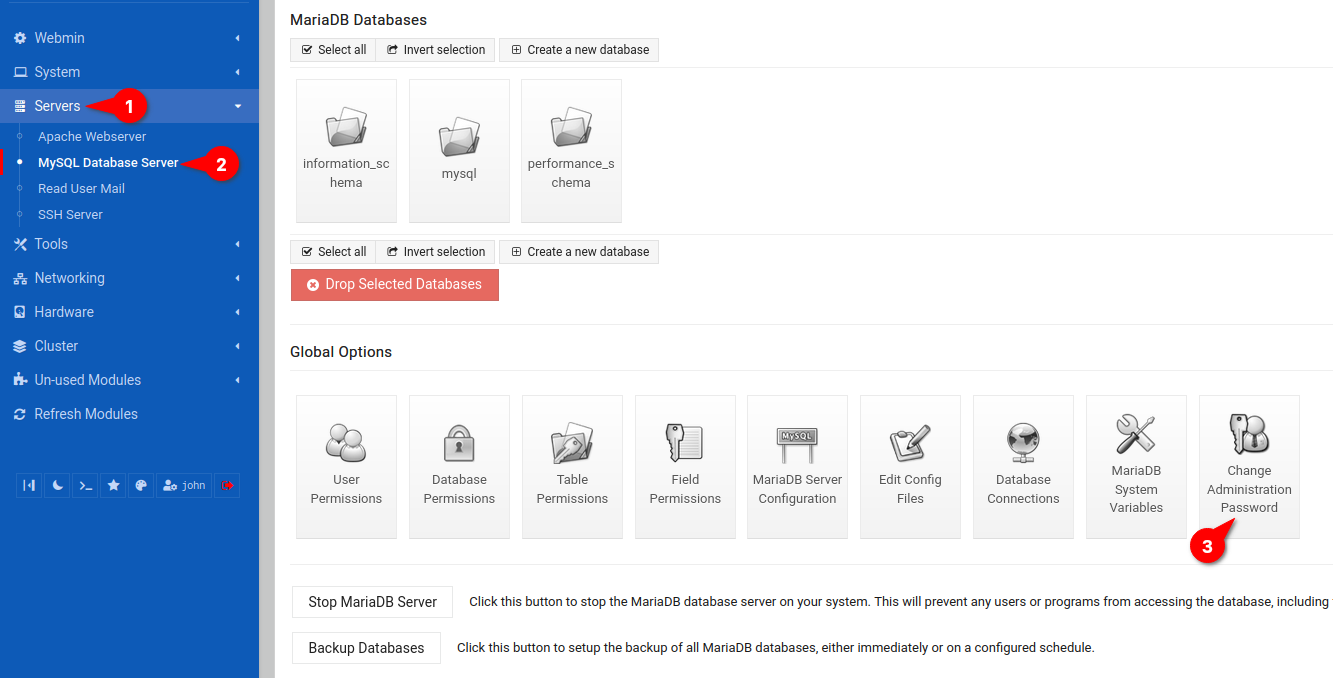
4. Now, click the Servers menu —> MySQL Database Server, then click the Change Administration Password option under the Global Options section. This action redirects your browser to a page where you’ll set an admin password to secure your MySQL server (step five).
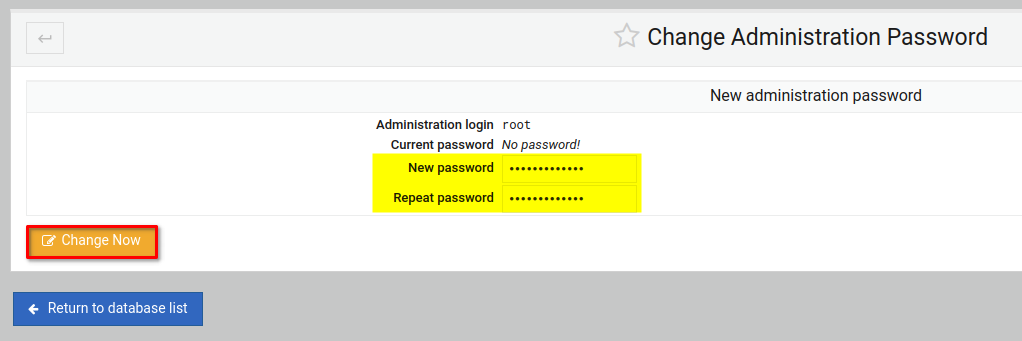
5. Lastly, input a new password for the MySQL root user, repeat the password, and click the Change Now to confirm.
Setting up a MySQL root password is recommended to improve the security of your MySQL database server.
Installing PHP to Support PHP-Based Web Applications
You’ve completed installing MySQL server with Webmin for the database backend. But to support PHP-based web applications, similar to installing MySQL server, you’ll need to install PHP packages from Webmin Dashboard.
1. Initialize installing PHP with the following:
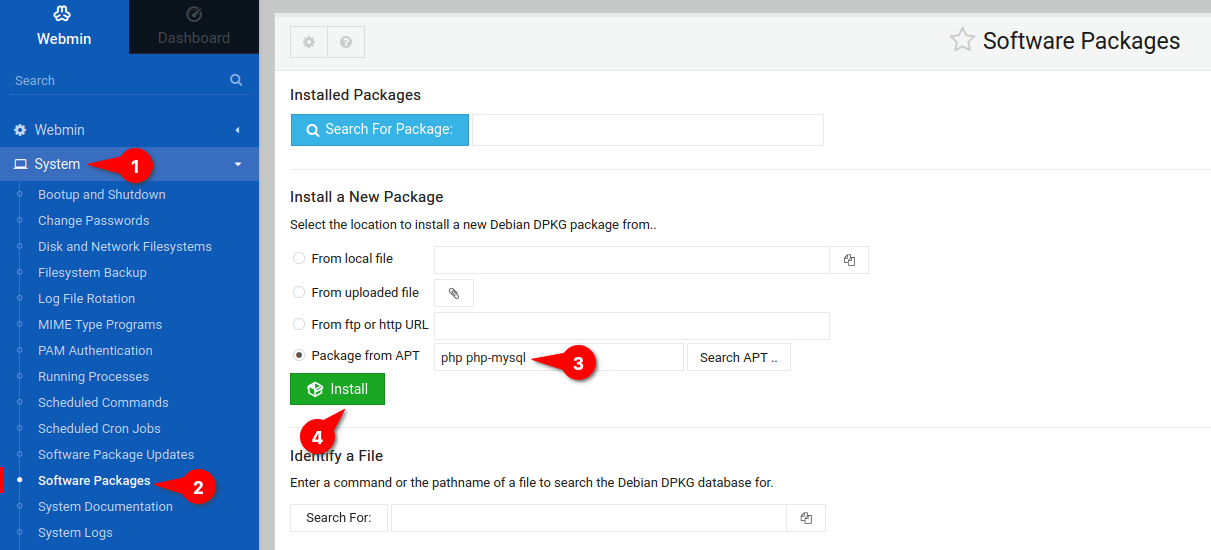
- Click the System menu and select Software Packages to access the page where you’ll install new packages.
- On the Install a New Package section, select the Package from APT option and input the package names php and php-mysql. The MySQL module (php-mysql) for PHP allows your PHP applications to use MySQL/MariaDB as the database backend.
- Click Install to install PHP packages.
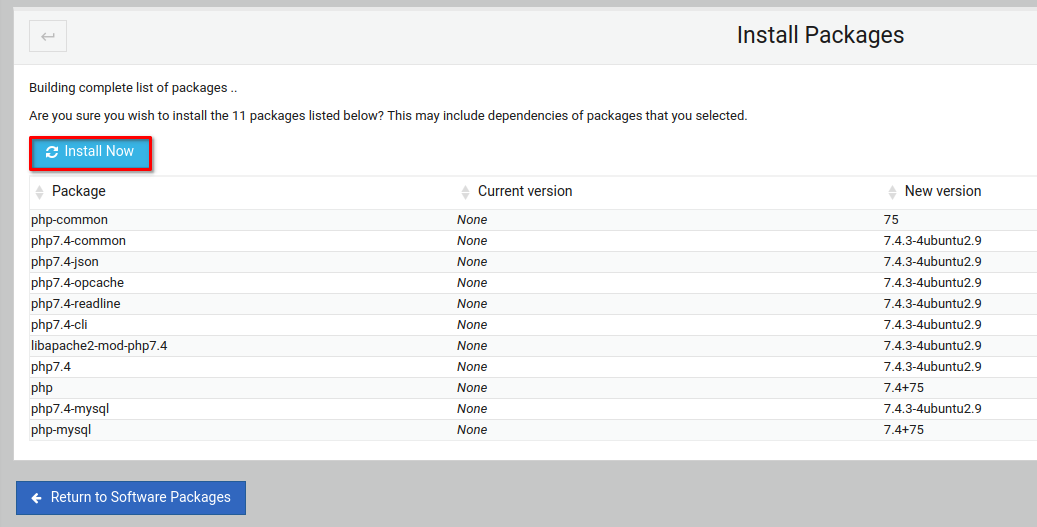
2. Next, click Install Now to confirm and install PHP packages.
3. After installing the packages, click the Refresh Modules menu to reload Webmin modules and apply new changes.
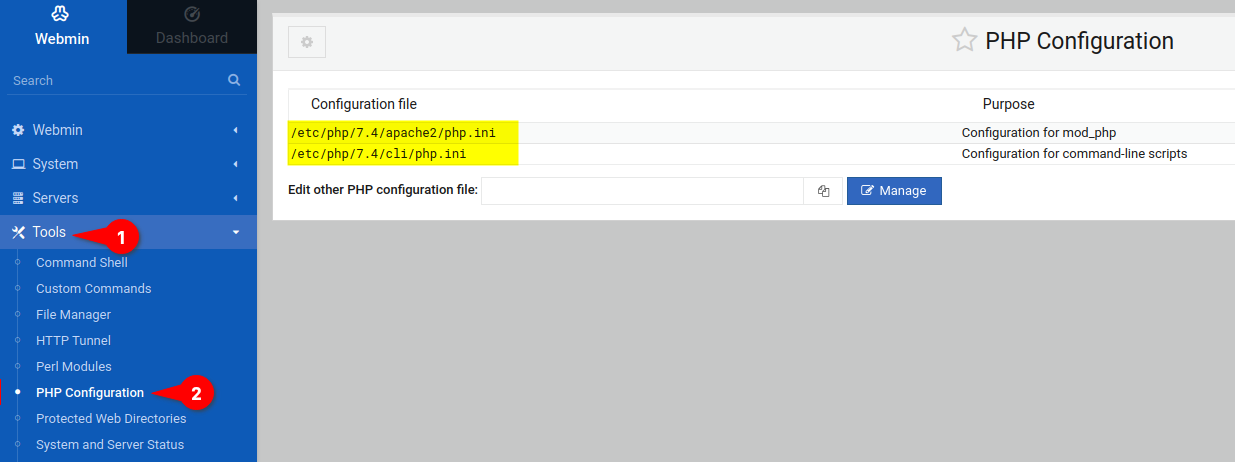
4. Lastly, click the Tools menu and select PHP Configuration to see the page managing the php.ini configuration.
You can now edit the php.ini configuration manually or use the graphical menu from Webmin.
Verifying Apache2 Web Server and PHP
By now, you’ve completely installed packages in Webmin. But how do you verify the PHP and Apache2 web server work? Create a new phpinfo file with Webmin to check your PHP installation information.
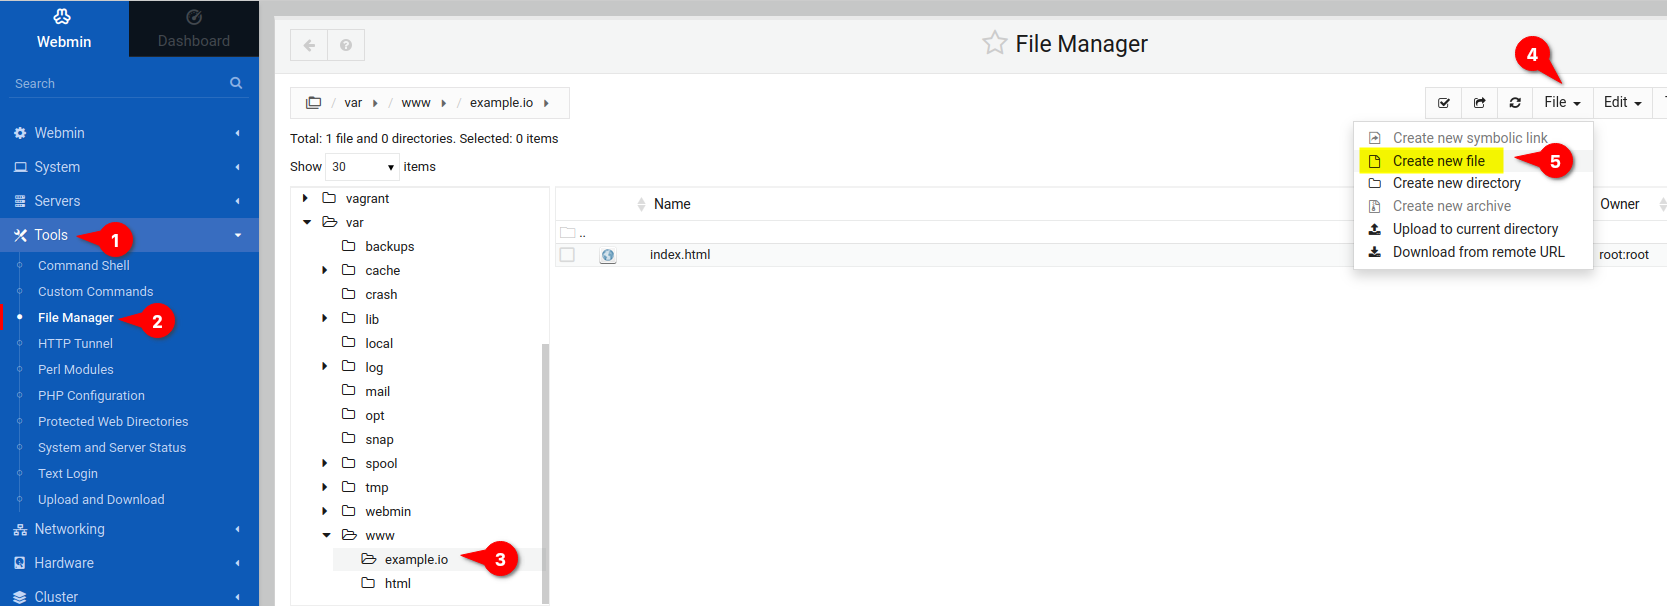
1. Click on the Tools menu, select File Manager, and look for the /var/www/example.io file.
Select the /var/www/example.io file, click the File drop-down menu and select Create New File to initialize creating a new file.
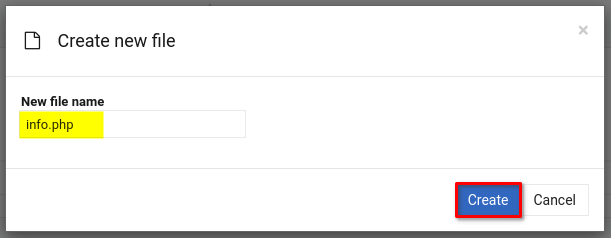
2. Next, input the new file name as info.php and click Create, as shown below, to finalize creating the file. The info.php file automatically opens in a text editor.
3. Populate the below PHP script to the info.php file, then click the Save button to confirm and save the file. The code below checks information about your PHP installation. <?php phpinfo(); ?>
<?php
phpinfo();
?>
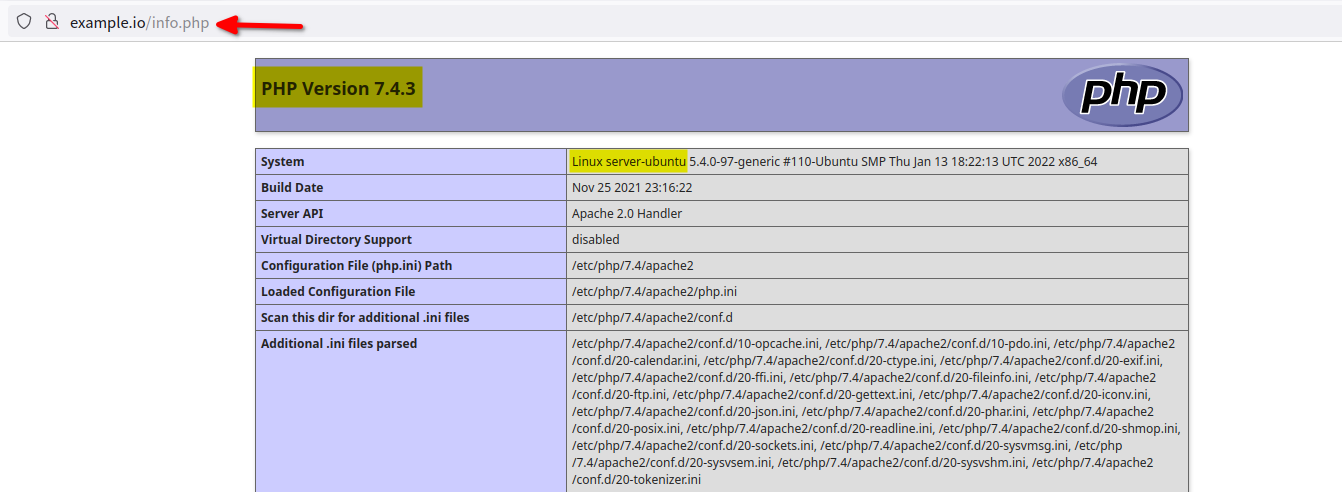
4. Finally, open a new tab on your web browser and visit your domain name (i.e., http://example.io/) followed by the URL path /info.php.
If your Apache2 and PHP installation are successful, you should see the PHP info page below.
Conclusion
You’ve learned how to install and secure Webmin with Apache reverse proxy throughout this tutorial. You’ve also touched on managing users and keeping your packages updated with the automatic update feature in Webmin.
In addition, you’ve configured the LAMP Stack through the Webmin dashboard, so now you’re ready to deploy your PHP web applications.
Now, why not set up NFS Mount, manage LDAP server, and Mail server?


