

Transferring files via USB storage to a Hyper-V virtual machine (VM) is not uncommon, especially when copying a large amount of data. But if you need to access a USB storage device in Hyper-V, you’ll need to perform several steps to enable Hyper-V USB passthrough access.
Unlike other hypervisors, such as VMWare Workstation, that make USB devices available inside VMs in a few clicks, Hyper-V requires quite a few more steps to accomplish the same. And in this article, you’ll learn ways to enable USB passthrough in Hyper-V.
Let’s get started!
Prerequisites
This article is a tutorial, and if you’d follow along with the examples, you’ll need to have the following.
- Hyper-V on Windows 10 or Windows Server 2016 and above – This article will use Hyper-V on Windows 10 version 21H1, and the host’s name is PH-5CG0022245.
- A Hyper-V virtual machine (VM) – The examples in this tutorial will be using a Windows Server 2016 VM named ATAWIN2016-1. Also, this guide assumes that you’ve already started your VM.
- One or more USB storage devices that you’ve already attached to the computer. This tutorial will be using an external USB hard drive and a USB flash drive.
Enabling Server-Side Hyper-V USB Passthrough Access
In a nutshell, the Server-Side Hyper-V USB passthrough means that you’ll be attaching a USB device to the Hyper-V host. In turn, the Hyper-V VM should have access to the USB device as if the device is directly connected to the VM.
This USB passthrough access method is appropriate if:
- The Hyper-V VM guest OS is either Windows or Linux.
- You only require access to non-removable USB mass storage devices. No other USB device types are compatible with server-side Hyper-V USB passthrough access.
- You want to control which USB storage devices are available to anyone who logs in to the Hyper-V VM.
Setting the USB Drive Offline on the Host
The host and the VM cannot have simultaneous access to the USB drive. For this reason, you’ll need to set the USB drive offline on the host first before you can enable it for Hyper-V USB passthrough access.
The Windows OS does not allow setting removable drive types offline, such as USB thumb drives or memory cards. Consequently, removable drive types are not applicable for Hyper-V USB passthrough access.
To enable the server-side Hyper-V USB passthrough, follow the steps below.
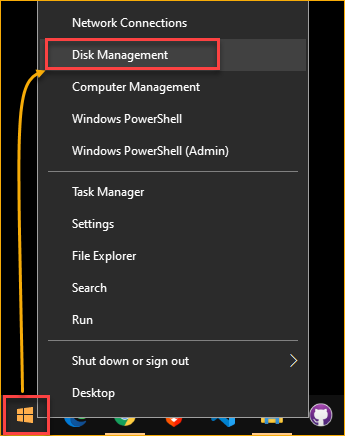
1. Open the Disk Management console. To do so, right-click Start and click Disk Management.
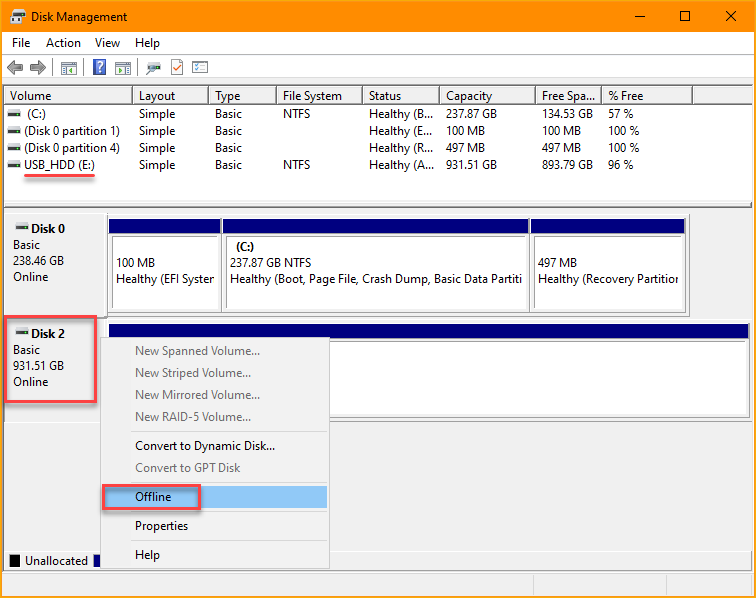
2. On the Disk Management window, look for the USB drive and set it to offline. To do so, right-click the Disk and click Offline. The example below sets Disk 2 offline.
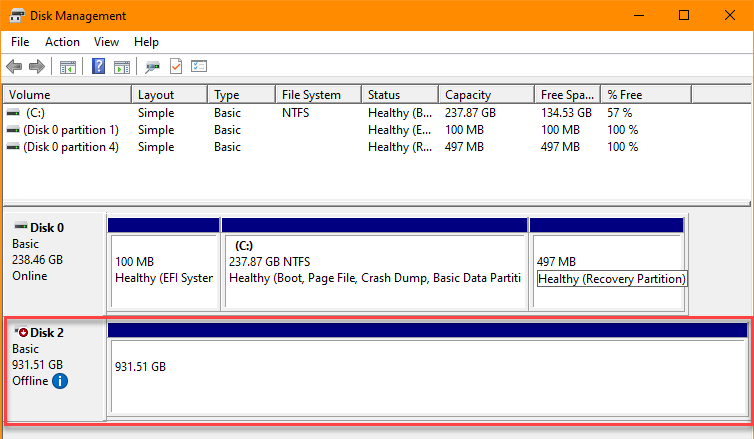
As a result, the disk becomes offline and loses its drive letter assignment, as shown below.
Adding the USB Drive to the Virtual Machine
The USB storage is offline on the host, which means the host operating system no longer has active access to the drive. You can now enable the Hyper-V USB passthrough by adding the USB storage as a new hard disk inside the VM. To do so, proceed as follows.
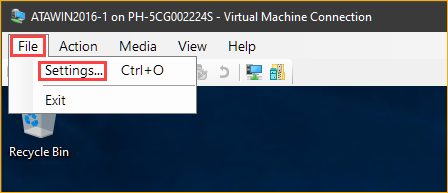
1. Switch to your Hyper-V Virtual Machine Connection (VMConnect) window. Click File —> Settings to open the VM settings.
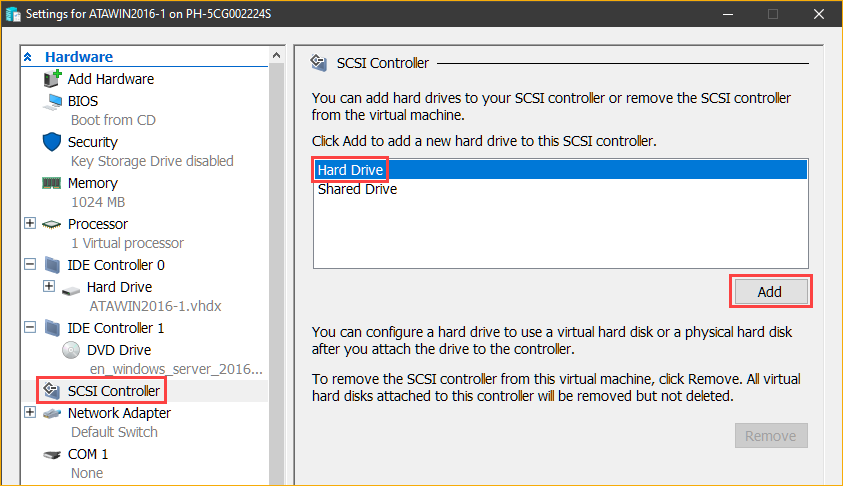
2. On the VM settings window, click SCSI Controller —> Hard Drive —> Add.
Can you add the hard drive to the IDE Controller instead of the SCSI Controller? — Yes. But know that once you added the drive as an IDE device, you cannot remove it from the VM without turning off the VM first. In contrast, you can remove the SCSI drive from a running VM.
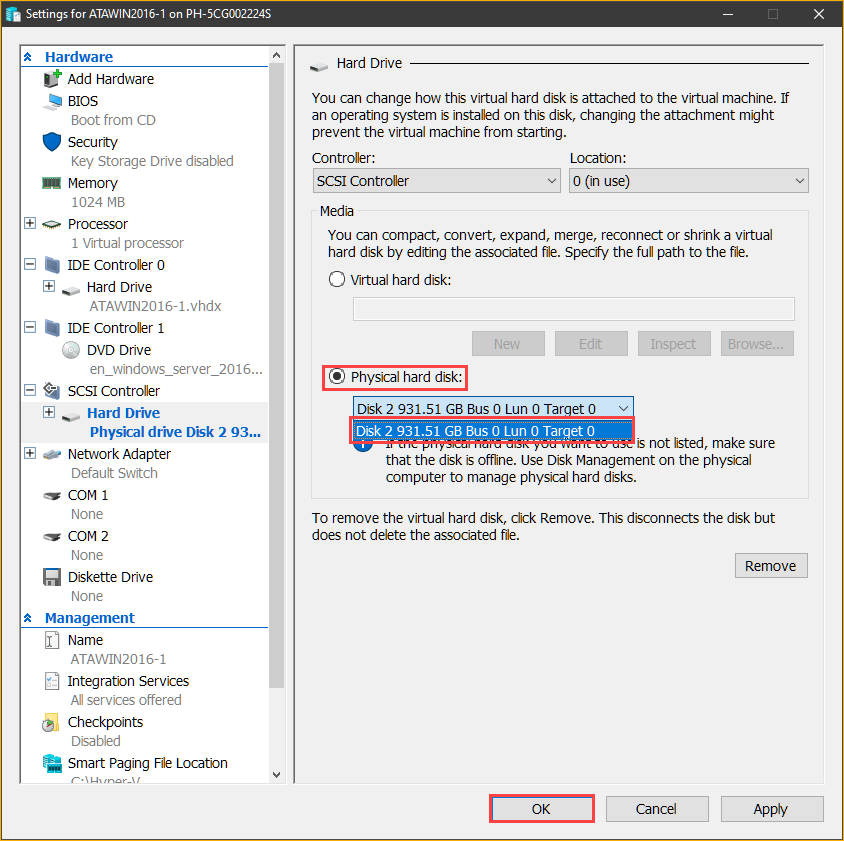
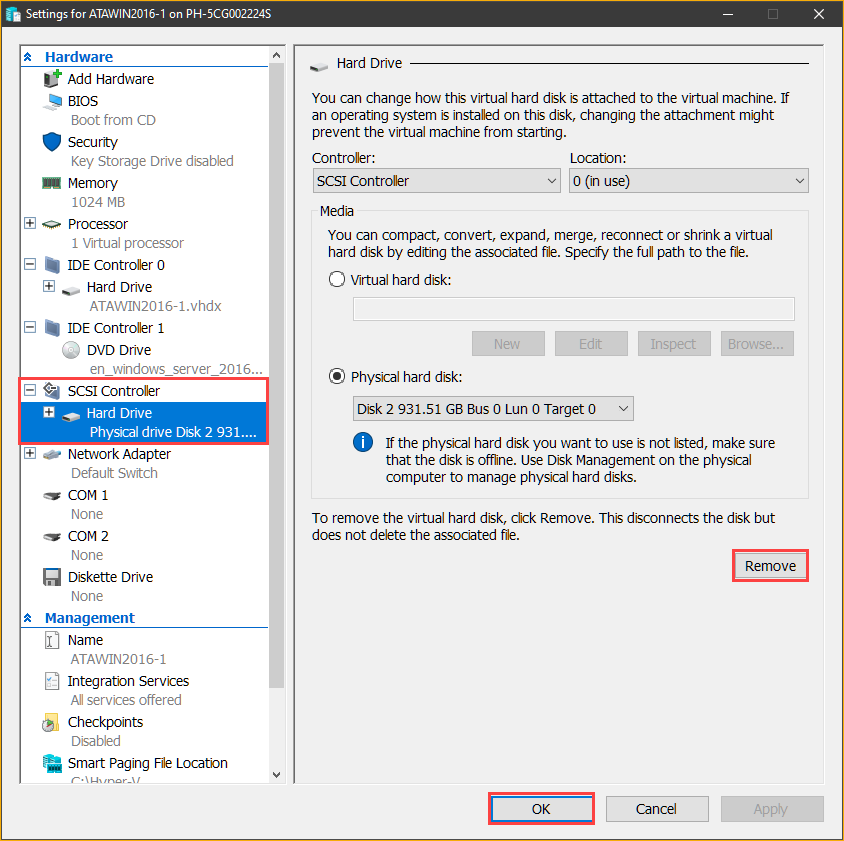
3. On the Hard Drive page, under the Media section, select the Physical hard disk option. Next, click the drop-down box and select the USB drive. The drive you’re choosing must have the same disk number must be the same as the disk you took offline in the Disk Management console.
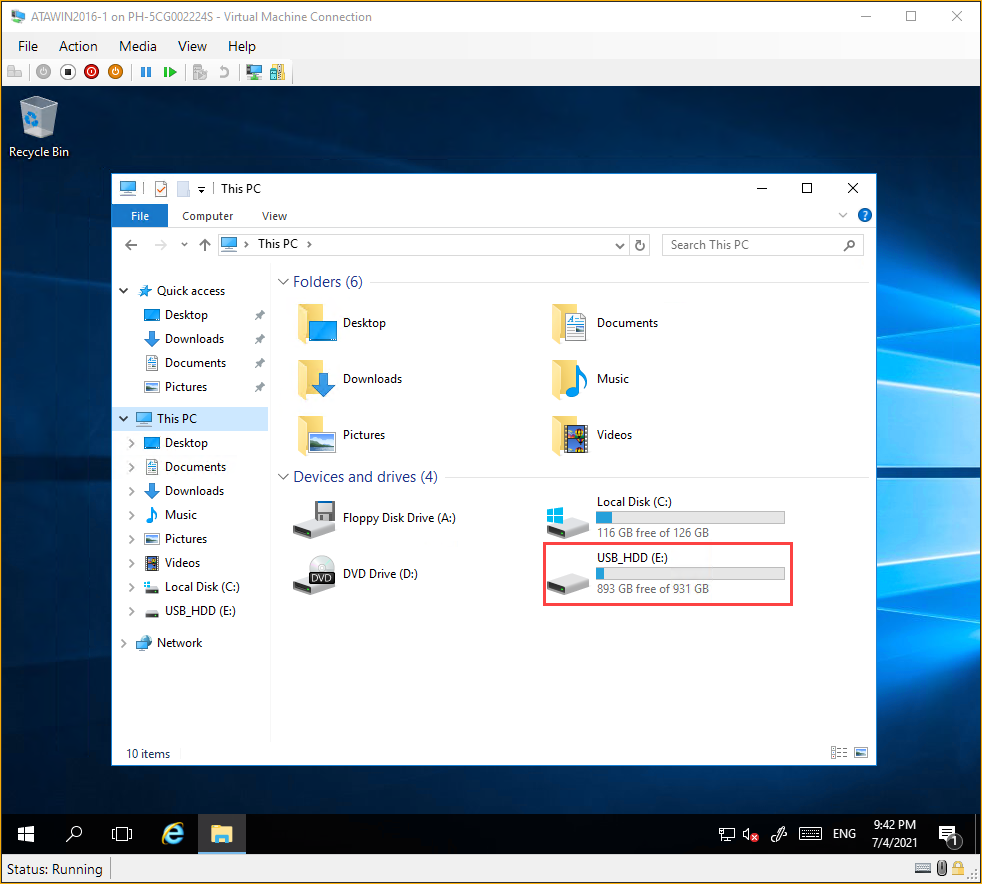
4. After adding the drive, open the File Explorer on your Hyper-V VM. You should now see the USB storage drive inside the VM, like the screenshot below.
Removing the USB Drive from the Virtual Machine
Suppose you’ve already accomplished your task involving the USB drive. When you no longer need the USB drive access on the VM, removing it only takes a few steps. To do so, follow the instructions below.
Open the VM’s settings by clicking on File —> Settings on the VMConnect window. Next, on the left pane, click the hard drive you added under the SCSI Controller. Finally, click the Remove button and click OK.
Enabling Client-Side Hyper-V USB Passthrough Access (Enhanced Session Mode)
Another way to access USB devices in Hyper-V is through the client-side enhanced session mode. With enhanced session mode, connecting to the VM using VMConnect allows you to use the host’s local devices and resources inside the VM.
Using the enhanced session mode is ideal when:
- Your guest VM’s operating system is Windows. Linux VMs do not have enhanced mode support.
- You need to share the USB device access with the host or multiple VMs.
- You need access to USB devices other than USB mass storage types. The enhanced session mode allows you to access different device types inside the VM, such as printers and flash drives.
- Users need to select which USB devices will be available inside the VM before connecting to the VM.
Turning On the Enhanced Session Mode
If your Hyper-V host is a Windows 8.1 or Windows 10 computer, you may skip this step because enhanced session mode is on by default.
Before you can connect to the Hyper-V VM with the enhanced session mode, ensure that the enhanced session mode status is on. Follow the steps below to enable enhanced session mode on the Hyper-V host.
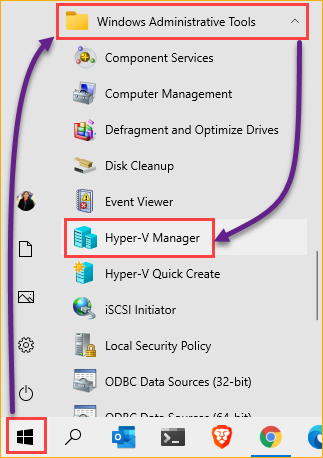
1. Open the Hyper-V Manager if you haven’t opened it yet. To do so, click Start —> Windows Administrative Tools —> Hyper-V Manager.
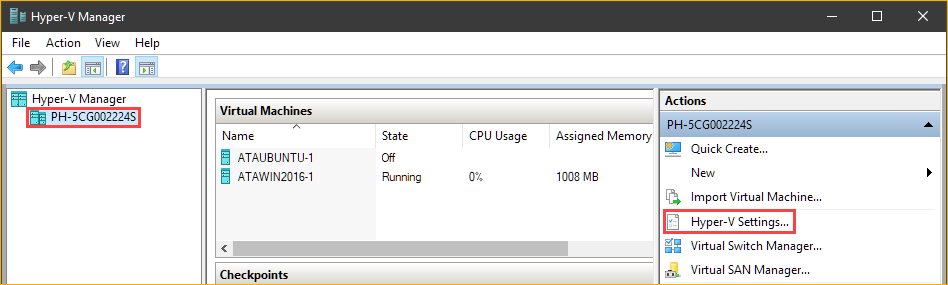
2. On the Hyper-V Manager window, click to select the Hyper-V host on the left pane and click Hyper-V Settings under the Actions pane.
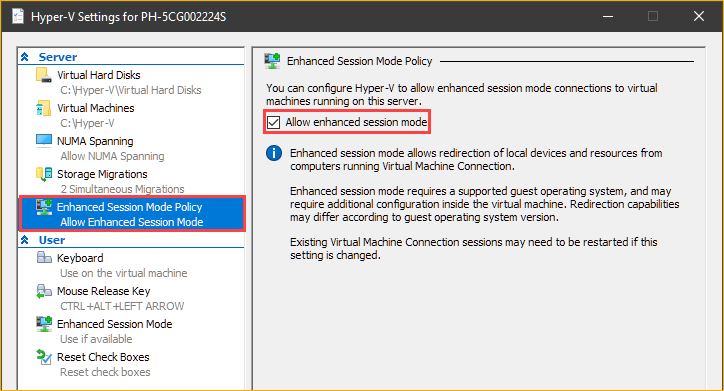
3. On the Hyper-V Settings window, click Enhanced Session Mode Policy under the Server section. Next, put a check on the Allow enhanced session mode box. This option allows enhanced session mode connections to the VMs running on the host.
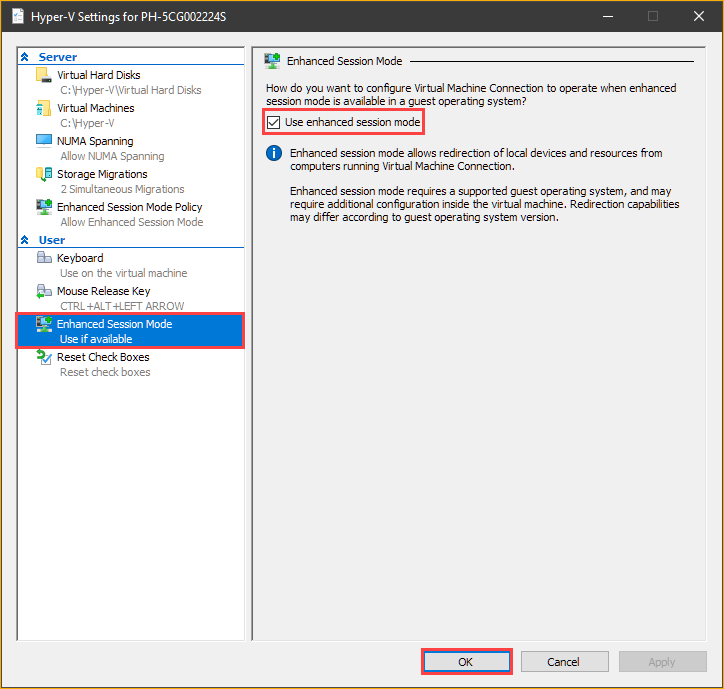
4. Click Enhanced Session Mode under the User section. Next, put a check on the Use enhanced session mode box. This option enables VMConnect to connect to the guest VM in enhanced session mode. Finally, click OK.
Accessing USB Devices in Enhanced Mode
After ensuring that enhanced session mode is enabled in Hyper-V, you can now access USB devices inside the Hyper-V VM. Follow the steps below to access USB storage devices in Hyper-V.
1. If you currently have a session with the VM, close the session first.
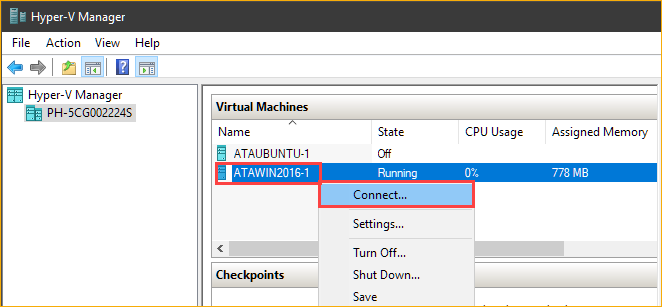
2. On the Hyper-V Manager, right-click on your VM and click Connect. Doing so opens the VMConnect window.
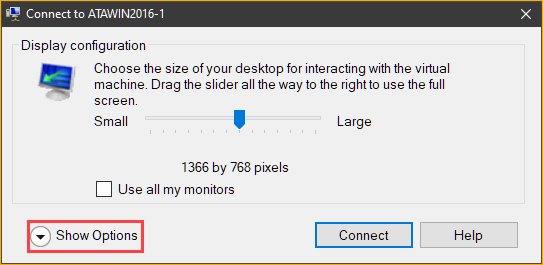
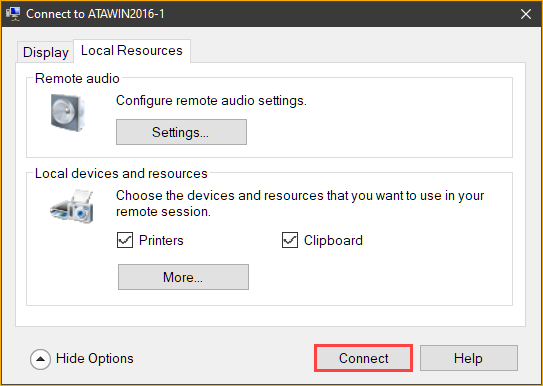
3. On the Connect window, click Show Options to reveal more options available before connecting to the VM.
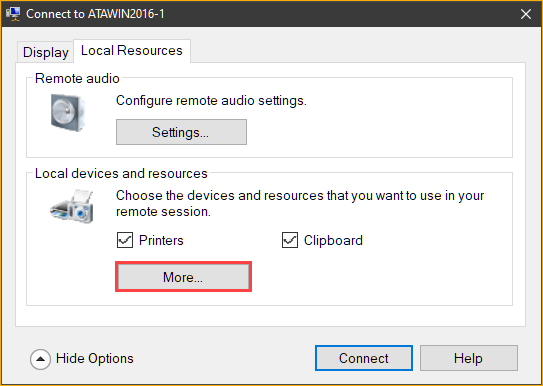
4. Next, click the Local Resource tab. Under the Local devices and resources section, click More.
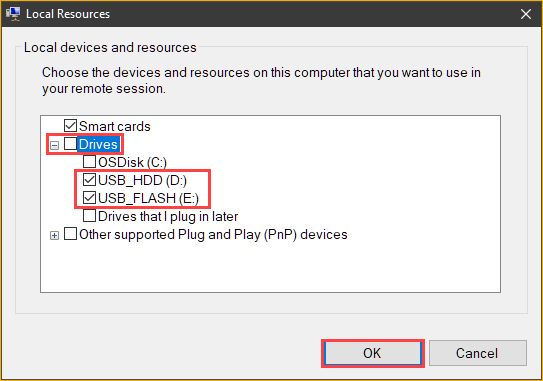
5. Next, on the Local Resources window, click to expand Drives on the list. As you can see below, the existing drives attached to the host are available to select. In this example, the selected drives are the D (USB hard drive) and E (USB flash drive). After making your selection, click OK.
Selecting the Drives that I plug in later will cause the Hyper-V VM to automatically recognize and make available the USB drives that you may plugin later to the VM.
6. Back on the Local Resources tab, click Connect to start the session with the VM.
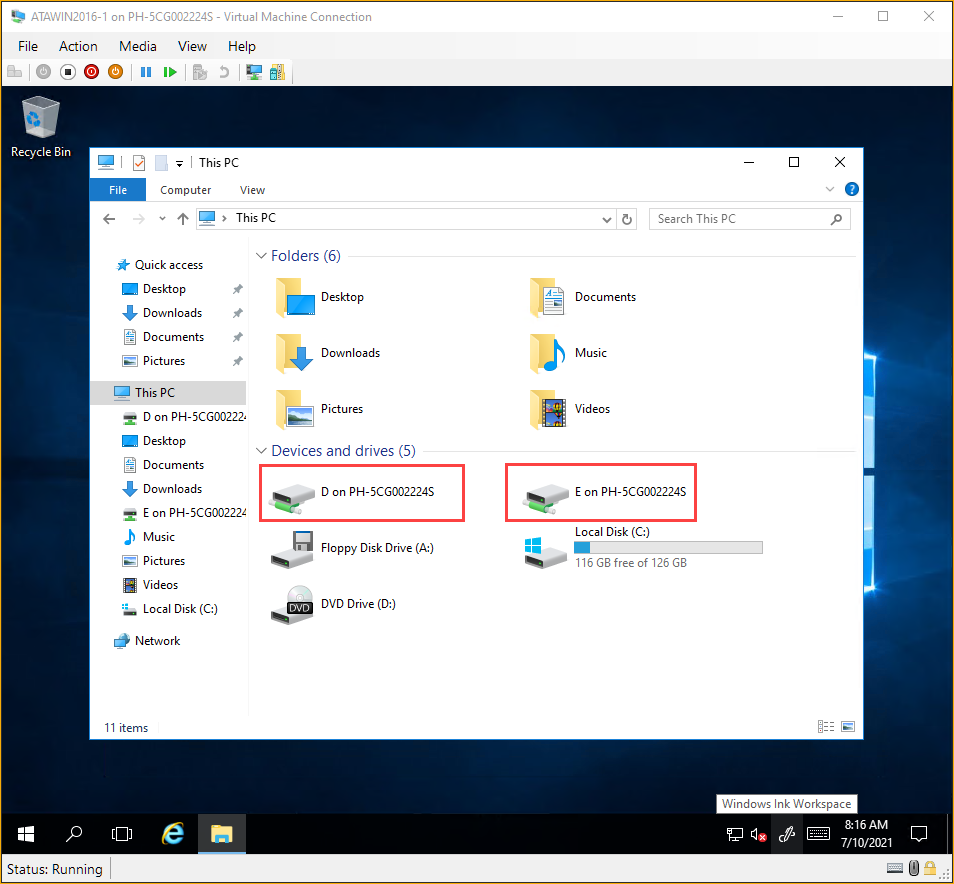
7. Now, log in to your VM and open File Explorer to confirm the drives are available. As you can see below, the VM recognizes the USB drives as drives on a remote machine instead of local devices.
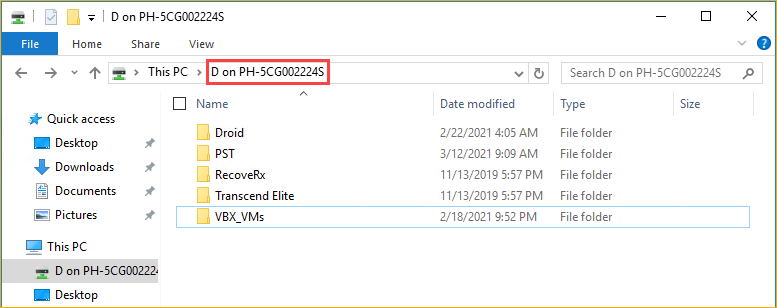
8. Finally, to confirm the drives are accessible, double-click to open the drives and verify you can see their contents.
Enabling Client-Side Hyper-V USB Passthrough (Remote Desktop Protocol)
The Hyper-V USB passthrough access methods you’ve learned so far involve using VMConnect as the client. But what if you’re using a computer that doesn’t have VMConnect? Or perhaps you don’t want to install the Hyper-V tools that include VMConnect on your management PC?
Typically, system admins remotely access servers through the Remote Desktop Protocol (RDP) using their preferred remote desktop clients. And like VMConnect, you can also access local resources to use inside the VM.
The main difference is that, in the VMConnect, you are accessing the devices attached to the Hyper-V host inside the VM. But in RDP, you’ll be accessing the USB devices attached to the RDP client instead.
This method applies not only to Hyper-V VMs but to any remote Windows machines that you access via RDP.
Follow the instructions below to access USB drives in Hyper-V via RDP. Although many RDP clients are available, this tutorial will be using the native RDP client in Windows. Also, before proceeding, make sure that you know the VM’s IP address.
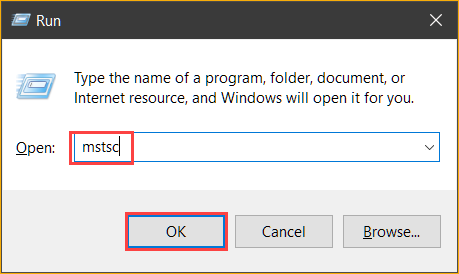
1. Press CTRL+R to bring up the Run dialog.
2. On the Run dialog box, type mstsc in the Open box and press Enter. Doing so will launch the Remote Desktop Connection dialog box.
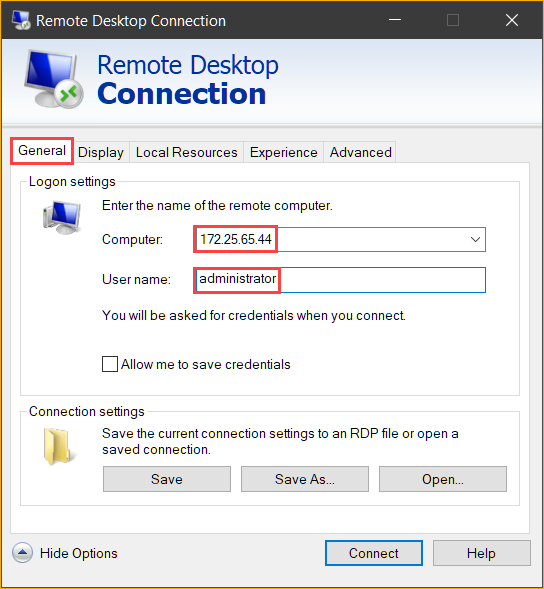
3. Under the General tab, enter the VM’s IP address into the Computer box. Also, enter the username that you use to log in to the VM.
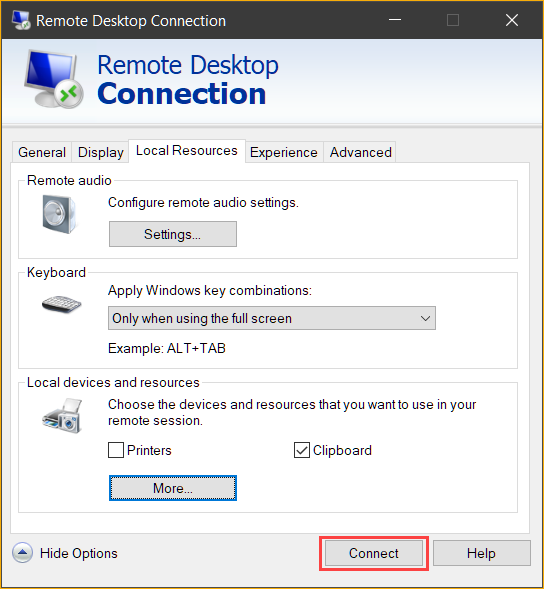
4. Next, click the Local Resources tab and click More.

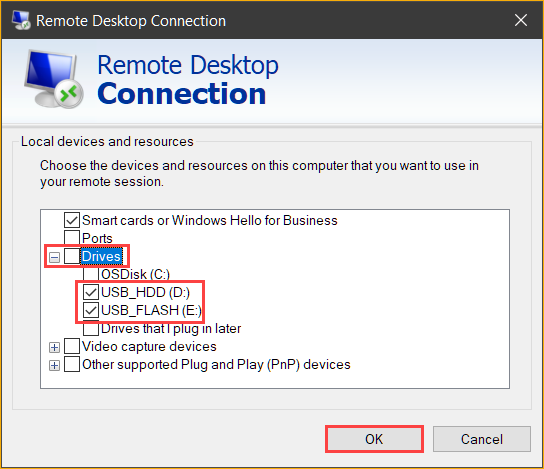
5. On the list of Local Devices and Resources, click to expand Drives. Next, click to check the drives you want to access in the VM and click OK. As you can see below, this example chooses two USB drives— D and E. After making your selection, click OK.
6. Now, click the Connect button on the Remote Desktop Connection window to start the remote desktop session.
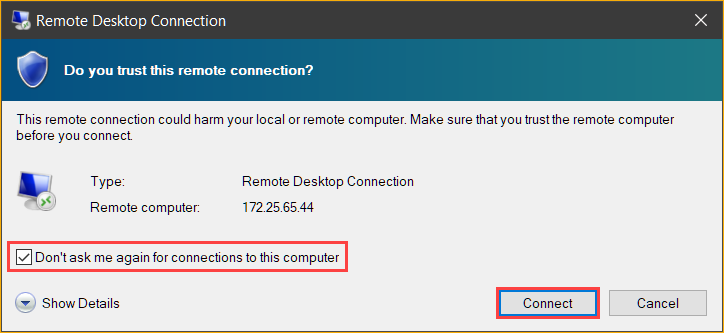
7. If It’s your first time connecting to this VM, you may get a prompt saying Do you trust this remote connection? This confirmation prompt requires you to confirm that you trust that the remote connection will have access to your previously selected devices.
To avoid this prompt in the future, click to check Don’t ask me again for connections to this computer and click Connect.
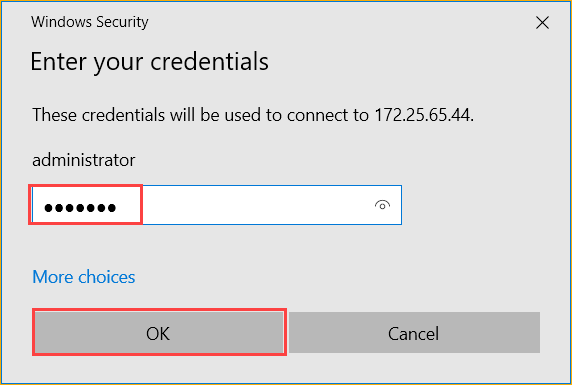
8. At the credential prompt, type in the credential password and click OK.
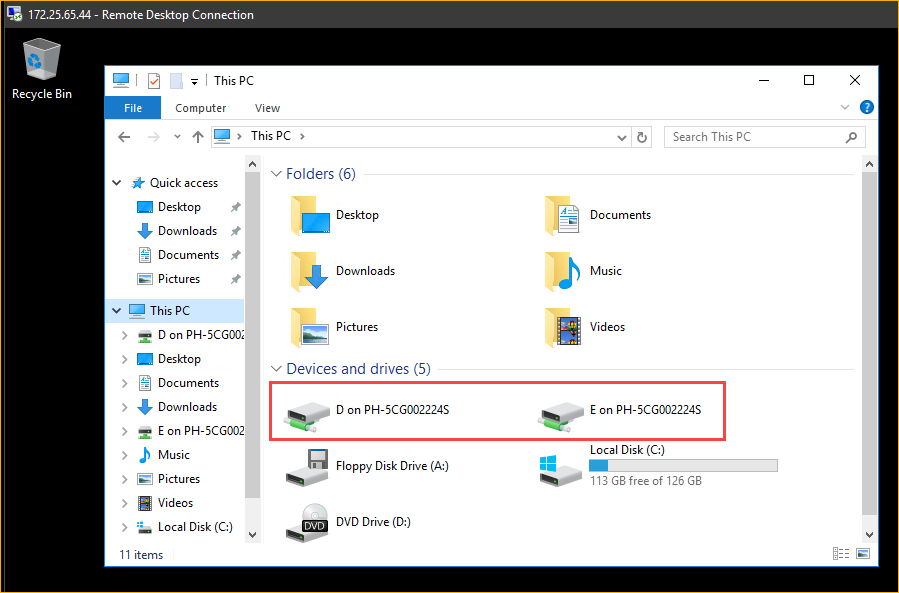
9. After you’ve logged in to the VM, open File Explorer and confirm that the USB drives you selected are present.
Conclusion
Enabling Hyper-V USB passthrough in Hyper-V may seem complex at first glance. But knowing the right steps and which method works best based on your requirements makes the task less complicated. This article showed you different ways to enable USB storage access inside of a Hyper-V VM.
From using VMConnect either server-side or client-side to using a remote desktop client, which Hyper-V USB passthrough access method would you prefer? Do you know another method that this tutorial did not cover?


