


In the past five years, the data science industry has exploded, and jobs in data science are plentiful and pay well. But, getting started in data science can be difficult. One of the biggest obstacles is having the right tools and environment set up on your computer. Well, not unless you see how to install Anaconda and how to use it for data science.
Anaconda is a powerful data science platform and a great way to get started with data analysis, modeling, and visualization. And in this tutorial, you’ll go through the steps of installing Anaconda on Ubuntu Linux and some basic data manipulation and visualization tasks.
Ready? Read on to learn how to get started with data science using Anaconda on Linux!
Prerequisites
This tutorial will be a hands-on demonstration. If you’d like to follow along, be sure you have an Ubuntu Linux machine with at least 4 GB of RAM and 5 GB of free disk space.
The minimum disk space needed to install Anaconda is 5GB, but you’ll need more free space to perform serious data science work. Working on data science requires a lot of disk space because you have to download and store data sets. Having 50GB of free space on your machine would suffice for working on data science.
Downloading the Anaconda Installer Bash Script
Whether you are new to data science or a seasoned professional, Anaconda is the perfect platform for your data analysis and modeling needs. But first, you’ll have to install Anaconda on your machine.
To install Anaconda, you’ll need to download the installer Bash script from the Anaconda website. At the time of writing, the latest version is Anaconda3-2021.11-Linux-x86_64.sh.
1. Open your terminal and run the below commands to download and save Anaconda’s installer Bash script to your /tmp directory.
cd /tmp
curl -O https://repo.anaconda.com/archive/Anaconda3-2021.11-Linux-x86_64.sh
2. Next, run the sha256sum command below to generate an SHA-256 cryptographic hash for the downloaded file (Anaconda3-2021.11-Linux-x86_64.sh). This command gives you a way to verify the integrity of the installer Bash script using MD5 or SHA256.
Downloading files from the internet always comes with risks of the files getting tampered with or corrupted in transit. Verifying the integrity of the installer Bash script is crucial to be sure you’ve received an identical copy of the file that Anaconda originally published.
sha256sum Anaconda3-2021.11-Linux-x86_64.shNote down the file’s hashes to compare them with the ones available on Anaconda’s website (step three).

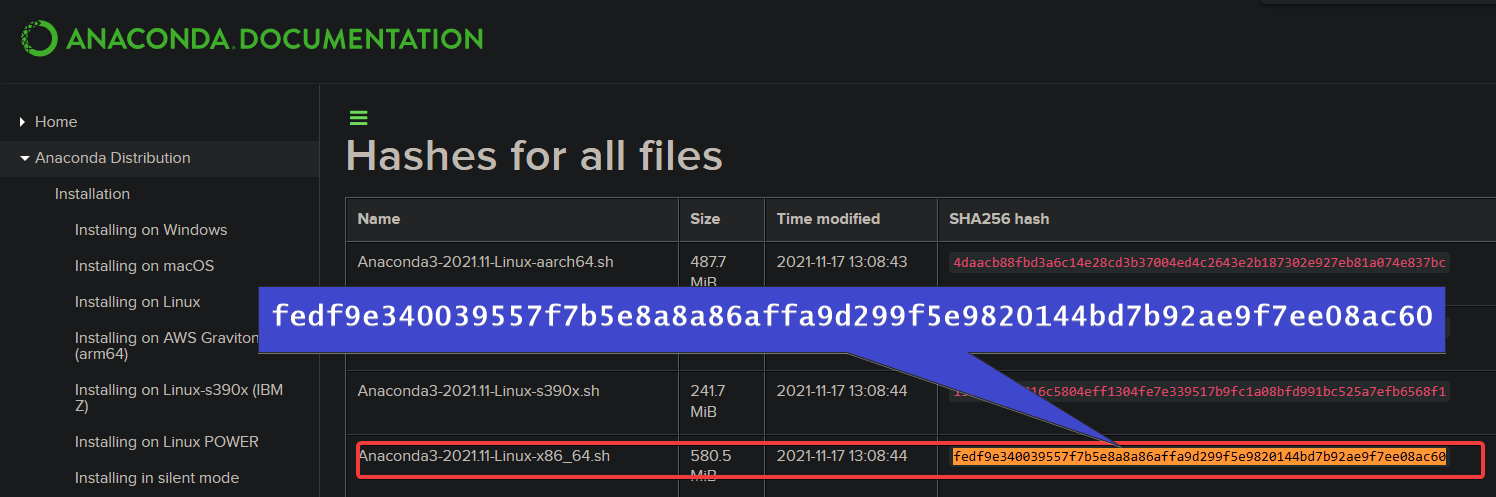
3. Lastly, open your favorite web browser and navigate to Anaconda’s list of hashes.
Look for the name of the installer Bash script you downloaded (Anaconda3-2021.11-Linux-x86_64.sh). Once found, ensure that the hashes you noted in step two match those listed on Anaconda’s website.
If the hashes don’t match, repeat steps one to three and recheck the hashes.
Installing Anaconda on Ubuntu
Now that you have downloaded the Bash script and verified its integrity, you’re ready to install Anaconda. The installer Bash script includes all the necessary installation commands, so all you need to do is run it.
1. Run the following command to install Anaconda on your machine. Make sure to replace Anaconda3-2021.11-Linux-x86_64.sh with the name of the Bash script file you downloaded.
Note that you must include the bash command regardless of your shell.
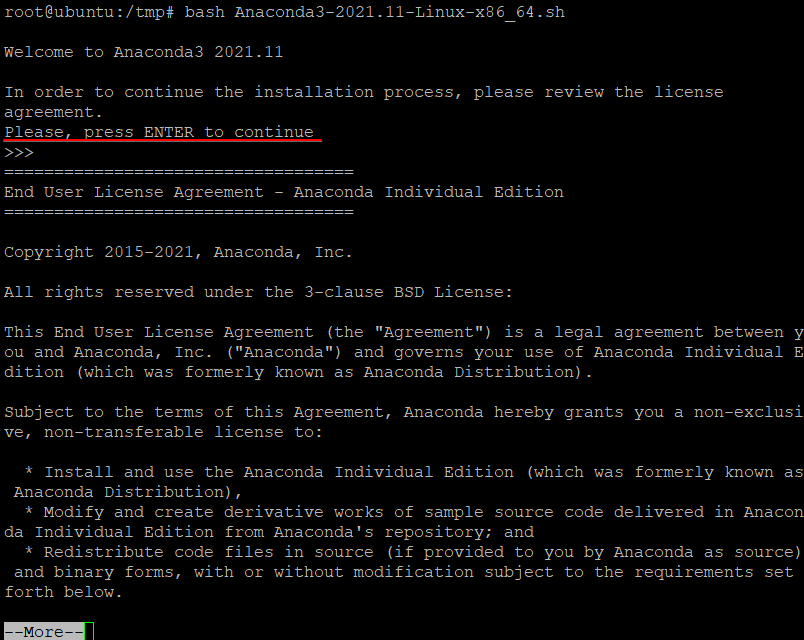
bash Anaconda3-2021.11-Linux-x86_64.sh2. After running the Bash script, press Enter to see the End User License Agreement (EULA) when prompted. Keep pressing Enter to read through the end of the EULA.
3. After reading the EULA, type yes and press Enter to accept the license terms, as shown below.

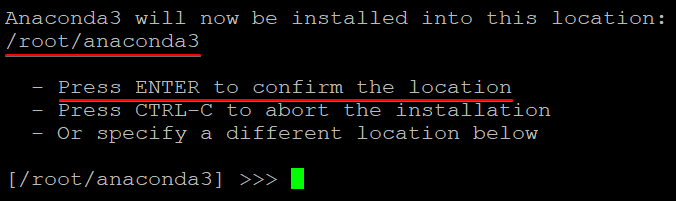
4. Now, press Enter to accept Anaconda’s default install location. You can choose any location you like, but choosing a directory within your home folder is recommended for easier access.
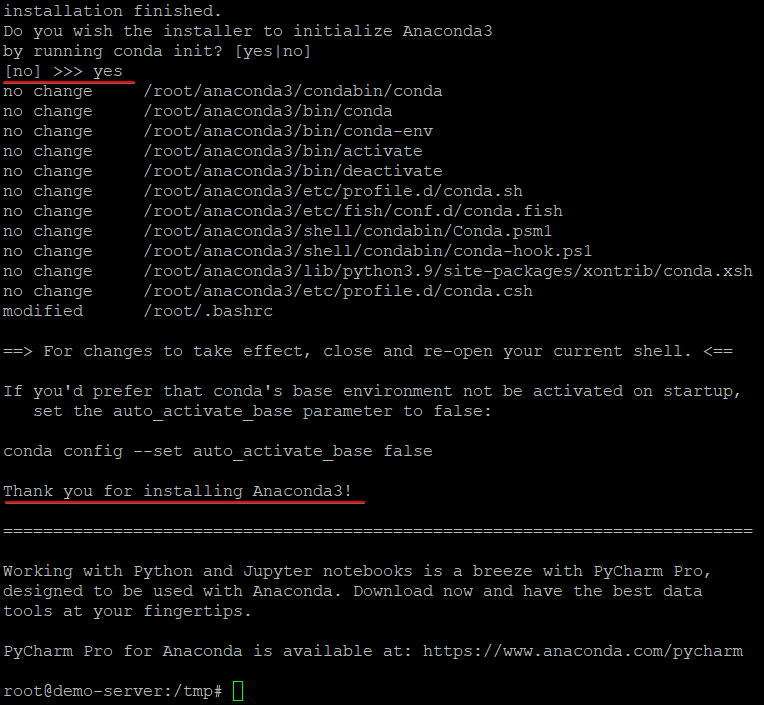
5. Input yes and press Enter when prompted to initialize Anaconda3. This conda init command ensures the conda command is available from your terminal every time you log into your machine.
6. Next, run the below command to apply the changes to your shell environment.
source ~/.bashrcYour current shell changes to base, which indicates Anaconda3 is successfully installed, as shown below. base is the default shell environment in Anaconda that provides all of the core Python libraries and tools needed for data science.
The base shell environment includes powerful command-line tools, including conda, anaconda prompt, and Jupyter Notebook.

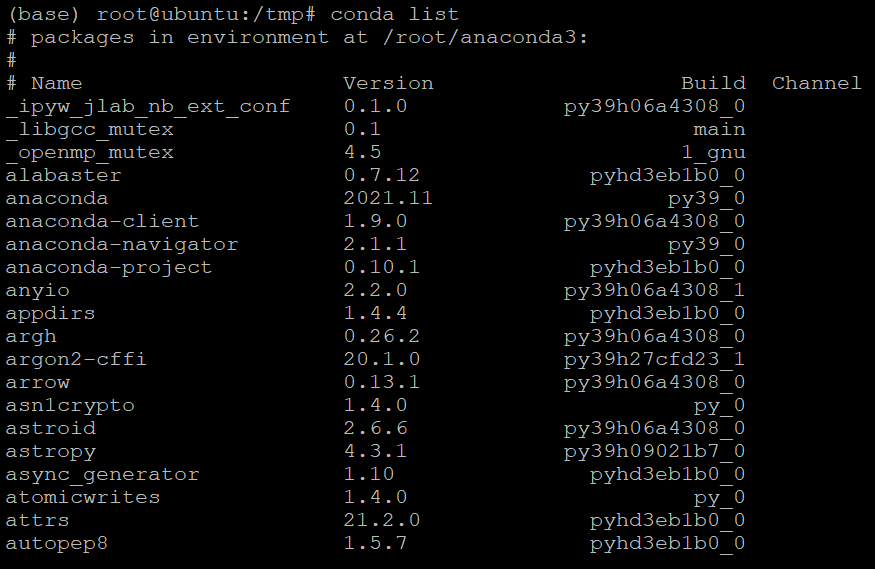
7. Run the below conda list command to verify that Anaconda is properly installed.
conda list You’ll see a list of all the packages and versions, as shown below, that are currently included as part of your base environment.
8. Lastly, run the conda deactivate command below to close the anaconda session.
conda deactivate
Note that the conda activate and conda deactivate commands only work on conda 4.6 and later versions. For conda versions earlier than 4.6, run the below commands instead: source activate or source deactivate
Setting Up Your Anaconda Environments
You’ve just installed Anaconda on your machine, but you must set up environments before you can use Anaconda for data science. Environments are separate locations on your file system where you can install different versions of Python and packages.
This setup is useful if you need to work with multiple projects requiring different Python or package versions.
From this point throughout the tutorial, you can name environments and files as you like as they are arbitrary.
To set up your Anaconda environments:
1. Run the conda create command below to create a new environment named my_env running Python3 (python=3).
conda create --name my_env python=3
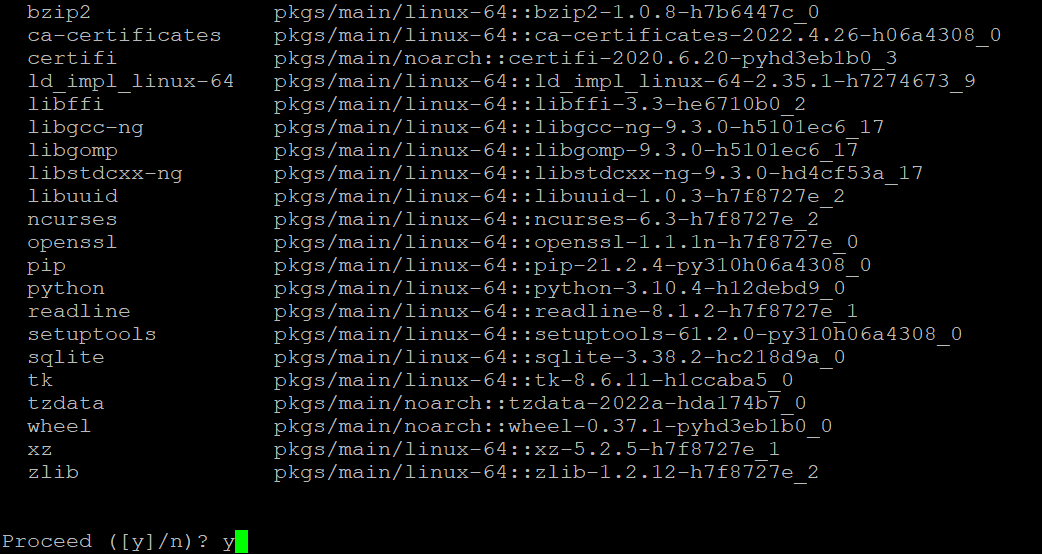
2. Next, input y and press Enter when prompted to choose whether or not to proceed with creating the environment.
3. Once the environment has been created, run the below conda activate command to activate your new environment (my_env).
conda activate my_env
4. Now, run the below conda create command to install all of the core Python libraries and tools listed below needed for data science for your data_env environment:
scipy– A popular Python library for scientific computing to perform data analysis tasks.
numpy – A library for working with multidimensional arrays.
pandas– A handy library for data analysis as it provides a powerful and intuitive way to work with tabular data.
matplotlib– A plotting library used to create sophisticated visualizations of your data.
conda create --name data_env python=3 numpy scipy pandas matplotlib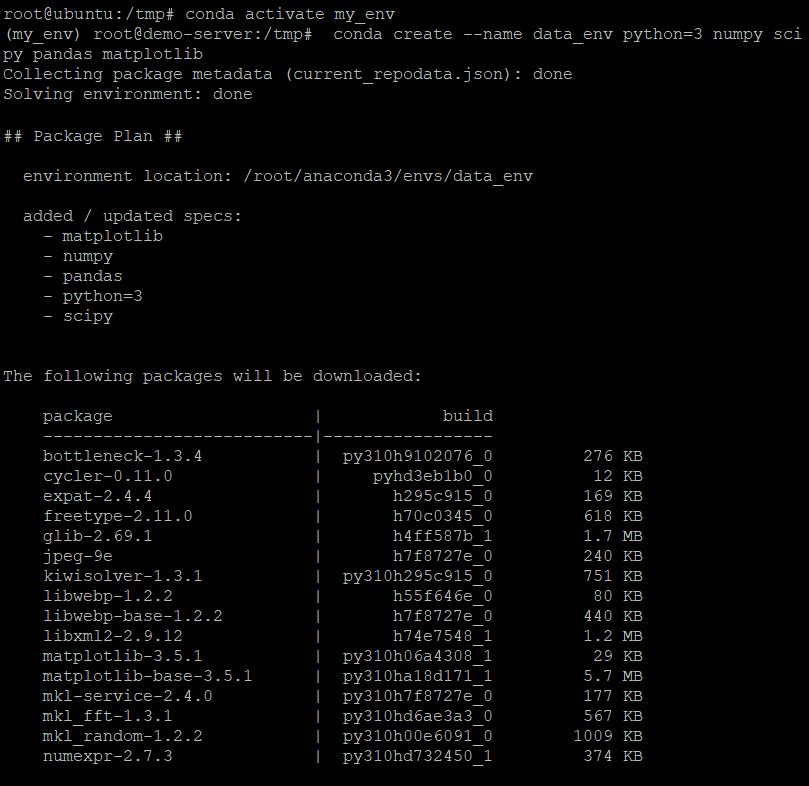
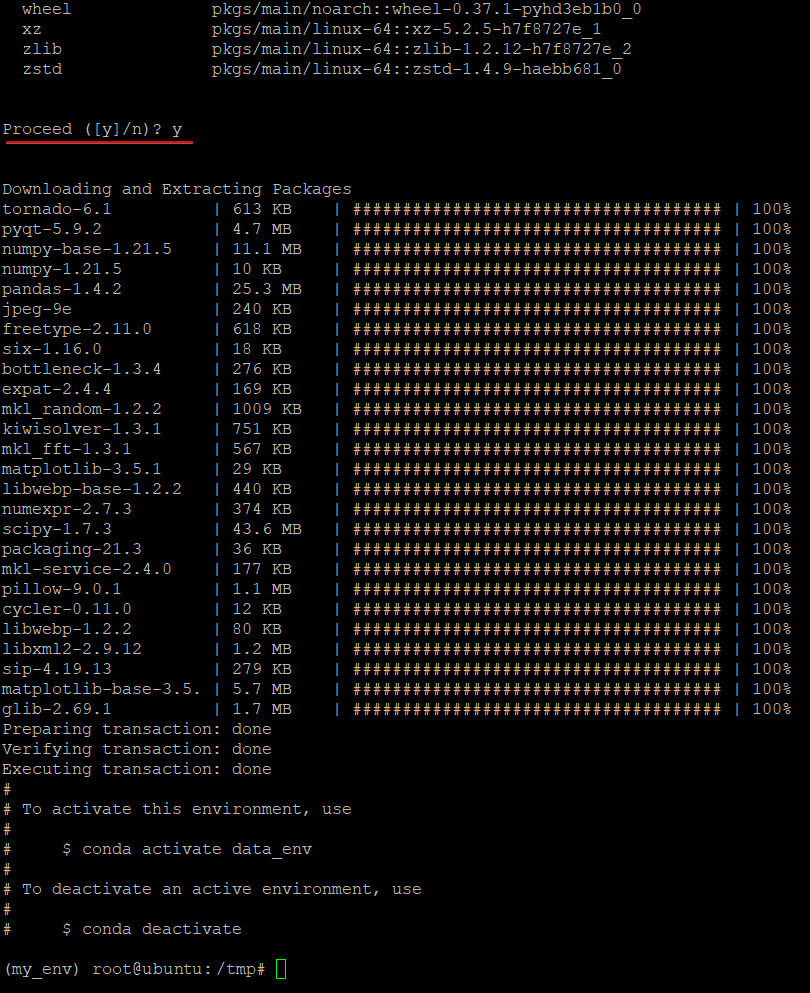
5. Input y and press Enter to continue creating the data_env environment.
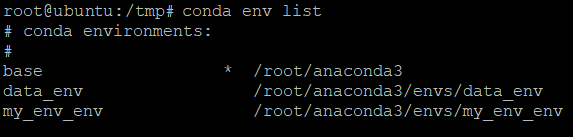
6. Finally, run the following conda env command to check the list of available environments.
conda env listYou’ll see all environments that have been created on your machine, including the base environment, as shown below.
Running Your First Python Program
You now have your environment running, and that’s great. But the environment is not doing much right now unless you write a program on it. In this tutorial, you’ll use your environment to write and run a simple age calculator Python program.
To write a Python program with your environment:
1. Run the below command to activate your environment (my_env).
conda activate my_env
2. Next, run the below command to open the Python interpreter. The Python interpreter is a REPL (read-evaluate-print loop) environment that allows you to write and run Python code interactively.
python3
3. Copy and paste the following code into the interpreter and press Enter.
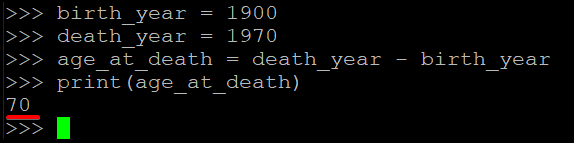
This code block calculates and prints out the age at death of a person born in 1900 and decreased in 1970.
birth_year = 1900
death_year = 1970
age_at_death = death_year - birth_year
print(age_at_death)
Below, you can see the output 70 printed on the terminal, indicating that the person was 70 years old when they died.
4. Now, run the exit() command below to exit the Python interpreter
exit()
5. Lastly, run the below command to close and terminate the my_env environment’s session.
conda deactivate
Building Your First Data Science Project
So far, you’ve seen how to run a simple Python program using your environment. But this time, step up your data science game by creating your first project. A data science project typically involves collecting, exploring, analyzing, and visualizing data to address a specific business need or problem.
To build your first data science project, plot your data with a light (X, Y) scatter plot using the matplotlib library:
1. Run the conda activate command below to activate an environment called data_env.
conda activate data_env
2. Next, create a Python file called scatter.py using your preferred text editor.
nano scatter.py3. Populate the code below into your scatter.py file, save the changes and close the editor. This code block creates two arrays, each with 12 elements, and plots and show data points.
# Imports matplotlib.pyplot to visualize the plot
import matplotlib.pyplot as plt
# Contains an array of numbers (cars ages) to x.
x = [5,7,8,7,2,17,2,9,4,11,12,9,6]
# Contains an array of nunbers (cars speeds) to y.
y = [99,86,87,88,111,86,103,87,94,78,77,85,86]
# Plot the data points
plt.scatter(x, y)
# Show the plotted data points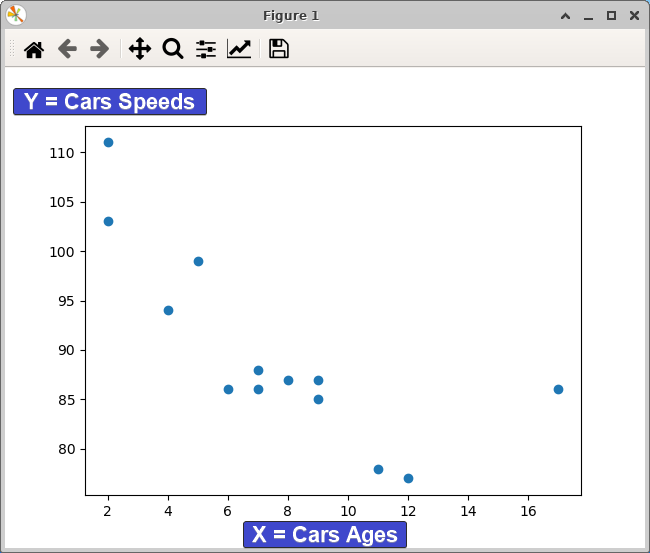
plt.show()4. Finally, run the below command to execute the Python file (scatter.py), which shows the plot on the screen.
python scatter.pyYou will see the data points plotted on a graph as shown below. The relationship between age and speed of cars is clear and can help inform decisions about how to maintain or improve the performance of a fleet of cars.
The apparent relationship is that, as the age of a car increases, the speed at which it can travel decreases.
You may also notice a slight positive correlation between age and speed – as the cars’ ages increase, their speeds tend to increase slightly as well. This relationship can be useful for car manufacturers who want to optimize their vehicles for performance and efficiency.
There you have it! You have successfully installed Anaconda on Linux and created your first data science project.
Removing Environments
Environments consume your storage, especially if you keep ones that don’t serve any purpose anymore. Why not remove them? The conda env remove will do the trick so long as you know the environment’s name to remove.
Run the below command to list all environments.
conda env list
Note down the environment’s name you plan to remove.

Now, run the following command to remove the environment named (-n) data_env. Replace data_env with your target environment’s name to remove.
conda env remove -n data_env

Alternatively, you can run the below command specifying the path (-p) where the environment is located (/root/anaconda3/envs/data_env).
conda env remove -p /root/anaconda3/envs/data_env

Conclusion
In this tutorial, you’ve learned how to install Anaconda on Ubuntu Linux and create a Python 3 environment for data science. You wrote your first program and used matplotlib to plot your data.
At this point, you’re now ready to begin your journey as a data scientist with these skills!
Why not begin your data science journey with Anaconda Navigator? Start exploring, analyzing, and visualizing data for your own projects!


