

Deploying your containerized application on Google Kubernetes Engine (GKE) offers you flexibility. Of what? The flexibility of configuring your application’s infrastructure just the way you want.
If you’re a developer who’s interested in deploying containerized applications on Google-managed cloud infrastructure, you’re in for a treat! In this tutorial, you’ll learn how to deploy microservices on GKE.
Read on and scale your application on this awesome Google-managed cloud infrastructure!
Prerequisites
This tutorial will be a hands-on demonstration. If you’d like to follow along, be sure you have the following:
- A Google Cloud Platform (GCP) account – If you don’t have one, you can opt-in for a free trial.
- An active domain to host your application – This tutorial uses a domain named mymicroservice.xyz.
Setting up the Google Kubernetes Engine (GKE) Environment
Google Kubernetes Engine (GKE) is a managed environment where you can build, scale, and manage containerized applications using Google infrastructure. But before you can deploy microservices, you’ll set up your GKE environment first.
1. Open your favorite web browser and sign in to your GCP console.
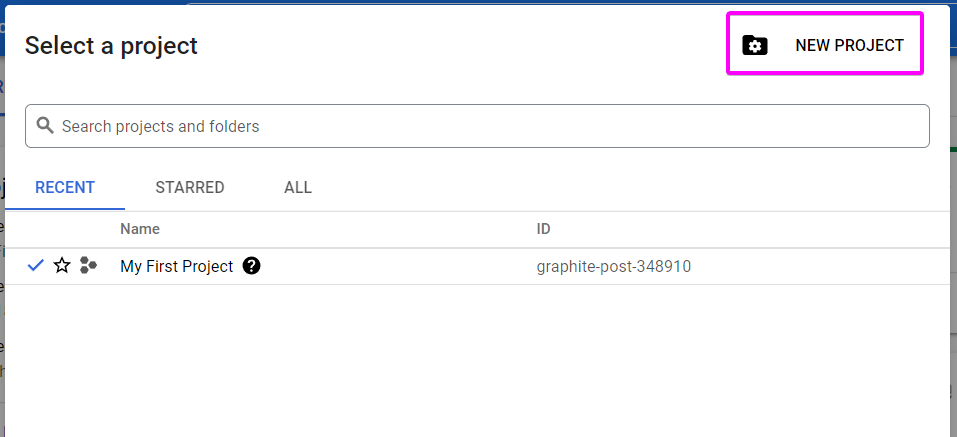
2. Click on the project drop-down button shown below in the GCP’s dashboard. A pop-up window appears where you see an option to create a new project.

3. Click on NEW PROJECT to initialize creating a project in the pop-up window.
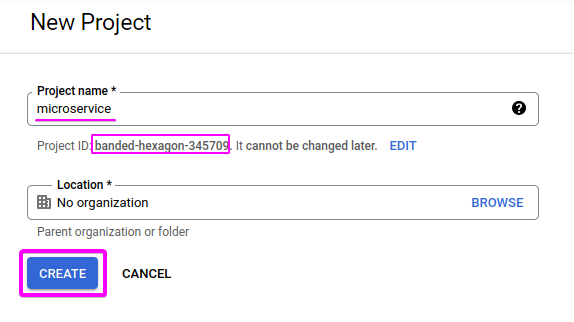
4. Next, set the project’s name to microservice on the New Project page, as shown below. Note the Project ID as you’ll be using it later, and click on CREATE to finalize creating the new project.
After creating the new project, your browser redirects to the GCP dashboard.  Creating a New Project

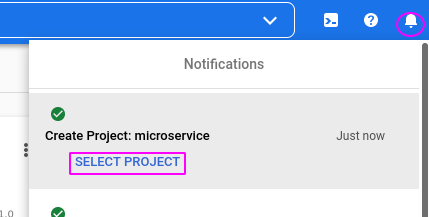
5. Once your project is ready, click SELECT PROJECT below the Create Project: microservice notification, as shown below.
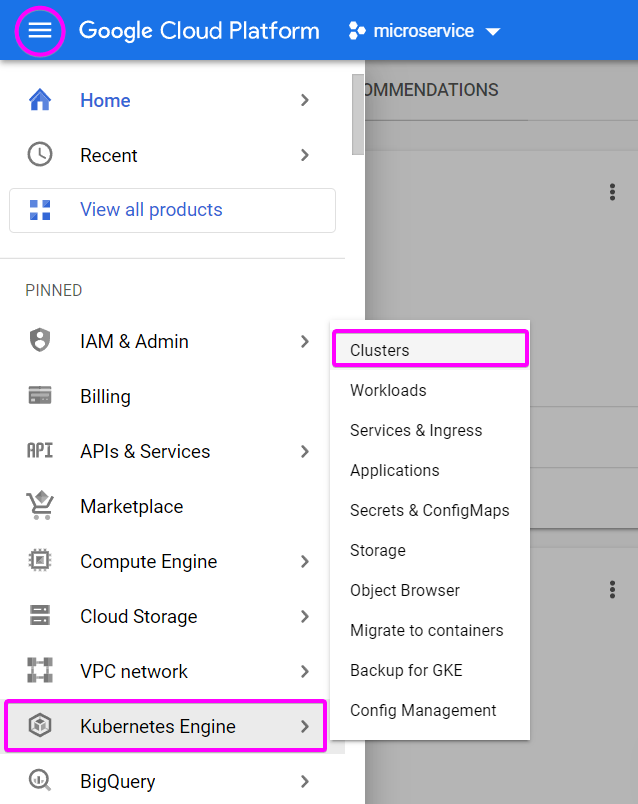
6. Now, click on the hamburger icon (top-left), hover to Kubernetes Engine on the navigation menu, and choose Clusters. Your browser redirects to a page where you can enable the Kubernetes Engine API (step seven).
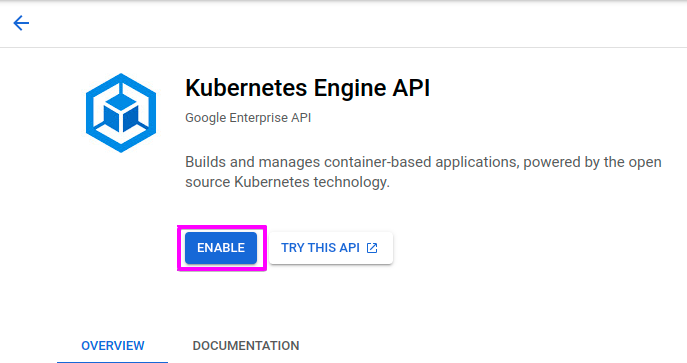
7. Lastly, click on the ENABLE button shown below to enable the Kubernetes Engine API on your project. Enabling the Kubernetes Engine API allows you to create a cluster.
Creating and Connecting to a Kubernetes Cluster
Since you now have the Kubernetes Engine API enabled, the next step is to create a Kubernetes cluster. You’ll need a cluster to run microservices on a set of servers or nodes.
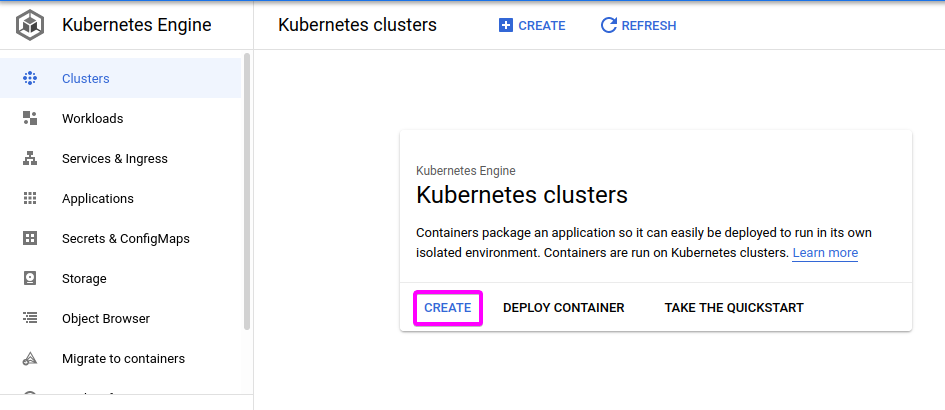
1. On the Kubernetes Engine dashboard, click on CREATE, as shown below, to create a Kubernetes cluster in the GKE environment. This action opens a pop-up window where you can choose which cluster mode you like to use.
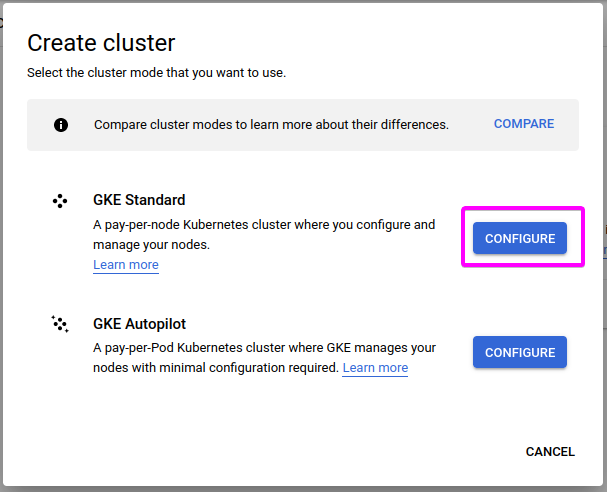
2. Next, choose your preferred cluster mode and click on CONFIGURE. This tutorial uses the GKE Standard cluster mode.
This cluster mode gives you the flexibility to configure the underlying infrastructure and node configurations the way you want. Other than having both the infrastructure and node configurations handled for you, which is what the other option provides.
After selecting the cluster mode, your browser redirects to a cluster configuration page (step three).
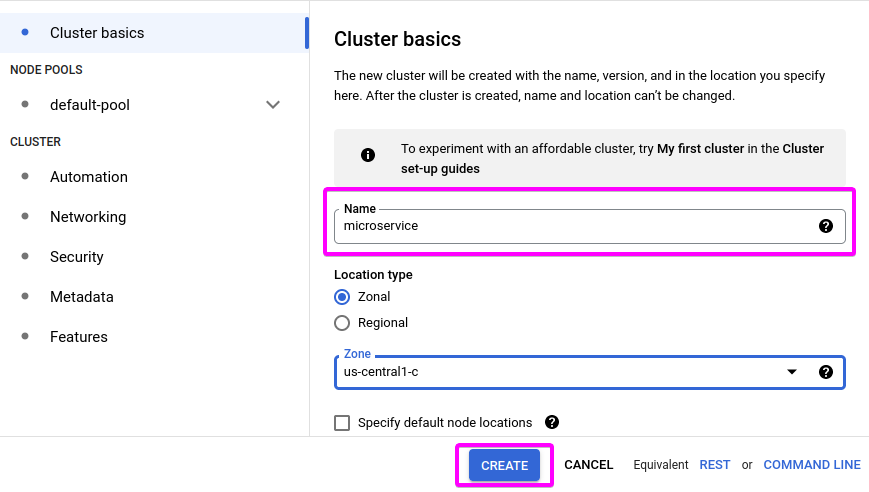
3. Configure the cluster under Cluster basics by setting the cluster name to microservice, as shown below.
After setting the cluster name, leave other settings on default, and click on CREATE at the bottom to finalize creating the cluster.
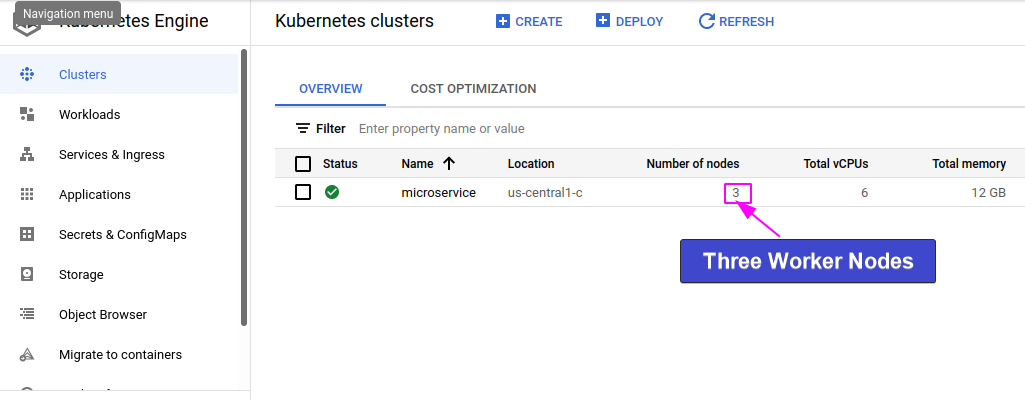
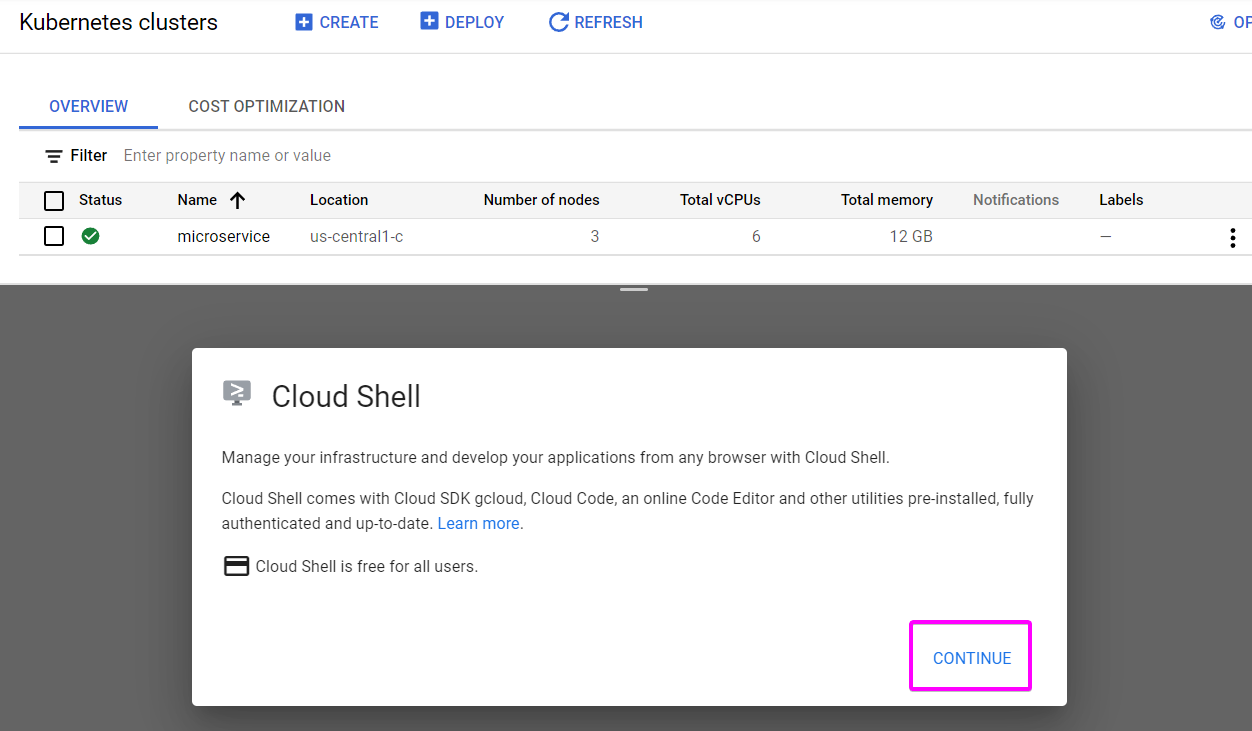
Cluster creation takes some time to complete. But once your cluster is ready, you’ll see a Kubernetes cluster node with three worker nodes created for you, like in the image below.
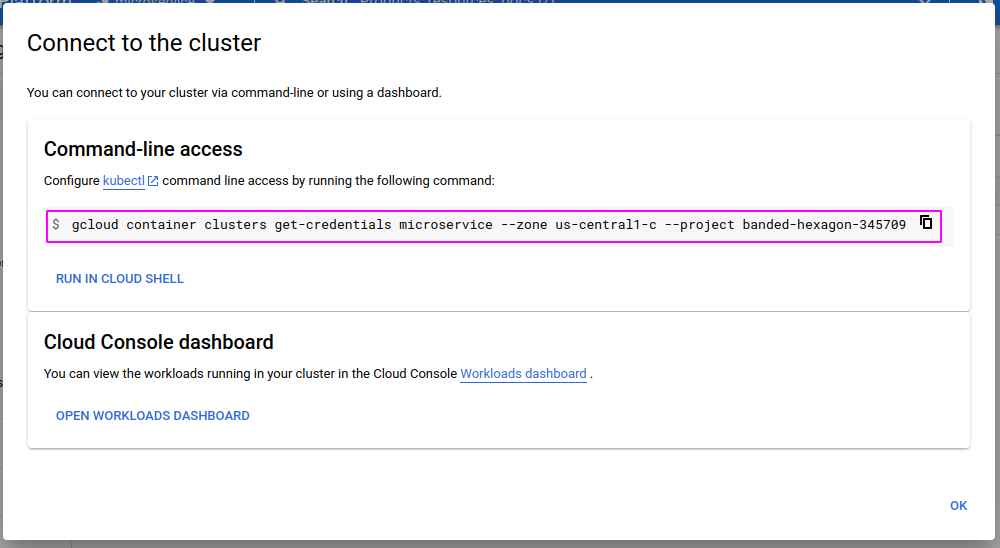
4. Now, click on the ellipsis (upper-right), and select Connect, as shown below. Doing so opens a pop-up window where you can get the command you’ll use to connect the Google cloud shell to your cluster (step five).
Google cloud shell is a temporary shell you can work with on the GCP to run your Kubernetes or kubectl commands. Google cloud shell can also be seen as a GKE sandbox.
5. Copy the command under Command-line access as you you’ll need it to interact with your cluster via kubectl commands, and close the pop-up window.
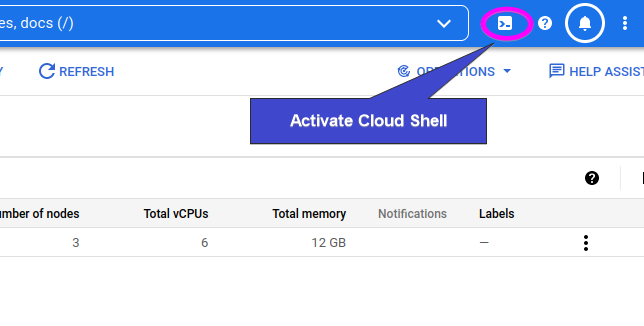
6. Next, click on the Activate Cloud Shell button (top-right) shown below to activate the Google Cloud Shell for your cluster.
7. In the prompt below, click on CONTINUE to activate the cloud shell. You get this prompt the first time you activate the Google cloud shell.
Once Google Cloud Shell is activated, a terminal pops up at the bottom of the page where you can run commands to manage your cluster, as shown below.
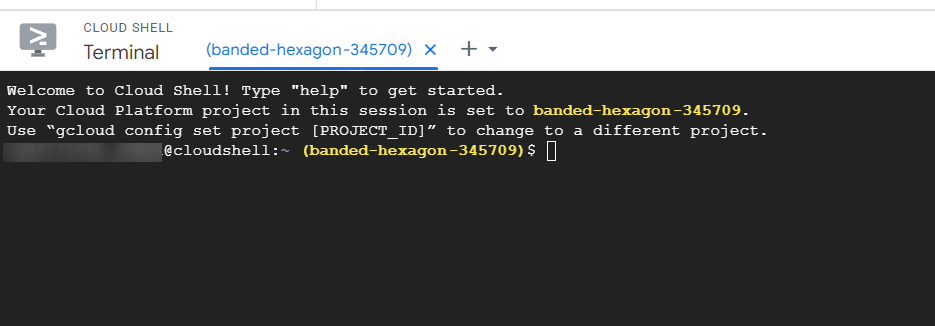
8. Run the gcloud config command below to set your working directory to your current project on the cloud shell. Be sure to replace PROJECT_ID with your actual project ID.
gcloud config set project PROJECT_IDClick AUTHORIZE like in the prompt below to confirm gcloud’s request for your credentials.

You’ll get the following output after authorizing the credential request.

9. Now, paste the command you noted in step five and press Enter to connect to your cluster.

10. Finally, run the kubectl get command below to ensure you connected successfully and check how many worker nodes you have for your cluster.
It’s good practice to run this command to check the number of the worker nodes corresponding with the one you saw when you created your cluster.
kubectl get nodesWith the output below, you have everything set up (three nodes) and good to go into creating the Kubernetes pods needed for your cluster.

Creating Kubernetes Pods
Now that you’ve connected to your cluster feel free to deploy a simple microservice on GKE. This microservice comprises a Vue frontend application and a Node backend application.
To deploy this microservice, you’ll create two pods containing a Node Docker container image and a Vue Docker container image hosted on Docker Hub.
1. Run the command below to create a node-pod.yaml file on the google cloud shell, which opens on the nano editor. This file will store the configuration settings of your node pod.
nano node-pad.yaml2. Copy and paste the following code to the node-pod.yml file, save the file and close the editor.
Since you’re using the nano editor, you can press
Ctrl+Oto save; press Enter andCtrl+Xto exit the editor.
The code below creates a Pod with the name node-microservice-pod. The pod will contain a node-service image from dockerHub that listens on port 4000.
apiVersion: v1
kind: Pod
metadata:
  name: node-microservice-pod #name of the pod
  labels:
    name: node-microservice-pod
    app: demo-microservice-app
spec:
  containers:
  - name: node-service #name of the docker image
    image: mercybassey/node-service #docker image
    ports:
    - containerPort: 4000 #image port number
Next, run the following kubectl create command to create your node pod.
kubectl create -f node-pod.yaml
4. Run the below command to create a file called vue-pod.yml. This file will store the configuration settings for your vue pod.
nano vue-pod.yaml 5. Add the following code to the vue-pod.yml file, save the changes and close the editor.
The code below creates a Pod with the name vue-microservice. This pod will contain an image named vue-service hosted on dockerHub that listens on port 8000.
apiVersion: v1
kind: Pod
metadata:
  name: vue-microservice-pod #name of the pod
  labels:
    name: vue-microservice-pod
    app: demo-microservice-app
spec:
  containers:
  - name: vue-service # name of docker image
    image: mercybassey/vue-service # docker image
    ports:
    - containerPort: 8000 # container port
6. Now, run the kubectl create command below to create your vue pod with the configuration settings in the vue-pod.yaml file.
kubectl create -f vue-pod.yaml
7. Lastly, run the kubectl get command below to check if your newly-created pods are ready.
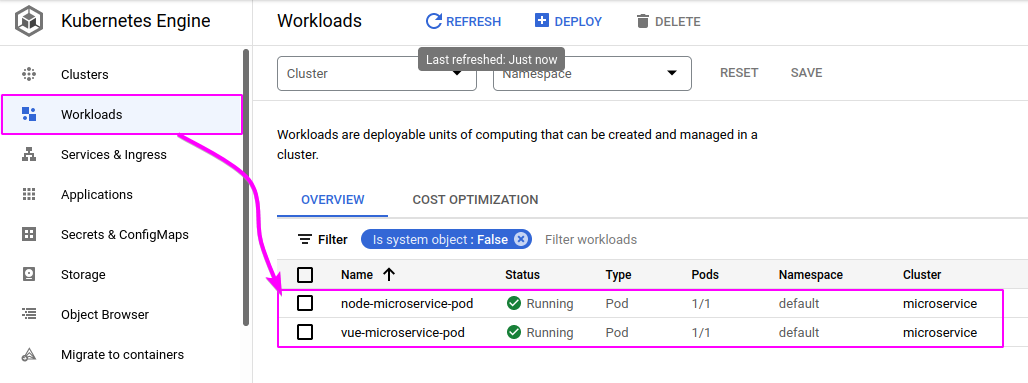
kubectl get podsAs you can see below, both the node and vue pods are running.

Alternatively, you can check for your pods in the GKE environment by going to the Workloads page, as shown below.
Creating an Internal Service to Produce an Ingress Object
Your pods are running correctly, so it’s time to dig into creating a ClusterIP-type service object, an internal service.
You’ll create an internal service to produce an ingress object that creates a single HTTP load balance later. Like normally when developing for production, having multiple external IP addresses is not good practice just for reliability and high-performance sake.
To create an internal service, you’ll create a configuration file in YAML format like all other configuration files you’ve created so far:
1. Run the following command to create a file called vue-service.yaml, which will hold the internal service’s configuration.
nano vue-service.yaml2. Populate the following configuration to the vue-service.yaml file, save the changes, and close the nano editor.
The code below performs the following:
- Creates a
Servicecalledvue-service. - Sets a
ClusterIP-type that contains thevue-pod. - Maps the port (
8000) of theserviceto a target port (80).
apiVersion: v1
kind: Service
metadata:
  name: vue-service # name of service
  labels:
    name: vue-service
    app: demo-microservice-app
spec:
  type: ClusterIP #type of service
  ports:
    - port: 8000
      targetPort: 80
  selector:
    name: vue-microservice-pod # the pod that this service is built on
    app: demo-microservice-app
3. Next, run the kubectl create command below to create the service you defined in the vue-service.yaml file.
kubectl create -f vue-service.yaml
4. Now, run the kubectl command below to get the service’s status.
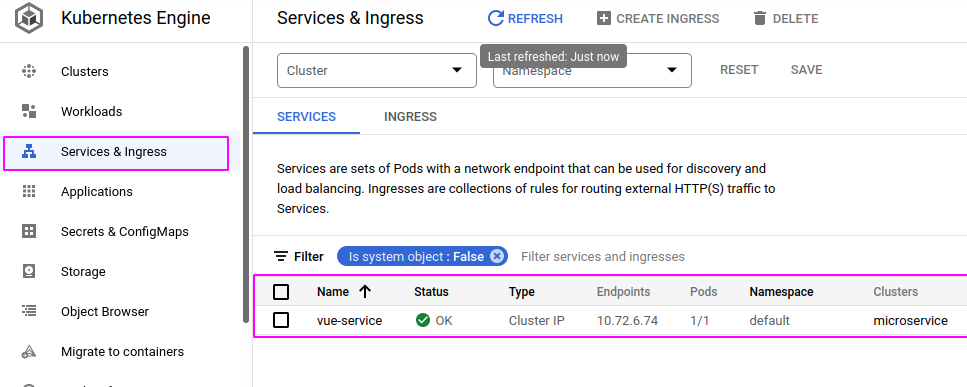
kubectl get servicesNotice below that both services have a ClusterIP type.

Alternatively, you can check for your services’ status via the GKE environment by going to the Services and Ingress page below.
Creating an Ingress Resource for Single HTTP Load Balancer
You now have running services to support creating an ingress resource. An ingress resource lets you manage external access to your services in a cluster, typically HTTP. You’ll create an ingress resource to provide a single HTTP load balancing.
To create an ingress resource, you’ll need to install an ingress controller via Helm, which is pre-installed on the Google Cloud Shell:
1. Run the following command to confirm Helm is installed on the cloud shell. helm version
helm version
2. Next, run each command below to add the nginx-stable Helm repository in the Google Cloud Shell.
helm repo add ingress-nginx https://kubernetes.github.io/ingress-nginx
helm repo update
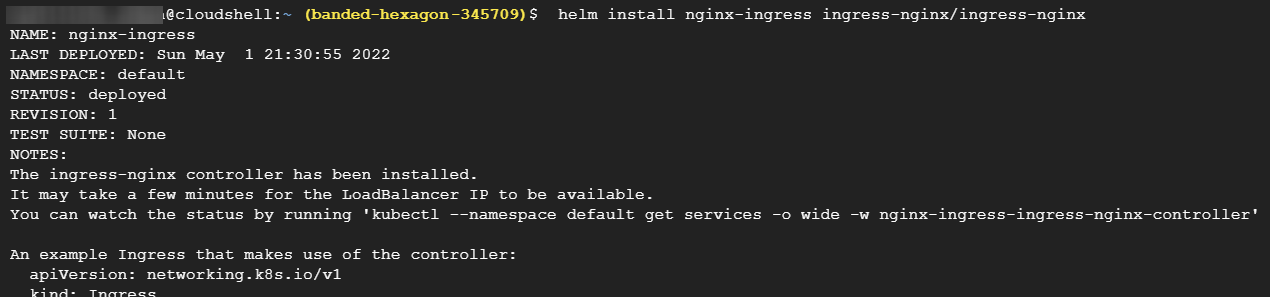
3. Run the helm install command below to deploy an NGINX controller deployment and service.
helm install nginx-ingress ingress-nginx/ingress-nginxThe deployment takes a few minutes. Once complete, you’ll get an output like the one below.
4. Now, run the following commands to confirm that the nginx-ingress-controller deployment and service are deployed to your GKE cluster # Verify NGINX Deployment kubectl get deployment nginx-ingress-ingress-nginx-controller # Verify NGINX Service kubectl get service nginx-ingress-ingress-nginx-controller 
# Verify NGINX Deployment
kubectl get deployment nginx-ingress-ingress-nginx-controller
# Verify NGINX Service
kubectl get service nginx-ingress-ingress-nginx-controller
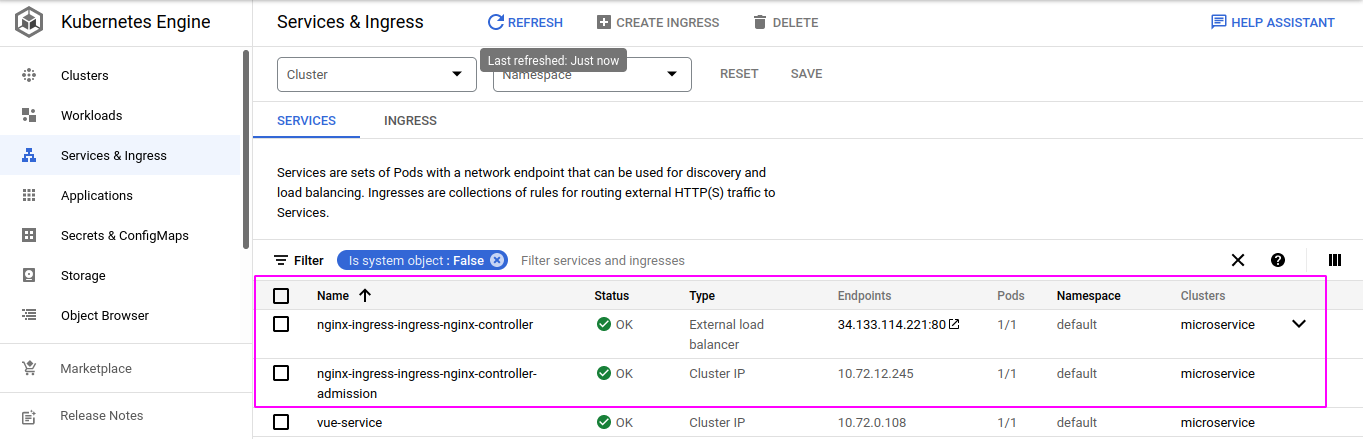
Alternatively, navigate to the Services and Ingress page to see the nginx-ingress-controller deployment and service and their endpoints, respectively.
Creating a Static IP Address to Retain Host DNS Records
Now that your NGINX ingress controller is ready, the next step is to create a reserved static IP address. Suppose your ingress got deleted. Recreating a new one can be time-consuming as a new IP address is created, and the DNS records pointing to your host are updated.
To retain your host DNS records, you’ll map your ingress resources to a static IP address:
1. Run the gcloud compute command below to create a reserved static IP address named microservice.
gcloud compute addresses create microservice --global
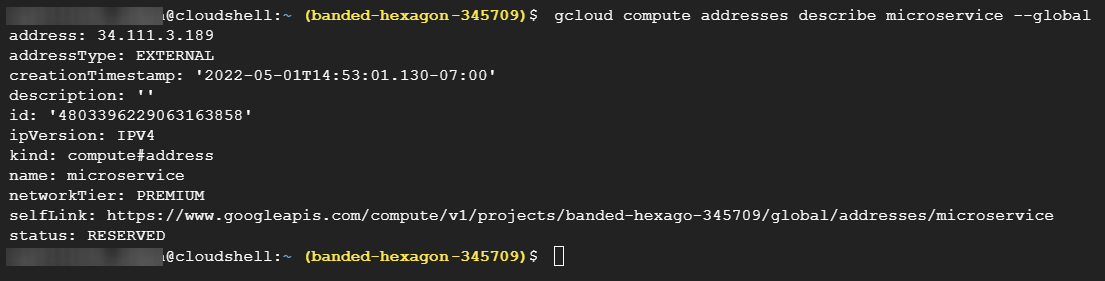
2. Next, run the below command to describe your reserved static IP address. gcloud compute addresses describe microservice --global
https://cloud.google.com/compute/docs/gcloud-computeNote down the address as you’ll need to point it to your domain in the following step.
3. Point your static IP address to your host domain by updating the DNS records of your domain, adding an A-type record containing the reserved static IP address.
4. Now, run the below command to create a file called ingress-resource.yaml. This file will store your ingress resource configurations.
nano ingress-resource.yaml5. Add the following code to the ingress-resource.yaml file, save the changes and close the editor.
The code below creates an ingress resource object that exposes your vue-service to the internet. This ingress resource object listens on port 8000 with a reserved static IP address called microservice.
apiVersion: networking.k8s.io/v1
kind: Ingress
metadata:
  name: microservice-ingress
  annotations:
    # the name of your reserved static IP address
		kubernetes.io/ingress.global-static-ip-name: microservice
    kubernetes.io/ingress.class: "nginx" #nginx ingress class
    nginx.ingress.kubernetes.io/ssl-redirect: "false"
spec:
  defaultBackend: # the service you want to expose to the internet
    service:
      name: vue-service #the service name
      port:
        number: 8000 #the service port number
  rules:
  - host: mymicroservice.xyz  #a registered domain to host your application
    http:
      paths:
      - path: "/" #this stands for the home route
        pathType: Prefix
        backend:
          service:
            # stands for the service you want to access when you visit
            # the home route of your application
            name: vue-service
            port:
              number: 8000 # the port number this service listens to
Next, run the kubectl create command below to create the ingress resource.
kubectl create -f ingress-resource.yaml
kubectl create command 7. Run the following command to get and verify if the ingress resource is completely created or in progress.
kubectl get ingressWhen your ingress is ready, you’ll get the following output.

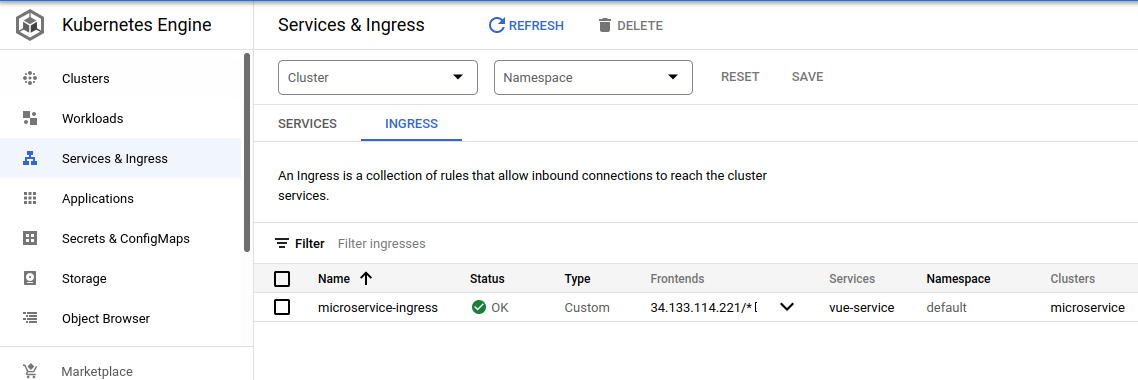
You can also check your ingress on the Services and Ingress page in GKE, as shown below.
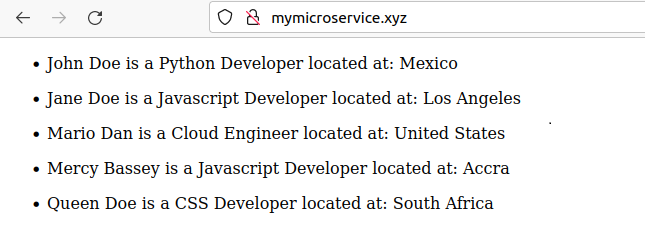
8. Finally, navigate to your domain to test your ingress resource.
You can verify your ingress resource is working correctly if you can access your domain, as shown below.
Conclusion
In this tutorial, you’ve taken a good grasp of working with Google Kubernetes Engine. You’ve also touched on creating a cluster, pods, a service, and an ingress resource. One other striking thing is that you’ve eliminated the time-consuming process of recreating an ingress resource by retaining your DNS record with a static IP address.
And at this point, your application is live and can now be accessed over the internet via a domain just like you’ll typically have when building for production.
So what other microservice would you like to deploy next? Perhaps the one with a MongoDB database?


