


Have you encountered any errors or faced issues with Git commits while working with Git? Perhaps an errant secret or sensitive data has been saved. Luckily, you can process your files with Git and remove from commit and fix the history.
If you’ve made several commits or cloned a repository with an already existing commit history, you’d typically want to look back and see what all commits were made. And in this tutorial, you’ll learn how to remove an entry from your Git history.
Read on and save the day with Git!
Prerequisites
This tutorial comprises step-by-step instructions. If you’d like to follow along, be sure you have the following in place:
- A local machine to test the Git commands – This tutorial uses Windows 10, but later versions will also work.
- Git Bash – This tutorial uses Git Bash 2.36.
Removing a File from Git Commit
When you work on Git as a team, you make hundreds of commits daily. As a result, there are high chances that you might need to undo a particular commit, such as due to an incorrect file or multiple files. This demand is usually caused by a change in code or configuration and becomes an issue.
To solve this issue, you’ll need to remove the file or multiple files from Git commit by running Git commands. You’ll use one of the popular tools to remove a single file from the Git commit, the Git Bash tool.
1. Open the Git Bash tool on your Windows machine.
2. Next, run the below command to create a repository folder and switch to that folder. These commands don’t provide output on the terminal. But be sure to replace ~/Desktop/Repository/repo1 with your preferred folder path and name.
# Creates the Repository folder and repo1 sub-folder
mkdir -p ~/Desktop/Repository/repo1
# Changes working directory to repo1
cd ~/Desktop/Repository/repo1
3. Run the following commands to initialize your repository and create two text files named test1.txt and test2.txt.
# Initializes the local repository (creating a .git hidden folder)
git init
# Creates two text files
touch test_file1.txt test_file2.txt
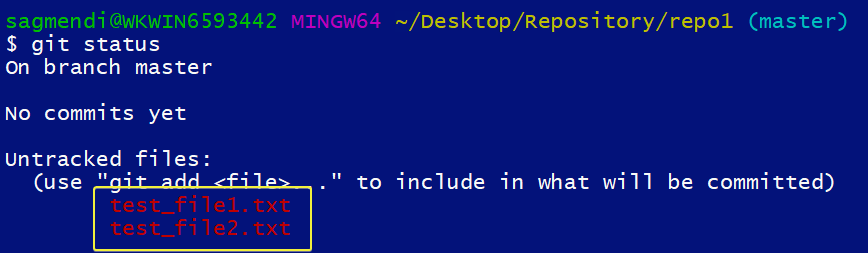
4. Now, execute the below command to check the status of the Git commit.
git statusAfter you execute the command, you’ll notice that the commits are untracked and not yet committed, as shown below.
5. Run the git add command below to add the two text files you created in step three (test_file1.txt and test_file2.txt) to your local repository.
This command doesn’t provide an output but adds the files without pushing them to the remote repository.
git add .6. Next, run the git commit command below so that Git keeps track of the progress and changes you made in the local repository.
git commit -m "Adding two new files test_file1.txt and text_file2.txt"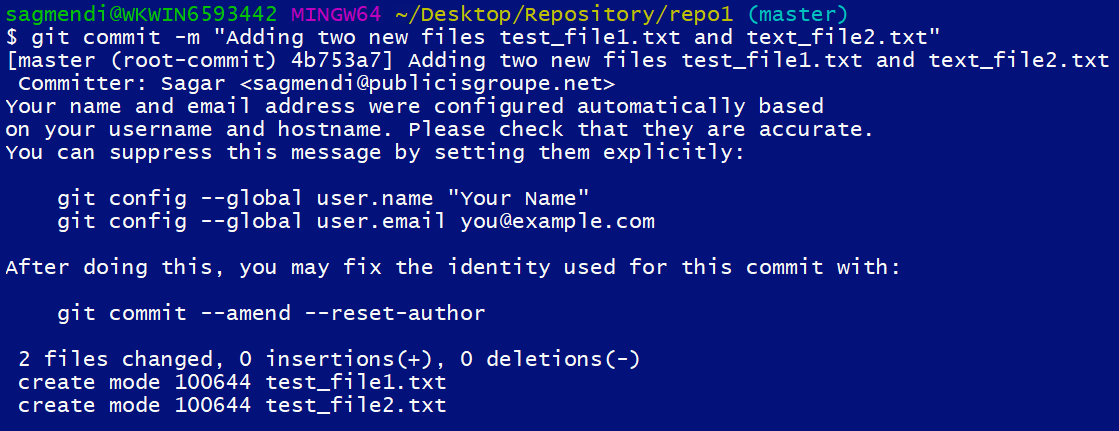
7. After committing, run the below command to remove a specific file (test_file2.txt) from Git commit.
git rm --cached test_file2.txt
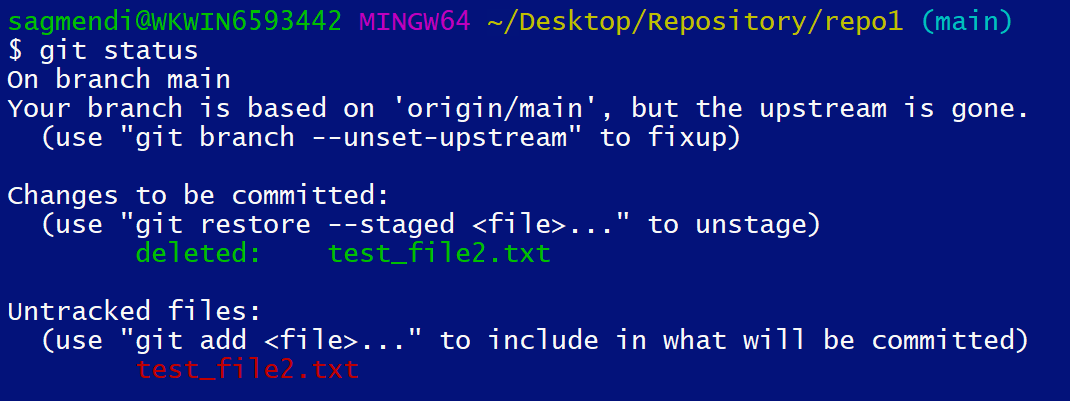
8. Finally, rerun the git status command below to verify the status of the repository.
git statusAs you can see below, the file has been removed from the staging area (the Git commit) and shows the file (test_file2.txt) under Untracked files.
Removing All Recently Committed Files
You’ve just learned to remove a specific file from the Git commit. But typically, you’ll have to delete multiple files, and Git is up to the task with the git reset command. The git reset command is a complex but, at the same time, versatile tool for undoing changes in the repository.
To see how the git reset works, you’ll commit a couple of files, then reset the changes to remove recently committed files stored in Git commit:
1. Create two new text files named test_file3.txt and test_file4.txt in the ~/Desktop/Repository/repo1 folder.
touch test_file3.txt test_file4.txt2. Next, run the git add command below, which doesn’t provide an output but adds the new text files to your local repository (~/Desktop/Repository/repo1).
git add .3. Run the git commit command below to commit the files so that Git keeps track of the progress and changes you made in the repository.
git commit -m "Adding two more files"
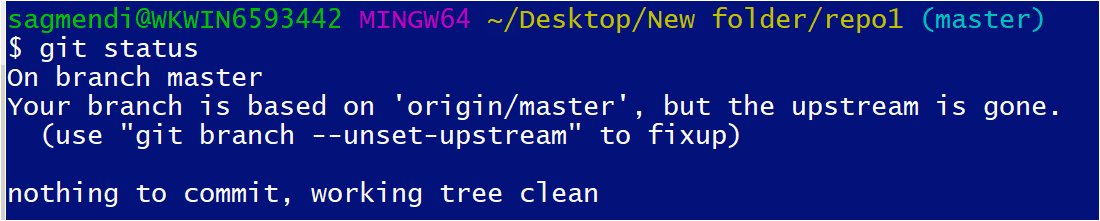
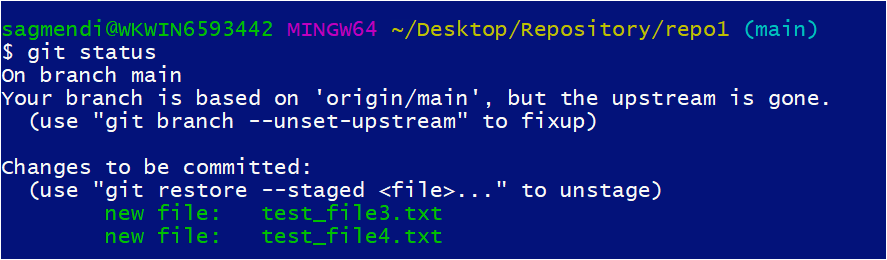
4. Now, run the below command to verify the status of your local repository.
git statusAs you can see below, the output shows the nothing to commit message, indicating everything is in place in the repository.
5. Next, run the git reset command below to revert the recently made commits in step three. This command doesn’t provide output but removes the files test_file3.txt and test_file4.txt.
git reset --soft HEAD~1You can also use git reset –soft HEAD^ to remove all the files that were committed until now.
6. Next, rerun the git status command below to verify the status of the repository.
git statusBelow, the output shows files test_file3.txt and test_file4.txt that need to be committed. This output signifies the files to be removed from Git commit.
Removing Specific Commits from Git History
Removing all committed files works like a charm if you like to start with a clean slate. But what if you only need to remove a particular commit? The git revert command will do the trick so long as you know the commit’s ID.
In the last step of the “Removing All Recently Committed Files” section, you noticed that the commits were not committed but changed. You’ll now commit the changes to see the git revert command in action.
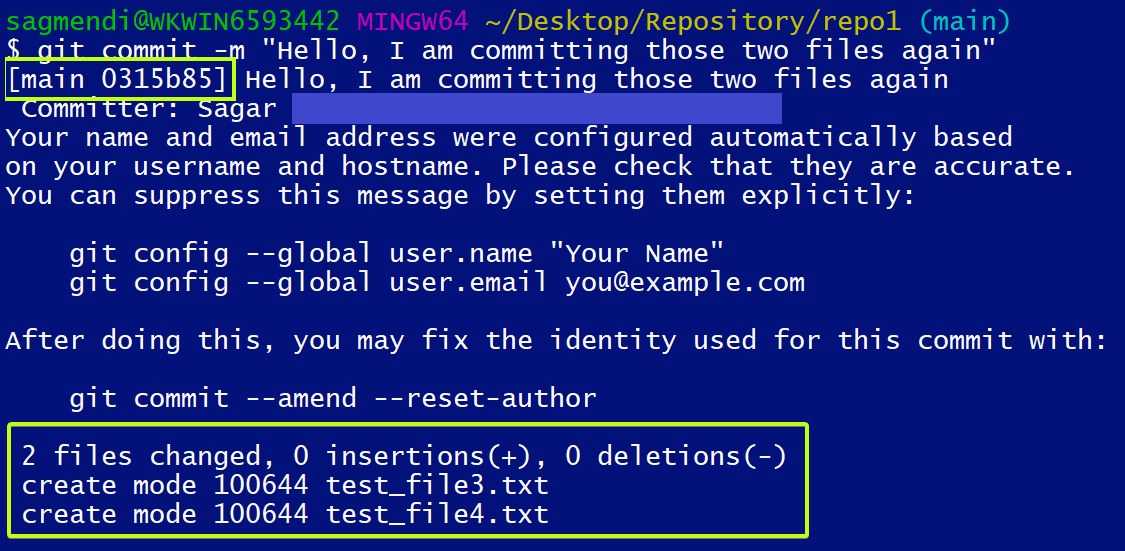
Run the git commit command below to commit the recent changes on your local repository.
git commit -m "Hello, I am committing those two files again"
After running the command, you’ll notice that both the text files are committed again, and the commit ID is 0315b85, as shown below.
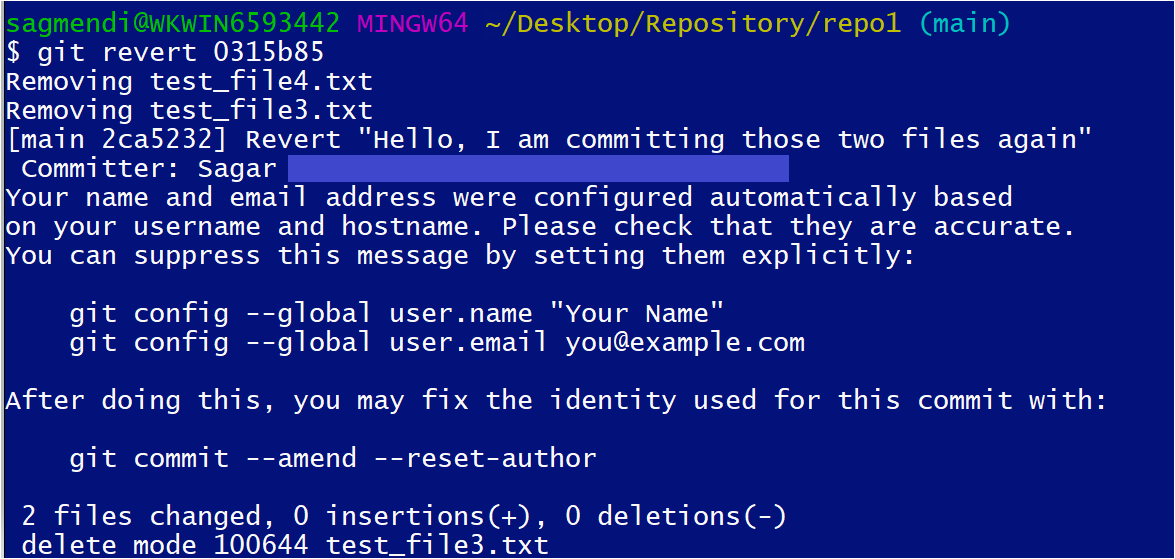
Now, run the git revert command below to revert the commit you did in the previous step. Be sure to replace 0315b85 with your commit’s ID.
git revert 0315b85
Below, you can see two files you recently committed have been deleted.
Deleting a Directory from Git Commit History
By now, you already know how to delete a committed file, but how about a directory? Deleting a directory from a Git commit is similar to deleting files.
1. Run the below commands, which don’t provide output but perform the following:
- Create a folder named
myfolderinside your local repository (~/Desktop/Repository/repo1).
- Create a file named l.txt inside the ~/Desktop/Repository/repo1/myfolder folder.
mkdir myfolder && touch myfolder/l.txt2. Next, run the git commands below to add the new folder (~/Desktop/Repository/repo1/myfolder) to your local repository.
git add .
git commit -m "Adding folder"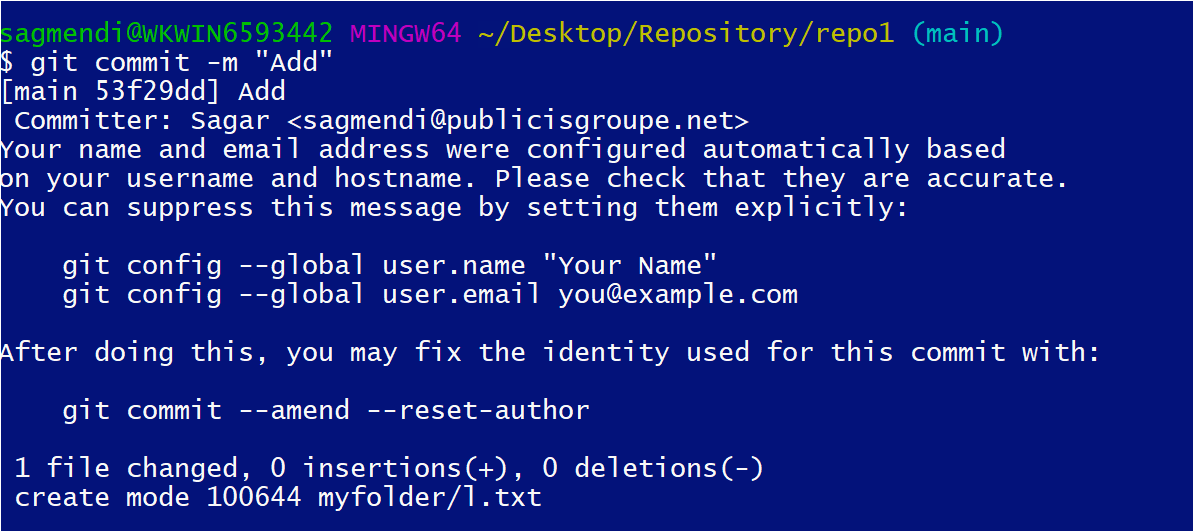
3. Run the following git rm command to remove the folder (myfolder) you committed in step two.
git rm -r myfolder/
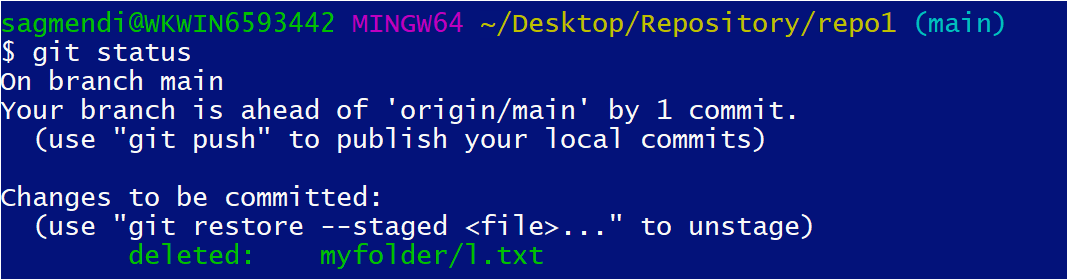
4. Finally, run the git status command to verify the status of the repository and see if the folder has been removed.
git statusBelow, you can see that the entire folder (myfolder) has been deleted successfully, along with the l.txt file inside.
Conclusion
In this tutorial, you’ve learned to work with Git commits, such as removing a specific commit, a file, or multiple files. You’ve also touched on deleting an entire folder within the local repository and committing the changes.
At this point, you can confidently commit changes on your repository and remove commits you deem unnecessary without messing things up.
With what you’ve learned in this tutorial, which method do you think could be excellent to work with commits for your team?


