

API keys, SSH keys, passwords, and other secrets are the lifeblood of modern web applications. Keeping secrets secure yet accessible only to authorized users is critical. But how? Google Cloud Platform (GCP) Secrets Manager is up to the task.
GCP Secrets Manager helps organizations manage and keep their secrets from prying eyes. And in this tutorial, you will learn how to start with GCP Secrets Manager and protect your sensitive data.
Read on to up your security game with GCP Secrets Manager!
Prerequisites
This tutorial will be a hands-on demonstration. To follow along, be sure you have the following:
- A GCP account with billing enabled to get access to the Secrets Manager service in the Cloud Console – But a free trial is available where you get $300 of free credit (enough for this tutorial).
- A Ubuntu Linux VM instance to generate an SSH key – This tutorial uses Ubuntu 20.04, but any other recent version should also work.
Creating a New Google Cloud Project
Taking advantage of services in GCP, like the GCP Secrets Manager, requires a dedicated environment to work in, a Google Cloud Project. This project ensures all your associated resources are kept from messing with other projects.
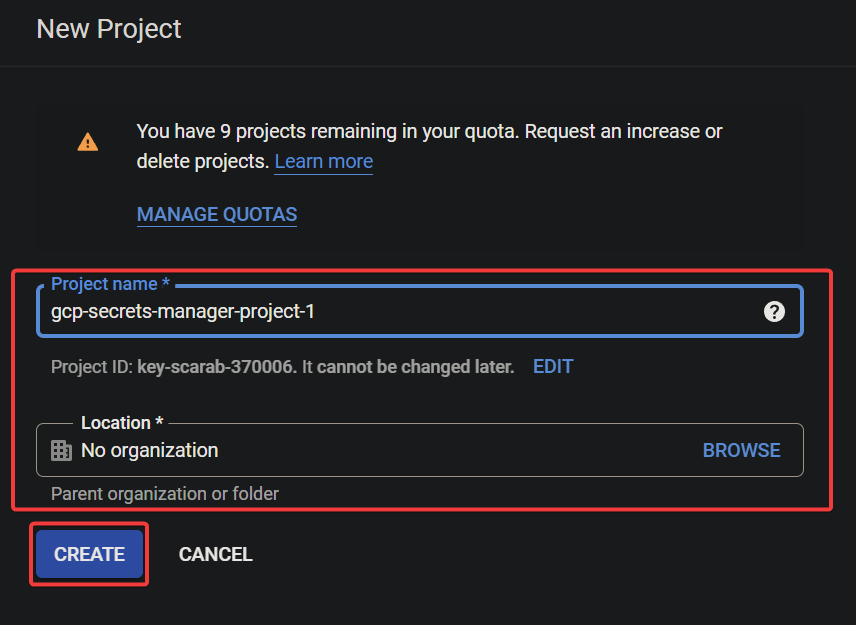
1. Open your web browser, navigate the GCP Cloud Resource Manager page, and click CREATE PROJECT, as shown below.

2. Next, provide your Project name and Location (a parent organization or folder), and click CREATE to finalize creating the project.
You can use any name as long as it is globally unique within GCP.
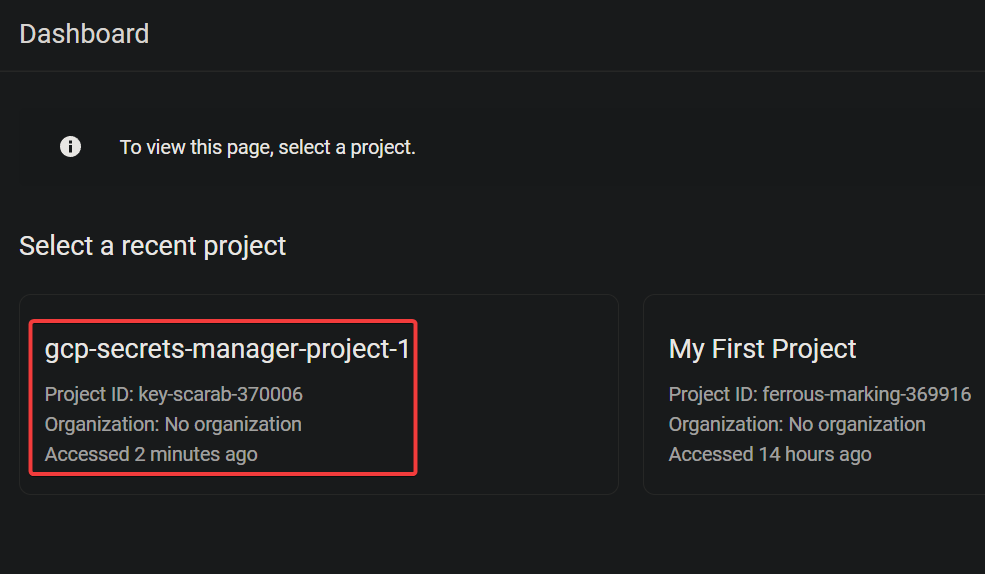
You will see a similar notification message, as shown below, which indicates your project has been created.

3. Once created, navigate to the Project Selector page, and select the newly created project from the list. Doing so lets you set an active project to work on.
Enabling the Secrets Manager API and Other APIs
API is the core of GCP Secrets Manager. And before you can use the GCP Secrets Manager service, you first need to enable the required APIs in your project.
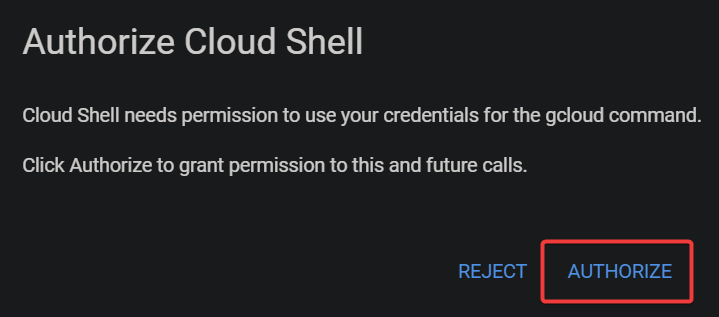
1. In the Google Cloud Console, click the Activate Shell Icon (upper-right) to activate the Cloud Shell, and a new shell pane opens, as shown below. Cloud Shell is a browser-based shell that lets you manage and administer GCP resources from anywhere.

2. Next, run the following gcloud services command to enable the required APIs in the current project. This command enables the Cloud Run API, Cloud Build API, and Secrets Manager API.
gcloud services enable run.googleapis.com \
cloudbuild.googleapis.com \
secretmanager.googleapis.com
3. Now, click AUTHORIZE when prompted to give permissions for the gcloud CLI to enable the APIs.
You will see a similar success message when the APIs are enabled in your project, as shown below.

Generating an SSH Key Pair
Now you have enabled the required APIs, you are almost ready to create your first secret. But first, you need data to store as a secret. For this tutorial, you will generate an SSH key pair to store as a secret, which you can use to SSH into an Ubuntu Linux instance.
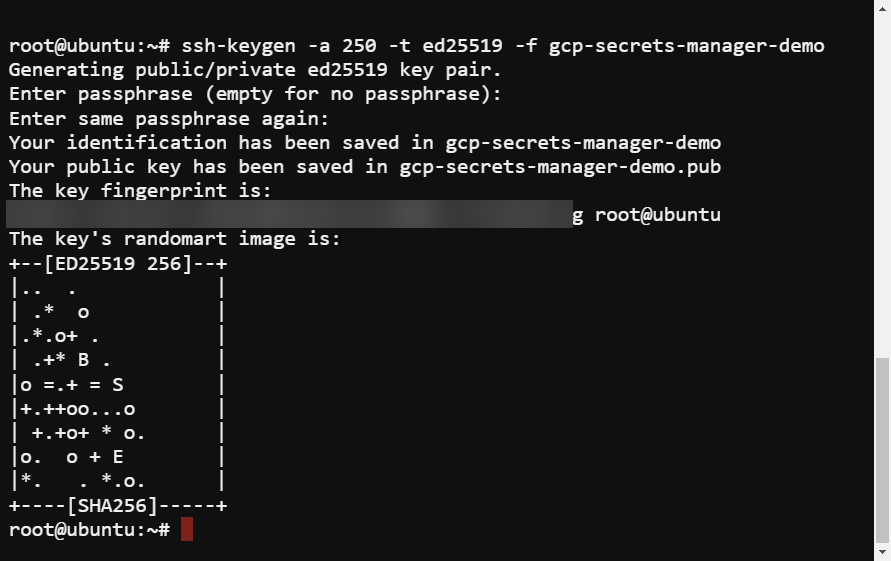
1. Open your terminal on your Ubuntu machine, and run the below ssh-keygen command. This command generates an SSH key pair named gcp-secrets-manager-demo. But of course, you can set your preferred name instead.
This SSH key pair is of type ed25519 with a key size of 250 bits.
ssh-keygen -a 250 -t ed25519 -f gcp-secrets-manager-demoPress Enter when prompted to accept the default values.
You will see an output similar to the following image indicating the SSH key pair has been generated.
2. Next, run the ls command below to list all (-la) generated SSH key pairs.
ls -la gcp-secrets-manager-demo*If the SSH key pair generation worked correctly, you would see two files as follows:
| Key File | Key File |
| gcp-secrets-manager-demo | The private SSH key. This key should only be accessible to you and never shared with anyone. |
| gcp-secrets-manager-demo.pub | The public SSH key. This key can safely be shared with other users as it holds no secrets. |

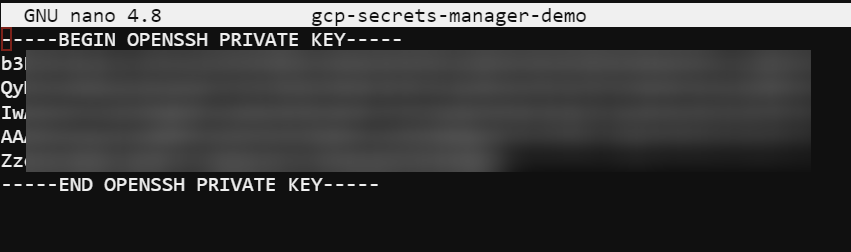
3. Lastly, open the private SSH key in your preferred text editor.
nano gcp-secrets-manager-demoCopy and save the private key, similar to the one below, in a safe place, as you will need this key later to create a secret.
Creating a Secret in GCP Secrets Manager
With an SSH key generated, it is time to make the private key a secret stored in GCP Secrets Manager. The GCP Secrets Manager is the best storage option for API keys, SSH keys, database credentials, and so on (secrets).
With GCP Secrets Manager, your secret is hidden and will not accidentally upload to GitHub or similar repositories. This behavior ensures secrets are secure, encrypted, and accessible only to authorized users.
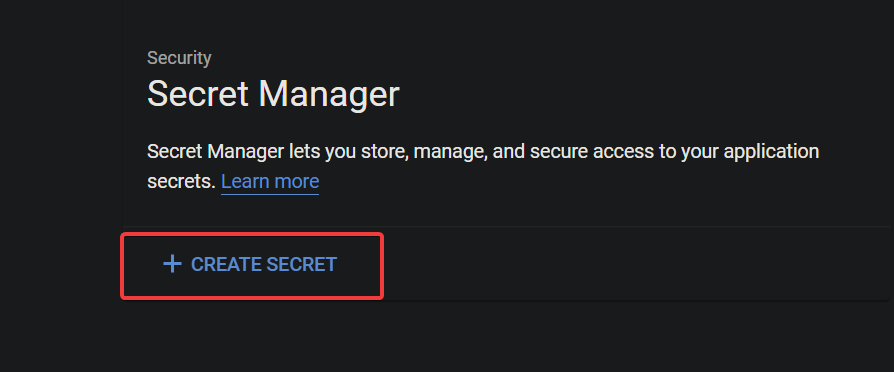
Navigate to the Secret Manager page in the GCP Cloud Console, and click CREATE SECRET to initiate creating a new secret.
Now, configure the following secret details:
- Name – Enter a unique name for the secret, which must not contain any sensitive information. Note that this name can only contain lowercase letters, numbers, and hyphens.
- Enter the private SSH key you copied in the last step of the “Generating an SSH Key Pair” section.
- Keep other settings as is, and click CREATE SECRET to finalize creating your secret.

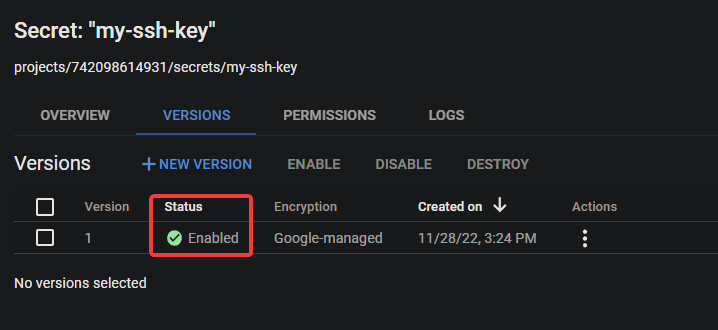
You will see an Enabled status similar to the one below, indicating that your secret is ready for use.
Using a Secret to SSH Into an Ubuntu Machine
You have successfully created a secret in GCP Secrets Manager. Now what? That secret will just sit there unless you put it to good use. Since your secret is an SSH private key, you will SSH into your Ubuntu machine using your secret.
Before SSHing into your Linux machine, you first have to get access to your secret:
1. Run the gcloud secrets command below in your Google Cloud Shell to obtain the data (the SSH private key you stored) associated with your secret.
Replace the my-ssh-key with the actual name of your secret and 1 with the version of your secret. Doing so lets you verify the correct version of the secret you plan to use.
gcloud secrets versions access 1 --secret=my-ssh-key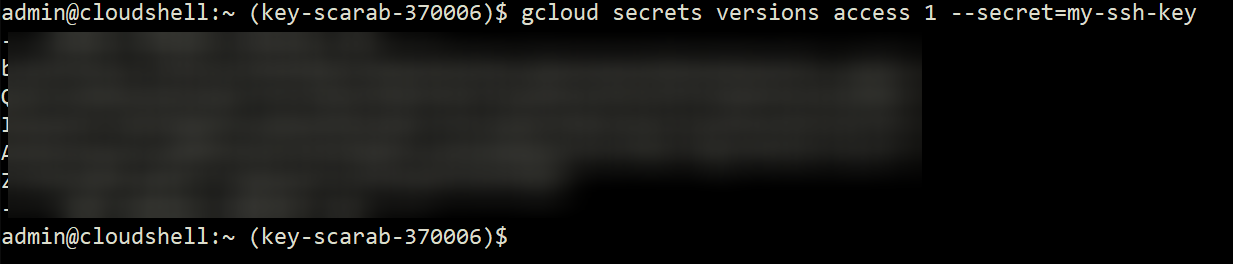
2. Next, run the below command to write out your secret’s (my-ssh-key) value (version 1) to a text file (gcp-secrets-manager-demo.txt) in raw text format.
This command does not provide output to the Cloud Shell, but you will later test your secret in the following steps.
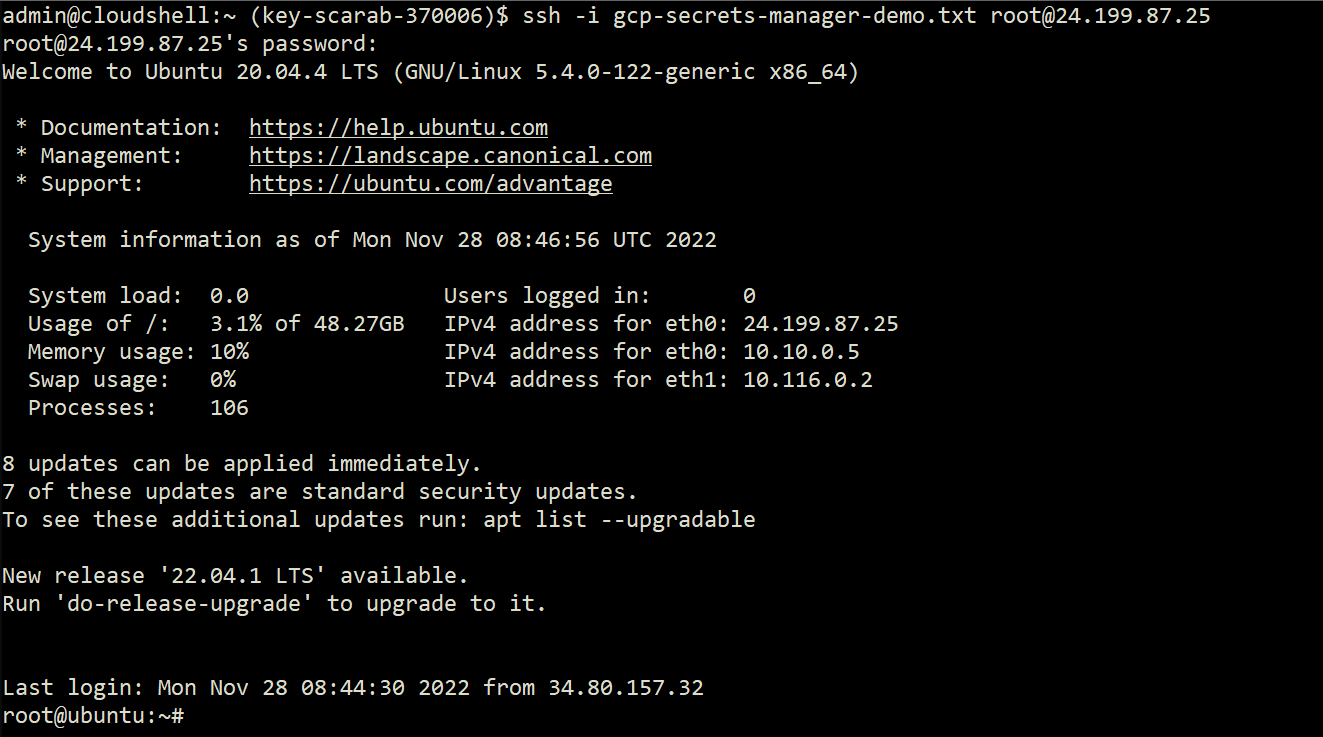
gcloud secrets versions access 1 --secret=my-ssh-key > gcp-secrets-manager-demo.txt3. Lastly, run the following ssh command to connect to your Ubuntu instance. In the command below, you use the private SSH key saved to the gcp-secrets-manager-demo.txt text file.
Ensure you replace username with your actual username and ip-address with the IP address of your instance. ssh -i gcp-secrets-manager-demo.txt username@ip-address Enter the password associated with the username when prompted, and you will now be successfully logged in to your Ubuntu instance, as shown below.
As you can see, no one other than authorized users (you, in this case) can access the private SSH key stored in GCP Secrets Manager.
Cleaning Up Resources
You have managed to SSH into your Ubuntu machine without exposing your secret to anyone. But keep in mind that you will incur charges to your GCP account unless you clean up your resources.
To clean up your resources, delete your project and the resources associated with it:
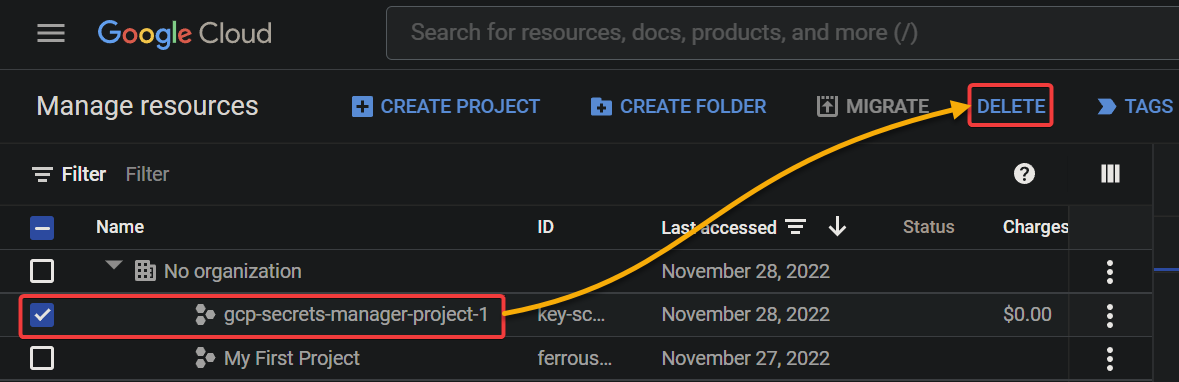
Open the GCP Cloud Resource Manager on your browser, tick the checkbox next to the project name, and click DELETE to delete the entire project.
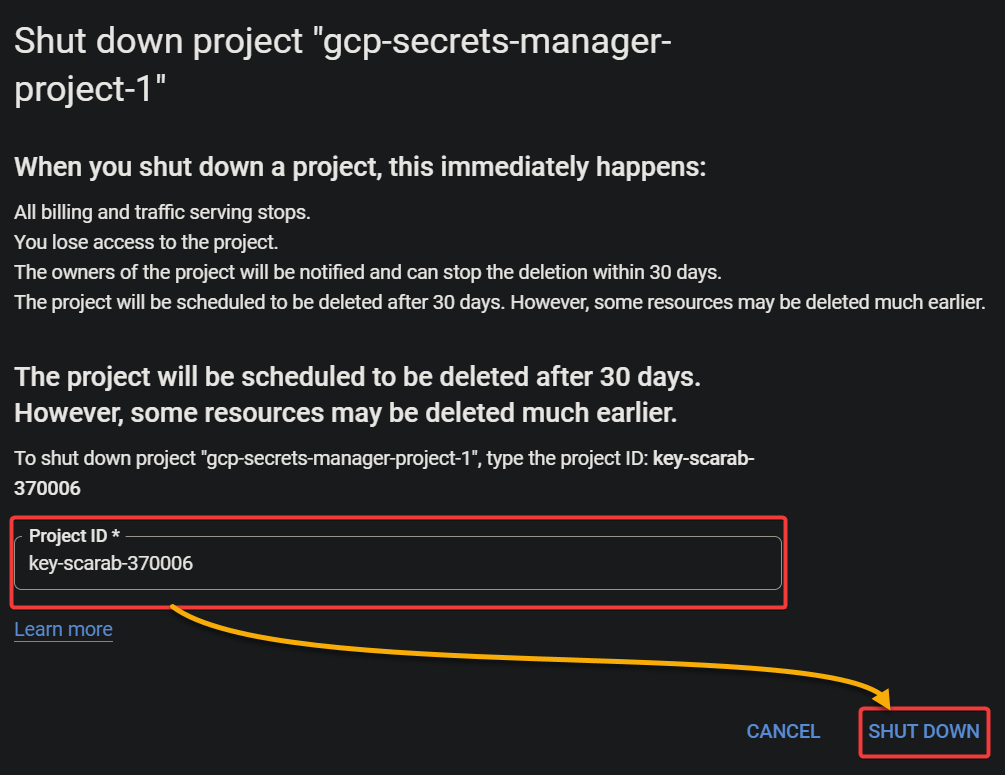
Now, type in the Project ID, and click SHUT DOWN to confirm the deletion.
Conclusion
Securely storing and managing secrets can be challenging for IT professionals, but with GCP Secrets Manager, you are in good hands. And in this tutorial, you have learned how to store sensitive data as secrets securely.
At this point, you are now confident in managing secrets securely in GCP Secrets Manager. But SSHing into a remote machine is just one of the perks of having secrets.
Now, why not rotate your secrets to keep them even more secure?


