


Securing data is a top priority for any organization, and encryption is one of the most effective ways to protect data. But how exactly? Google Cloud Platform (GCP) provides a key management service called Google Key Management Service (KMS), which lets you quickly create and manage encryption keys.
In this tutorial, you will learn how to create and use a key in GCP KMS. You will also go through some important concepts related to key management, such as keys, keyrings, and key versions.
Ready? Read on, and take your data security to the next level!
Prerequisites
This tutorial will be a hands-on demonstration. To follow along, be sure you have a GCP account with active billing, but a free trial would suffice.
A Google Cloud Project is a collection of resources you create and manage in GCP. Note that you should create separate projects for each of your applications. Doing so lets you efficiently manage the resources for each application. In the end, you can delete all the resources associated with a project, which is helpful for clean-up.
To create a new Google Cloud project:
1. Open your favorite web browser, and log in to the GCP Console. Like the AWS console, the GCP console is a web-based interface for managing your resources in Google Cloud.
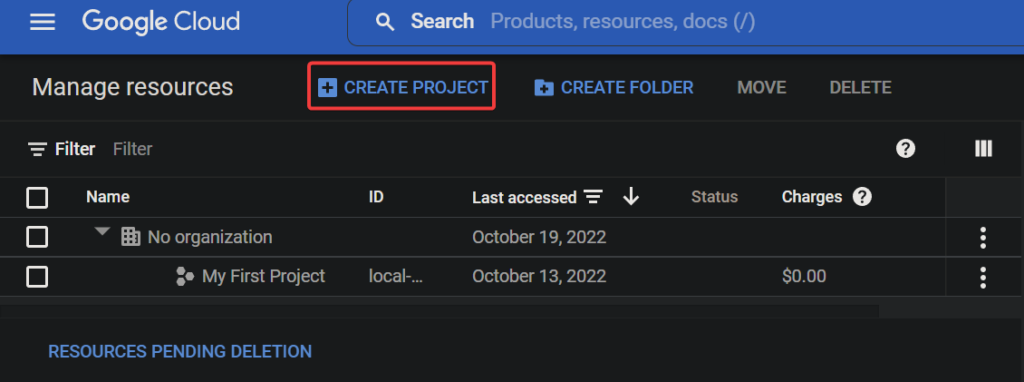
2. On your GCP console, navigate to the Manage Resources page, where you can see and manage all your existing projects.
3. Next, click on the CREATE PROJECT button to create a new project.
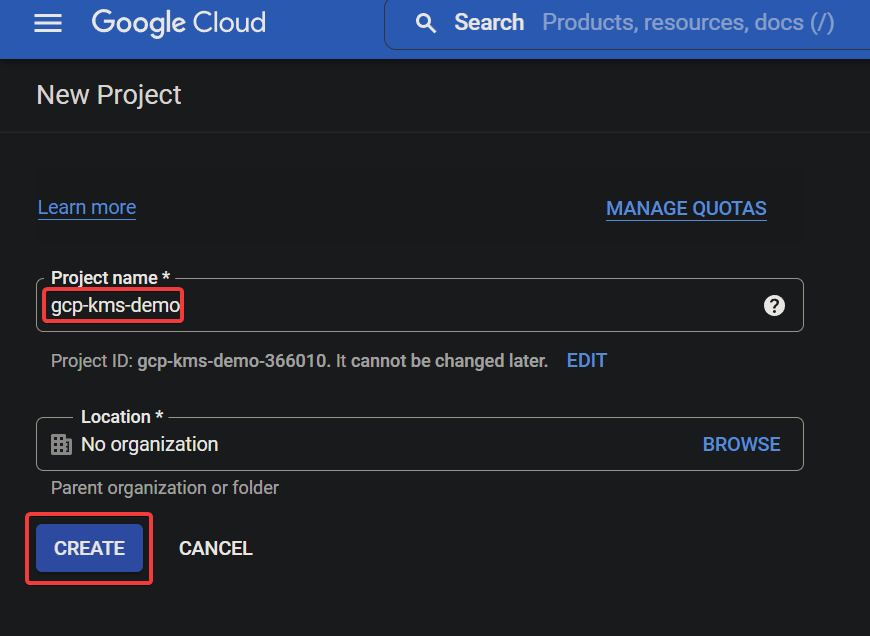
Lastly, configure the following settings for your new project, and click CREATE to create your project.
- Project name – Enter a name for your project, which does not need to be unique, and can be changed later on. This tutorial’s choice for the project name is gcp-kms-demo.
- Location – Select the parent organization or folder where you want this project to be created. Your newly created project will be the top parent. But you can skip this field if you do not have an organization.
The Location field might not show up if you use a trial account.
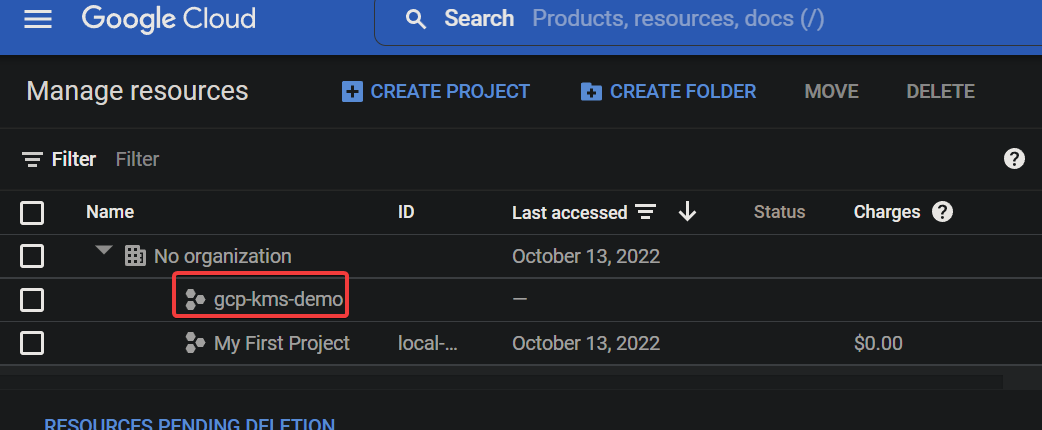
If successful, you will see your newly-created Google Cloud project listed, as shown below.
Enabling the Cloud KMS API for the Google Cloud Project
You have just created your first If successful, you will see your newly-created Google Cloud project listed, as shown below.Cloud project, and typically you cannot leave it unprotected. Worry not! The Cloud KMS API is a set of Google-provided encryption APIs that you can use to protect your data.
To use the Cloud KMS API, you need to enable it for your project:
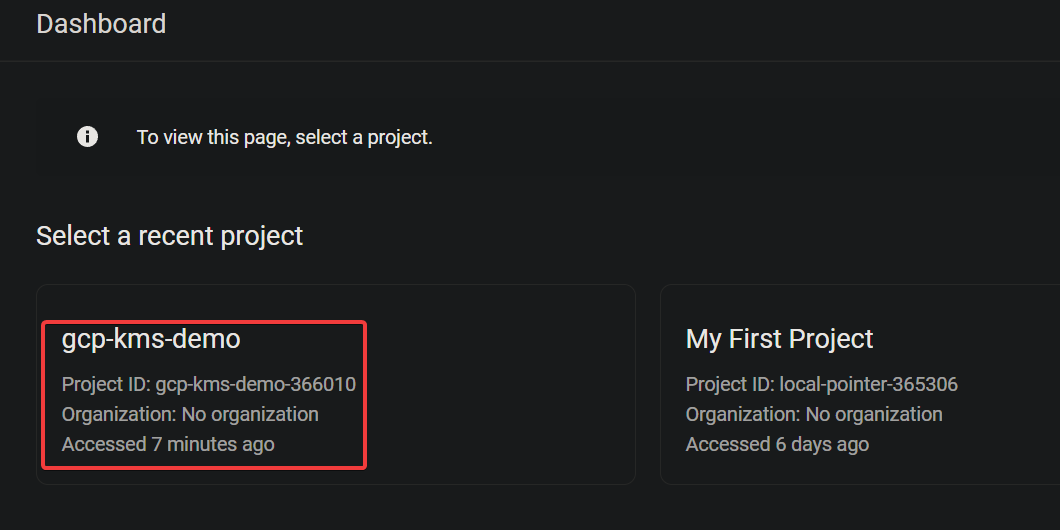
1. Navigate to the google project selector page, and select your Google Cloud project (gcp-kms-demo).
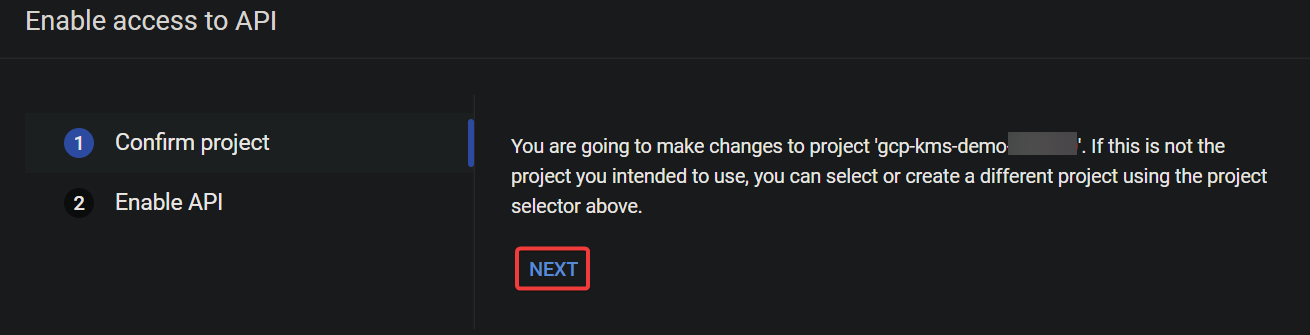
2. Next, navigate to the Enable access to API page, and click NEXT to confirm enabling the API for the selected project.
3. Now, click ENABLE to enable the Cloud KMS API.

At this point, the Cloud KMS API is enabled for your project. You can now start using the Cloud KSM API to create and manage encryption keys.

Starting the Cloud Shell to Create Keys and Keyrings
Enabling the Cloud KMS API prepares you to create keys and keyrings to encrypt and decrypt your data. Keys and keyrings are the fundamental concepts in Cloud KMS.
| Key | A key is an encryption key stored in a keyring that you can use to encrypt and decrypt your data. Each key has a name, and the name must be unique within the keyring. You can use IAM ( Identity and Access Management) policies to control who has access to keys. |
| Keyring | A keyring is a container in Cloud KMS that holds a set of keys. You can think of the keyring as a folder on your computer that contains many files. But in essence, a keyring holds a set of keys in a specific Cloud KMS location. |
But before creating keys and keyrings, you first have to start the Cloud Shell. The Cloud Shell is a free and interactive shell you can use to run commands on the Google Cloud Platform without installing any tools on your machine.
1. In the GCP Console, click the Activate Cloud Shell button (top-right), as shown below, to start the Cloud Shell.

A Cloud Shell session initializes, as shown below (at the bottom of the page), where you can run commands.

2. Next, run the following gcloud This prompt shows up the first time you run the gcloud command in the Cloud Shell, asking you to authorize the gcloud tool to access the KSM API.in the Cloud Shell to create a new keyring (keyrings) called kms-demo-keyring in the global location.
gcloud kms keyrings create "kms-demo-keyring" \
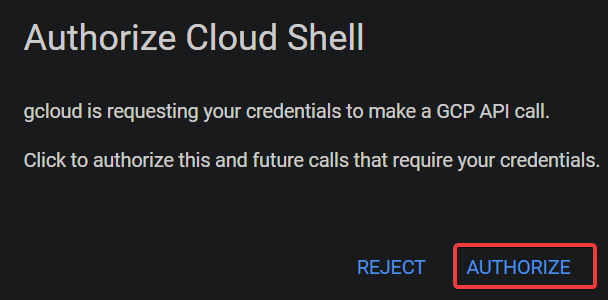
--location "global"When prompted, click AUTHORIZE to continue running the command.
This prompt shows up the first time you run the gcloud command in the Cloud Shell, asking you to authorize the gcloud tool to access the KSM API.
As shown below, there are no output messages when the keyring is successfully created.

3. Once authorized, run the below command to create a key (keys) called kms-demo-key01 in the keyring (kms-demo-keyring). The –purpose flag specifies that GCP KMS will use this key for encryption.
Note that the location (global) must be the same as what you set for the keyring.
gcloud kms keys create "kms-demo-key01" \
  --location "global" \
  --keyring "kms-demo-keyring" \
  --purpose "encryption"
Each time you create or rotate a key, Cloud KMS creates a new version of the key. This feature lets you easily roll back to a previous version if necessary.
Like creating a keyring, there are no output messages when the key is successfully created.
But at this point, you have a keyring and key that you can use to encrypt and decrypt your data.

4. Now, run the following command to list the keys in a –keyring (kms-demo-keyring)
gcloud kms keys list --location "global" --keyring "kms-demo-keyring"You will see an output similar to the screenshot below with information as follows:
| PURPOSE | ENCRYPT_DECRYPT | Indicates the purpose of the key (encryption and decryption). |
| ALGORITHM | GOOGLE_SYMMETRIC_ENCRYPTION | Indicates the key uses Google Symmetric Encryption, the default algorithm for Cloud KMS keys. |
| PROTECTION_LEVEL | SOFTWARE | Indicates the key is software-protected. |
| LABELS | You can add labels to keys to categorize them or to add additional information. | |
| PRIMARY ID | 1 | Indicates the key is the primary key for the keyring, which is what Cloud KMS uses by default when you do not specify a key. Note that you can have only one primary key per keyring. |
| PRIMARY STATE | ENABLED | Shows the current status of the key. The ENABLED state indicates the key can be used for its specified purpose. |

Encrypting and Decrypting Data with GCP KMS
Encryption is a crucial line of defense to deter malicious parties’ access to sensitive data. And now that you have an encryption key, you can use it to encrypt your data.
To encrypt data with GCP KMS:
1. Run the below command, which does not provide output, but creates a text file (gcp-kms-demo.txt) with some texts to encrypt.
echo "This is some sensitive data that I want to encrypt." > gcp-kms-demo.txt2. Next, run each command below to list (ls) the text file (gcp-kms-demo.txt) and view (cat) its content to verify the data.
# List the text file
ls cat gcp-kms-demo.txt
# View the text file's content
cat gcp-kms-demo.txt
3. Once verified, run the below command to encrypt the data in your file (gcp-kms-demo.txt) using your key (kms-demo-key01). The encrypted data will then be stored in a new file called gcp-kms-demo.txt.encrypted.
Although this command does not provide output, you will later verify the encryption in the following step.
gcloud kms encrypt \
    --location "global" \
    --keyring "kms-demo-keyring" \
    --key "kms-demo-key01" \
    --plaintext-file ./gcp-kms-demo.txt \
    --ciphertext-file ./gcp-kms-demo.txt.encrypted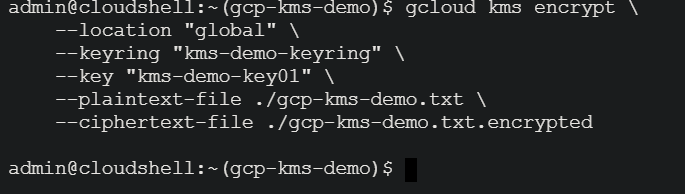
4. Now, run the following command to try and view the encrypted file’s data (gcp-kms-demo.txt.encrypted).
cat gcp-kms-demo.txt.encryptedYou will see broken, strange, and unreadable symbols, as shown below. This output indicates that the file was successfully encrypted.
You need to store this encrypted file in a secure location. For example, you can store multiple copies in AWS S3, GCP Cloud Storage, or Azure Blob Storage. Google Cloud does not save the plain text version of your data. So if you lose the encrypted file, decrypting the file to get the original data back is impossible.

5. Once encrypted, run the command below to decrypt your data (gcp-kms-demo.txt.encrypted) using the same key (kms-demo-key01). But this time, the decrypted data is stored in a new file called gcp-kms-demo.txt.decrypted.
Like with encryption, this command does not provide output, but you will verify the decryption in the following step.
gcloud kms decrypt \
  --location "global" \
  --keyring "kms-demo-keyring" \
  --key "kms-demo-key01" \
  --ciphertext-file ./gcp-kms-demo.txt.encrypted \
  --plaintext-file ./gcp-kms-demo.txt.decrypted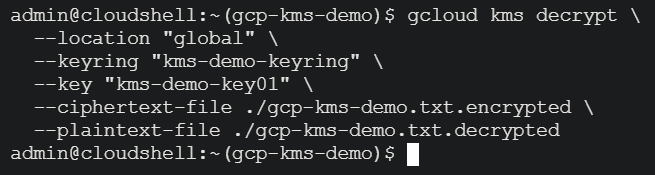
6. Finally, run the following command to view (cat) the decrypted file (gcp-kms-demo.txt.decrypted) and verify the data was successfully decrypted.
cat gcp-kms-demo.txt.decryptedBelow, you can see the original data you saved on the text file. Congratulations! You have successfully encrypted and decrypted data using Google Cloud KMS.

Cleaning Up Google Cloud Resources
Your resources (a keyring and a key) are billed per use. So when you are finished with them, you should delete your resources to avoid recurring charges.
1. Run the below command to list all of the versions of the key (keys) you created.
gcloud kms keys versions list \
  --location "global" \
  --keyring "kms-demo-keyring" \
  --key "kms-demo-key01"
You will see at least one version listed, as shown below.

2. Next, run the following command, which does not provide output but destroys the specified key (kms-demo-key01).
Note that to delete your resources successfully, you must specify the location, keyring, and key names.
gcloud kms keys versions destroy 1\
  --location "global" \
  --keyring "kms-demo-keyring" \
  --key "kms-demo-key01"
3. Now, run the below command to list the keys again.
gcloud kms keys versions listBelow, the STATE indicates the key has been scheduled for destruction (DESTROY_SCHEDULED).
You can not destroy a key right away. Google gives a 30-day grace period, which greatly helps if you accidentally destroy a key. After 30 days, the key will be permanently destroyed automatically and cannot be recovered.

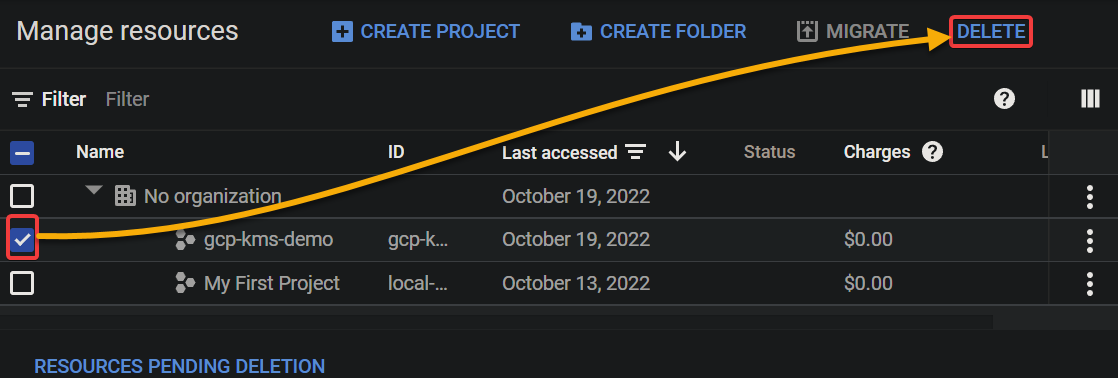
4. Navigate to the Manage Resources page, tick the checkbox next to your Google Cloud project, and click DELETE to delete the entire project.
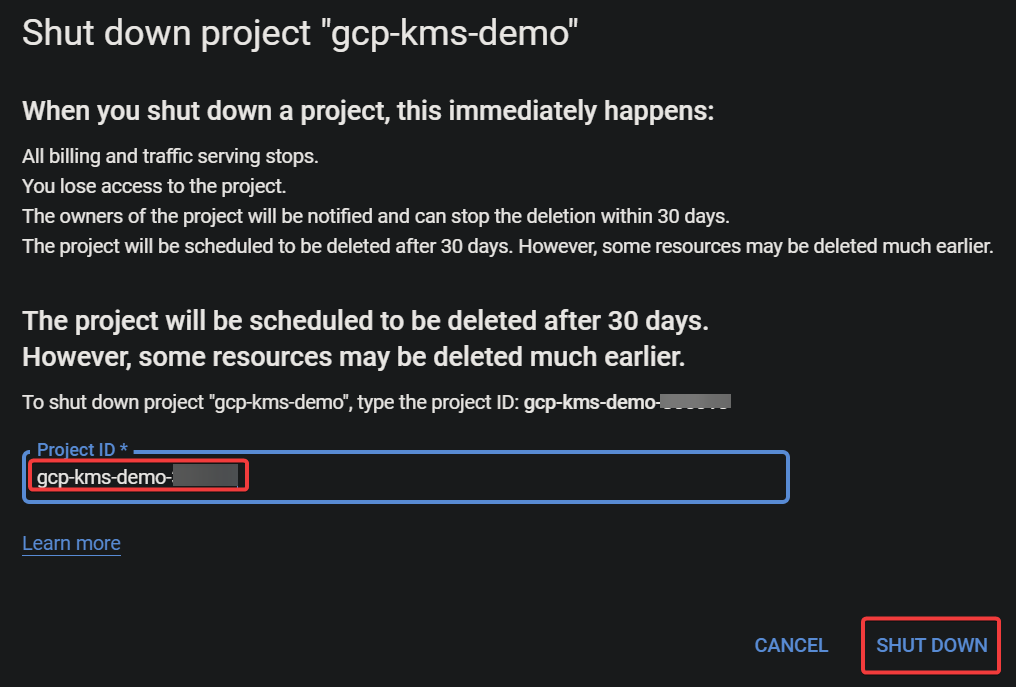
5. Lastly, enter the Project ID, and click SHUT DOWN to delete your project.
Like deleting a key, you have 30 days to change your mind before the project is permanently deleted.
Conclusion
Data encryption is a critical security measure to protect your data, and you have seen that GCP KSM is up to the task. In this tutorial, you have learned that GCP KMS is a convenient service that lets you encrypt your data with a few commands.
With this newfound knowledge, why not set up a key rotation to secure even more of your data? Rotate your key at least once a month to maintain optimal security.


