


Are you looking for a way to encrypt and decrypt your data quickly? Check out AWS Key Management! This service offers high-level security for your data by allowing you to create and manage cryptographic keys. You can also control who has access to your keys and what actions they can take with them.
This tutorial, by no means, covers everything there is to know about AWS Key Management. But, it will give you a good overview of the basics of using this powerful tool.
Read on to take advantage of AWS Key Management’s security benefits!
Prerequisites
This tutorial will be a hands-on demonstration. If you’d like to follow along, be sure you have the following.
- An AWS account with active billing. You can create an AWS account for free here. The free tier includes enough services to get you started with this tutorial.
- You have AWS CLI installed and configured on your machine. Check out this tutorial for more information.
Creating a KMS Key Using The AWS Console
Read on if you prefer the AWS console (GUI) instead of the AWS CLI. The following section will guide you through creating a KMS key using the console.
Creating an IAM User
To get started, you must create an IAM user that you’ll use to access the AWS Key Management Service from the AWS Command Line Interface (CLI).
IAM users are separate from your AWS root account credentials. Using IAM users is considered a best practice because it allows you to have granular control over who has access to what resources in your AWS account.
Follow these steps to create an IAM user with password access for the AWS Key Management Service:
1. Sign in to the AWS Management Console as the root user.
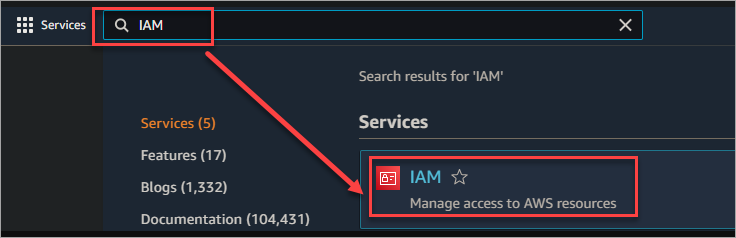
2. Type IAM into the Find services search bar and select IAM from the results to open the IAM console. This console is where you can manage IAM users and their permissions.
3. Navigate to Users → Add users to add a new IAM user.

4. Do the following steps on the Add user page.
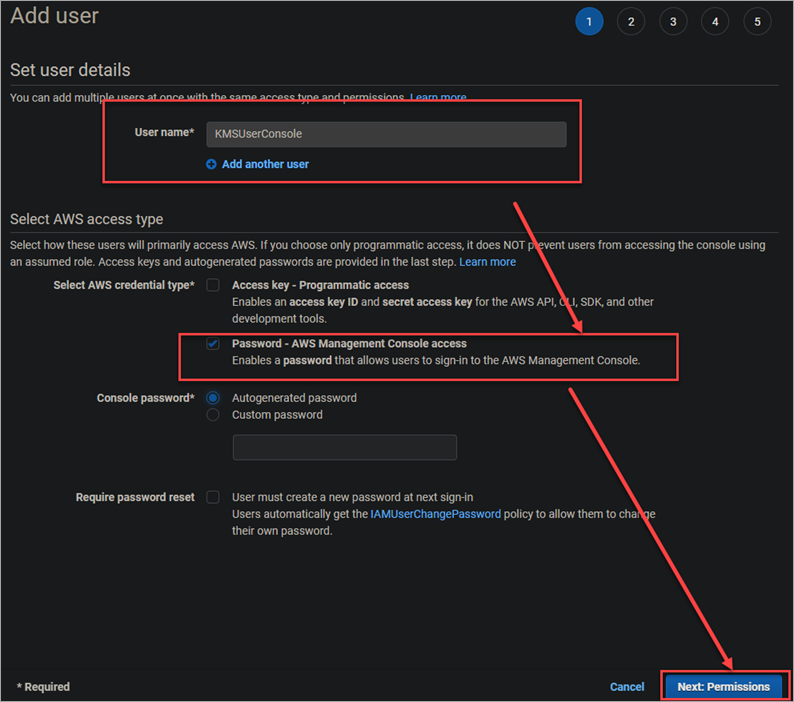
Enter a name for your new user. In this example, it’s called KMSUserConsole.
Select the Password – AWS Management Console access radio button > Autogenerated password. This option will generate a random password for your user.
Make sure the User must create a new password at next sign-in checkbox is unchecked. This action will allow you to log in as this user without having to reset the password first.
Click Next: Permissions to continue.
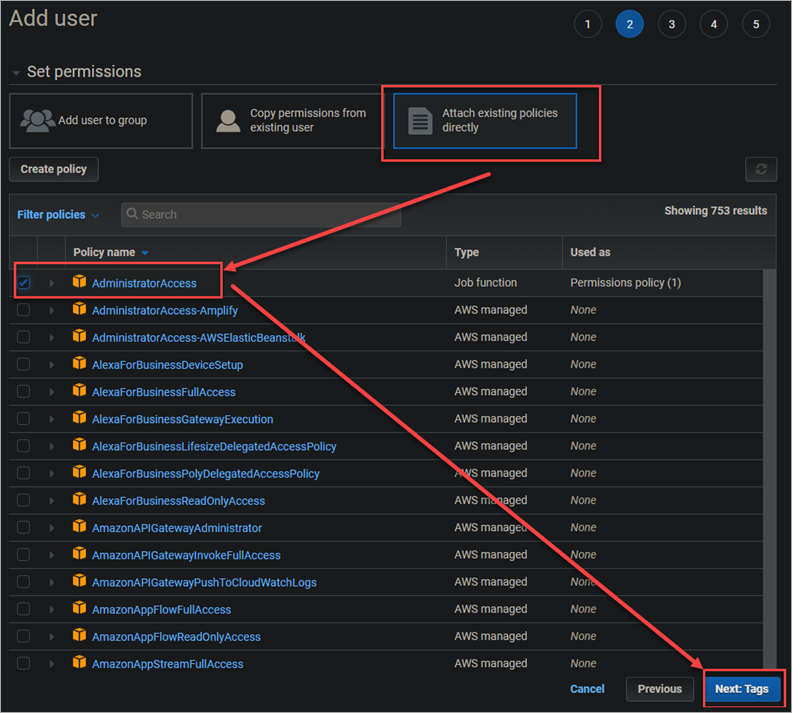
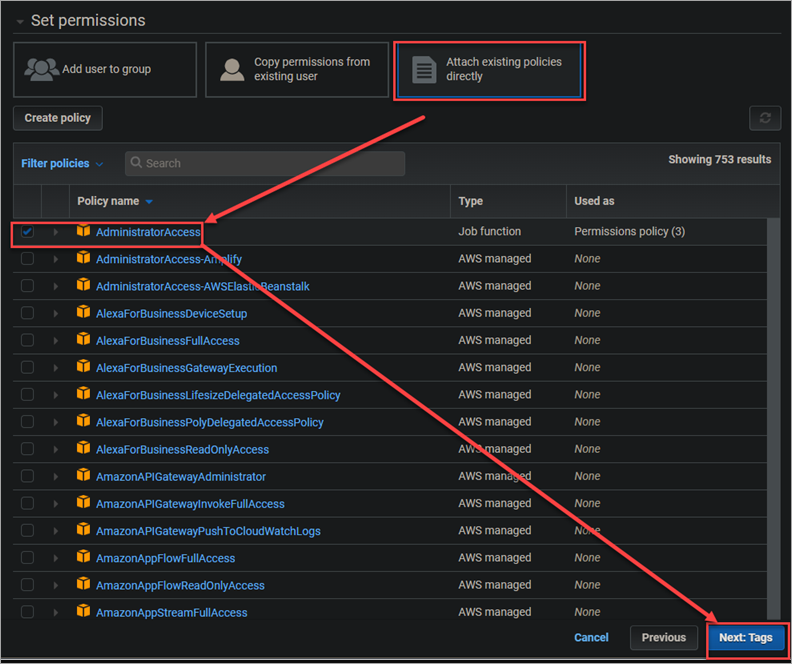
5. On the Set permissions page, select Attach existing policies directly. Select AdministratorAccess from the list of available policies. This policy gives the user full access to AWS, including the ability to create and manage keys.
Click Next: Tags to continue.
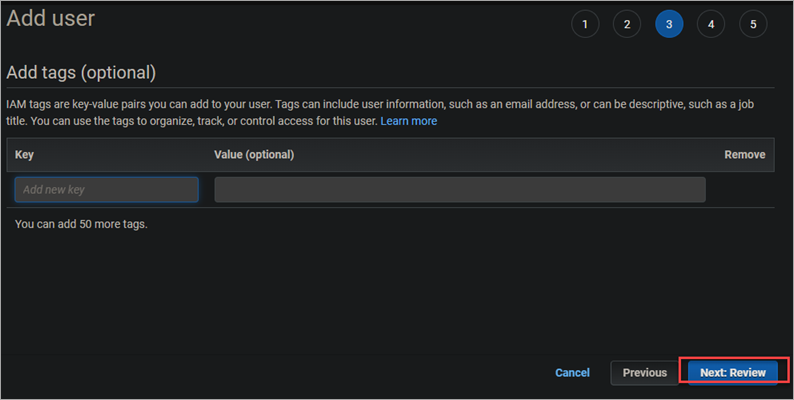
6. On the Add tags (optional) page, you can add any relevant tags to your user. For this tutorial, you will not be adding any tags. Click Next: Review to review your user’s permissions and information.

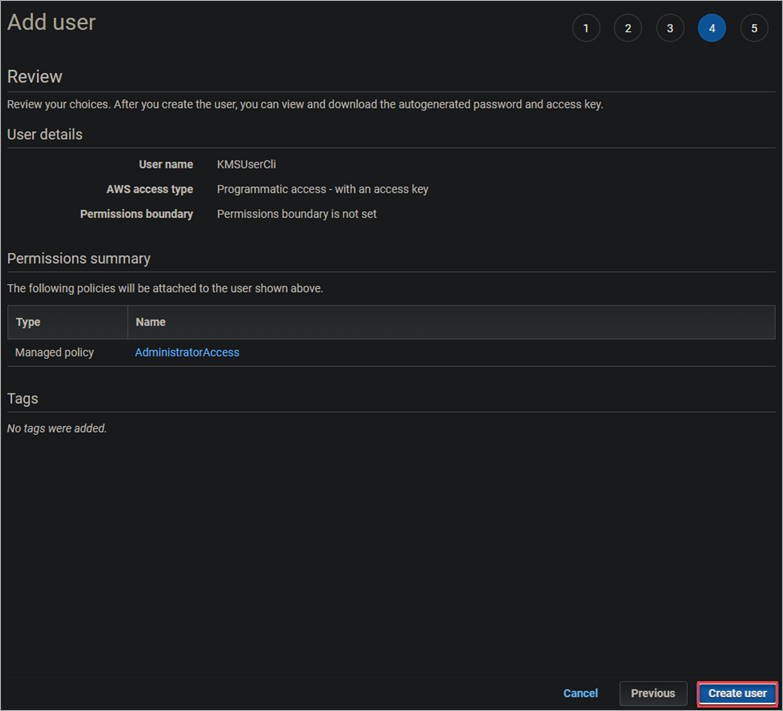
7. Ensure that the AdministratorAccess policy is selected and click Create user to finish creating your new IAM user.

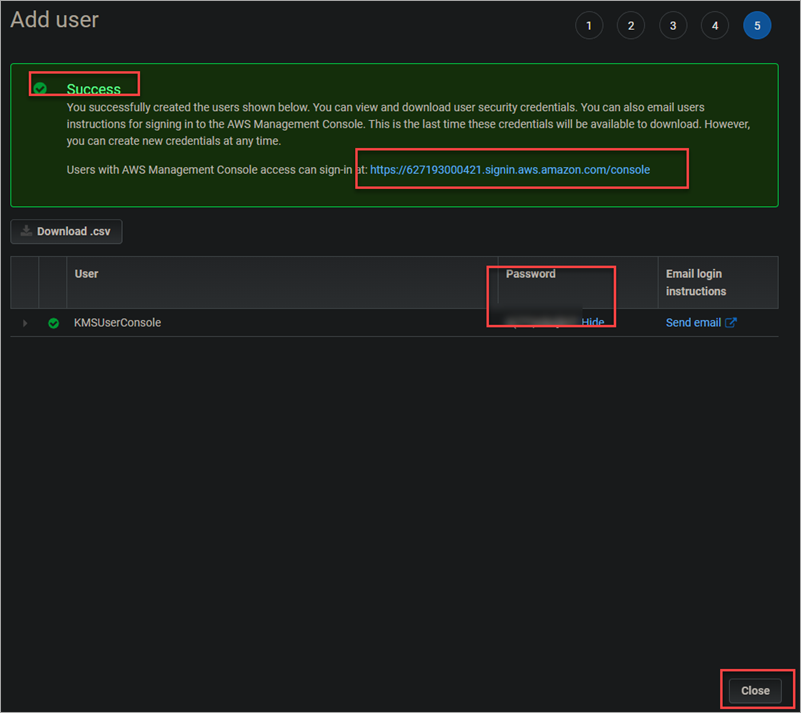
8. The IAM user creation ends after a few minutes, and you will see a Success banner message.
Copy or download the password somewhere safe because you will need it to log in as this new IAM user later.
Click on the URL next to the message to navigate to the IAM user sign-in page.
Click Close to close the message window.
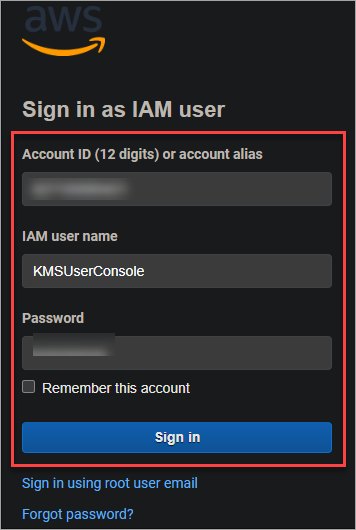
9. On the next page, enter the username and password you just generated and click Sign in to log in as your new IAM user.
Creating a KMS Key Using the AWS Console
Now that you’ve logged in to the AWS Management Console as your IAM user, you’re ready to create your first KMS key.
Follow these steps to create a KMS key using the AWS console.
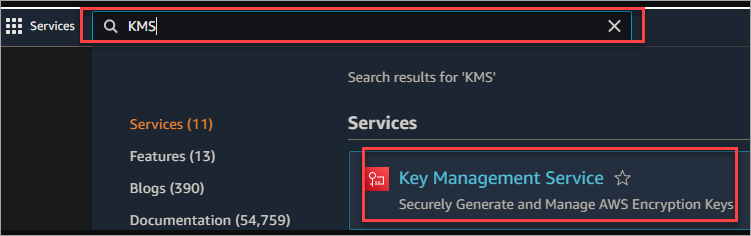
1. Type KMS into the Find services search bar. Select Key Management Service from the results to open the KMS console.
2. Click on Customer managed keys in the left-hand sidebar > Create key to create a new KMS key.

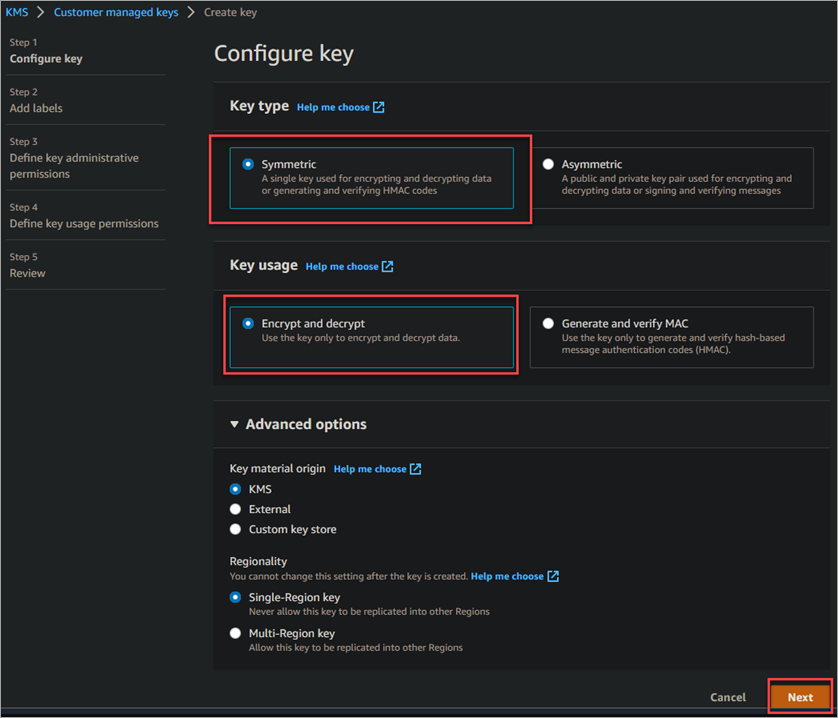
3. Do the following on the next screen.
Key type: Select Symmetric. This type of key is for encryption and decryption and works best for most use cases.
Key usage: Select Encryption and decryption. This key usage allows you to use your key for encryption and decryption.
Keep all others settings as their default values and click Next.
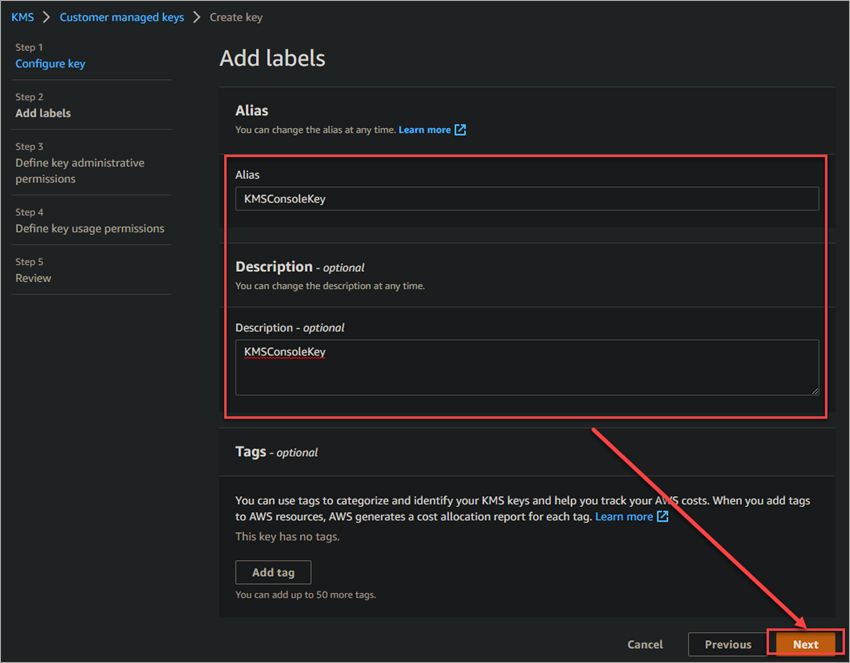
4. Enter an Alias for your key. This alias will help you quickly identify your key in the KMS console. The alias must be between 1 and 256 characters long and can only contain alphanumeric characters, hyphens (-), and underscores (_).
The alias can not start with aws/ since this prefix is reserved for AWS-managed keys. You will get the following error message if you try to use this prefix.

Enter a Description for your key. This field is optional, but it’s always a good idea to include a description so you can remember the key’s usage for later.
Keep all others settings as their default values and click Next to continue.
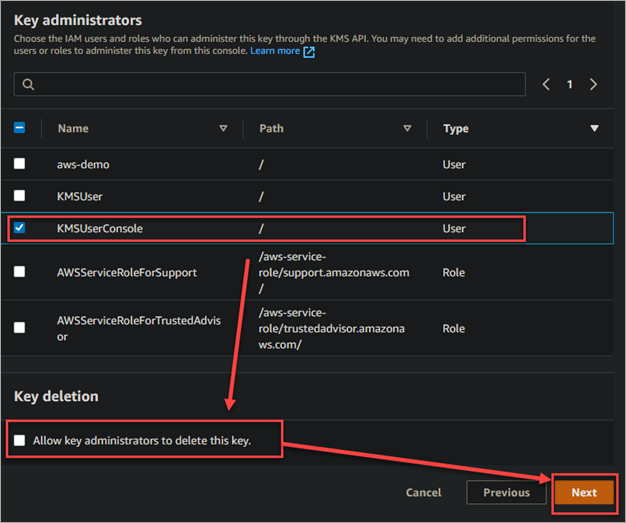
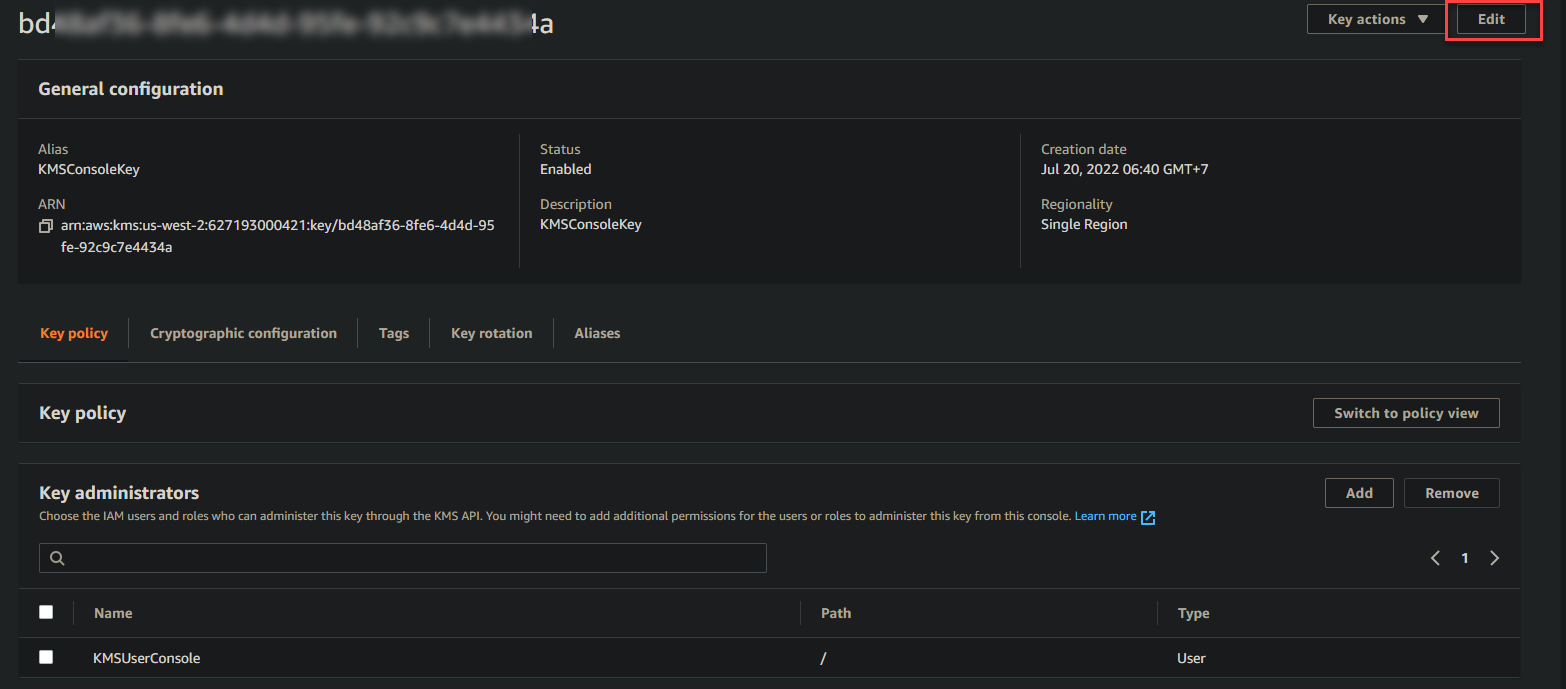
5. Select the checkbox next to the user you created earlier, KMSUserConsole. This user will be the only one who has access to use this key.
Keep the Allow key administrators to delete this key unchecked since you will not want anyone to delete your key.
Click Next to continue.
Select the user you created earlier, KMSUserConsole, and click next. This action lets your user use the key in cryptographic operations, like encrypting and decrypting data.
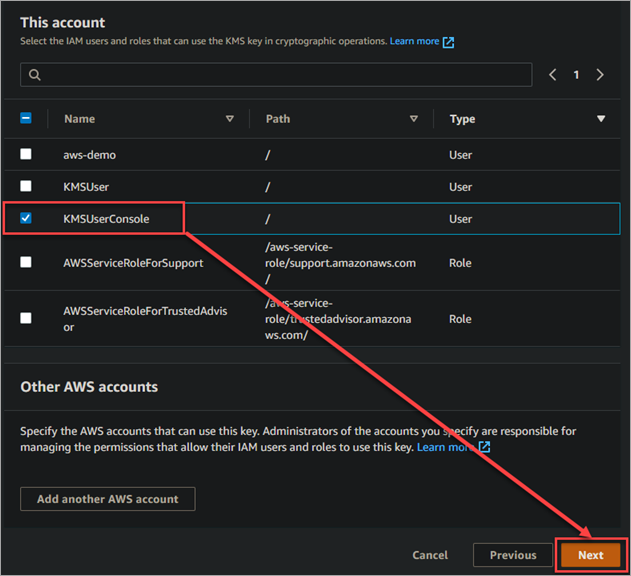
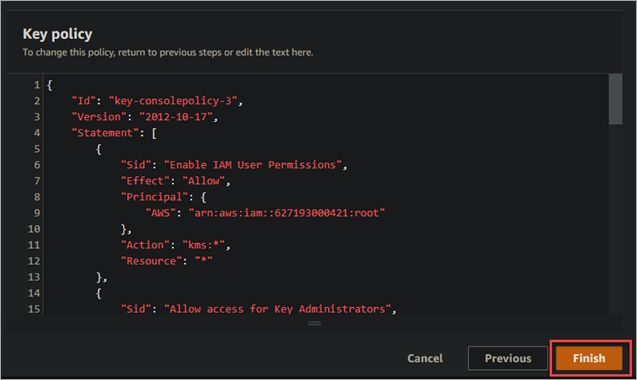
7. Finally, click on the Finish button to complete the key creation process.
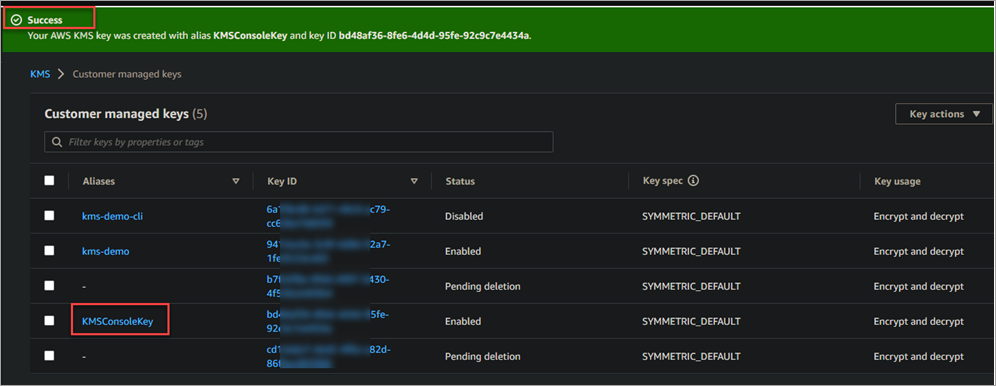
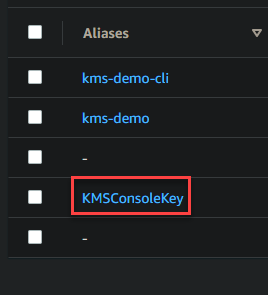
Your new KMS key will now appear in the customer-managed keys section of the KMS console. You can see information about your key, such as when the status, key ID, alias, etc.
Managing KMS Keys Using the AWS Console
Now that you’ve created a KMS key, the following sections show you about managing them using the AWS console.
Editing a KMS Key
You can edit a KMS key at any time to change its settings. To do this, follow these steps:
1. Click on the hyperlink of the key you want to edit. This action opens the key details page.
2. Click on the Edit button in the upper right-hand corner of the page.
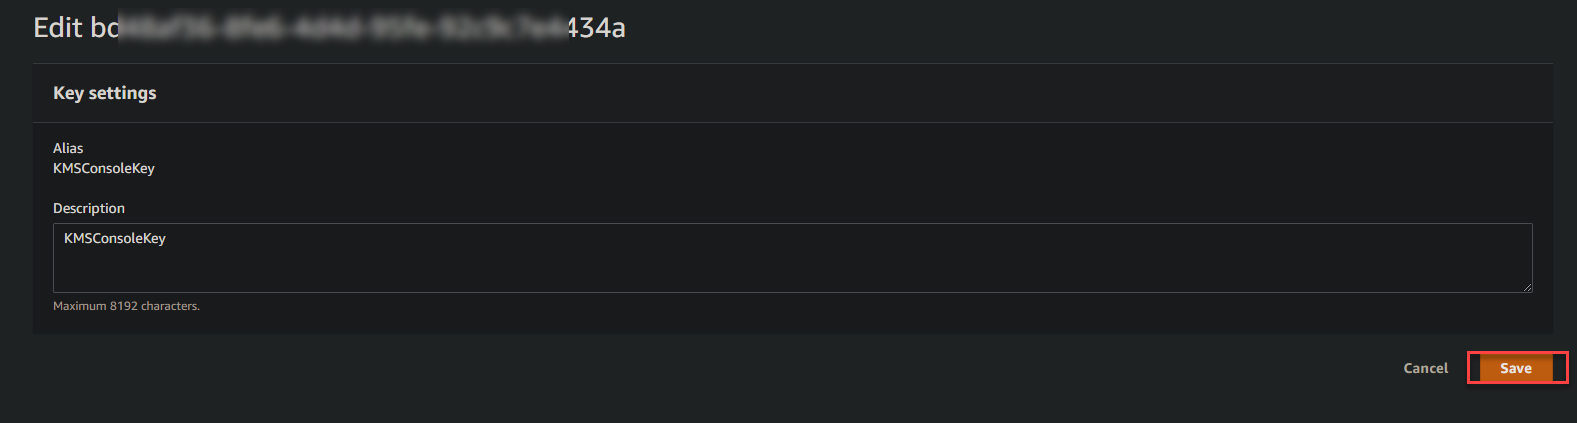
3. Make any changes you want to make to the key and click Save. You must know that the only thing you can change is the description.
Disabling and Enabling a KMS Key
You can disable and enable a KMS key at any time. By default, all keys are enabled when they are first created. Suppose a key may have been compromised. It’s a good idea to disable the key until you investigate further.
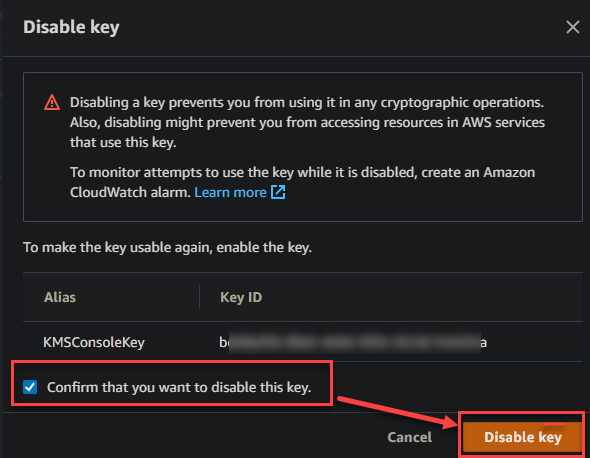
1. Tick the checkbox next to the key you want to disable and click Key actions → Disable.
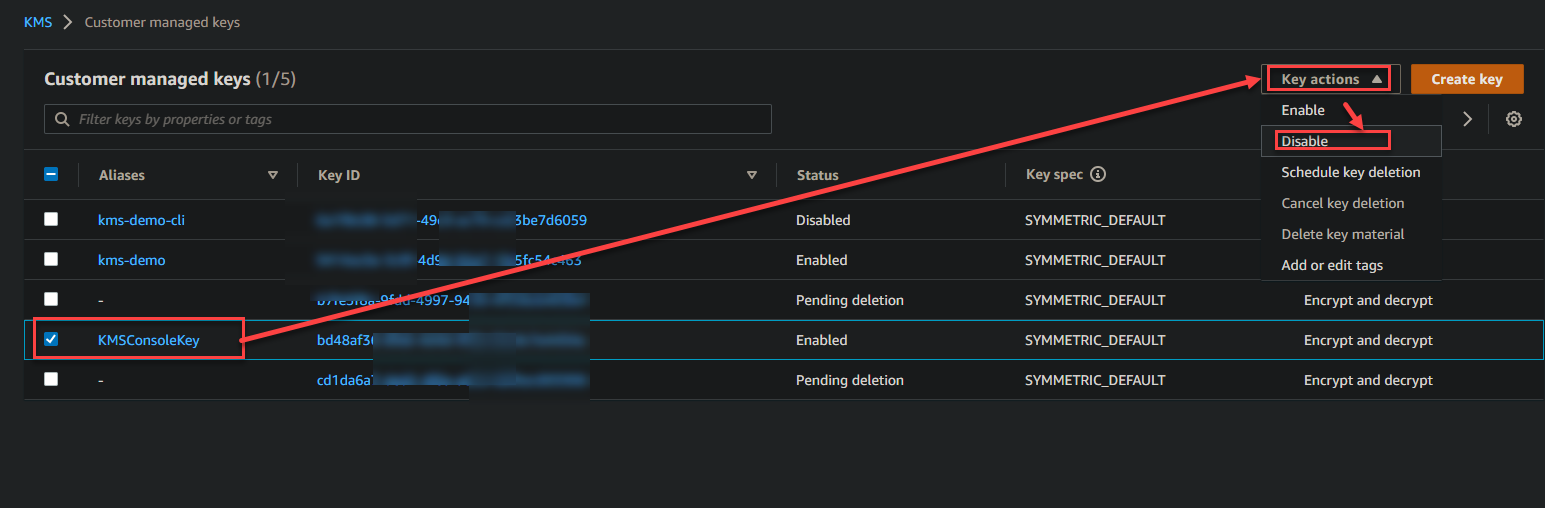
2. A window asks you to confirm that you want to disable the key. Click the checkbox next to Confirm that you want to disable this key and click Disable.
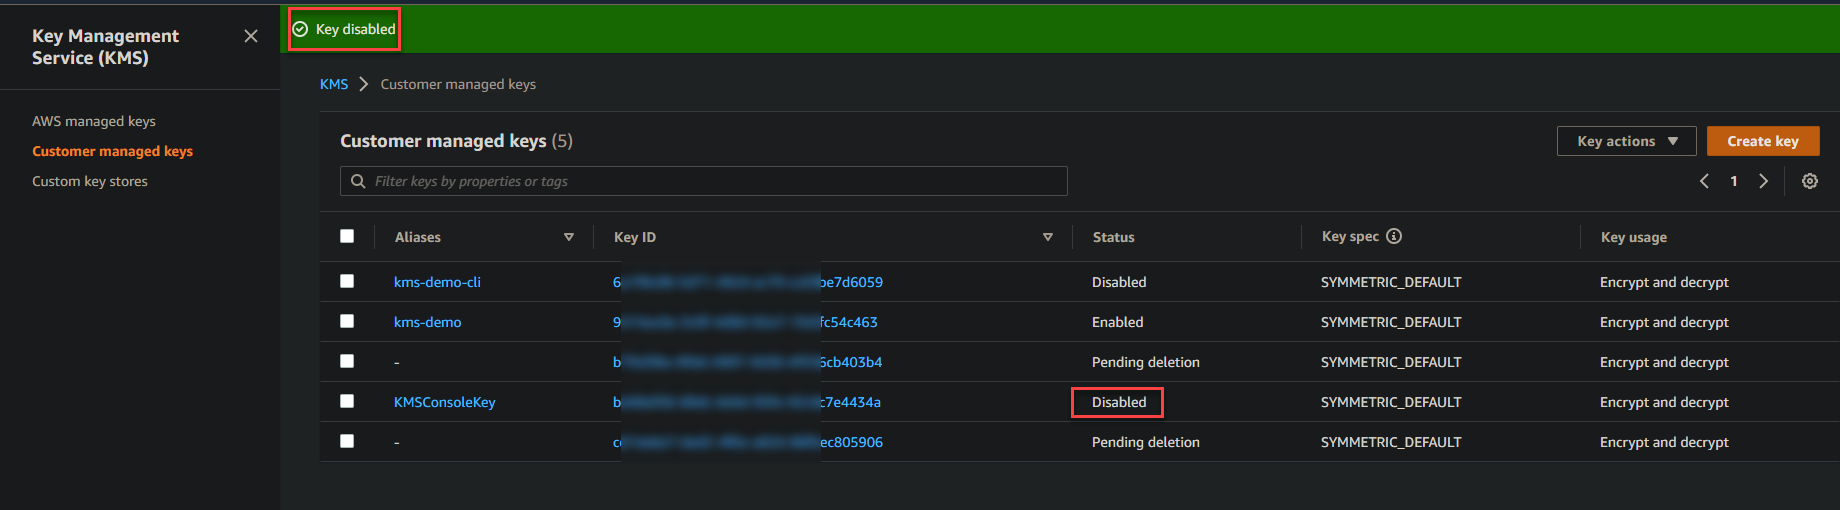
The key is now disabled, and you will see a message on the key details page. The status of the key will also change to Disabled, as shown below.
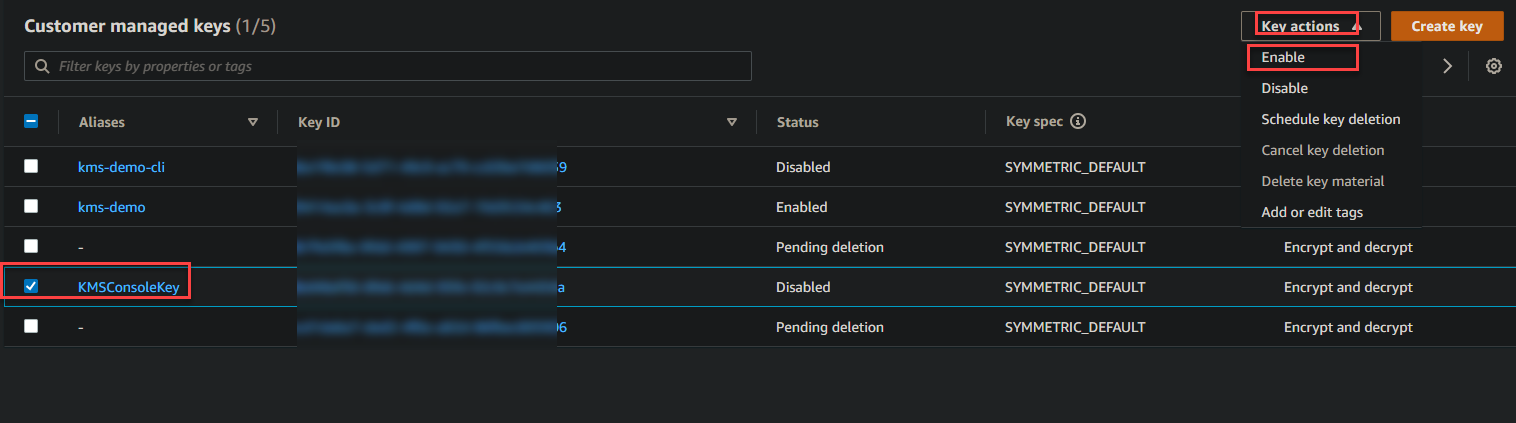
3. When your investigation is complete, you can re-enable a key, and you’re ready to start using the key again. Tick the checkbox next to the key you want to enable → Key actions → Enable.
Creating a KMS Key Using the AWS CLI
Big fan of using the AWS CLI? Good for you! You can also create a KMS key using the AWS CLI. This section will teach you how to create an IAM user with programmatic access.
After creating the user, you will store the credentials in an AWS profile. You will interact with AWS with that profile to create a KMS key.
Creating an IAM User with Programmatic Access
You need an IAM user with programmatic access to authenticate using the AWS CLI without a password. Programmatic access uses access keys, a combination of an access key ID and a secret access key to make API calls.
Follow these steps to create an IAM user with programmatic access
1. Create a new IAM user named KMSUserCli in the AWS Console. Refer to the earlier Creating an IAM User section (steps 1 to 4).
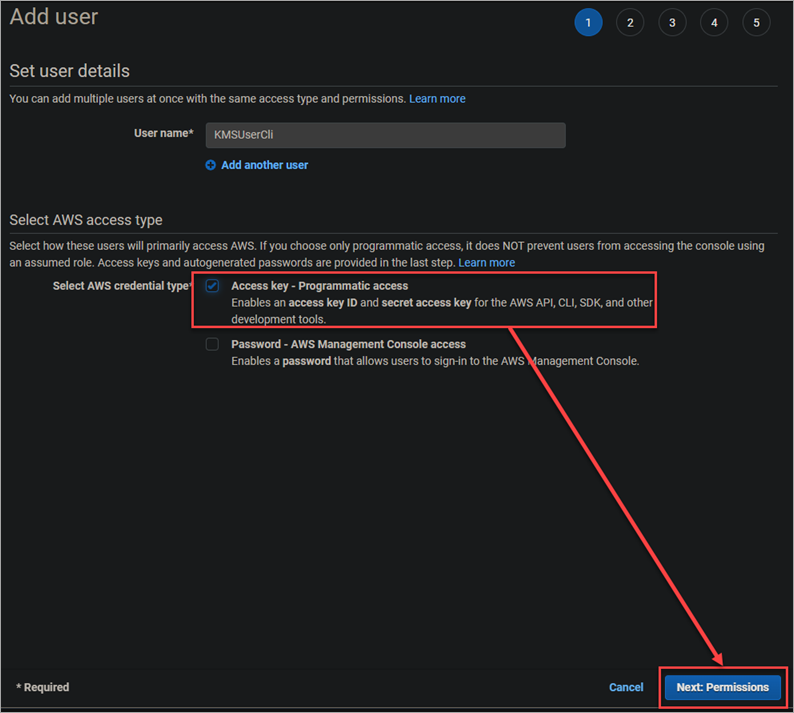
2. When you reach the Select AWS access type, select Programmatic access and click Next: Permissions.
3. Select Attach existing policies directly. Tick the checkbox next to AdministratorAccess and click Next: Tags.
4. Skipping adding tags and click Next: Review.
5. Finally, click Create user to create the user.
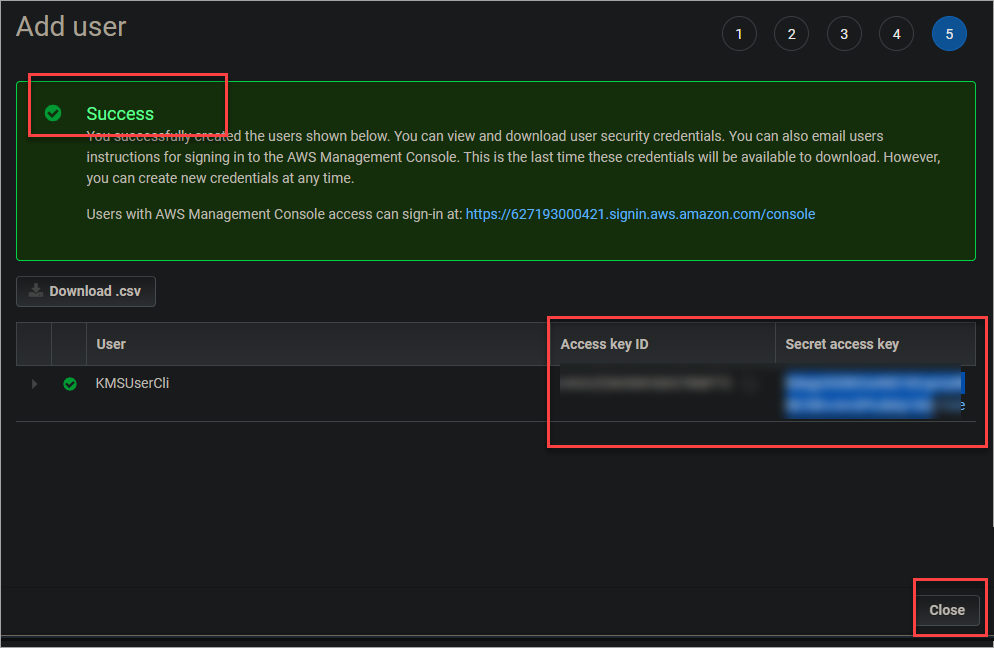
Once the process completes, you will see a screen similar to the one below, with your new user’s access key ID and secret access key. These are the keys that you will use to configure the AWS CLI. Be sure to store these keys in a safe place, as you cannot view them again after this page!
Don’t share those keys in public CI/CD pipelines or comments on GitHub or other public forums!
Configuring the AWS CLI Profile
Now that you have created an IAM user, you need to set up your AWS profile on your machine so that you can access the AWS Key Management Service using the credentials for that user.
Follow these steps to configure your AWS profile:
1. Open PowerShell or Command Prompt as an administrator.
2. Run the below command to verify if you have the AWS CLI installed. You will see something similar to the screenshot below if it is installed.
aws --version
3. Now, run the below command to set up your new profile.
aws configure4. At the prompt, enter the following information.
- AWS Access Key ID: Enter the access key ID for the IAM user you created earlier.
- AWS Secret Access Key: Enter the secret access key for the IAM user you created earlier.
- Default region name: Enter your preferred region. For this tutorial, you will use us-west-2.
- Default output format: Enter JSON. Output in JSON format is easier to read.

Creating a KMS Key Using The AWS CLI
Now that you have an IAM user with programmatic access, you can start creating a KMS key.
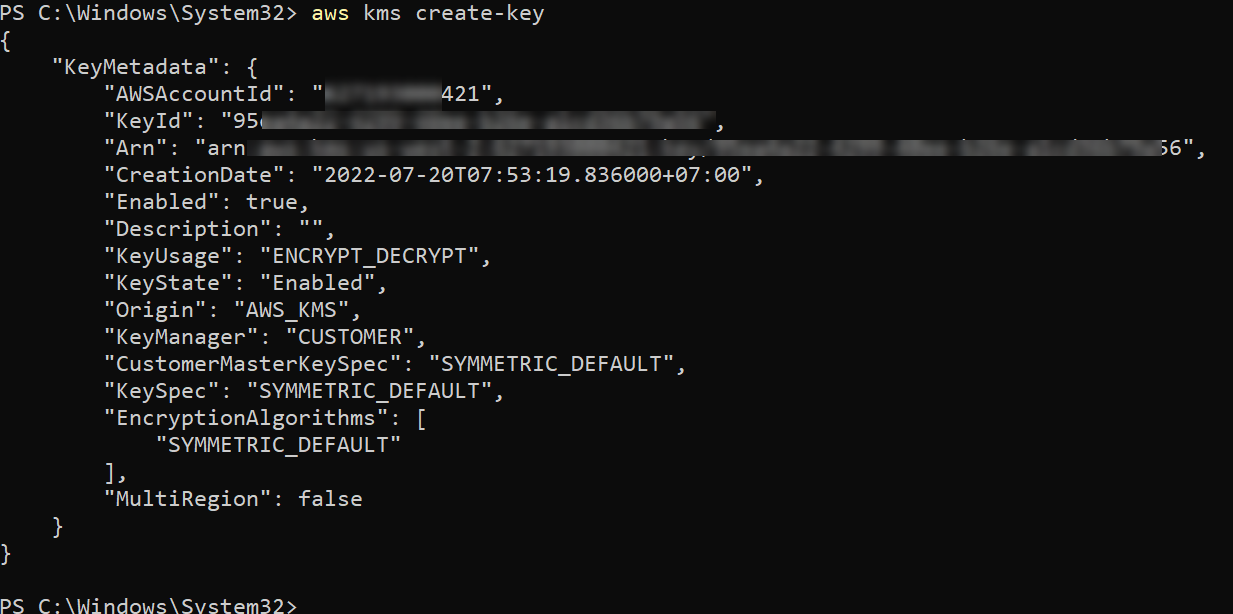
Run the following command to create a new KMS key.
aws km create-key
You will see an output similar to the one below. The KeyId is the identifier of your new KMS key. Note it down as you will need it later.
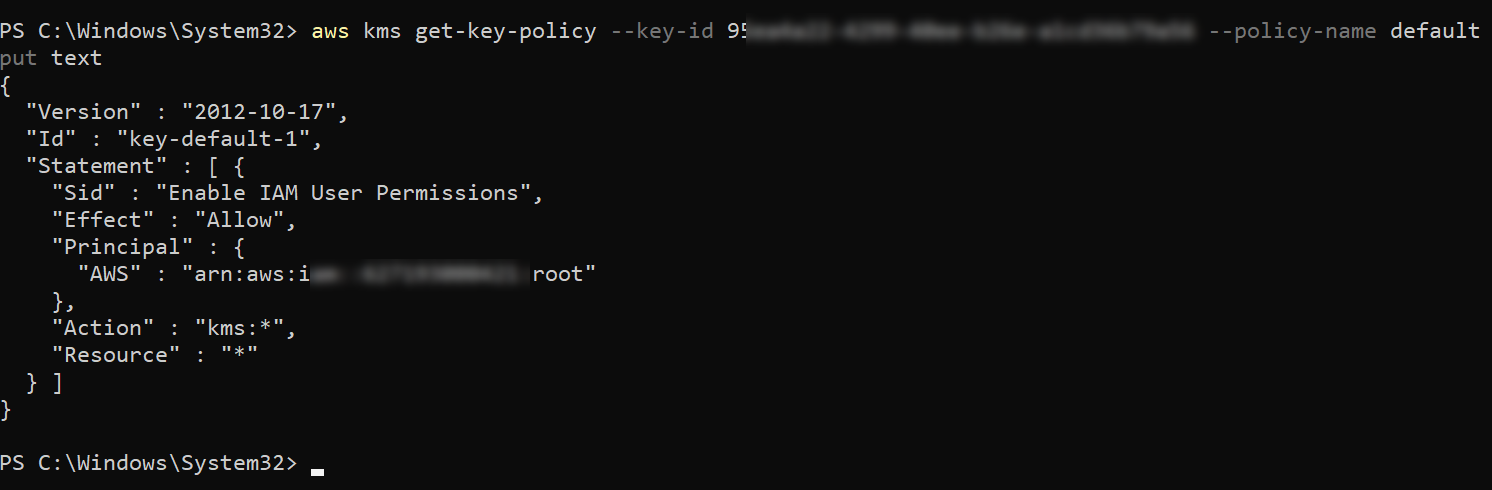
Since you don’t explicitly specify a key policy, AWS KMS creates a default key policy for the new key. This policy gives full control of the key to the root user, including the ability to create AWS Identity and Access Management (IAM) users and roles.
Run the following command to retrieve the key policy of your new KMS key. Replace the --key-id argument with the actual KeyId of your new KMS key. This command returns a text document that contains the key policy of your new KMS key.
aws km get-key-policy --key-id you_KeyId_here --policy-name default --output text
The output should look something like the one below.
Managing KMS Keys Using the AWS CLI
Now that you have created a KMS key, you can learn how to manage it using the AWS CLI. This section will teach you how to list, disable, and enable a KMS key.
You can disable and enable a KMS key at any time. Disabling a KMS key is useful when you want to investigate potential misuse or if you need to stop using the key for any other reason temporarily.
1. Run the following command to disable a KMS key. Replace the –key-id argument with the actual KeyId of your KMS key. This command doesn’t have any output.
aws aws kms disable-key --key-id you_KeyId_here
2. To verify that the key is disabled, run the following command. The output should include the “KeyState”: “Disabled” field, as shown.
aws kms describe-key --key-id you_KeyId_here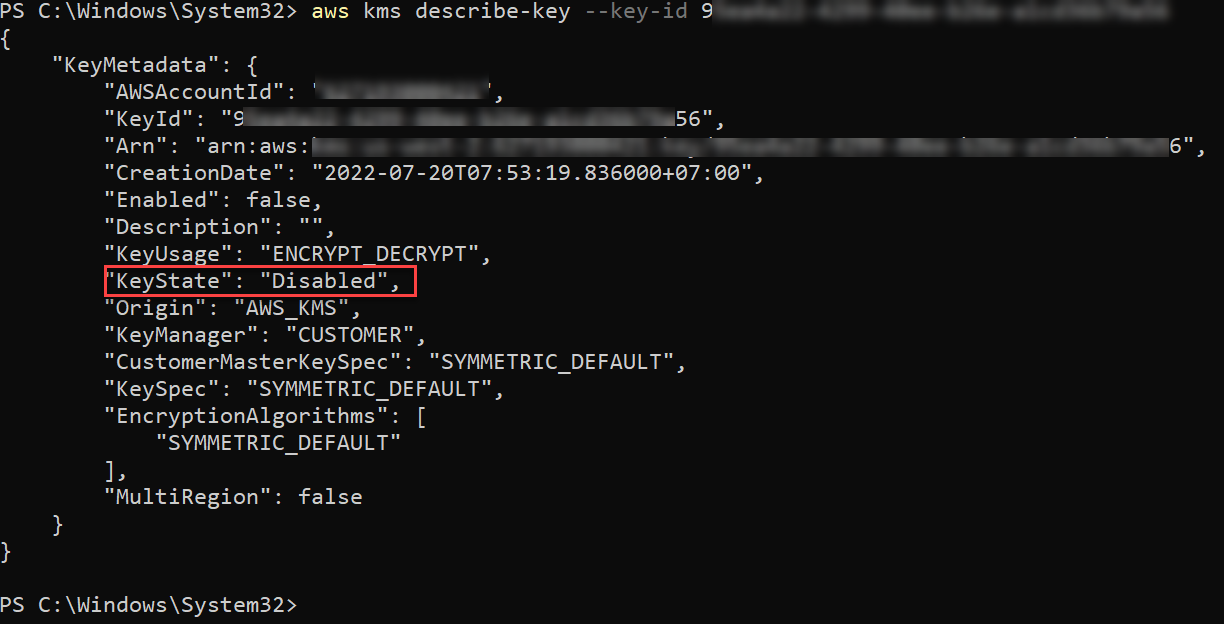
3. To enable the key, run the following command. Again, this command doesn’t have any output.
aws kms enable-key --key-id you_KeyId_here
aws kms describe-key --key-id you_KeyId_here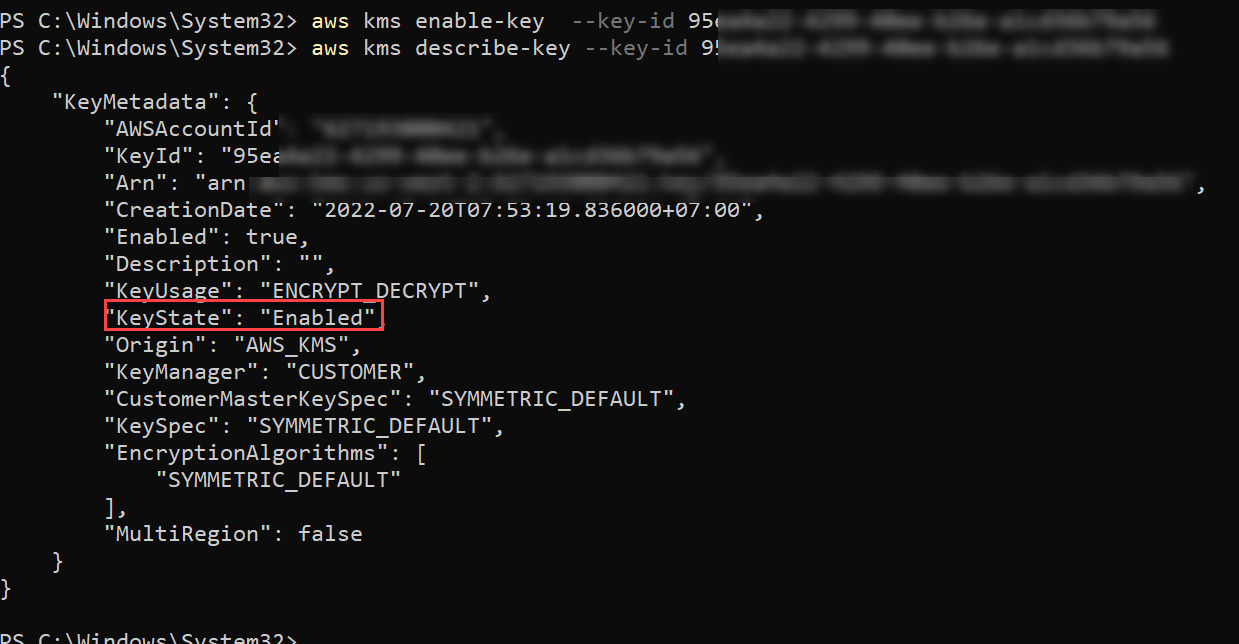
4. Finally, run the following command to list all the KMS keys in your account. The output includes information such as the keyId and KeyArn of each key.
aws kms list-keys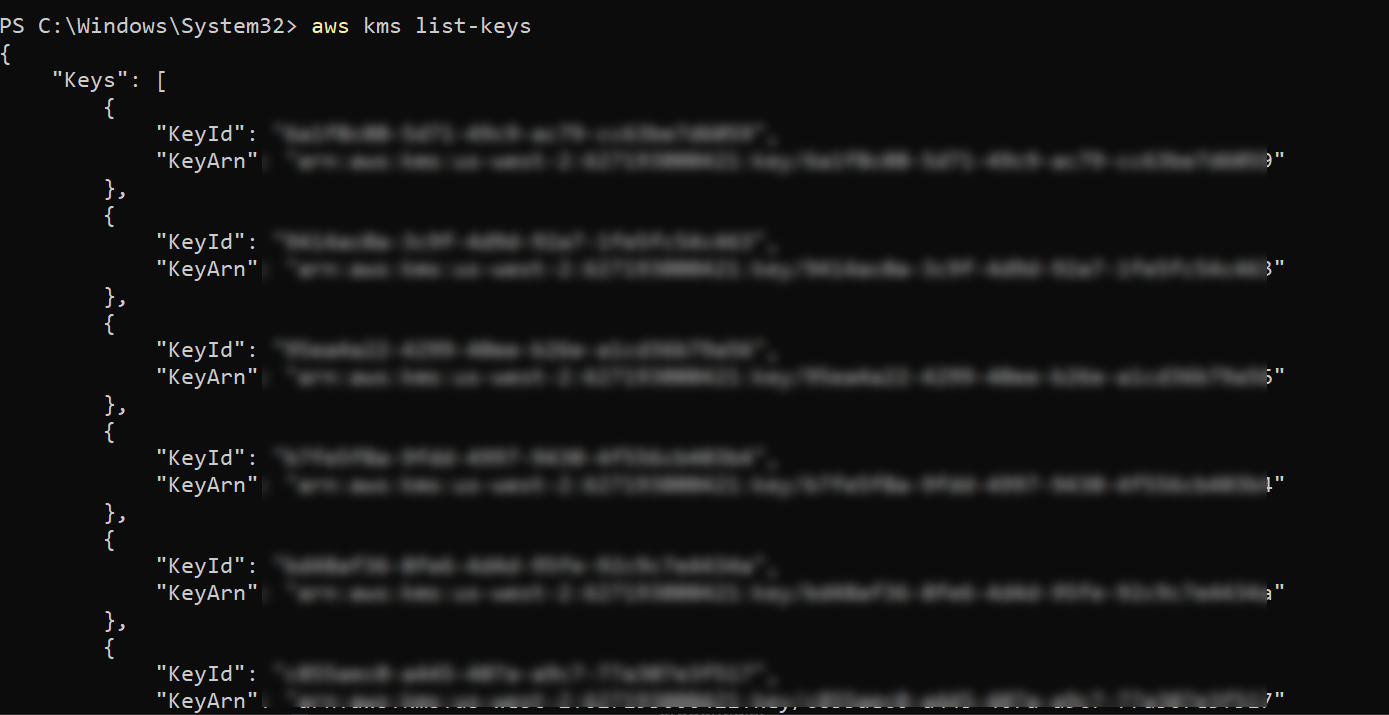
Conclusion
In this article, you learned how to create and manage KMS keys using the AWS CLI and the AWS console. You also learned how to create an IAM user with programmatic access allowing AWS CLI to manage your KMS keys.
AWS key management skill is essential for anyone who works with AWS, especially if you are responsible for managing sensitive data. Following the steps in this article, you should now have the skills you need to start using AWS KMS.
With this newfound knowledge, why not create AWS KMS resources with AWS CloudFormation to save time and effort?


