


Domain Name Server (DNS) is a critical component of the internet infrastructure, and building your DNS server can be challenging. Well, not with BIND, where you can create your BIND DNS server in no time. BIND has an excellent reputation among administrators for its flexibility and high availability support.
In this article, you’ll learn how to install and configure a secure BIND DNS Server and verify that sub-domains are resolved to the correct IP address.
Read on and create your DNS server with no sweat!
Prerequisites
This tutorial will be a hands-on demonstration. To follow along, ensure you have the following.
- A Linux server – This example uses the Ubuntu 20.04 server.
- A non-root user with root privileges or root/administrator user.
- A domain name pointed to the server IP address – This demo uses the atadomain.io domain and server IP address 172.16.1.10.
Installing BIND Packages
The default Ubuntu repository provides BIND packages but doesn’t come installed with your system. You can install BIND as the main DNS Server or authoritative only. BIND gives you powerful features, such as master-slave installation support, DNSSEC support, and built-in Access Control Lists (ACL).
To get started with BIND DNS, you’ll first need to install the BIND packages on your machine with the apt package manager.
1. Open your terminal and log in to your server.
2. Next, run the apt update command below to update and refresh the repository package index. This command ensures that you are installing the latest version of packages.
sudo apt update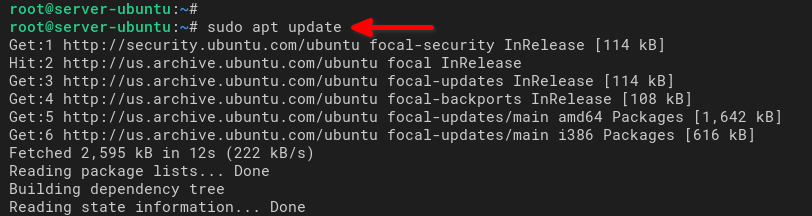
3. Once updated, run the below apt install command to install BIND packages for the Ubuntu server.
The bind9-utils and bind9-dnsutils packages provide additional command-line tools for BIND. These packages are useful for testing and managing the BIND DNS server.
sudo apt install bind9 bind9-utils bind9-dnsutils -y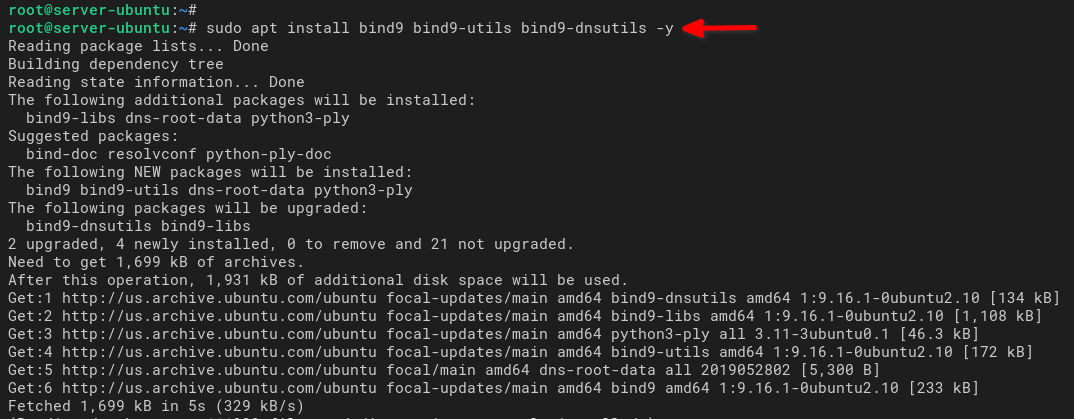
4. Lastly, run the systemctl command below to verify the BIND service.
The BIND package comes with the service named and is automatically started and enabled during the BIND package installation.
# Check if named service enabled
sudo systemctl is-enabled named

# Check named service status
sudo systemctl status named
Now you should see the BIND named service is enabled with the status as active (running). At this point, the BIND service will run automatically at system startup/boot.

Configuring BIND DNS Server
You’ve now installed BIND packages on the Ubuntu server, so it’s time to set up the BIND installation on your Ubuntu server. How? By editing BIND and the named service’s configurations.
All configuration for BIND is available at the /etc/bind/ directory, and configurations for the named service at /etc/default/named.
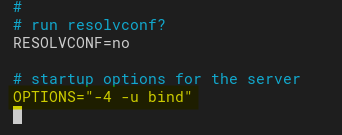
1. Edit the /etc/default/named configuration using your preferred editor and add option -4 on the OPTIONS line, as shown below. This option will run the named service on IPv4 only.
OPTIONS="-4 -u bind"Save the changes you made and close the file.
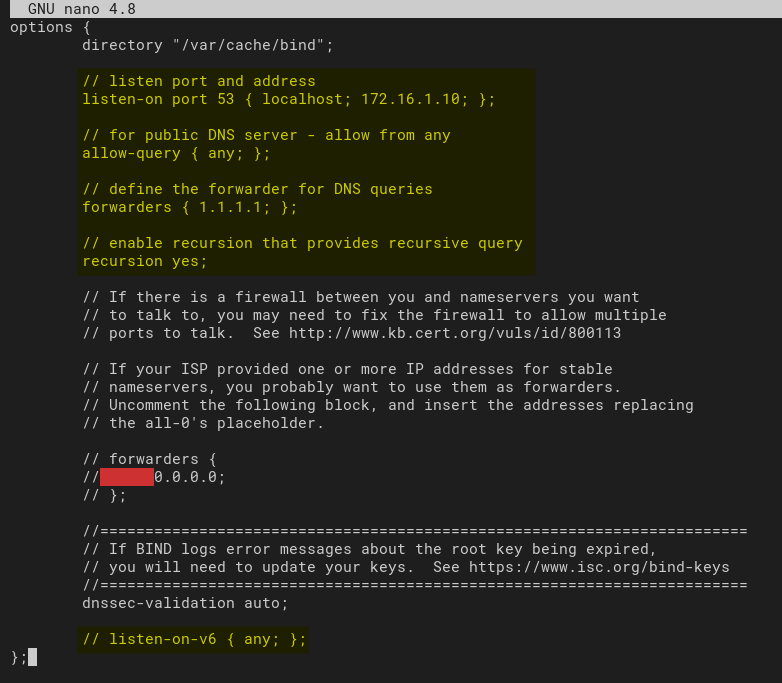
2. Next, edit the /etc/bind/named.conf.options file and populate the following configuration below the directory "/var/cache/bind"; line.
This configuration sets the BIND service to run on default UDP port 53 on the server’s localhost and public IP address (172.16.1.10). At the same time, it allows queries from any host to the BIND DNS server using the Cloudflare DNS 1.1.1.1 as the forwarder.
    // listen port and address
    listen-on port 53 { localhost; 172.16.1.10; };

    // for public DNS server - allow from any
    allow-query { any; };

    // define the forwarder for DNS queries
    forwarders { 1.1.1.1; };

    // enable recursion that provides recursive query
    recursion yes;
At the bottom, comment out the listen-on-v6 { any; }; line, as shown below, to disable the named service from running on IPv6.
3. Lastly, run the following command to verify the BIND configuration.
sudo named-checkconfIf there’s no output, the BIND configurations are correct without any error.

Setting Up DNS Zones
At this point, you’ve configured the basic configuration of the BIND DNS Server. You’re ready to create a DNS Server with your domain and add other sub-domains for your applications. You’ll need to define and create a new DNS zones configuration to do so.
In this tutorial, you’ll create a new Name Server (ns1.atadomain.io) and sub-domains (www.atadomain.io, mail.atadomain.io, vault.atadomain.io).
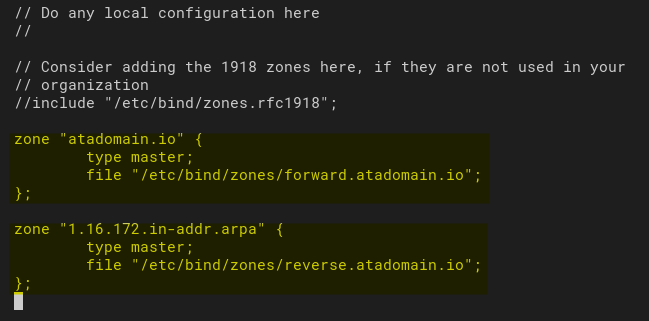
1. Edit the /etc/bind/named.conf.local file using your preferred editor and add the following configuration.
This configuration defines the forward zone (/etc/bind/zones/forward.atadomain.io), and the reverse zone (/etc/bind/zones/reverse.atadomain.io) for the atadomain.io domain name.
zone "atadomain.io" {
    type master;
    file "/etc/bind/zones/forward.atadomain.io";
};

zone "1.16.172.in-addr.arpa" {
    type master;
    file "/etc/bind/zones/reverse.atadomain.io";
};
Save the changes and close the file.
2. Next, run the below command to create a new directory (/etc/bind/zones) for string DNS zones configurations.
mkdir -p /etc/bind/zones/3. Run each command below to copy the default forward and reverse zones configuration to the /etc/bind/zones directory.
# Copy default forward zone
sudo cp /etc/bind/db.local /etc/bind/zones/forward.atadomain.io

# Copy default reverse zone
sudo cp /etc/bind/db.127 /etc/bind/zones/reverse.atadomain.io

# List contents of the /etc/bind/zones/ directory
ls /etc/bind/zones/
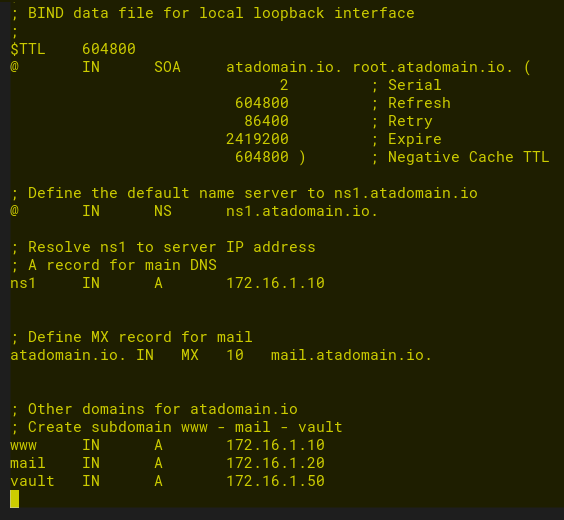
4. Now, edit the forward zone configuration (/etc/bind/zones/forward.atadomain.io) using your preferred editor and populate the configuration below.
The forward zone configuration is where you define your domain name and the server IP address. This configuration will translate the domain name to the correct IP address of the server.
The configuration below creates the following name server and sub-domains:
ns1.atadomain.io– The main Name Server for your domain with the IP address172.16.1.10.
- MX record for the
atadomain.iodomain that is handled by themail.atadomain.io. The MX record is used for the mail server.
- Sub-domains for applications:
www.atadomain.io,mail.atadomain.io, andvault.atadomain.io.
;
; BIND data file for the local loopback interface
;
$TTL    604800
@       IN      SOA     atadomain.io. root.atadomain.io. (
                            2         ; Serial
                        604800         ; Refresh
                        86400         ; Retry
                        2419200         ; Expire
                        604800 )       ; Negative Cache TTL

; Define the default name server to ns1.atadomain.io
@       IN      NS      ns1.atadomain.io.

; Resolve ns1 to server IP address
; A record for the main DNS
ns1     IN      A       172.16.1.10


; Define MX record for mail
atadomain.io. IN   MX   10   mail.atadomain.io.


; Other domains for atadomain.io
; Create subdomain www - mail - vault
www     IN      A       172.16.1.10
mail    IN      A       172.16.1.20
vault   IN      A       172.16.1.50
Save the changes and close the file.
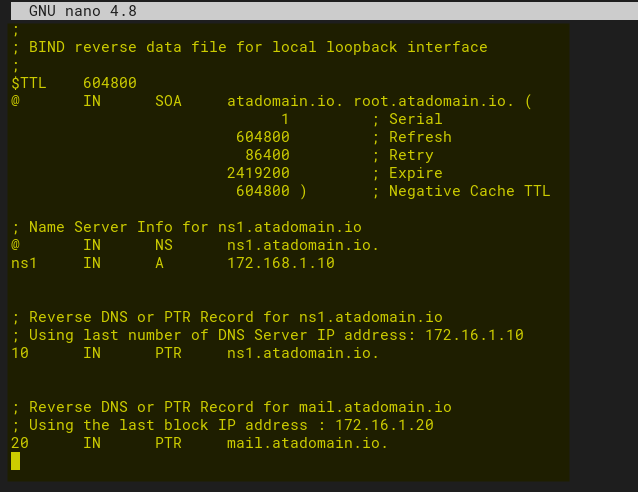
5. Like the forward zone, edit the reverse zone configuration file (/etc/bind/zones/reverse.atadomain.io) and populate the following configuration.
The reverse zone translates the server IP address to the domain name. The reverse zone or PTR record is essential for services like the Mail server, which affects the Mail server’s reputation.
The PTR record uses the last block of the IP address, like the PTR record with the number 10 for the server IP address 172.16.1.10.
This configuration creates the reverse zone or PTR record for the following domains:
- Name server
ns1.atadomain.iowith the reverse zone or PTR record172.16.1.10.
- PTR record for the domain
mail.atadomain.ioto the server IP address172.16.1.20.
;
; BIND reverse data file for the local loopback interface
;
$TTL    604800
@       IN      SOA     atadomain.io. root.atadomain.io. (
                            1         ; Serial
                        604800         ; Refresh
                        86400         ; Retry
                        2419200         ; Expire
                        604800 )       ; Negative Cache TTL

; Name Server Info for ns1.atadomain.io
@       IN      NS      ns1.atadomain.io.


; Reverse DNS or PTR Record for ns1.atadomain.io
; Using the last number of DNS Server IP address: 172.16.1.10
10      IN      PTR     ns1.atadomain.io.


; Reverse DNS or PTR Record for mail.atadomain.io
; Using the last block IP address: 172.16.1.20
20      IN      PTR     mail.atadomain.io.
Save the changes and close the file.
6. Now, run the following commands to check and verify BIND configurations.
# Checking the main configuration for BIND
sudo named-checkconf

# Checking forward zone forward.atadomain.io
sudo named-checkzone atadomain.io /etc/bind/zones/forward.atadomain.io

# Checking reverse zone reverse.atadomain.io
sudo named-checkzone atadomain.io /etc/bind/zones/reverse.atadomain.io
When your configuration is correct, you’ll see an output similar below.

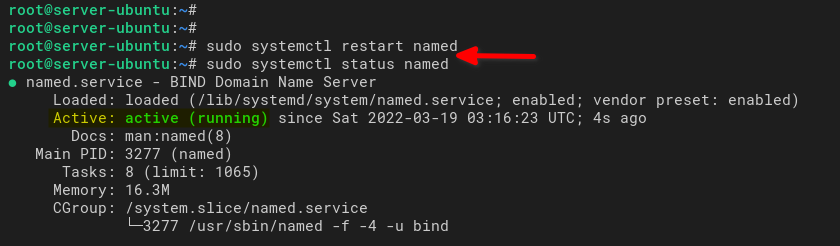
7. Lastly, run the systemctl command below to restart and verify the named service. Doing so applies new changes to the named service.
# Restart named service
sudo systemctl restart named

# Verify named service
sudo systemctl status named
Below, you can see the named service status is active (running).
Opening DNS Port with UFW Firewall
At this point, you’ve completed the BIND DNS Server installation. But you still have to secure your DNS Server. You’ll set up the UFW firewall and open the DNS port for any queries to the server. Doing so allows clients to make a query to the BIND DNS server.
For security reasons, it’s recommended to run and enable the UFW firewall on your Ubuntu server.
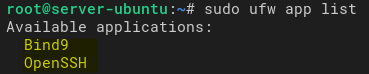
1. Run the ufw command below to check available applications on the UFW firewall.
sudo ufw app listYou should see the Bind9 on the UFW application list below.
2. Now run the below command to allow the Bind9 to the UFW firewall.
sudo ufw allow Bind9
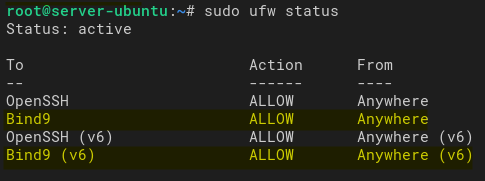
3. Lastly, run the following command to check enabled rules on the UFW firewall.
sudo ufw statusYou should see the Bind9 application on the list like in the screenshot below.
Verifying BIND DNS Server Installation
You’ve now completed the BIND DNS installation and configured the UFW firewall. But how do you verify your DNS Server installation? The dig command will do the trick.
Dig is a command-line utility for troubleshooting DNS Server installation. dig performs DNS lookup for the given domain name and displays detailed answers for the domain name target. On the Ubuntu system, dig is part of the bind9-dnsutil package.
To verify your BIND DNS server installation:
1. Run each dig command below to verify the sub-domains www.atadomain.io, mail.atadomain.io, and vault.atadomain.io.
If your DNS Server installation is successful, each sub-domain will be resolved to the correct IP address based on the forward.atadomain.io configuration.
# Checking the domain names
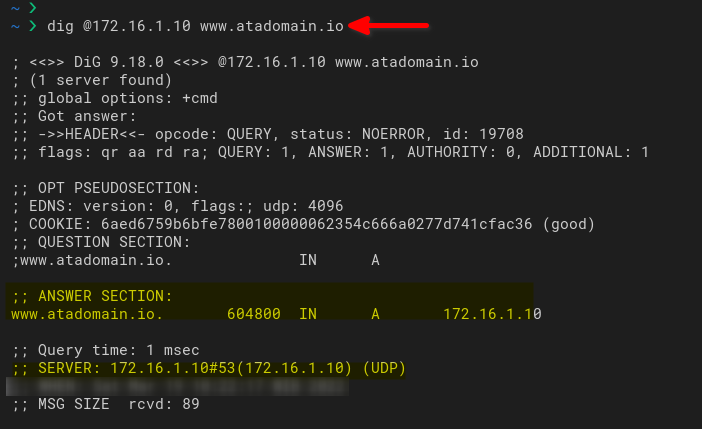
dig @172.16.1.10 www.atadomain.io
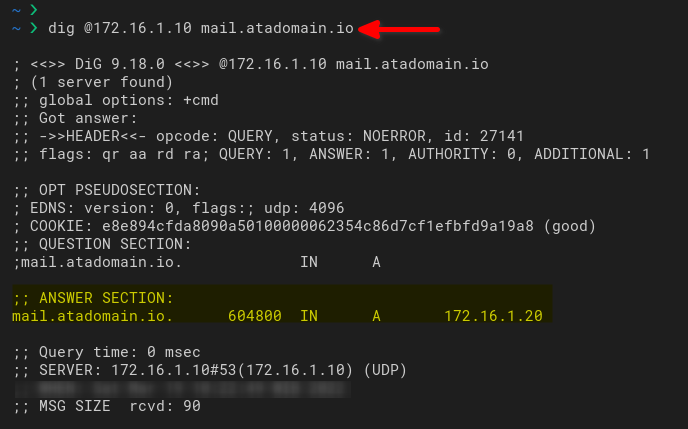
dig @172.16.1.10 mail.atadomain.io
dig @172.16.1.10 vault.atadomain.ioBelow is the output of the sub-domain www.atadomain.io resolved to the server IP address 172.16.1.10.
Below is the sub-domain mail.atadomain.io resolved to the server IP address 172.16.1.20.
And below is the sub-domain vault.atadomain.io resolved to the server IP address 172.16.1.50.

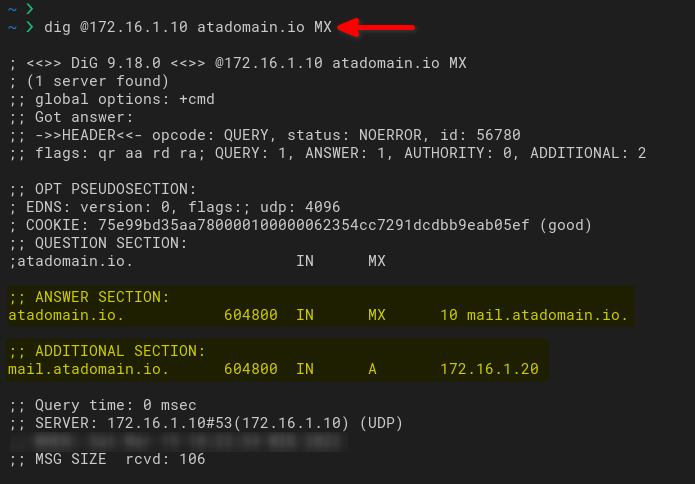
2. Next, run the dig command below to verify the MX record for the atadomain.io domain.
dig @172.16.1.10 atadomain.io MXYou should see the atadomain.io domain has the MX record mail.atadomain.io.
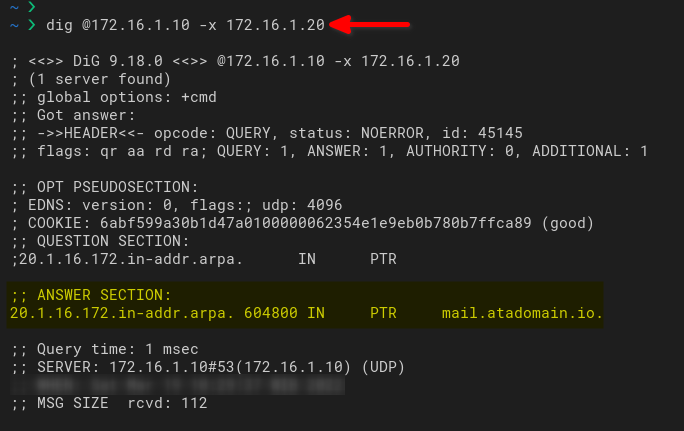
3. Lastly, run the following commands to verify the PTR record or reverse zone for the server IP addresses 172.16.1.10 and 172.16.1.20.
If your BIND installation is successful, each IP address will be resolved to the domain name defined on the reverse.atadomain.io configuration.
# checking PTR record or reverse DNS
dig @172.16.1.10 -x 172.16.1.10
dig @172.16.1.10 -x 172.16.1.20
You can see below, the server IP address 172.16.1.10 is resolved to the domain name ns1.atadomain.io.

As you see below, the server IP address 172.16.1.20 is resolved to the domain name mail.atadomain.io.
Conclusion
Throughout this tutorial, you’ve learned how to create and set up a secure BIND DNS server on your Ubuntu server. You’ve also created the forward and reverse zone for adding your domain and verified DNS servers by running dig commands.
Now, how can you implement a BIND DNS Server in your environment? Perhaps implement BIND as an authoritative server? Or set up high availability with master-slave BIND installation?


