

Protecting your AWS account’s critical resources by setting up multi-factor authentication (MFA) should be a top priority whether your account is at risk or not. How? AWS MFA is a powerful security feature that significantly enhances your AWS account security.
In this tutorial, you will learn how to set up MFA for your AWS account and ensure that only authorized users can access your AWS infrastructure and resources.
Ready? Read on and keep malicious entities off your AWS resources!
Prerequisites
This tutorial houses hands-on demonstrations. To follow along, be sure you have the following in place:
- An AWS account with active billing enabled – Sign up for a free-tier account if you do not have one yet.
- A mobile device (with an internet connection) to use for an authentication app to set up AWS MFA – This tutorial uses an Android device (Xiaomi 9C) as an example. Still, the process is similar for iOS devices.
Creating an IAM User with Password Access
Before setting up AWS MFA, creating an IAM user with password access is crucial. Doing so ensures you have a secure and separate identity to access your AWS resources. You will later employ this particular IAM user for AWS MFA.
An IAM user is an identity within your AWS account that you create and manage to enable secure access to your AWS resources. Each IAM user has unique credentials (i.e., username and password) to sign in to the AWS Management Console and access AWS resources.
To create an IAM user with password access:
1. Open your preferred web browser, sign in to the AWS Management Console as the root user, and navigate to the IAM console.
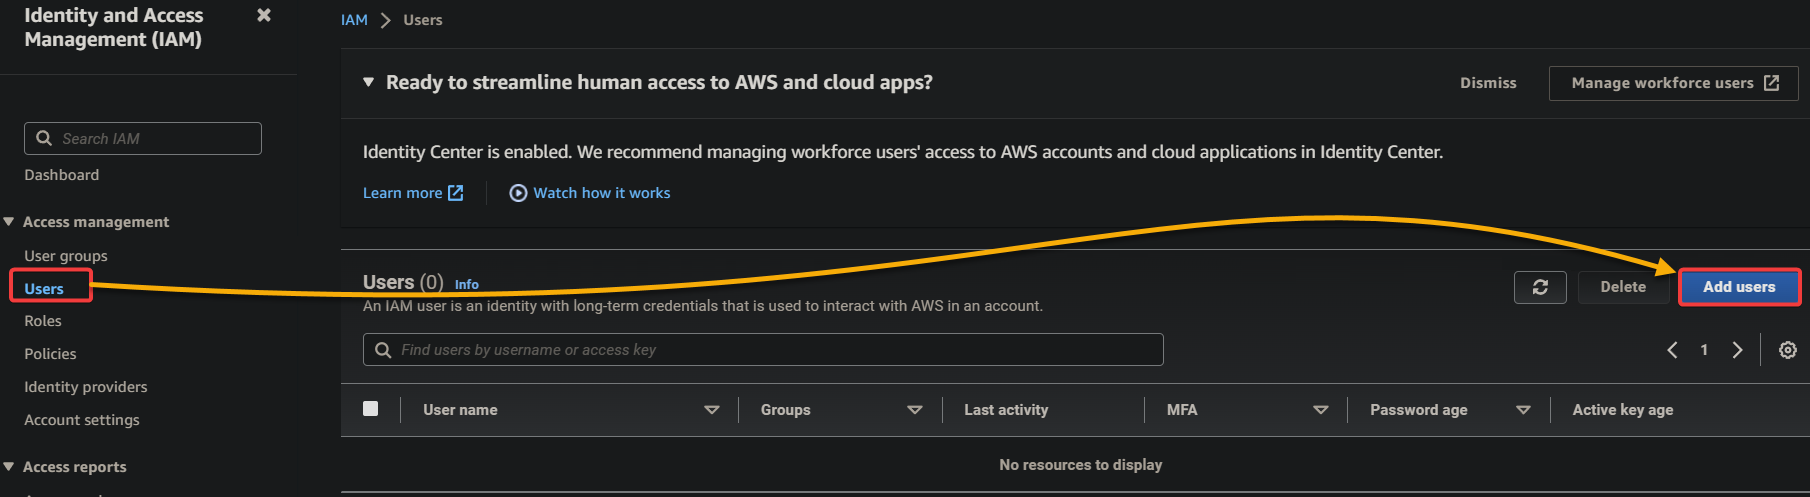
2. On the IAM console, navigate to Users (left pane), and click Add user to initiate adding a new user.
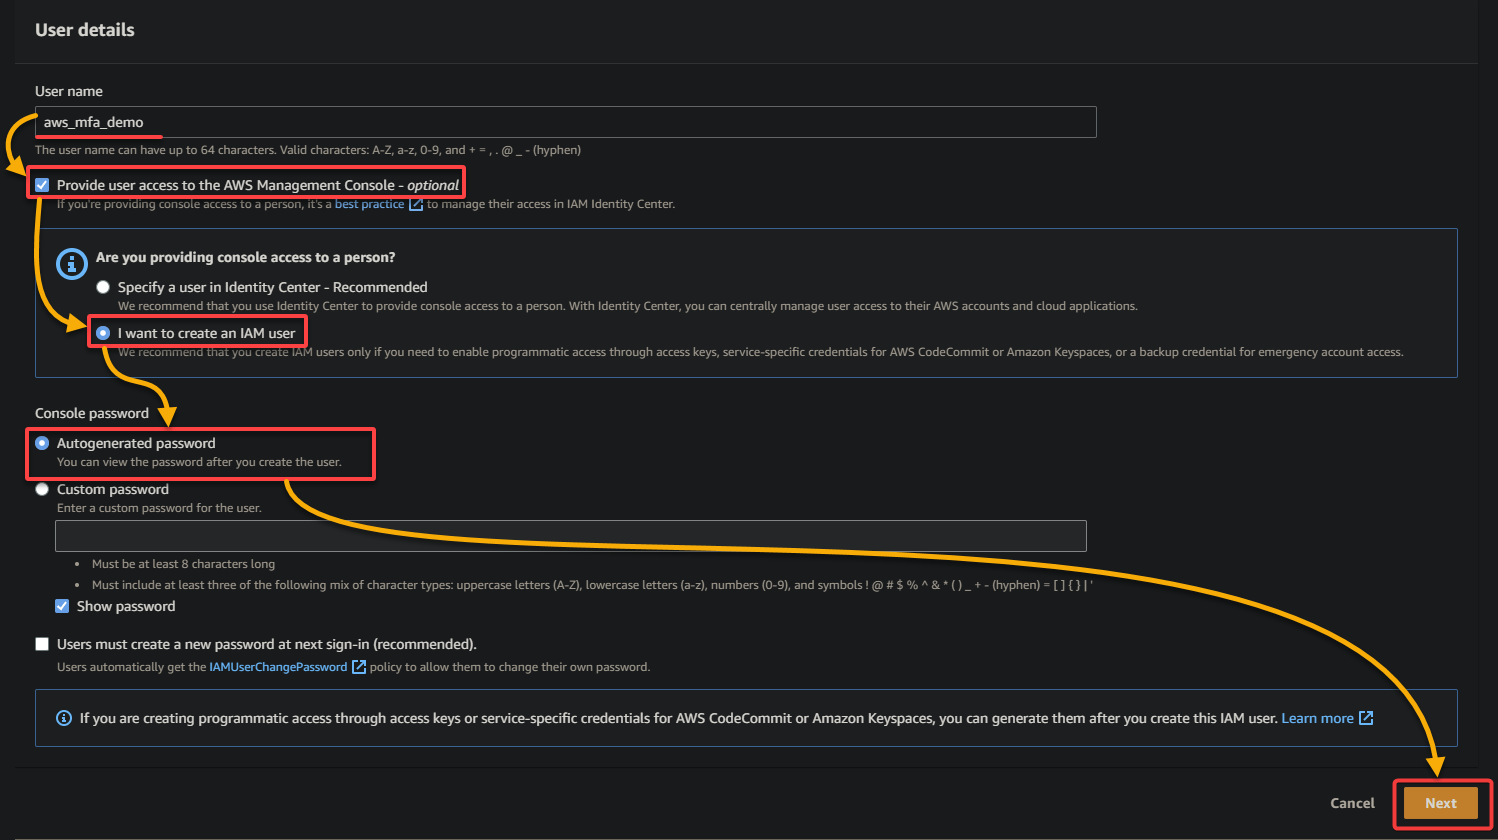
3. Configure the IAM user details with the following:
- User name: Provide a unique user name for this new user(aws_mfa_demo)
- Tick the Provide user access to the AWS Management Console checkbox to allow the user to sign in to the AWS Management Console.
- Select I want to create an IAM user to create a new IAM user.
- Select Autogenerated password to have AWS generate a strong password for the user.
Once configured, click Next to proceed.
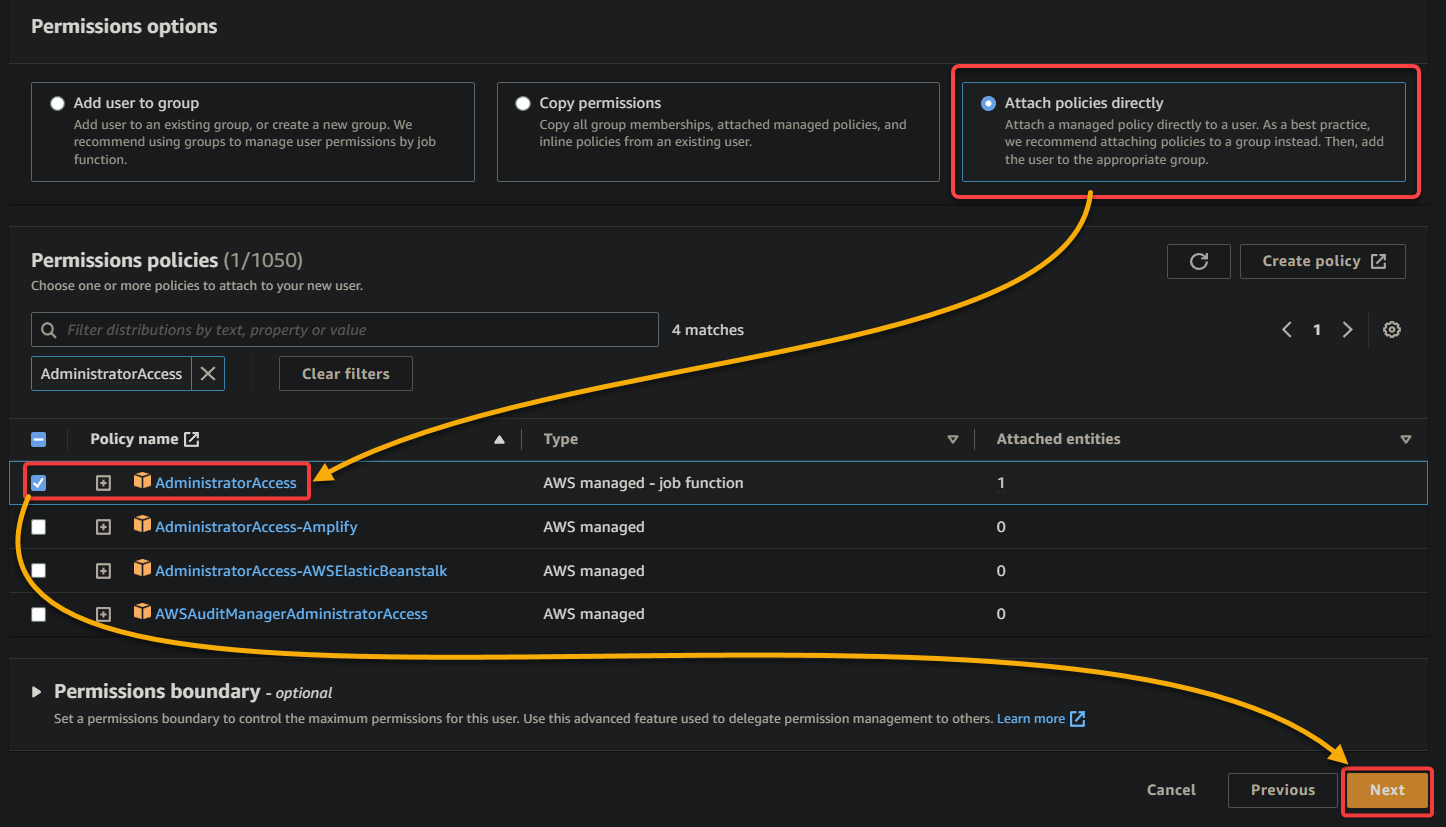
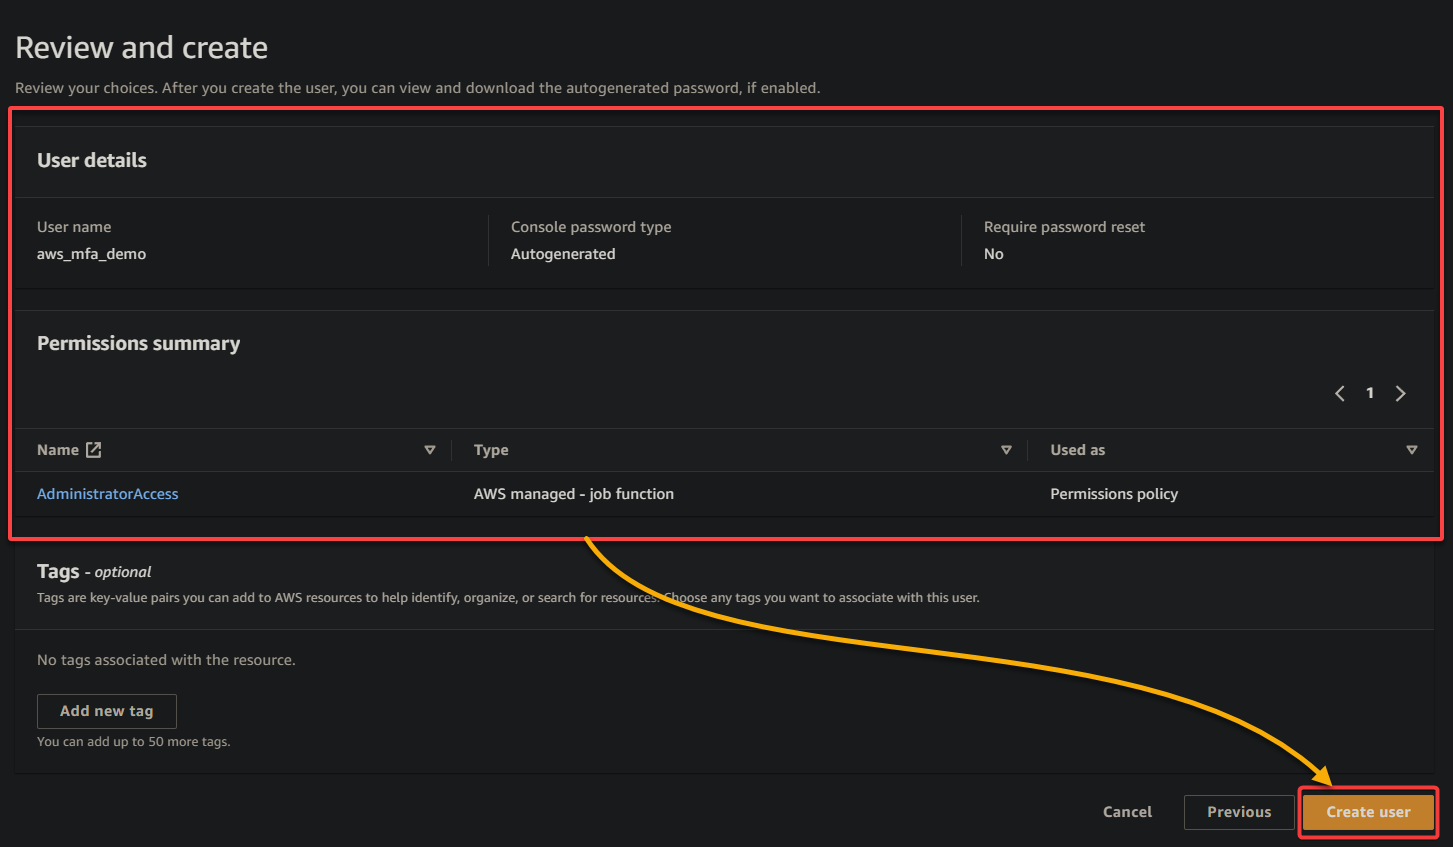
4. Now, choose the Attach policies directory option, select the AdministratorAccess policy in the list, and click Next to grant the user full access to AWS resources.
5. Review the user details, and click Create user to finalize creating the IAM user.
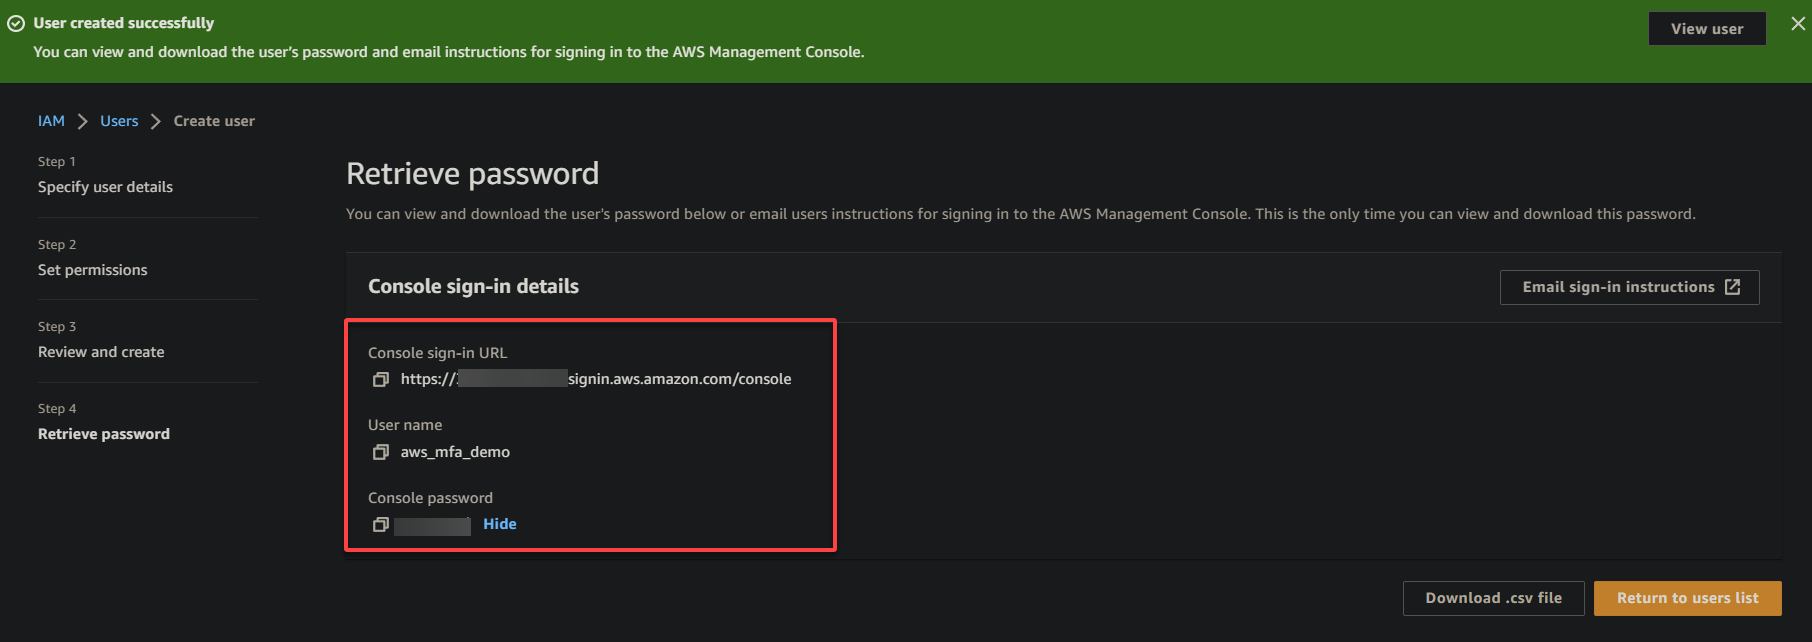
6. Lastly, open a new browser tab, navigate to the Console sign-in URL, and sign in with the IAM user credentials displayed.
For security reasons, logging in to your AWS IAM account via a private browser (i.e., Google Chrome’s Incognito) is strongly recommended, especially when setting up AWS MFA.
Setting up AWS MFA to Secure AWS Resources
With a dedicated IAM user created, you are ready to set up your AWS MFA. But first, you must install an authentication app on your mobile device which generates a unique six-digit code. Along with your password, the six-digit code is required to complete the MFA process when signing in to AWS.
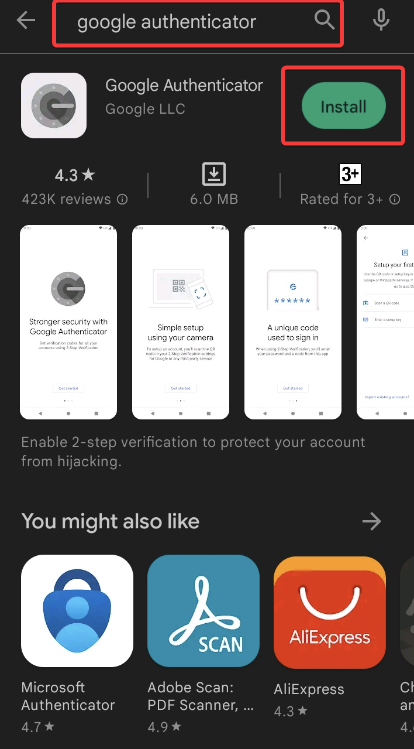
AWS supports many authentication apps, but this tutorial’s choice is Google Authenticator, which is free and compatible with Android and iOS devices.
To start setting up AWS MFA to secure your resources:
1. Open the Google Play Store on your Android device, search for and install Google Authenticator, as shown below.
Perhaps your usage is high, and you want to use multiple devices (smartphone, tablet, or desktop computer) to access your AWS account with MFA enabled. If so, you can use Authy to authenticate your login attempts on any of your devices.
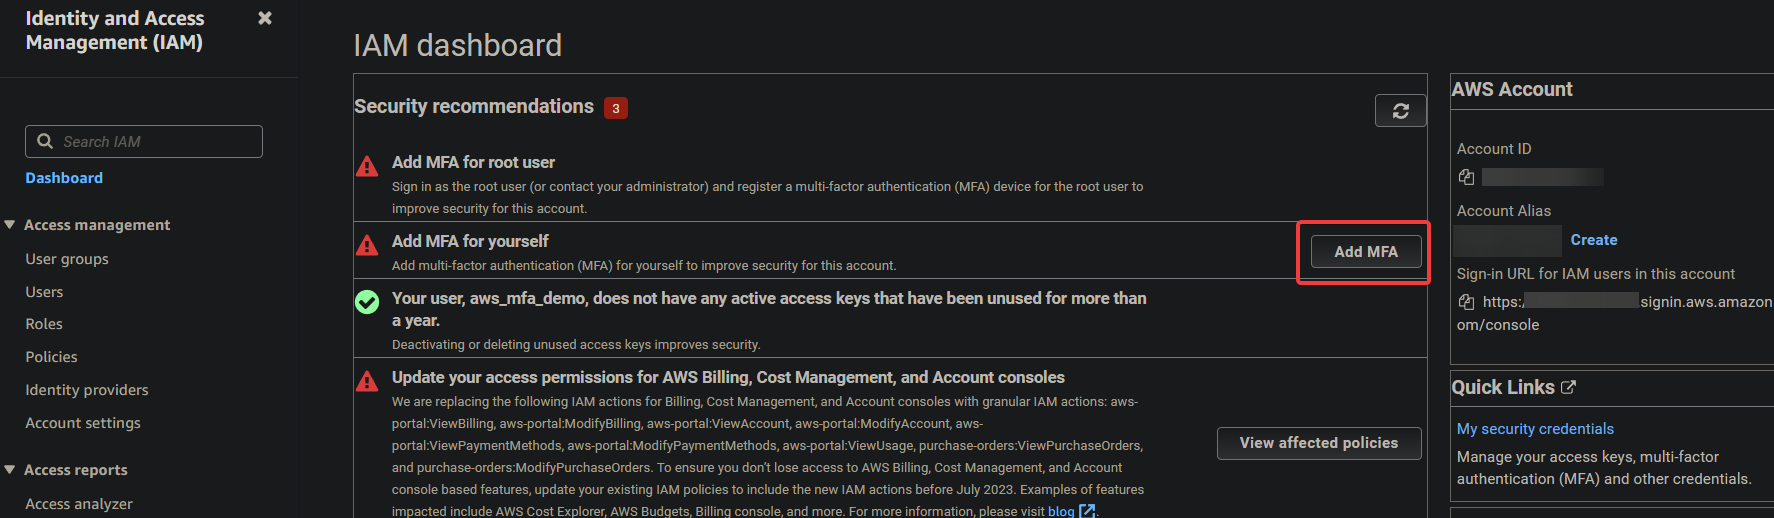
2. Once installed, return to the browser tab where you logged in as the IAM user, navigate to the IAM console, and select the newly-created user (aws_mfa_demo).
3. Under Security recommendations, click Add MFA next to the Add MFA for yourself option to initiate assigning an MFA.
4. Now, click Assign MFA to continue.

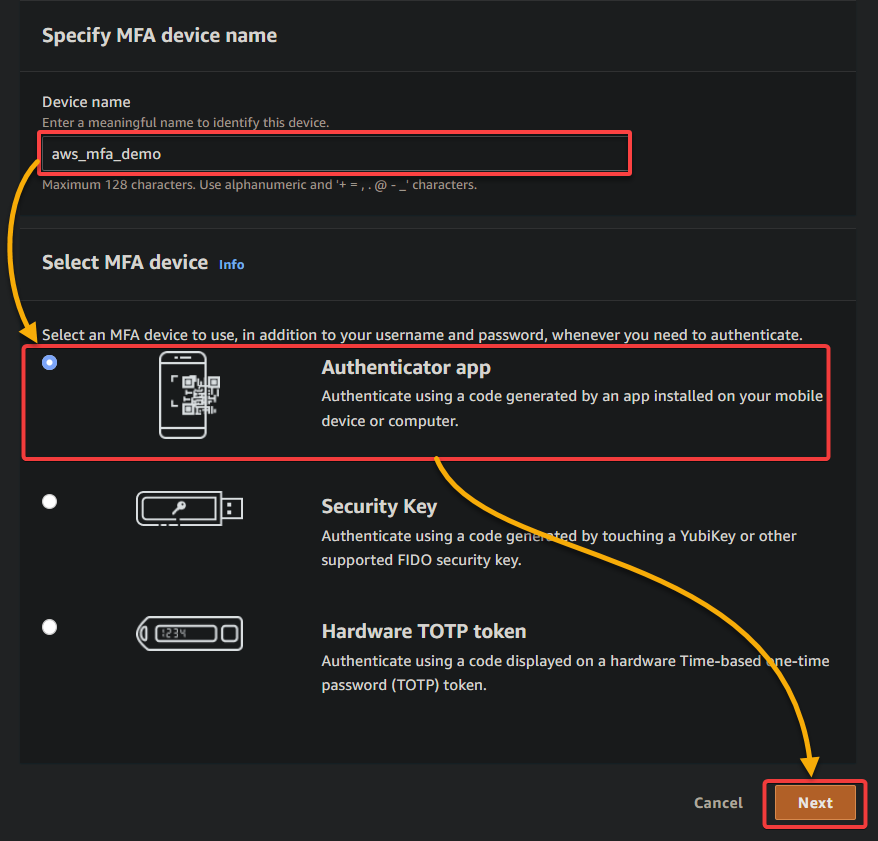
5. On the next page, configure the settings as follows:
- Device name – Provide a descriptive name for your device that helps you distinguish between different MFA devices associated with your AWS account.
- Select MFA device – Select an MFA device from the available options depending on your specific needs and preferences.
This tutorial’s choice is the Authenticator app. Software-based authenticators are generally the most popular choice due to their ease of use and availability on mobile devices. But hardware-based options may be preferred in high-security environments where additional physical security measures are required.
| MFA Device | Details |
|---|---|
| Authenticator app | Involves a software-based authenticator app, such as Google Authenticator or Authy, to generate the MFA codes. |
| Security Key | Involves a hardware-based security key, such as a YubiKey or a Nitrokey, to generate the MFA codes. With this option, you must purchase the hardware Security Key from a third-party website or vendor — more expensive than a software-based authenticator app. |
| Hardware TOTP token | Involves a hardware token (an RSA SecurID or a Gemalto token) to generate the MFA codes. These tokens are specifically intended for users with AWS GovCloud (US) accounts accessing IAM. |
Once configured, click Next to initiate registering your MFA device.
AWS allows you to register up to eight MFA devices (can be a combination of any supported MFA types) with your root and IAM users. This feature gives you flexibility in managing your MFA devices. At the same time, you can choose the best type of MFA device for each user based on their specific needs and requirements.
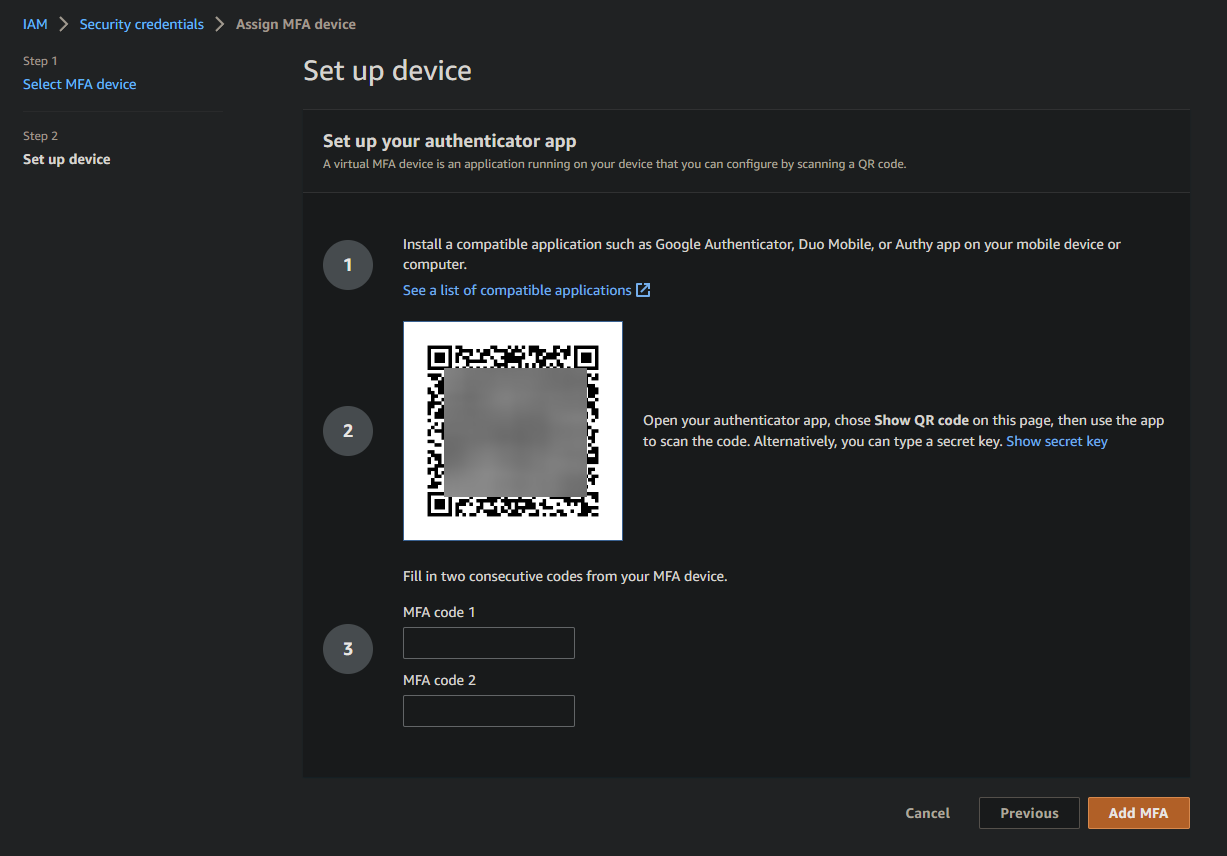
Your browser redirects to a page like the one below, where you can see a QR code displayed.
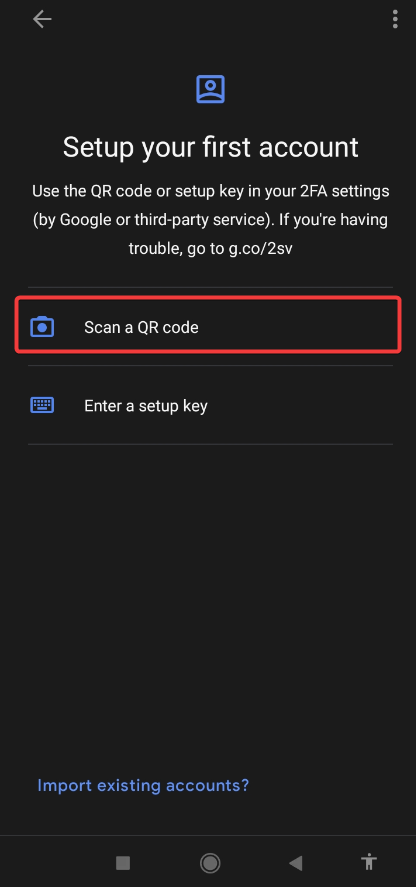
6. Next, open the Google Authenticator app on your mobile device, and tap Scan a QR code to open your device’s camera for QR code scanning.
7. Hold your device’s camera up to the displayed QR code on your browser while ensuring the QR code is in focus and fully visible on the screen.
The Google Authenticator app automatically detects the QR code and adds a new entry for your AWS IAM user, along with a six-digit authentication code. Note that the six-digit code periodically changes.
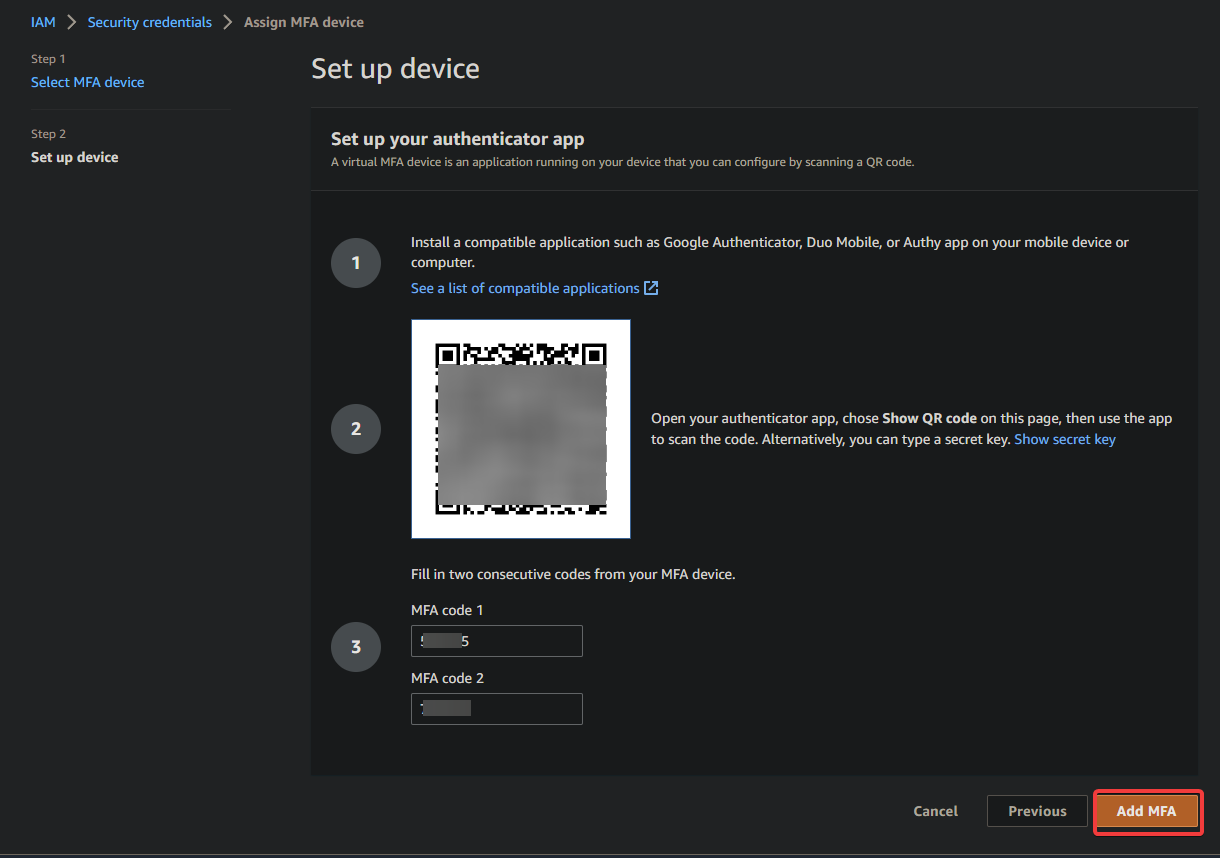
8. Now, fill in the two empty boxes on the Set up device page with two successive authentication codes from the Google Authenticator app, and click Add MFA. Doing so authenticates and registers your MFA device to your IAM user.
Note that each six-digit code is only valid for a limited period, typically 30 seconds, and expires. This time-limited aspect of the MFA code increases security by reducing the window time for attackers to intercept the code to gain unauthorized access to AWS resources.
The MFA system verifies that the user’s device generates the codes in real-time by requiring the user to provide two consecutive codes. This behavior is more secure than the codes being replayed or stolen from a previous session.
Enabling MFA authentication for an IAM user only affects that specific user’s credentials. Other IAM users in the same AWS account have distinct identities with credentials, and each identity has its own MFA configuration.
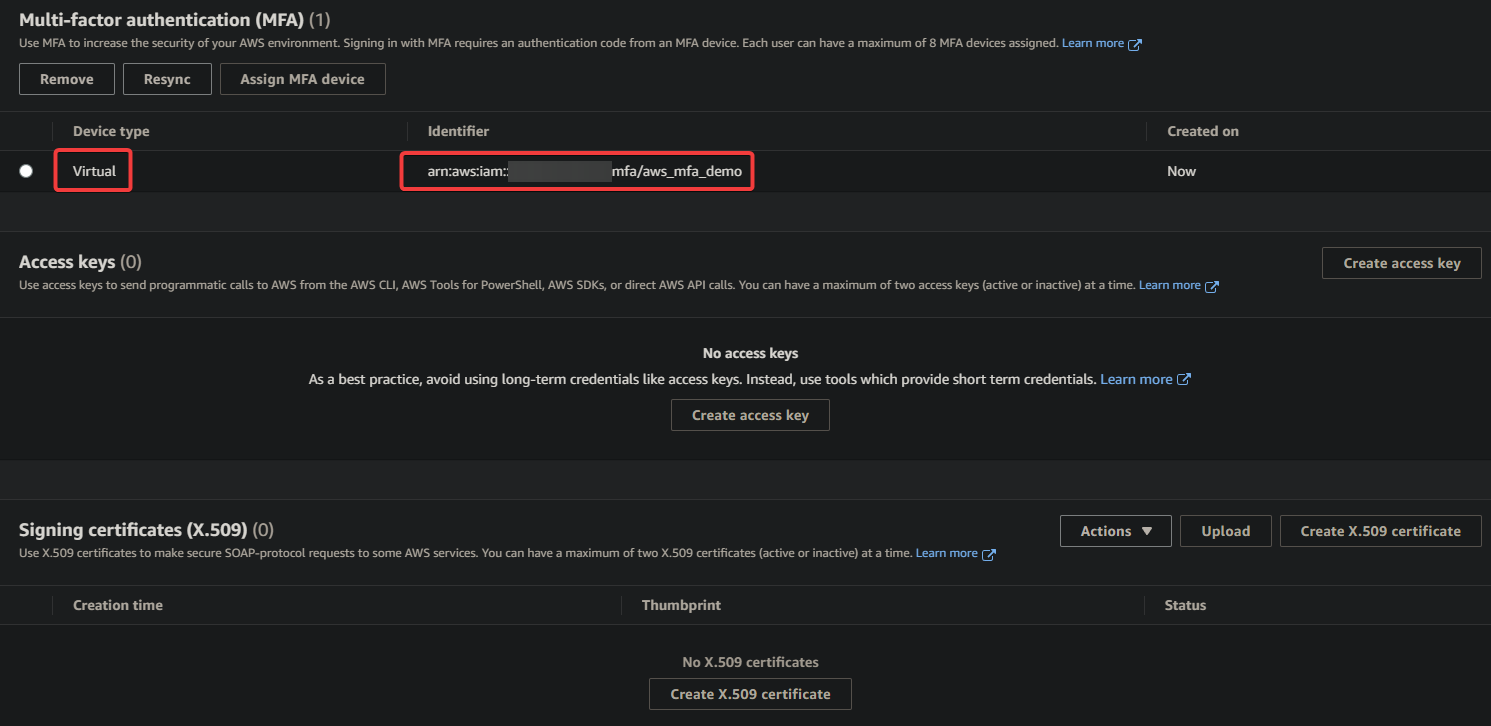
9. Lastly, return to the IAM console page, and you will see the MFA device has been successfully added for your IAM user, as shown below.
Verifying the MFA Setup
After setting up MFA for your AWS account, you still have to verify that your MFA setup is working correctly before relying on it for authentication.
To verify your MFA setup works:
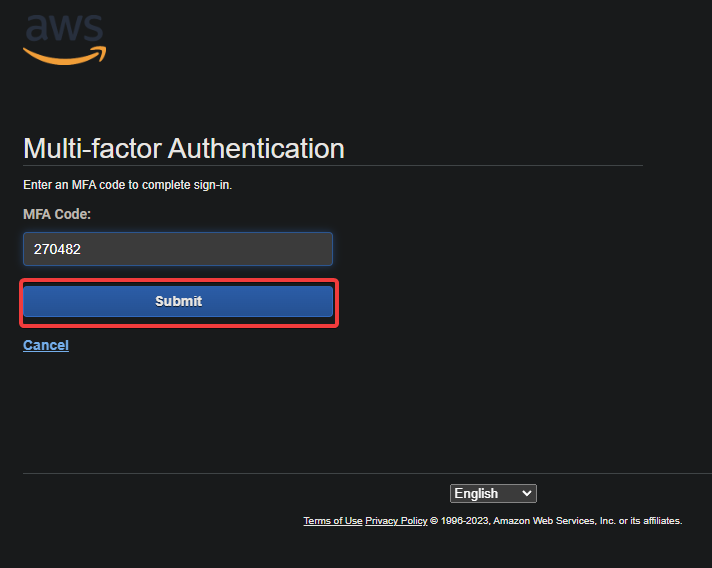
1. Log out of the IAM console and log back in using your IAM user credentials. This time, you will be asked to enter a six-digit MFA authentication code from the Google Authenticator app on your device.
2. Enter the code and click Submit to complete the authentication process.
3. Finally, try accessing your AWS resources and see if all goes well.
If you cannot use your MFA device to access your AWS resources, click the Resync button on the IAM console to resynchronize your MFA device.

Conclusion
Security is always a top concern when it comes to cloud computing. With the help of multi-factor authentication, you enhance your AWS account’s security. And in this tutorial, you have learned how to set up AWS MFA for IAM users to safeguard your resources from unauthorized access.
With a fully functional MFA, you can be confident that your AWS account and resources are protected against malicious activity.
Securing your account via the AWS Management Console works great, that is for sure. But if you prefer to work on a command-line environment, why not use AWS MFA via the AWS CLI instead?


