
Are you ready to take your serverless computing skills to the next level? Look no further! The AWS Lambda CLI is here to help you quickly manage and invoke your Lambda functions from the command line.
With the AWS Lambda CLI, you have all the power of the Lambda platform at your fingertips to easily create, deploy, and invoke your functions in response to various events. And in this tutorial, you will learn to jumpstart your journey toward becoming a serverless pro with AWS Lambda CLI.
Dive in and start building scalable, reliable applications in the cloud!
Prerequisites
This tutorial will be a hands-on demonstration. To follow along, be sure you have the following:
- An AWS account with active billing – The free tier will suffice.
- A computer (Linux, macOS, or Windows) AWS CLI installed and configured – This tutorial uses Ubuntu 20.04.
An IAM user with programmatic access (Access Key and Secret Key) to make API calls to AWS Lambda.
Creating an Execution Role
Before starting with the AWS Lambda CLI, you must create a dedicated Identity and Access Management (IAM) role for your Lambda functions.
An AWS Lambda function functions based on an execution role and a deployment package:
- The execution role grants the necessary permissions to execute your Lambda functions
- The deployment package contains all the code for your functions.
To create an execution role, follow these steps:
1. Run the following command to create a new directory (mkdir) as your project directory, and move into it. This directory is where you will store all your Lambda functions and code and run subsequent commands.
You can name the directory differently, but this tutorial uses my-lambda-project.
mkdir my-lambda-project && cd my-lambda-project
2. Next, create a JSON file named trust-policy.json with your preferred text editor, and populate the code below into the file.
The code below contains the trust policy for your IAM role (execution role), which defines the permissions granted. These permissions specifically “Allow" the "lambda.amazonaws.com" service to assume your IAM role ("sts:AssumeRole").
By specifying the permissions granted to your function via the execution role, you can ensure that the role has access to the resources it needs and nothing more. Moreover, permissions help protect your resources and prevent unauthorized access or actions.
{
"Version": "2012-10-17",
"Statement": [
{
"Effect": "Allow",
"Principal": {
"Service": "lambda.amazonaws.com"
},
"Action": "sts:AssumeRole"
}
]
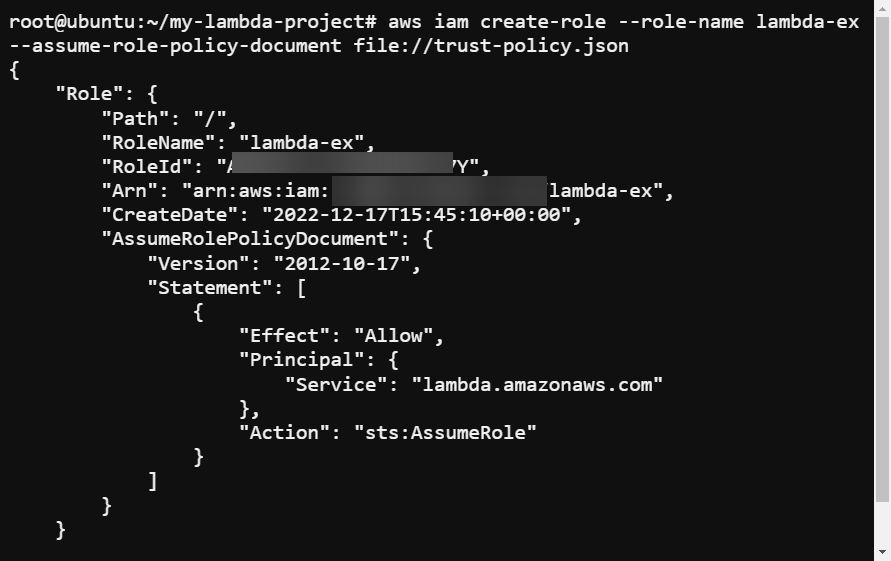
}Run the aws iam for your Lambda function named lambda-ex. The file, trust-policy.json, is located in the same directory where this command is run from.
aws iam create-role --role-name lambda-ex --assume-role-policy-document file://trust-policy.jsonAs shown below, the output indicates the role is created successfully.
4. Lastly, run the command below to attach attach-role-policy to your IAM role. This policy grants the permissions needed for your Lambda functions to execute.
aws iam attach-role-policy --role-name lambda-ex --policy-arn arn:aws:iam::aws:policy/service-role/AWSLambdaBasicExecutionRole
Creating a Deployment Package
With the role and permissions in place, you need a way to put your project resources in one place. How? You will create a deployment package containing all the necessary files, including your code and any required libraries, in a single package.
To create a deployment package, you will create a simple Node.JS function. This function logs the environment variables and event data to the console and returns the log stream when invoked.
💡 Note that you must write the code for your function in a language supported by AWS Lambda.
Create a new JavaScript file named index.js, populate the code below for your AWS Lambda function, and save and close the file.
This file is the entry point for your function. When your function is invoked, the code in this file executes.
// Exports the handler function as a Lambda function
exports.handler = async function(event, context) {
// Logs all environment variables to the console.
  console.log("ENVIRONMENT VARIABLES\\n" + JSON.stringify(process.env, null, 2))
// Logs the incoming event to the console
  console.log("EVENT\\n" + JSON.stringify(event, null, 2))
// Returns the log stream name of the current execution context
  return context.logStreamName
}
Lastly, run the below zip command to create a deployment package (*function.zip*) for your Lambda function (*index.js*).
💡 A deployment package makes managing your function easier and ensures everything it needs is available when invoked.
zip function.zip index.js
Creating a Lambda Function
Now that you have both the execution role and the deployment package needed to create a function, it is time to create your first Lambda function.
To create a Lambda function, you first need your account ID handy:
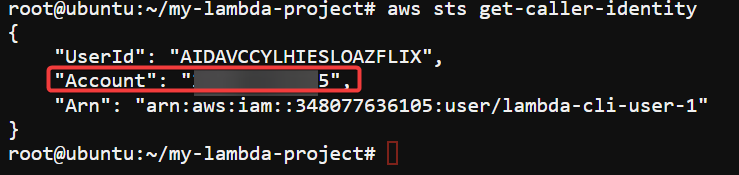
1. Run the below aws sts command to find your account ID (get-caller-identity).
aws sts get-caller-identityNote the Account ID from the output, as you will need it to create your Lambda function.
2. Next, run the aws lambda command below to create a new Lambda function (create-function) named my-first-function. Replace <YOUR_ACCOUNT_ID> with your actual AWS account ID and my-first-function with your preferred function name.
The command below specifies the following:
--runtime nodejs18.x | The runtime for your function is the programming language in which your function is written. |
--zip-file fileb://function.zip | The name and location of the deployment package for your function. |
--zip-file fileb://function.zip | The function handler for your function (the entry point for your function code). The function handler is typically in the form of filename.handler, where filename is the name of your code file, and handler is the name of the function within that file. |
aws lambda create-function --function-name my-first-function \
--zip-file fileb://function.zip  --runtime nodejs18.x \
--role arn:aws:iam::<YOUR_ACCOUNT_ID>:role/lambda-ex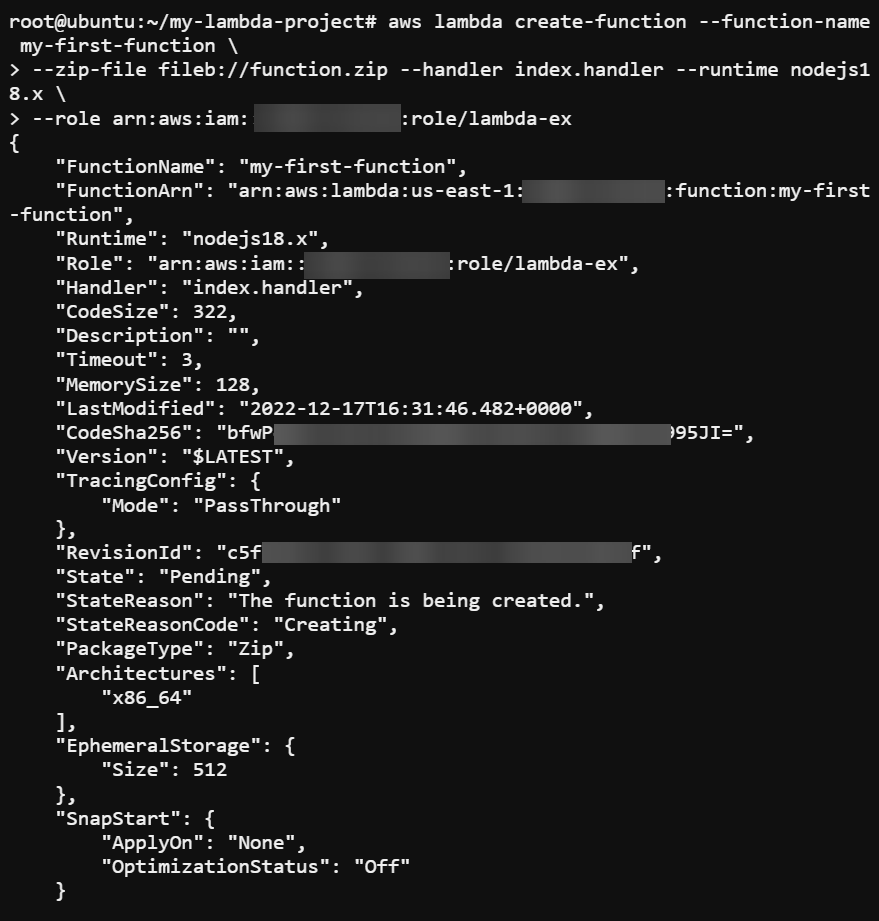
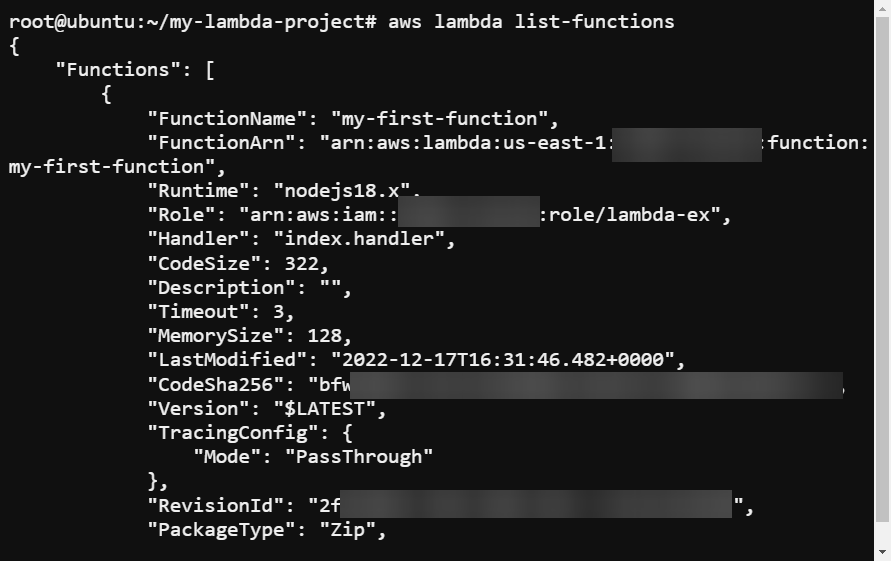
3. Now, run the below command to list all available functions (list-functions) in your account. This command comes in handy when you lose track of your functions.
aws lambda list-functionsAs shown below, you will see all functions you have in your account, including your newly-created function, with their names and details.
Invoking the Lambda Function
With your Lambda function successfully created, how do you know it actually works? You must invoke your function using the AWS Lambda CLI invoke subcommand.
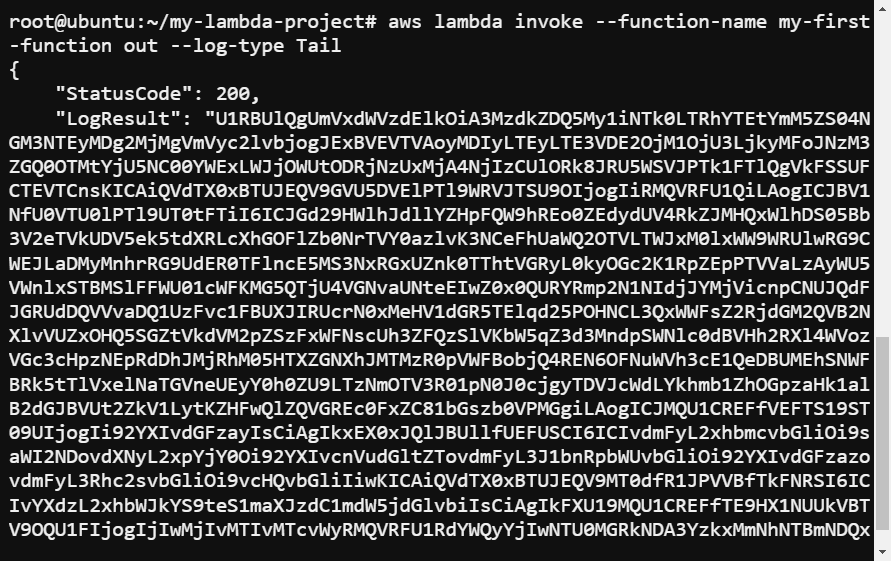
Run the below aws lambda command to invoke your Lambda function (my-first-function ), which includes the execution log (Tail) in the output.
aws lambda invoke --function-name my-first-function out --log-type TailBelow, the output looks like a mess since it is just a plain string encoded as base64. Jump to the following step to decode and see the actual output of the function.
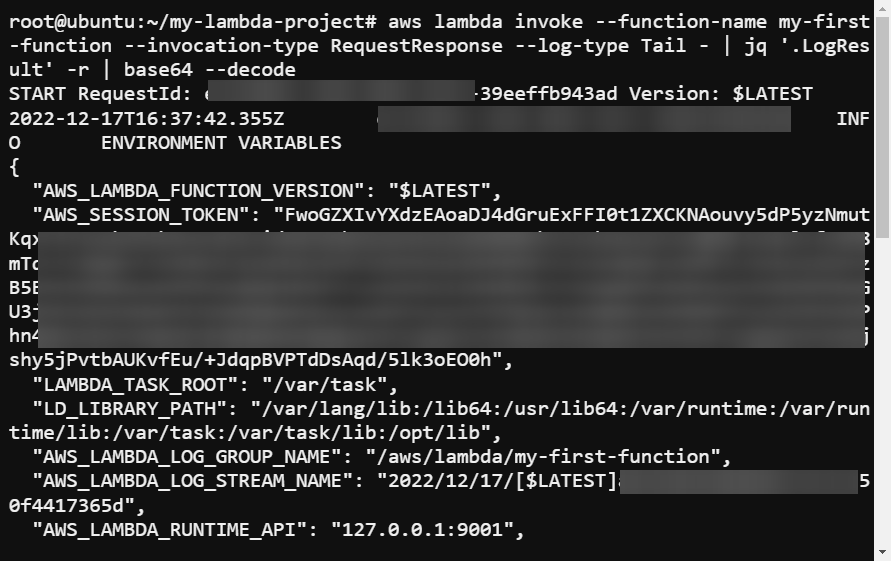
Now, run the same command below, but this time decode (--decode) the function’s output.
This command keeps the connection open (RequestResponse) until the function returns a response or times out.
aws lambda invoke --function-name my-first-function --invocation-type RequestResponse --log-type Tail - | jq '.LogResult' -r | base64 --decodeThis time, you can see the output below is readable, containing the environment variables and event data logged in your index.js file.
Deleting a Lambda Function
Having too many functions can be a pain and incur unnecessary charges. When you are done with your functions, deleting them is best to clean up and prevent breaking the bank.
Run the below command, which does not provide output, but deletes (delete-function) a specific Lambda function (my-first-function).
Ensure you got the --function-name right, and run the aws lambda list-functions command first to be on the safe side. Otherwise, you might be deleting a precious function you spent plenty of time creating.
aws lambda delete-function --function-name my-first-functionNow, run the below command to list all functions (list-functions) and verify that the function has been deleted.
aws lambda list-functionsThe output below shows a blank output since not even one function exists.

Conclusion
Lambda functions let you quickly build and deploy cloud-based applications without the hassle of setting up and maintaining servers. And in this tutorial, you have learned how the AWS Lambda CLI allows you to create, invoke, and delete Lambda functions easily. These features make the AWS Lambda CLI an essential tool for any developer working with Lambda.
By now, you understand the basics of working with the AWS Lambda CLI and be confident in creating your own serverless applications. But the journey continues as there are endless possibilities for what you can do with AWS Lambda and the CLI!
AWS Lambda CLI boosts your ability to build scalable, reliable applications in the cloud. Why not take the next step and update your function to add even more functionality?


