


Data management without worrying about provisioning, replicating data, and autoscaling may seem out of reach. Well, not when Amazon’s fully managed service, AWS DynamoDB, got your back!
AWS DynamoDB is a NoSQL database service that scales and manages databases efficiently. And in this tutorial, you will learn how to create a NoSQL DynamoDB table and how you can perform various functions on the table.
Without further delay, dive in and scale up your data management!
Prerequisites
This tutorial houses hands-on demonstrations. To follow along, ensure you have the following:
- An AWS account – A free trial will suffice.
- An IAM user with proper rights to create and manage the NOSQL DynamoDB table.
Creating a NoSQL AWS DynamoDB Table
Before taking advantage of the AWS DynamoDB, you must create a NOSQL DynamoDB table. There are various ways to create a DynamoDB table, such as via the AWS CLI tool based on Python library or Terraform, an infrastructure as code (IaC) tool.
But for this tutorial, you will create a NoSQL AWS DynamoDB table via the AWS Management Console.
To create a NoSQL DynamoDB table, follow these steps:
1. Open your favorite web browser, and sign into the AWS Management Console with your IAM user account.
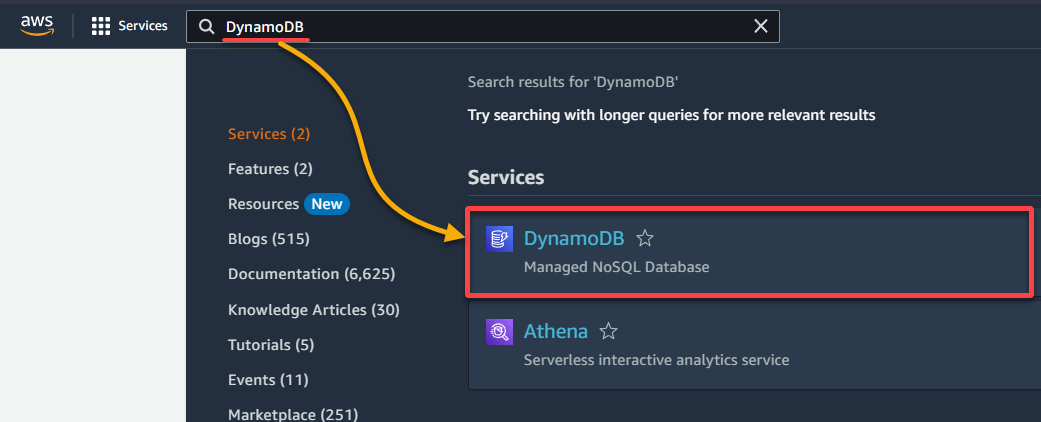
2. Next, search for DynamoDB and select the DynamoDB service from the result list, as shown below, to access the DynamoDB page.
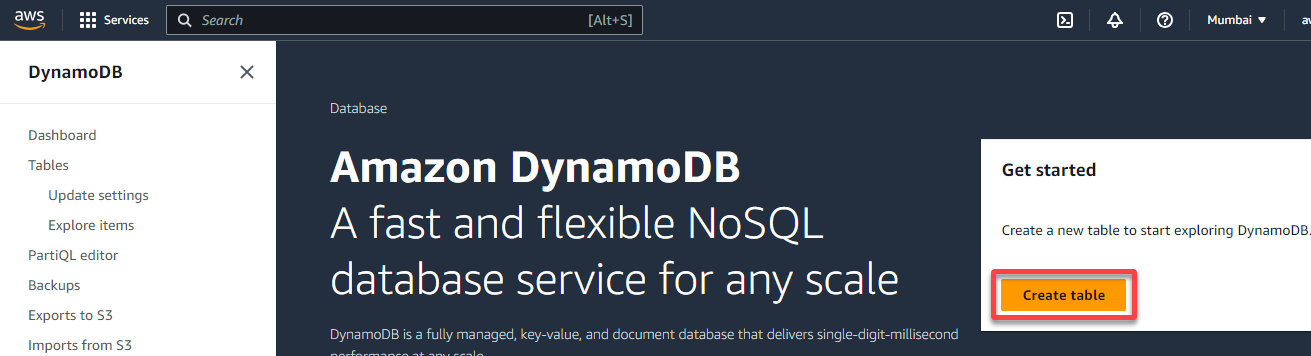
3. On the Amazon DynamoDB page, click Create table (right-most) to initiate creating a new table. Your browser redirects to a page where you can configure the new table (step four).
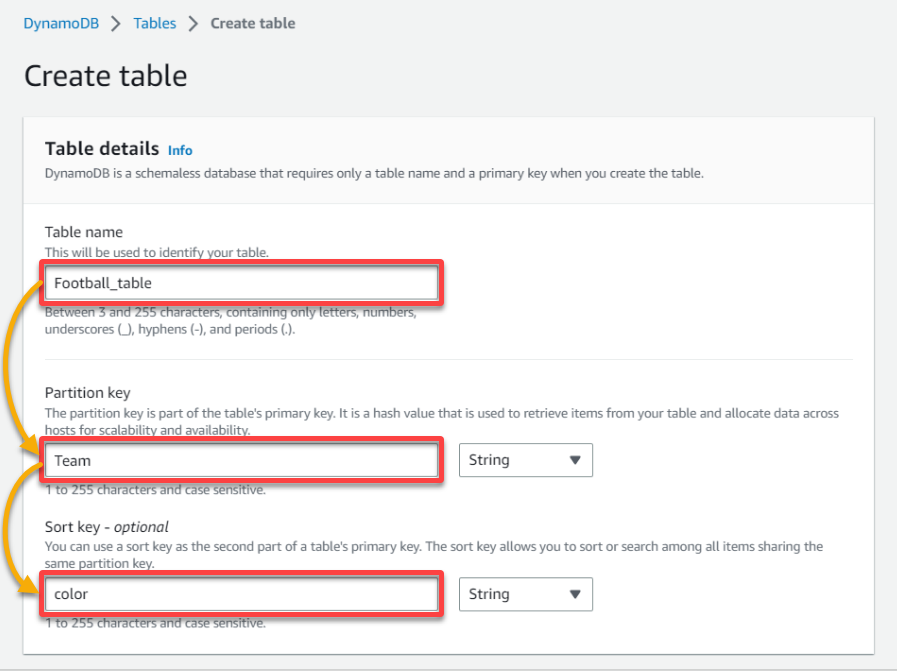
4. Now, configure the Table details as follows, where the values are arbitrary:
- Table name – Provide a descriptive name for your DynamoDB table (i.e., Football_table).
- Partition key – Input a partition key (i.e., Team), allowing you to identify all the table items uniquely.
- Sort key – Specify a sort key (i.e., color), which allows you to sort the values of all the same partition keys.
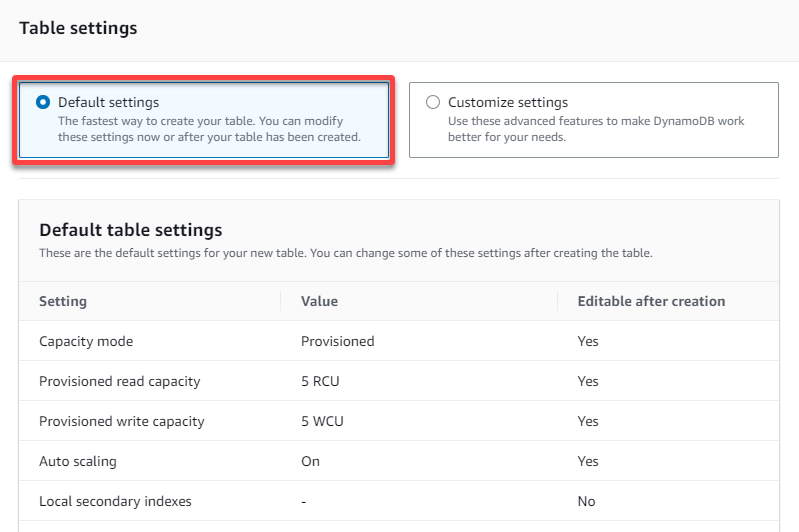
5. Under Table settings, choose the Default settings option for a quick way to create your table.
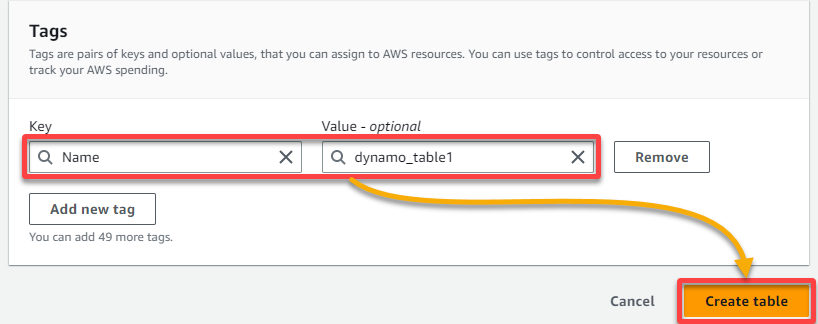
6. Lastly, set the tag key as Name, with the value as dynamo_table1 (arbitrary), and click Create table (bottom-right) to finalize creating your new DynamoDB table.
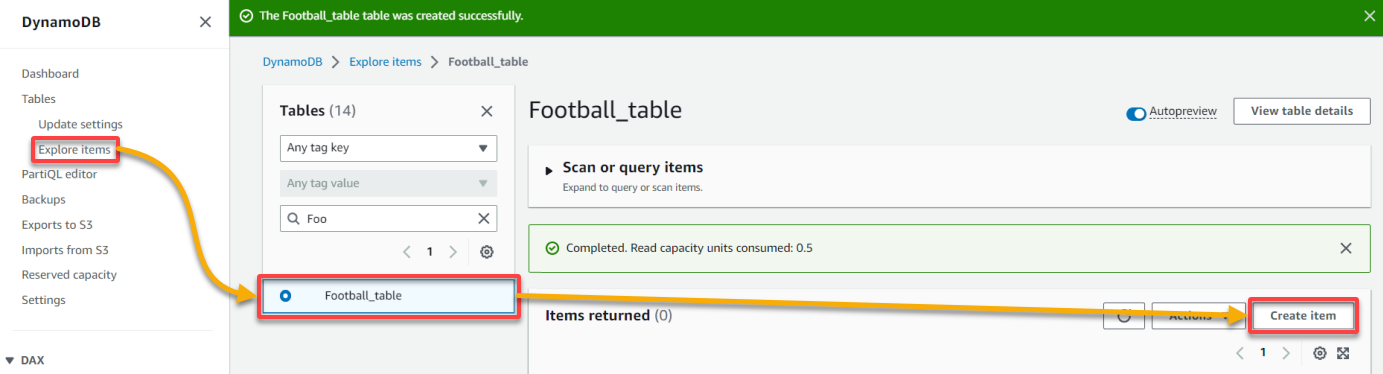
Once created, you will see the new DynamoDB table listed, as shown below.

Adding and Deleting Data in the DynamoDB Table
You have just created an AWS DynamoDB table, but a table with no data is not doing much. In this example, you will add some data to your table. With populated data, you can later perform various operations, such as checking customer information or analyzing the data.
To add data to your newly-created DynamoDB table:
1. On the DynamoDB page, navigate to Explore items under Tables, select your table name (Football_table), and click Create item. Your browser redirects to a page where you can configure a new item to add to your table (step two).
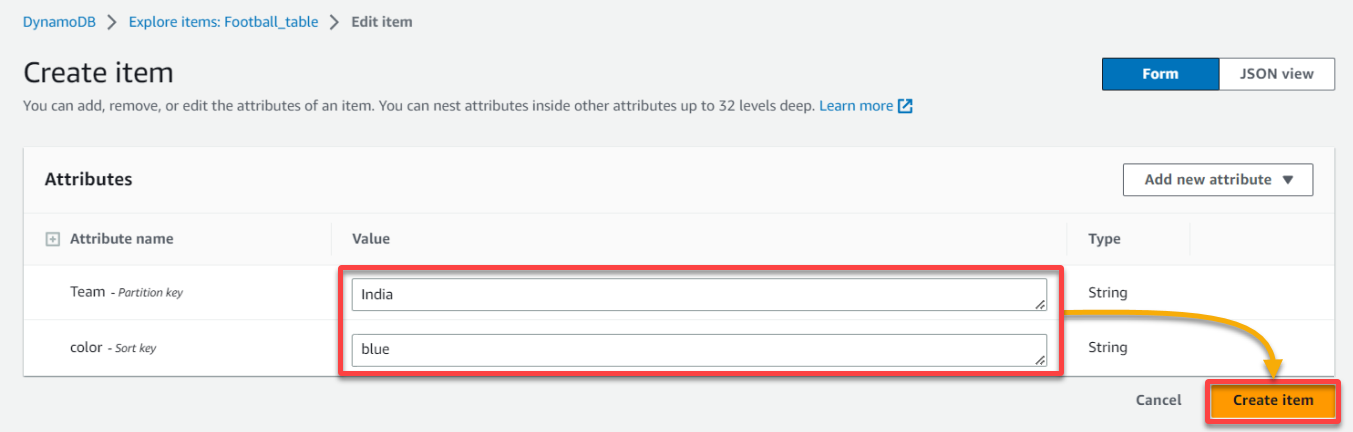
2. In the Create item page, add a Team (i.e., India) and color (i.e., blue) attribute, and click Create item (bottom-right) to create the item in your table.
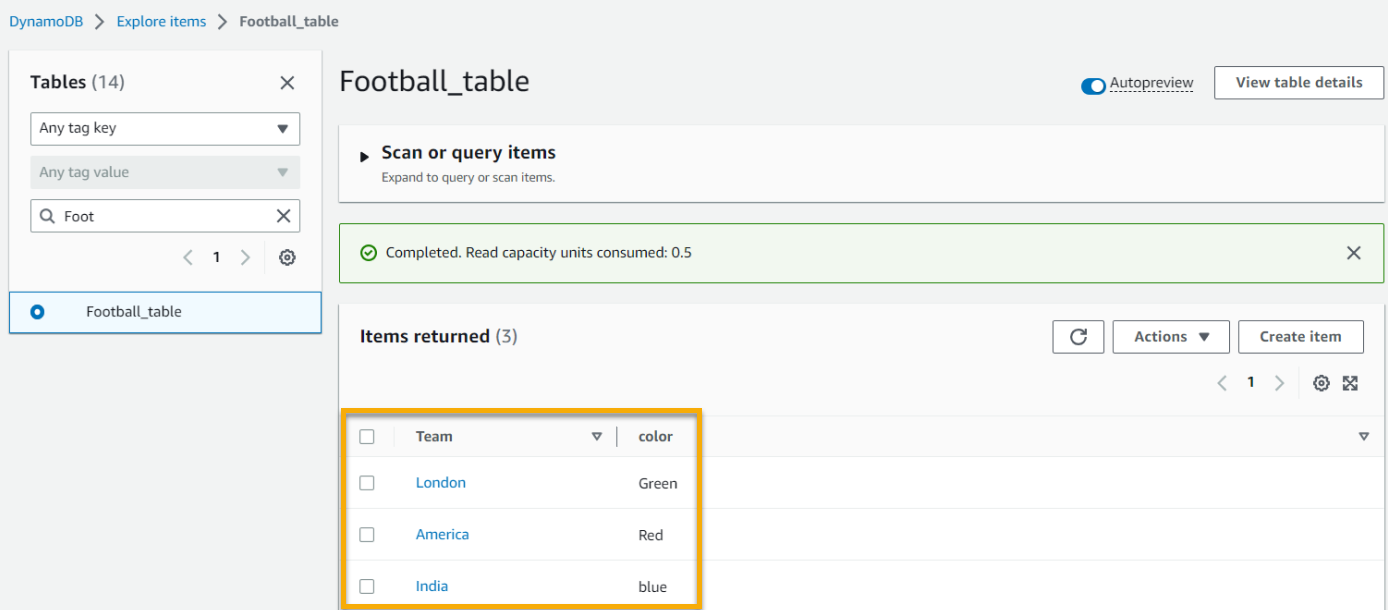
3. Repeat steps two to three to create two more items, as follows:
- Team – America and London.
- color – red and green.
You will have the same output once you have added the remaining items, as shown below.
4. Now, select one item from the list, click the Actions dropdown, and choose Delete items to delete the selected item.

Querying Data from an AWS DynamoDB table
After populating data to your table, how can you verify their accessibility? You will query data to verify they are correctly added to your AWS DynamoDB table.
To query data from your AWS DynamoDB table:
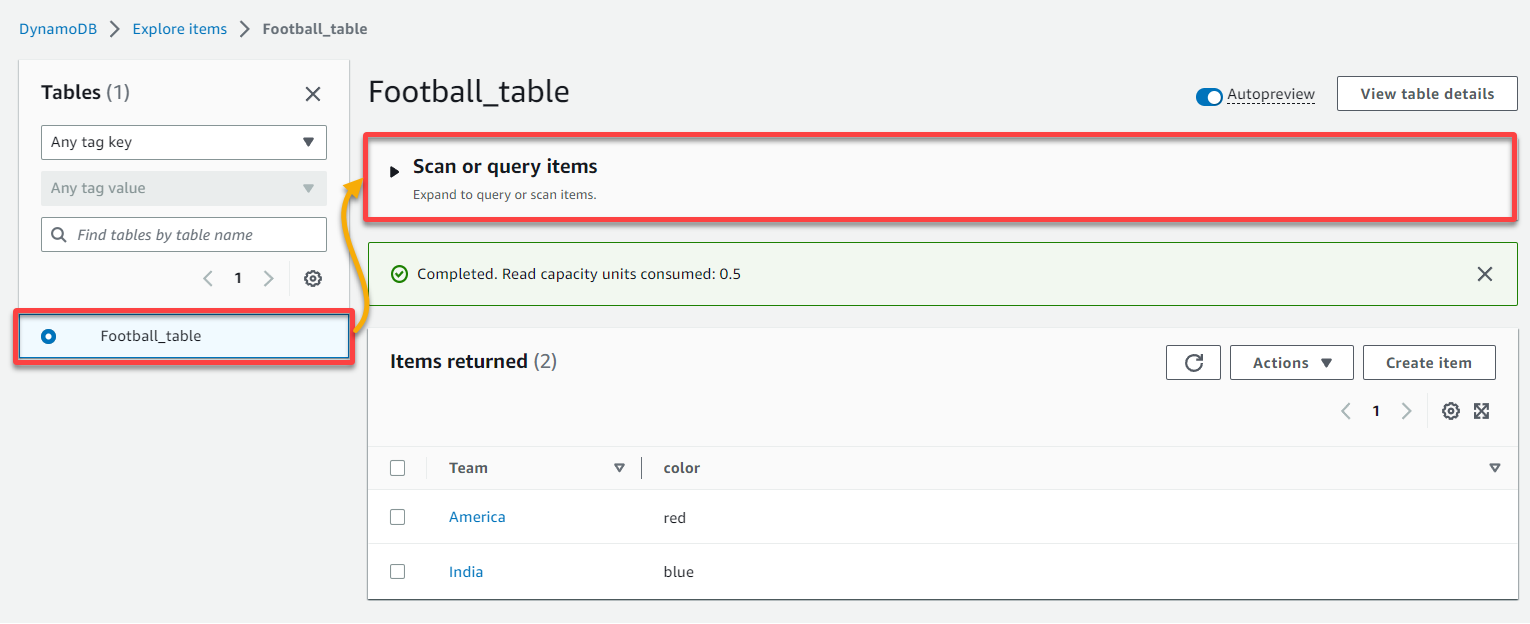
Select your table in the Explore items page, and expand the Scan or query items section, as shown below.
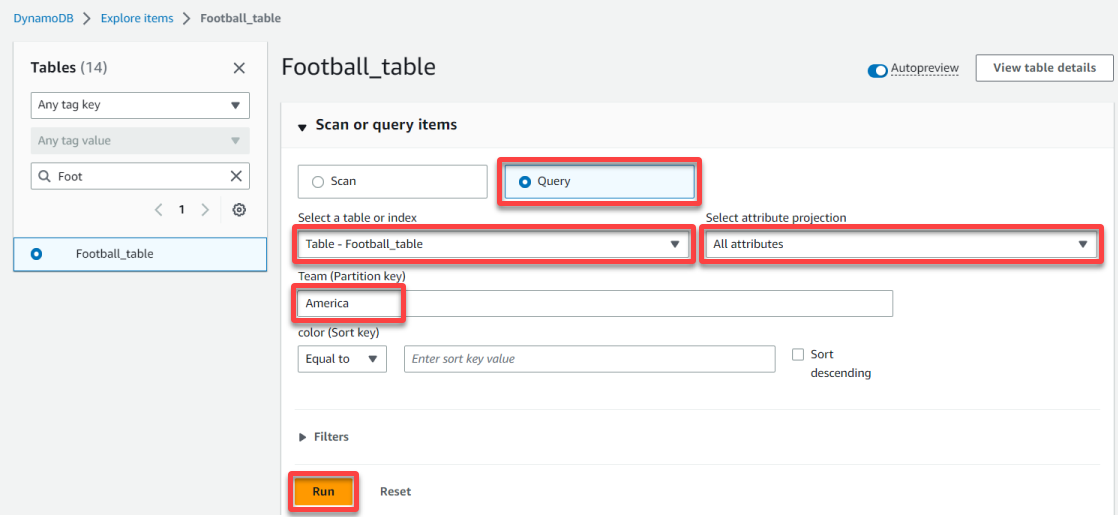
Now, configure the data query as follows:
- Select the Query option since you are querying data.
- Select your AWS DynamoDB table (i.e., Football_table) from the dropdown.
- Choose to query All attributes.
- Insert an item’s Partition key (i.e., America).
Once configured, click Run to run the query.
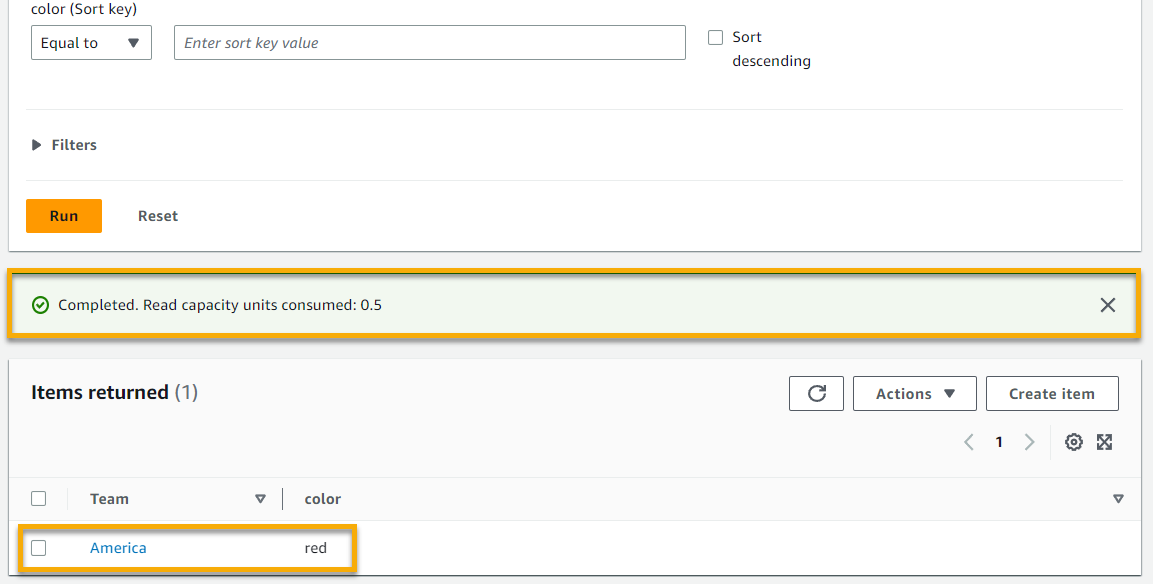
If the query is successful, you will see the results under the Items returned section, as shown below. Also, you will notice a notification indicating the units consumed for running the query.
Deleting a DynamoDB Table
Keeping too many tables, especially obsolete ones, only leads to confusion and unwanted charges. Instead of just items, why not delete entire tables you no longer need?
To delete a DynamoDB table, follow these steps:
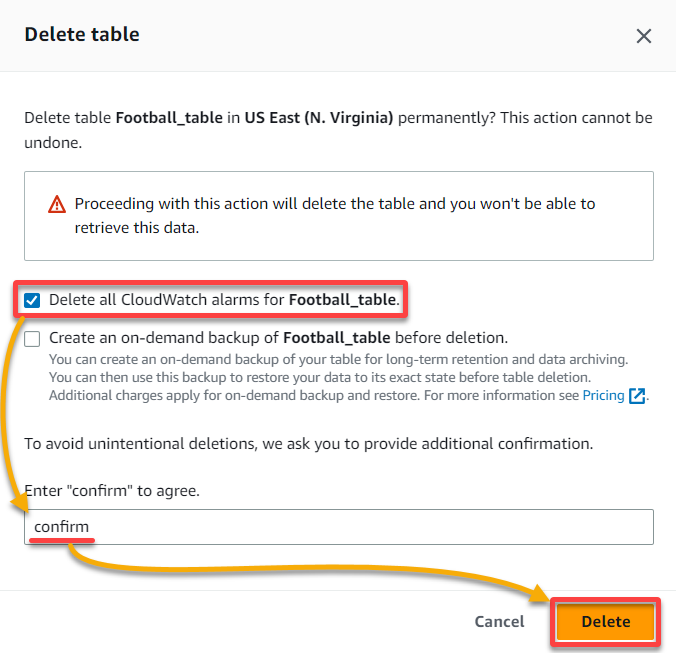
1. On the DynamoDB page, navigate to Tables (left pane), search for the table to delete, select the table from the results list, and click Delete. A pop-up window appears where you need to confirm the deletion.

2. Now, tick the first box to ensure you Delete all CloudWatch alarms for the selected table, type confirm, as shown below, and click Delete to confirm deleting the table.
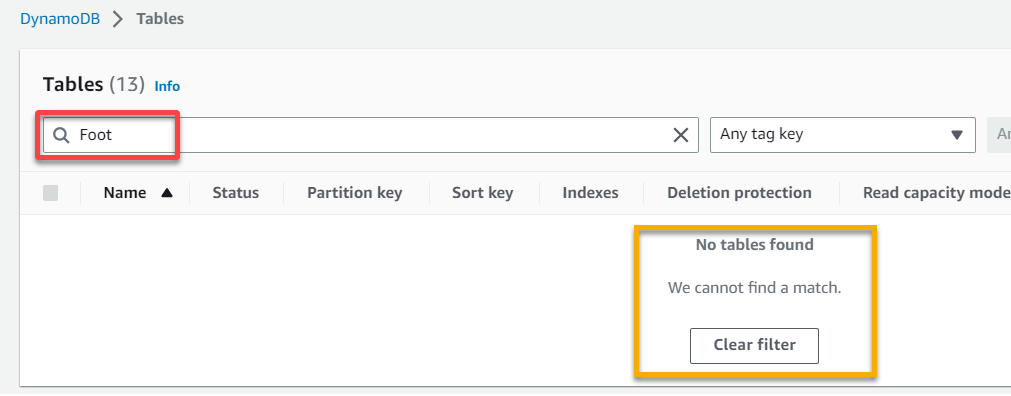
3. Finally, search for the table you deleted, and you will notice it no longer exists.
Conclusion
In this tutorial, you have learned how to create your first NoSQL database on AWS DynamoDB managed service via the AWS Management Console.
You have touched on adding, deleting, and querying data from an AWS DynamoDB table. And at this point, you can effectively manage your database with just a few clicks.
Now that you have a database and tables created on the AWS DynamoDB, you can store your data on your database instead of storing it in other services such as AWS S3.


