


Are you saving your passwords in the text files, configuration files, or deployment files while deploying applications in the Amazon AWS cloud? If yes, you’re putting your secrets at risk. Luckily, the AWS CLI Secrets Manager keeps off attackers from getting exposed to your passwords.
The AWS CLI Secrets Manager solves all your security concerns, encrypts all your stored passwords, and decrypts only while retrieving them. In this tutorial, you’ll learn how to protect sensitive information from prying eyes.
Ready? Read on and keep your secrets, well, a secret!
Prerequisites
This tutorial will be a step-by-step demonstration. If you’d like to follow along, be sure you have the following in place:
- A Windows machine – This tutorial uses Windows 10, but later versions will also work.
- An AWS IAM user with an access key ID and a secret key setup on your local machine. The user must have access to create and manage Secrets – This tutorial uses an IAM user called iamuser.
Ensure the IAM user has programmatic access and that you assign the user to the existing policy of AmazonIAMFullAccess.
- An AWS RDS Microsoft SQL server database instance.
- AWS Schema Conversion Tool installed on your Windows machine.
Configuring AWS CLI with AWS Credentials
AWS CLI is a command-line tool that allows you to work with AWS APIs to manage and provision the AWS services. But before you run any commands using AWS CLI, you must first configure AWS CLI with AWS credentials. Doing so allows you to connect to the AWS account and execute commands.
To configure your AWS credentials on AWS CLI:
1. Open command prompt as administrator, and run the following commands to configure AWS credentials (aws configure).
cd C:\Users # Change the working directory to C:\Users
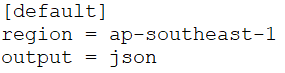
aws configure # Configure AWS credentialsEnter the AWS IAM user details, such as AWS Access Key ID, Secret Access Key, and region. You can skip the output format as default, text, or json.

2. Next, open File Explorer, navigate to the C:\Users\%USERNAME%\.aws directory, and verify if the credentials and config files are present.
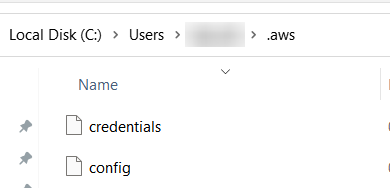
3. Open the credentials and config files. You’ll notice the credentials you specified in step one are successfully stored in both.

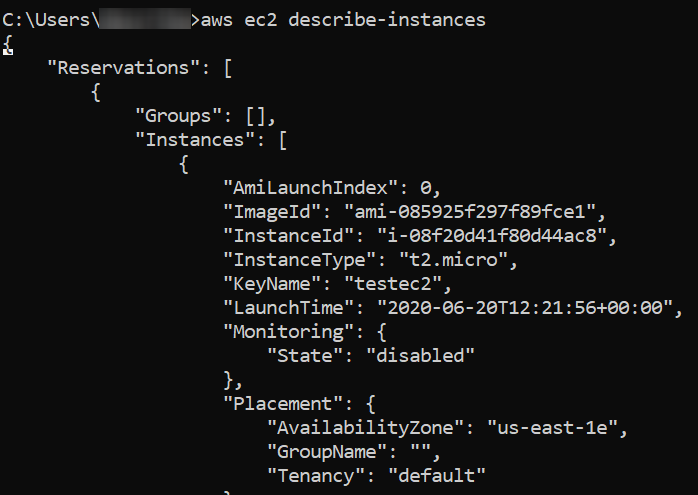
4. Finally, run the following commands to test if your AWS credentials are working.
The command uses your AWS credentials to authenticate to the AWS account and retrieves the lists of all instances.
# Change directory, one level up (C:\Users\%USERNAME%).
cd ..
# Retreive the lists of all instances.
aws ec2 describe-instances
Notice that when you execute the command, you’ll connect to AWS resources using AWS APIs.
Creating Secrets via the AWS CLI
You’ve successfully verified your AWS CLI configuration and AWS credentials work correctly, and now you’re ready your create your secrets. You’ll use these secrets to connect to a database in the latter part of this tutorial.
Create a file called creds.json on your Desktop, and copy/paste the below configuration that contains database details, which you’ll later store as secrets.
{
      "username": "admin",
      "password": "password",
      "engine": "sqlserver"
      "host": "database-3.cgph34pcibdl.us-east-1.rds.amazonaws.com"
      "port": "1433"
      "dbInstanceIdentifier": "database-3"
}
Next, run the below command to perform the following:
- Change the working directory (
cd) to yourDesktopdirectory. - Create an AWS secret (
create-secret) namedMySecret_DBagainst thecreds.jsonfile.
# Change working directory to Desktop
cd Desktop
# Create an AWS secret
aws secretsmanager create-secret --name mySecret_DB --secret-string file://creds.json
The below output contains the secret’s ARN, Name, and VersionId.

You can update secrets as many times you wish by running the following command, where –secret-id specifies the secret’s ARN or name: aws secrets manager update-secret –secret-id ARN_OR_NAME \ –secret-string “NewValue”
Verifying the AWS Secrets via the AWS Management Console
You’ve just created your secrets with AWS CLI, and that’s a huge step. But how do you know your secrets exist in your AWS cloud? Verify your AWS secrets by manually checking in the AWS Management Console.
1. Open your favorite web browser and log in to the AWS Management Console.
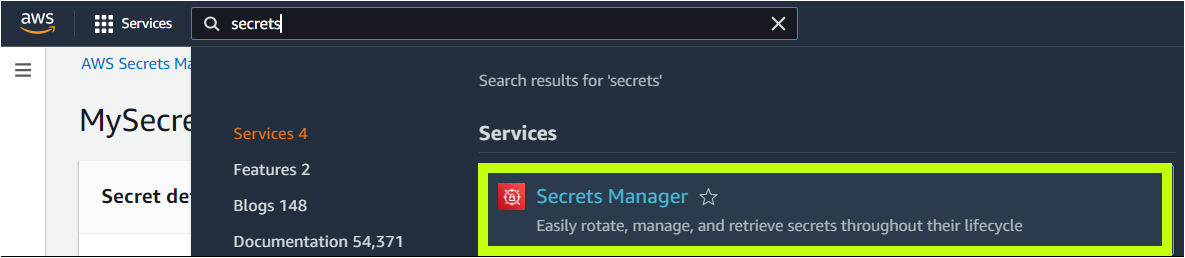
2. Search for secretes on the console’s home page, and choose Secrets Manager from the result. Doing so redirects your browser to the page where you can see and manage your AWS Secrets Manager (step three).
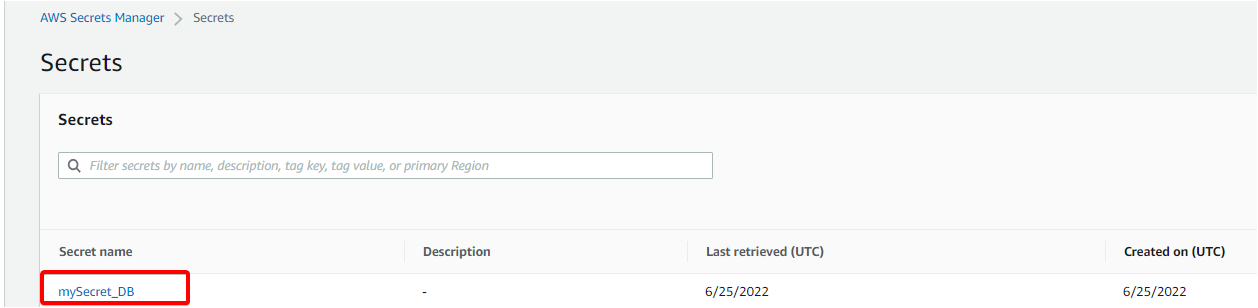
3. Lastly, click on your secret from the list below to access your secrets’ information.
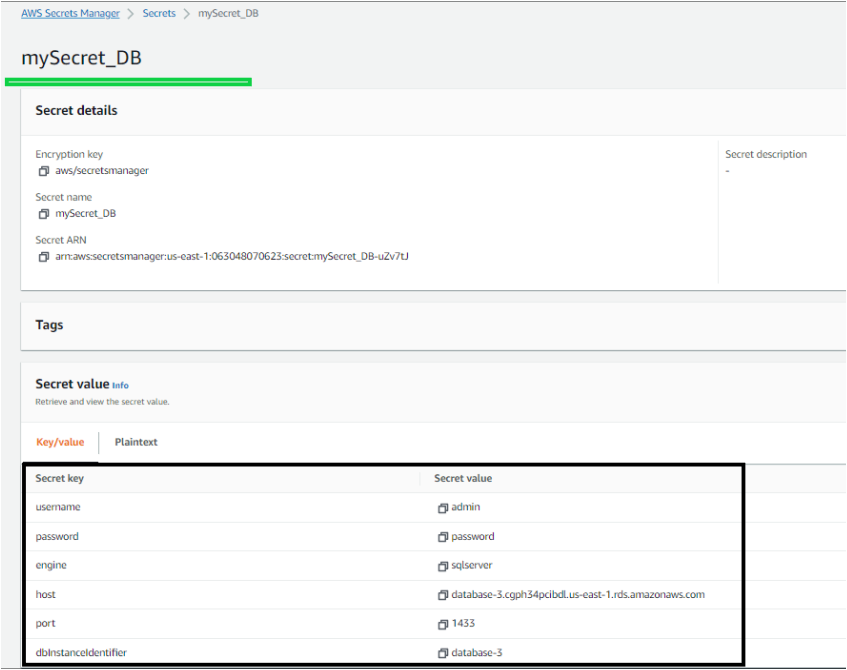
You’ll see the below page describing all the secret’s details, such as the Name, ARN, value ( Key/Value), and so on.
Authenticating AWS RDS DB Instance with the AWS CLI Secrets Manager
Even though you’ve successfully verified your secrets, they’re just sitting in the AWS Secrets Manager service. Why not learn to retrieve them and perform authentication with the AWS RDS service?
To authenticate with the AWS RDS DB instance using AWS Secrets Manager:
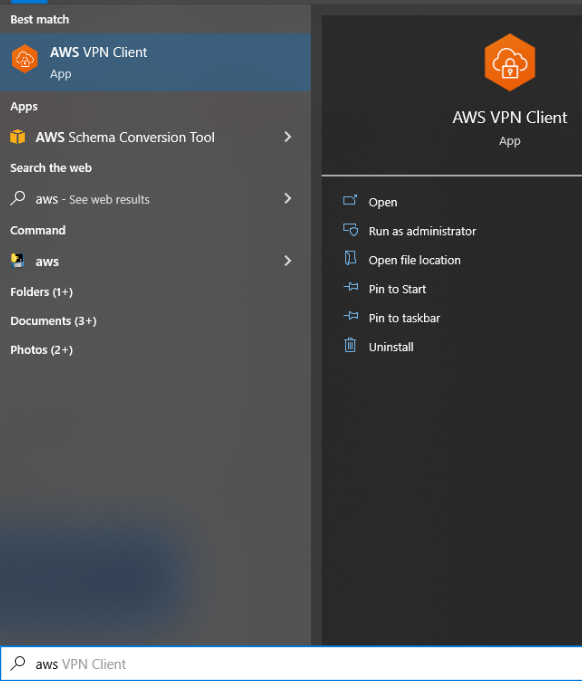
1. Open the AWS Schema Conversion Tool (AWS VPN Client) from your Desktop or Start menu.
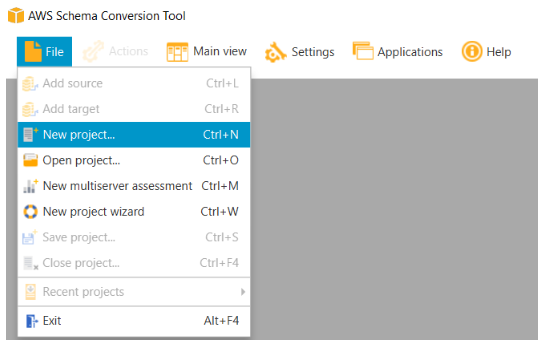
2. Next, click on File —> New Project to create a project.
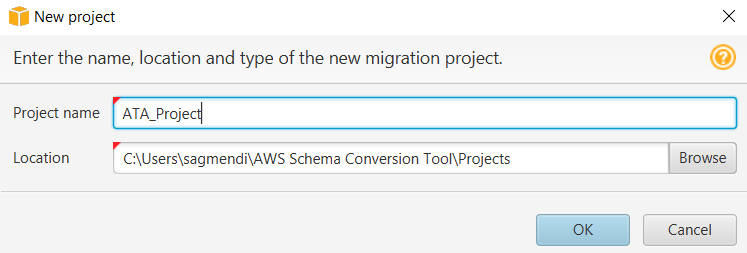
3. Enter a Project name (ATA_Project) and the location where you wish to store the project, and click OK to create the project.
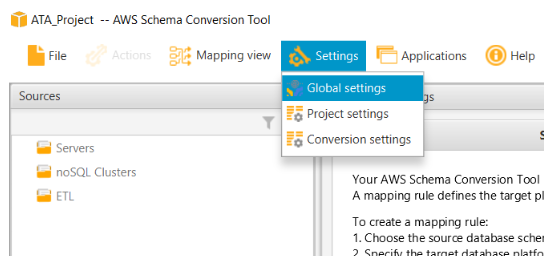
After creating the project, you’ll see the project name (ATA_Project) at the top of the window (step four).
4. Now, click Settings —> Global settings to open the Global settings window where you can add your AWS profile (step five).
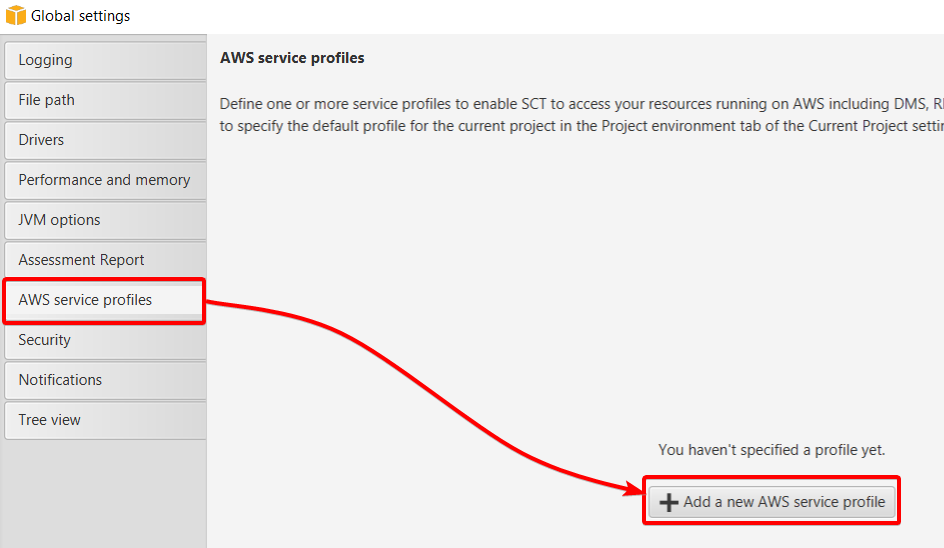
5. On the Global settings window, click on Add a new AWS service profile to initiate adding a new AWS service profile.
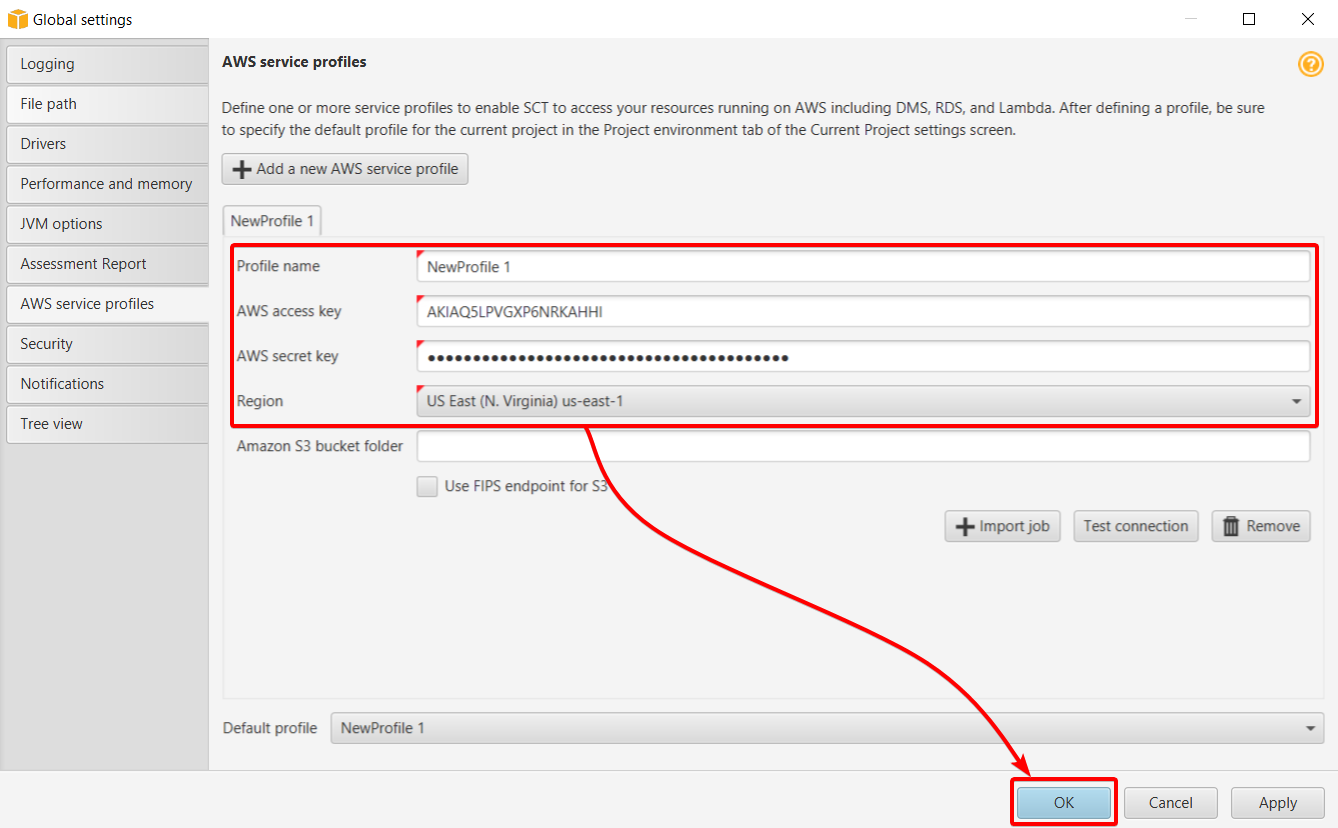
6. Next, enter details for the new AWS service profile:
- Profile name – Set a unique profile name, but this tutorial’s choice is NewProfile 1.
- AWS access key and secret key – Input the AWS access and secret keys in step one of the “Configuring AWS CLI with AWS Credentials” section.
- Region – Set the region where you’d like to authenticate and connect to the AWS service.
- Click OK to create the new AWS service profile.
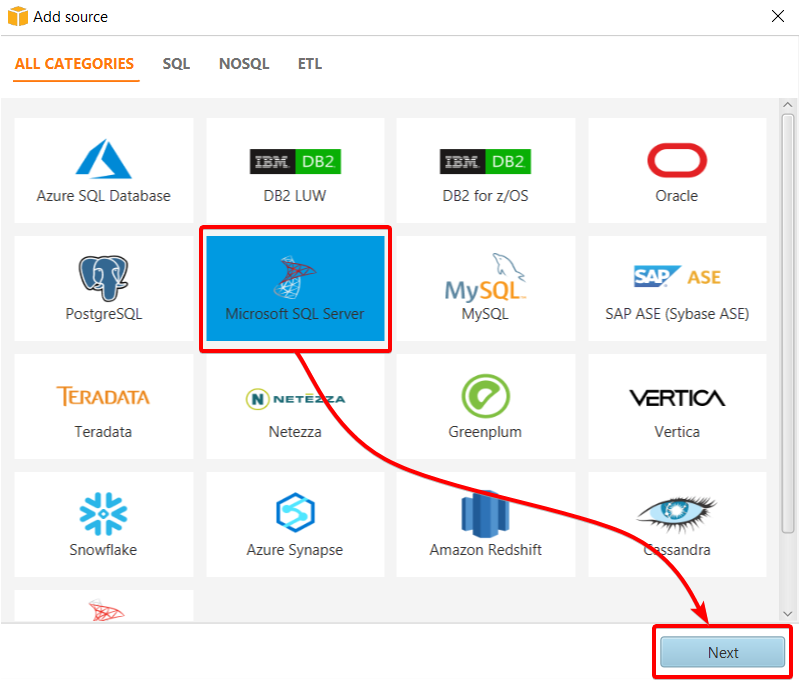
7. After creating an AWS service profile, click on the Add source from the toolbar to see the list of databases you can connect to (step eight).

8. Select the Microsoft SQL Server option, and click Next to configure your database source connection.
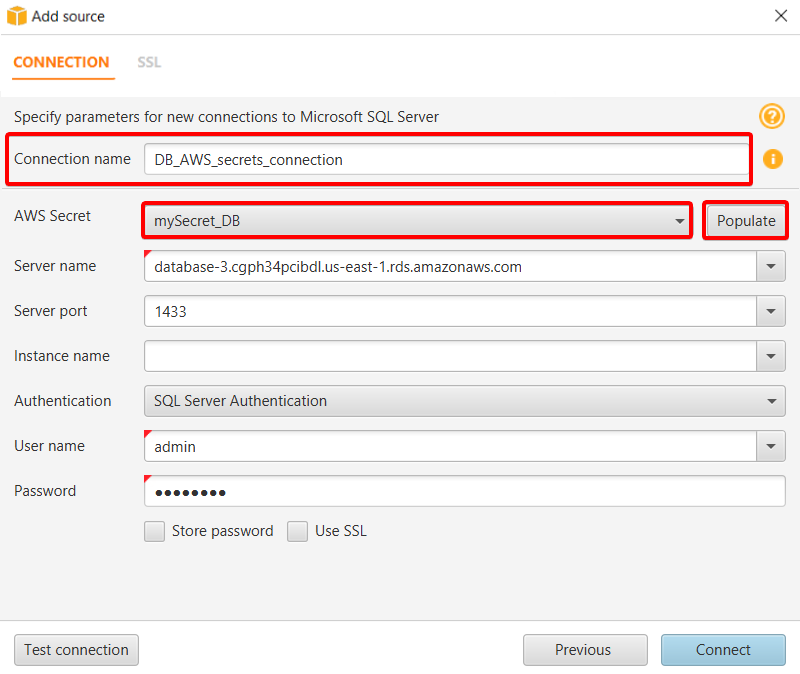
9. Provide the following details for connecting to the Microsoft SQL Server:
- Connection name – Input a connection name you like, but this tutorial uses DB_AWS_secrets_connection.’
- AWS Secret – Select your AWS secret (mySecret_DB), and click Populate. You’ll notice the AWS secrets you created in the AWS secrets manager are automatically populated in the required fields.
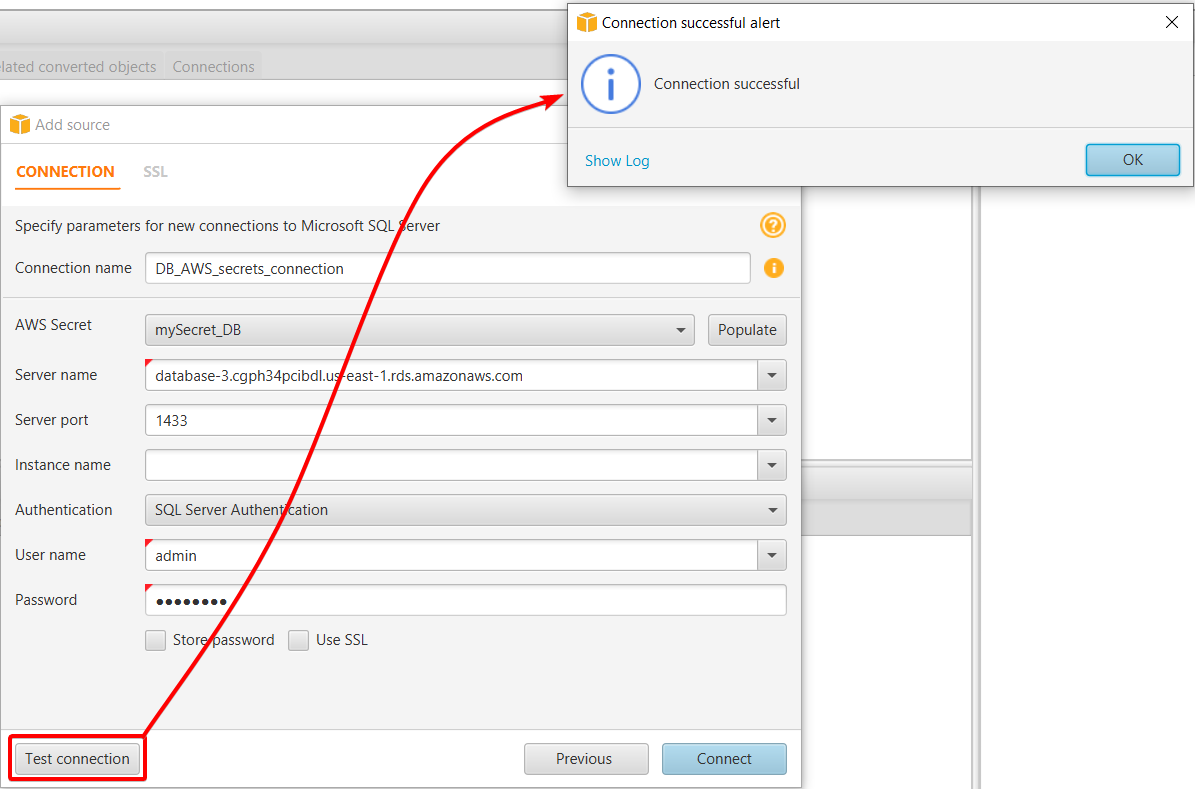
10. Now, click on Test connection to verify if the secrets are correct and can connect to the database created. Doing so tests whether the AWS Schema Conversation Tool can authenticate the AWS account and services.
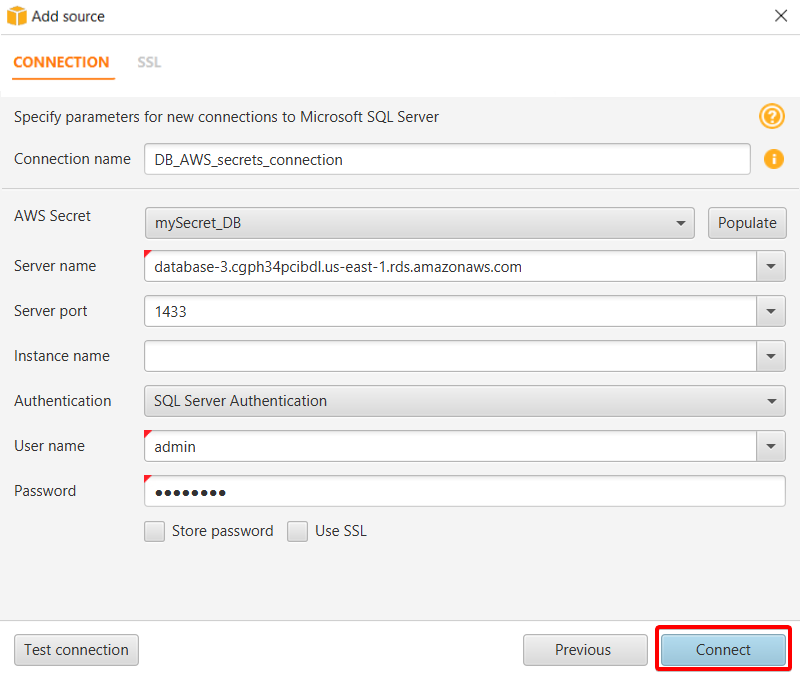
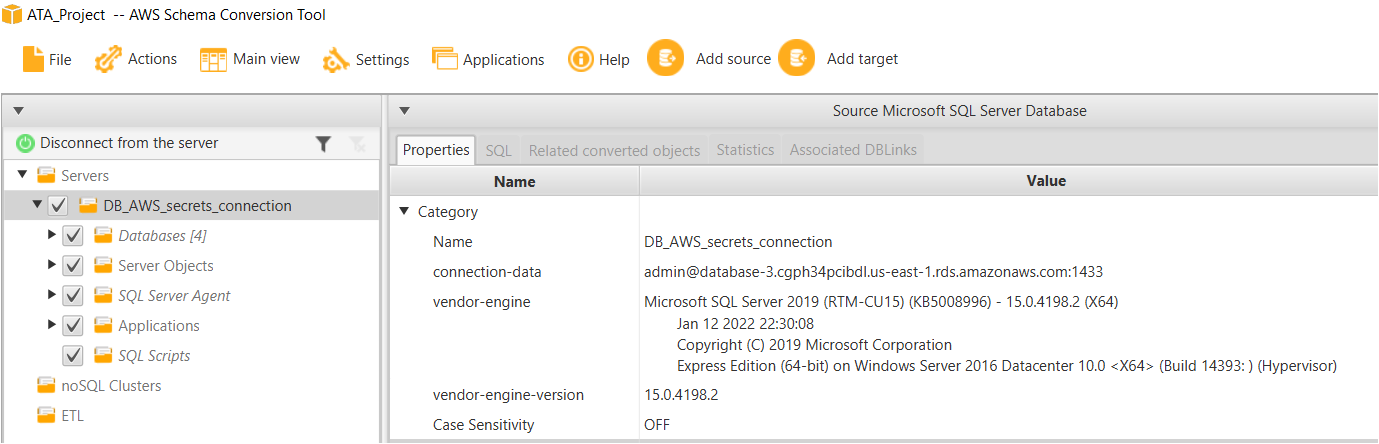
11. Finally, click on Connect (bottom-right) to connect to the database.
Once connected, you’ll see all database details, such as engine version, connection details, etc., as shown below.
Conclusion
Managing your AWS secrets comes in various ways, such as directly using the AWS console or Terraform. But in this tutorial, you’ve learned how to store AWS secrets using the AWS CLI with a single command. Ultimately, you connected to your database using AWS secrets with the AWS Conversion Schema Tool.
You’re now equipped with the knowledge of keeping your secrets safe from prying eyes. What do you plan to store next in AWS secrets using the AWS CLI?


