

Storing confidential information as readable text is a significant security risk. Sadly, PowerShell scripts that use plain-text passwords appear to exist still, and scripters should take steps to change this practice. But protecting secrets and passwords for use in scripts have always been a challenge.
Not a reader? Watch this related video tutorial!But with the new PowerShell encrypt password modules, securing secrets and passwords now only takes a few commands. This tutorial will teach you how to use the PowerShell Secret Management and Secret Store modules to store and retrieve passwords securely, whether interactively or in scripts.
Prerequisites
This tutorial will be a hands-on demonstration but doesn’t require many prerequisites. As long you have a computer with Windows PowerShell 5.1 or PowerShell 7.x, then you’re good to go. This tutorial uses a Windows 10 computer with PowerShell 7.2.0.
Installing the PowerShell Encrypt Password Modules
Before you can manage and store Powershell encrypt passwords, you’ll need to install the PowerShell encrypt password modules, and there are two:
- Microsoft.PowerShell.SecretStore – an extension module that provides the secret store (vault) for storing secrets.
- Microsoft.PowerShell.SecretManagement – gives you the commands to interface and manage the vault and the items it contains.
There are third-party secret store modules that work with the PowerShell Secret Management module. But, this tutorial will cover only the Microsoft-provided secret store. As always, be cautious when using third-party vaults.
Follow these steps to install the necessary PowerShell encrypt password modules:
1. Open an elevated PowerShell console (as admin) on your computer.
2. Next, run the command below to set PowerShell’s execution policy Set-ExecutionPolicy to RemoteSigned. This command ensures you can run PowerShell scripts on your computer.
Set-ExecutionPolicy RemoteSignedOn non-Windows computers, the execution policy is always set to Unrestricted and not changeable.
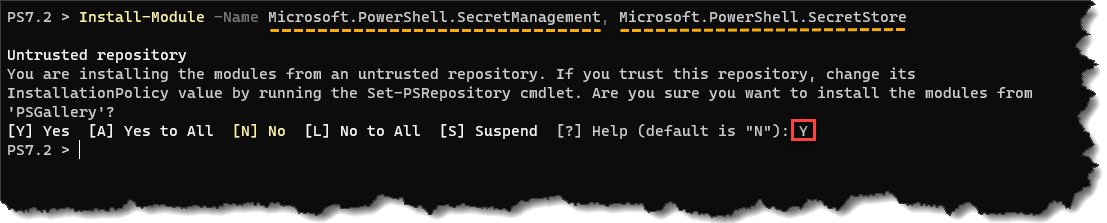
3. Now, run the following Install-Module command to install the secret management module (Microsoft.PowerShell.SecretManagement).
Install-Module -Name Microsoft.PowerShell.SecretManagement, Microsoft.PowerShell.SecretStoreOn the confirmation prompt shown below, press Y then Enter to continue the installation.
4. Lastly, run the Get-Module command below to confirm the installation of the modules.
Get-Module -ListAvailable Microsoft.PowerShell.SecretManagement, Microsoft.PowerShell.SecretStoreThe screenshot below confirms that you successfully installed the modules on this computer.

Creating a Microsoft Secret Store Vault
Before you can start storing encrypted passwords and secrets, you’ll first need to set up a vault. A vault is a secure repository for storing your secrets.
Run the Register-SecretVault command below to register a new vault, and set the vault store provider to Microsoft.PowerShell.SecretStore module. In this example, the vault is named Vault1, but you can name it differently. Also, the -Description is optional but helpful to describe your new secret vault.
Register-SecretVault -Name Vault1 -ModuleName Microsoft.PowerShell.SecretStore -Description "My first secret vault"The Microsoft Secret Store vaults only work on the current user account context, meaning, only the user account who created the vault can access it.
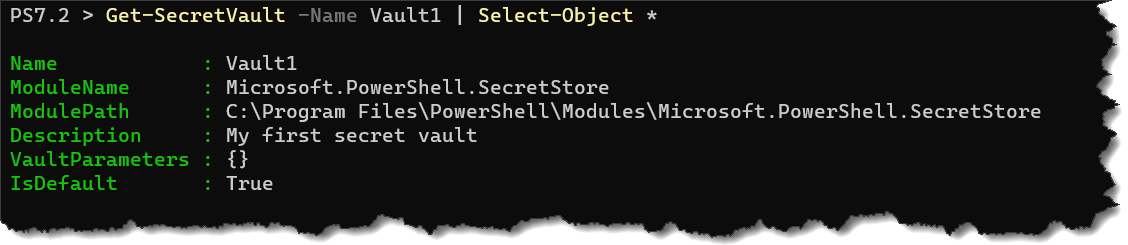
Now, run the Get-SecretVault vault command below to confirm the new vault creation.
Get-SecretVault -Name Vault1 | Select-Object *As you can see below, Vault1 shows as a Microsoft.PowerShell.SecretStore vault. Notice that the IsDefault value is set to True because this vault is the first and only secret vault on your user account.
Do not create multiple vaults with the same vault module. If you do, each vault will contain duplicate entries, and there’s no added benefit.
Storing and Updating Secrets
You’ve registered a new secret vault and can now start storing sensitive information in it. But before you do, you should know what type of secrets you can store in a vault.
The Microsoft Secret Store accepts the following data types as secrets.
- PSCredential
- HashTable
- SecureString
- String
- byte[]
If you’re planning to store a secret pair, such as a username+password or application ID+API key, you’d want to consider the PSCredential or HashTable types. The other secret types are more appropriate for single-value secrets only.
For example, run the below command to add a new username and password PSCredential object to the store.
# Create a credential object.
$credential = Get-Credential
# Create a new secret named Secret1
Set-Secret -Name Secret1 -Secret $credential
The first time you add a secret to the secret store, the
Set-Secretcommand will ask you to assign a master password for the secret store itself, as shown below. Specify the new password for your vault and make sure you remember it, as there’s no way to recover a lost secret store password.

When you need to update a secret, you only need to run the same
Set-Secretcommand to overwrite the existing secret.
Retrieving Secrets
You’ve now created your first secret and stored it in your secret vault. Now, perform the following guide whenever you need to retrieve a secret from the vault.
By default, a Secret Store requires a password to unlock. And after 900 seconds of inactivity, the vault locks itself again. So before you can retrieve a secret, you’ll need to unlock the vault first.
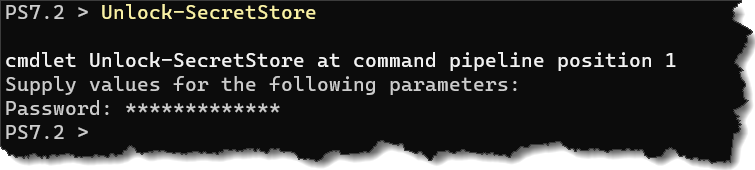
1. Run the command below to unlock your secret vault.
Unlock-SecretStoreType in the vault’s password and press Enter on the password prompt.
As shown below, you will not see any message if the unlock operation was successful.
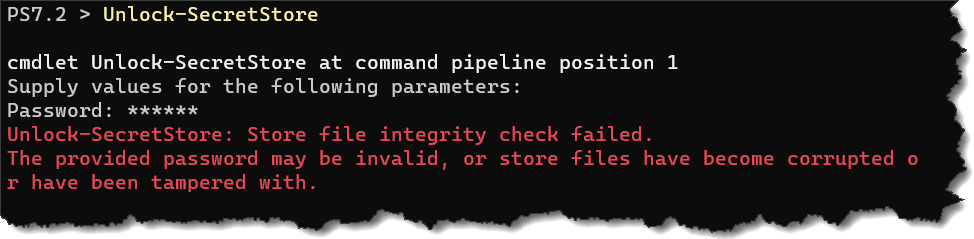
But if the unlock failed, perhaps if you’ve entered a wrong password, you’ll get a failure message instead, like the one below.
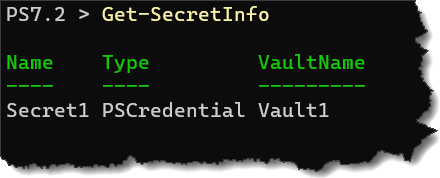
2. Once you’ve unlocked the secret store, run the command below to view the list of secrets it contains. If you know the name of the secret you want to retrieve, skip to the next step.
Get-SecretInfoBelow, you can see the command shows you the secret’s name, its type, and in which vault name it resides.
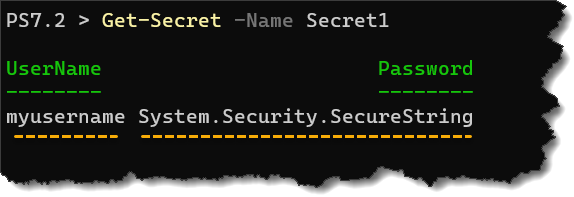
3. Now that you know the secret’s name run the command below to retrieve the secret’s value.
Get-Secret -Name Secret1Notice below that the password shows as System.Security.SecureString, which indicates the password encrypt worked well.
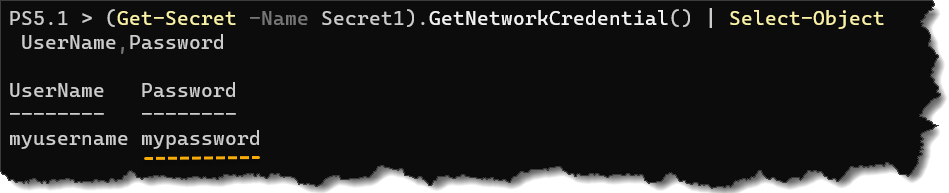
4. Finally, run the below command to call the GetNetworkCredential() method on the PSCredential to view the password in plain text.
(Get-Secret -Name Secret1).GetNetworkCredential() | Select-Object *And you have now successfully retrieved the password.
Using the PowerShell Encrypt Password in Automation
So far, you’ve learned to register and create a new secret store. You’ve also created a new secret and learned how to recall that secret when you need it. But the way you did the secret retrieval is interactive.
The whole point of automation is to eliminate manual interactions with your scripts. Manually typing in the secret store master password to unlock it does not fit well into automation. But don’t worry because there are ways you can work around this challenge.
Encrypting the Secret Store Master Password
Since unlocking the secret store requires a password by default, you need a way to do so without manually typing in the master password. But you must also make sure not to expose the master password as plain text.
One way to achieve this automation scenario is by saving your master password in an encrypted XML file.
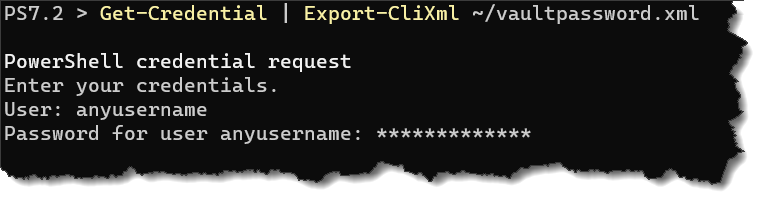
1. First, run the below command to save your master password in a CliXml file. This command prompts the credential and exports (Get-Credential | Export-CliXml) that credential to an XML file in your home directory (~/vaultpassword.xml).
You can name the XML file differently as you prefer and export it to a different file path.
Get-Credential | Export-CliXml ~/vaultpassword.xmlType in any username in the User prompt and press Enter.
Next, type in your secret store’s master password and press Enter.
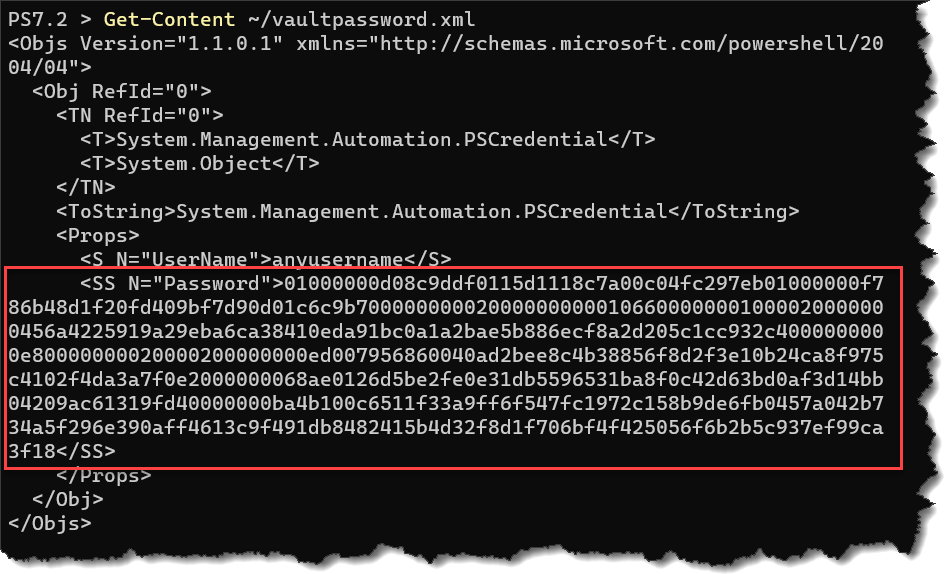
2. Now, run the Get-Content command below to confirm that the credential file (~/vaultpassword.xml) you exported exists and contains the encrypted master password.
Get-Content ~/vaultpassword.xmlThe XML files will not show the master password in plain text, but secure strings, as you can see below. You can now re-use this XML file in your scripts.
3. Run or add the command below in your script. This command imports the encrypted password from your XML file (Import-CliXml ~/vaultpassword.xml) into a variable ($vaultpassword).
$vaultpassword = (Import-CliXml ~/vaultpassword.xml).PasswordIf you’re wondering, decrypting/importing the encrypted password from XML only works for the user account that encrypted the password. Even if someone else copies the XML file, they cannot decrypt the password.
4. Run the command below to unlock your secret store without specifying the password. How so? Because your script calls the Unlock-SecretStore command and passes the $vaultpassword to the -Password parameter
Unlock-SecretStore -Password $vaultpassword5. Finally, run the below command to retrieve the secret you need (Select-Object Username,Password).
(Get-Secret -Name Secret1).GetNetworkCredential() | Select-Object Username,Password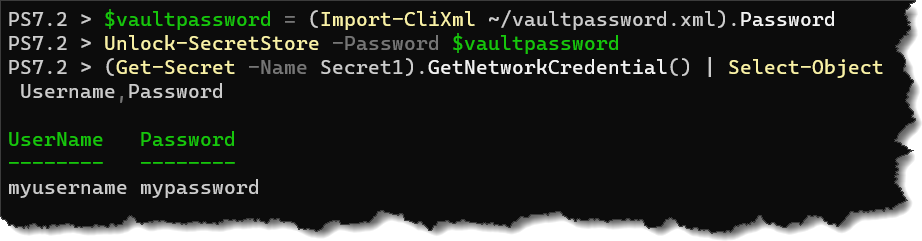
Disabling the Secret Store Password Authentication
Remember that the secret store is only accessible to the user account that created it. The secret store will be available as long as your script or PowerShell session operates under that user account context.
With that condition in mind, disabling the secret store password requirement is another solution that you can try. In doing so, your automation scripts do not need additional logic to handle the master password.
To disable the secret store’s password authentication requirement:
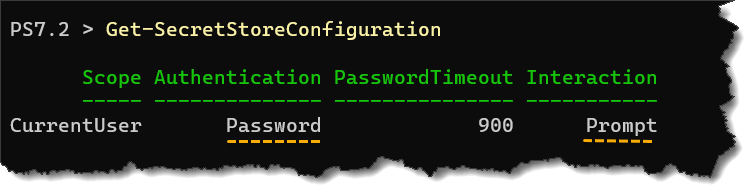
1. First, run the Get-SecretStoreConfiguration command below to confirm that password authentication is enabled on the secure store. Get-SecretStoreConfiguration
According to the result below, the secret store authentication requires a password.
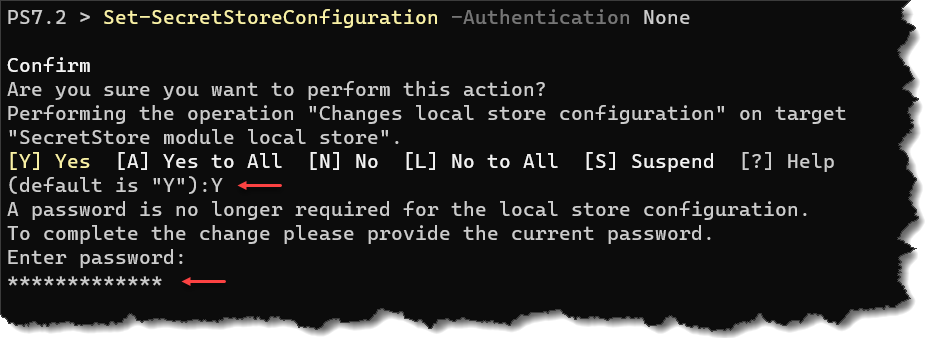
2. Next, run the below " target="_blank" rel="noreferrer noopener nofollow">Set-SecretStoreConfiguration command to set the Authentication and Interaction settings to None to disable the password requirement.
Set-SecretStoreConfiguration -Authentication None -Interaction None3. On the confirmation prompt, press Y and Enter. Lastly, enter the current secret store password and press Enter to complete the operation.
Conclusion
Throughout this tutorial, you’ve realized that using passwords in PowerShell typically requires scripters to develop ways to store and retrieve them securely. There are third-party solutions, but the most decent ones usually involve cost and a complicated setup.
Apart from storing passwords locally, Microsoft also provides the Azure Key Vault module that allows saving credentials to your Azure subscription — ideal for sharing secrets within teams or organizations.
Standardizing credential management in PowerShell is now possible with the release of Secret Management and Secret Store modules. Now, will you be willing to transition your scripts to take advantage of the PowerShell encrypt password modules?


